knitting

sirac

a design by La Visch Designs

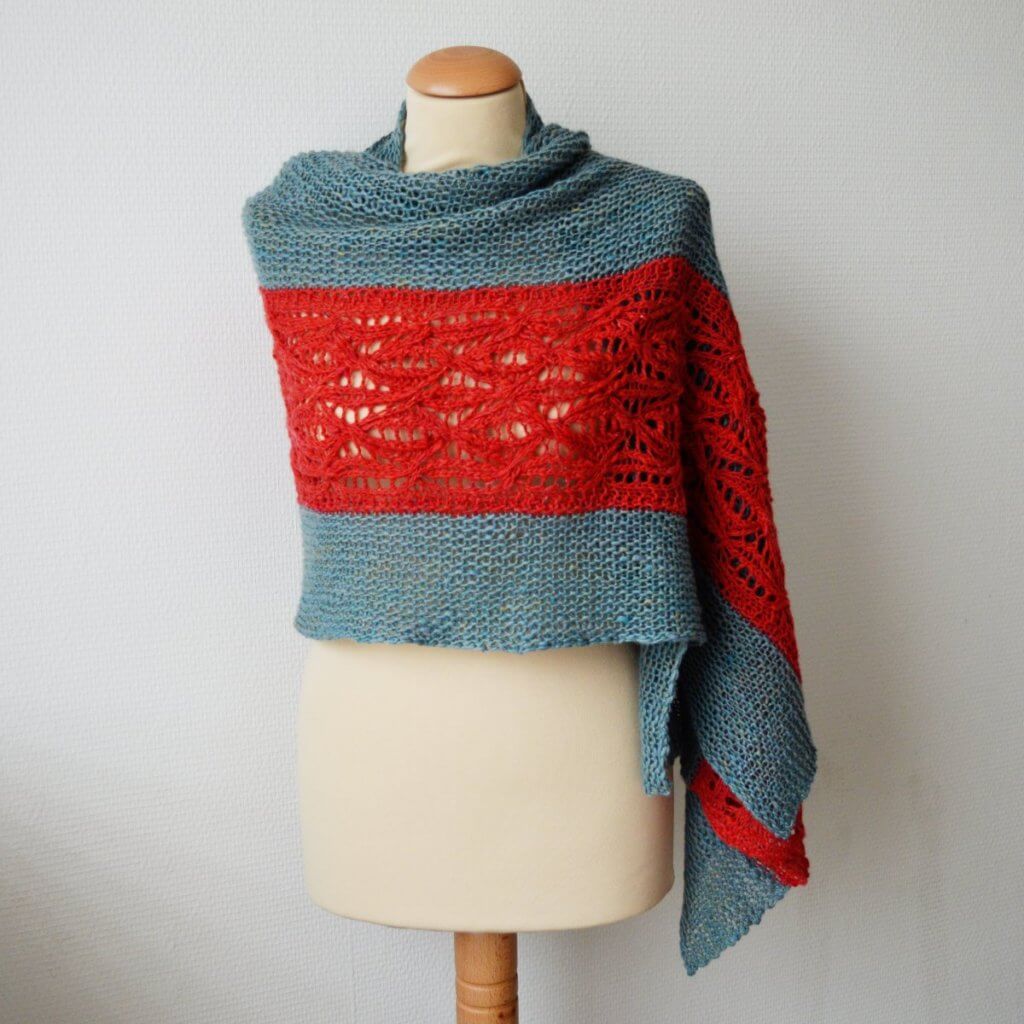
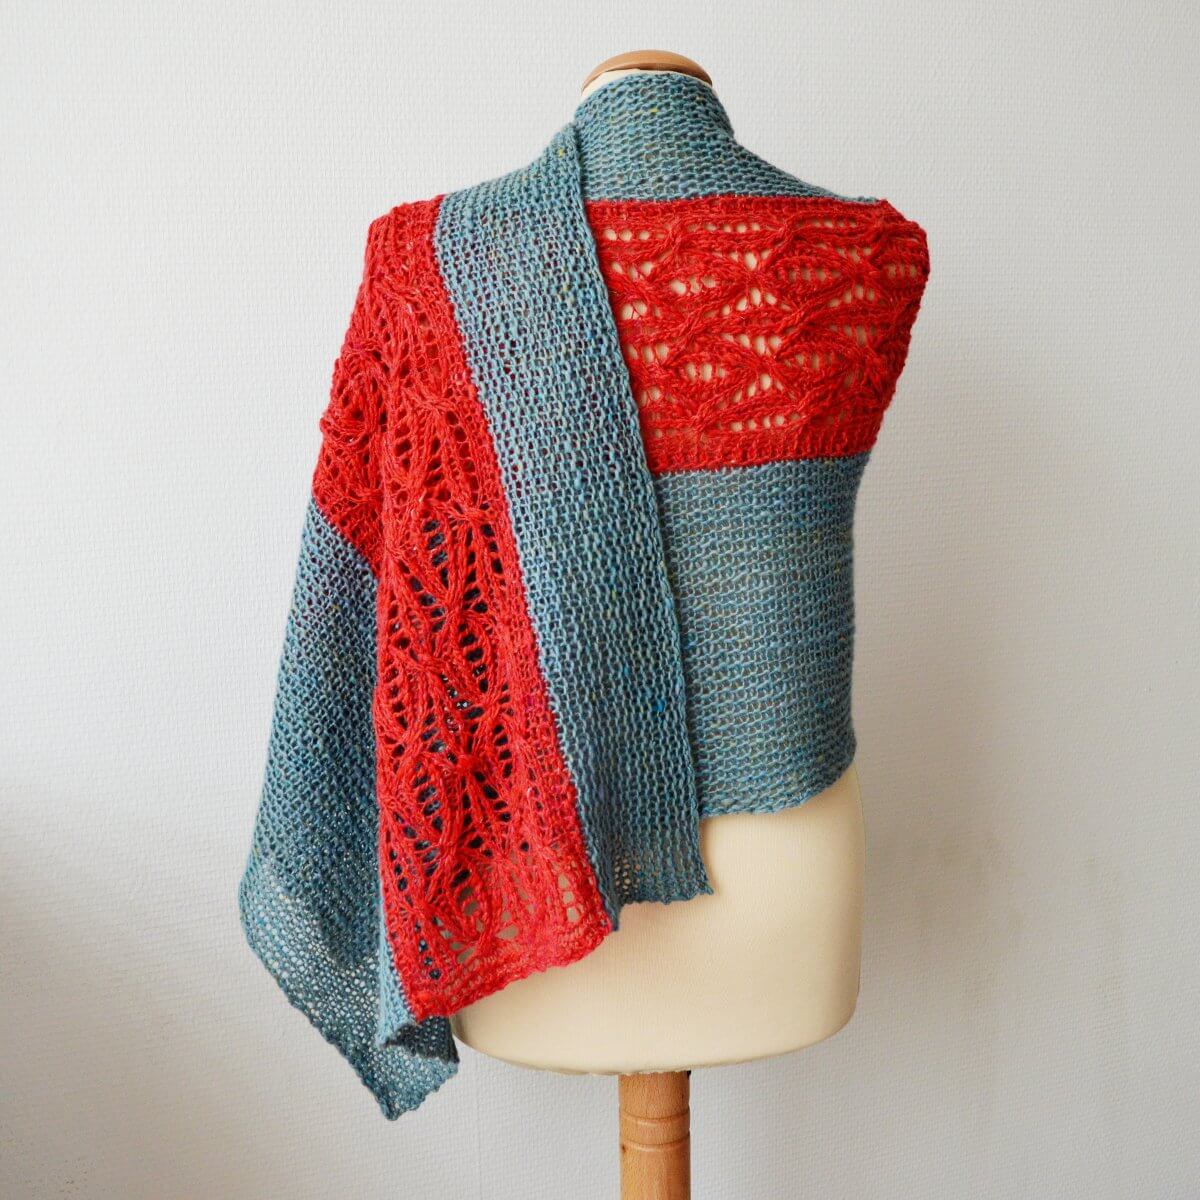
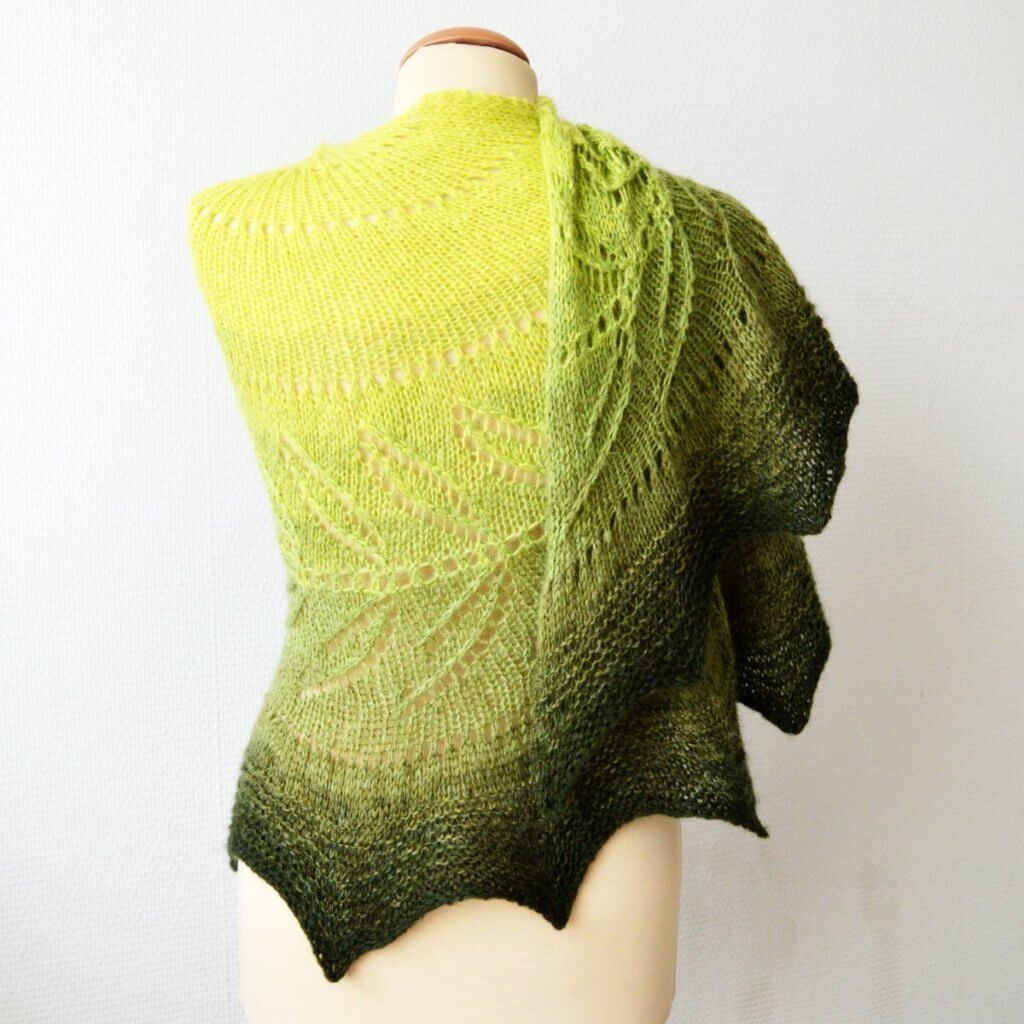
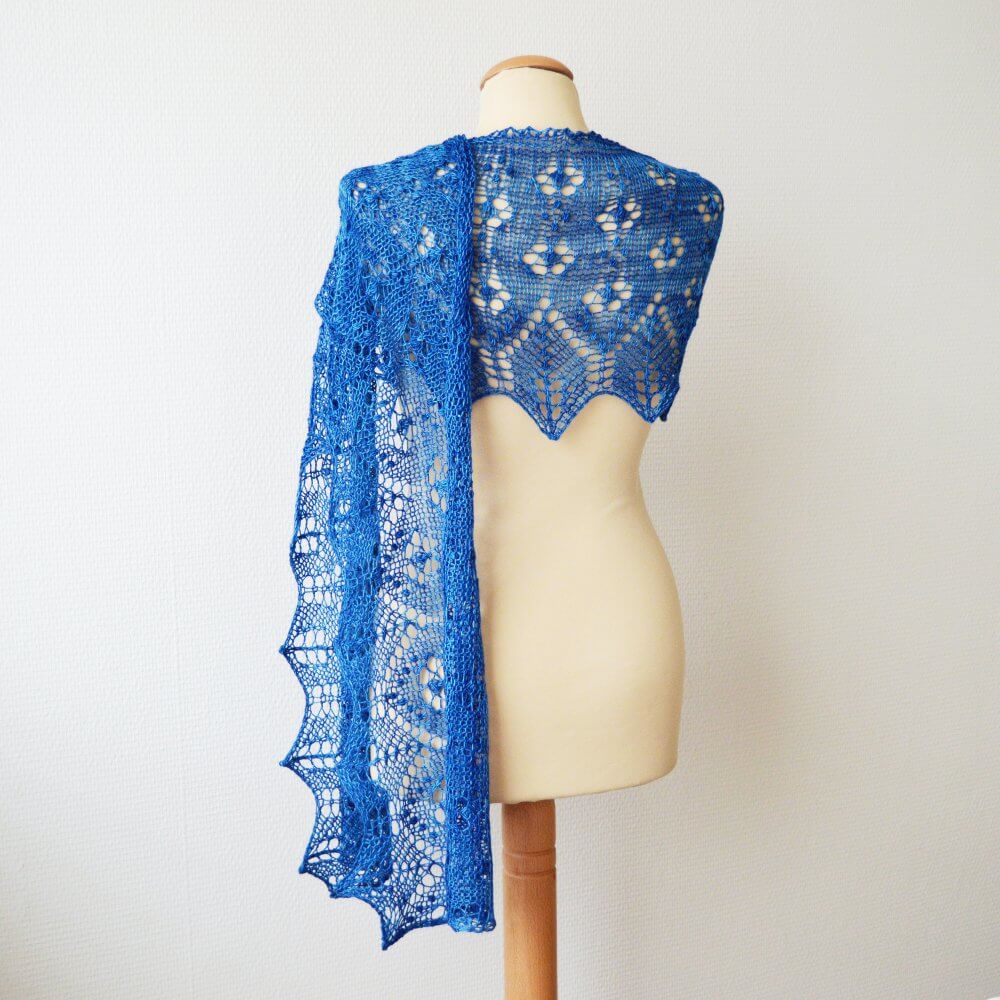
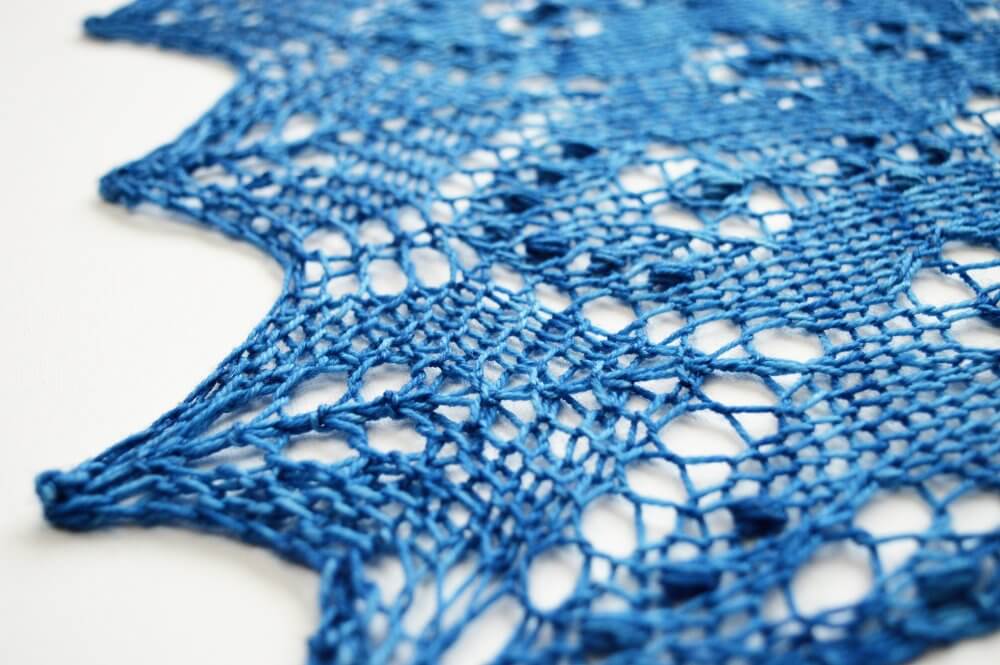
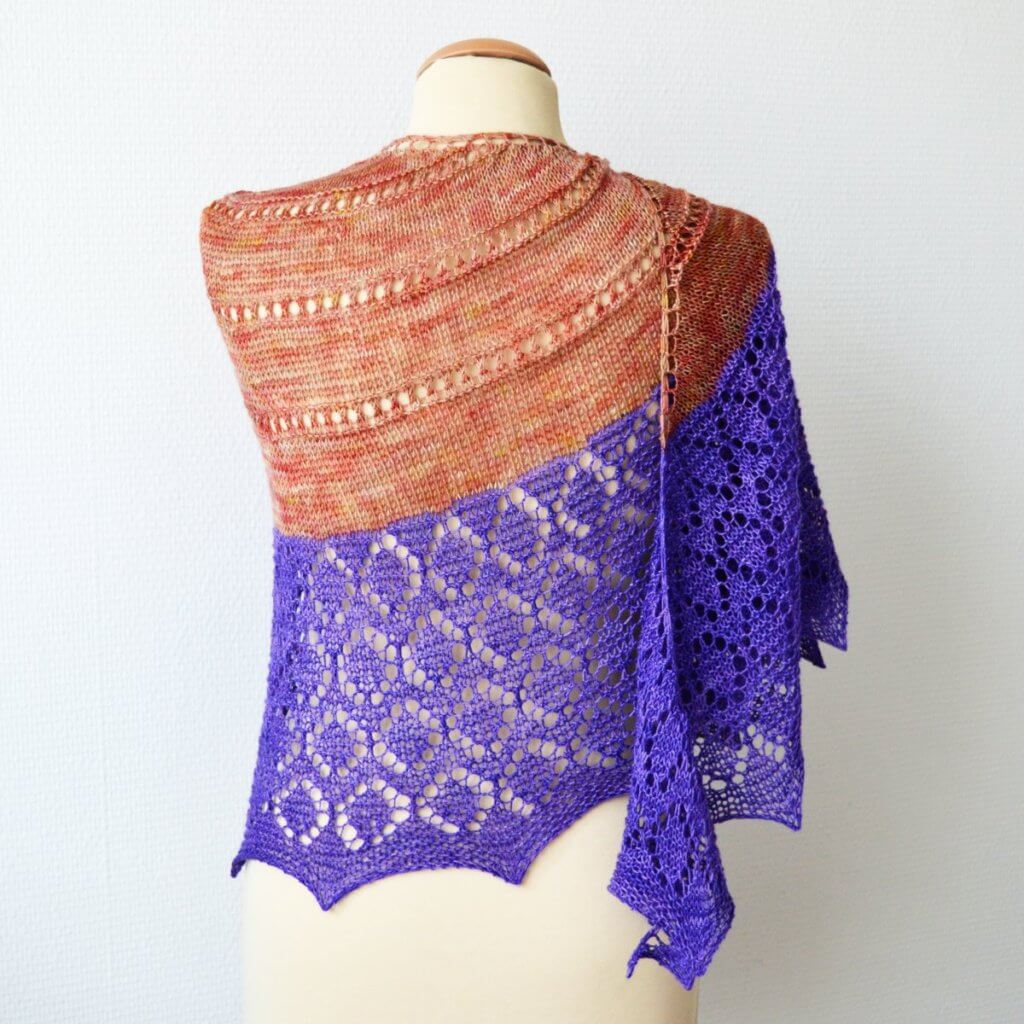
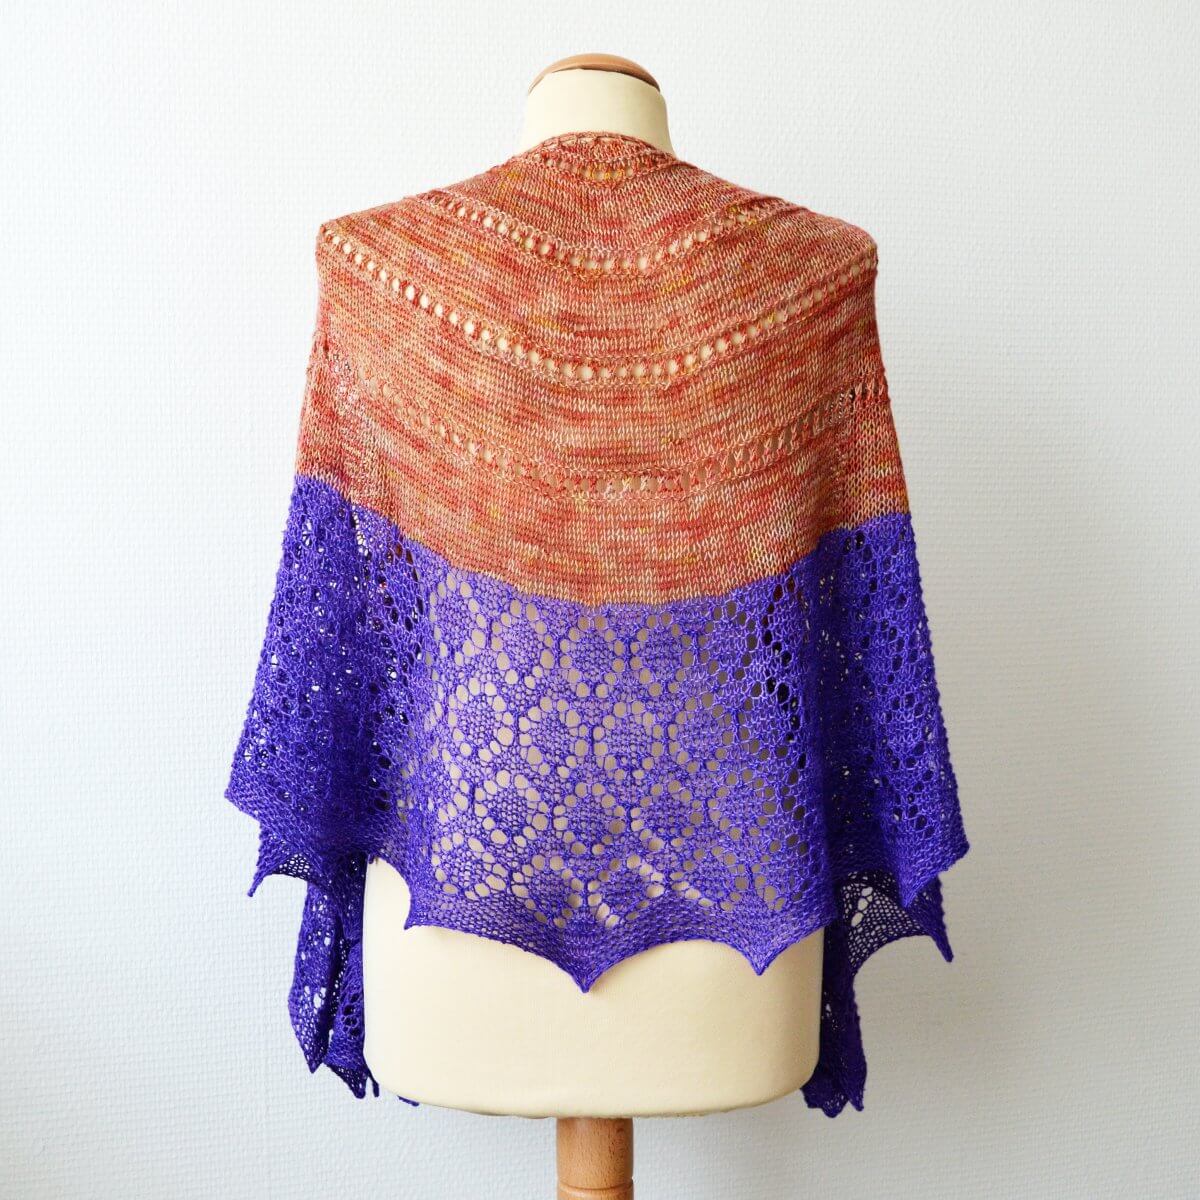
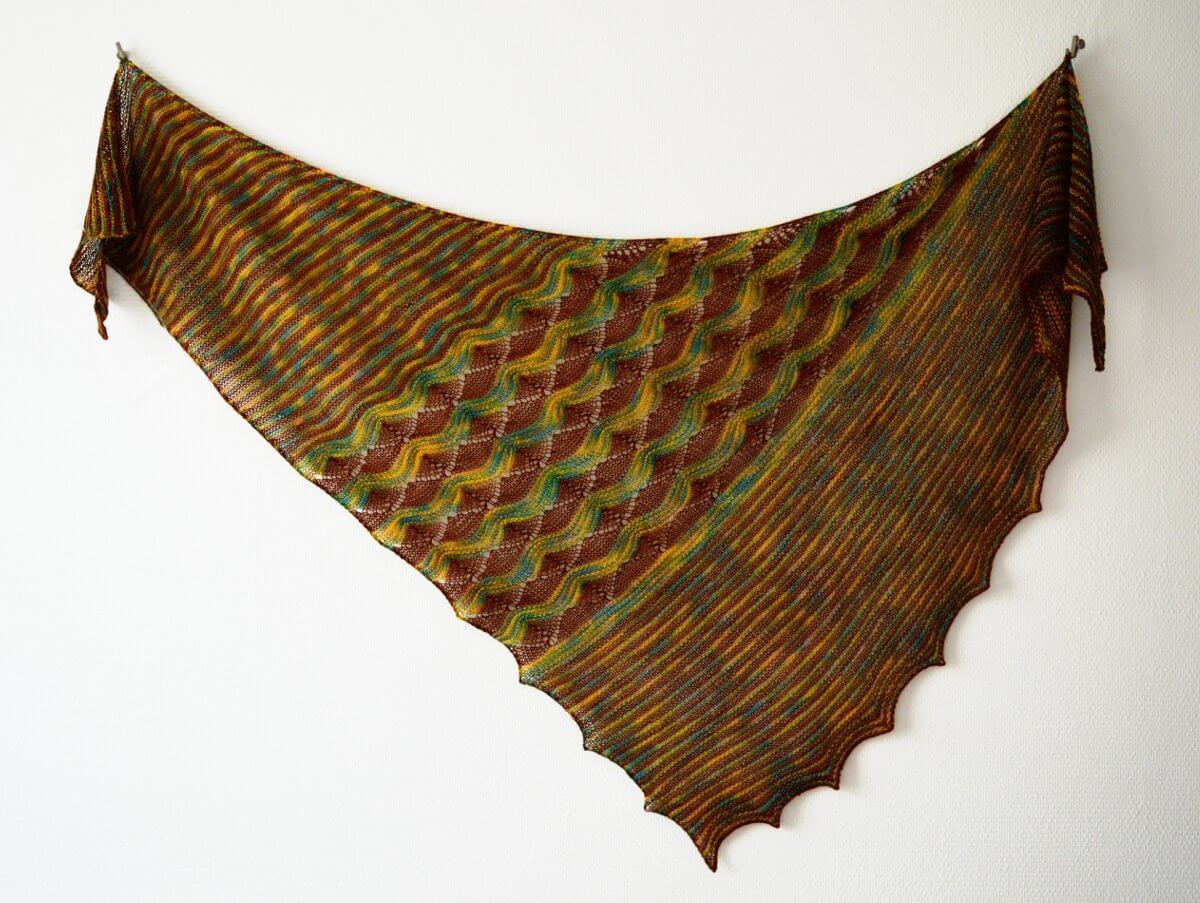
Sirac is a highly customizable stole in 2 colors. Make it longer, shorter, wider or narrower; it’s all possible because the pattern allows for easy modification. Sirac has both interesting and mindless knitting, therefore this really is the perfect project for me!

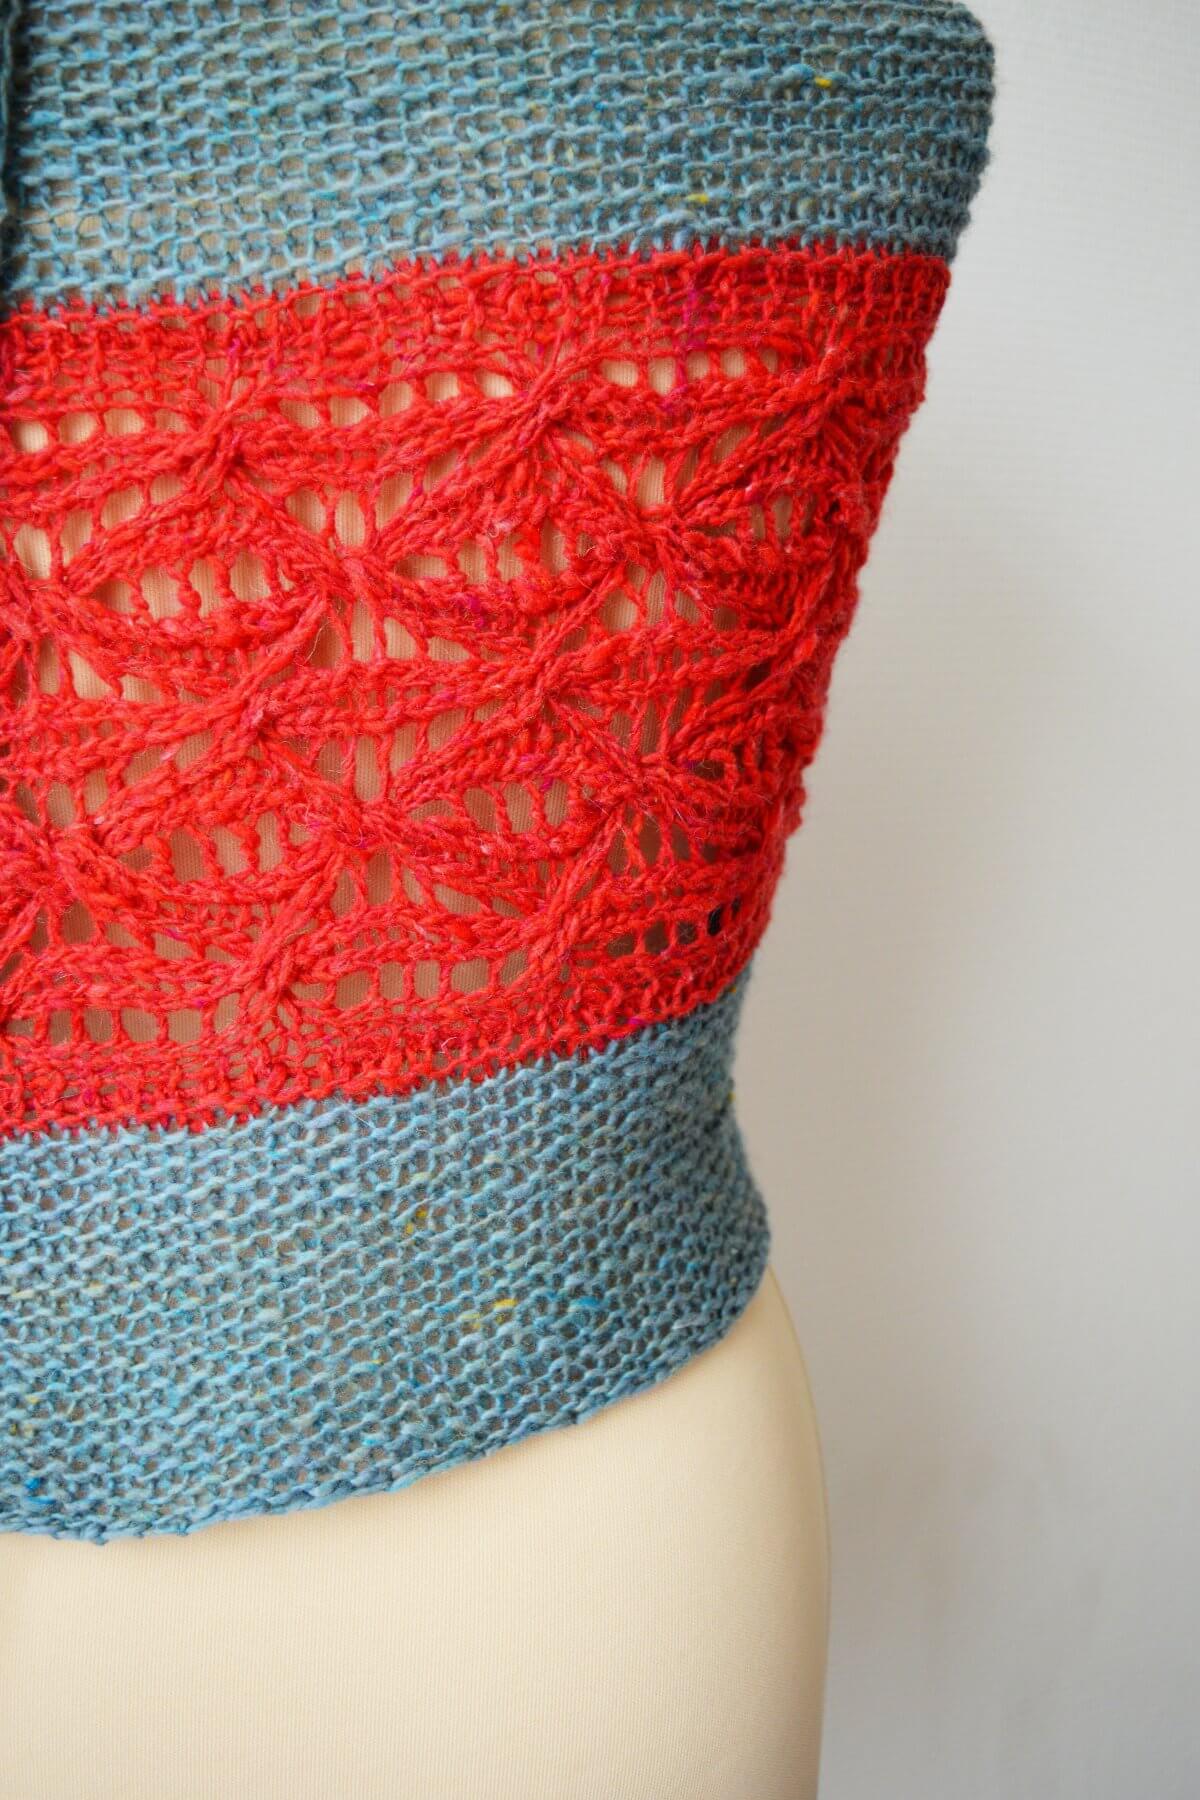
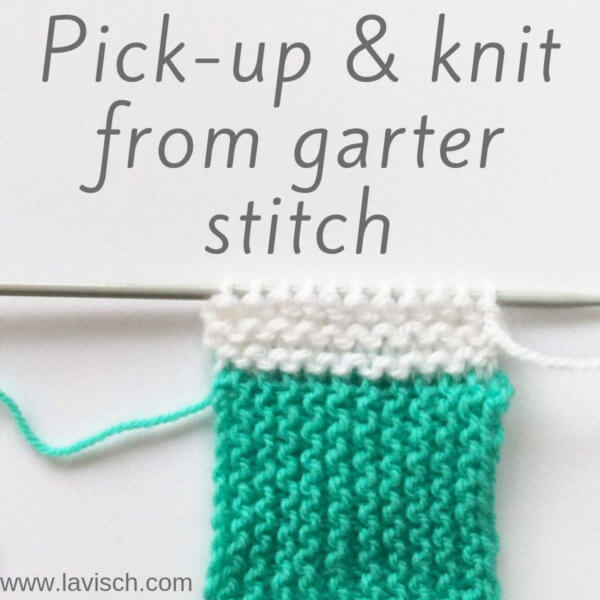
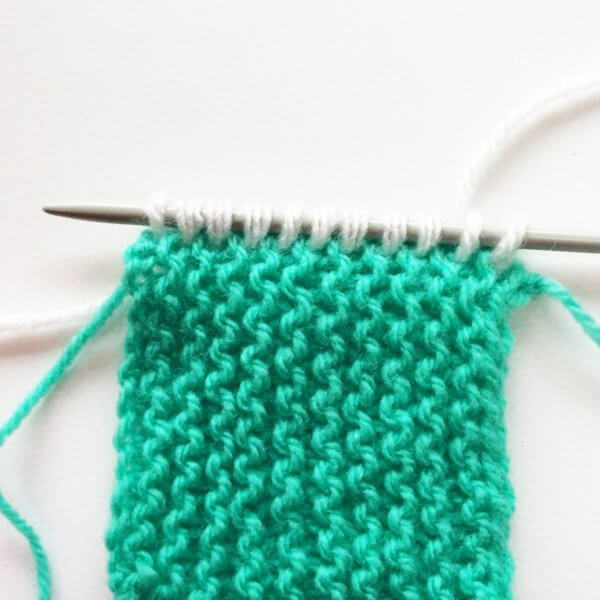
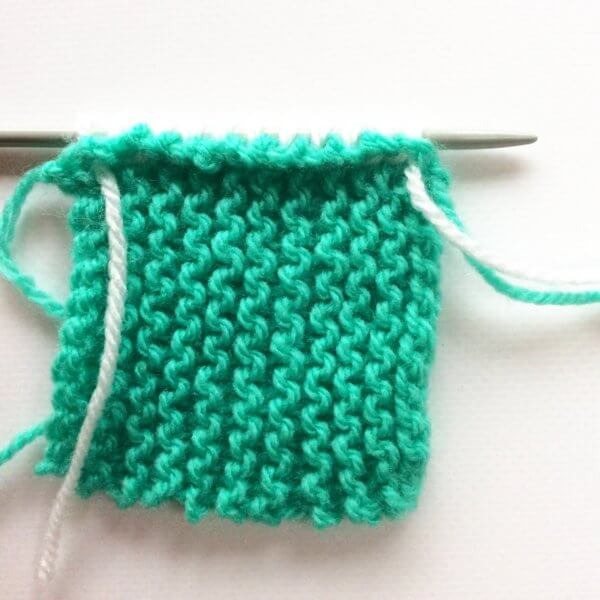
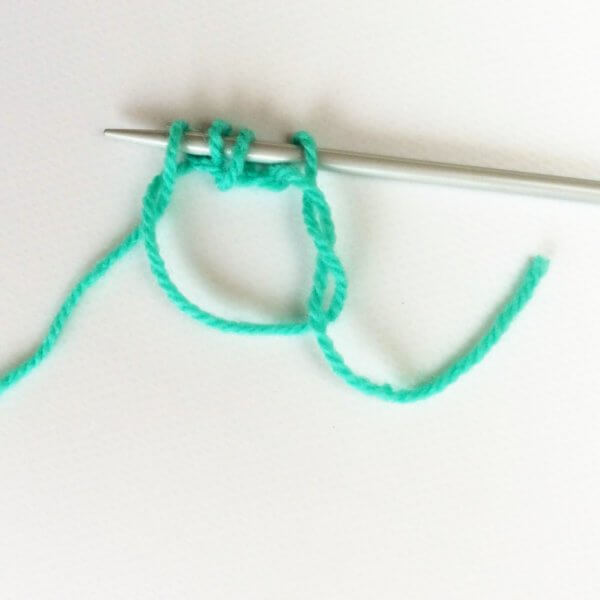
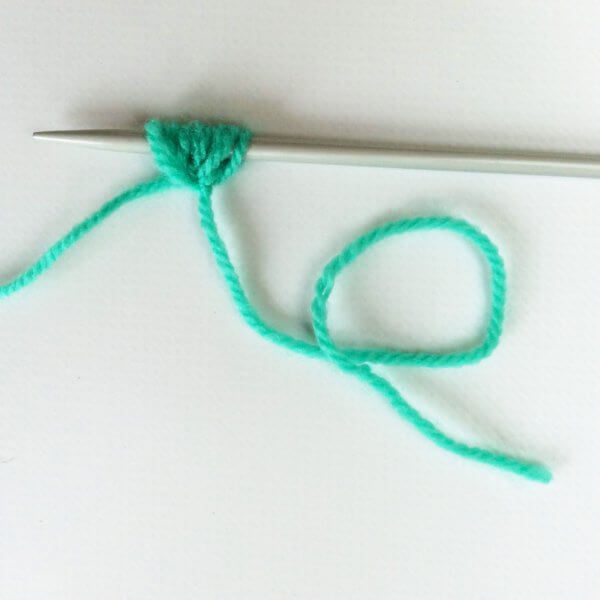
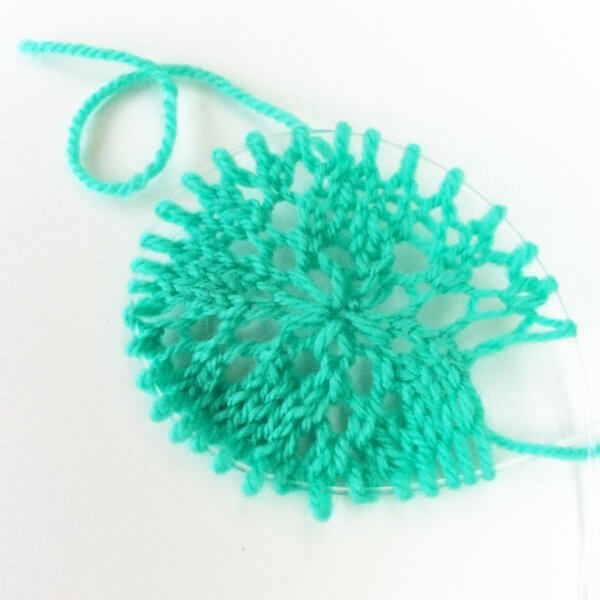
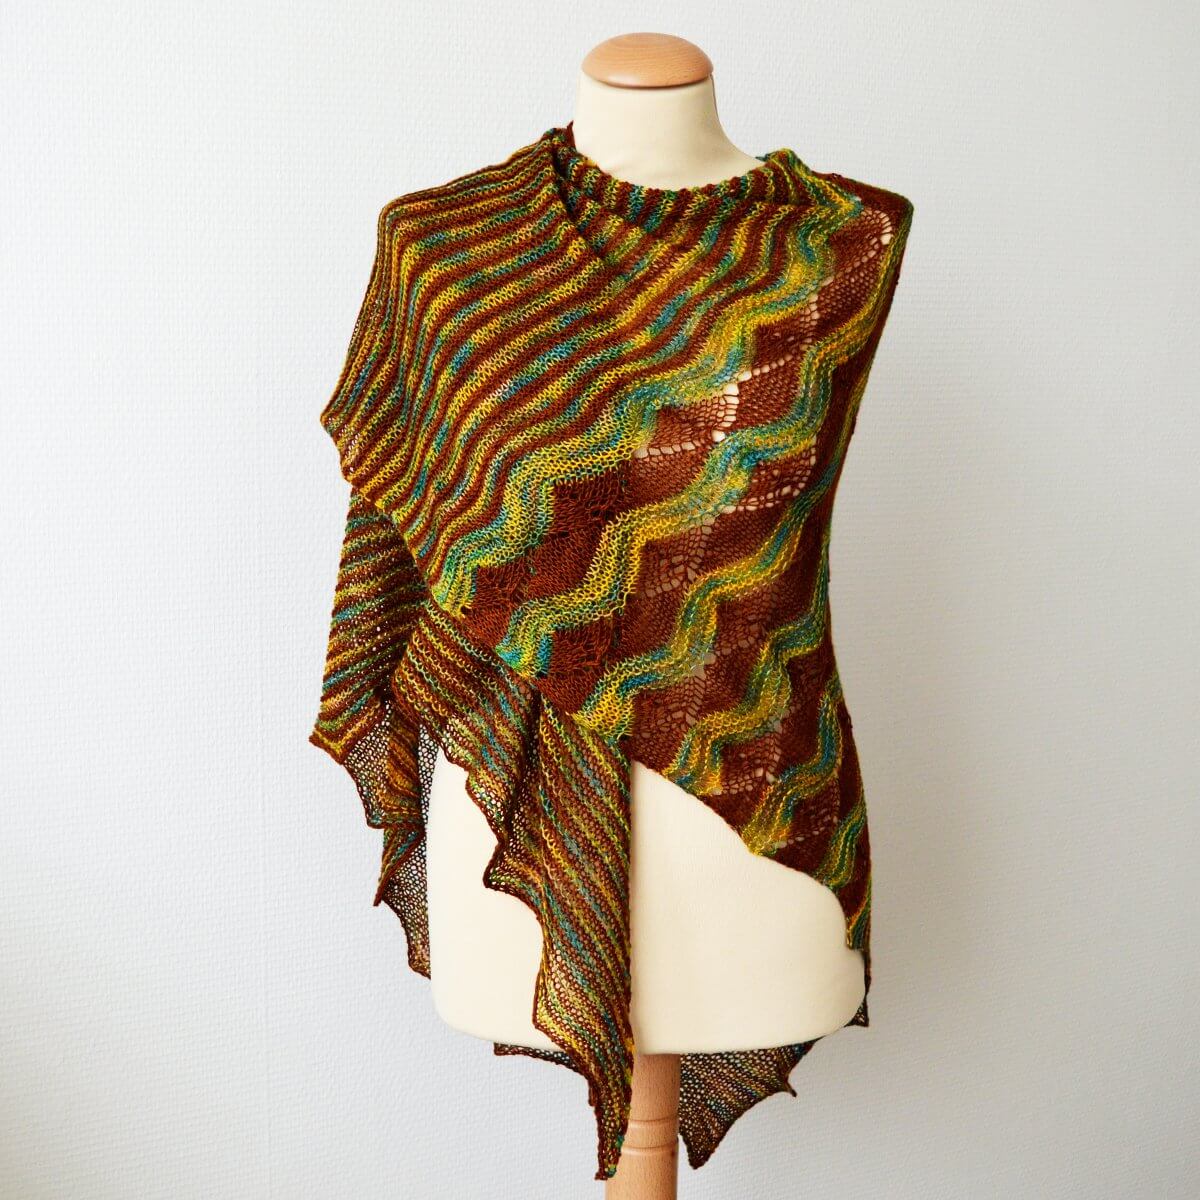
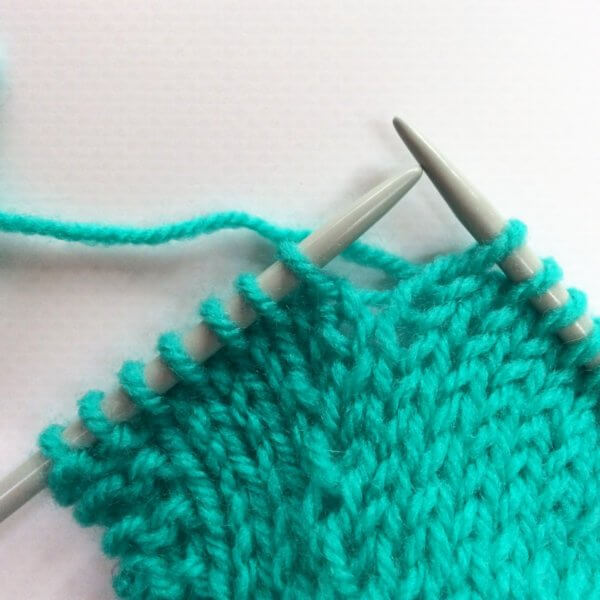
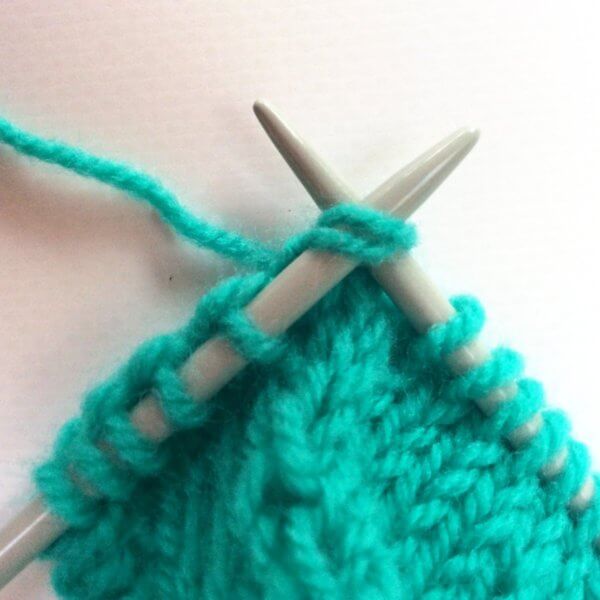
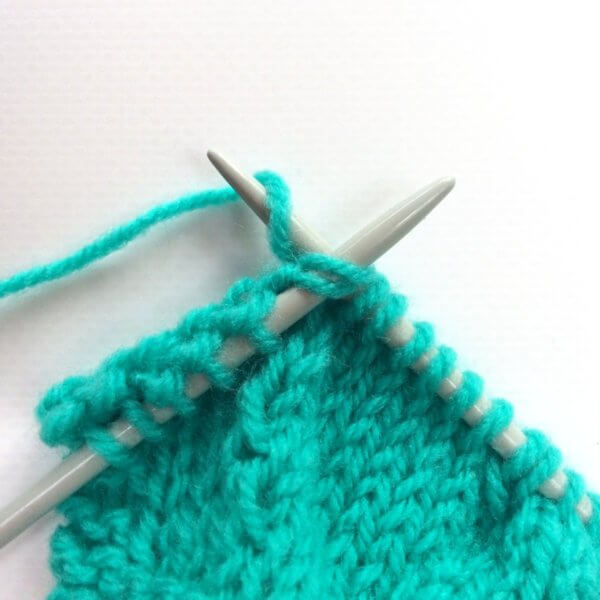
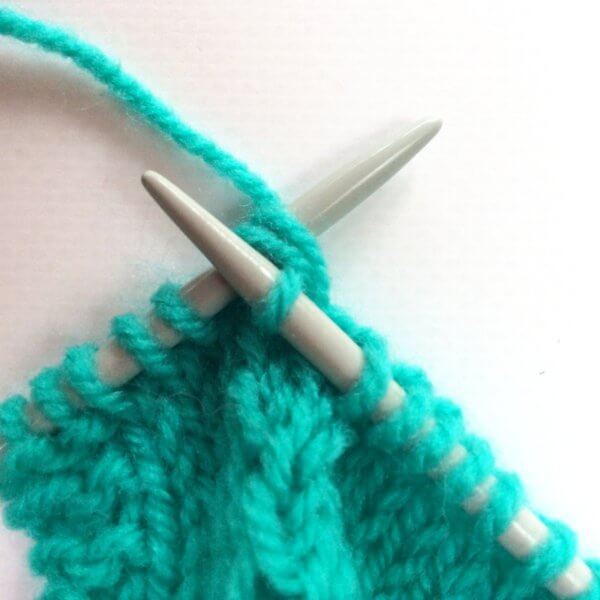
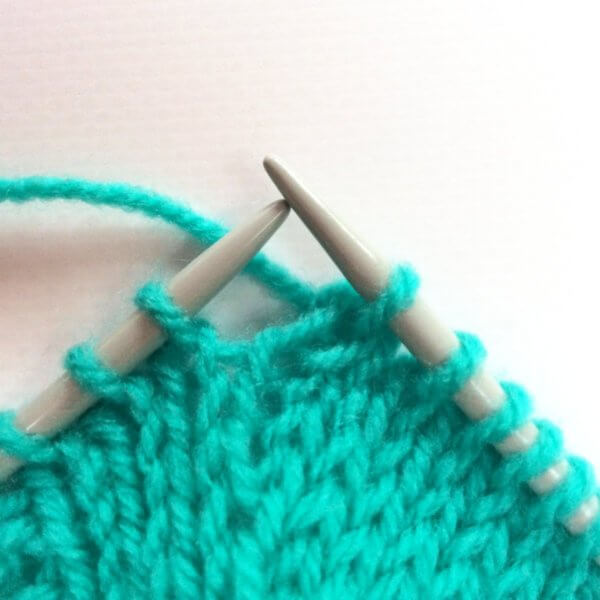
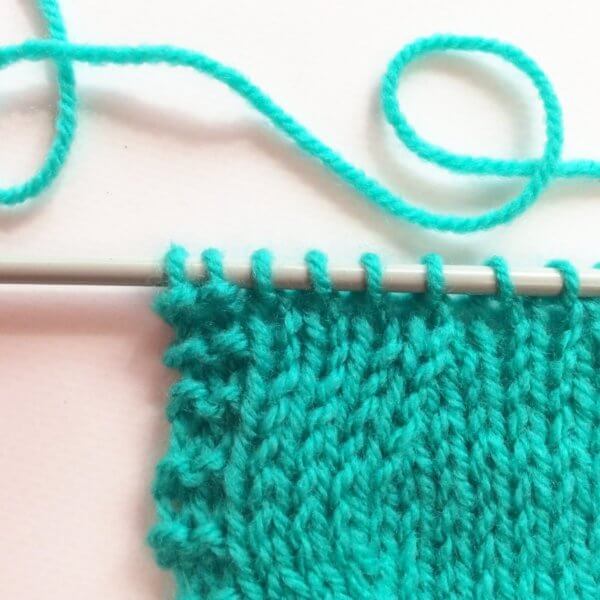
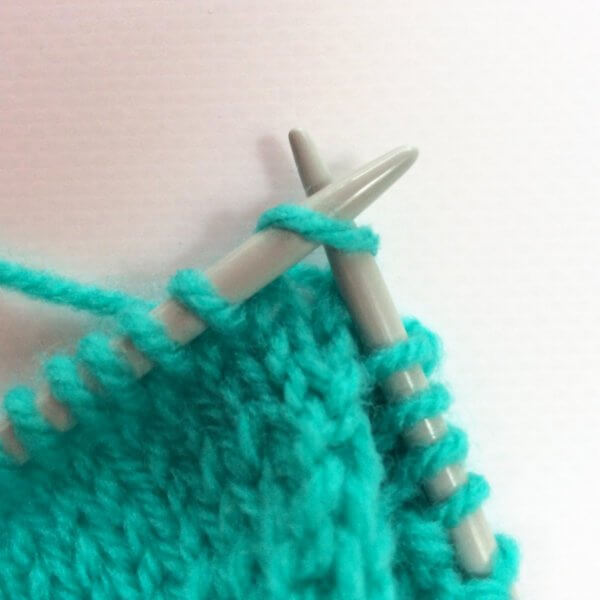
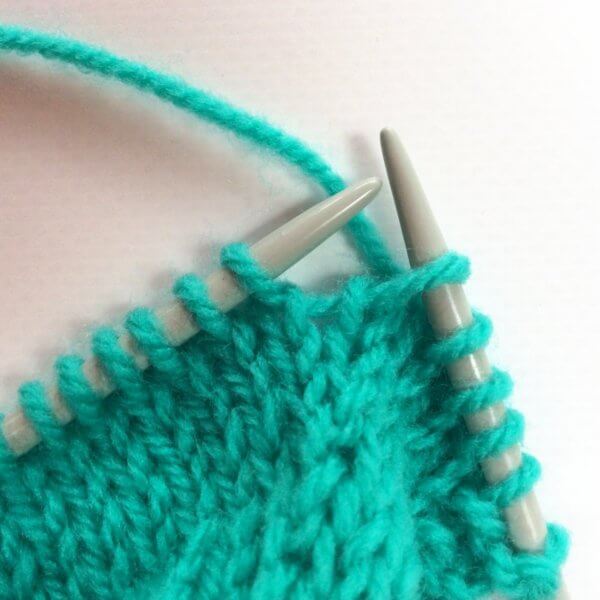
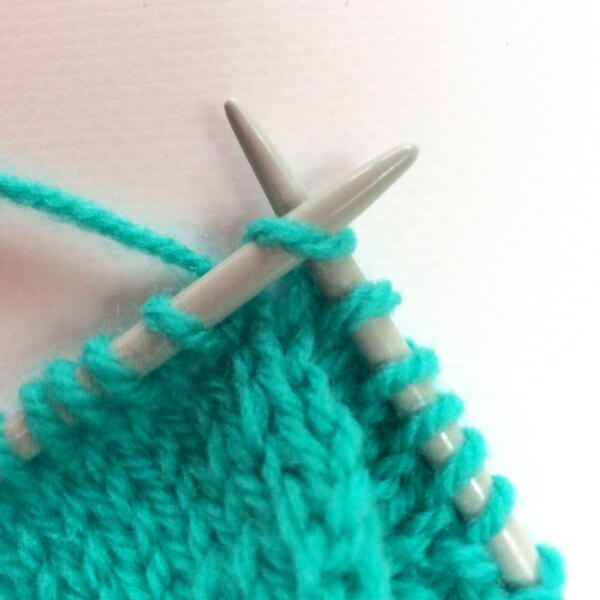
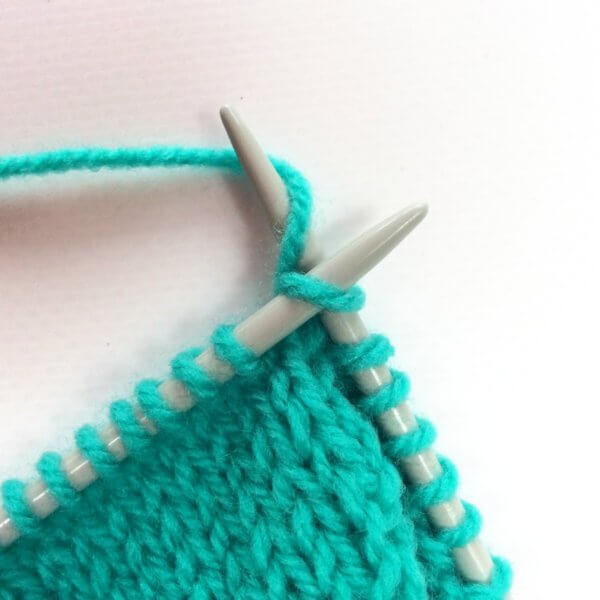
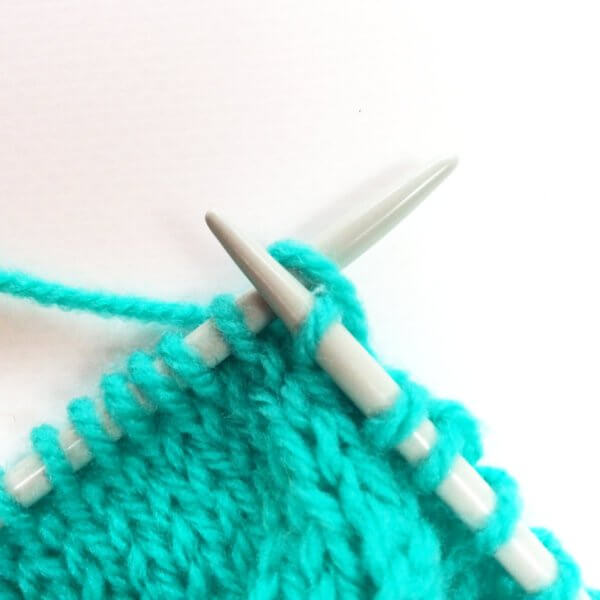
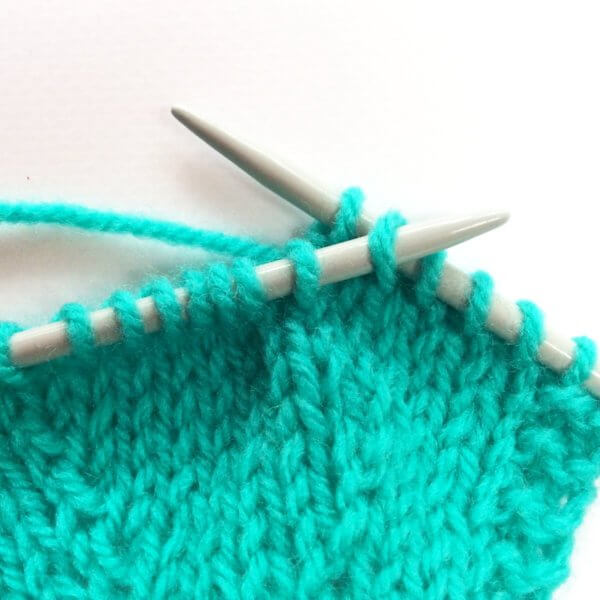
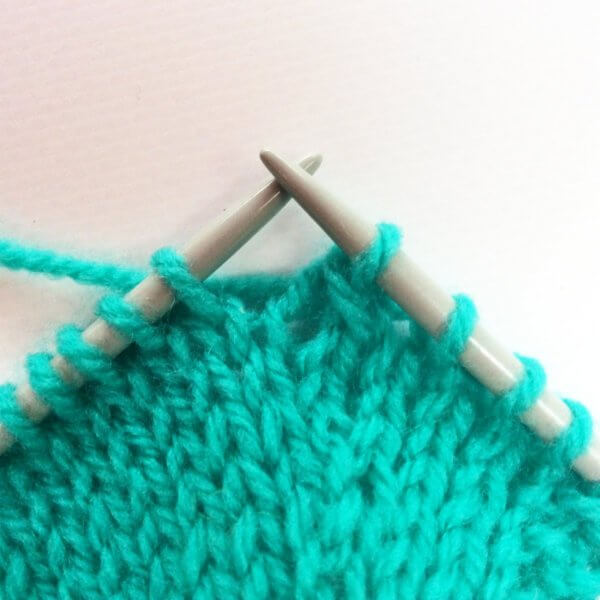
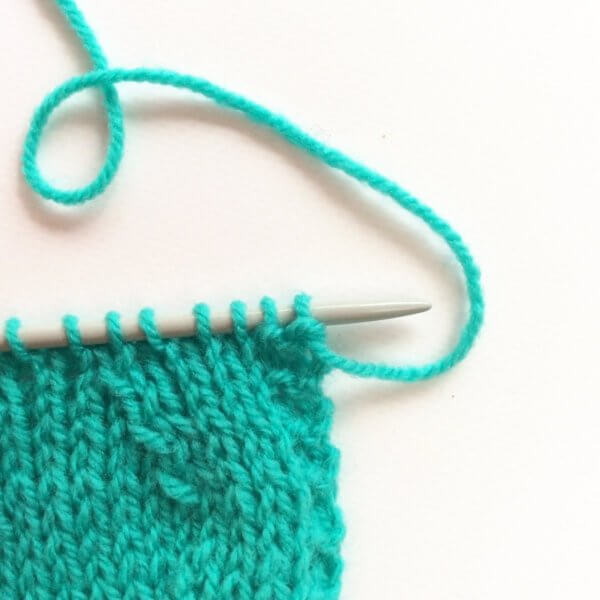
This stole is knitted back and forth, starting with the cabled lace panel. Next, stitches are picked up and knit on the long sides of the lace panel for the garter stitch sections. Also, the instructions for the lace are provided both charted and written out.


Pay what you want: (minimum €6.50)

Add to cart


Difficulty level

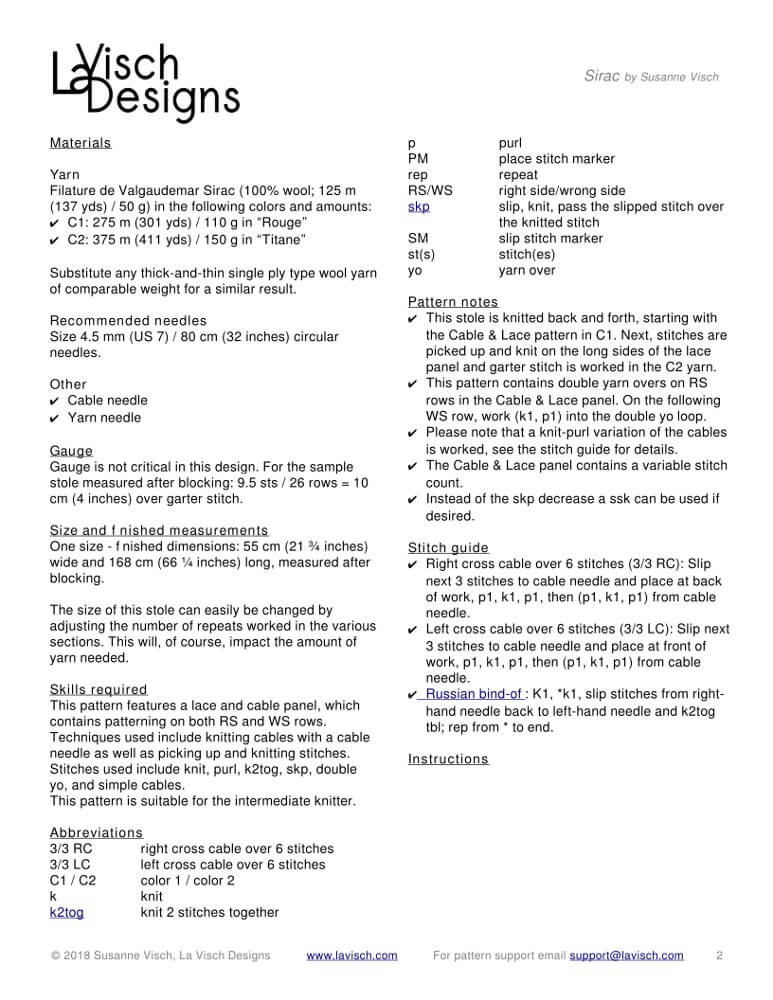
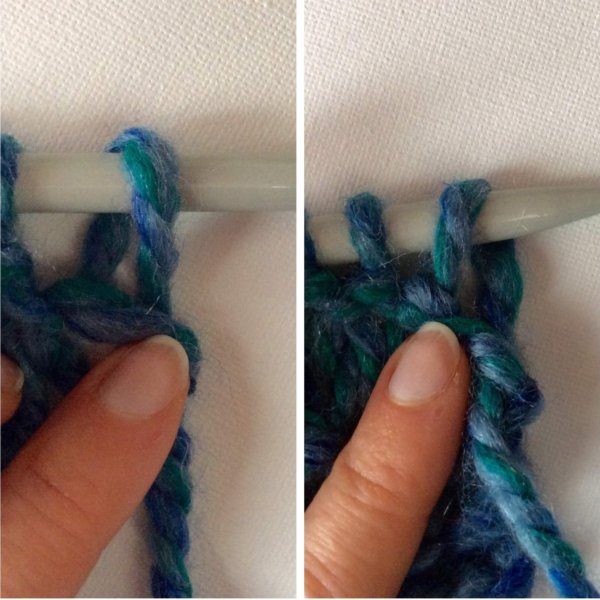
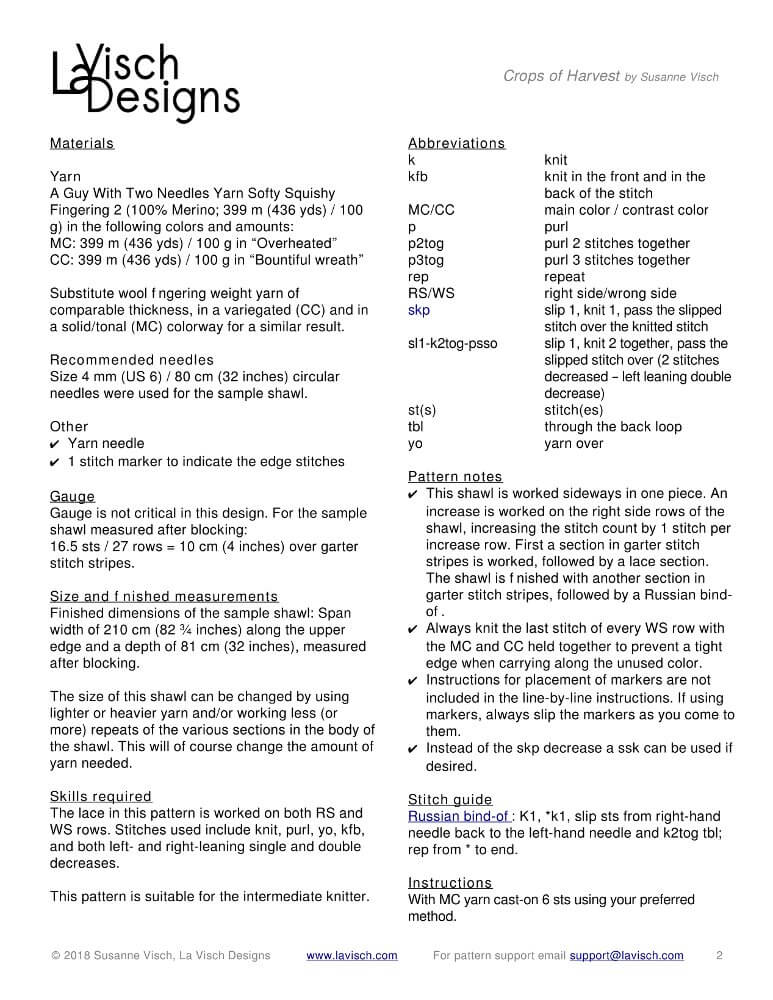
This pattern features a lace and cable panel, which contains patterning on both RS and WS rows. Techniques used include knitting cables with a cable needle as well as picking up and knitting stitches. Stitches used include knit, purl, k2tog, skp, double yo, and simple cables. This pattern is suitable for the intermediate knitter.

Size and finished measurements

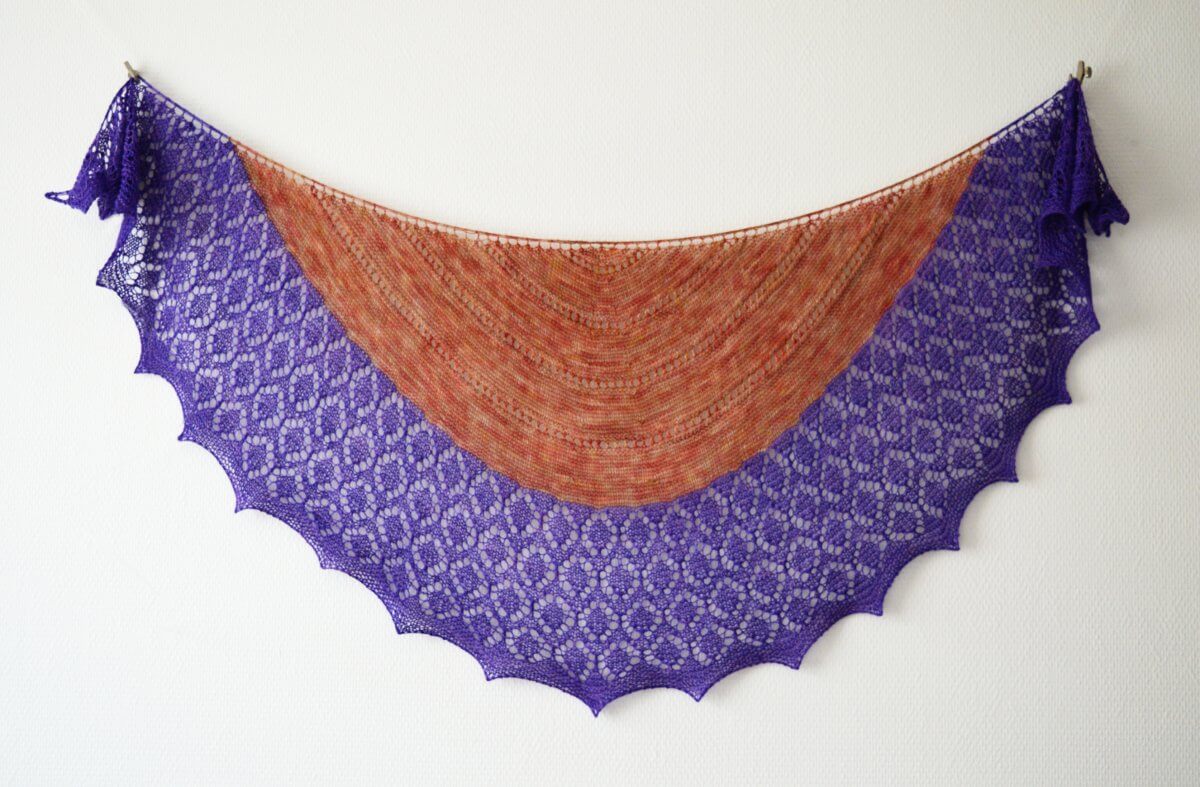
One size – finished dimensions: 55 cm (21 ¾ inches) wide and 168 cm (66 ¼ inches) long, measured after blocking. Change the size of this stole by adjusting the number of repeats worked in the various sections. This will, of course, impact the amount of yarn needed.

Pattern details

  • Gauge: Gauge is not critical in this design. For the sample shawl: 9.5 sts / 26 rows = 10 cm (4 inches) over garter stitch, measured after blocking.
  • Pattern languages included: English and Dutch (Dit patroon omvat zowel een Nederlandse als een Engelse versie)
  • Digital PDF has 4 pages (letter size)

Materials

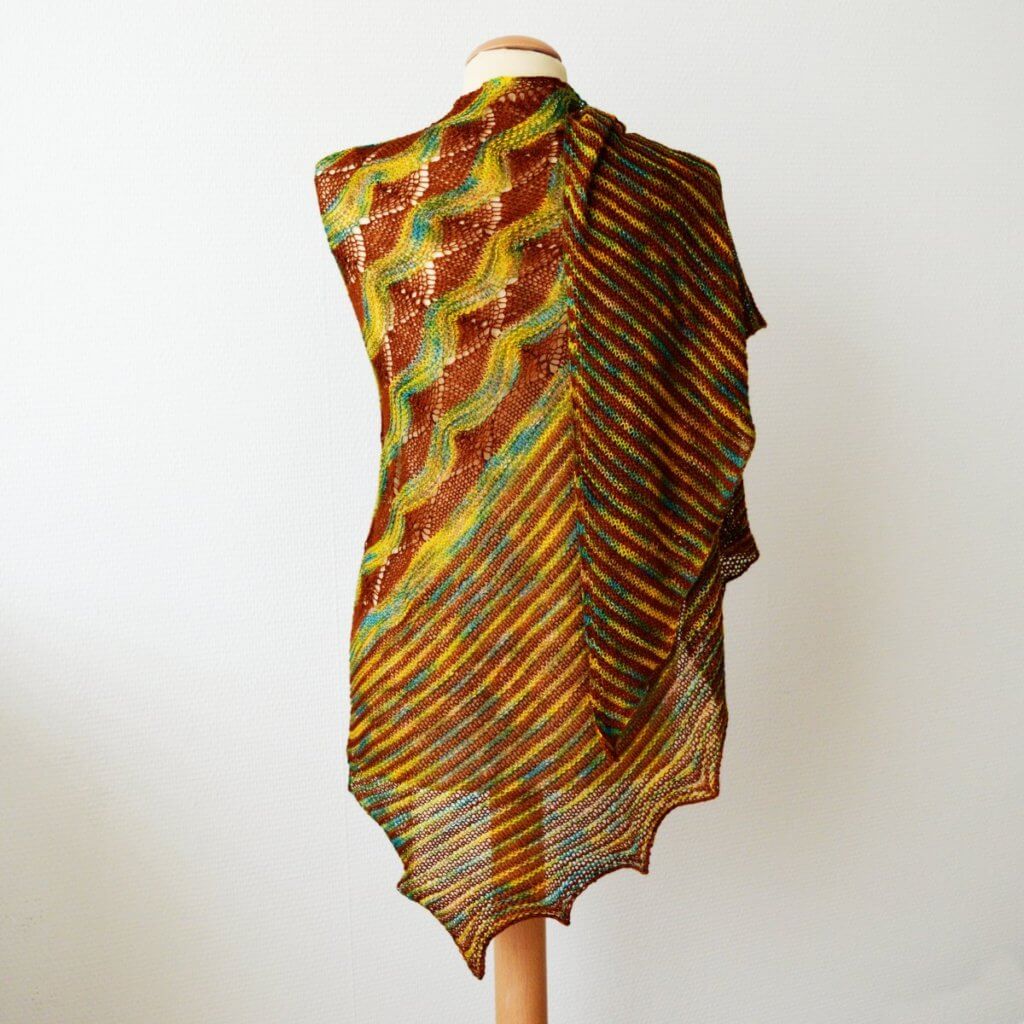
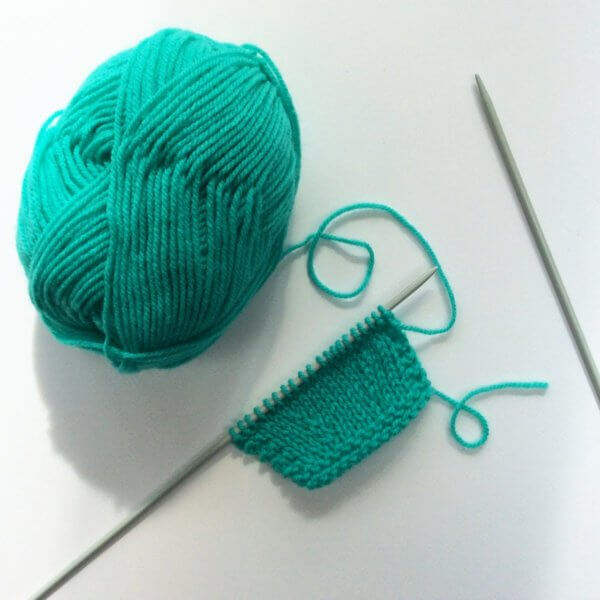
  • Yarn: Filature de Valgaudemar Sirac (100% wool; 125 m (137 yds) / 50 g) in the following colors and amounts: C1: 275 m (301 yds) / 110 g in “Rouge” and C2: 375 m (411 yds) / 150 g in “Titane”. Substitute any thick-and-thin single ply type wool yarn of comparable weight for a similar result.
  • Size 4.5 mm (US 7) / 80 cm (32 inches) circular needles.
  • Cable needle
  • Yarn needle

sirac Read More »

tutorial – pick-up & knit from garter stitch

Tutorial pick-up & knit from garter stitch - by La Visch Designs

In my Sirac stole design a center panel in a Cable & Lace pattern is worked first, after which stitches are picked up and knit on the long sides of the panel. After this, the rest of the pattern can be worked perpendicular to the Cable & Lace panel. One of my testers (hi Marilyn!) mentioned that it would be a good idea to dedicate a photo tutorial to the technique used for that. So here we are!

Of course, there are many ways to accomplish this. In this tutorial, I’m focusing on “pick-up and knit” from a garter stitch piece, worked without a chain stitch selvage. Such a selvage is pretty neat for picking-up stitches, but it also makes the selvage tighter than may be preferable. In such cases, it’s good to know how to pick-up & knit stitches from a regular garter stitch edge.

The difference between “pick-up” and “pick-up & knit”

It may be confusing what exactly the difference is between just “pick-up” and “pick-up & knit”. I mean, both have some picking-up action going on. The main difference is, that with just “pick-up” stitches of the piece already worked are placed on the knitting needle without introducing new yarn.

With “pick-up and knit”, new yarn is pulled through the piece already worked and the loops are placed on a knitting needle. These new loops are the new stitches from which the rest of the piece is worked.

Pick-up & knit from garter stitch step-by-step

In this example, I’m using a contrasting yarn for the pickup & knit part, to make it easier for you to see what exactly I’m doing and where.

1. We start with a piece of knitting worked completely in garter stitch, turned sideways with the RS facing. And yes, plain garter stitch does not really have a RS and WS, but it can have when there is patterning on a background of garter stitch.

Tutorial pick-up & knit from garter stitch - by La Visch Designs

2. Insert your needle (or crochet hook if you find that easier!), from front to back, between the garter stitch ridges, between the last and second-to-last columns of stitches. In other words: in between the ridges and 1 stitch in from the edge.

Tutorial pick-up & knit from garter stitch - by La Visch Designs

3. Wrap your yarn around the needle or crochet hook…

Tutorial pick-up & knit from garter stitch - by La Visch Designs

4. …and pull the loop of yarn through the work and place it on the needle.

Tutorial pick-up & knit from garter stitch - by La Visch Designs

5. Repeat steps 2-4, picking up 1 stitch per garter stitch ridge until all ridges have been worked. The result looks like this from the RS:

Tutorial pick-up & knit from garter stitch - by La Visch Designs

This is how it looks from the WS:

Tutorial pick-up & knit from garter stitch - by La Visch Designs

Next, you can start knitting according to your pattern. Take care, though, to see whether the stitches are positioned normal or twisted. The stitch mount has a potential impact on your project!

Stitch mount

Stitches have a left and right leg. The way they are positioned on the needle impacts the look of the stitches when knit. In the picture below on the left, you can see the regular orientation with the right leg in front of the needle. On the left there is a twisted stitch: the left leg of the stitch is in front of the needle. This is no problem though: Just knit (or purl) the twisted stitch through the back loop to untwist the stitch mount.

Making a crochet provisional cast-on - a tutorial by La Visch Designs

And here how it looks with some more rows worked from the RS:

Tutorial pick-up & knit from garter stitch - by La Visch Designs

And from the WS:

Tutorial pick-up & knit from garter stitch - by La Visch Designs

The white part looks a tad wider than the “body” of the piece because I used a slightly heavier weight yarn!

Patreon logo

Thanks to my Patreon supporters for bringing you this freebie! Creating quality patterns and tutorials is a lot of work and resource-intensive. However, I find it important to give you free content like this tutorial. Thanks to the generous support of my Patreon supporters, I can make it happen. Thank you, patrons! Click here to join, or click here to read more about La Visch Designs on Patreon.

tutorial – pick-up & knit from garter stitch Read More »

green madeira

Green Madeira shawl

Green Madeira is a semi-circle Pi shawl, designed for the gorgeous gradient yarn used. While I made my version in a mohair type yarn, any worsted weight gradient yarn would make a lovely shawl with this design!

Work this shawl from the top-down, starting with a garter stitch tab. The instructions for the lace are, of course, both charted and fully written out.


Pay what you want: (minimum €6.50)

Add to cart


Difficulty level

The half-circle Green Madeira shawl is knit from the top down and is started with a garter tab cast-on. Lace patterning is worked on both RS and WS rows. Stitches used include knit, purl, yo, m1, skp, k2tog, and p2tog. This pattern is suitable for the intermediate knitter.

Size and finished measurements

Finished dimensions of the sample shawl: span width of 172 cm (67 ¾ inches) and a depth of 63 cm (24 ¾ inches), measured after blocking.

Pattern details

  • Gauge: Gauge is not critical in this design. For the sample shawl: 11 sts / 24 rows = 10 cm (4 inches) over stockinette, knitted on smaller needles and measured after blocking.
  • Pattern languages included: English and Dutch (Dit patroon omvat zowel een Nederlandse als een Engelse versie)
  • Digital PDF has 4 pages (letter size)

Materials

  • Yarn: 420 m (459 yds)/ 150 g Pro Lana Woolly Hugs Bobbel Mohair (45% Acrylic, 40% Nylon, 15% Mohair; 420 m (459 yds)/ 150 g) in “203 Green”. Substitute any worsted weight mohair-type yarn with long color changes for a similar result.
  • Size 5 mm (US 8) / 80 cm (32 inches) circular needles
  • Size 5.5 mm (US 9) knitting needle (for bind-off only).
  • Yarn needle
  • Stitch markers to use in between lace repeats (optional)

green madeira Read More »

lace for mom

Lace for Mom

The moment I showed my mom the yarn I used in this scarf, she said: “You know this is soooo my color?!” No problem mom, this one is for you. The delicate lace is based on traditional Estonian stitch patterns, which, of course, include nupps. My mom wouldn’t have it any different! Instructions for both traditional and easy nupps are included.

This design in size S was originally published in Knotions Magazine. This pattern, however, not only contains instructions for the peaked border on one of the long sides as pictured but also for a wider symmetrical version (size L). The instructions for the shawl are provided both fully charted and written out.


Pay what you want: (minimum €6.50)

Add to cart


Difficulty level

The Lace for Mom scarf is worked lengthwise and contains lace that is worked on the right side of the fabric only. Size L also requires grafting / Kitchener stitch. Stitches used include knit, purl, k2tog, skp, yo, a centered double decrease (sl2-k1-p2sso) and nupps. This pattern is suitable for the intermediate to advanced knitter.

Sizes and finished measurements

S (L) – finished dimensions: 29 (40) cm (11 ½ (15 ¾) inches) wide and 224 cm (88 ¼ inches) long, measured after blocking. Shawl pictured is size S.

Pattern details

  • Gauge: For the sample Lace for Mom shawl: 12.7 sts / 18.8 rows = 10 cm (4 inches) over body pattern knit with smaller size needles, measured after blocking. Gauge is however not critical for this design.
  • Pattern languages included: English and Dutch (Dit patroon omvat zowel een Nederlandse als een Engelse versie)
  • Digital PDF has 4 pages (letter size)

Materials

  • Yarn: 402 (603) m (440 (660) yds) Malabrigo Yarn Sock (100 % wool; 402 m (440 yds) per 100 g) in 806 Impressionist Sky. Substitute any wool fingering weight yarn of comparable thickness for a similar result.
  •  Size 5 mm (US 8) / 80 cm (32 inches) circular needles
  • One extra pair size 5 mm (US 8) / 80 cm (32 inches) circular needles for grafting, for size L only
  • Size 6 mm (US 10) / 80 cm (32 inches) circular needles for cast-on only
  • Yarn needle
  • 21 stitch markers to use in between lace repeats (optional)
  • Waste yarn, approx. 1 m (1.1 yds), for size L only
  • Crochet hook in a size equivalent to the small size knitting needles (optional, for easy nupps)

lace for mom Read More »

tutorial – circular cast-on

Circular cast-on - a tutorial by La Visch Designs

Casting-on for knitting in the round is usually a rather fiddly business. The circular cast-on method in this tutorial, unfortunately, isn’t any different in that respect. Still, when wanting the cast-on for a project knitted flat and in the round, this method gives a very nice and invisible start.

I think it’s ideal for things like top-down hats, center-out blankets or shawls, and the like. It’s pretty similar to the idea of starting a project with a magic ring in crochet. A big plus is that the ring can be tightened to close up the starting hole, once you’re well underway and past that fiddly starting stage.

In this tutorial I used a circular needle in the magic loop way, but (of course) double pointed needles (dpn’s) can also be used for the small-circumference start.

Materials

Besides yarn and circular knitting needles (or dpn’s), it’s also a good idea to use stitch markers to denote the corner stitches. I didn’t use them in this tutorial and it shows in the end result! If using circular needles, make sure the cable is long enough to do magic loop. In my experience, 80 cm / 32 inches or longer is needed for that.

Circular cast-on - a tutorial by La Visch Designs

The circular cast-on step-by-step

1. Make an overhand knot in your yarn as shown below in the picture.

Circular cast-on - a tutorial by La Visch Designs

2. Next, position your knitting needle as shown underneath the strand of your that goes to the ball of yarn.

Circular cast-on - a tutorial by La Visch Designs

3. Now insert the needle in the circle of yarn, yarn over and pull the loop through the circle. This makes a new stitch as shown below.

Circular cast-on - a tutorial by La Visch Designs

4. Now, yarn over again…

Circular cast-on - a tutorial by La Visch Designs

5. …. and (as in step 3) again insert the needle in the circle of yarn, yarn over and pull the loop through the circle. This makes a new stitch as shown below.

Circular cast-on - a tutorial by La Visch Designs

6. Repeat steps 3 and 4 as often as needed. In this example, I repeated another 2 times to get to a total of 8 stitches on my needle.

Circular cast-on - a tutorial by La Visch Designs

7. Now you can pull on the yarn tail to tighten up the cast-on circle. Don’t worry if it loosens up, later on, you can always tighten it again.

Circular cast-on - a tutorial by La Visch Designs

8. And now you can start knitting according to your pattern! This may also be a good time to insert any stitch markers needed, for the correct placement of the increases. In this example, I didn’t, which shows in the wonky placement of the yarn overs in the picture below. Still, the cast-on itself in the center can be seen pretty well, so there it is!

Circular cast-on - a tutorial by La Visch Designs
Patreon logo

Thanks to my Patreon supporters for bringing you this freebie! Creating quality patterns and tutorials is a lot of work and resource-intensive. However, I find it important to give you free content like this tutorial. Thanks to the generous support of my Patreon supporters, I can make it happen. Thank you, patrons! Click here to join, or click here to read more about La Visch Designs on Patreon.

tutorial – circular cast-on Read More »

beat the fug

Beat the Fug by La Visch Designs

Beat the Fug is a crescent-shaped shawl worked from the top-down. Inspired by the “Free-Wrench” novel by Joseph R. Lallo and the yarn dyed to match by Third Vault Yarns, it perfectly catches the steampunk vibe so wonderfully described in the story.

The shawl starts with a garter stitch tab. The body contains special shaping, which helps to avoid the “bump” in the upper edge of the shawl, so often present in crescent shawl designs. The lace in the border is knit on both right side and wrong side rows. The instructions for the border of the shawl are provided both fully charted and written out.


Pay what you want: (minimum €6.50)

Add to cart


Difficulty level

The Beat the Fug shawl starts with a modified garter stitch tab. Stitches used include knit, purl, k2tog, p2tog, skp, a centered double decrease, yo and m1L and m1R increases. This pattern is suitable for the intermediate knitter.

Sizes and finished measurements

Size S (L) finished dimensions: Wingspan of 152 (175) cm (60 (69) inches) and a depth of 40 (50) cm (15 ¾ (19 ¾) inches), measured after blocking. The shawl shown is in size L.

Pattern details

  • Gauge: For the sample shawl measured after blocking: 19 sts / 23 rows = 10 cm (4 inches) in stockinette stitch. Gauge is not critical for this design, but a loose gauge is strongly advised.
  • Pattern languages included: English and Dutch (Dit patroon omvat zowel een Nederlandse als een Engelse versie)
  • Digital PDF has 6 pages (letter size)

Materials

  • Yarn: Third Vault Yarns Companion 4-ply (100% Sw Merino; 400 m (437 yds) / 100 g) in the following colors and amounts: C1: 140 (200) m (153 (219) yds) / 35 (50) g in The Windbreaker, and C2: 260 (400) m (284 (437) yds) / 65 (100) g in Well Fug!
  • Size 4 mm (US 6) / 80 cm (32 inches) circular needles
  • Yarn needle
  • 2 stitch markers to mark the center of the shawl
  • Stitch markers for the lace section (optional)

beat the fug Read More »

crops of harvest

crops of harvest

Crops of Harvest is a stylish triangular shawl knit sideways. There is just something about the combination of striped garter stitch and lace that appeals to me. Lazy mindless knitting, together with lovely lace, makes it a perfect choice to combine a solid/tonal fingering weight yarn with a variegated one. What’s not to love?!

The pattern contains both fully written out as well as charted instructions for the lace. The lace section in the middle of the shawl is true lace knitting, worked on both wrong and right side rows.


Pay what you want: (minimum €6.50)

Add to cart


Difficulty level

The lace in the Crops of Harvest shawl pattern is worked on both RS and WS rows. Stitches used include knit, purl, yo, kfb, and both left- and right-leaning single and double decreases. This pattern is suitable for the intermediate knitter.

Sizes and finished measurements

One size (easily adjustable): Finished dimensions of the sample shawl: Span width of 210 cm (82 ¾ inches) along the upper edge and a depth of 81 cm (32 inches), measured after blocking.

Pattern details

  • Gauge: Gauge is not critical in this design. For the sample shawl measured after blocking: 16.5 sts / 27 rows = 10 cm (4 inches) over garter stitch stripes.
  • Pattern languages included: English and Dutch (Dit patroon omvat zowel een Nederlandse als een Engelse versie)
  • Digital PDF has 4 pages (letter size)

Materials

  • Yarn: A Guy With Two Needles Yarn Softy Squishy Fingering 2 (100% Merino; 399 m (436 yds) / 100 g) in the following colors and amounts: MC: 399 m (436 yds) / 100 g in “Overheated” and CC: 399 m (436 yds) / 100 g in “Bountiful wreath”. Substitute wool fingering weight yarn of comparable thickness, in a variegated (CC) and in a solid/tonal (MC) colorway for a similar result.
  • Size 4 mm (US 6) / 80 cm (32 inches) circular needles
  • Yarn needle
  • 1 stitch marker to indicate the edge stitches

crops of harvest Read More »

a design by La Visch Designs

lace for mom in knotions magazine

Lace for Mom

The moment I showed my mom the yarn I used in this shawl, she said: “You know this is soooo my color?!” No problem mom, this one is for you. The delicate lace in Lace for Mom is based on traditional Estonian stitch patterns, which, of course, include nupps. My mom wouldn’t have it any different! Often, people find nupps a tad daunting. Don’t stress though, the pattern contains instructions for both traditional and easy nupps.

And the best part? You can find this pattern for free in the March 2018 issue of Knotions Magazine!

Lace for Mom - a design by La Visch Designs
Logo Knotions Magazine

lace for mom in knotions magazine Read More »

tutorial – knitting the k2tog decrease

Knitting the k2tog decrease - a tutorial by La Visch Designs

In my previous post, I showed you how to work the left-leaning skp decrease. In this one, I will tell you all about the matching right-leaning decrease, the one abbreviated with “k2tog”. This stands for “knit 2 stitches together”. It’s a very easy and very common way to reduce the number of stitches in your project and make it narrower.

Below you can find how to work this decrease, so get your materials and follow along! I’m starting with the same swatch I used in my previous tutorial on the m1bl increase.

Knitting the k2tog decrease - a tutorial by La Visch Designs

Knitting the right-leaning k2tog decrease step by step

1. First, take your project and work to the spot indicated in your pattern, where the decrease is supposed to be made. I’m making the decrease 3 stitches in, counted from the garter stitch edging on the left side of the swatch. However, because the decrease itself uses 2 stitches I have to stop to do the decrease 5 stitches from the left-side edging.

Knitting the k2tog decrease - a tutorial by La Visch Designs

2. Next, insert the tip of the right-hand needle into the first 2 stitches at the same time as if to knit.

Knitting the k2tog decrease - a tutorial by La Visch Designs

3. Wrap the yarn around the needle…

Knitting the k2tog decrease - a tutorial by La Visch Designs

4. ..pull it through the stitches you inserted the right-hand needle in…

Knitting the k2tog decrease - a tutorial by La Visch Designs

5. …and slip the original stitches of the left-hand needle.

Knitting the k2tog decrease - a tutorial by La Visch Designs

And this is how to work the k2tog decrease! The result in stockinette is shown below. In this small swatch, there are three decrease rows worked every other row, at a distance of 2 stitches from the garter stitch edge.

Knitting the k2tog decrease - a tutorial by La Visch Designs

tutorial – knitting the k2tog decrease Read More »

tutorial – knitting the skp decrease

Knitting the skp decrease - a tutorial by La Visch Designs

To make shaping in your knitting possible, knowing how to decrease the number of stitches on your needles is quite important. In this post, I’m going to show you how to work the left-leaning decrease that is abbreviated with “skp”. Skp stands for “slip 1, knit 1, pass the slipped stitch over the knitted stitch”.

There are, of course, also other left-leaning decreases. Take for example the “slip slip knit” (ssk) decrease. And yes, the result is quite similar to that of the skp, but I find the latter personally much easier to work. That’s the reason I usually include the skp decrease in my patterns and add a note that instead, an ssk can be used if desired.

Below you can find how this decrease is worked, so get your materials and follow along! I’m starting with the same swatch I used in my previous tutorial on the m1bl increase.

Knitting the skp decrease - a tutorial by La Visch Designs

Knitting the left-leaning skp decrease step by step

1. First, take your project and work to the spot indicated in your pattern, where you want to make the decrease. In my case, that’s 3 stitches in from the garter stitch edging on the right side of the swatch.

Knitting the skp decrease - a tutorial by La Visch Designs

2. Next, insert the tip of the right-hand needle into the first stitch as if to knit…. (It is, of course, possible to insert the needle as if to purl, but this will twist the stitch mount and will make the decrease look like a twisted stitch.).

Knitting the skp decrease - a tutorial by La Visch Designs

3. … and slip it onto the right-hand needle without actually knitting it.

Knitting the skp decrease - a tutorial by La Visch Designs

4. Next, we are going to knit the second stitch. To do so, we start with inserting the right-hand needle into the first stitch on the other needle as shown below.

Knitting the skp decrease - a tutorial by La Visch Designs

5. Wrap the yarn around the needle…

Knitting the skp decrease - a tutorial by La Visch Designs

6. ..pull it through the stitch you inserted the right-hand needle in…

Knitting the skp decrease - a tutorial by La Visch Designs

7. …and slip the original stitch off the left-hand needle.

Knitting the skp decrease - a tutorial by La Visch Designs

8. Next, insert the left-hand needle into the second stitch counted from the tip of the right-hand needle…

Knitting the skp decrease - a tutorial by La Visch Designs

9. And pull it over the first stitch from the tip on the right-hand needle to complete the decrease. Do you see how it slants to the left?

Knitting the skp decrease - a tutorial by La Visch Designs

And this is how to work the skp decrease! The result in stockinette is shown below. In this example, there are three decrease rows worked every other row, at a distance of 2 stitches from the garter stitch edge.

Knitting the skp decrease - a tutorial by La Visch Designs

The decreases in this particular swatch look a bit wibbly/wobbly but in my experience that mostly disappears after blocking. In lace, however, I don’t notice it at all after blocking.

tutorial – knitting the skp decrease Read More »