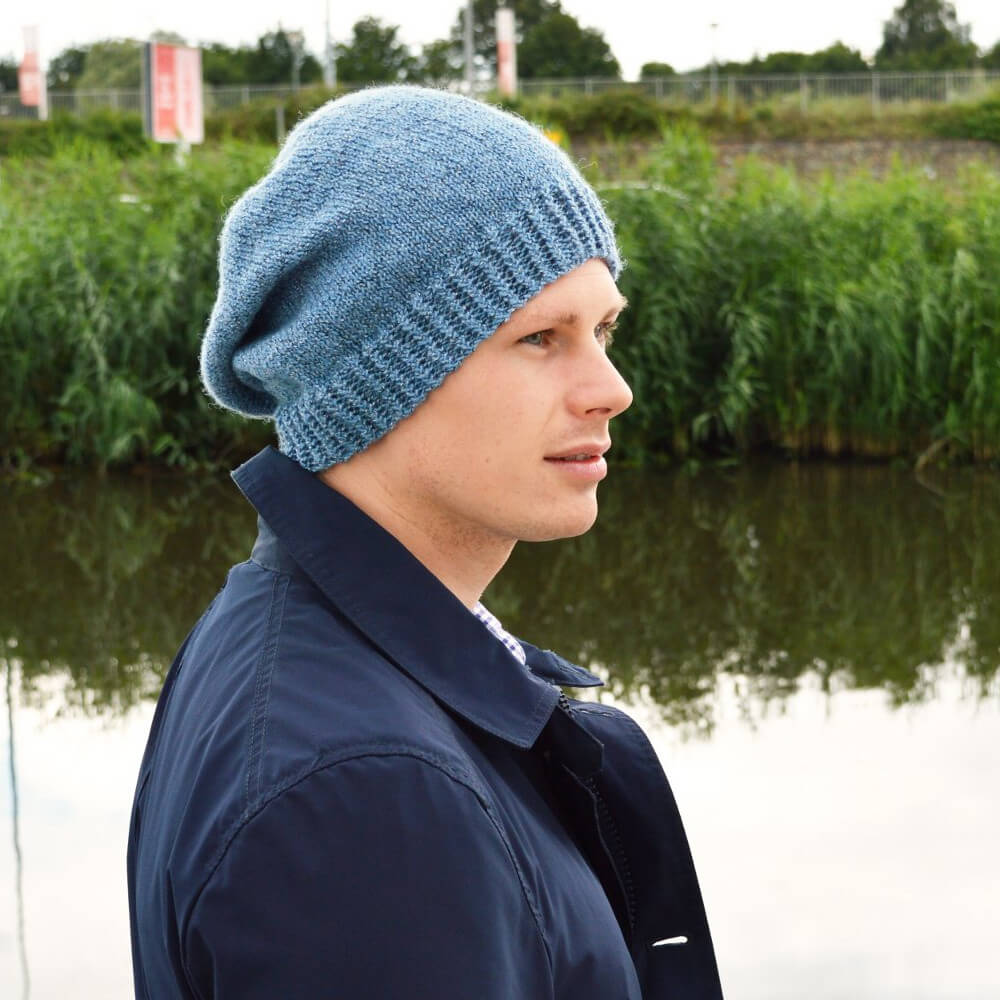
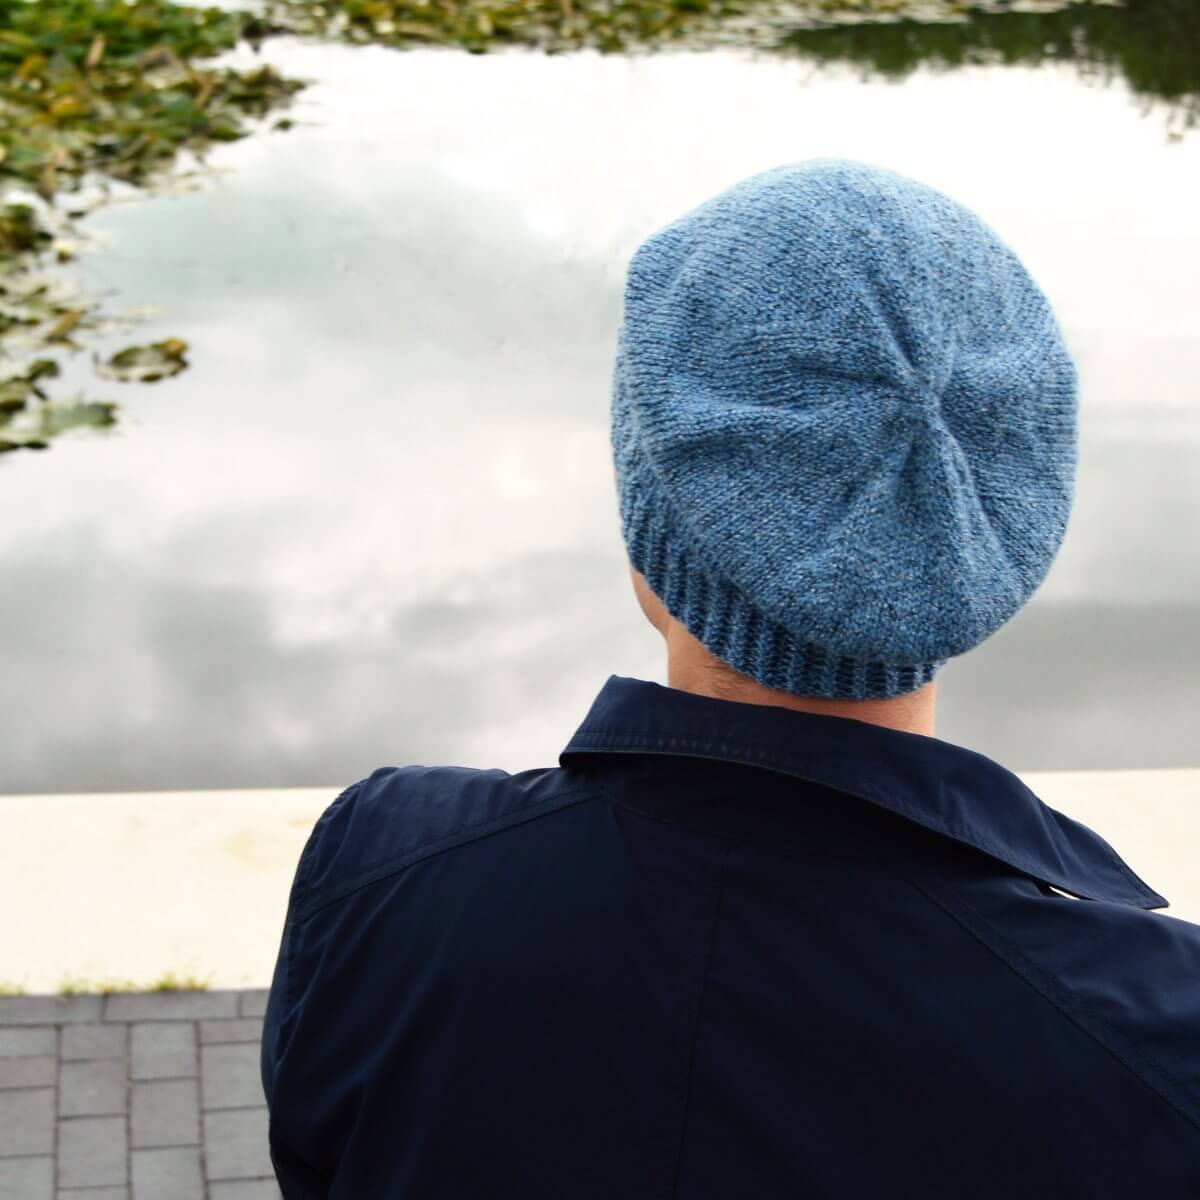
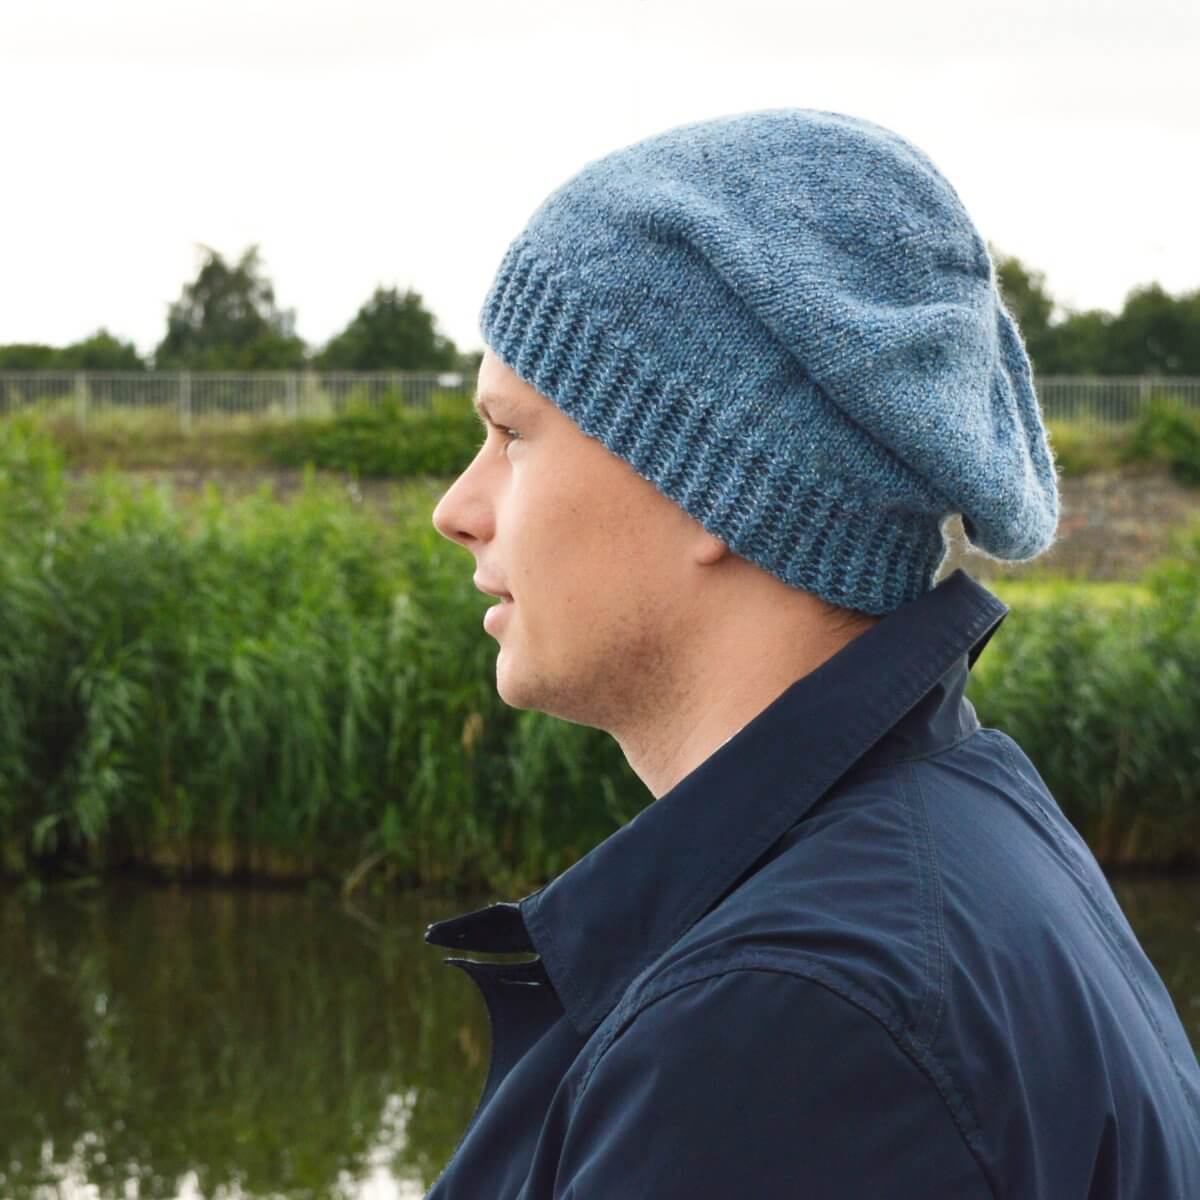
Humdrum is a straightforward hat with a brim in rick-rack rib and a simple stockinette body. The perfect project for that one special skein of sock yarn. Due to the amount of stockinette stitch, Humdrum makes for wonderful mindless knitting. A wonderful plain hat to both knit and wear!
This pattern contains instructions for a range of children and adult sizes. Humdrum is completely seamless and knitted from the bottom up.
Pay what you want: (minimum €4.90)
€
Difficulty level
Work Humdrum in the round, starting at the brim. Rick rack ribbing is worked, stitches are increased around, and the body of the hat is worked in stockinette. Next, the stitches are decreased for the crown. Stitches used in this design include knit, purl, k2tog, and the M1 increase. This pattern is suitable for the advanced beginner to intermediate knitter.
Size and finished measurements
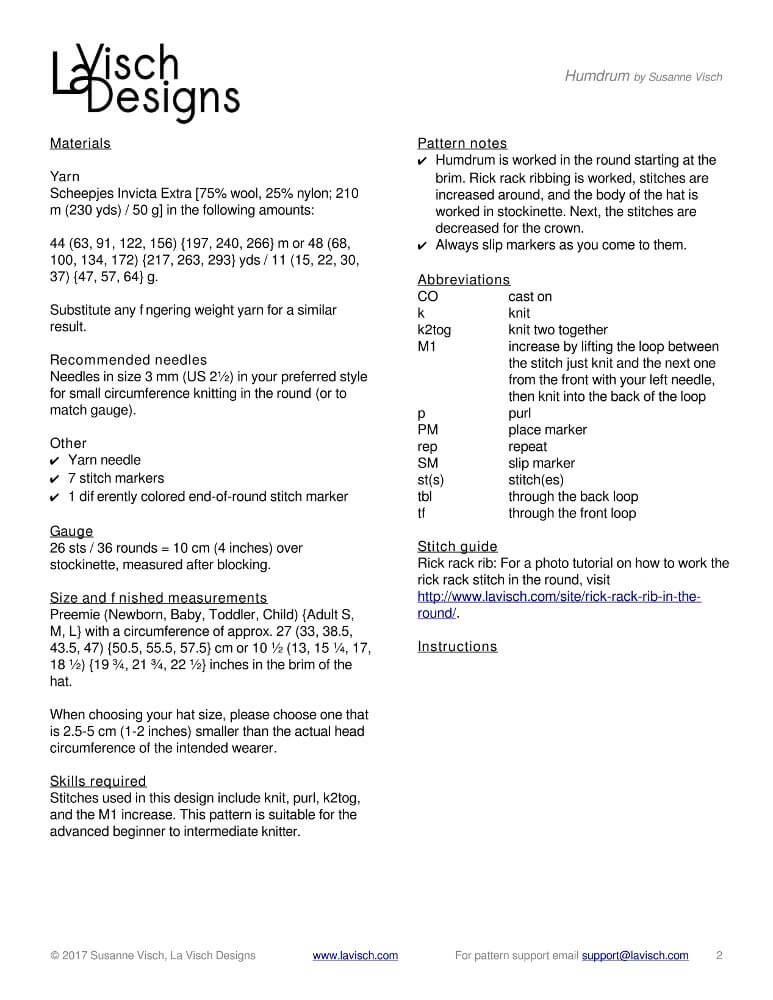
Preemie (Newborn, Baby, Toddler, Child) {Adult S, M, L} with a circumference of approx. 27 (33, 38.5, 43.5, 47) {50.5, 55.5, 57.5} cm or 10 ½ (13, 15 ¼, 17, 18 ½) {19 ¾, 21 ¾, 22 ½} inches in the brim of the hat.
When choosing your hat size, please choose one that is 2.5-5 cm (1-2 inches) smaller than the actual head circumference of the intended wearer.
Pattern details
Gauge: 26 sts / 36 rounds = 10 cm (4 inch) over stockinette after blocking.
Pattern languages included: English and Dutch (Dit patroon omvat zowel een Nederlandse als een Engelse versie).
Digital PDF has 4 pages (letter size).
Materials
Scheepjes Invicta Extra [75% wool, 25% nylon; 210 m (230 yds) / 50 g] in the following amounts: 44 (63, 91, 122, 156) {197, 240, 266} m or 48 (68, 100, 134, 172) {217, 263, 293} yds / 11 (15, 22, 30, 37) {47, 57, 64} g. Substitute any fingering weight yarn for a similar result.
Knitting needles in your preferred style for small circumference knitting in the round in the following size (or to match gauge): Size 3 mm (US 2 1/2)
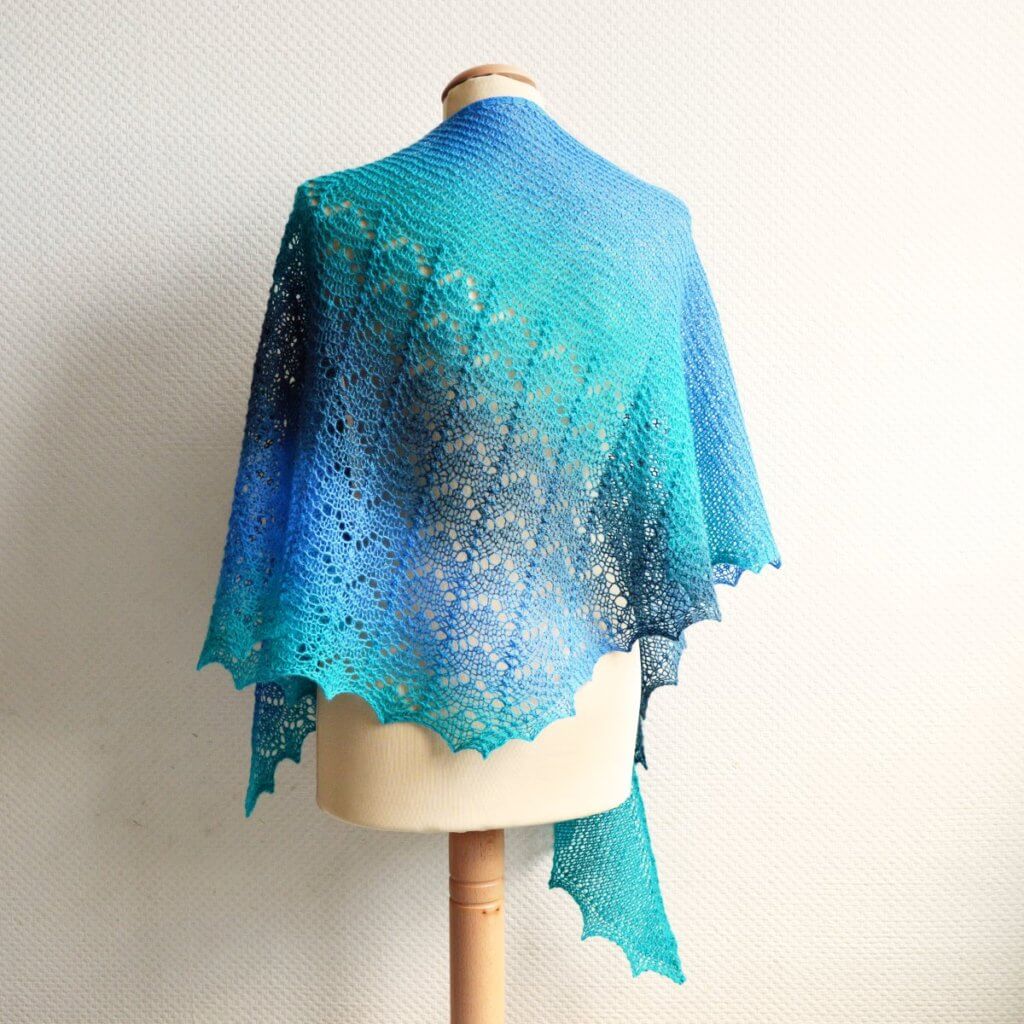
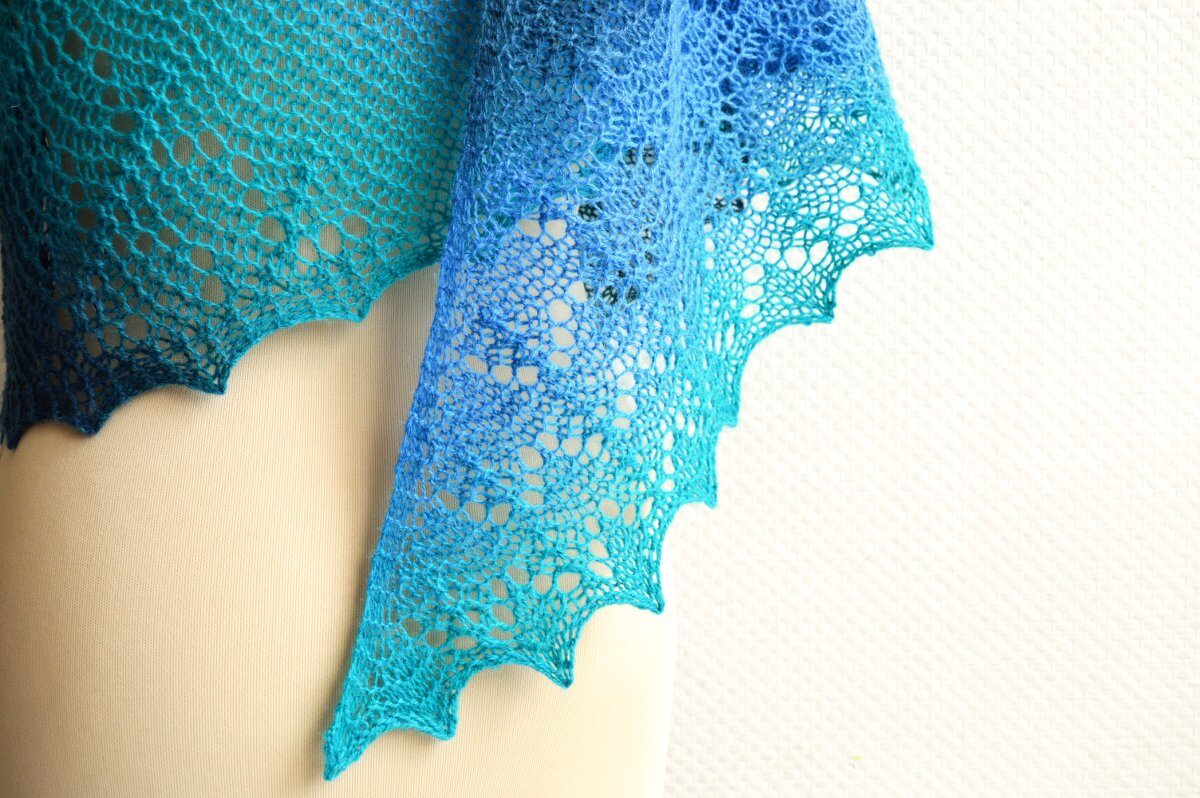
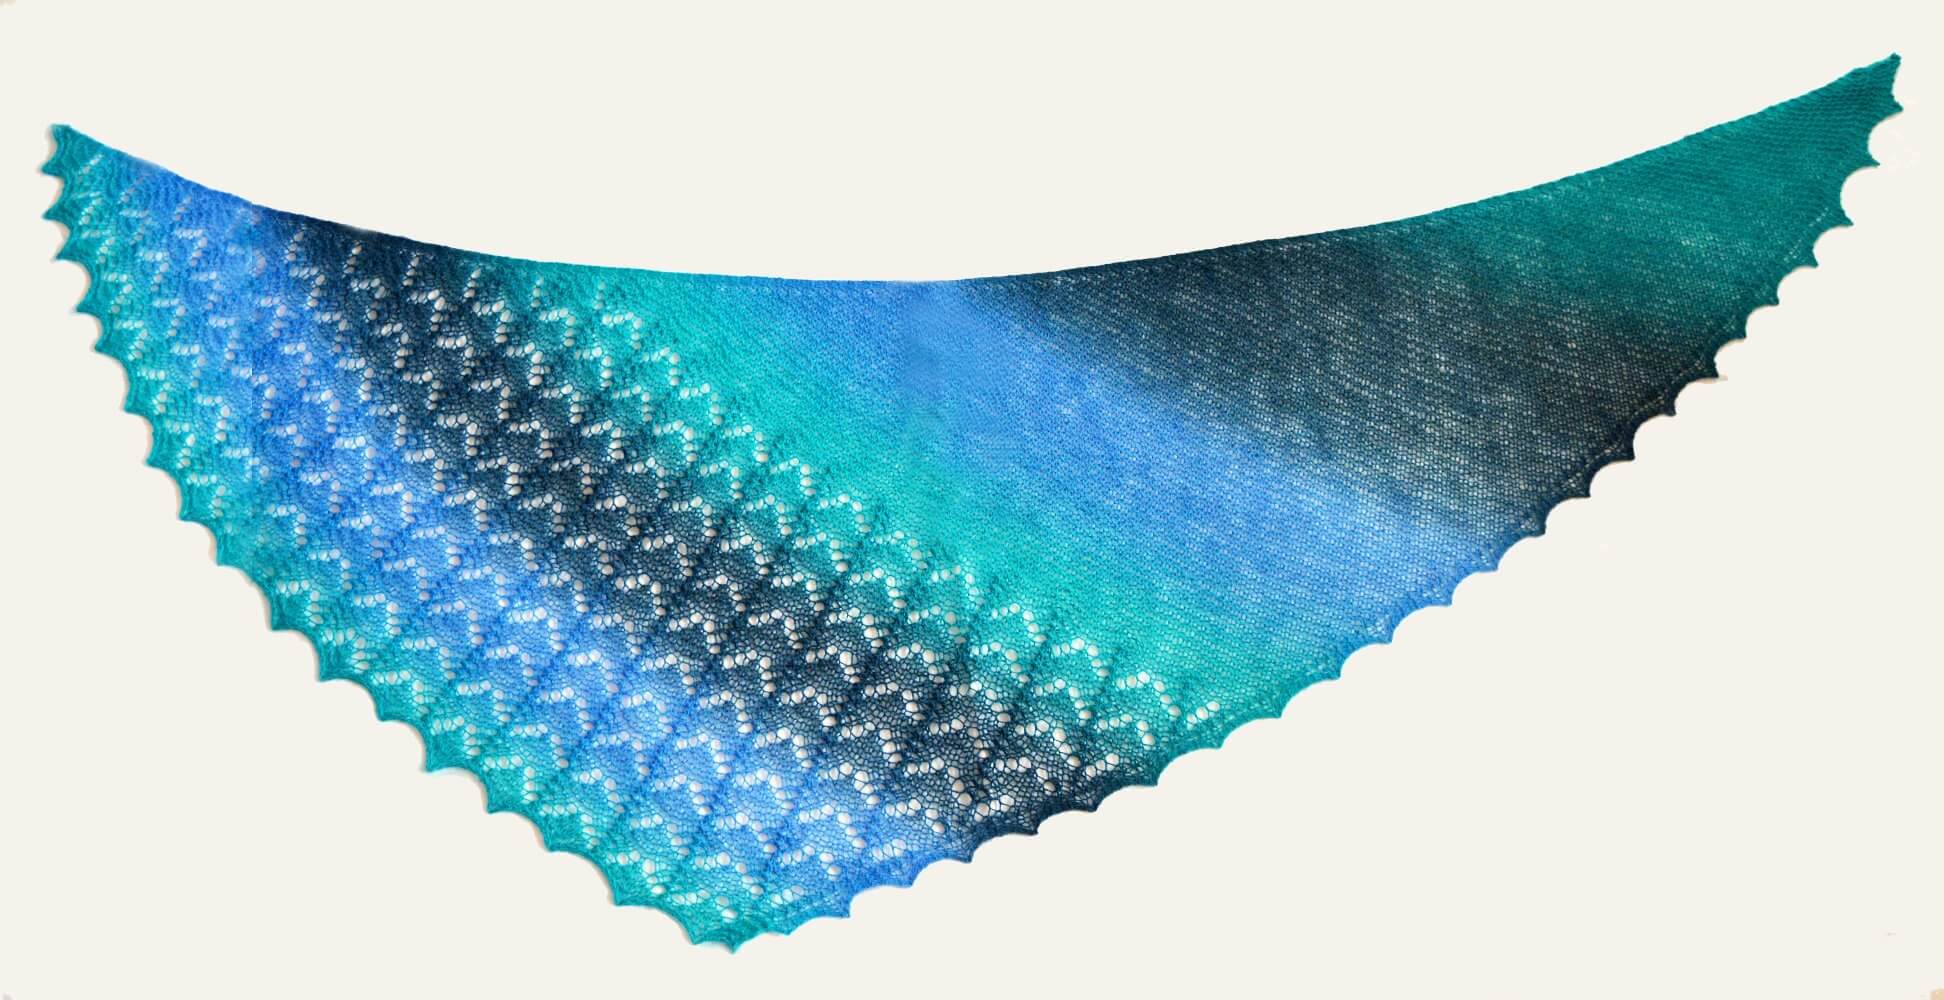
Scuba is a simple yet stylish triangular shawl knit sideways on the bias. The combination of garter stitch and simple lace makes it a perfect choice for that skein of gradient yarn with long color runs. With its generous size of 195 cm (76 ¾ inches) along the upper edge and a depth of 61 cm (24 inches), it is perfect to wear as an elegant scarf.
The pattern contains both fully written out as well as charted instructions for the lace section.
Pay what you want: (minimum €6.50)
€
Difficulty level
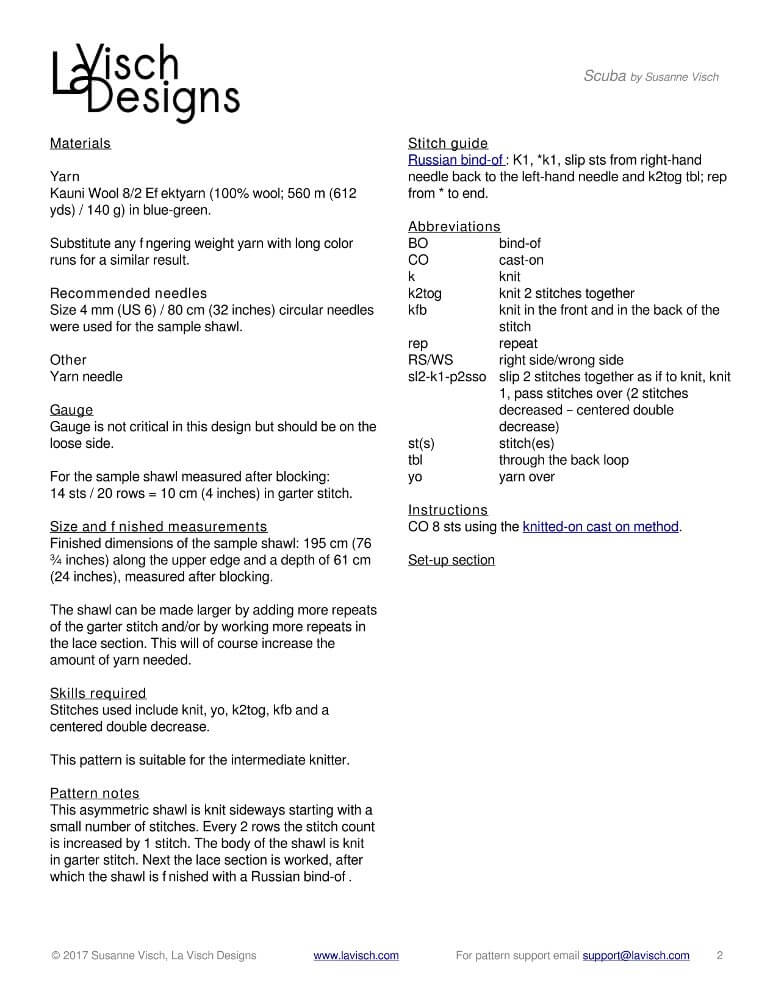
Stitches used include knit, yo, k2tog, kfb and a centered double decrease. This pattern is suitable for the intermediate knitter.
Sizes and finished measurements
Finished dimensions of the sample shawl: 195 cm (76 ¾ inches) along the upper edge and a depth of 61 cm (24 inches), measured after blocking.
Enlarge the shawl by adding more repeats of the garter stitch and/or by working more repeats of the lace section. This will, of course, increase the amount of yarn needed.
Pattern details
Scuba is written for a gauge of approx. 14 sts / 20 rows = 10 cm (4 inches) over garter stitch, measured after blocking. Gauge is however not critical in this design.
Pattern languages included: English and Dutch (Dit patroon omvat zowel een Nederlandse als een Engelse versie)
Digital PDF has 4 pages (letter size)
Materials
Kauni Wool 8/2 Effektyarn (100% wool; 560 m (612 yds) / 140 g) in blue-green. Substitute any fingering weight yarn with long color runs for a similar result.
Size 4 mm (US 6) / 80 cm (32 inches) circular needles
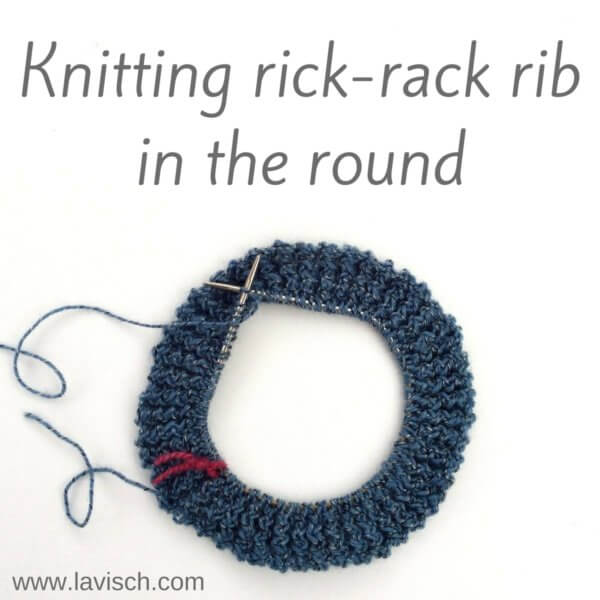
I’ve written it before in this tutorial on how to knit the rick rack rib flat: sometimes a less boring finishing of a project than plain old 2×2 rib is just what the doctor ordered. In this post, I’m going to show you how to knit rick rack rib in the round.
As with the flat worked version of this stitch, the characteristic zig-zag texture is obtained by the knitting the stitches in a different order than they appear on the needle. Rick rack rib worked in the round is knitted as a multiple of 3 stitches. The main difference with the flat worked version is, of course, that there are no WS rows when working the round.
In short, the instructions for this stitch worked in the round consist of the following 2 rounds:
Round 1: *Purl 1, skip the first stitch, knit in the back loop of the second stitch (do not slip this stitch off the needle), knit into the front loop of the first stitch and now slip both knitted stitches of the needle; repeat from * to end of the round.
Round 2: *Purl 1, skip the first stitch, knit in the front loop of the second stitch (do not slip this stitch off the needle), knit into the front loop of the first stitch and now slip both knitted stitches from the needle; repeat from * to end of the round.
Repeat rounds 1 and 2 to the desired height.
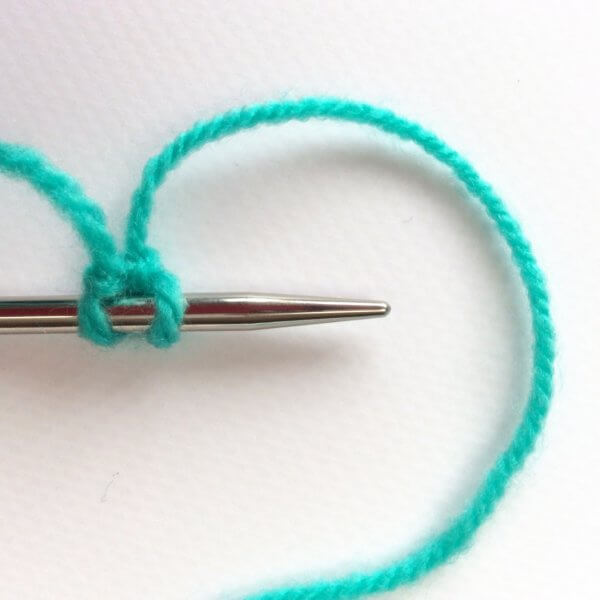
How to knit rick rack rib in the round step by step
Round 1
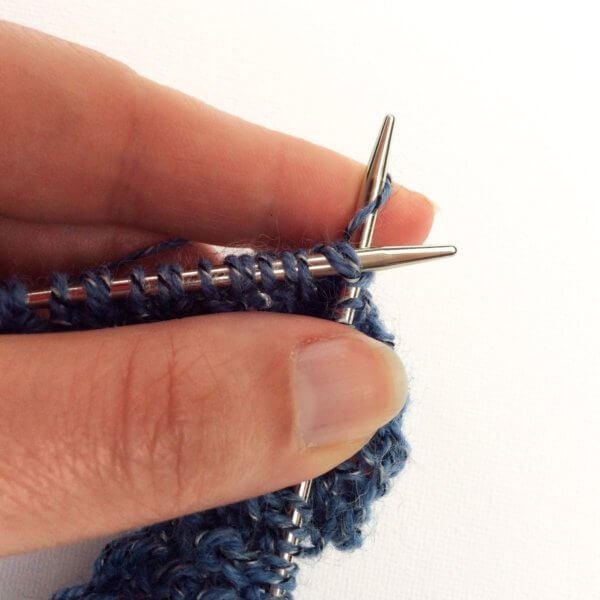
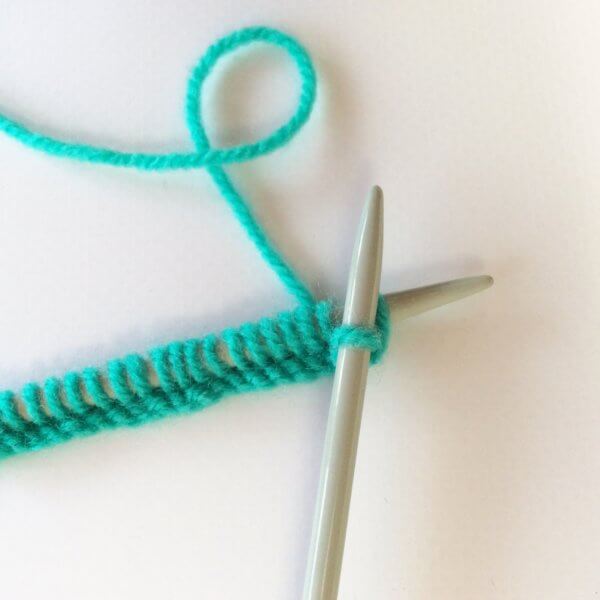
1. Purl 1 stitch.
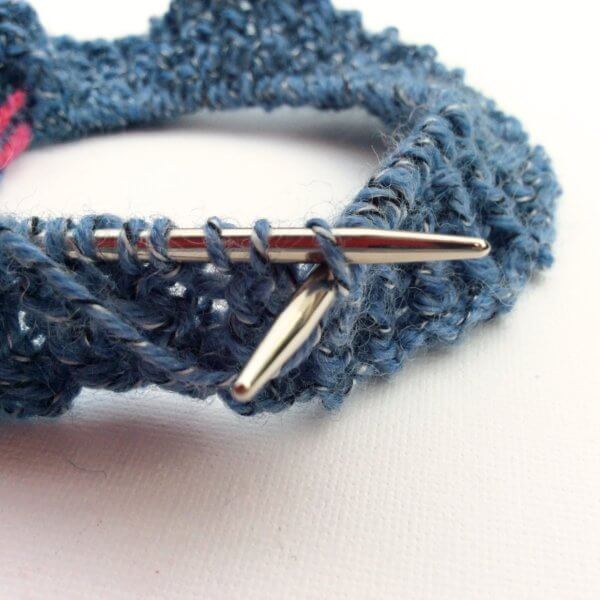
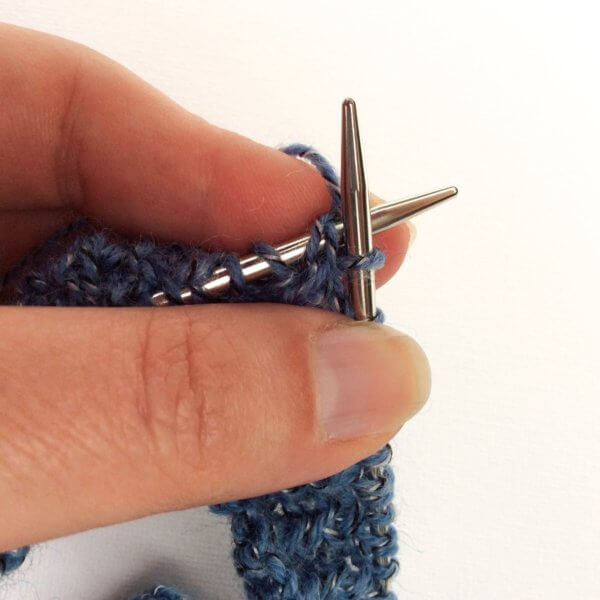
2. Skip the first stitch and insert your needle int the second stitch on the needle in the back loop.
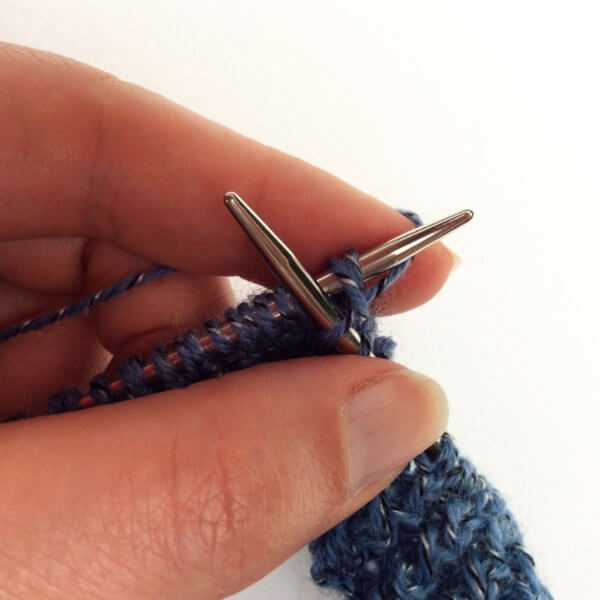
3. Wrap the yarn around the needle as usual…
4. … and pull through to complete knitting this stitch. Do not slip this stitch off the left-hand needle just yet!
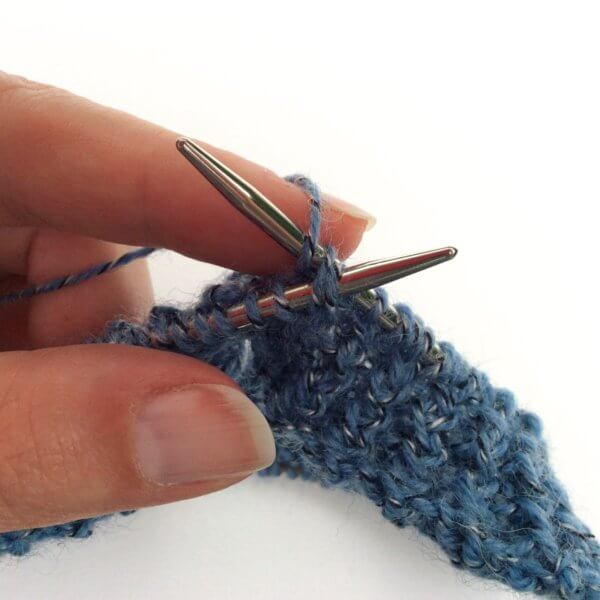
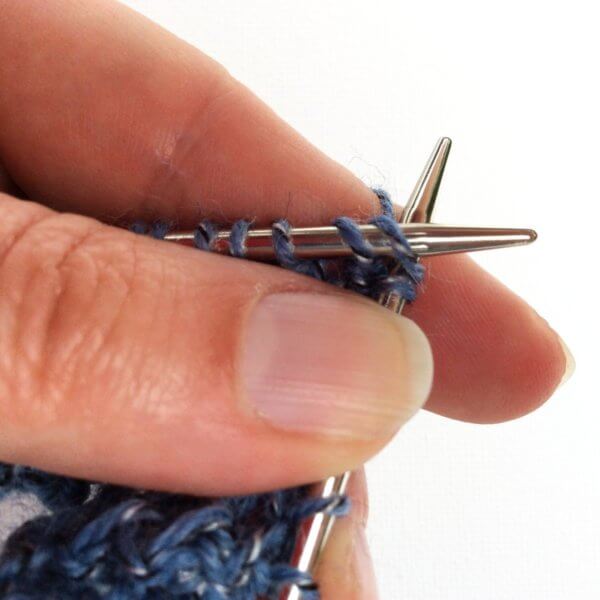
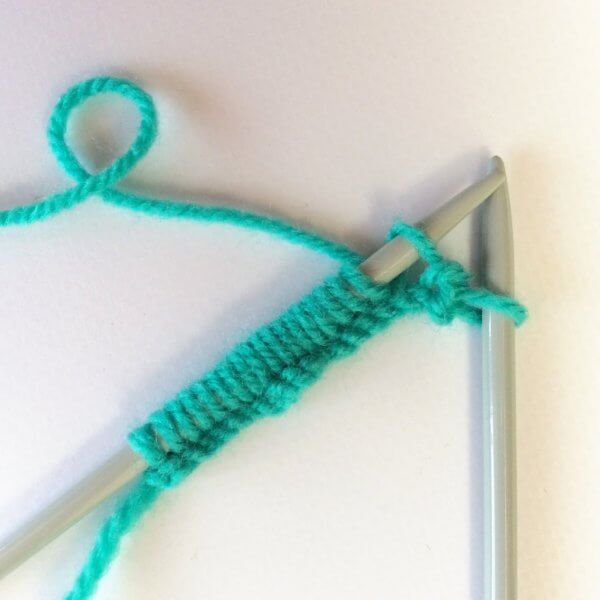
5. Knit into the front loop of the first stitch that you skipped in step 2.
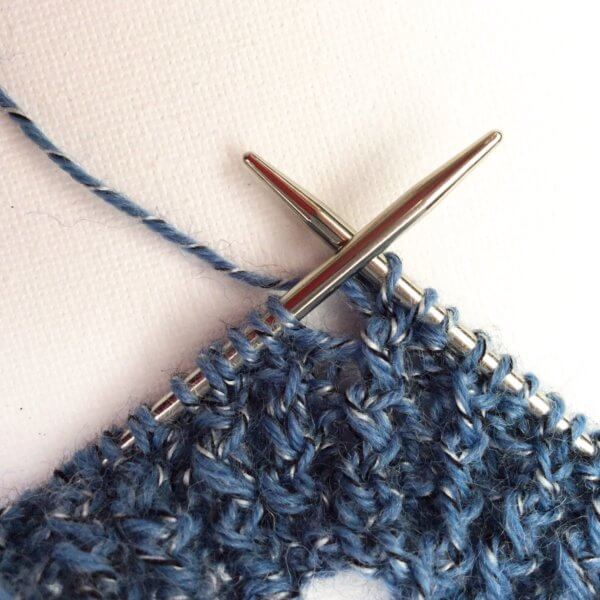
6. Then slip both knitted stitches from the needle. Do you see how the 2 stitches combined slant to the left?
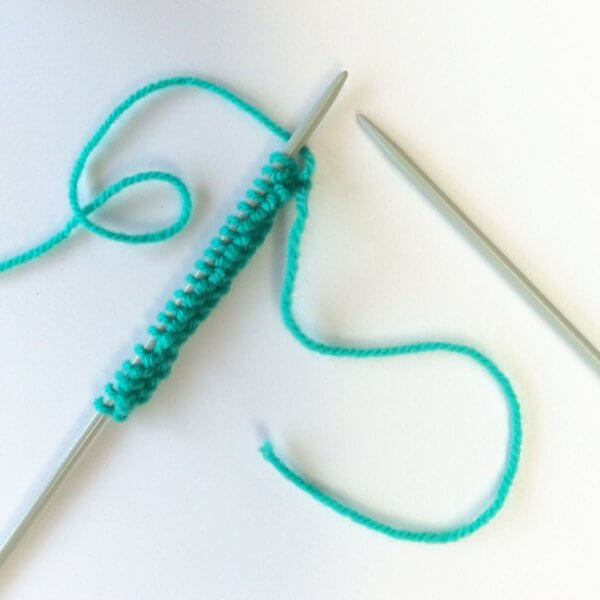
7. Repeat steps 1 to 6 the end of the round.
Round 2
8. Purl 1 stitch.
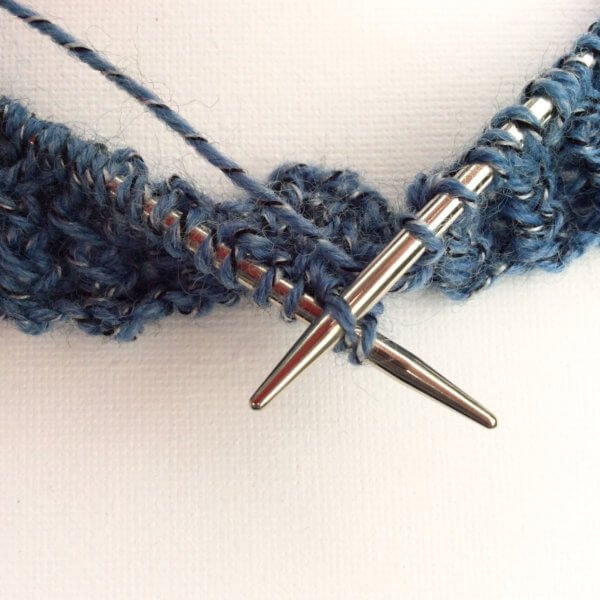
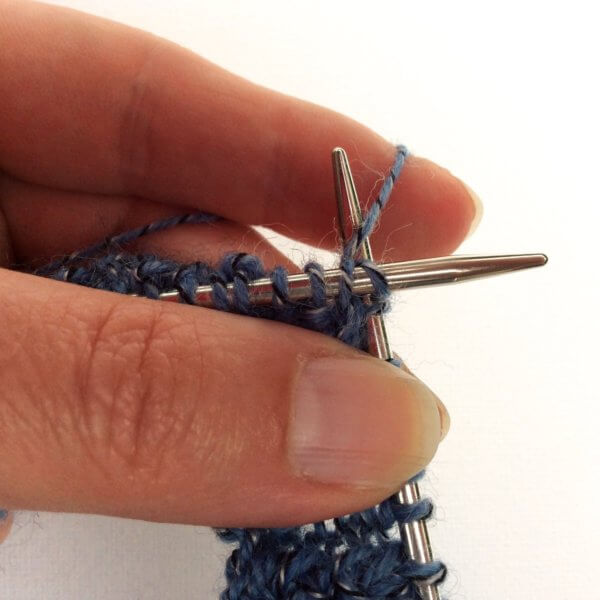
9. Skip the first stitch and insert the needle as if to knit in the second stitch on the left-hand needle. This can be a tad fiddly!
10. Twist the right-hand needle so that is behind the left-hand needle and wrap the yarn around.
11. Next pull the yarn through, but do not slip this stitch off the needle just yet!
12. Knit the first stitch that you skipped in step 9….
13. ….then slip both knitted stitches from the needle. The 2 knitted stitches combined in this round produce a right-slanting result!
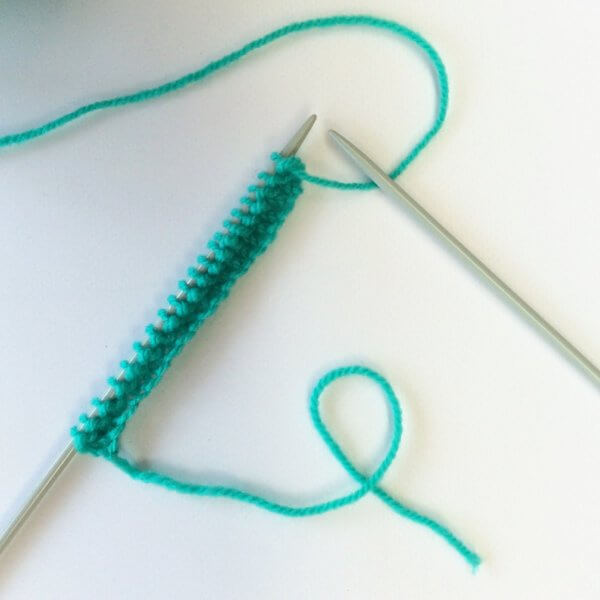
14. Repeat steps 8 to 13 to the end of the round. And this is how to knit rick rack rib in the round!
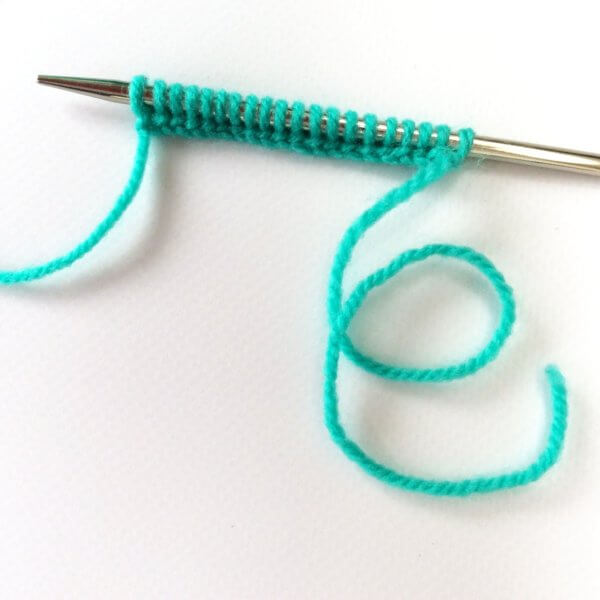
On the outside of the work, it will look something like this:
In case your project ends with rick-rack rib, you can bind-off after row 2 by binding off in purl 1, knit 2 pattern.
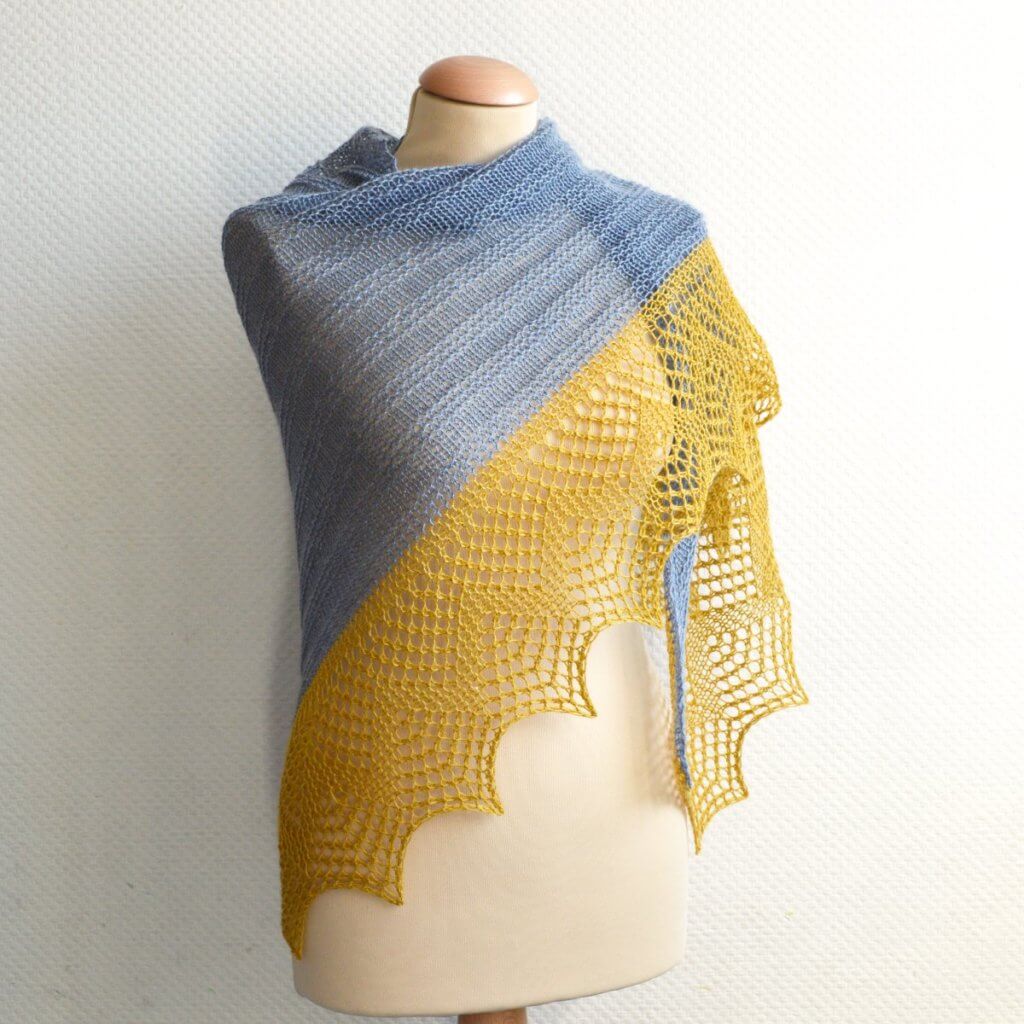
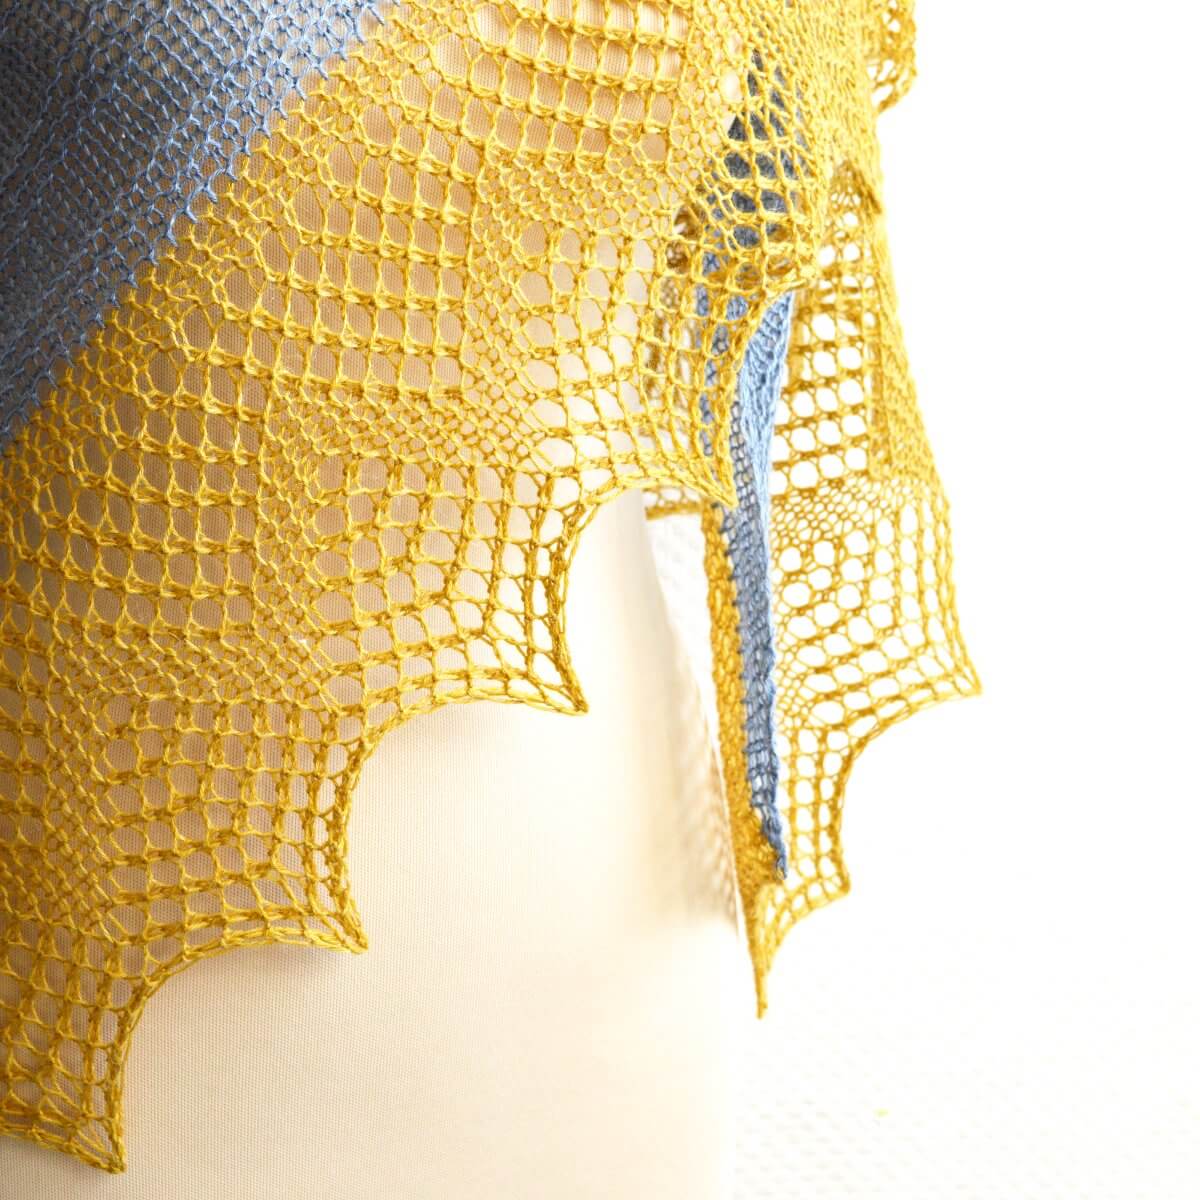
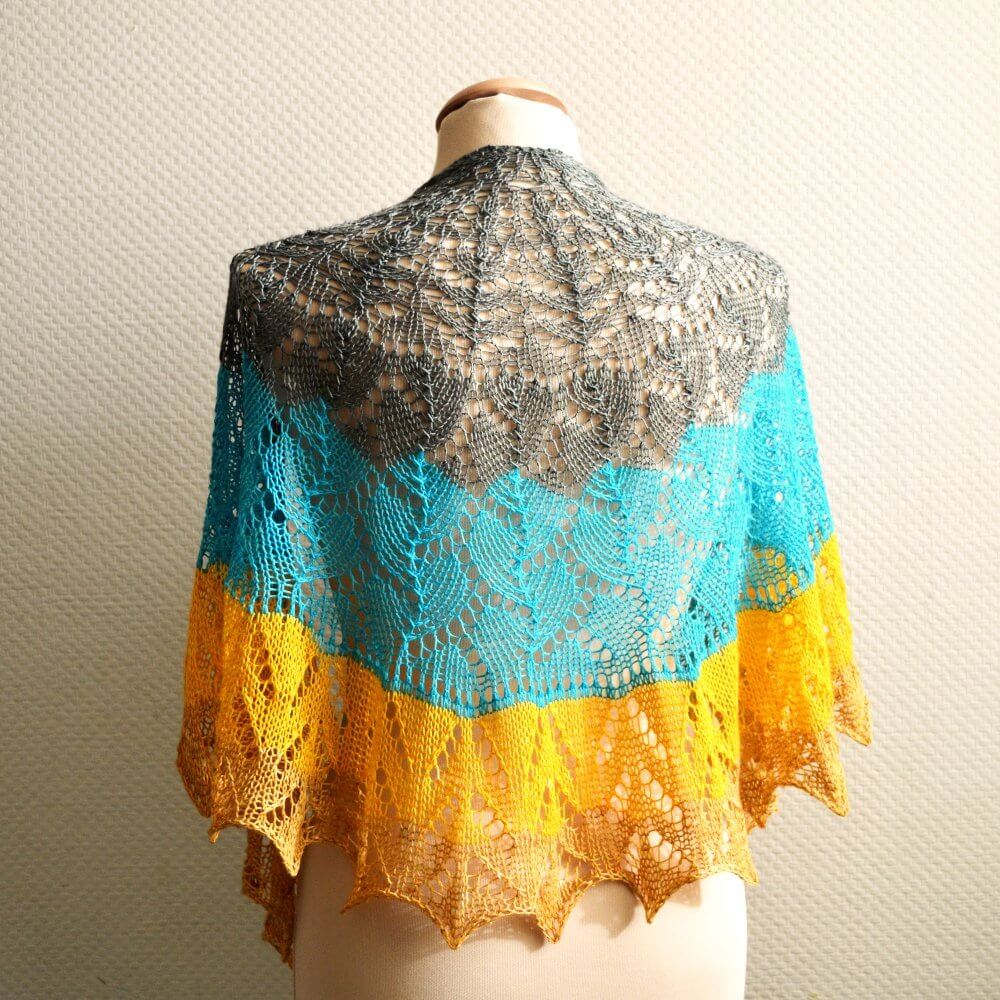
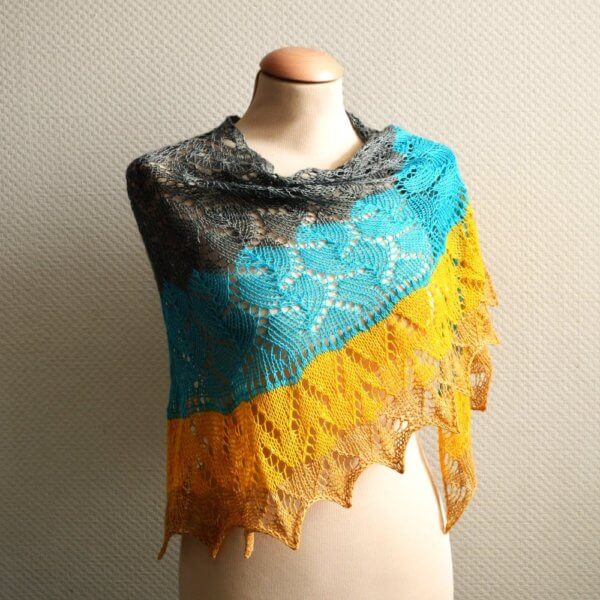
Mustard and Slate is the shawl to knit when you just don’t want to choose… Simple or lace? Gray or Oker? Using two colors, Mustard and Slate has a simple textured body and a delightful lace edging. You can really have it all!
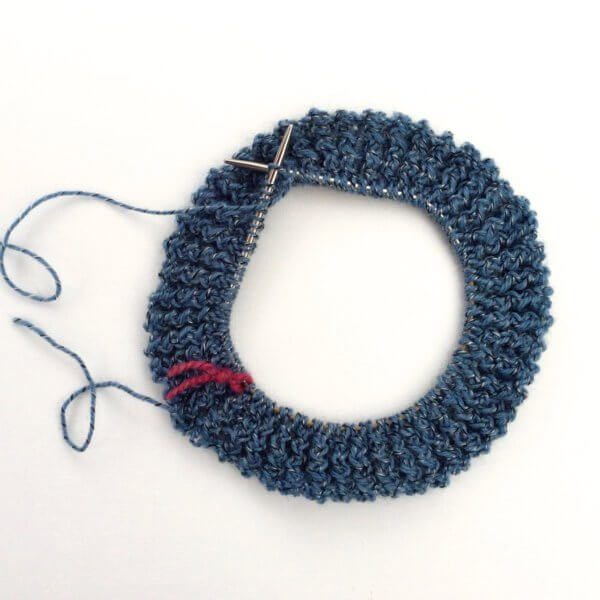
Knit this shawl from the top-down in one piece, starting at the neck edge with a garter tab. Mustard and Slate is finished with an edging that is knitted on sideways and attached to the live stitches of the body as it is being worked. The instructions for the edging are provided charted and written out.
Pay what you want: (minimum €6.50)
€
Difficulty level
This shawl is started with a garter stitch tab. Stitches used include knit, purl, skp, k2tog and yo. This pattern is suitable for the intermediate knitter.
Size and finished measurements
One size (easily adjustable): span width of 152 cm (60 inches) along the upper edge and a depth of 75 cm (29 ½ inches), measured after blocking.
Pattern details
Gauge is not critical for this design, for the sample shawl: 13.5 sts / 25 rows = 10 cm (4 inches) over body pattern after blocking.
Pattern languages included: English and Dutch (Dit patroon omvat zowel een Nederlandse, als een Engelse versie).
Digital PDF has 4 pages for the English version and 5 pages for the Dutch version (letter size).
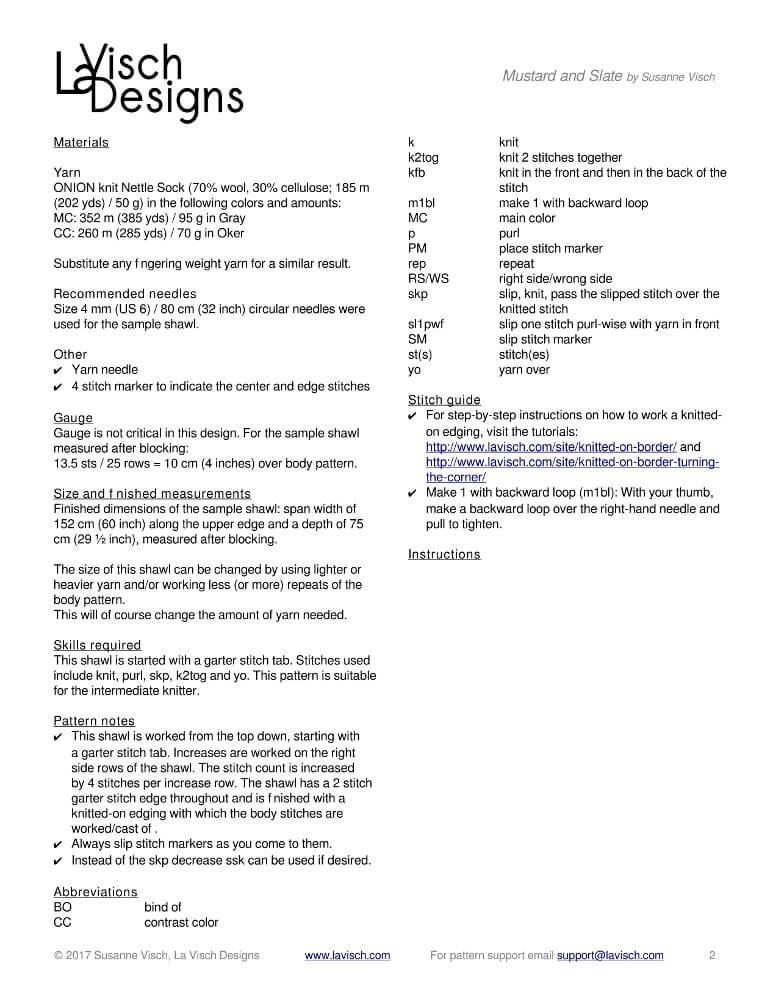
Materials
ONION knit Nettle Sock (70% wool, 30% cellulose; 185 m (202 yds) / 50 g) in the following colors and amounts: MC: 352 m (385 yds) / 95 g in Gray, CC: 260 m (285 yds) / 70 g in Oker. Substitute any fingering weight yarn for a similar result.
Size 4 mm (US 6) / 80 cm (32 inches) circular needles
Yarn needle
4 stitch markers to indicate the center and edge stitches
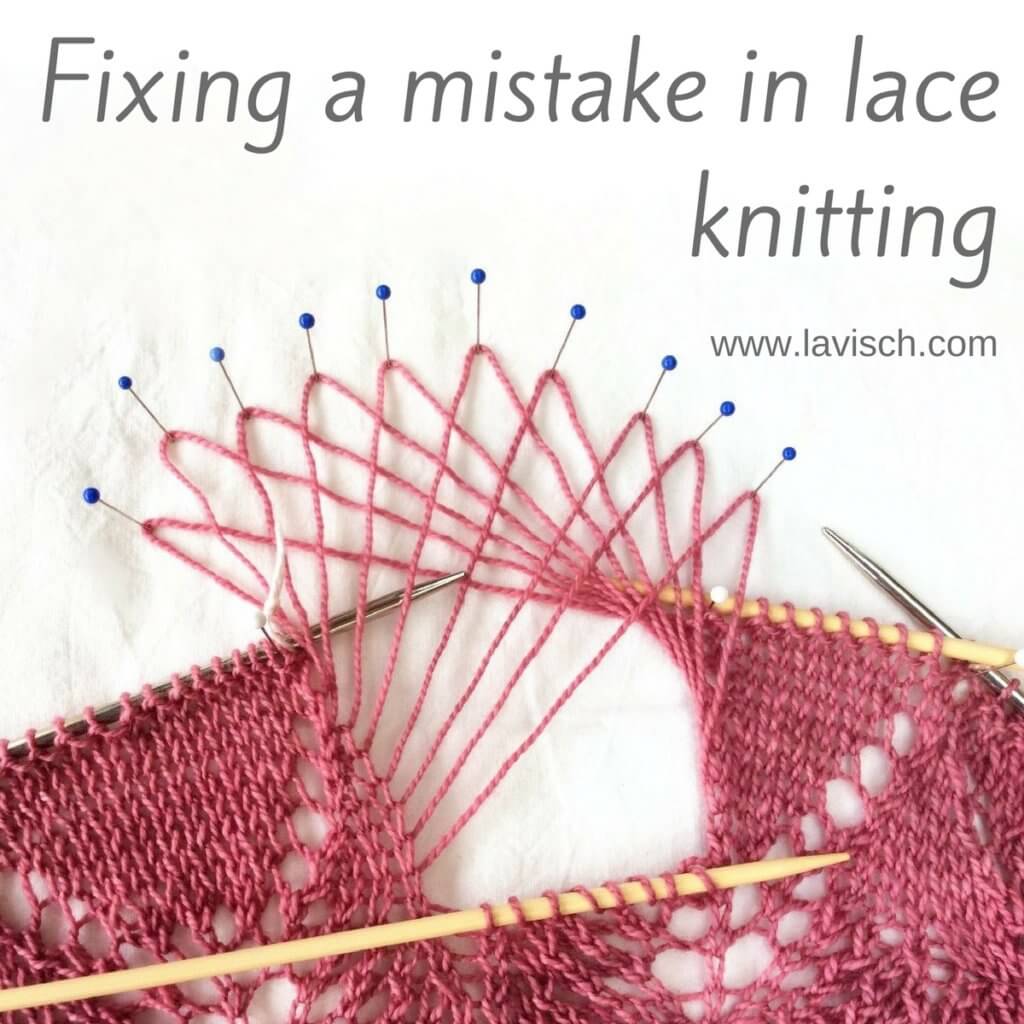
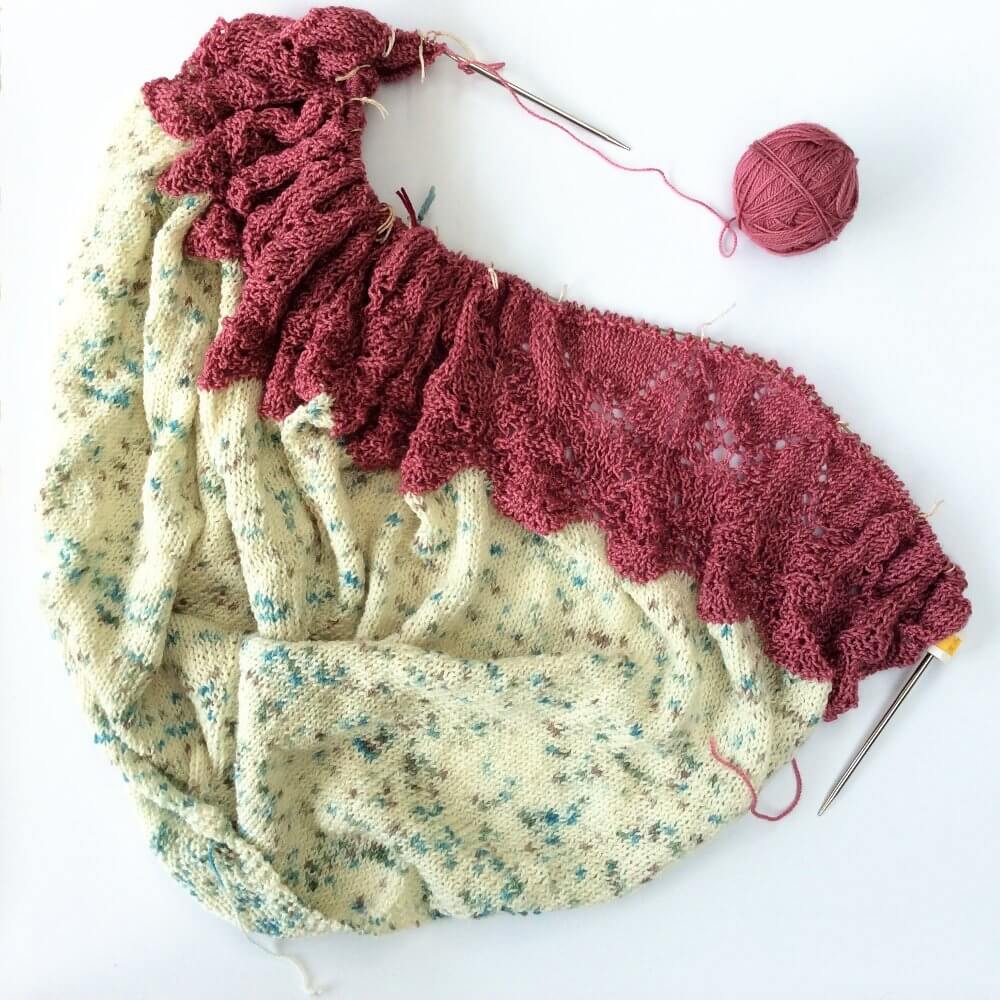
This post is all about my recent confrontation with fixing a mistake in lace knitting. As you may have seen if you’re following me on Instagram or Facebook, I’ve been happily knitting along on my latest design using Nurturing Fibres Super Twist Sock in “Odette” and “humbug”. I got mine from Wol zo Eerlijk, a lovely store with lots of environmentally friendly and fair trade yarns. Anyway, there I was, in the home stretch, with only 10 more rows of edging to go before the bind off. It was then that I saw it: a mistake in my lace, 9 rows down!
When I found the mistake in the pink border of my Pink Monarda shawl pictured, I had about 320 stitches per row. So no, I was not going to rip out all that work! Instead, I dropped down only 8 stitches to the place where I made the mistake. After that was correcting the error, followed by knitting everything back up to the row I was on.
In this post, I’ll show you exactly what I did!
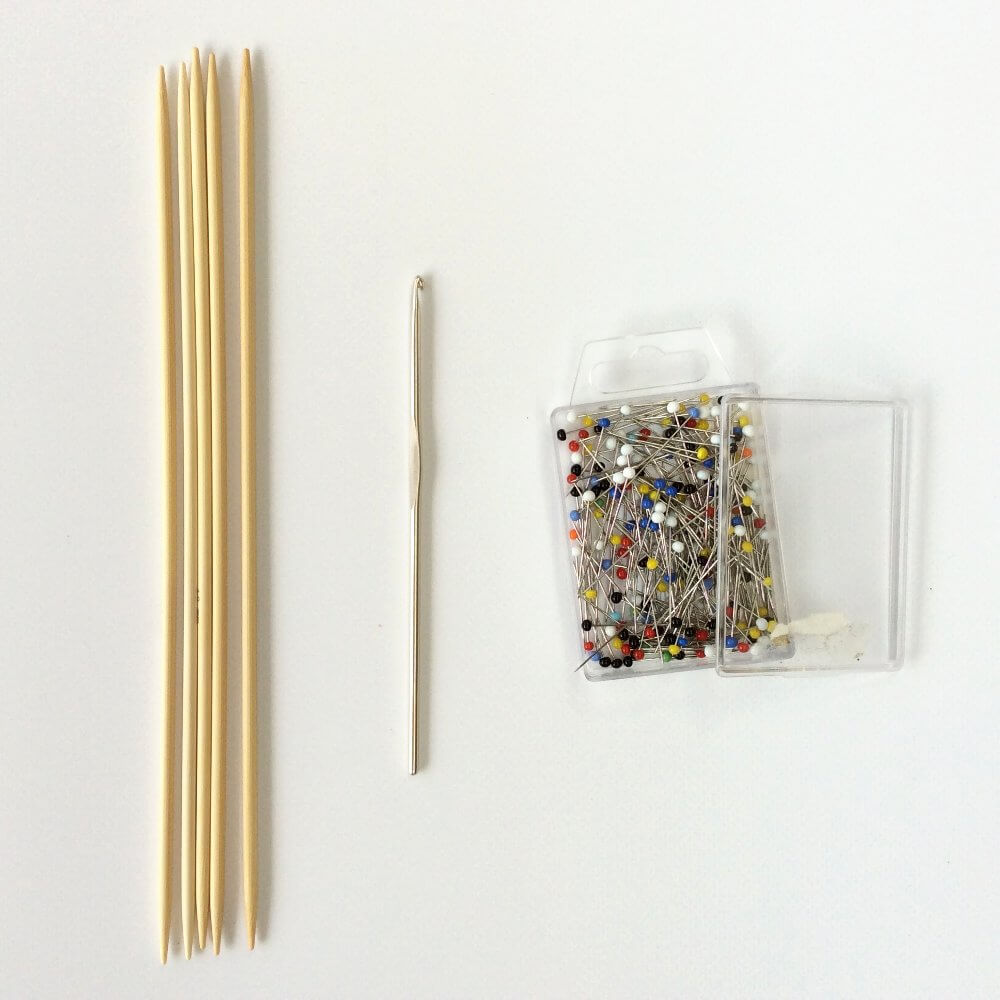
Helpful materials
To start, it is pretty handy to have some tools available to make fixing the mistake easier. I used the following:
A set of DPN’s (double pointed needles) in the same size as the needles used in your project, or smaller.
A crochet hook.
Some pins.
A pillow.
The pillow and pins were used to make sure that your work stays exactly where you need it to be. Also, it helps to see the mistake better when pinned out, instead of all scrunched up like lace tends to be before blocking.
On to the fixing!
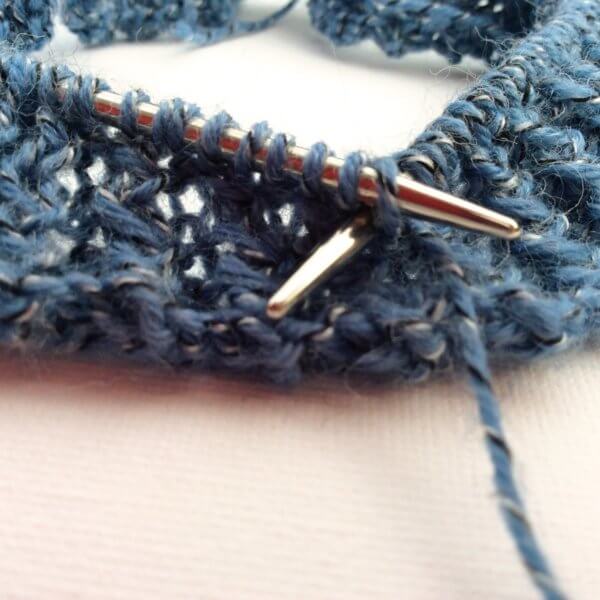
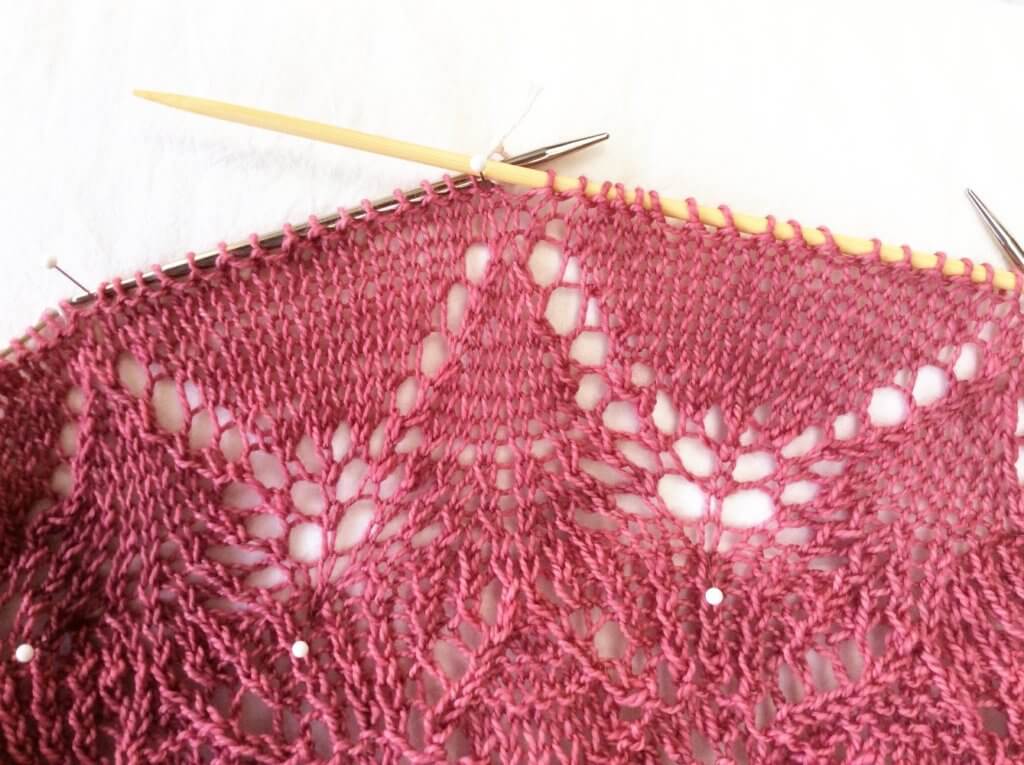
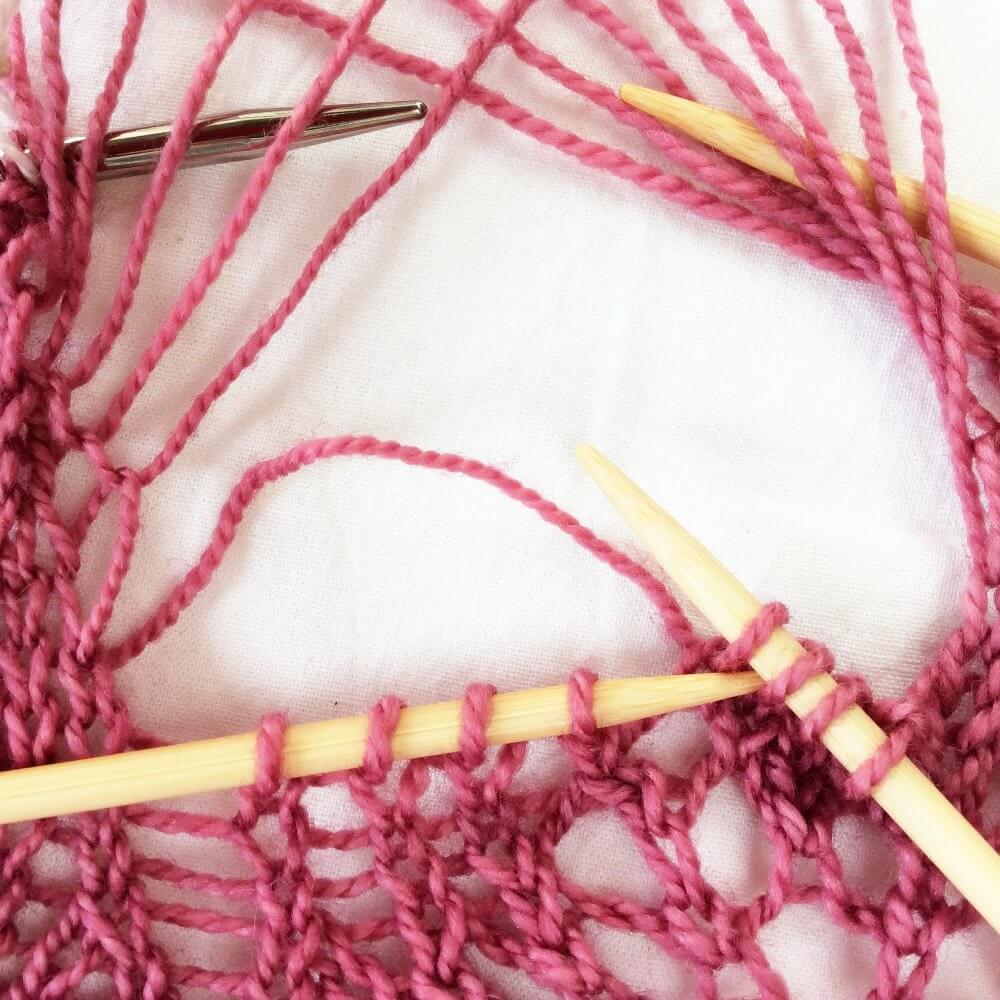
1. To start, I pinned out my knitting on the pillow. I did this in such a way that I could clearly see a repeat of the lace pattern that was knitted correctly, as well as the one with the mistake in it. I slipped some of the stitches on one of the DPN’s to help fixate the whole better on the pillow. Can you see in the picture below where the mistake is?
2. The mistake is in the left half of the repeat, near the 4th yarn over, counted from the needle. Can you see it? In the picture below, I have indicated it with the circle.
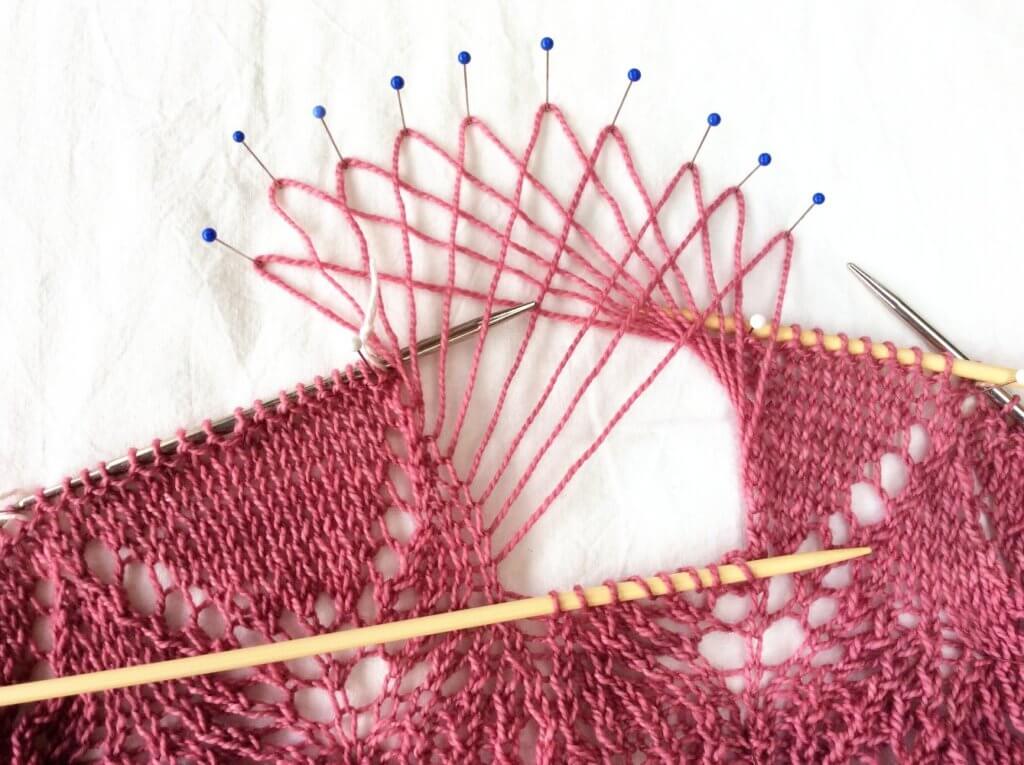
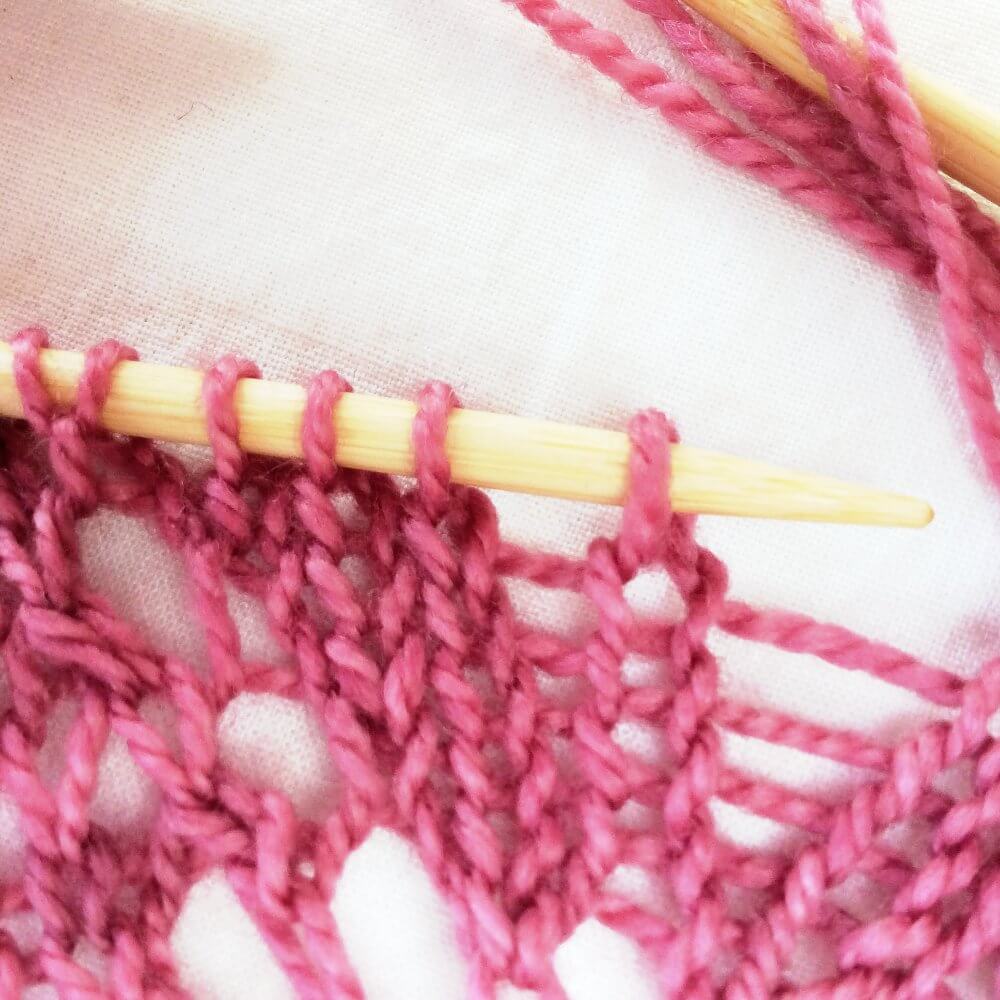
3. In this particular case, it wasn’t necessary to drop down the whole repeat. Instead, I only dropped the 8 stitches on the left half of the repeat. I dropped down until I reached the purl row exactly below the row with the mistake in it.
When approaching the row below the mistake, I stopped ripping back and started to carefully tink (tink = knit backward!) further back, catching the released stitches with another DPN. It is especially important to do it like this when working with very slippery yarn. If you don’t take care, the knitting may run deeper down than desired, thus increasing the amount of fixing to do.
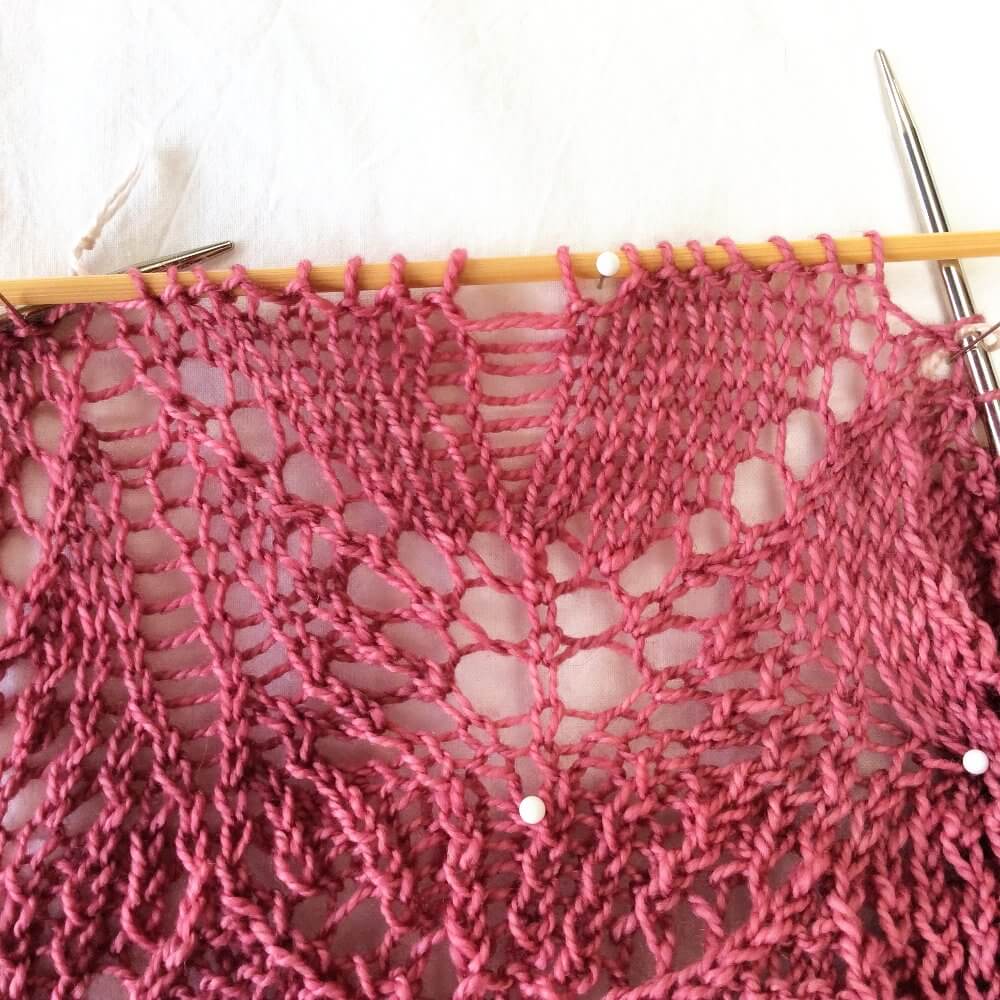
The yarn from every row dropped, I pinned to the pillow, going from left to right. This made sure nothing got tangled, and I could easily count the number of dropped down rows. This, in turn, made it easier to see where to pick up the chart when knitting it back up.
4. Then it was a matter of knitting back in pattern. As you can see, you use the free loop of yarn, just as you would use the thread running to the ball of yarn. If you find it challenging to catch the thread correctly to pull it through a stitch, you can always use the crochet hook to assist with this.
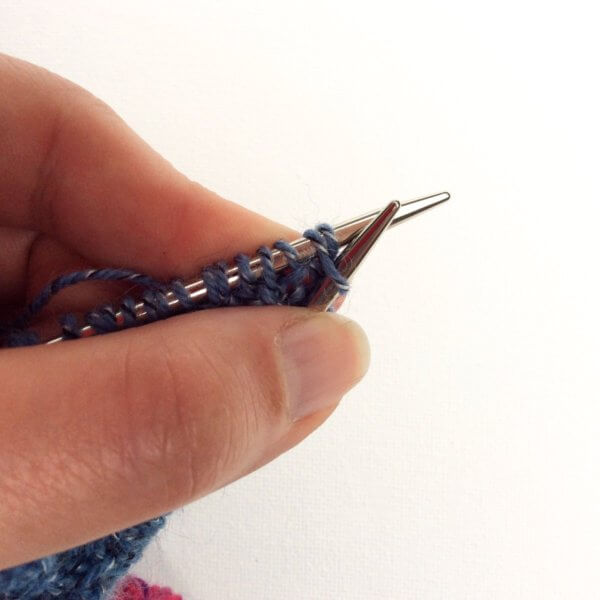
5. Because of the way I manipulated the yarn through the stitches, some of the stitches got mounted twisted. In the picture below, you can see that the left leg of the stitch is in front of the needle, instead of at the back. This really is no problem, but it is something to pay attention to. To correct this, I knitted these twisted stitches through the back loop.
6. And here you see the result: all fixed! The loose stitches you can see next to the re-knitted stitches are because of the tension on those threads when manipulating the dropped down stitches. This should, however, correct itself during blocking. If it’s still a tad visible, you can redistribute the excess yarn a bit over the various stitches.
7. And this is how to go about fixing a mistake in lace knitting. Now on to knitting those final rows of this shawl…
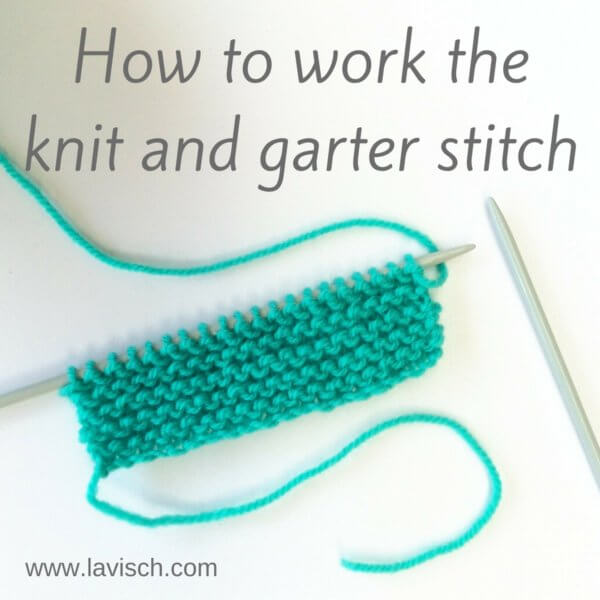
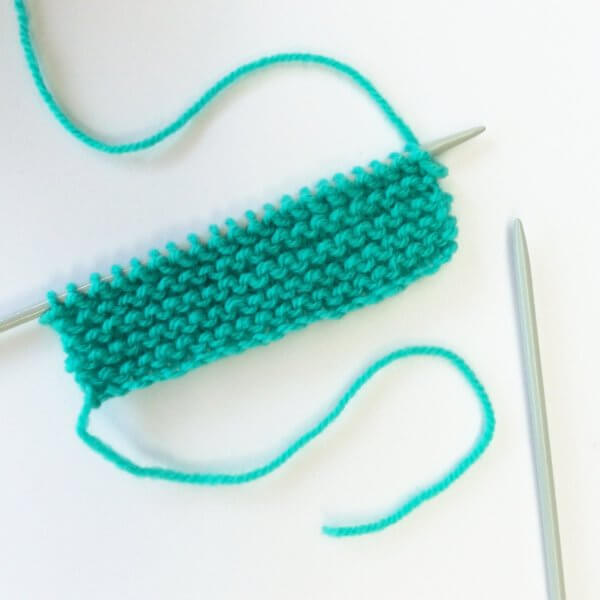
In this post, I’m going to show you how the knit and garter stitch is worked. The knit stitch is the basis of most knitting stitches and therefore often the first one beginning knitters start with. When knitting a flat piece in the knit stitch only, you get a fabric in what’s called “garter stitch”. Usually, a piece knit in garter stitch will be shorter and wider than the same amount of stitches and rows worked in other types of stitches. Garter stitch has a wonderful texture, is very squishy and elastic and best of all: it lies flat when knitted back and forth! Truly a wonderful stitch to have in you knitter’s tool box
In this post, I’ll show you how to work both the basic knit stitch and the ins and outs of garter stitch when worked back and forth (flat). Working garter stitch in the round also involves purling and will, therefore, be addressed in a different post.
Working the knit and garter stitch back and forth step by step
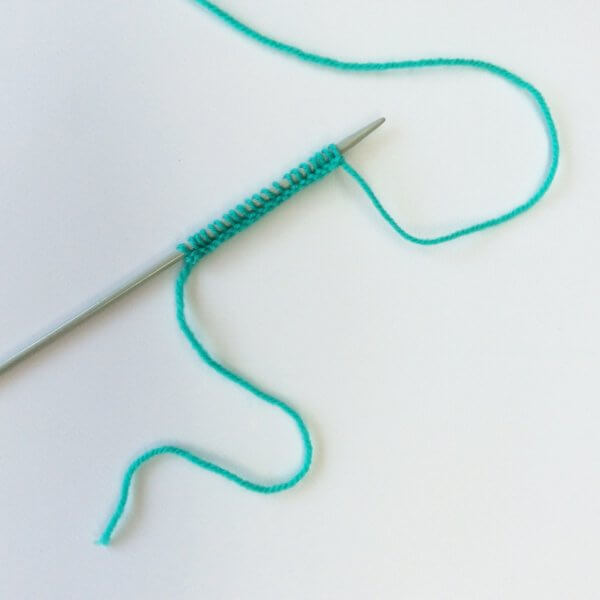
1. I’m starting with a number of stitches already cast on. What you see here, is done with the knitted on cast on.
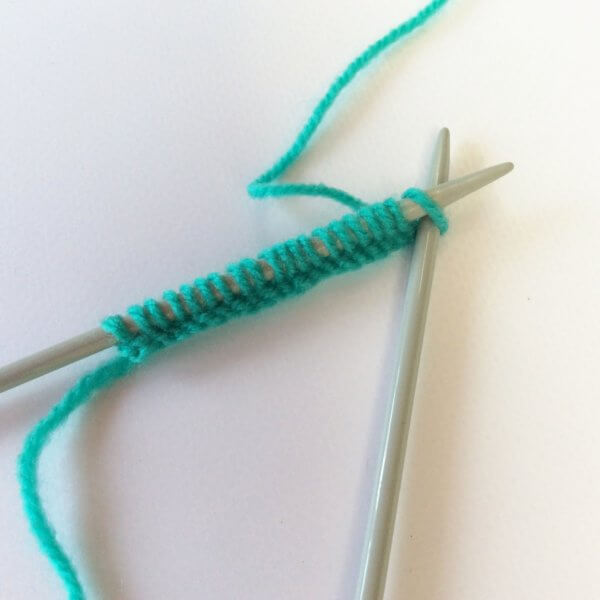
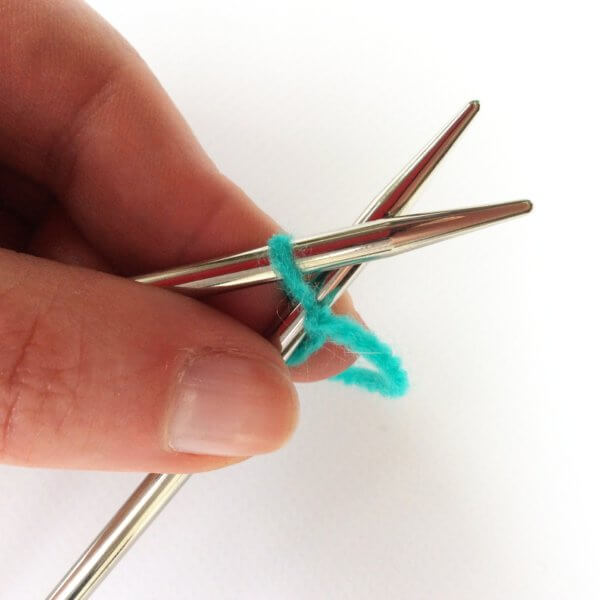
2. To start, take your second needle and insert the tip into the stitch with the needle under your main needle. Insert at an angle so your needles cross as pictured.
3. Hold the crossed needles together, take the yarn connected to your ball and wrap it around the bottom needle. Begin by going around, and then over. Depending on your knitting style this can be done with either your left or your right hand. The end result is however always the yarn wrapped around the needle as pictured.
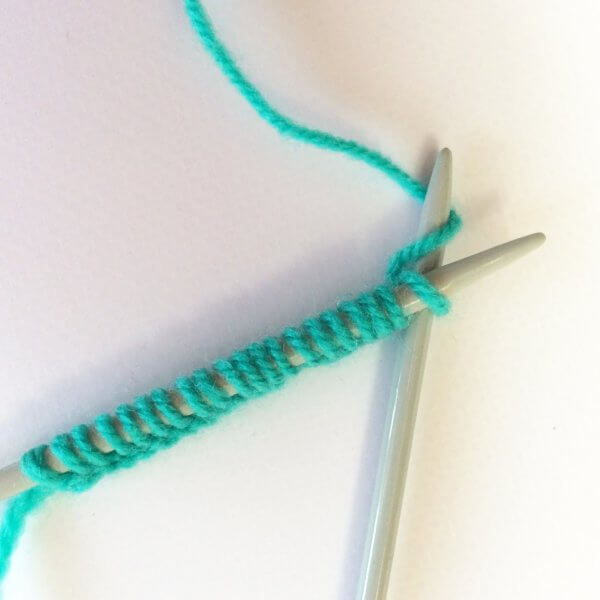
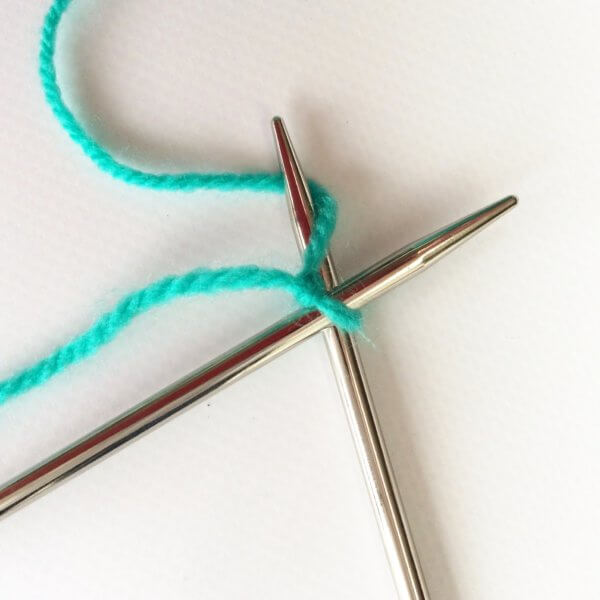
4. Take the bottom needle and bring it back through the stitch pulling the yarn with it.
5. Now slide of the original stitch you inserted your needle in (step 2) and tighten the yarn a bit. In the above picture, you see the original stitch on the right of the second needle. You have now knit a knit a stitch!
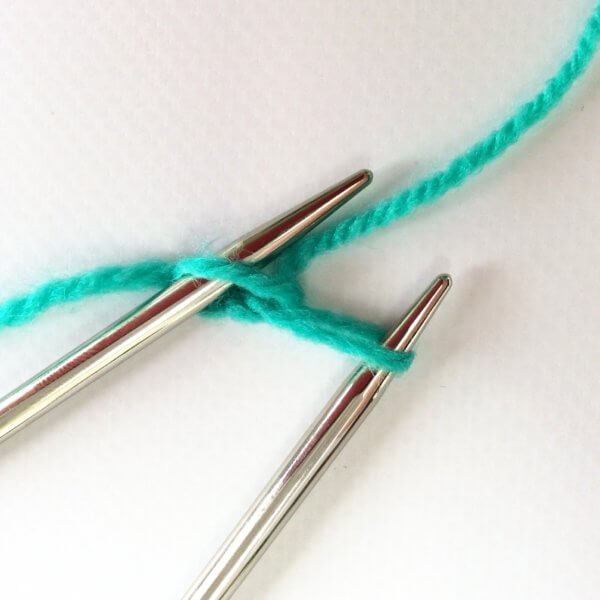
6. Repeat steps 2-5 until you’ve worked all stitches on your main needle. The second needle which now has all the stitches on it looks something like this:
7. Now switch the knitting needles around: the needle containing all the stitches becomes the main needle and the empty one becomes the second needle. I know I could also call them the left-hand and right-hand needles, but this could become confusing for those holding their needles differently.
8. Make sure your yarn is behind the needle and again follow steps 2-5 until you’ve worked all stitches on your main needle. The second needle now again has all the stitches on it:
9. When switching needles again, you can now see the characteristic ridges of garter stitch starting to emerge:
10. When I’ve knitted a couple of more rows we have a small swatch of garter stitch fabric! And this is how to work the knit and garter stitch.
Tips & tricks
Garter stitch comes out in ridges and each ridge is 2 rows. To know how many rows you’ve knit you can just count the ridges and then double the number.
Garter stitch looks the same on both right side (RS) and wrong side (WS) rows. There is, however, a trick to determine what side you are: Did you see in the picture with step 1 above where the yarn tail from casting on was? With the first row, I knit (which is usually called the RS) the yarn tail was on the bottom left. This means that every time I have my knitting on the main needle and the yarn tail is on the bottom left, I’m about to knit a RS row. You can of course also use a stitch marker or safety pin to see easily which side is what.
In this tutorial, I showed you how to work garter stitch by working knit stitches on every row. By purling every row, however, you also get garter stitch!
If you want to work in multiple colors, you should know that in garter stitch, if you switch colors on a right side row, there will be a line across the wrong side where you can see the loops of stitches connecting. This can, of course, be a design feature. If you don’t want this line visible, make sure to start the new color with the RS facing.
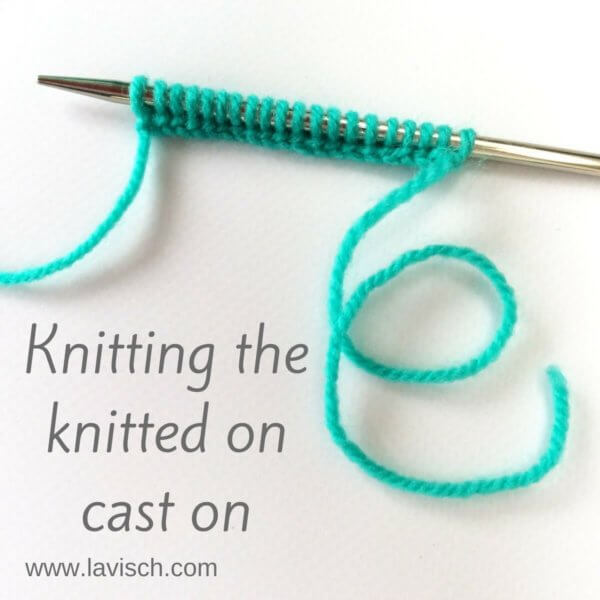
The knitted on cast-on is a very strong and reasonably stretchy cast on to start your knitting project with. It’s the cast on I use most often because it is just so easy to do. Personally, I wouldn’t use it for a knitting project that would be blocked heavily. For all other applications, though, it makes a very nice edge. Think for example of edges of garments, non-lace blankets etc.
This particular method is also great for the beginner knitter because it is basically the knit stitch that is used to cast on. In this post, I’ll show you how to do it!
The knitted on cast-on step by step
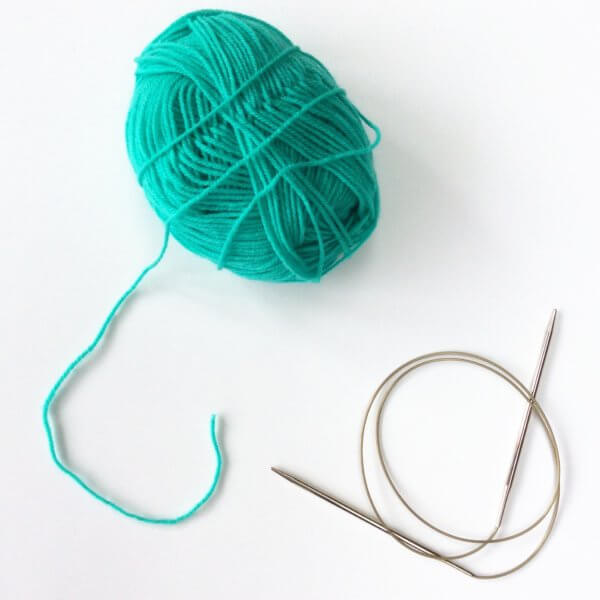
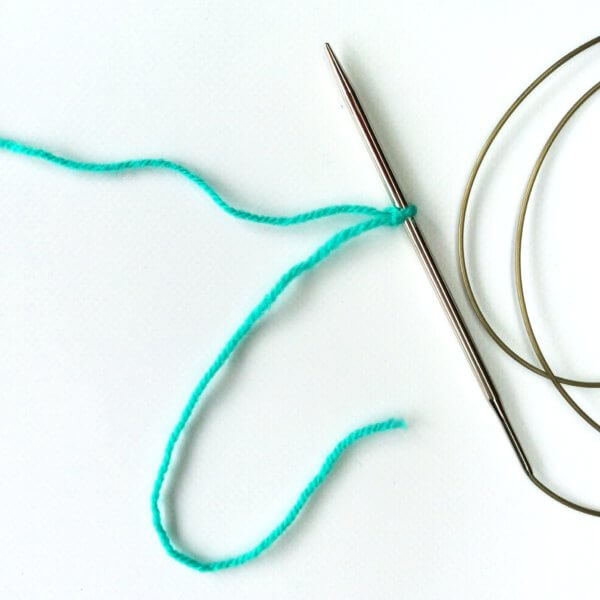
1. Take a length of yarn from your ball of yarn.
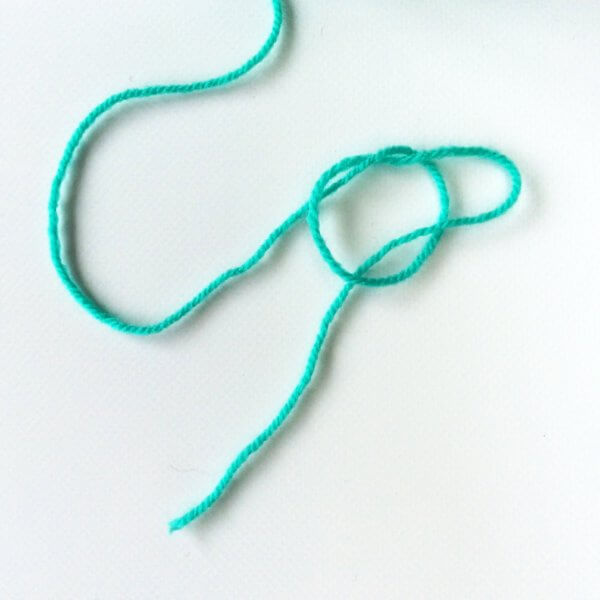
2. Make a slip knot….
3. ….and insert the needle into the upper loop and tighten the slip knot onto the needle. This is the first stitch. Make sure to leave enough on the tail of the yarn to weave in later.
It is also possible not to use a slip knot and just loop the yarn around the needle for your first stitch, thus avoiding the knit in the corner of your work. For the sake of this tutorial, however, I’m going with the slip knot version.
4. Take your second needle and insert the tip into the stitch with the needle under your main needle. Insert at an angle so your needles cross as pictured.
5. Hold the crossed needles together, take the yarn connected to your ball and wrap it around the bottom needle: go around, and then over. Depending on your knitting style this can be done with either your left or your right hand. The end result is however always the yarn wrapped around the needle as pictured.
6. Take the bottom needle and bring it back through the stitch pulling the yarn with it in a loop.
7. Now transfer the new loop from the bottom needle to the other needle and tighten the yarn. You have now cast on a stitch!
8. Repeat steps 4-7 until you have reached the desired amount of stitches on your needle.
And that is all there is to it! The knitted on cast-on looks like this after a few more stitches have been cast on.
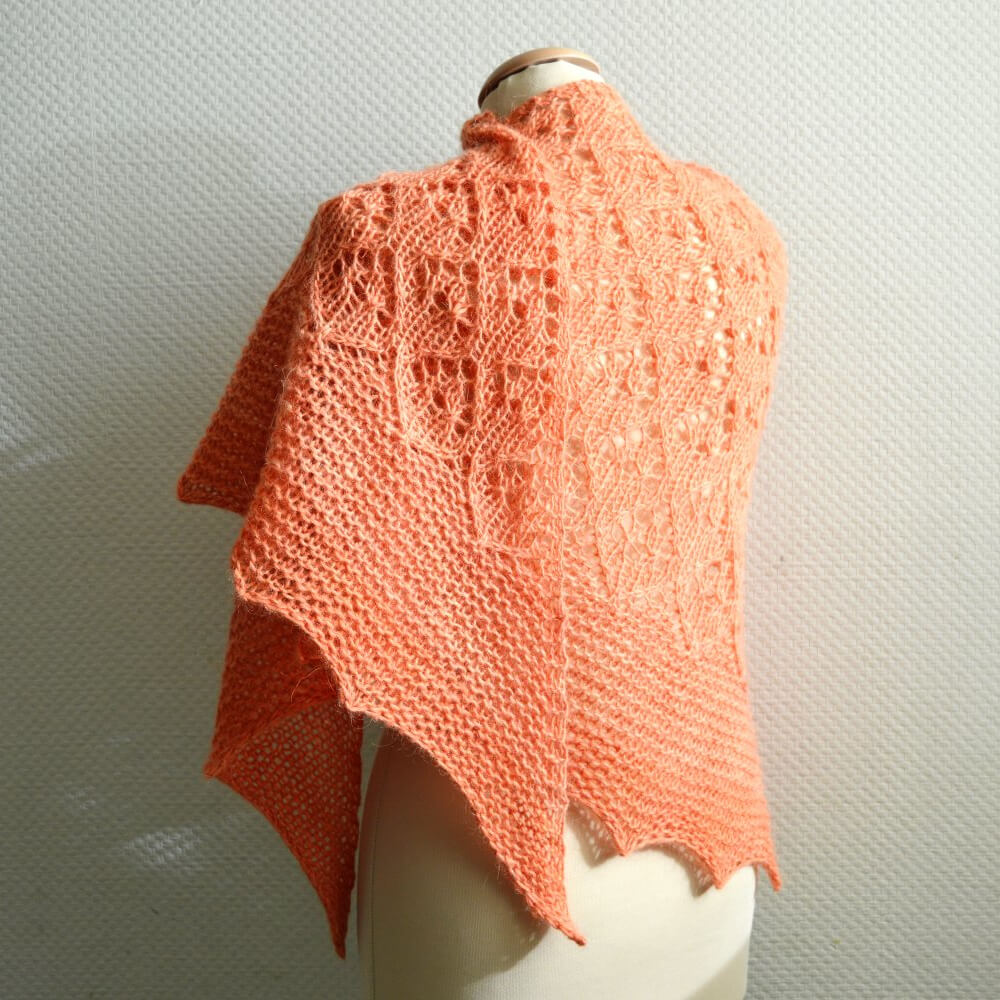
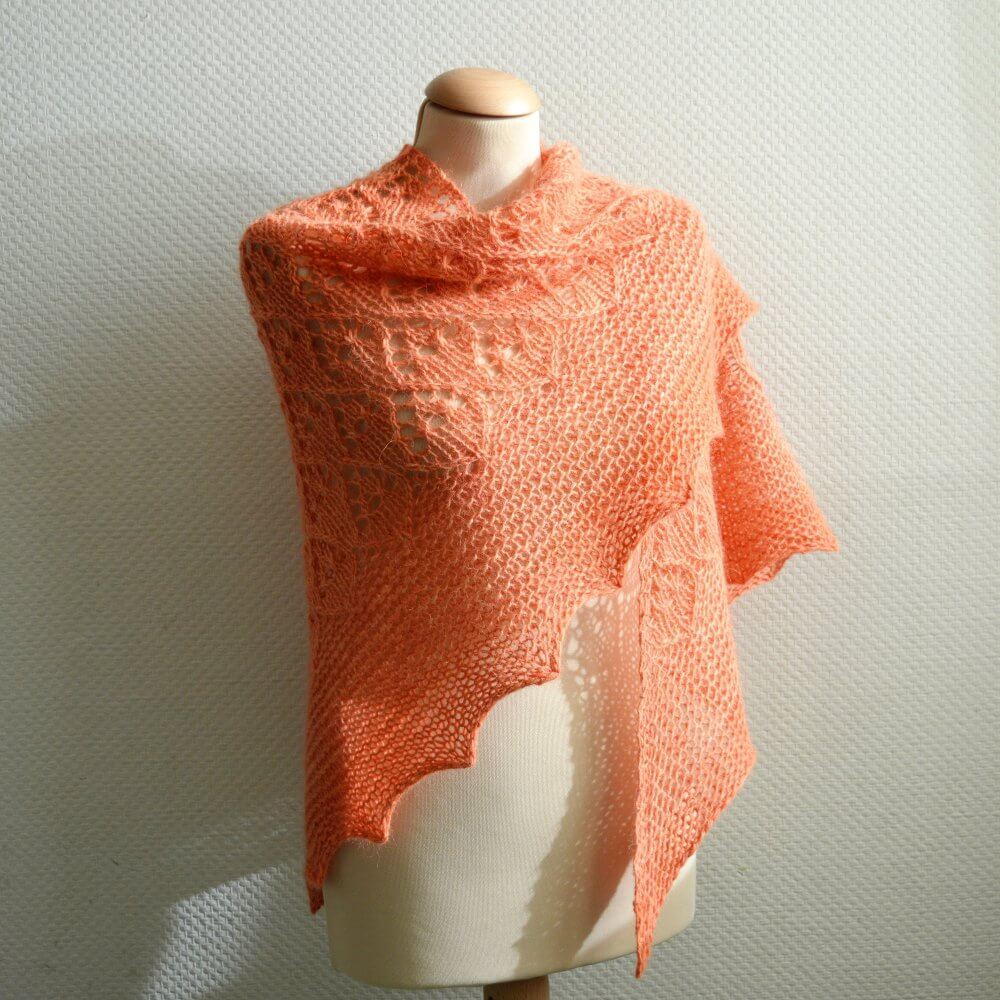
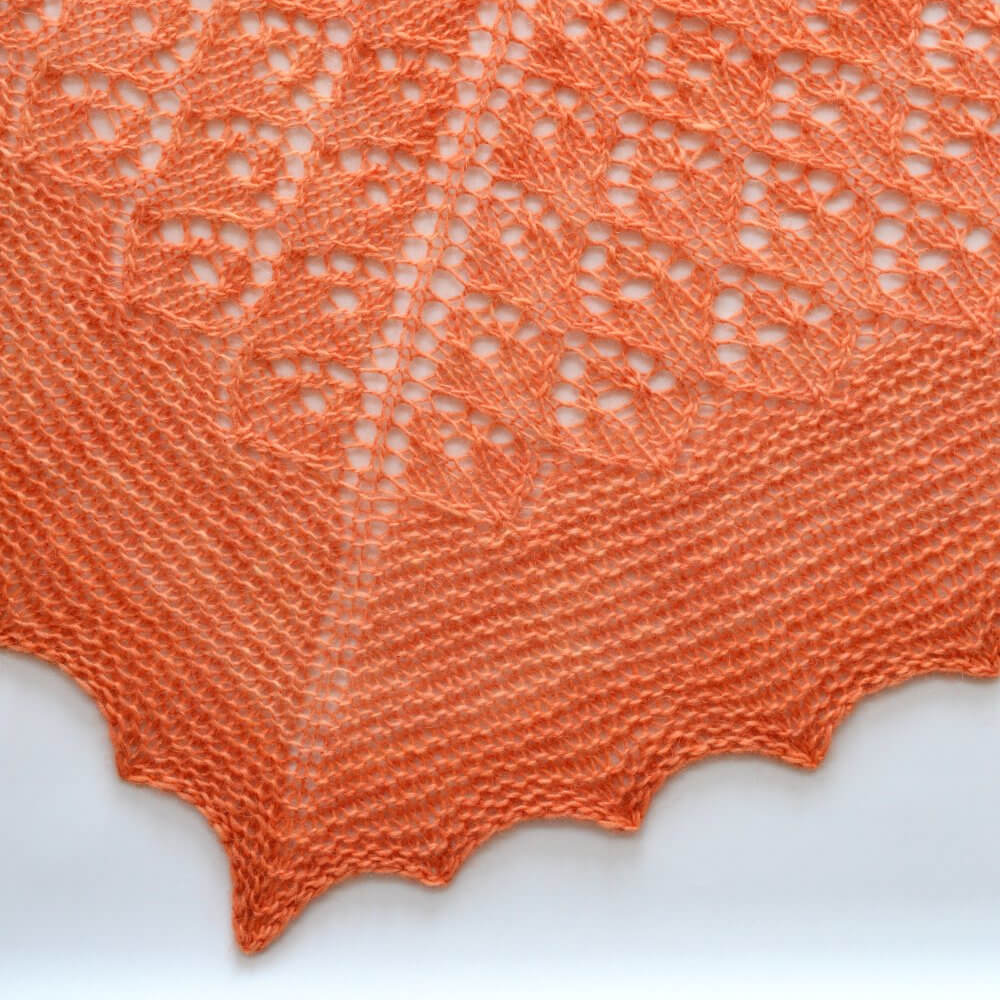
Zeezicht: a semi-circle Pi shawl, filled with sea and beach lace patterns. Inspired by the colors in the lovely Eternity Ranch sock yarn used, this design is truly eye-catching. This design will also make solid colored yarns shine!
The Zeezicht shawl is worked from the top-down and is started with a garter stitch tab. The lace is patterned on the right side only. The instructions are both charted and written out.
Pay what you want: (minimum €6.50)
€
Difficulty level
This half-circle shawl is knit from the top down, starting with a garter tab cast-on. Stitches used include knit, purl, yo, m1, skp, k2tog, as well as a double decrease. This pattern is therefor suitable for the intermediate to advanced knitter.
Size and finished measurements
One size (easily adjusted): span width of 146 cm (57 ½ inches) and a depth of 54 cm (21 ¼ inches), measured after blocking.
Pattern details
Gauge is not critical in this design. In the sample shawl: 22 sts / 25 rows = 10 cm (4 inches) over Sand Dune Lace, knitted on smaller needles and measured after blocking.
Pattern languages included: English and Dutch (Dit patroon omvat zowel een Nederlandse als een Engelse versie).
Digital PDF has 4 pages in the English version and 5 in the Dutch version (letter size).
Materials
100 g / 405 m (443 yds) Merino/Nylon Sock by Eternity Ranch Yarns [75% Merino wool, 25% nylon] in “Sea Side”. Substitute any fingering weight yarn for a similar result.
Size 4 mm (US 6) / 80 cm (32 inches) circular needles.
Size 4.5 mm (US 7) / 80 cm (32 inches) circular needles (for bind-off only).
Toscane: a lovely chunky lace shawl, named after that gorgeous burned orange color so often found in the hills of Tuscany. This particular color was achieved by dyeing the Ístex Léttlopi yarn with madder. Dye your own with the tutorial or choose one of the many available colors. Toscane is a fast, top-down knit and bound to become a favorite!
Written and charted instructions are included for the lace body of the shawl.
Pay what you want: (minimum €6.50)
€
Difficulty level
This shawl is knit from the top down, starting with a garter tab cast-on. Stitches used include knit, purl, yo, k2tog, skp, double decreases, make 1 with a backward loop, as well as knitting through the back loop. This pattern is therefor suitable for the intermediate knitter.
Size and finished measurements
One size (easily adjusted): Wingspan of 177 cm (69 ½ inches) and a depth of 75 cm (29 ½ inches), measured after blocking.
Pattern details
Gauge is not critical in this design. For the sample shawl measured after blocking: 9.2 sts / 18.8 rows = 10 cm (4 inches) over lace pattern.
Pattern languages included: English and Dutch (Dit patroon omvat zowel een Nederlandse als een Engelse versie).
Digital PDF has 4 pages in the English version and 5 in the Dutch version (letter size).
Materials
400 m (437 yds) Ístex Léttlopi (100% wool; 100 m (109 yds) / 50 g). Substitute any aran weight wool yarn for a similar result.
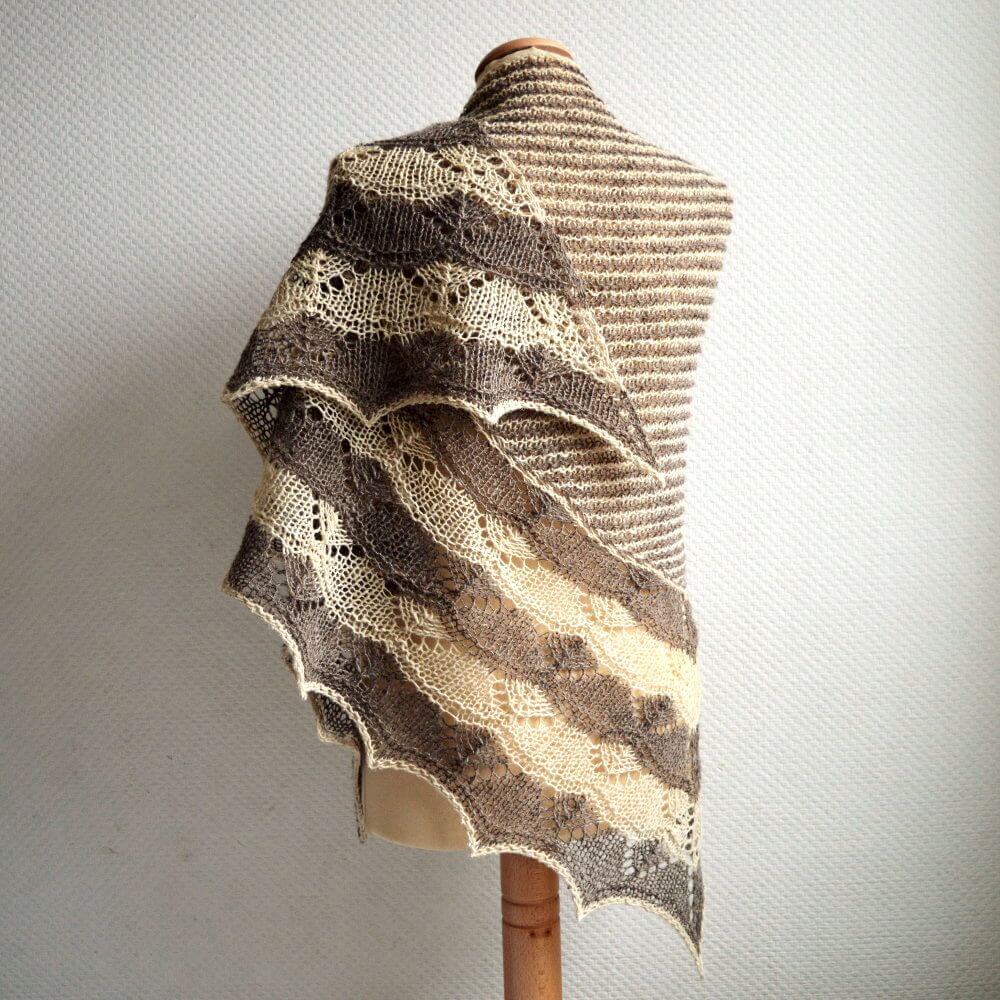
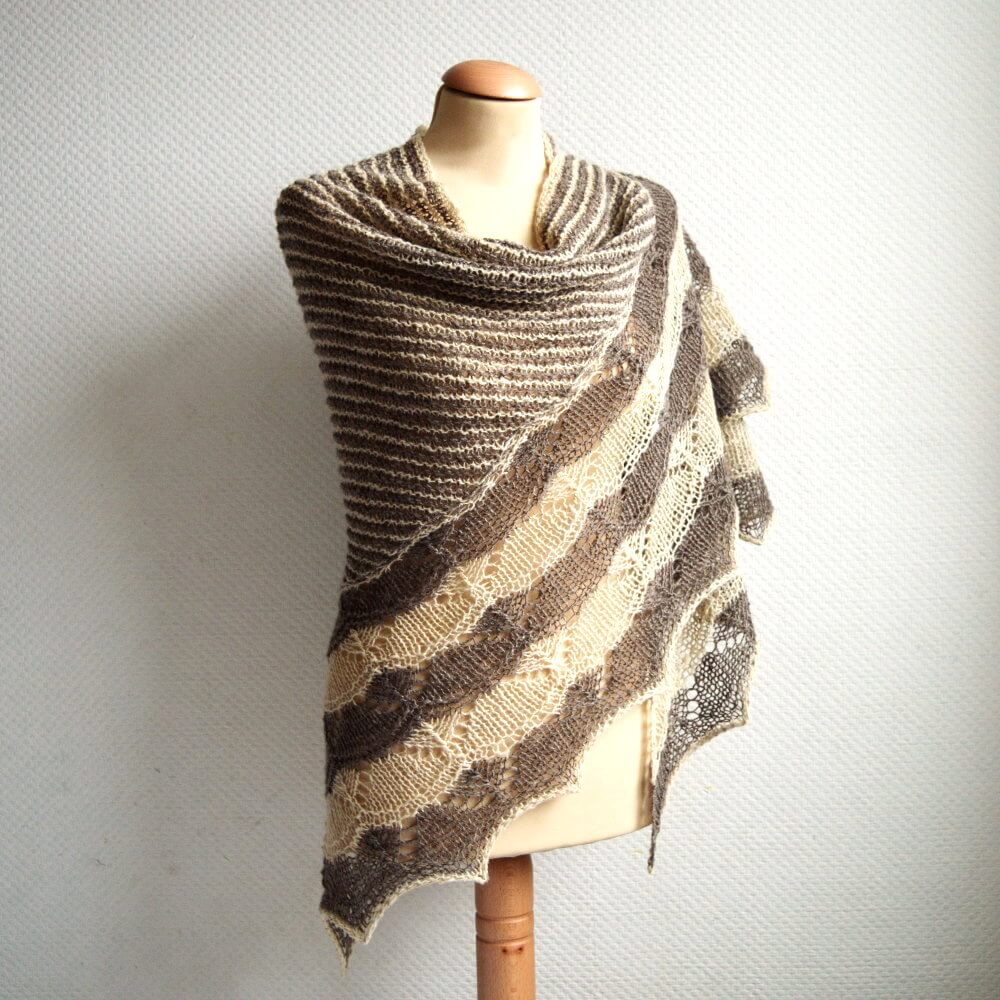
In Bichrome you find a two-color garter stitch center triangle with a stunning two-color lace edge. Made using the lovely and rustic Elena base by Moeke Yarns, Bichrome is the perfect thing to throw on when there is a bit of chill in the air. Bichrome starts at the bottom corner of the center triangle and is increased until large enough. Bind off stitches for the top of the shawl, then pick up stitches along two edges of the triangle to work the border outwards.
Written and charted instructions included for the lace border.
Pay what you want: (minimum €6.50)
€
Difficulty level
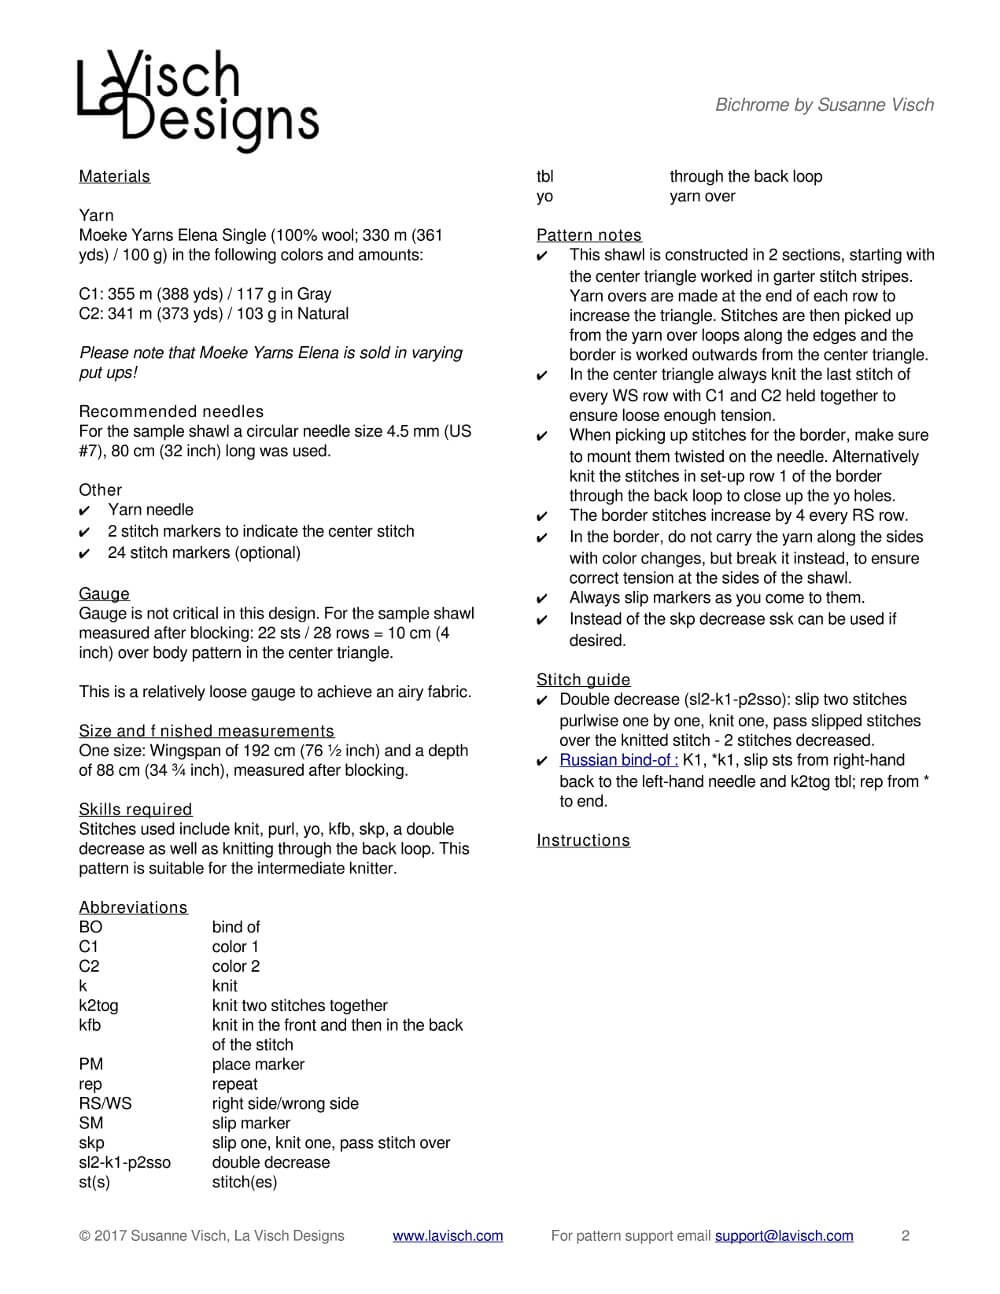
Stitches used include knit, purl, yo, kfb, skp, a double decrease as well as knitting through the back loop. This pattern is suitable for the intermediate knitter.
Size and finished measurements
One size: Wingspan of 192 cm (76 ½ inches) and a depth of 88 cm (34 ¾ inches), measured after blocking.
Pattern details
Written for a gauge of 22 sts / 28 rows = 10 cm (4 inches) over body pattern in the center triangle after blocking. Gauge is not critical for this design, but a loose gauge is strongly advised.
Pattern languages included: English and Dutch (Dit patroon omvat zowel een Nederlandse als een Engelse versie).
Digital PDF has 4 pages (letter size).
Materials
Moeke Yarns Elena Single (100% wool; 330 m (361 yds) / 100 g) in the following colors and amounts: C1 – 355 m (388 yds) / 117 g in Gray, C2 – 341 m (373 yds) / 103 g in Natural. Please note that Moeke Yarns Elena is sold in varying put ups!
4.5 mm (US 7 / 80 cm (32 inches) circular needles.