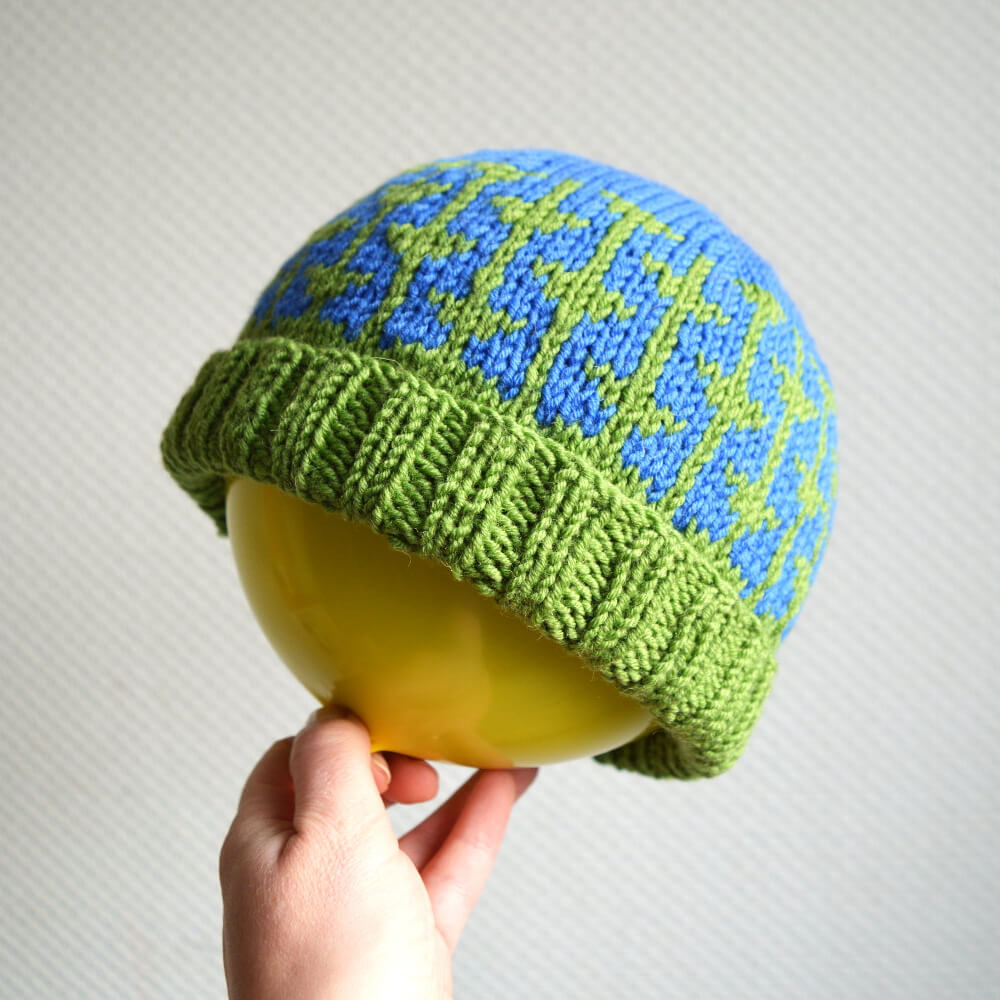
knitting

pijl hat

Pijl hat

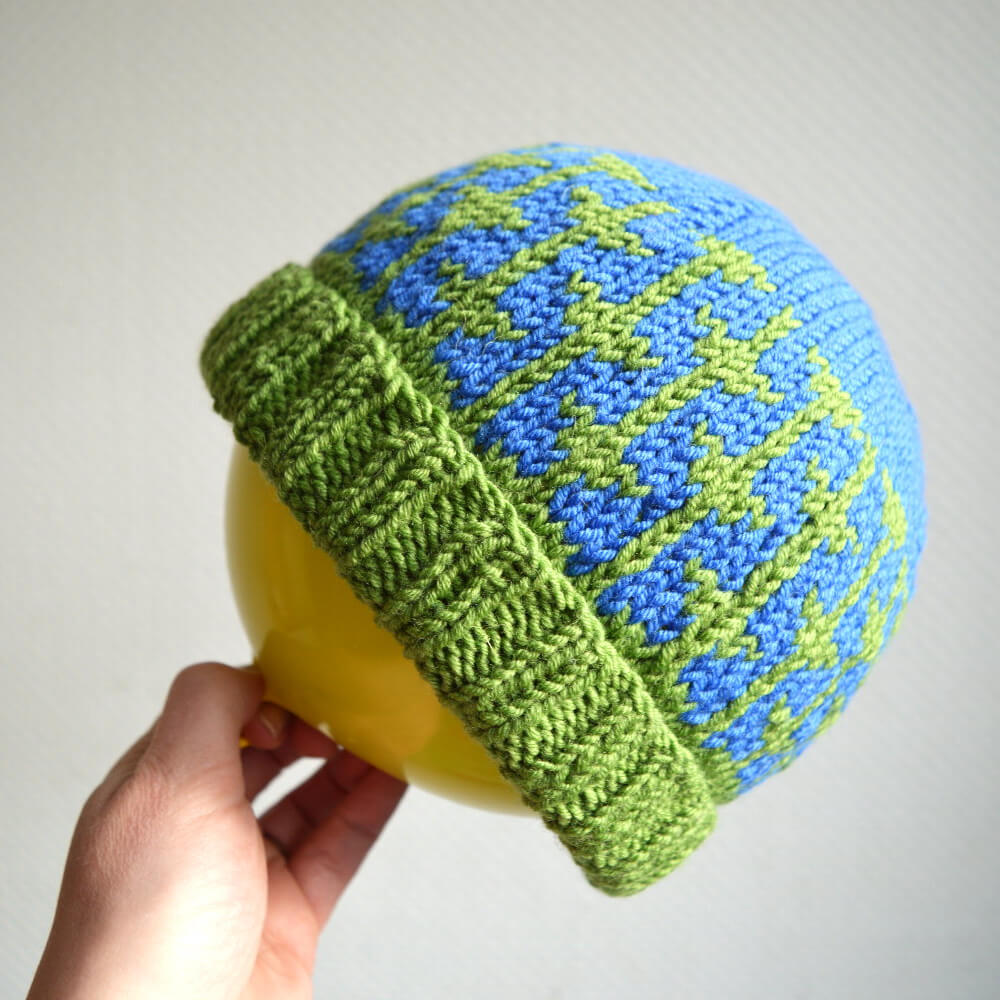
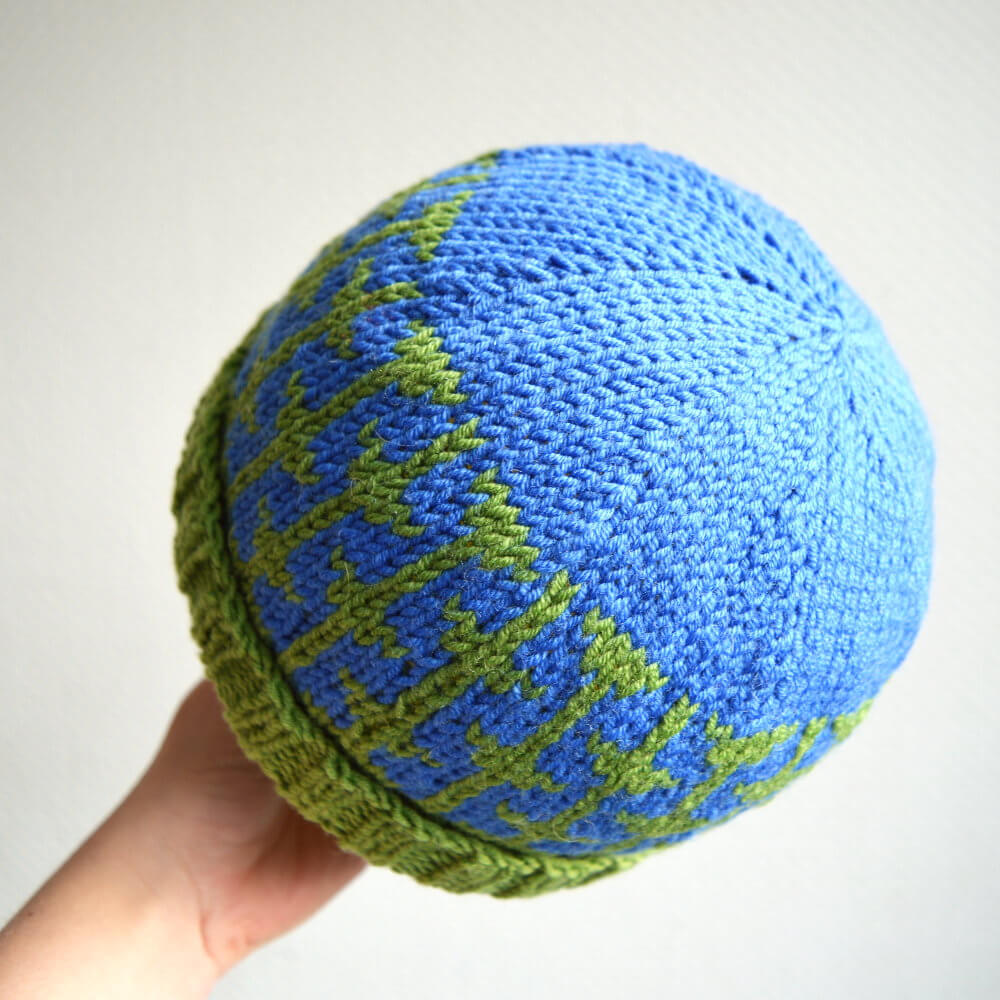
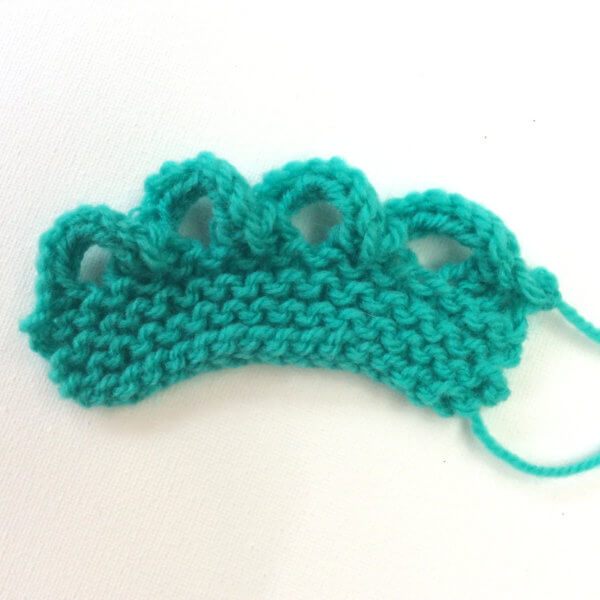
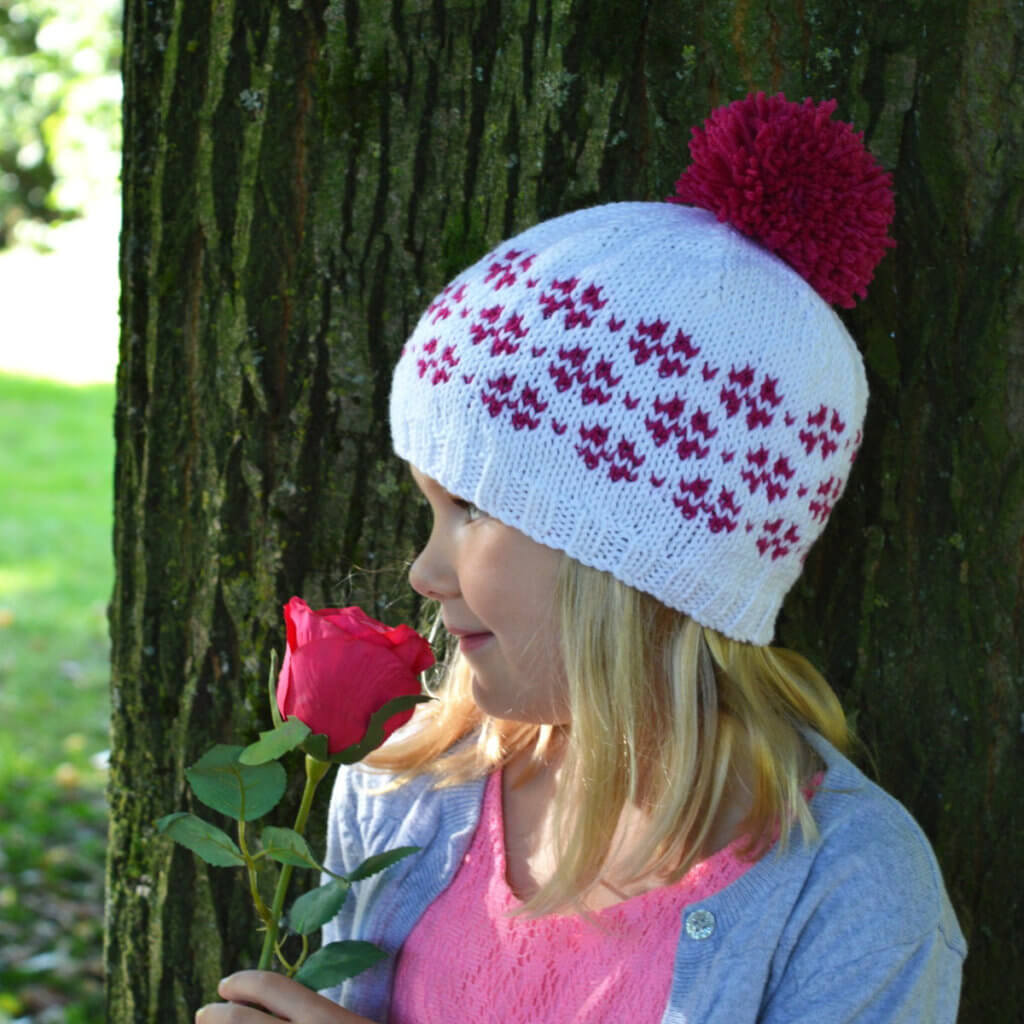
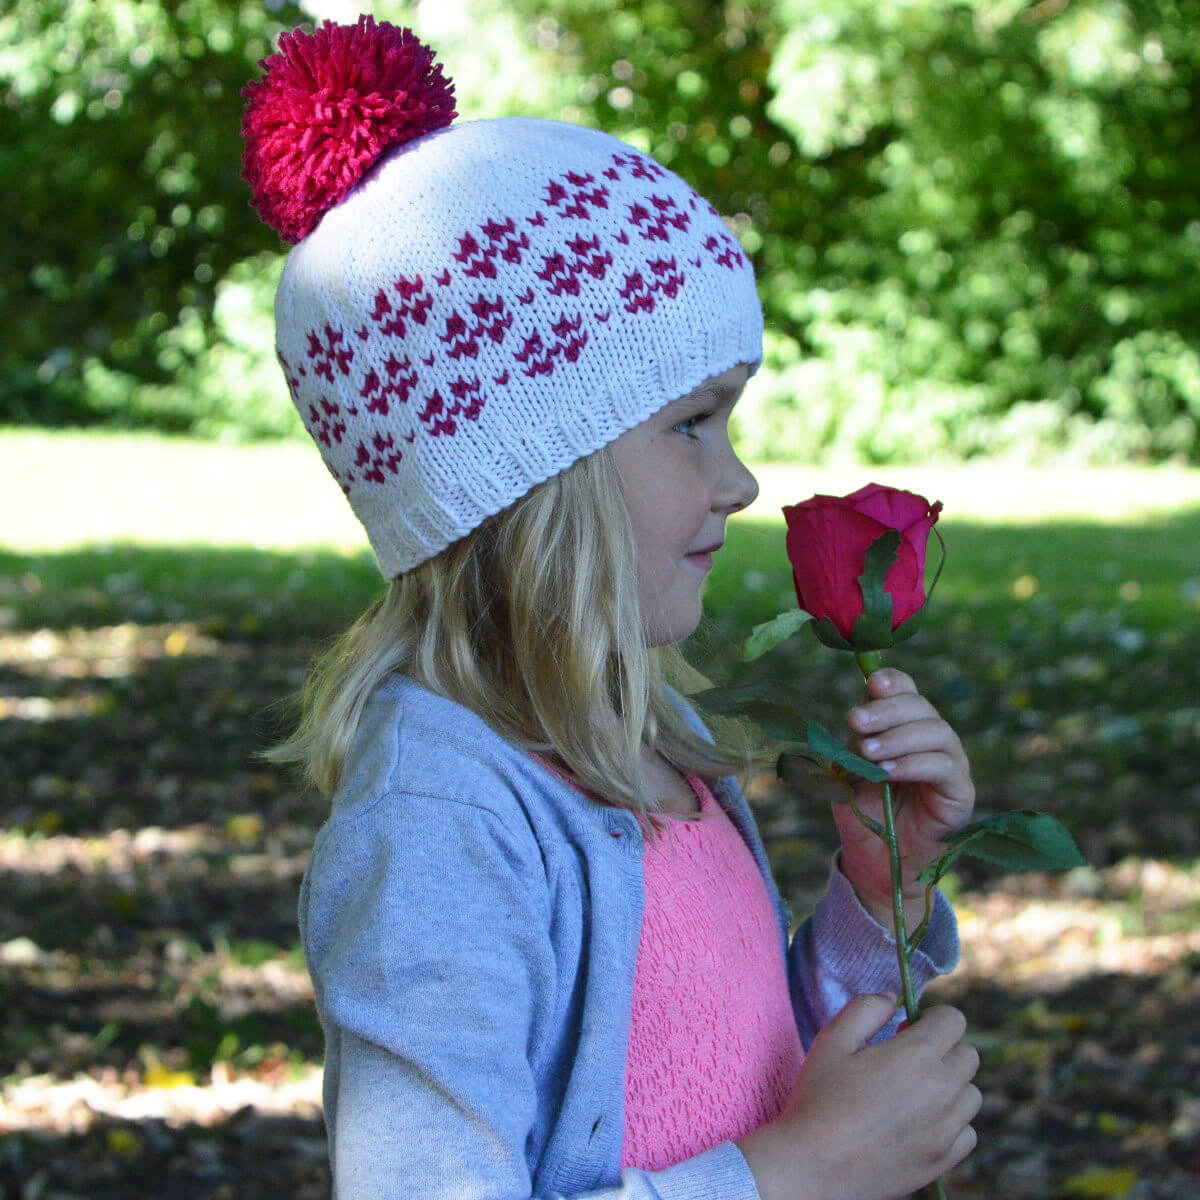
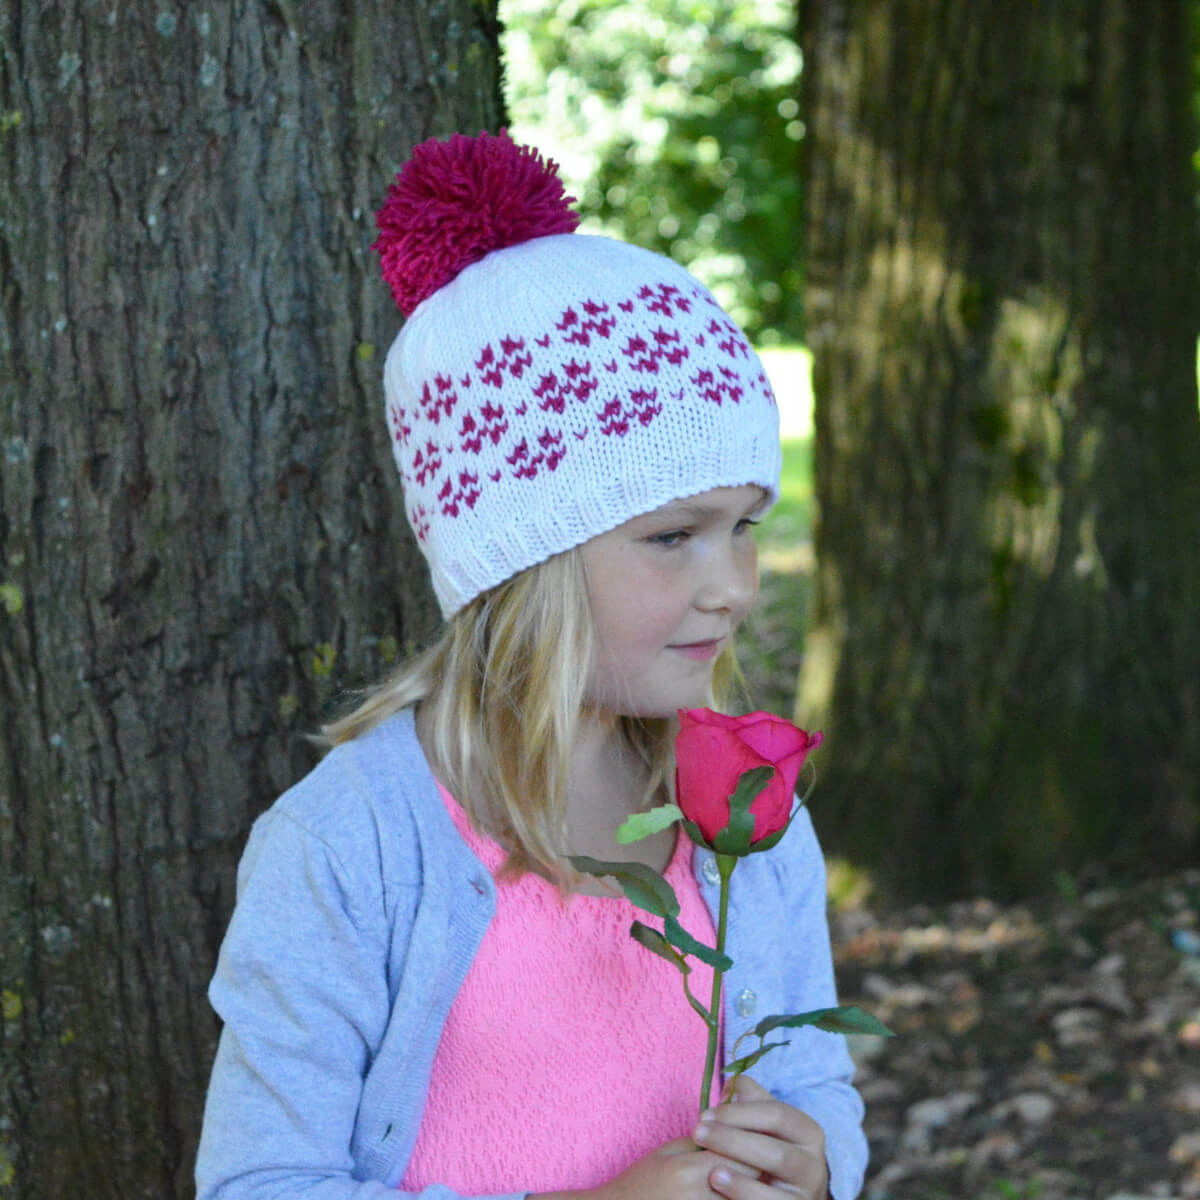
The Pijl hat is a lovely unisex hat with stranded color work. With only two colors, this hat knits up super quick. Due to the simple colorwork design, it is also a great first stranded project for anyone who has never attempted this technique before.

This pattern contains instructions for a whopping 9 sizes, ranging from Preemie to Adult Large. The Pijl hat is knit completely seamless and from the bottom up. The color work pattern for the body of the hat is in charted form only. All other instructions are in written form.


Pay what you want: (minimum €4.90)

Add to cart


Difficulty level

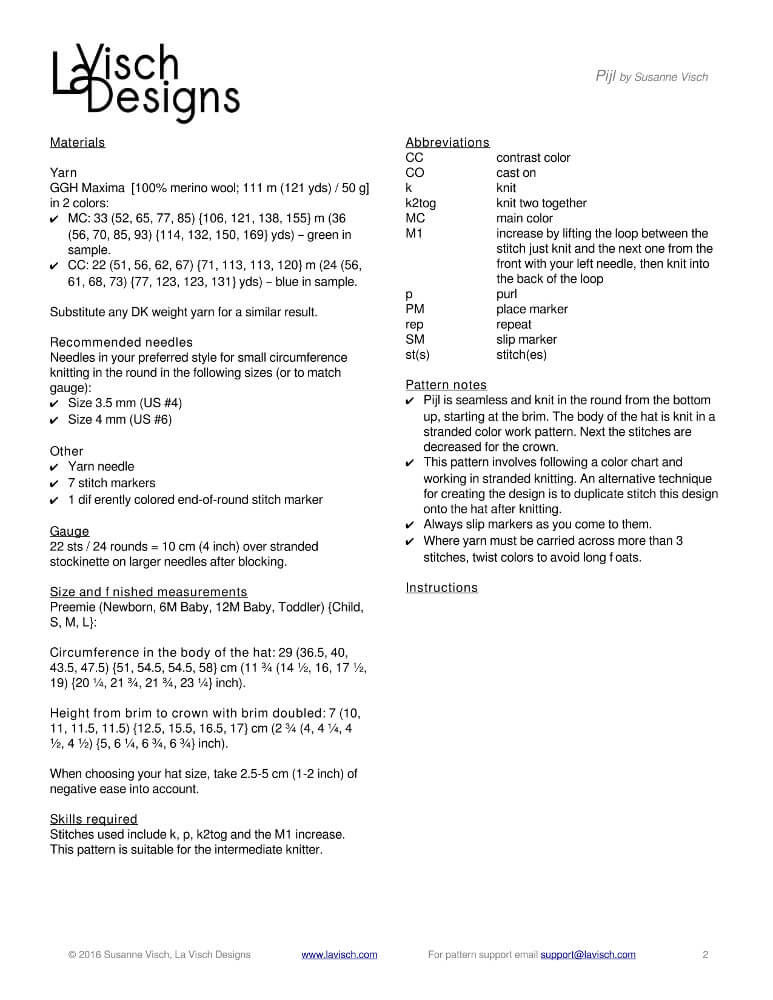
Stitches used include k, p, k2tog and the M1 increase. This pattern is suitable for the intermediate knitter.

Size and finished measurements

Preemie (Newborn, 6M Baby, 12M Baby, Toddler) {Child, S, M, L} with resulting circumference of approx. 29 (36.5, 40, 43.5, 47.5) {51, 54.5, 54.5, 58} cm (11 ¾ (14 ½, 16, 17 ½, 19) {20 ¼, 21 ¾, 21 ¾, 23 ¼} inches) in the body of the hat.

When choosing your hat size, take 2.5-5 cm (1-2 inches) of negative ease into account.

Pattern details

  • Gauge: 22 sts / 24 rounds = 10 cm (4 inches) over stranded stockinette on larger needles.
  • Pattern languages included: English and Dutch (Dit patroon omvat zowel een Nederlandse als een Engelse versie).
  • Digital PDF has 4 pages (letter size).

Materials

  • Yarn: GGH Maxima [100% merino wool; 111 m (121 yds) / 50 g] in 2 colors:
    MC: 33 (52, 65, 77, 85) {106, 121, 138, 155} m (36 (56, 70, 85, 93) {114, 132, 150, 169} yds) – green in sample.
    CC: 22 (51, 56, 62, 67) {71, 113, 113, 120} m (24 (56, 61, 68, 73) {77, 123, 123, 131} yds) – blue in sample.
    Substitute any DK weight yarn for a similar result.
  • Knitting needles in your preferred style for small circumference knitting in the round in the following sizes (or to match gauge): Size 3.5 mm (US 4) and size 4 mm (US 6)
  • Yarn needle
  • 7 stitch markers
  • 1 differently colored end-of-round stitch marker

pijl hat Read More »

tutorial: knitting the loopy bind-off

Knitting the loopy bind-off - a tutorial by La Visch Designs - www.lavisch.com

In this post I want to show you a variation of the i-cord BO: the loopy bind-off. With a regular i-cord BO you work directly over all stitches, binding them off. With the loopy bind-off loops of i-cord are made in between the stitches that are to be bound off. This does not only give a highly decorative edge, but is also a very elastic finishing. For this reason, this would be a nice BO to use on items like shawls, that have to be blocked quite aggressively for the best results.

Similar to regular i-cord (click here for the post about it!), this stitch can be knit over 3, 4 or 5 stitches. The more stitches, the fatter the resulting i-cord will be. The number of stitches also affects the loops in this bind-off: if you want to knit the i-cord for the loops over 3 stitches, you will need a multiple of 3 stitches to bind-off.

Knitting the loopy bind-off - a tutorial by La Visch Designs - www.lavisch.com

To knit the loopy bind-off, you need a set of knitting needles, plus one extra needle in the same size. It can be worked on both the good and the wrong side of the work. In this example I’m binding off a small swatch in garter stitch.

The loopy bind-off step by step

1. Use the first 3 stitches on the left needle to knit regular i-cord. You can decide how long to make the cord, as long as it is equal for all loops. In this example I made cord with a length of 3.5 cm, which was 10 rows.

Knitting the loopy bind-off - a tutorial by La Visch Designs - www.lavisch.com

2. Next, bring the needle with the i-cord stitches parallel to the needle with the stitches to be bound off, by twisting it counterclockwise.

Knitting the loopy bind-off - a tutorial by La Visch Designs - www.lavisch.com

3. Insert the third needle into the first stitch on the front needle, then immediately also into the first stitch of the back needle. Wind the yarn around the needle as usual, pull the yarn through both stitches and then slip off the first stitch of both the front and back needle. This is really very similar to working a three-needle BO.

Knitting the loopy bind-off - a tutorial by La Visch Designs - www.lavisch.com

4. Repeat step 3 twice.

Knitting the loopy bind-off - a tutorial by La Visch Designs - www.lavisch.com

5. Next, slip the 3 newly knitted stitches back to the left-hand needle.

Knitting the loopy bind-off - a tutorial by La Visch Designs - www.lavisch.com

6. Repeat steps 1 to 5 until 3 stitches remain on the left-hand needle. Next, repeat steps 1 and 2 once more.

Knitting the loopy bind-off - a tutorial by La Visch Designs - www.lavisch.com

7. Work step 3 twice, you now have 2 stitches on the right-hand needle.

Knitting the loopy bind-off - a tutorial by La Visch Designs - www.lavisch.com

8. Pass the first stitch over the second stitch, you now have 1 stitch remaining on the right-hand needle.

Knitting the loopy bind-off - a tutorial by La Visch Designs - www.lavisch.com

9. Repeat step 3 once more, followed by 1 repetition of step 8. All stitches are now cast off, you can now cut the yarn and pull the tail through the last loop.

Knitting the loopy bind-off - a tutorial by La Visch Designs - www.lavisch.com

This is how the loopy bind-off edge will look like on the right side of the work:

Knitting the loopy bind-off - a tutorial by La Visch Designs - www.lavisch.com

And this is how it looks on the wrong side of the work:

Knitting the loopy bind-off - a tutorial by La Visch Designs - www.lavisch.com

Depending on the desired effect you can use either the right or wrong side of this bind-off.

And that is all there is to it!

tutorial: knitting the loopy bind-off Read More »

bloem

Bloem hat

Bloem is a cute hat with stranded color work depicting little flowers. With only two colors, this hat knits up super quick and is a great first stranded project for anyone who has never attempted this technique before.

The Bloem hat pattern contains instructions for a whopping 9 sizes, ranging from Preemie to Adult Large. The Bloem hat is completely seamless and knitted from the bottom up. The color work pattern for the body of the hat is provided charted only. All other instructions are in written form.


Pay what you want: (minimum €4.90)

Add to cart


Difficulty level

Bloem is seamless and knit in the round from the bottom up. This pattern involves following a color chart and working in stranded knitting. An alternative technique for creating the design is to duplicate stitch this design onto the hat after knitting.

Stitches used include knit, purl, k2tog and the M1 increase. This pattern is suitable for the intermediate knitter.

Size and finished measurements

Preemie (Newborn, 6M Baby, 12M Baby, Toddler) {Child, S, M, L} with resulting circumference of approx. 30 (37, 40.5, 44.5, 48.5) {51.5, 54, 55, 59} cm (11 ¾ (14 ½, 16, 17 ½, 19) {20 ¼, 21 ¼, 21 ¾, 23 ¼} inches) in the body of the hat.

When choosing your hat size, take 2.5-5 cm (1-2 inches) of negative ease into account.

Pattern details

  • Gauge: 22 sts / 24 rounds = 10 cm (4 inches) over stranded stockinette on larger needles.
  • Pattern languages included: English and Dutch (Dit patroon omvat zowel een Nederlandse als een Engelse versie).
  • Digital PDF has 4 pages (letter size).

Materials

  • Yarn: GGH Maxima [100% merino wool; 111 m (121 yds) / 50 g] in 2 colors:
    MC: 29 (49, 59, 68, 76) {93, 111, 121, 140) m (32 (54, 64, 75, 82) {102, 121, 131, 152} yds)
    CC: 40 (47, 47, 49, 49) {51, 60, 60, 62} m (44 (51, 51, 53, 53) {56, 65, 65, 68} yds)
    Substitute any DK weight yarn for a similar result.
  • Knitting needles in your preferred style for small circumference knitting in the round in the following sizes (or to match gauge): Size 3.5 mm (US 4) and size 4 mm (US 6)
  • Yarn needle
  • 7 stitch markers
  • 1 differently colored end-of-round stitch marker

bloem Read More »

Indie Design Gift-A-Long 2016

Logo of the 2016 Gift-A-Long
It is finally Gift-A-Long time again! I’m very excited to announce that the Gift-A-Long 2016 (or GAL for short) has started. This year I’m of course also participating again as both a designer and knitter/crocheter. However, I’m still trying to decide what patterns to buy and make myself.

What is the Gift-A-Long 2016?

The Indie Design Gift-A-Long is a 6-week long international event hosted in the Indie Design Gift-A-Long Group on Ravelry. Thousands of knitters and crocheters come together in Knit-A-Longs (KAl’s) and Crochet-A-Longs (CAL’s). The goal is to get our holiday knitting/crocheting done using patterns designed by participating independent designers. In the statistics overview below you can see (besides are fun facts) that a whopping 335 designers participate!

Statistics of the Gift-A-Long 2016

From November 22, 2016, at 8:00 pm US EST to December 31, 2016, at midnight US EST there are fun games, contests, and 8 KAL/CAL’s. The KAL/CAL’s are a wonderful way to make your gifts, either for yourself or for others. Lot’s of chatting and cheering are also a big part of the GAL because enthusiastic company makes those needles and hooks really fly.

There are multiple categories for projects, and chat threads for each of these. Any design by a participating designer is eligible for joining in. Any paid (not free) pattern from these designers is eligible for winning prizes. Prizes are won through fun games, random draws, and trivia questions. And splendid prizes they are! In this thread, there is an overview of physical prizes donated.

The GAL sale

In addition to the KAL/CAL’s, there is of course also the GAL sale. The Gift-A-Long 2016 kicks off with the Giant Gift-A-Long Sale: From November 22nd, 8 pm EST to November 30th, 11:59 EST, participating Indie Designers are offering between 5 and 20 of their independently published patterns at 25% off. To take advantage of the sale, use the coupon code: giftalong2016.

A full list of participating designers can be found here. In the picture below you can see some of the participating designers by location. The complete map with all Gift-A-Long 2016 designers is here. A wonderful handy searchable bundle of all sale patterns is also available.

In conclusion: the Gift-A-Long is a wonderful event that you really can’t miss. Most of all because it is just soooo  much fun.

See you in the GAL!

Map of 2016 Gift-A-Long designers

Indie Design Gift-A-Long 2016 Read More »

tutorial: knitting a bobble bind-off

Bobble bind-off tutorial by La Visch Designs - www.lavisch.com

In a previous blog I’ve already shown you how to cast on your knitting project with decorative bobbles. Of course we also want to know how to knit the matching bobble bind-off. You never know when it comes in handy!

There are many different types of bobbles possible for this application. However, you want a reasonably “fat” bobble for the best result, because these makes the bobble “pop” better.

In short an instruction for such a bobble would will be as follows:

Bobble of 5 stitches: Work [k1, yo, k1 , yo, k1] all in the same st. Turn work, p1, p1 tbl, p1, p1 tbl, p1. Turn and k5. Turn work, and p5. Turn work, k5, * pass second st on the right hand needle over the first stitch; rep from * until 1 st remains – 1 bobble made.

Below I’ll show you step by step how this looks when used at the bind-off edge of your knitting.

Knitting a bobble bind-off step by step

1. Your project is ready and you want to bind-off. First of all, make sure you’re using a multiple of 4+1 stitches plus any edge stitches. In this example I’m using a multiple of 4 + 1 + 2×2 edge stitches for both sides of the work. The 4 stitches consist of 1 stitch for every bobble and 3 stitches distance between each bobble.

Bobble bind-off tutorial by La Visch Designs - www.lavisch.com

2. Make sure you are on the right side of the work and knit 2 stitches. Next pass the second stitch on the right-hand needle over the first stitch to cast it off.

Bobble bind-off tutorial by La Visch Designs - www.lavisch.com

3.In the next stitch we will be making a bobble as follows: Work [k1, yo, k1 , yo, k1] all in the next stitch, without sliding it off prematurely. You now have 6 stitches on the right hand needle, we will knit the bobble over 5 of them.

Bobble bind-off tutorial by La Visch Designs - www.lavisch.com

4. Turn work, p1, p1 tbl, p1, p1 tbl, p1. The “p tbl” stitches are worked that way to close up the yo’s of the previous row. This will make the resulting bobble smoother, this may require some practice!

Bobble bind-off tutorial by La Visch Designs - www.lavisch.com

5. Turn work and knit 5 stitches.

Bobble bind-off tutorial by La Visch Designs - www.lavisch.com

6. Turn work and purl 5 stitches.

Bobble bind-off tutorial by La Visch Designs - www.lavisch.com

7. Turn work again and knit 5 stitches.

Bobble bind-off tutorial by La Visch Designs - www.lavisch.com

8. Now pass the second stitch on the right hand needle over the first stitch, repeat this until only 1 of the 5 bobble stitches remains. You have now created one bobble! You can push it out a bit to the right side of the work to show it to its best advantage. There are now only 2 stitches left on your right hand needle.

Bobble bind-off tutorial by La Visch Designs - www.lavisch.com

9. Next pass the second stitch on the right-hand needle over the first stitch to cast it off.

Bobble bind-off tutorial by La Visch Designs - www.lavisch.com

10. Knit one stitch and again pass the second stitch on the right-hand needle over the first stitch to cast it off. Repeat two more times to bind off 3 stitches in total.

Bobble bind-off tutorial by La Visch Designs - www.lavisch.com

11. Repeat steps 3 to 10 until 3 stitches on the left-hand needle remain.

Bobble bind-off tutorial by La Visch Designs - www.lavisch.com

12. Repeat steps 3 to 9 once more to knit the last bobble and end with binding off the 2 edge stitches.

Bobble bind-off tutorial by La Visch Designs - www.lavisch.com

And this is how the bobble bind-off is done!

tutorial: knitting a bobble bind-off Read More »

tutorial: knitting a bobble cast-on

Bobble cast-on tutorial by La Visch Designs - www.lavisch.com

In the series of decorative ways to cast-on a knitting project, I present here the bobble cast-on method. You’re probably already familiar with bobbles as a way to give an interesting 3D texture to your knitting. I used it myself for that purpose in my Moerbei shawl design. It is also possible to make bobbles right on the cast-on edge. Officially, the bobble cast-on is not a “real” cast-on method, because you already cast-on and knit a row before you start the actual bobbles. However, this should not spoil the fun!

To be honest, the only difference between regular bobbles and the bobbles with a bobble cast-on, is that they are knit on the edge of the work. There are many different types of bobbles possible for this application, however, you want a reasonably “fat” bobble for the best result.

In short an instruction for such a bobble would be as follows:

Bobble of 5 stitches: Work [k1, yo, k1 , yo, k1] all in the same st. Turn work, p1, p1 tbl, p1, p1 tbl, p1. Turn and k5. Turn work, and p5. Turn work, k5, * pass second st on the right hand needle over the first stitch; rep from * until 1 st remains – 1 bobble made.

Below I’ll show you step by step how this looks when used at the cast-on edge of your knitting.

Knitting a bobble cast-on step by step

1. Cast-on the required number of stitches, here I used a multiple of 4 + 1 + 2×2 edge stitches for both sides of the work. The 4 stitches consist of 1 stitch for every bobble and 3 stitches distance between each bobble. To cast-on I used the knitted-on method, but any other method would work.

Bobble cast-on tutorial by La Visch Designs - www.lavisch.com

2. Purl 1 row and turn the work.

Bobble cast-on tutorial by La Visch Designs - www.lavisch.com

3. Knit 2 stitches for the edge to the side.

Bobble cast-on tutorial by La Visch Designs - www.lavisch.com

4. Work [k1, yo, k1 , yo, k1] all in the next stitch, without sliding it off prematurely. You now have 7 stitches on the right hand needle, we will knit the bobble over 5 of them.

Bobble cast-on tutorial by La Visch Designs - www.lavisch.com

5. Turn work, p1, p1 tbl, p1, p1 tbl, p1. The “p tbl” stitches are worked to close up the yo’s of the previous row. This will make the outside surface of the resulting bobble smoother, this may require some practice!

Bobble cast-on tutorial by La Visch Designs - www.lavisch.com

6. Again turn your work and knit 5 stitches.

Bobble cast-on tutorial by La Visch Designs - www.lavisch.com

7. Next, turn work and purl 5 stitches.

Bobble cast-on tutorial by La Visch Designs - www.lavisch.com

8. Turn work again and knit 5 stitches.

Bobble cast-on tutorial by La Visch Designs - www.lavisch.com

9. Now pass the second stitch on the right hand needle over the first stitch, repeat this until only 1 of the 5 bobble stitches remains. There are now only 3 stitches left on your right hand needle. You have now created one bobble! You can push it out a bit to the right side of the work to show it to its best advantage.

Bobble cast-on tutorial by La Visch Designs - www.lavisch.com

10. Next knit the 3 stitches which I had chosen as the distance between the bobbles.

Bobble cast-on tutorial by La Visch Designs - www.lavisch.com

11. Repeat steps 4 to 10 until only 3 stitches remain on the left hand needle.

Bobble cast-on tutorial by La Visch Designs - www.lavisch.com

12. Repeat steps 4 to 9 once more for the last bobble and finish with knit 2 for the second set of edge stitches.

Bobble cast-on tutorial by La Visch Designs - www.lavisch.com

With this your bobble cast-on is finished!

This is how it looks after a few more rows in stockinette have been knit.

Bobble cast-on tutorial by La Visch Designs - www.lavisch.com

Pretty, isn’t it?

Stay tuned for the tutorial on the matching bobble bind-off!

tutorial: knitting a bobble cast-on Read More »

tutorial: knitting the i-cord bind-off

Knitting the i-cord bind-off - a tutorial by La Visch Designs - www.lavisch.com

In a previous post I’ve already shown you how to cast-on your knitting project with an i-cord cast-on. And of course it would be nice to be able to bind-off with a matching i-cord bind-off finishing. Fortunately, we can!

The i-cord bind-off is usually knit over 3 to 5 stitches. In this example I’m going to show the version made over 3 stitches. In short, instructions would look something like this:

I-cord bind off: Cast-on 3 sts, *k2, k2tog tbl, sl 3 sts just worked back to LH needle, pull yarn tight across back of sts; rep from * until 3 sts remain.
Next: K2tog tbl, k1, sl 2 sts to LH needle, k2tog tbl and fasten off.

The i-cord bind-off step by step

You can start casting off as soon as the last row of your work has been knit, and after your work has been turned when working flat back and forth.

1. With the right side facing, cast-on 3 stitches. I used the knitted-on method.

Knitting the i-cord bind-off - a tutorial by La Visch Designs - www.lavisch.com

2. Knit 2 stitches.

Knitting the i-cord bind-off - a tutorial by La Visch Designs - www.lavisch.com

3. Knit 2 stitches together through the back loop.

Knitting the i-cord bind-off - a tutorial by La Visch Designs - www.lavisch.com

4. Move the 3 stitches on the right needle back to the left hand needle one by one.

Knitting the i-cord bind-off - a tutorial by La Visch Designs - www.lavisch.com

5. Pull the yarn tight and make sure that it is behind your work.

Knitting the i-cord bind-off - a tutorial by La Visch Designs - www.lavisch.com

6. Repeat steps 2 to 5 until 3 stitches to bind-off remain.

Knitting the i-cord bind-off - a tutorial by La Visch Designs - www.lavisch.com

7. Knit 2 stitches together through the back loop.

Knitting the i-cord bind-off - a tutorial by La Visch Designs - www.lavisch.com

8. Knit 1 stitch.

Knitting the i-cord bind-off - a tutorial by La Visch Designs - www.lavisch.com

9. Move the 2 stitches on the right needle back to the left hand needle one by one.

Knitting the i-cord bind-off - a tutorial by La Visch Designs - www.lavisch.com

10 Knit 2 remaining stitches together through the back loop and fasten off.

Knitting the i-cord bind-off - a tutorial by La Visch Designs - www.lavisch.com
The “ear” where the yarn was fastened off, can be reduced by using a tapestry needle to pull it into the i-cord tube. Front and back of the work then look as follows:

Knitting the i-cord bind-off - a tutorial by La Visch Designs - www.lavisch.com

Knitting the i-cord bind-off - a tutorial by La Visch Designs - www.lavisch.com

Tip 1

It can be very nice to knit the i-cord bind-off in a contrasting color to the rest of your project. It may however happen, that the main color shines through in the i-cord BO. To avoid that, I would recommend to first knit a row in the contrast color, before starting the i-cord bind-off.

Tip 2

An i-cord bind-off edge on a piece worked in stockinette stitch is very pretty. As you know however, stockinette tends to curl…. A lot. An i-cord bind-off is usually not sufficient to prevent curling. For this you will have to look at other methods, such as garter stitch or rib. So if you purely want the effect of a stockinette stitch edge to your work, you better have a look at a folded hem.

tutorial: knitting the i-cord bind-off Read More »

framboos

Framboos

Framboos is a crescent-shaped shawl worked from the top-down. Its stockinette body will let that special skein of fingering weight yarn shine. The lace edging with its lovely picot finishing makes this shawl a true stunner.

The shawl is started with a garter stitch tab, the lace in the border is knit on both right side and wrong side rows. The instructions for the border of the shawl are provided both fully charted and written out. Instructions for changing the size of the shawl are also included.


Pay what you want: (minimum €6.50)

Add to cart


Difficulty level

The shawl is started with a garter stitch tab in combination with a provisional cast on. Stitches used include knit, purl, k2tog, skp, yo and double yo. This pattern is suitable for the intermediate to advanced knitter.

Size and finished measurements

Finished dimensions of the sample shawl: Wingspan of 160 cm (63 inches) and a depth of 47 cm (18 ½ inches), measured after blocking.

Pattern details

  • Written for a gauge of 16 sts / 23 rows = 10 cm (4 inches) over stockinette after blocking. Gauge is not critical for this design, but a loose gauge is strongly advised.
  • Pattern languages included: English and Dutch (Dit patroon omvat zowel een Nederlandse als een Engelse versie).
  • Digital PDF has 4 pages (letter size).

Materials

  • 415 m (454 yds) / 100 g Araucania Huasco / Botany Lace [100% merino wool]. Substitute any wool fingering weight yarn for a similar result.
  • Size 4 mm (US 6) / 80 cm (32 inches) circular needles.
  • Waste yarn for provisional cast on.
  • Yarn needle.
  • 41 stitch markers (optional).

framboos Read More »

tutorial: knitting an i-cord cast-on

Knitting the i-cord cast-on - a tutorial by La Visch Designs

Lately, I have all sorts of methods to cast on my knitting projects on my mind. Some I have already shared with you, think for example of the folded hem, the two-color cast-on, the picot cast-on, the provisional crochet cast-on and of course the Latvian twist. In this post, I want to show you how to knit an i-cord cast-on.

I-cord is usually knit over 3 to 5 stitches. In this example, I’m going to make an i-cord cast-on based on 3 stitches. In short, the instruction would be as follows:

I-cord CO: Cast-on 4 sts. k4, sl 4 sts just worked back to the LH needle, * kfb in next st, k3, sl 4 sts just worked back to the LH needle; rep from * until the desired number of sts has been achieved, plus 3 sts. Next: (k2tog) twice, sl 2 st back to LH needle, k2tog.

Knitting the i-cord cast-on step by step

1. Cast on 4 stitches, in this example I used the knitting-on method.

Knitting the i-cord cast-on - a tutorial by La Visch Designs

2. Knit 4 stitches.

Knitting the i-cord cast-on - a tutorial by La Visch Designs

3. Slip the 4 newly knitted stitches back to the left-hand needle one by one.

Knitting the i-cord cast-on - a tutorial by La Visch Designs

4. Knit the next stitch in front loop and then in the back loop before sliding the off the stitch just worked. Tighten your yarn a bit.

Knitting the i-cord cast-on - a tutorial by La Visch Designs

5. Knit 3 stitches.

Knitting the i-cord cast-on - a tutorial by La Visch Designs

6. Slip 4 stitches back to the left-hand needle one by one.

Knitting the i-cord cast-on - a tutorial by La Visch Designs

7. Repeat steps 4 to 6 until you have the desired number of stitches plus 3.

Knitting the i-cord cast-on - a tutorial by La Visch Designs

8. Knit 2 stitches together, twice.

Knitting the i-cord cast-on - a tutorial by La Visch Designs

9. Slip 2 stitches back to the left needle.

Knitting the i-cord cast-on - a tutorial by La Visch Designs

10. Knit these 2 stitches together.

Knitting the i-cord cast-on - a tutorial by La Visch Designs

Now your cast-on is ready and you can start the rest of your project!
This is how it looks at the front and back of the piece:

Knitting the i-cord cast-on - a tutorial by La Visch Designs

Notes

For a less “rounded” corner, you can also choose to omit steps 8 to 10. In the last repeat of step 6, slip only 3 stitches back to the left-hand needle and bind these off.

To use this cast-on method for a project knitted in the round, you can also choose to omit steps 8 to 10. In the last repeat of step 6, slip only 3 stitches back to the left-hand needle instead of 4 stitches and place those on a bit of waste yarn. Afterward you can then graft these stitches together with the starting stitches for a seamless connection of the i-cord edge.

This cast-on method also has a matching bind-off!

Patreon logo

Thanks to my Patreon supporters for bringing you this freebie! Creating quality patterns and tutorials is a lot of work and resource-intensive. However, I find it important to give you free content like this tutorial. Thanks to the generous support of my Patreon supporters, I can make it happen. Thank you, patrons! Click here to join, or click here to read more about La Visch Designs on Patreon.

tutorial: knitting an i-cord cast-on Read More »

stellaria cowl

by La Visch Designs

The Stellaria Cowl was inspired by a desire to use up various odds and ends of the lovely rustic yarn by Moeke Yarns. Named for the tiny flowers in the design, this cowl is an entertaining and relaxing knit.

This cowl is knit in the round, with easy jog-less striping and flower texture stitch pattern. Included in the pattern is a photo tutorial on how to work the flower stitch. Available in two sizes, the Stellaria Cowl is bound to become a favorite to make, wear and gift!


Pay what you want: (minimum €5.50)

Add to cart


Size and finished measurements

The Stellaria Cowl is available in 2 sizes, S (L), the cowl pictured is size S. Finished dimensions: height of 42.5 cm (16 ¾ inches) and 73 (93) cm (28 ¾ (36 ½) inches) circumference, measured after blocking.

Difficulty

This cowl is knit in the round. Stitches used include knit, purl, skp and k2tog. The pattern is suitable for the intermediate knitter.

Pattern details

  • Worked in the round.
  • Gauge is not critical in this design. For the sample cowl: 18 sts / 27 rows = 10 cm (4 inches) over stockinette in the stripe section, measured after blocking.
  • Pattern languages included: English and Dutch (Dit patroon omvat zowel een Nederlandse als een Engelse versie).
  • Digital PDF has 4 pages (letter size).

Materials

  • Yarn: Moeke Yarns Elena (100% wool; 330 m (361 yds) / 100 g) in the following colors and amounts:
    Color A: 73 (93) m (79 (101) yds) / 22 (28) g in Gray
    Color B: 195 (250) m (214 (273) yds) / 60 (76) g in Natural
    Color C: 102 (130) m (111 (141) yds) / 31 (40) g in Dark Coral
  • A 4 mm (US 6) circular needle, 60 cm (24 inches) length.
  • Yarn needle.
  • 1 “end-of-round” stitch marker

stellaria cowl Read More »