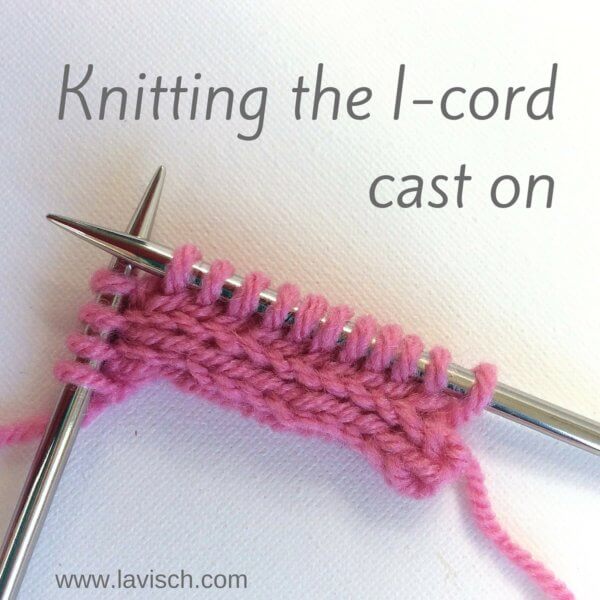
Lately, I have all sorts of methods to cast on my knitting projects on my mind. Some I have already shared with you, think for example of the folded hem, the two-color cast-on, the picot cast-on, the provisional crochet cast-on and of course the Latvian twist. In this post, I want to show you how to knit an i-cord cast-on.
I-cord is usually knit over 3 to 5 stitches. In this example, I’m going to make an i-cord cast-on based on 3 stitches. In short, the instruction would be as follows:
I-cord CO: Cast-on 4 sts. k4, sl 4 sts just worked back to the LH needle, * kfb in next st, k3, sl 4 sts just worked back to the LH needle; rep from * until the desired number of sts has been achieved, plus 3 sts. Next: (k2tog) twice, sl 2 st back to LH needle, k2tog.
Knitting the i-cord cast-on step by step
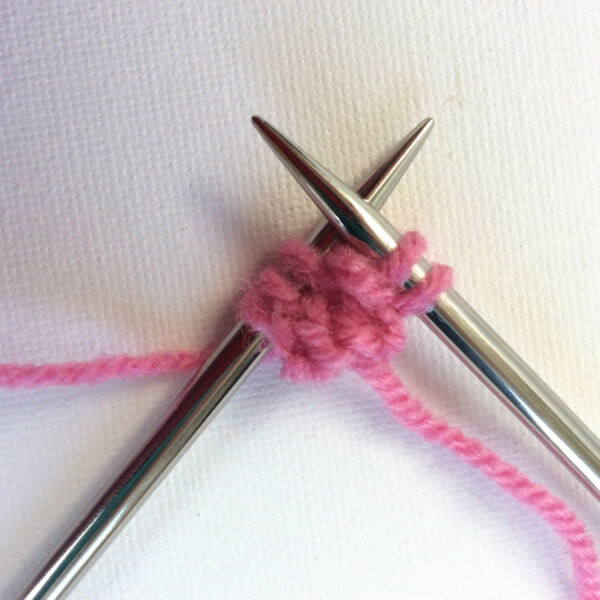
1. Cast on 4 stitches, in this example I used the knitting-on method.
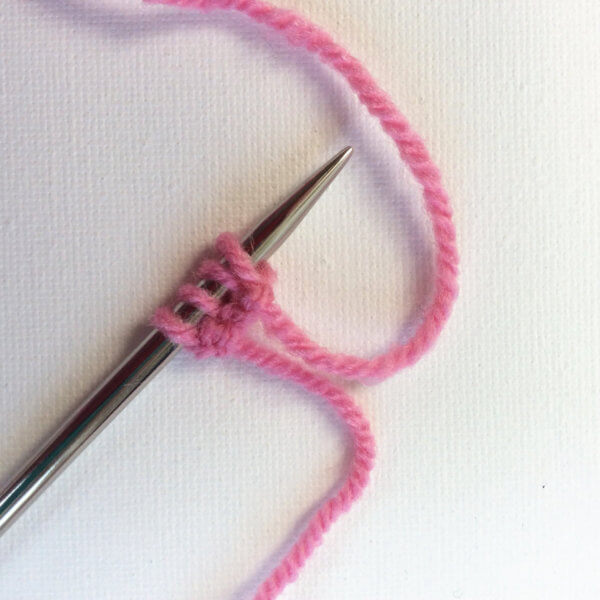
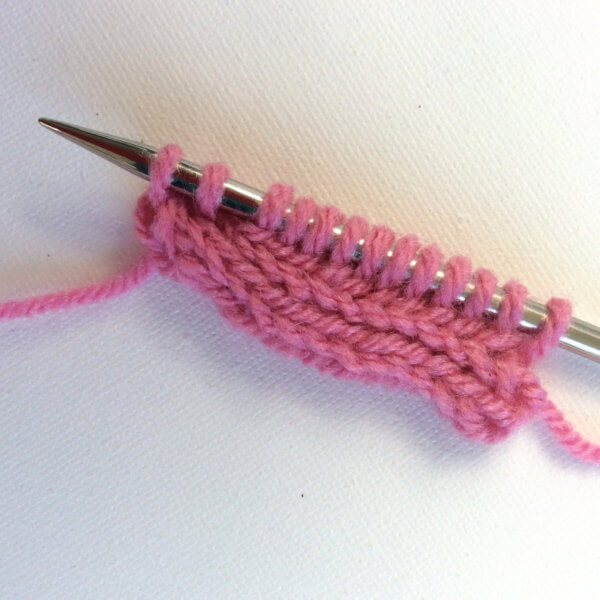
2. Knit 4 stitches.
3. Slip the 4 newly knitted stitches back to the left-hand needle one by one.
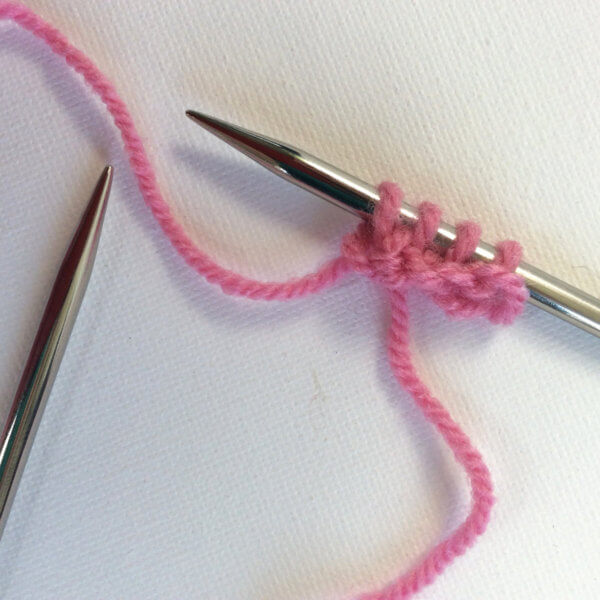
4. Knit the next stitch in front loop and then in the back loop before sliding the off the stitch just worked. Tighten your yarn a bit.
5. Knit 3 stitches.
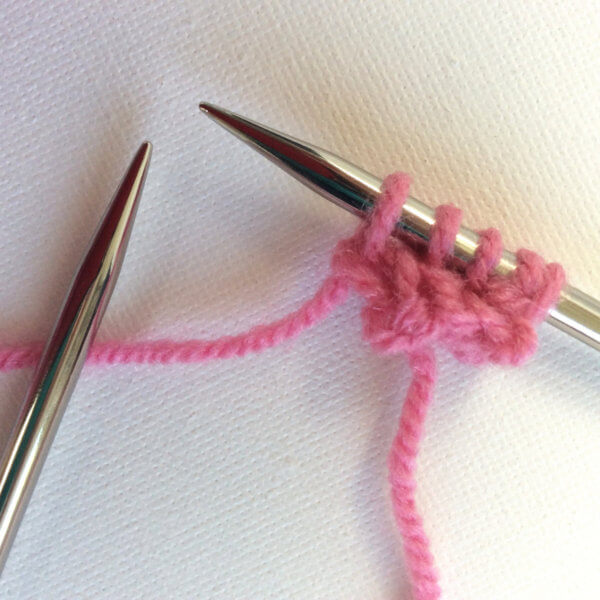
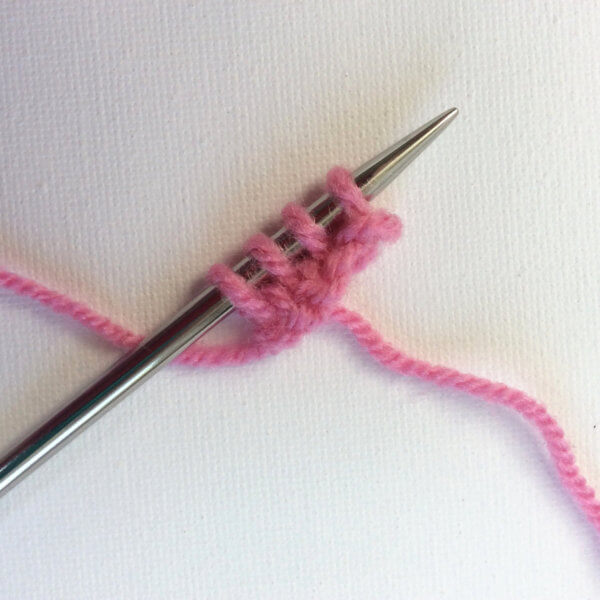
6. Slip 4 stitches back to the left-hand needle one by one.
7. Repeat steps 4 to 6 until you have the desired number of stitches plus 3.
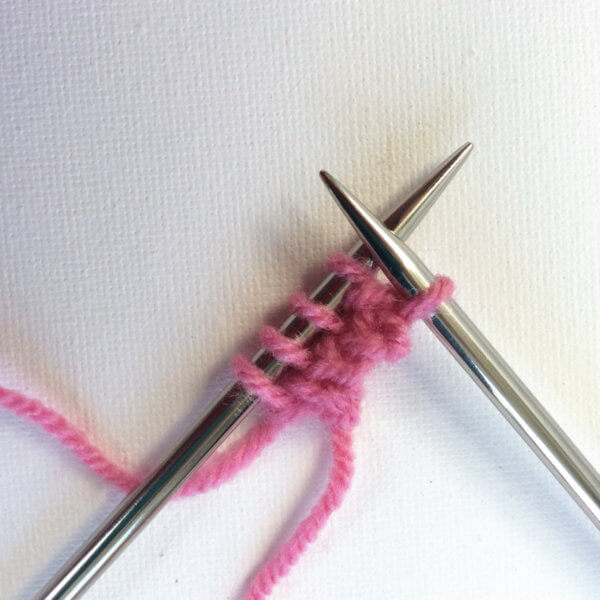
8. Knit 2 stitches together, twice.
9. Slip 2 stitches back to the left needle.

10. Knit these 2 stitches together.

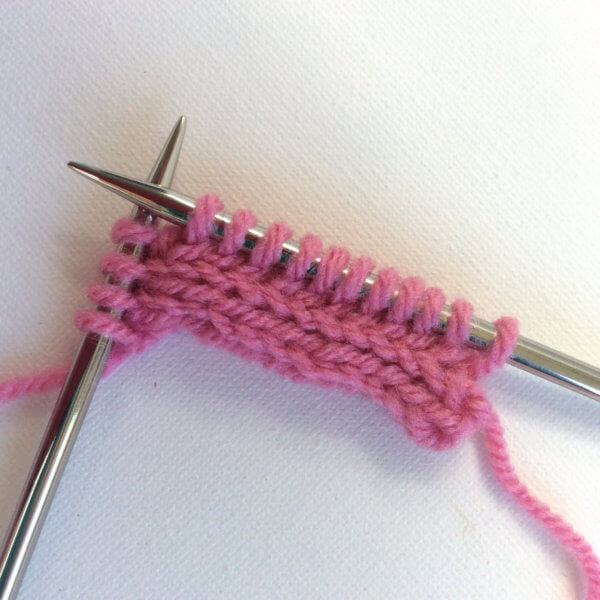
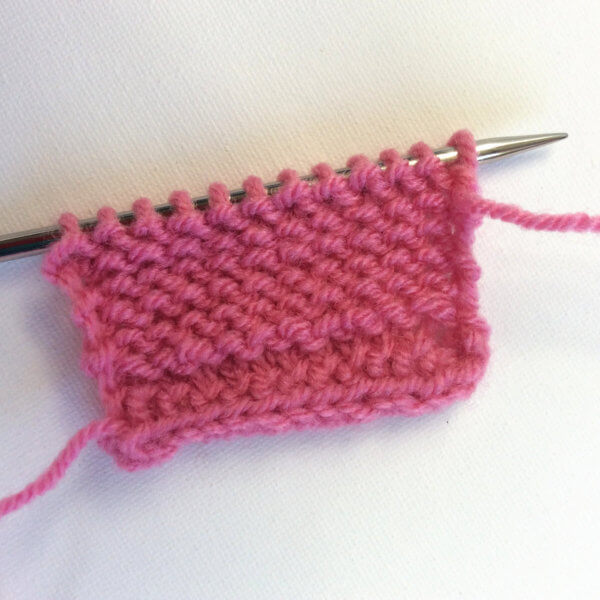
Now your cast-on is ready and you can start the rest of your project!
This is how it looks at the front and back of the piece:

Notes
For a less “rounded” corner, you can also choose to omit steps 8 to 10. In the last repeat of step 6, slip only 3 stitches back to the left-hand needle and bind these off.
To use this cast-on method for a project knitted in the round, you can also choose to omit steps 8 to 10. In the last repeat of step 6, slip only 3 stitches back to the left-hand needle instead of 4 stitches and place those on a bit of waste yarn. Afterward you can then graft these stitches together with the starting stitches for a seamless connection of the i-cord edge.
This cast-on method also has a matching bind-off!

Thanks to my Patreon supporters for bringing you this freebie! Creating quality patterns and tutorials is a lot of work and resource-intensive. However, I find it important to give you free content like this tutorial. Thanks to the generous support of my Patreon supporters, I can make it happen. Thank you, patrons! Click here to join, or click here to read more about La Visch Designs on Patreon.


