tutorial – working the knit 1 below (k1b) stitch

Working the knit 1 below (k1b) stitch

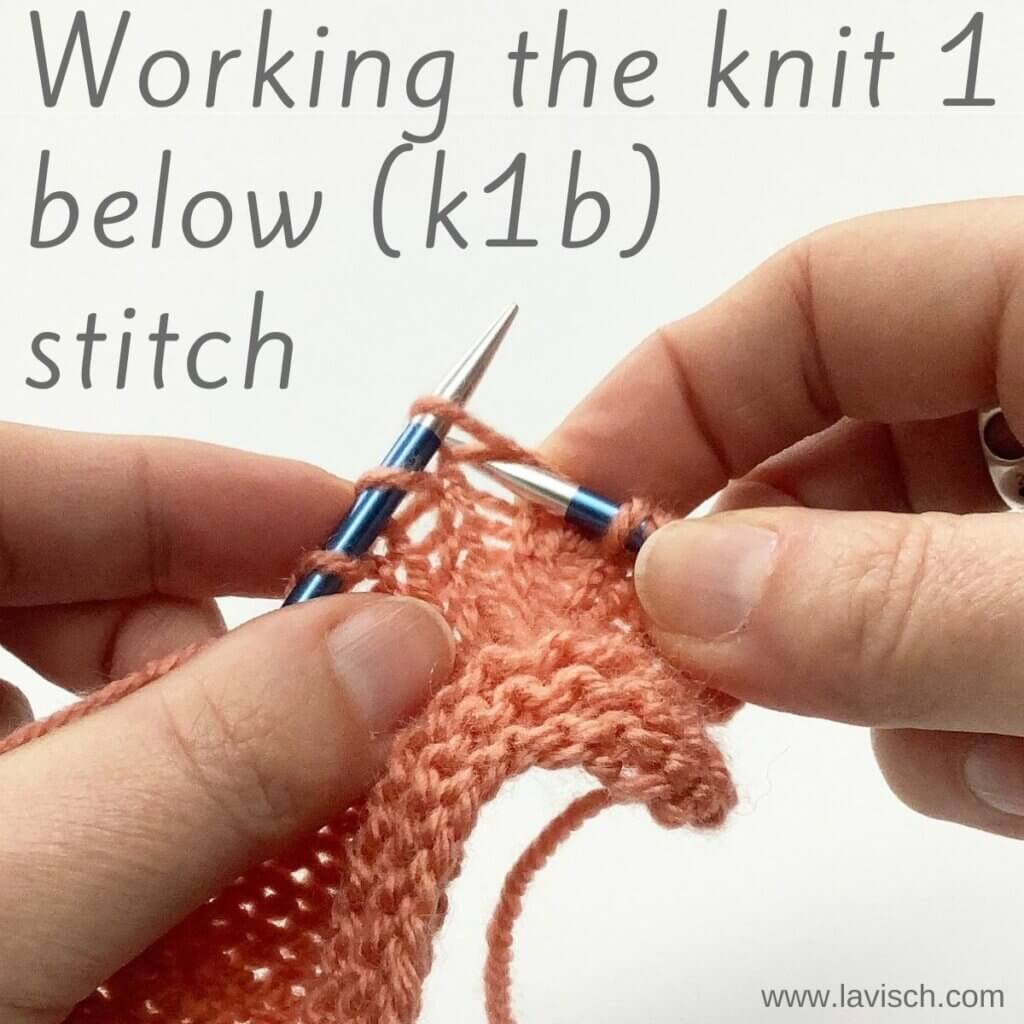
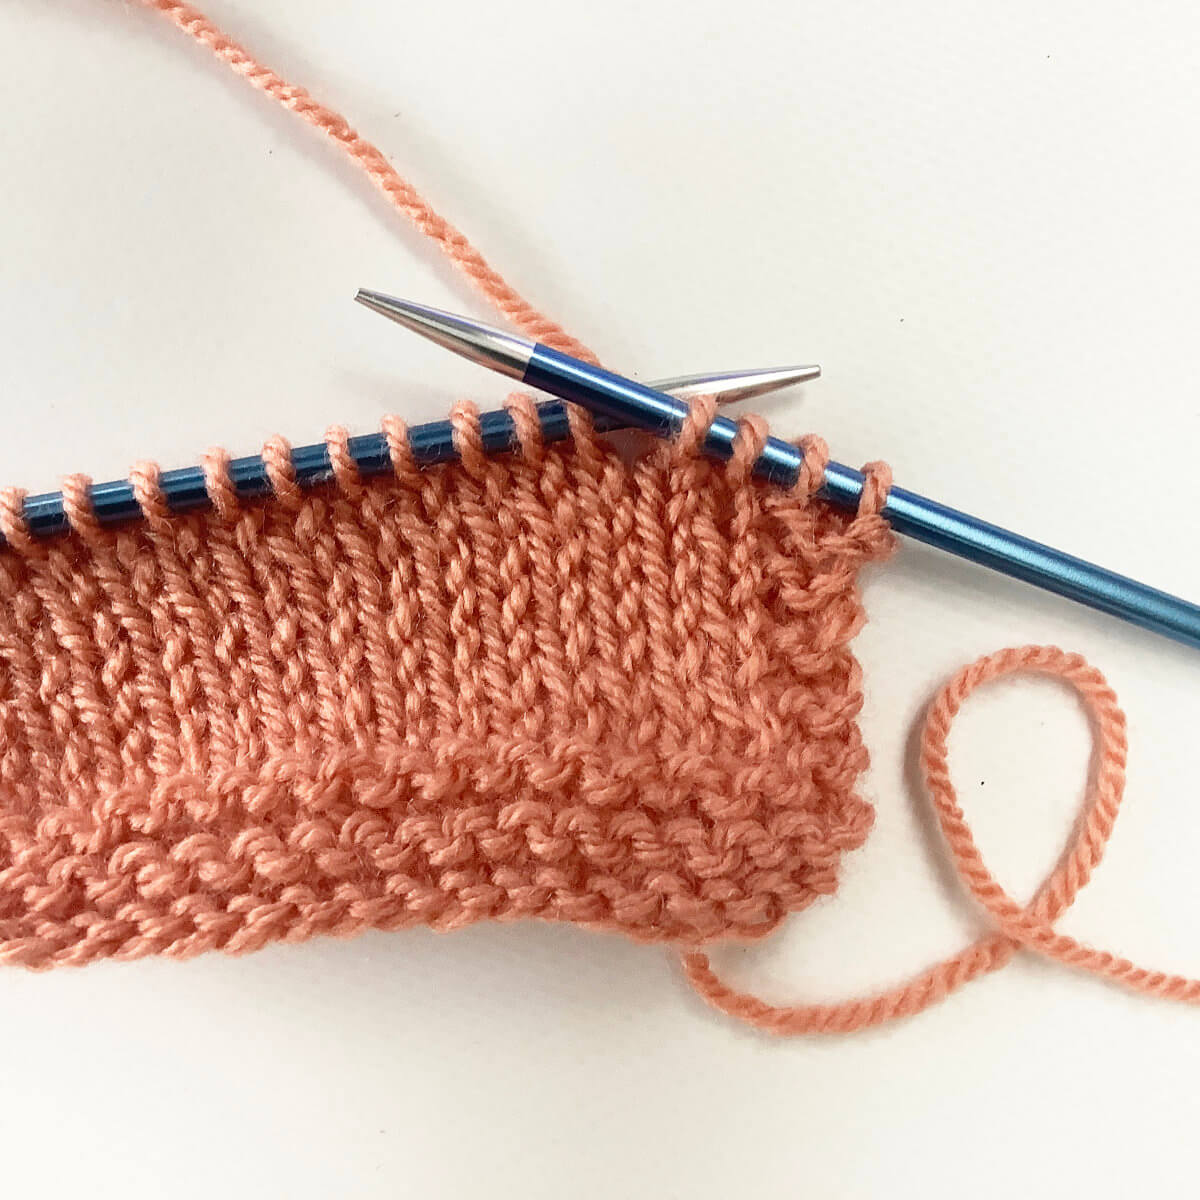
There are cases in which skipping the row on your needle for particular stitches is desired, and one is to knit or purl in the row below that one. In other words: you knit/purl into the stitch below where you normally would, exactly as the name suggests. Think, for example, of Fisherman’s Rib. In a previous tutorial I already showed you how to work the purl 1 below stitch, so now it’s the turn of the knit 1 below! The main challenge in working this stitch is recognizing the stitch to insert your needle in. So that’s what I’ll be showing you in this tutorial on how to work the knit 1 below or k1b stitch.

Materials used

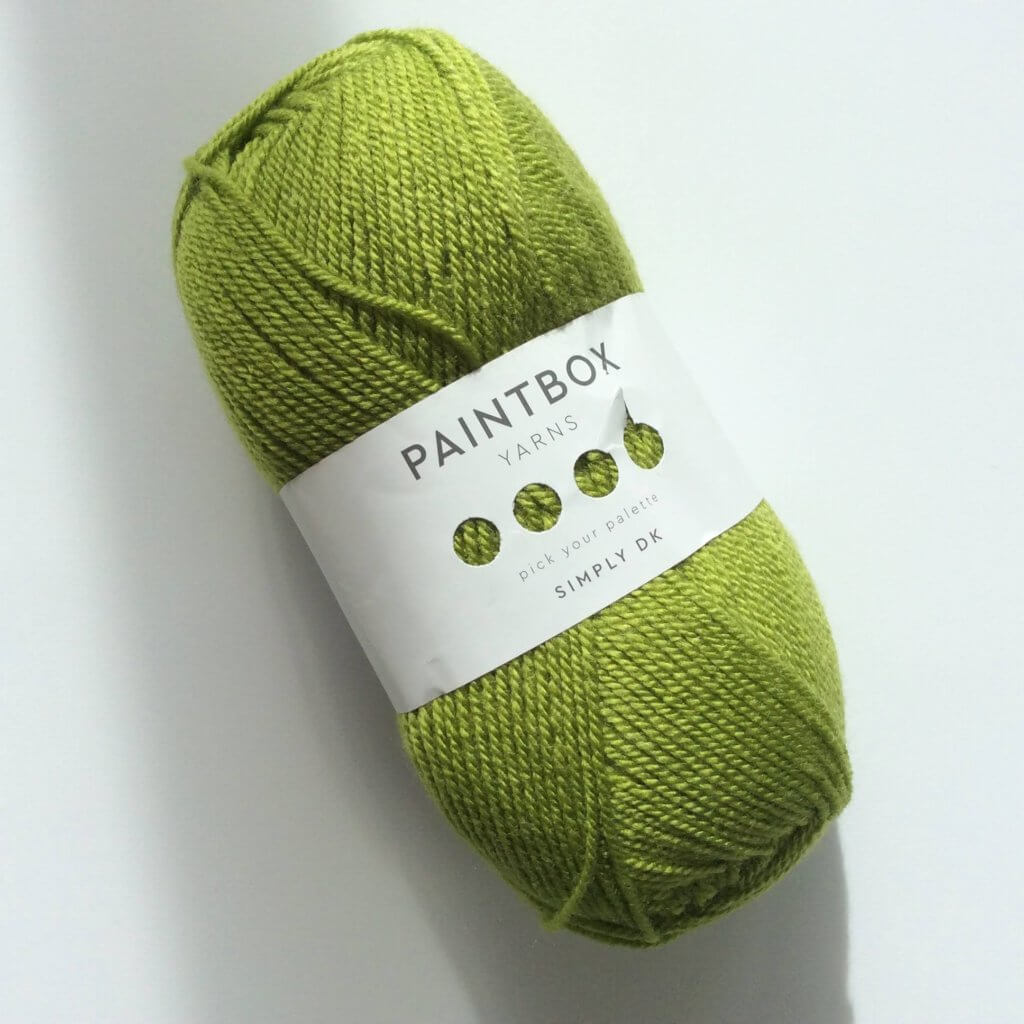
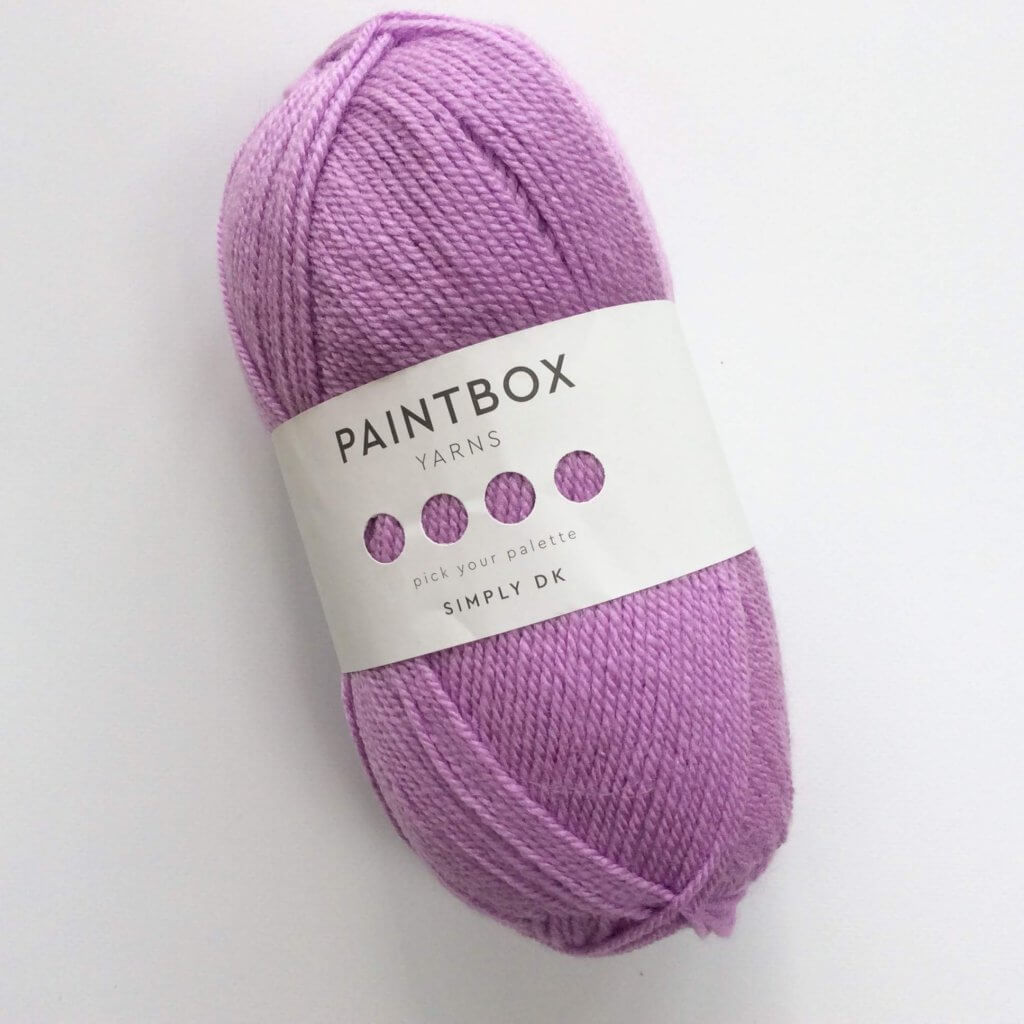
Yarn: * Paintbox Yarns Simply DK, a good value, good quality 100% acrylic yarn, here in the colors 155 Vintage Pink and 125 Spearmint Green.

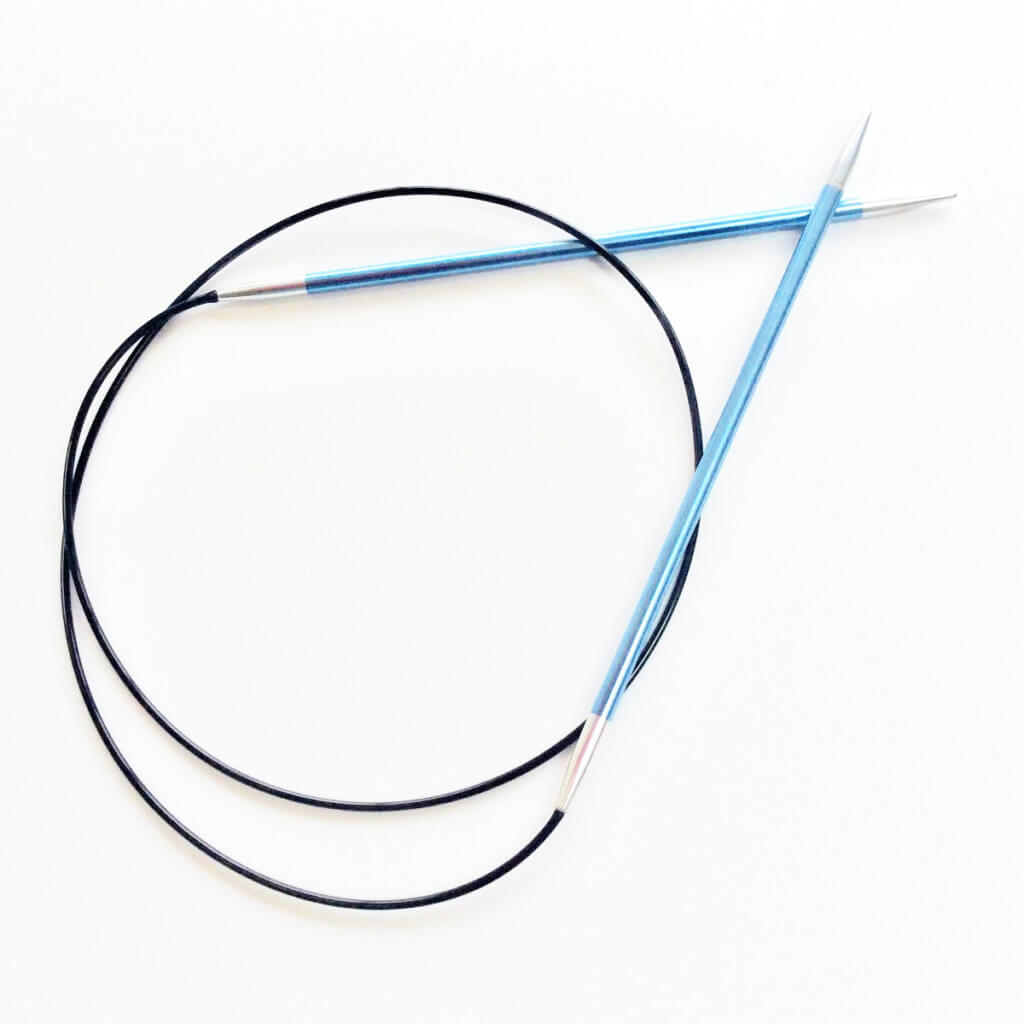
Needles: * KnitPro Zing Fixed Circular Needles. In this tutorial, I used the 4 mm (US 6) size with a cable length of 80 cm (32 inches).

Working a knit 1 below or k1b step by step

In patterns, you may encounter the following description of this stitch:
Knit 1 below (k1b): Knit into the stitch 1 row below the one on the needle by inserting the needle from front to back. Knit this stitch, then pull the worked stitch and the stitch above off the needle together.
But how to actually do this? Read on!

  1. First, work your way across the row until you’ve reached the point where you want to make the stitch

    In this case I’m making the k1b4 stitches in from the right edge.knit 1 below - step 1

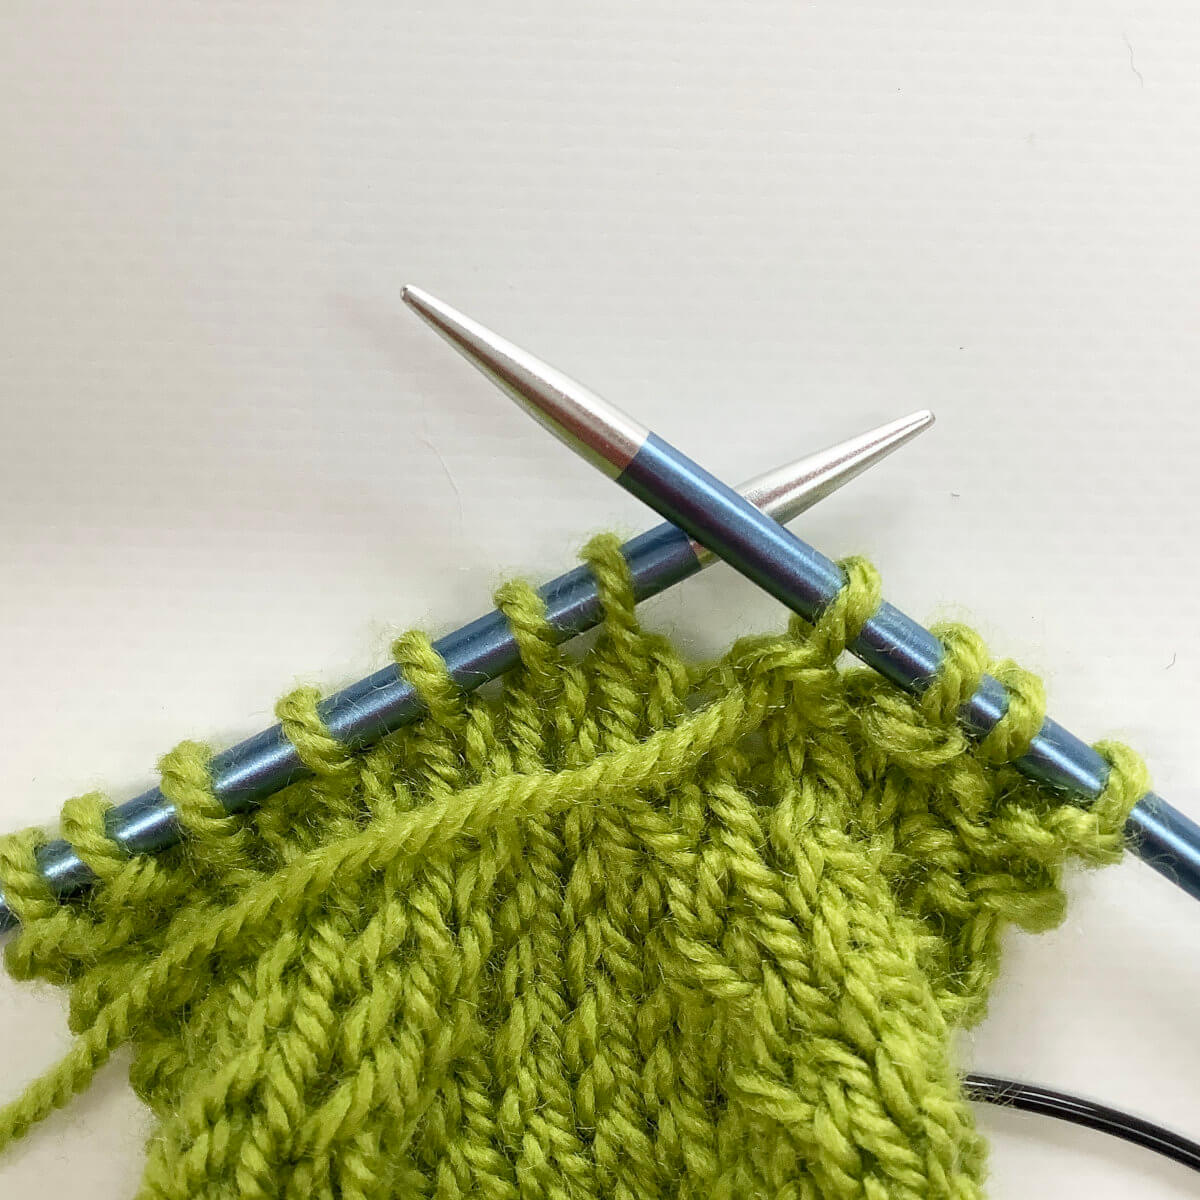
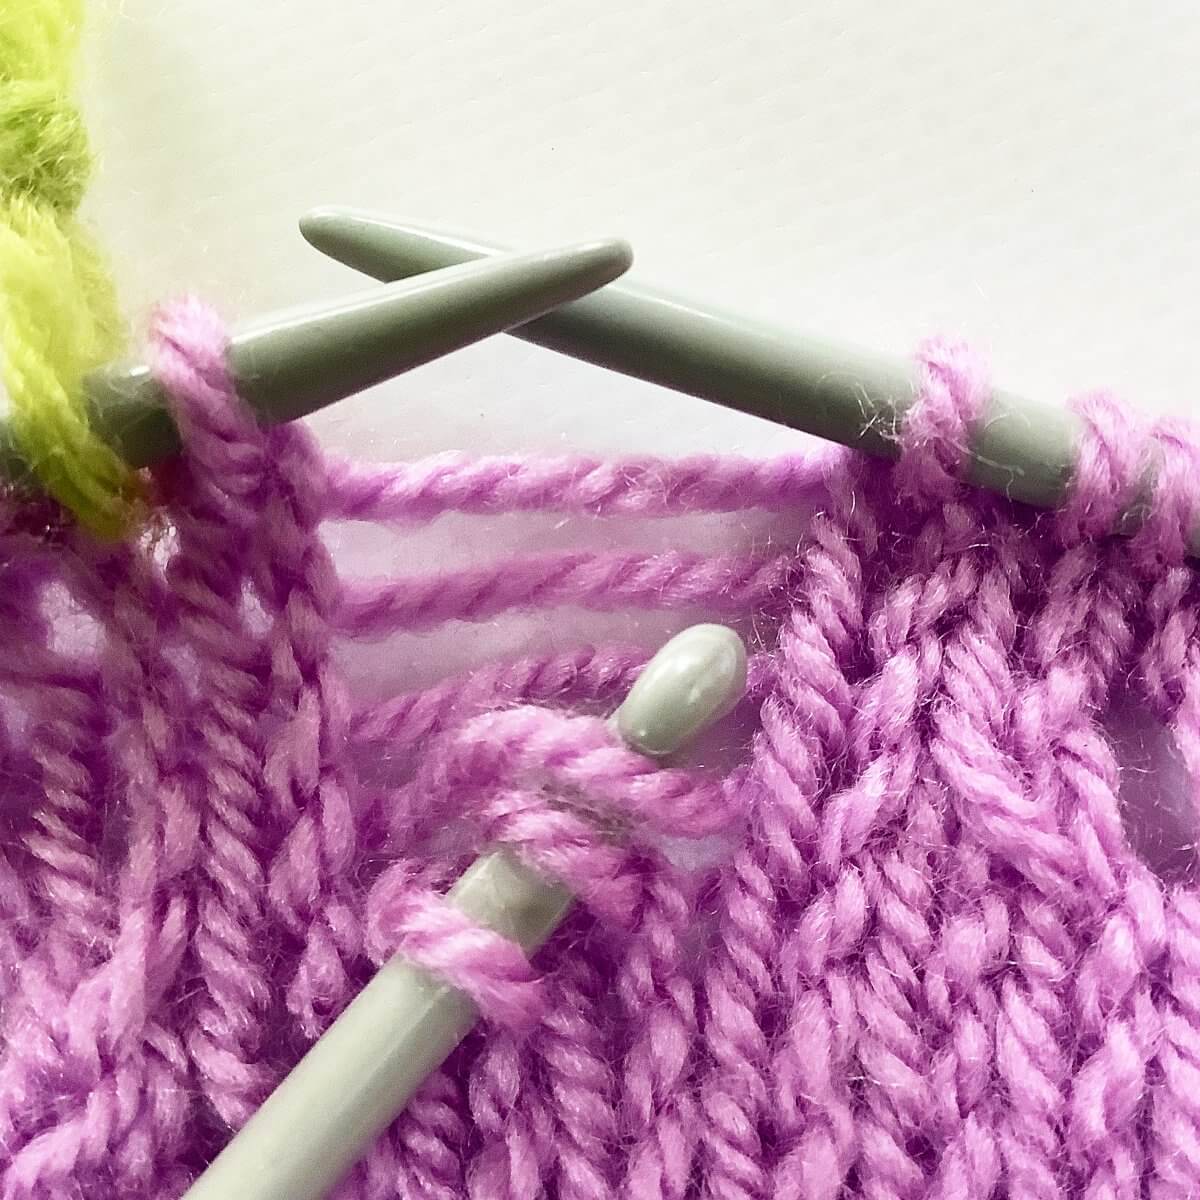
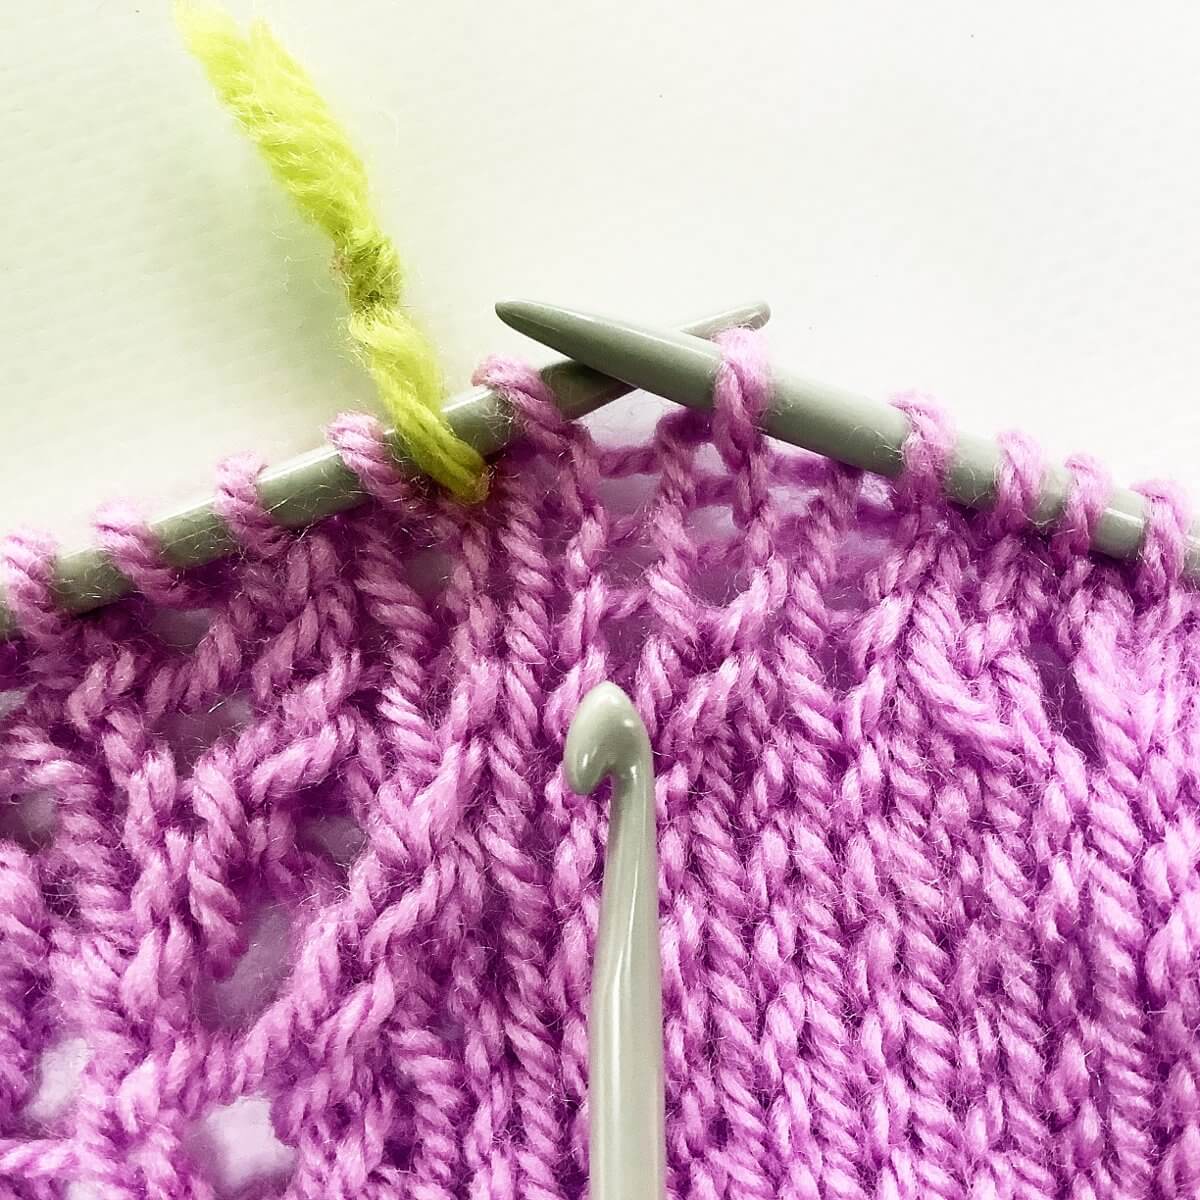
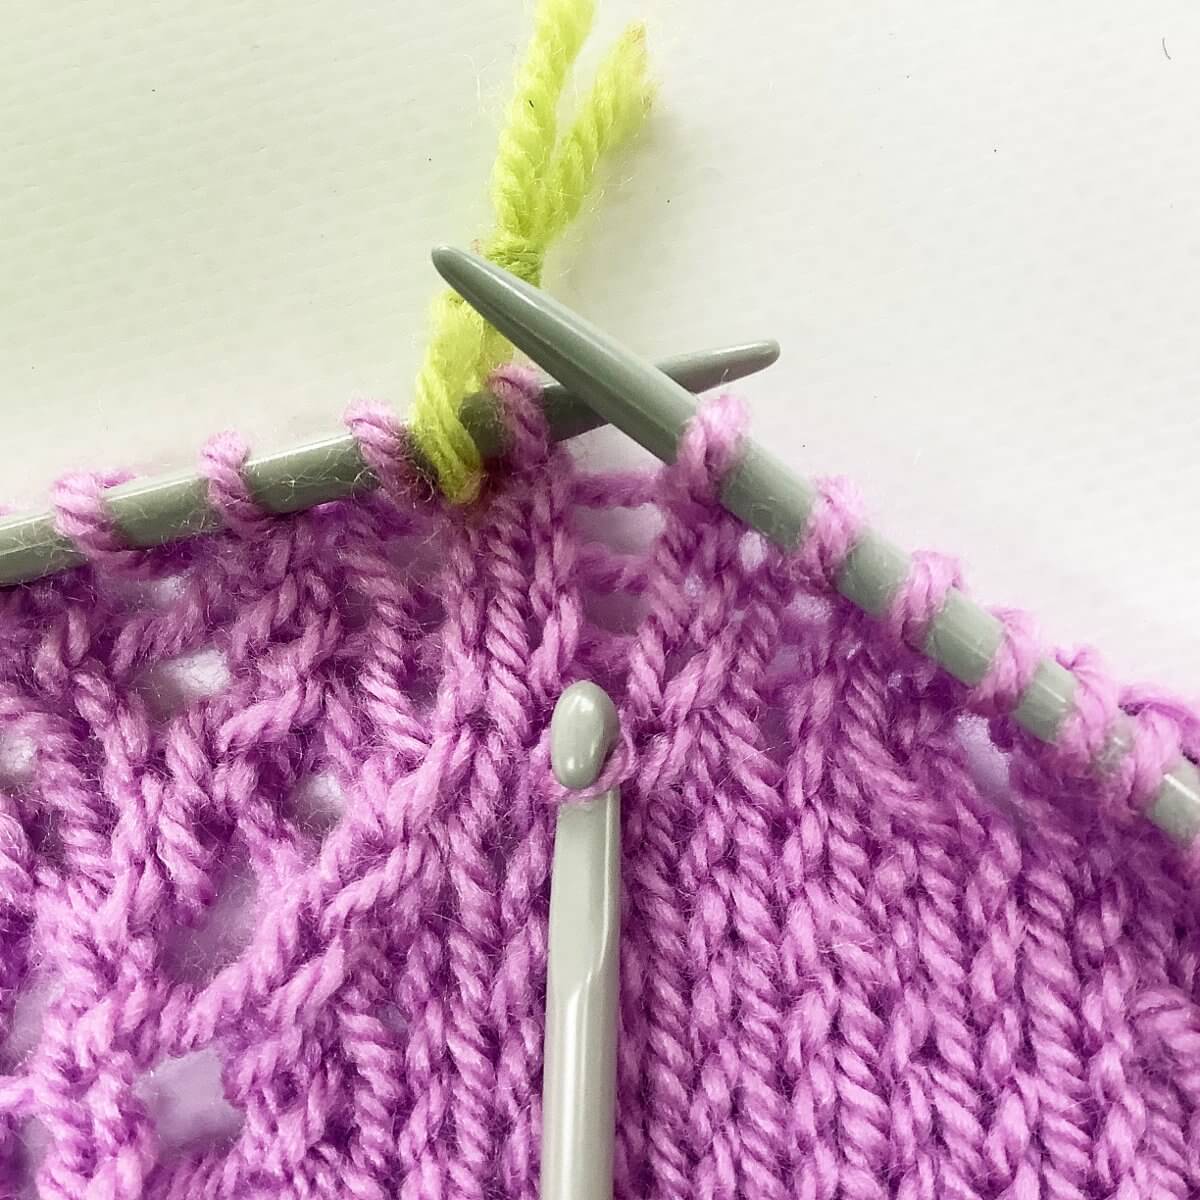
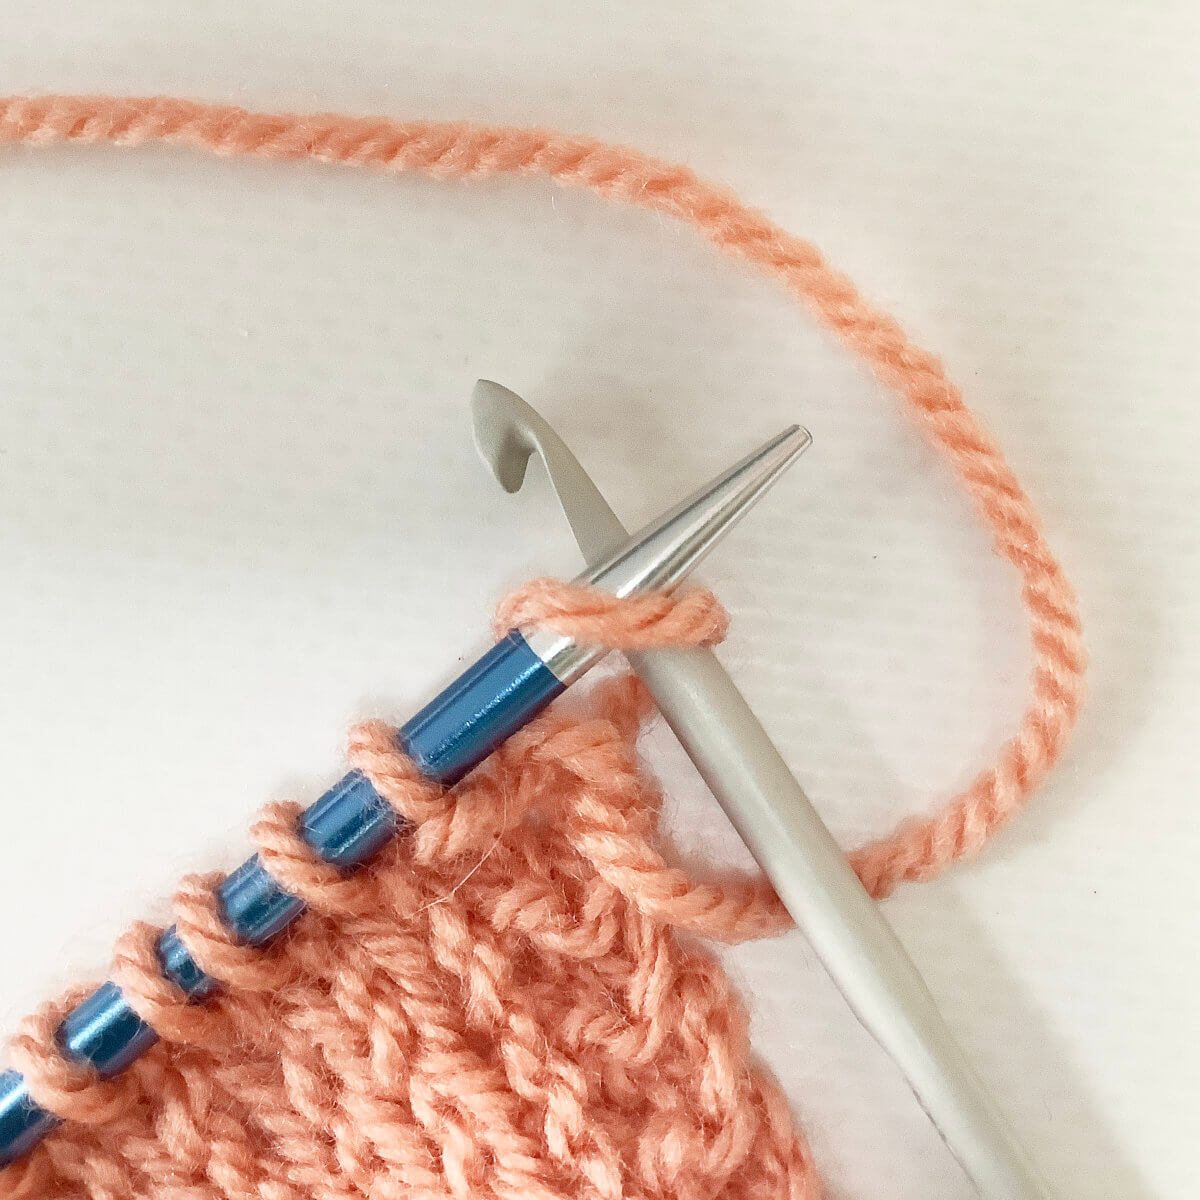
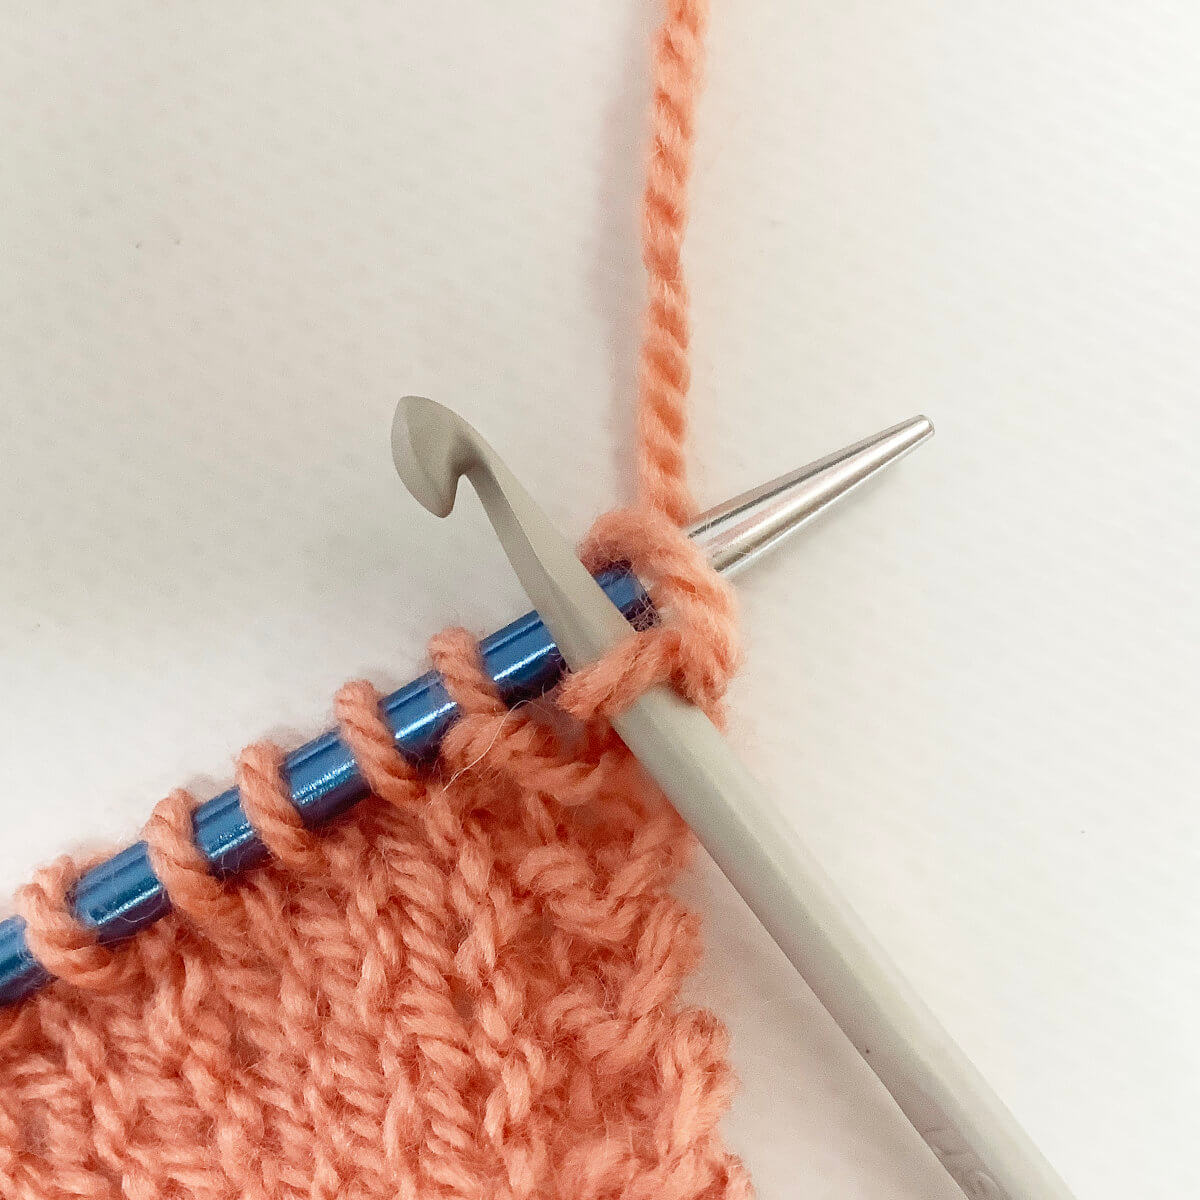
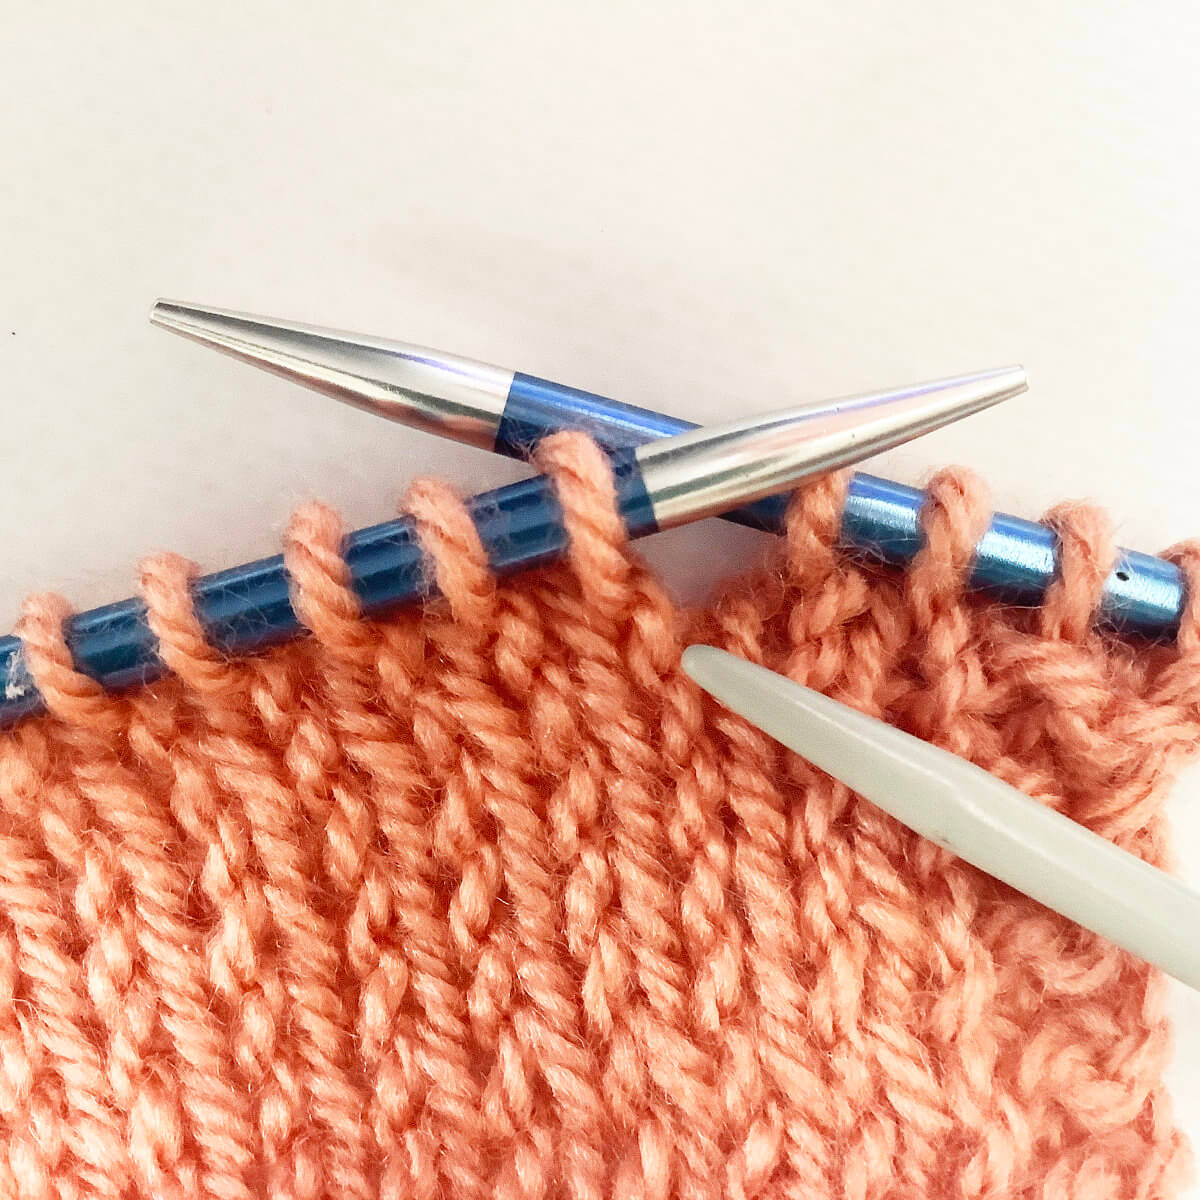
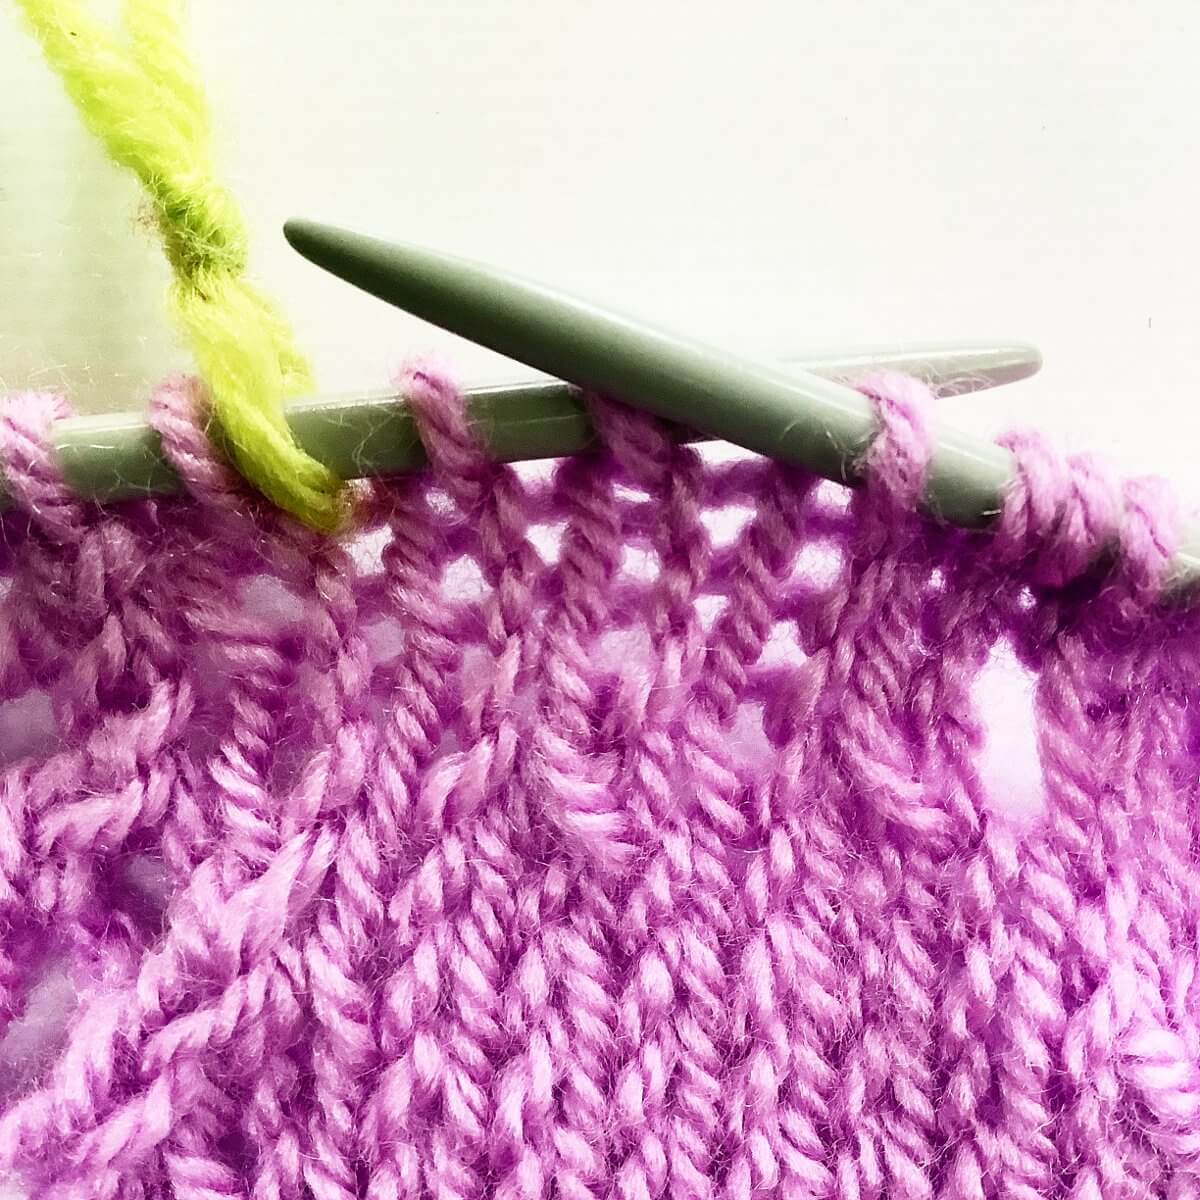
  2. Identify the correct loop to insert your needle in.

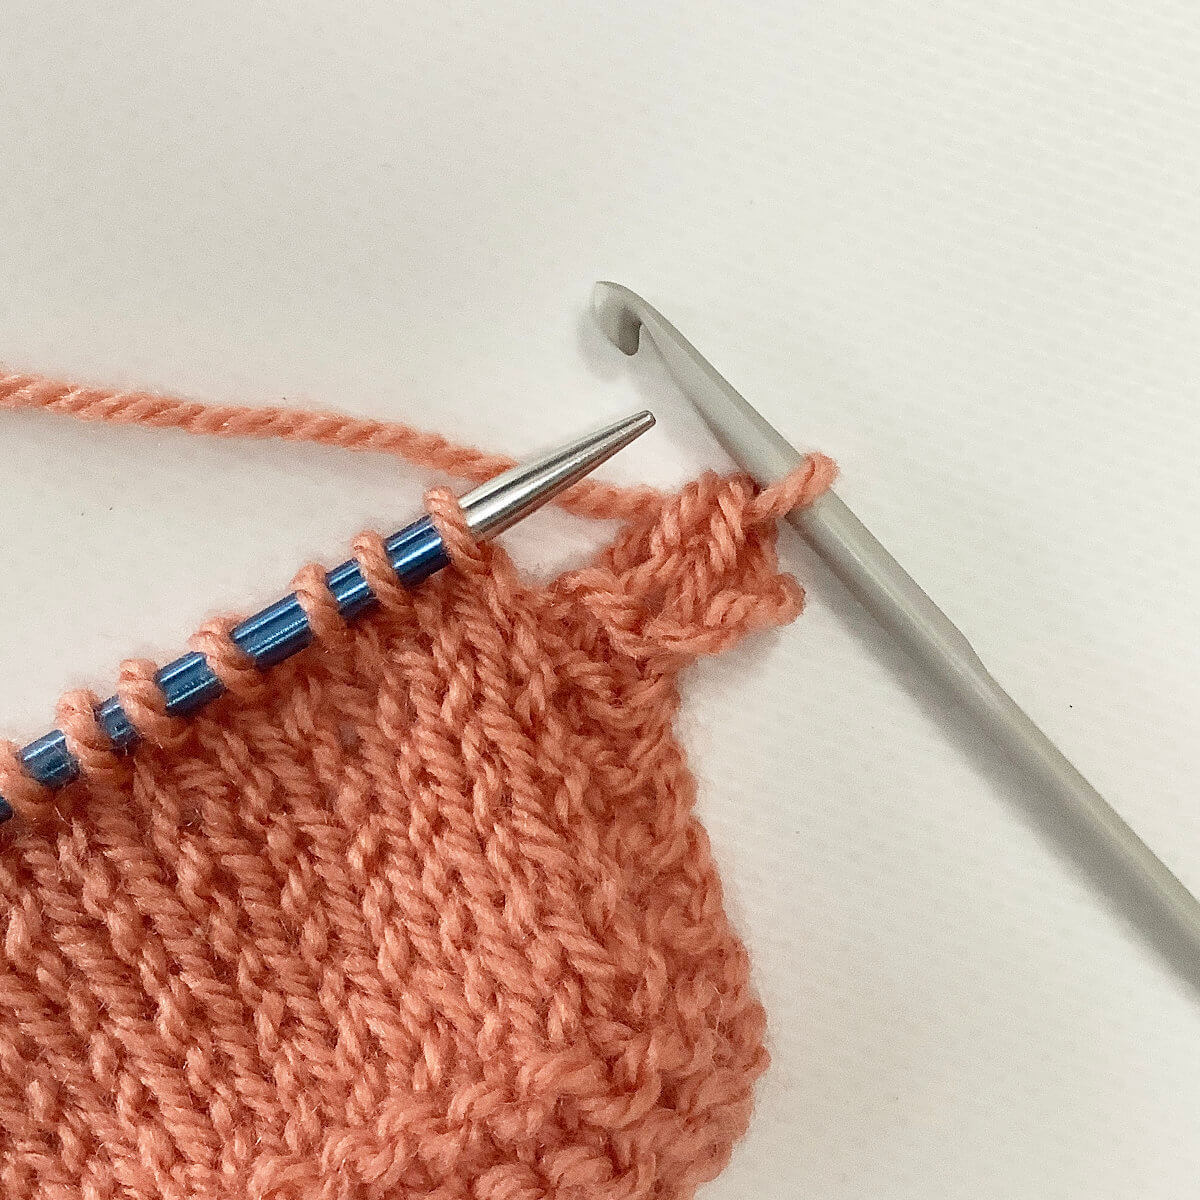
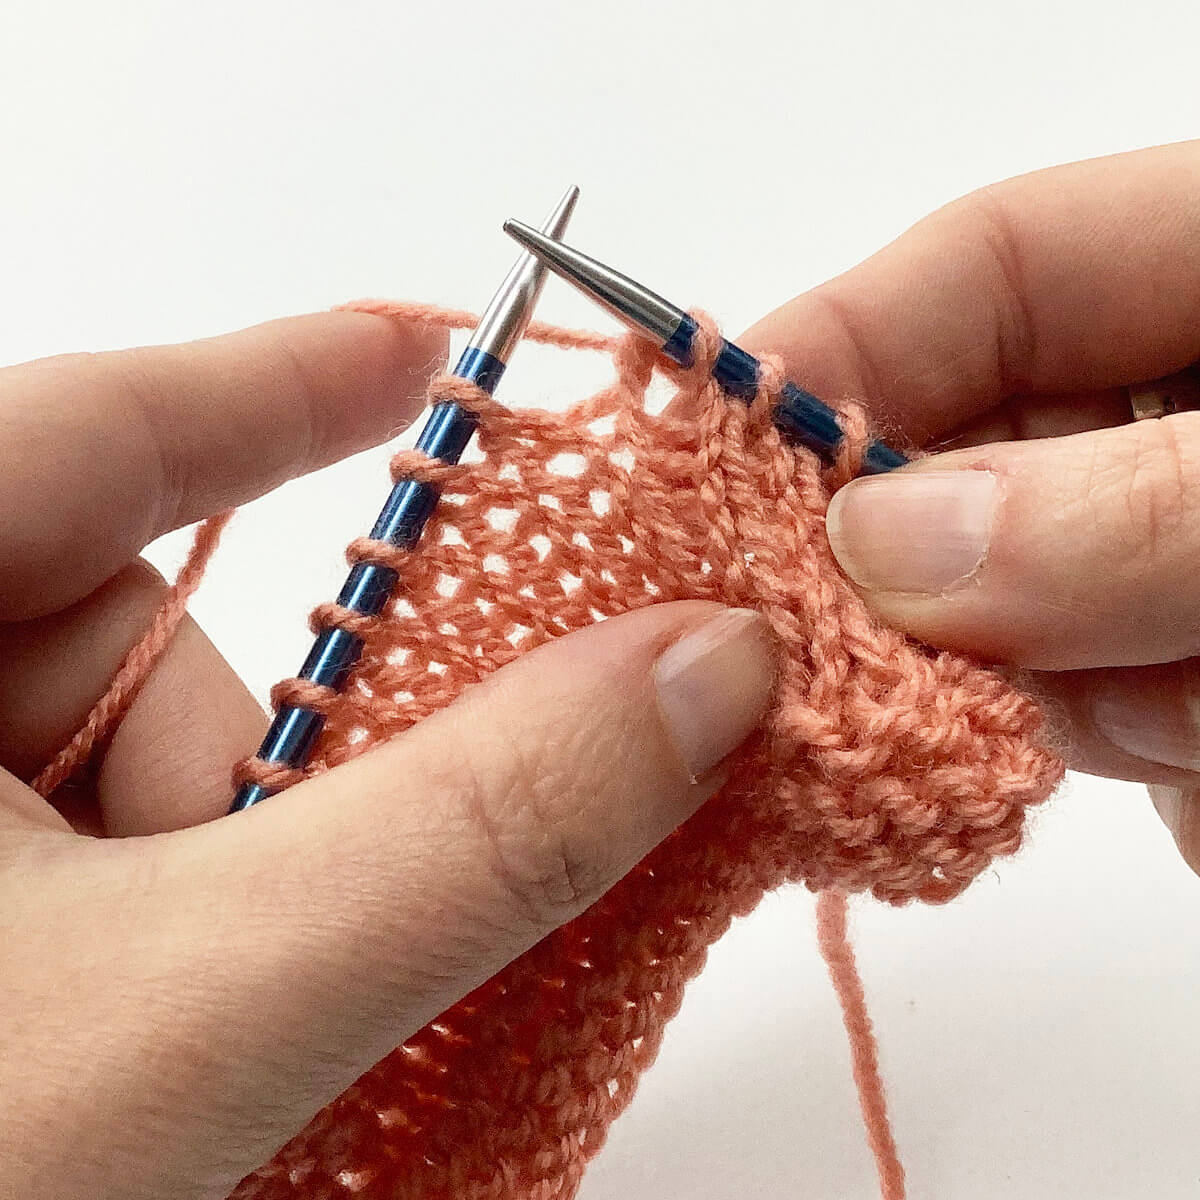
    Normally, you’d insert the right-hand needle in the loop that’s on the left-hand needle. If we go down a row, you see the stitch we want (pointed out by the extra needle), hugging the loop that’s on the needle.knit 1 below - step 2

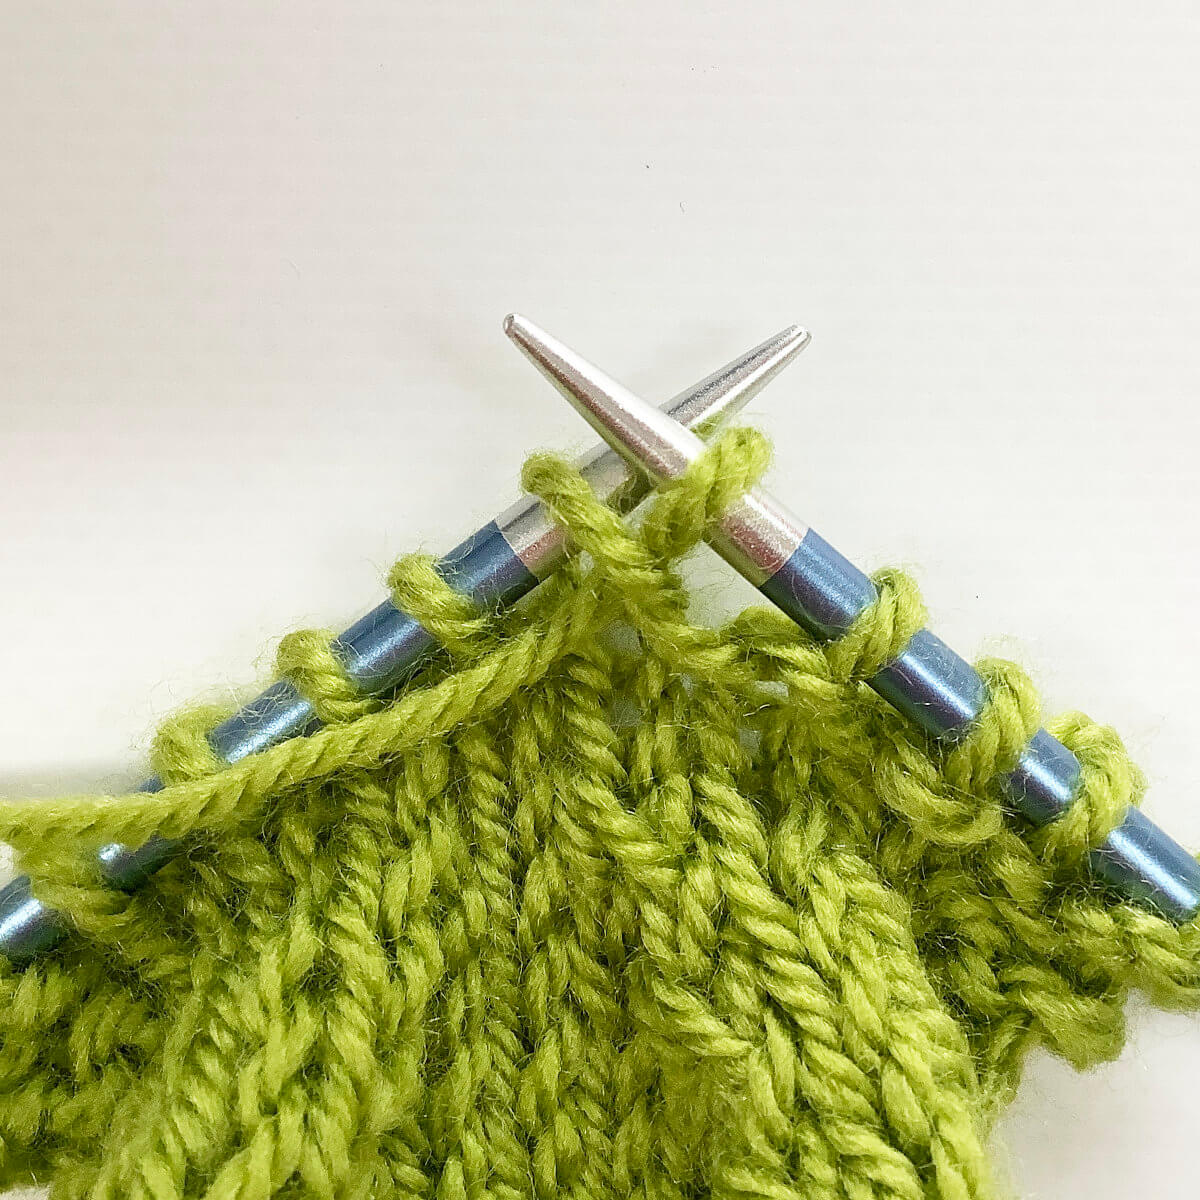
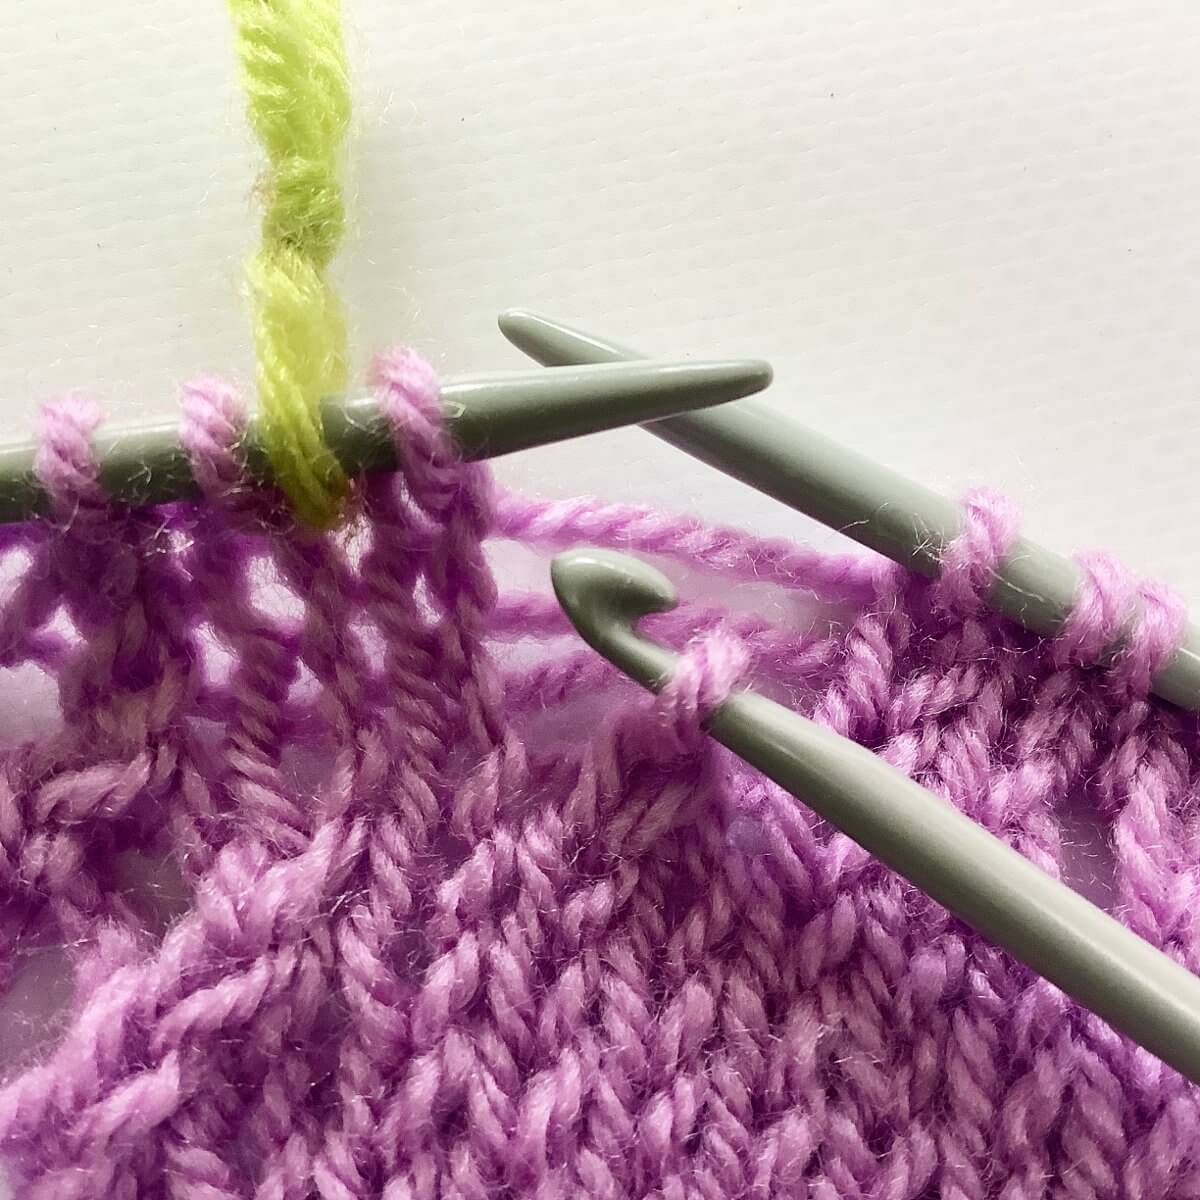
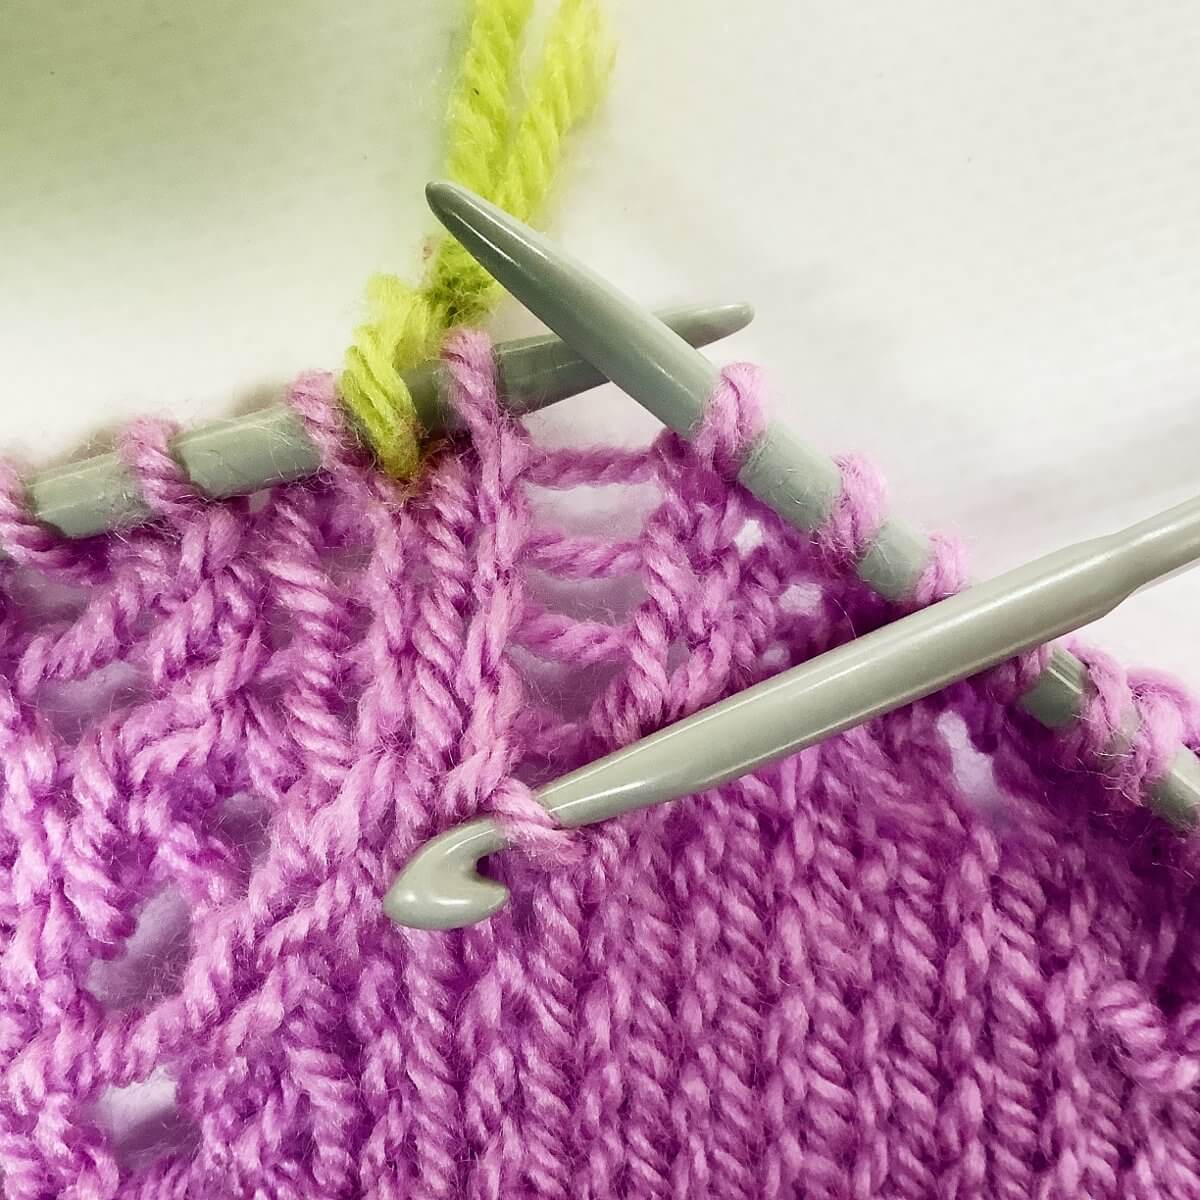
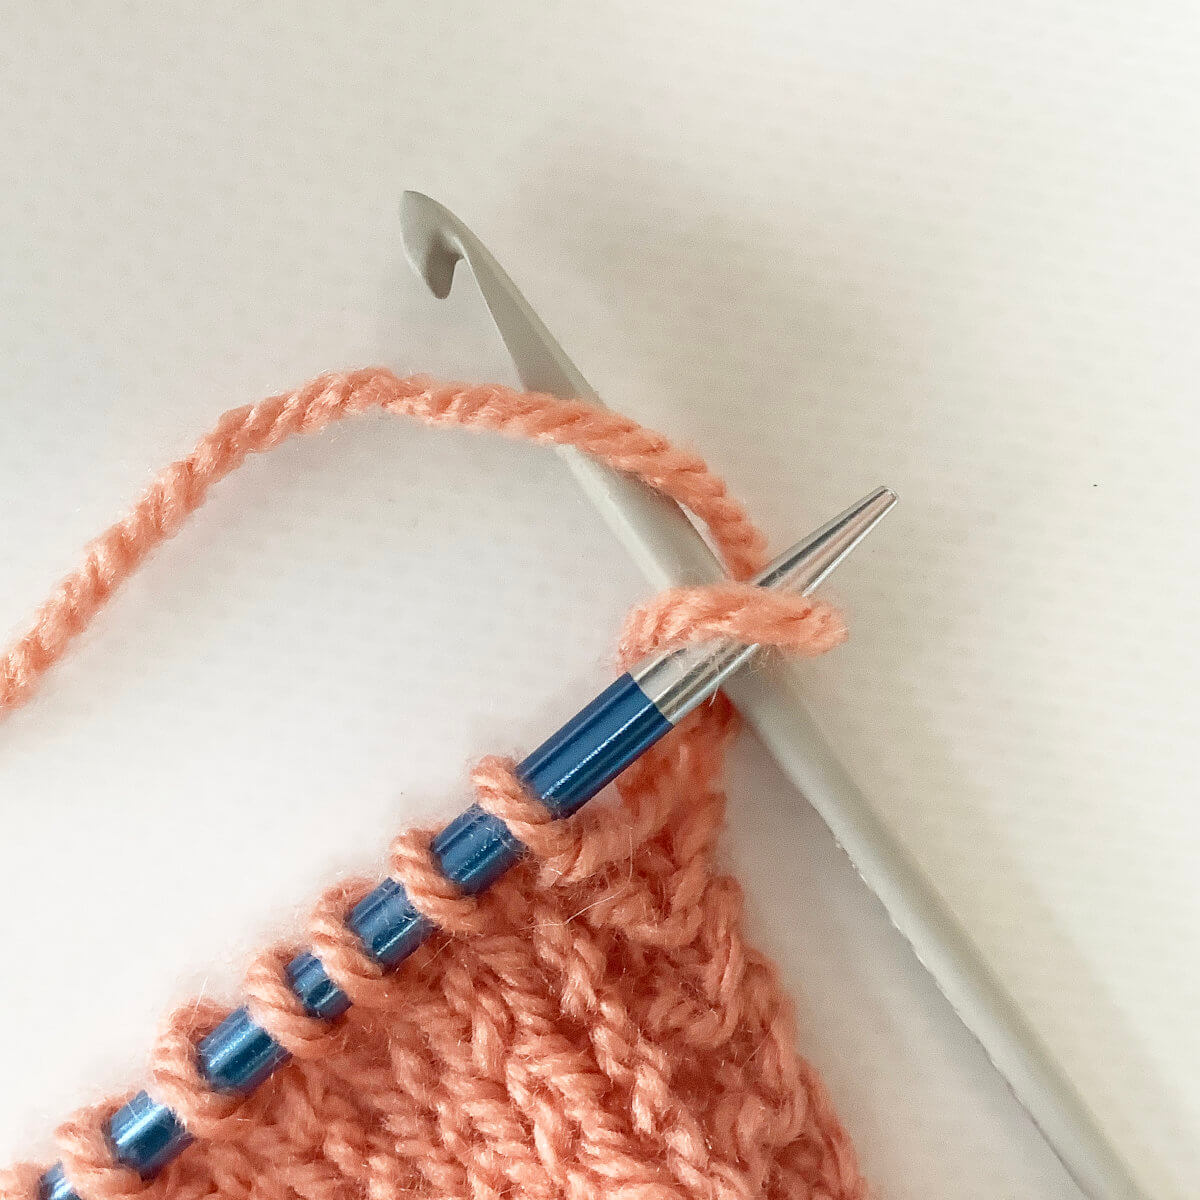
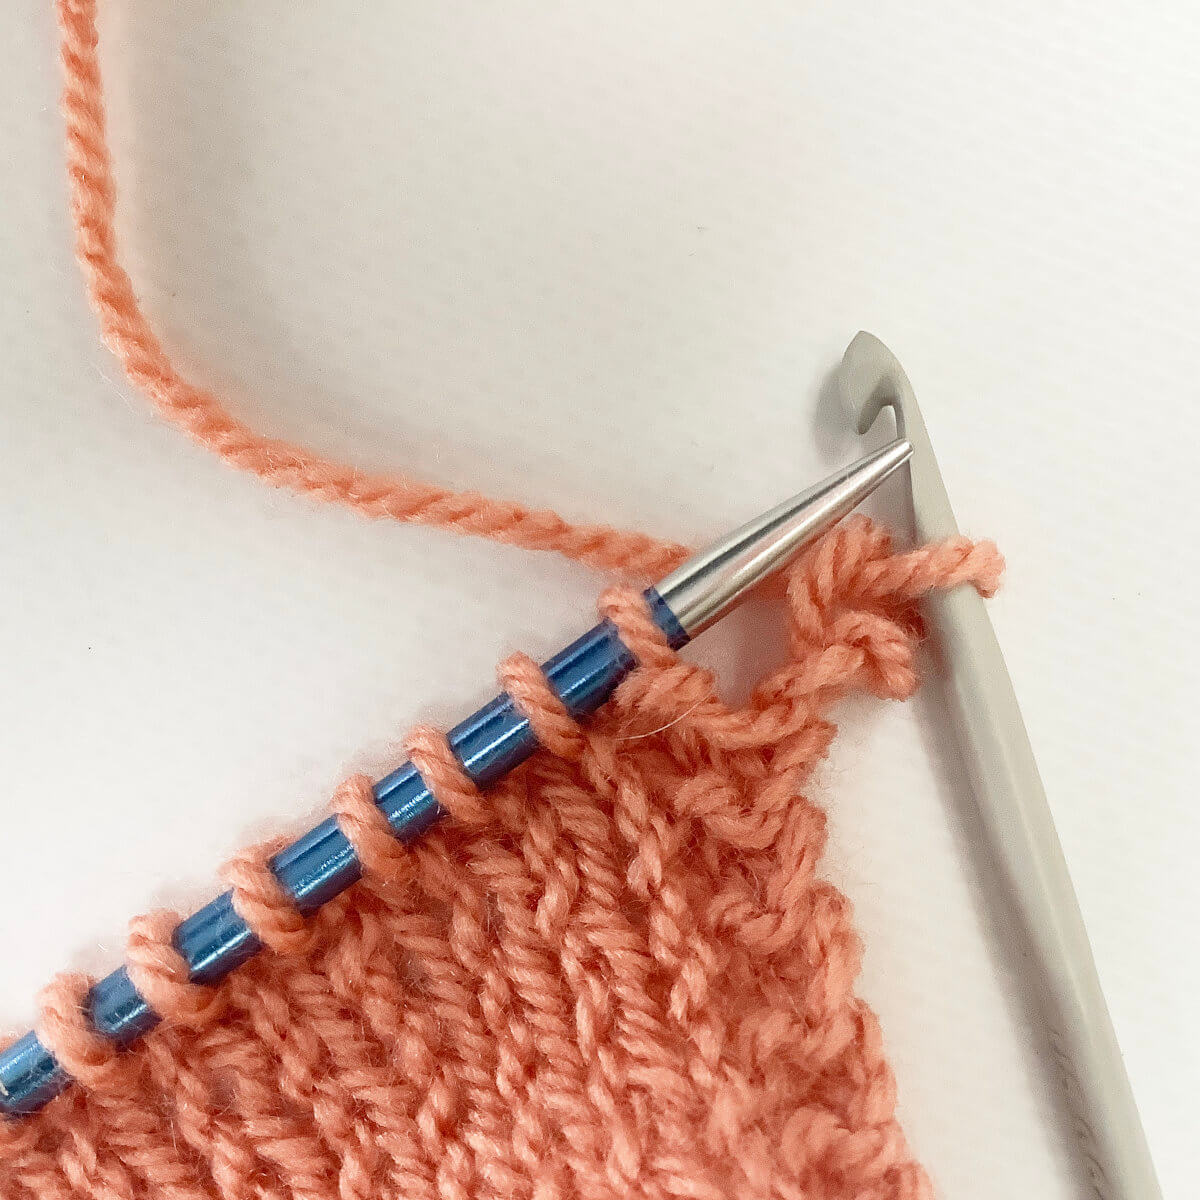
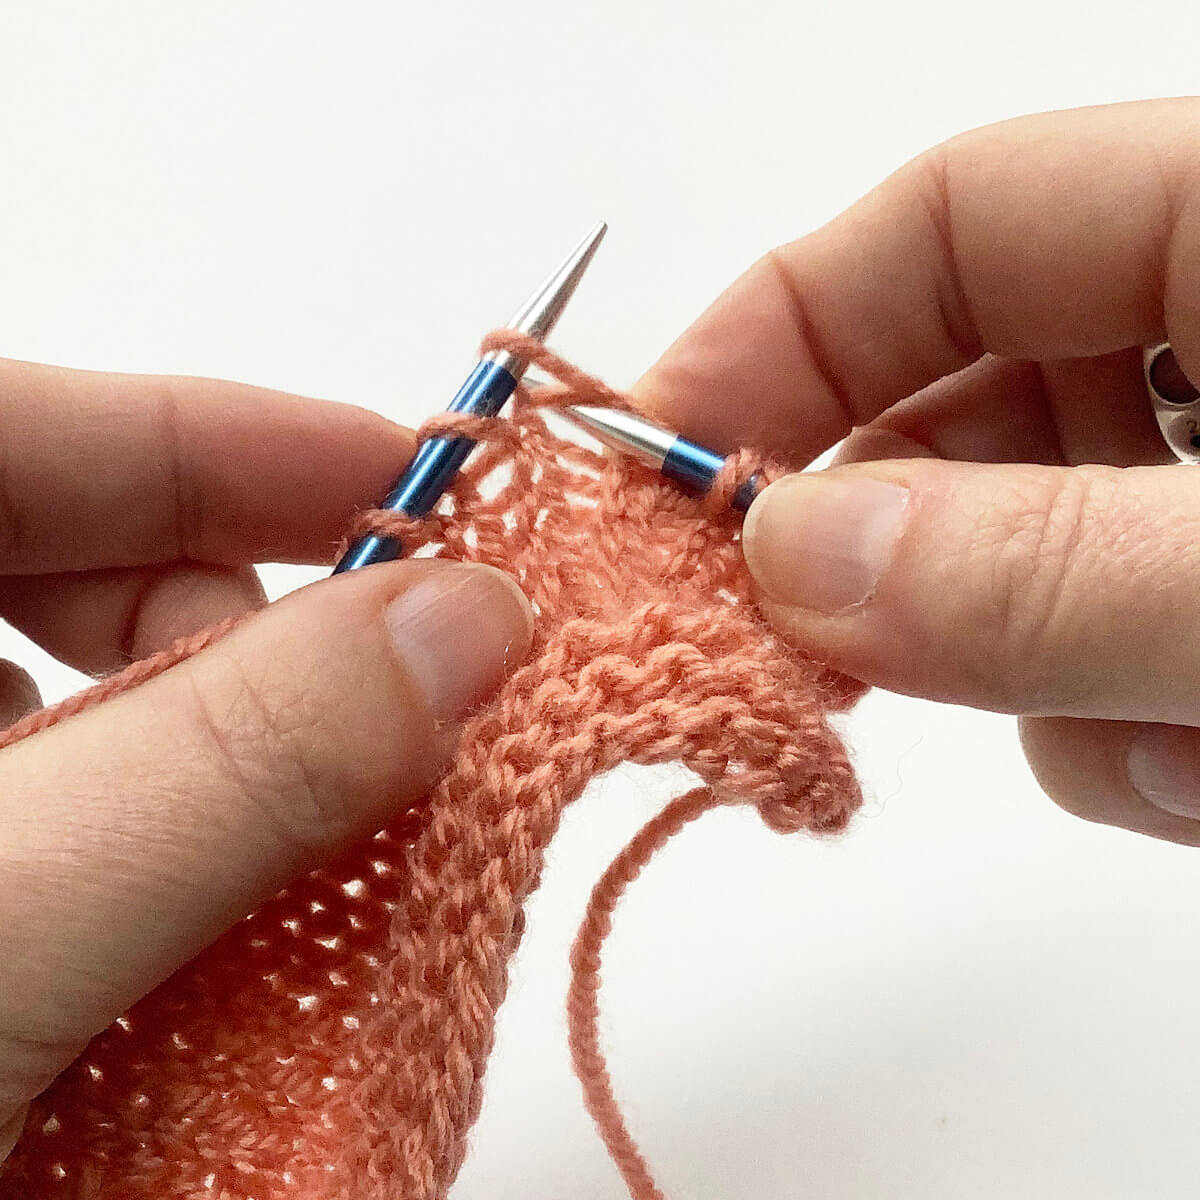
  3. Now, insert the right-hand needle knit wise in the stitch we’ve identified.

    You can see it more easily if you pull down the fabric a bit with your fingers.knit 1 below - step 3

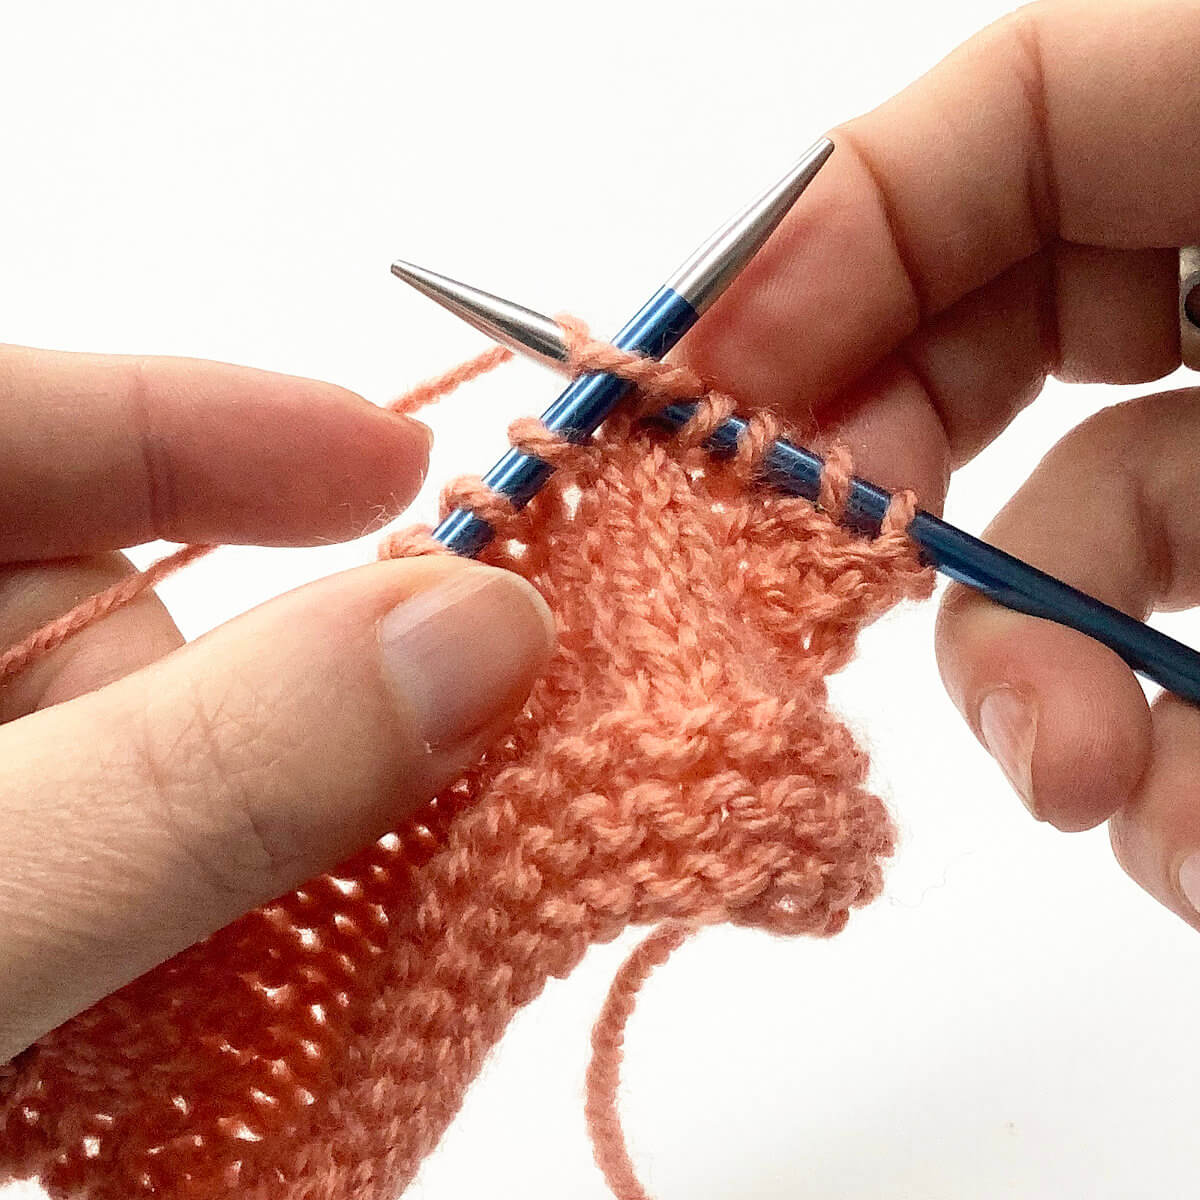
  4. Now wrap your working yarn around the needle

    knit 1 below - step 4

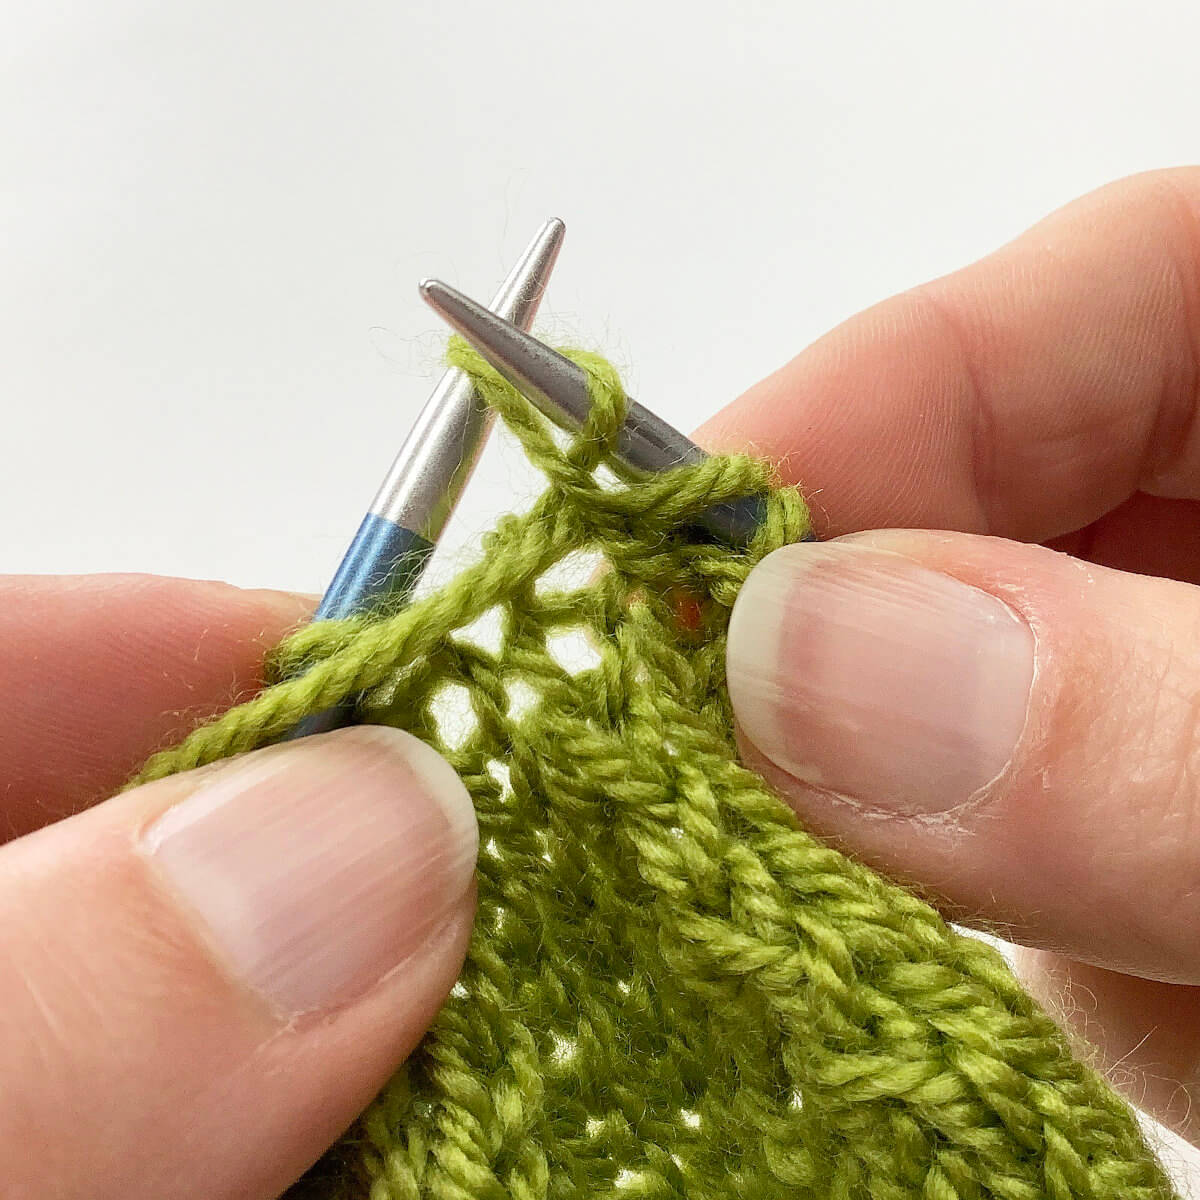
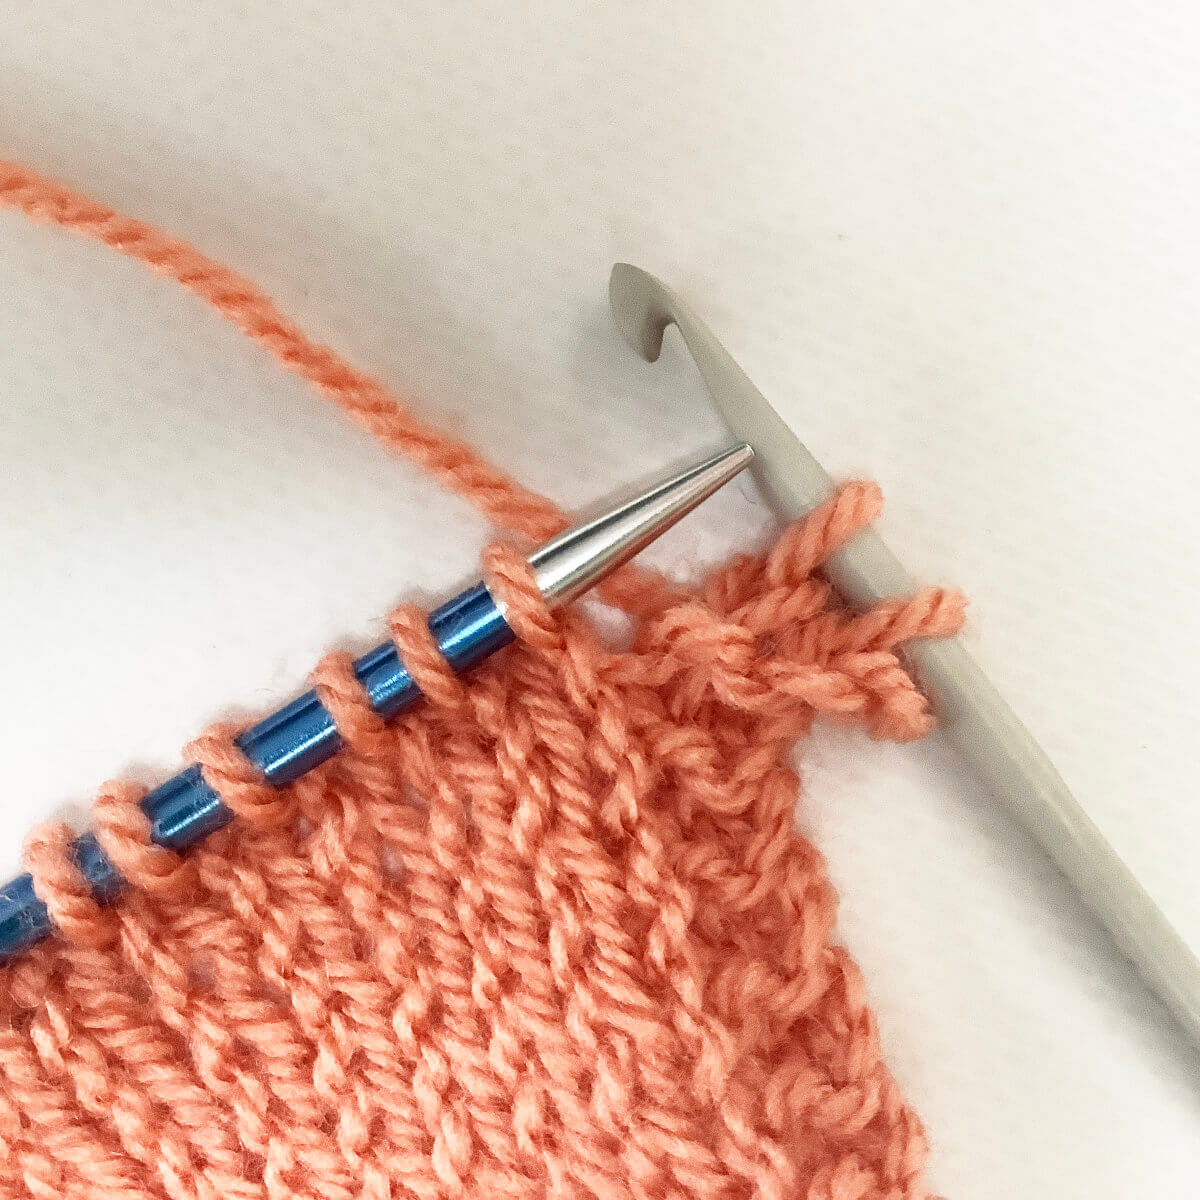
  5. …. and pull it through the stitch.

    See that you’re actually pulling it through 2 stitches at once? That is, the one on the needle and the one directly below it.knit 1 below - step 5

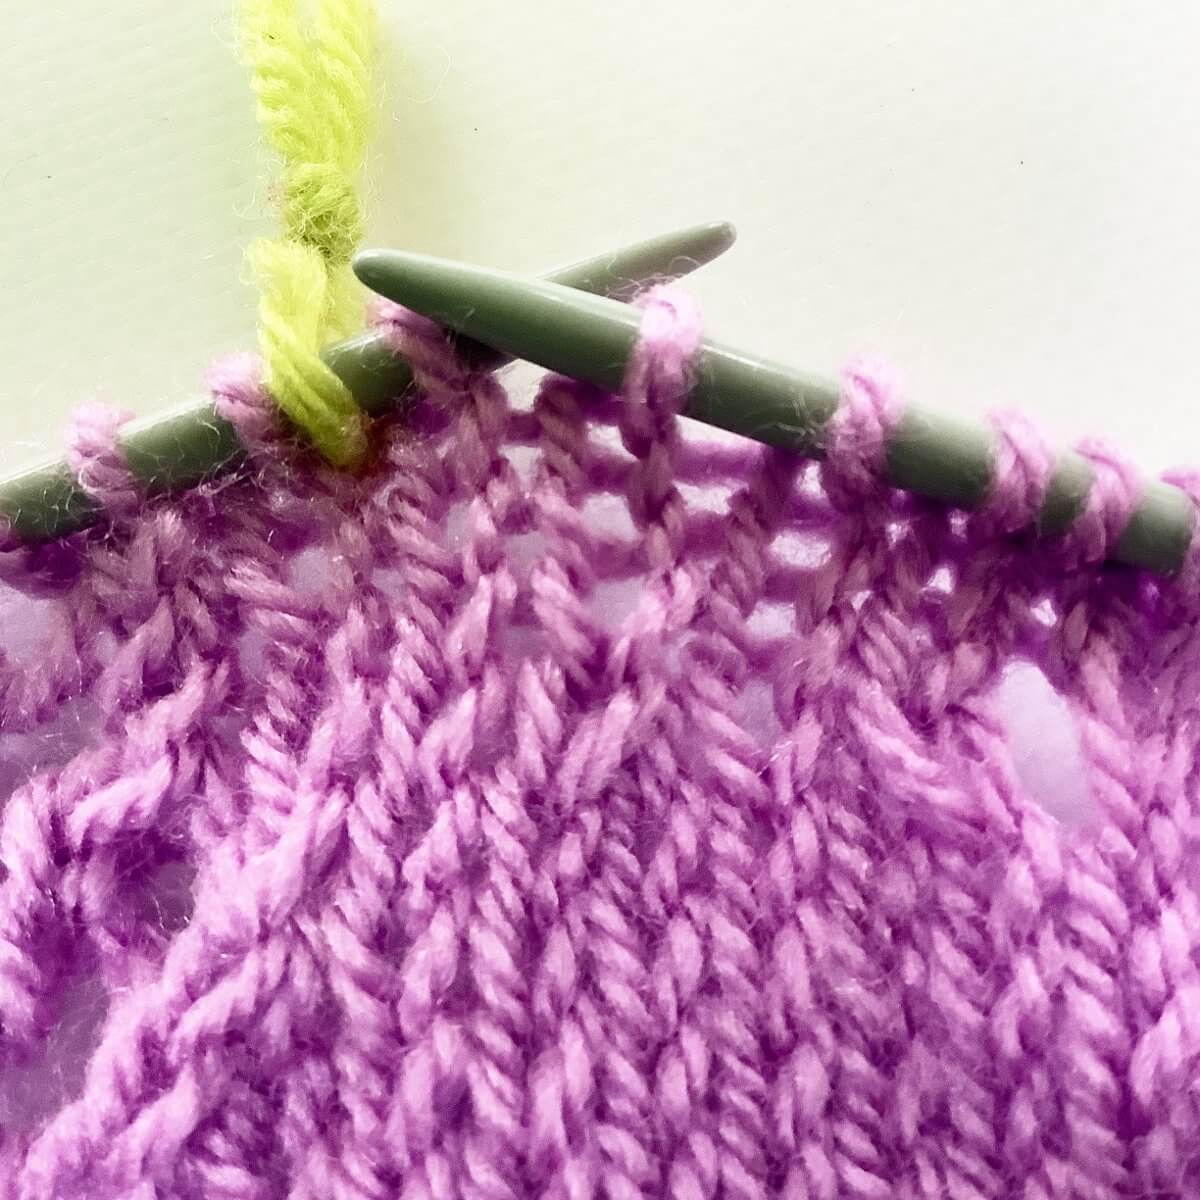
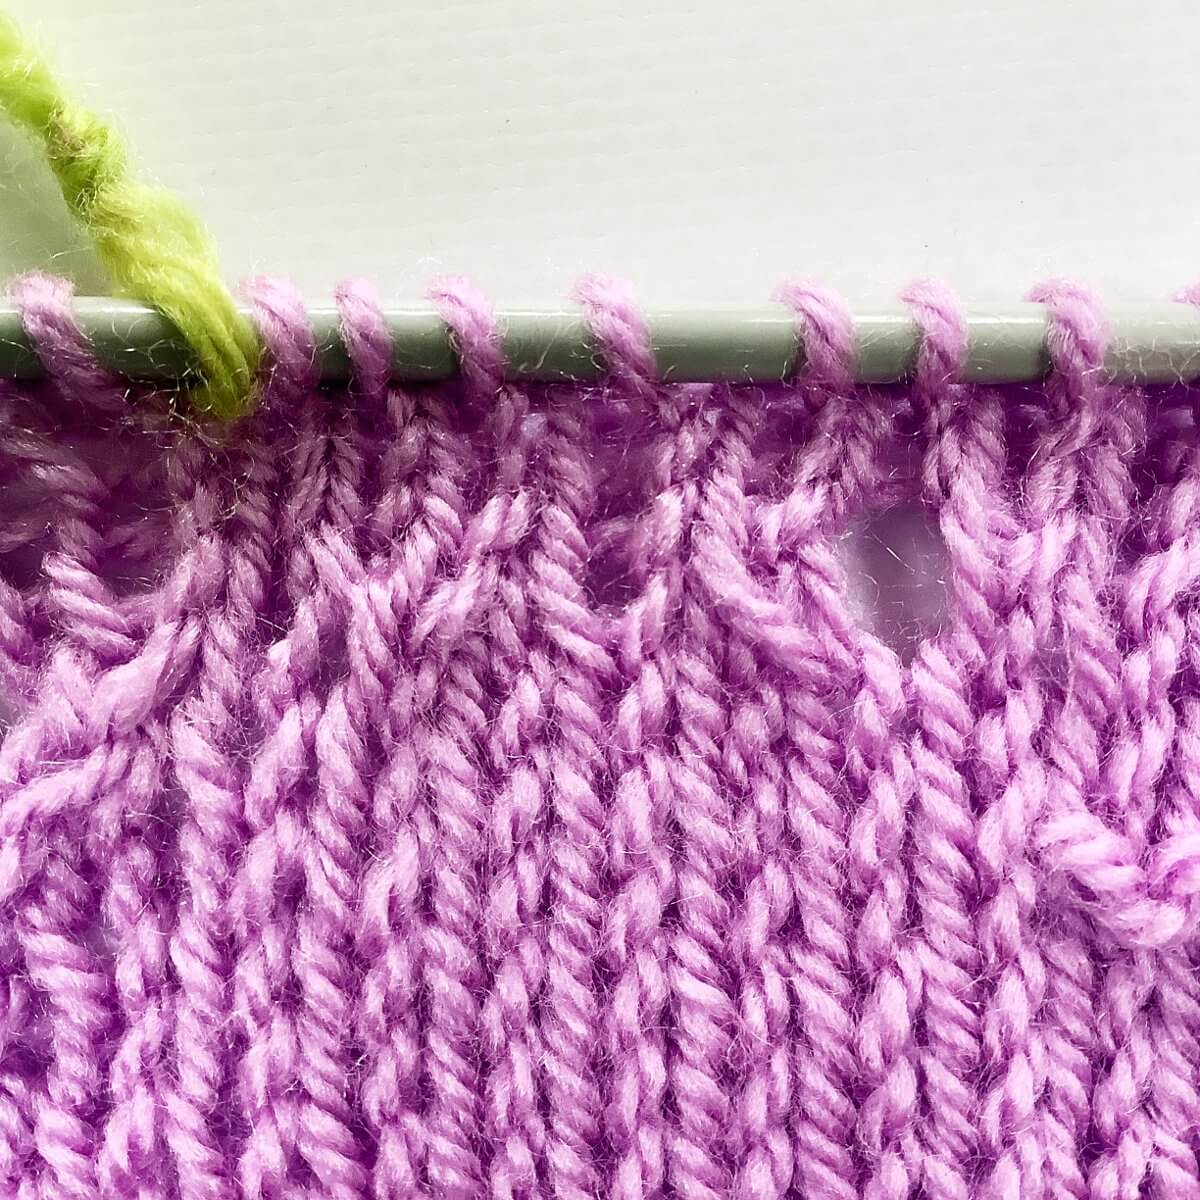
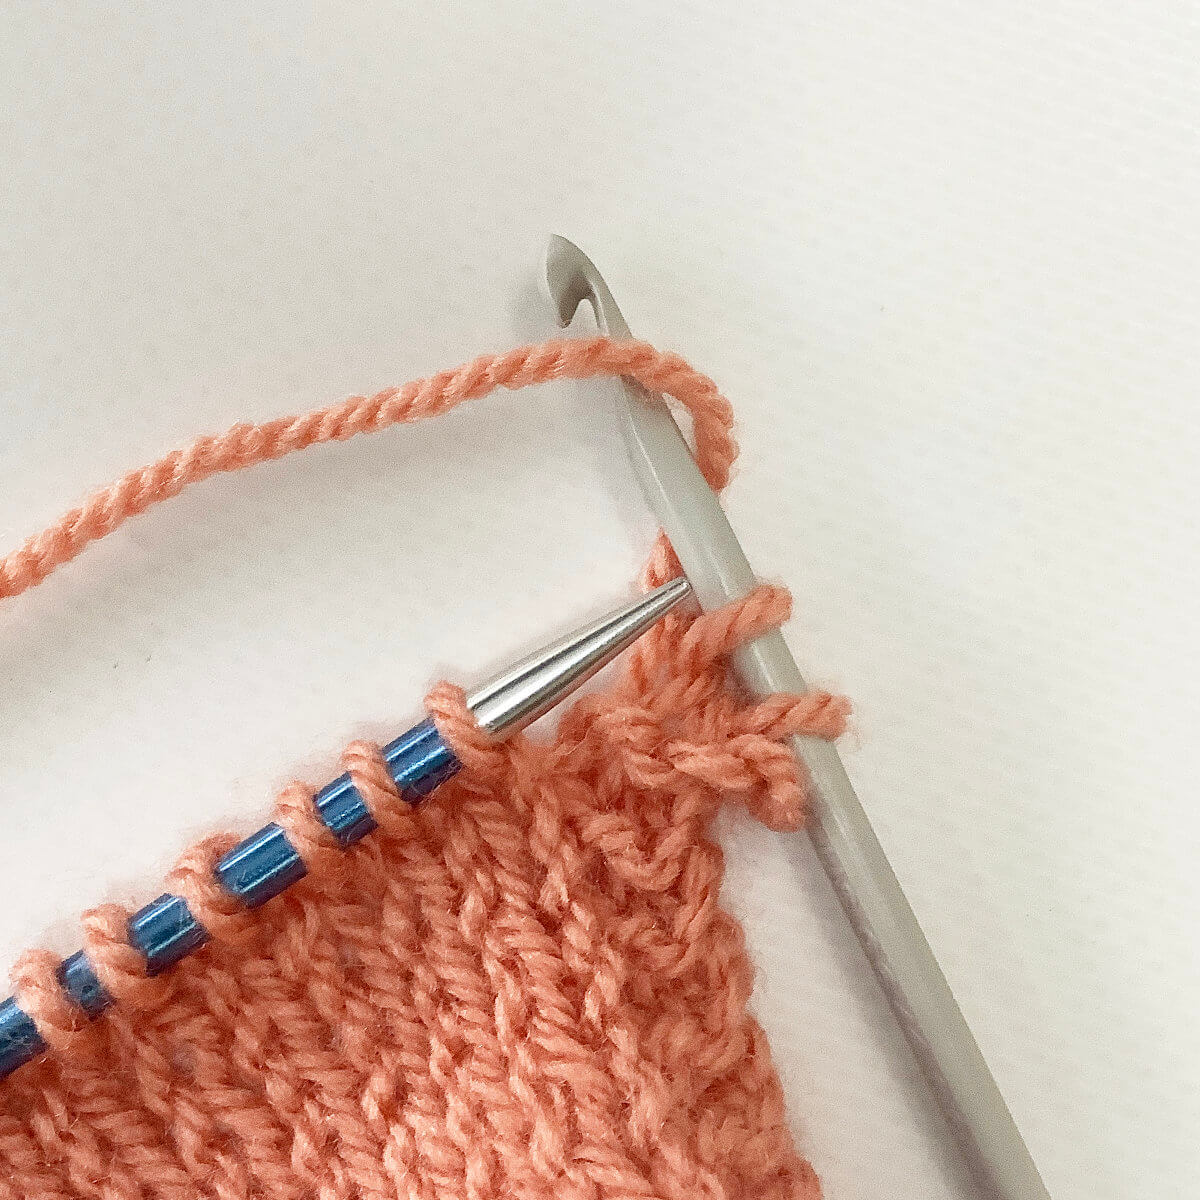
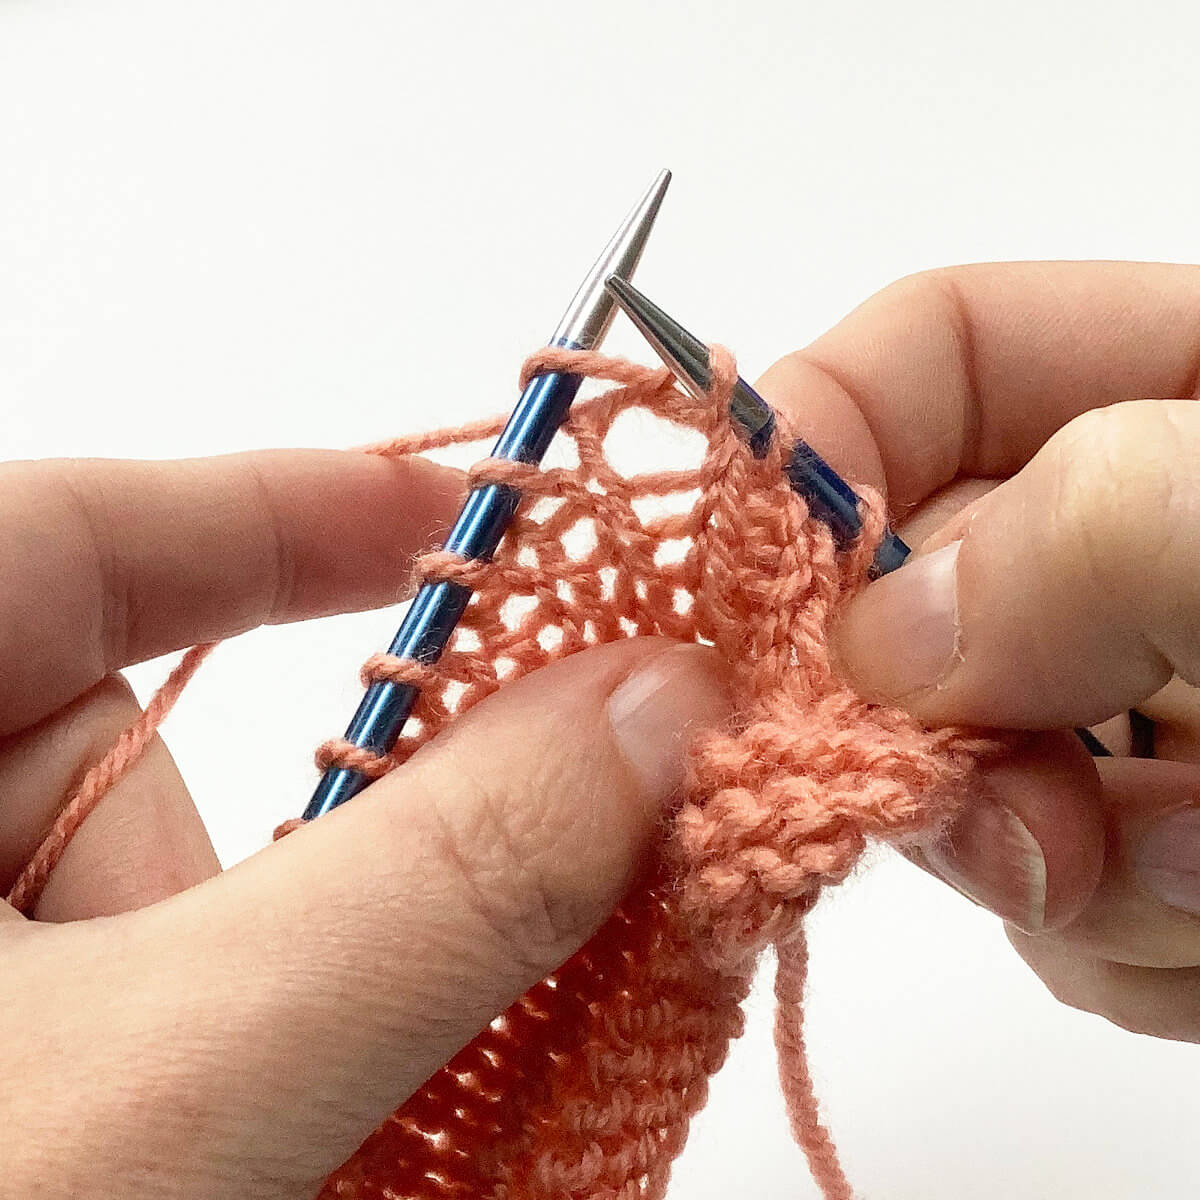
  6. Finish the stitch by slipping the top stitch off the left-hand needle without actually working it.

    Because the fabric is secured by knitting into the stitch below it, the stitch won’t run down unraveling.knit 1 below - step 6

And that’s all there is to it!

Patreon logo

Thanks to my Patreon supporters for bringing you this freebie! Creating quality patterns and tutorials is a lot of work and resource-intensive. However, I find it important to give you free content like this tutorial. Thanks to the generous support of my Patreon supporters, I can make it happen. Thank you, patrons! Click here to join, or click here to read more about La Visch Designs on Patreon.

tutorial – working the knit 1 below (k1b) stitch Read More »
tutorial – preventing a tight edge when knitting stripes

Preventing a tight edge when knitting stripes

When knitting stripes, especially the thinner ones, it often doesn’t make sense to break the yarn when switching to a different color. It mostly gives you a ton of ends to weave in later on. And personally, I’m just not a fan of extra and unnecessary work. That said, carrying the unused yarn along the side of the fabric has its own disadvantages.

For one, you have to remember to actually wrap the yarn you’re working with around the yarn you’re carrying along, before you go on knitting. Without securing the yarn to the side of the project and moving it up to where you’ll need it next, you’ll have a loose hanging strand on the edge of your work. And if you do remember to wrap the carried-along yarn, you may do it with a different tension than in the knitted fabric. This one is especially hard to judge, because both stitch pattern and yarn composition have a big influence on the tension of knitted fabric after blocking. This may very well result in a too tight or too loose tension at the edge, where it initially seemed to be just right.

In this post I’ll show you how I prevent these issues when carrying along the unused yarn at the side of the work.

Materials used

Yarn: * Paintbox Yarns Simply DK, a good value, good quality 100% acrylic yarn, here in the colors 155 Vintage Pink and 125 Spearmint Green.

Needles: * KnitPro Zing Fixed Circular Needles. In this tutorial, I used the 4 mm (US 6) size with a cable length of 80 cm (32 inches).

Preventing a tight edge when knitting stripes step by step

In this example I’m knitting thin 2-row stripes, but it would work just as well with deeper/wider stripes.

  1. Work to 1 stitch before the end of the row, at which point you’ll be switching to the other color yarn.

    This particular technique does assume that the new color of yarn is started and ended at the same side edge of the fabric. This means working an even number of rows in every stripe.Step 1

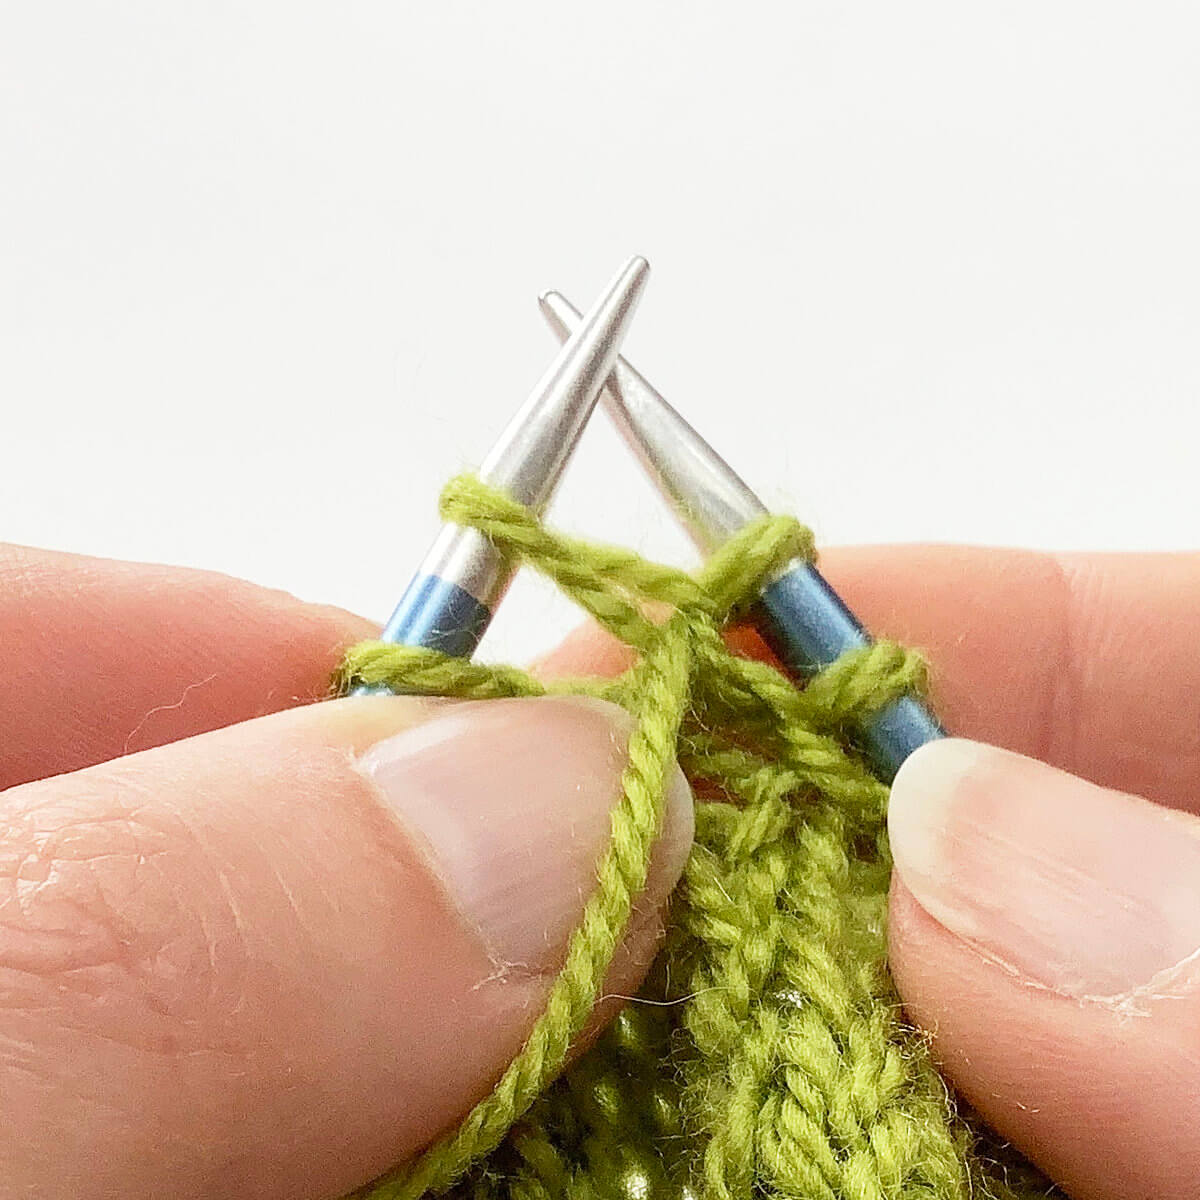
  2. Next, insert your needle into the stitch to work it and wrap both color yarns around the needle.

    In this case, the edge is worked in garter stitch, so we’re talking about a knit stitch here. But it can, of course, just as easily be done in a purl stitch.Step 2

  3. Now pull both strands of yarn through the stitch on the left-hand needle…

    Step 3

  4. … and slide the original stitch of the needle to complete the stitch.

    Step 4

  5. Now, turn the work and get ready to start the new row in the new color.

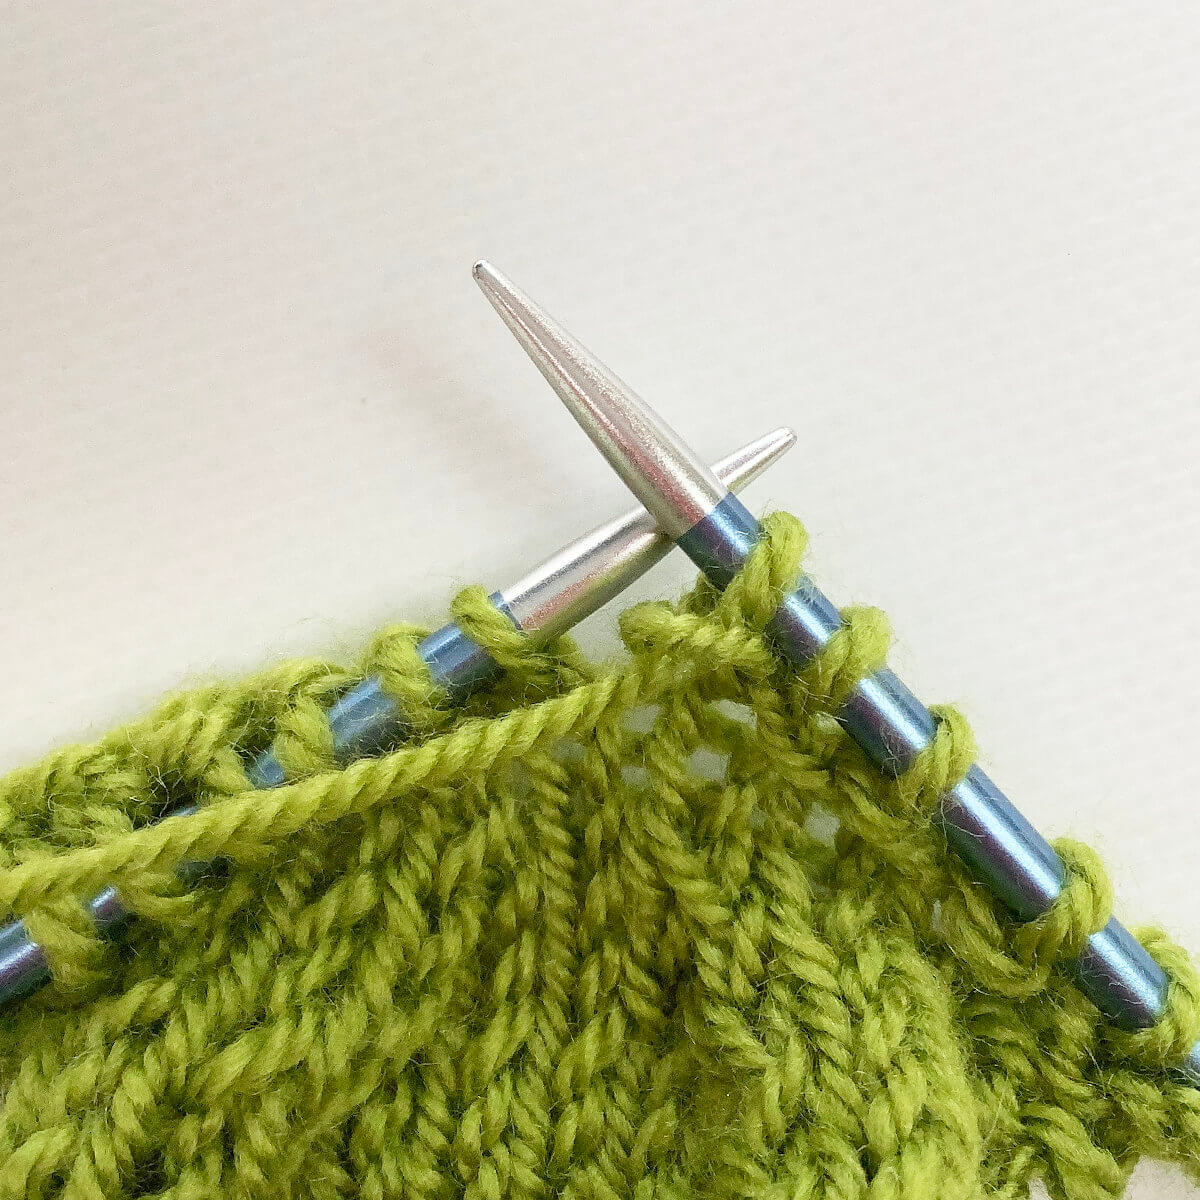
    To do so, insert your needle into both strands and work it as one using the new color yarn. What you’re basically doing is carrying along the unused yarn by knitting it into the last stitch of the row. This way the unused yarn is incorporated into the main fabric and will behave similarly upon blocking. In other words: no tension differences!Step 5

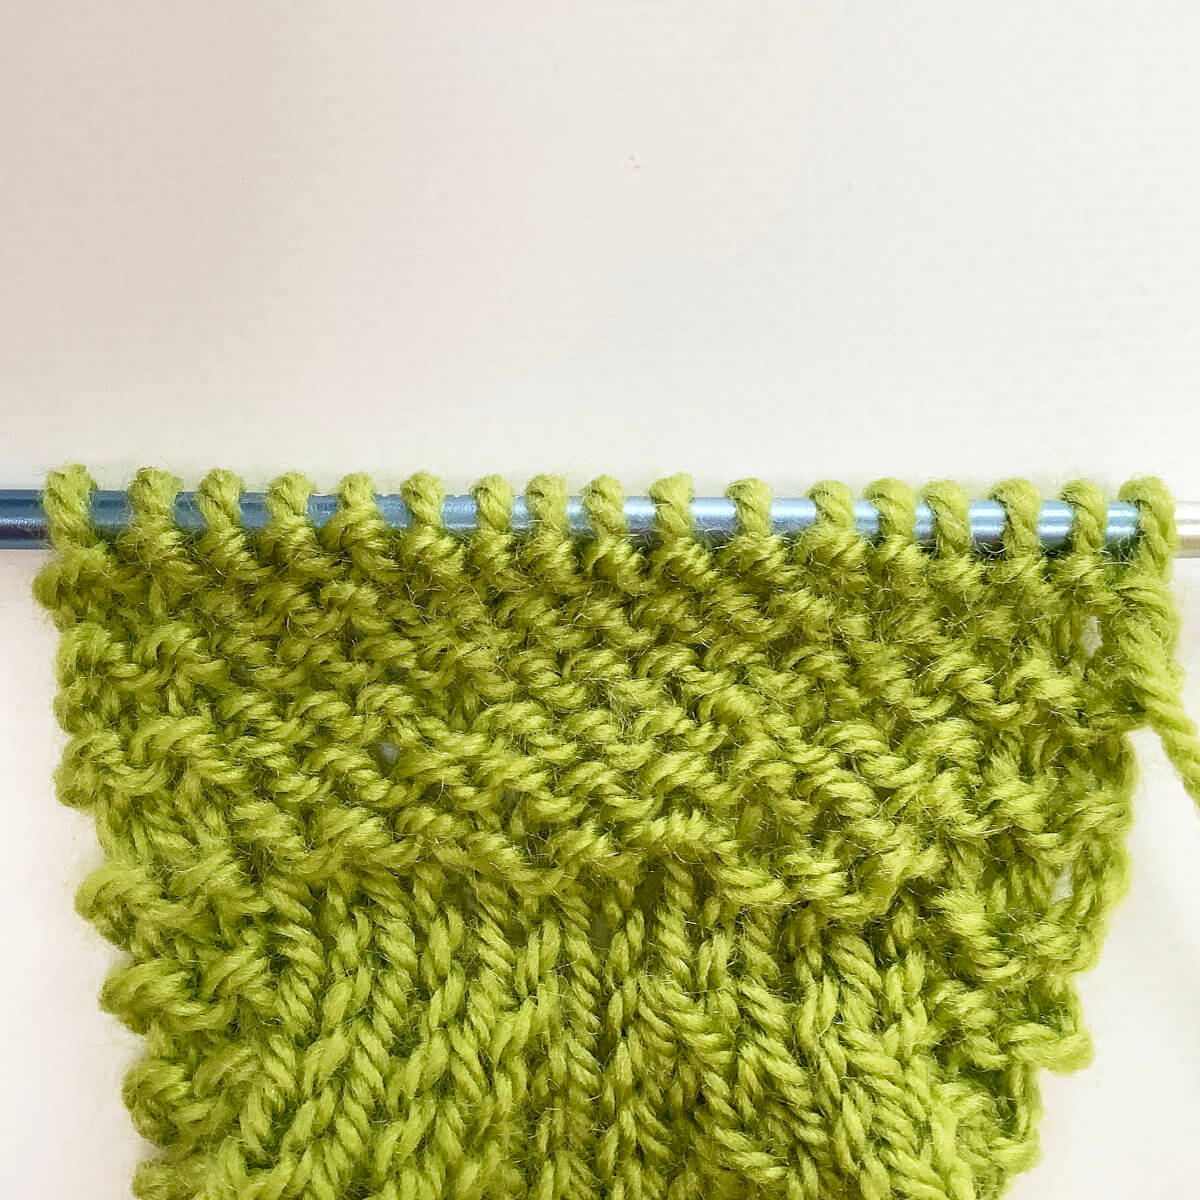
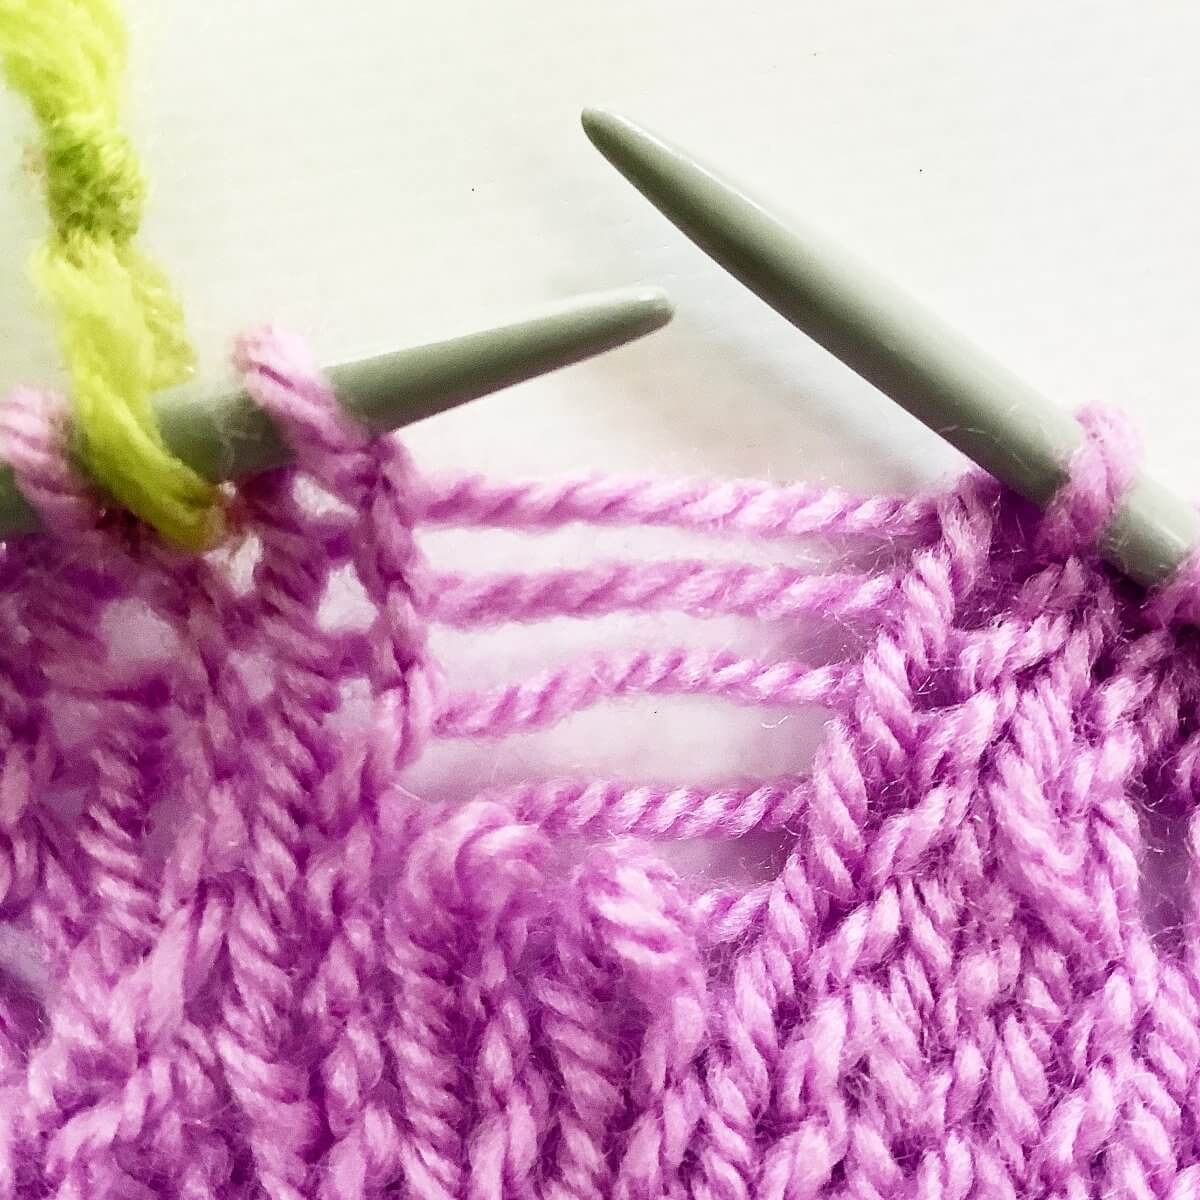
  6. This is how the resulting edge looks.

    Yes, the edge will be slightly bulkier than its non-doubled counterpart at the other side edge. But usually it’s not very noticeable.Preventing a tight edge when knitting stripes: the result

Overall look

You may wonder how this looks on both the right and wrong side of the fabric. This is how:

Preventing a tight edge when knitting stripes: result on the RS
Preventing a tight edge when knitting stripes: result on the WS

And that’s how to go about preventing a tight edge when knitting stripes!

Patreon logo

Thanks to my Patreon supporters for bringing you this freebie! Creating quality patterns and tutorials is a lot of work and resource-intensive. However, I find it important to give you free content like this tutorial. Thanks to the generous support of my Patreon supporters, I can make it happen. Thank you, patrons! Click here to join, or click here to read more about La Visch Designs on Patreon.

tutorial – preventing a tight edge when knitting stripes Read More »
winding grape

Winding Grape - a shawl design by La Visch Designs

Snuggle up in cozy woolens when it’s cold! This super bulky weight shawl will make you feel like you’re enveloped in a nice warm big hug. It knits up quickly, with its stockinette edge sections and cable section in the center. What’s not to like?! Or make Winding Grape in a lighter weight yarn.

Both written and charted instructions for the cable patterning are included in this pattern. Directions for the central cable section and plain stockinette sections are written separately and must be read together to work each row.


Pay what you want: (minimum €6.50)

€

Add to cart


Skills required

Directions for central cable section and plain stockinette / increase section are written separately and must be read together to work each row. The Winding Grape shawl starts with a garter tab cast-on. Stitches used include various cables, knit, purl, as well as right and left lifted regular and purl increases. This pattern is therefor suitable for the intermediate to advanced knitter.

Sizes and measurements

One size: Wingspan of 215 cm (84 ½ inches) and a depth of 75 cm (29 ½ inches), measured after blocking.

Adjust the sizing by using a different weight yarn and/or working a different number of repeats of the body pattern or the border. This will, of course, change the amount of yarn needed.

Pattern details

  • Worked flat from the top down.
  • Written for a gauge of 8 sts / 13 rows = 10 cm (4 inches) over stockinette measured after blocking. However, gauge is not critical in this design.
  • Pattern language: English.
  • Digital PDF has 5 pages (letter size)

Yarn

525 m (572 yds) Garnstudio Drops Andes (65% Wool, 35% Alpaca; 100 m (109 yds) / 100 g) in 4301 Purple. Please note that slightly different weights are available of this yarn. The one used for the sample shawl pictured is described above.

Substitute a solid-color super bulky weight wool yarn of similar thickness for a similar result or try double or triple stranding DK or worsted weight wool yarn.

Materials

  • Size 8 mm (US 11) / 100 cm (40 inches) circular needles. Choose a needle size appropriate for the yarn selected.
  • Yarn needle.
  • Cable needle.
  • 4 stitch markers.

winding grape Read More »
tutorial – inserting an afterthought life line

Tutorial inserting an afterthought life line

As shown in the post about life lines, these are very handy. They can be used for added security when you’re sure that a certain stretch of knitting is error-free. Just insert the life line and you have a safe place in your knitting to rip back to in the event you make a mistake in your knitting. But what to do when you’ve forgotten to add in a life line?

No worries! In that case you can insert an afterthought life line. In this post I’ll show you how.

Materials used

Yarn: * Paintbox Yarns Simply DK, a good value, good quality 100% acrylic yarn. Pictured here in the color 155 Vintage Pink.

Needles: * KnitPro Zing Fixed Circular Needles. In this tutorial, I used the 4 mm (US 6) size with a cable length of 80 cm (32 inches).

Darning needle: * Hiya Hiya Darn It Yarn Needle, or any other tapestry needle, threaded with yarn.

Crochet cotton: Manuela N° 5 from Schoeller+Stahl, a 100% mercerized cotton 6-ply thread (200 m (219 yds) / 50 g)

Inserting an afterthought life line step by step

In this example, I’m using the same stockinette swatch as for the previous life line tutorial. I’ll use it to show you how to insert a life line using a darning needle and thread. When doing so in a piece of knitted lace, you may find it easiest to do so after a plain knit of purl row if that’s possible in your patterning.

  1. First, make sure you have your thread and darning needle ready.

    Don’t cut your thread too short, or you may not have enough length to thread through all stitches, and allow for some stretch.Using life lines - getting everything ready

  2. Next, identify the row and stitches to insert the life line in, take your darning needle and insert it through the first couple of stitches on the needle.

    For this, it is of importance to correctly select which “leg” of the stitch to insert the darning needle under. In stockinette stitch fabric, the individual stitches look like a “V”. When inserting the needle, make sure to insert pass it underneath the right leg and over the left leg of the “V”. This way the stitches are mounted correctly on the life line. When doing it like this, you just have to follow the path of the life line when putting the fabric back on your knitting needle, to correctly mount the stitches there too. In other words: not twisted! Take care not to pierce any strands of yarn.Step 2 of inserting an afterthought life line

  3. After the first few stitches, pull the cotton thread through, taking care to leave a tail outside the piece of knitting.

    Then, you can insert the darning needle into the next couple of stitches and so on, to put all stitches on the thread.

  4. Now we have to secure the life line.

    To do so, I prefer making a loose knot in the ends of the cotton thread.Securing the life line

  5. And this is the result!

    When the life line is no longer needed, just undo the knot and pull the thread out of the knitting. Or follow the path of the life line through the stitches with a knitting needle before ripping back your knitting…

Patreon logo

Thanks to my Patreon supporters for bringing you this freebie! Creating quality patterns and tutorials is a lot of work and resource-intensive. However, I find it important to give you free content like this tutorial. Thanks to the generous support of my Patreon supporters, I can make it happen. Thank you, patrons! Click here to join, or click here to read more about La Visch Designs on Patreon.

tutorial – inserting an afterthought life line Read More »
tutorial – using life lines

Tutorial - using life lines

You may have heard about life lines and wonder about what they are and why they’re useful. I’ll tell you all about it in this post! In short: A life line in knitting is a temporarily inserted thread, to make sure that any dropped stitches can’t unravel down beyond the line you’ve inserted. This is particularly useful when knitting lace with a smooth yarn. Working lace back up with the correct stitches is much more complex than regular stockinette!

A life line can also be used for added security when you’re sure that a certain stretch of knitting is error-free. Just insert the life line and you have a safe place in your knitting to rip back to in the event you make a mistake in your knitting after that.

The technique for adding a life line is the very same as for putting live stitches on a piece of waste yarn or stitch holder, to work further on later on. The only difference is that with just adding a life line, the stitches are kept on the needle. With putting stitches on waste yarn, the stitches are pushed off the needle. The latter I also use when trying out the fit of sweaters, when the length of the cable of my circular knitting needles doesn’t allow for trying the piece on.

Many yarns are suitable to be used as a life line. Personally, though, I prefer yarn that is

  1. Thinner than my working yarn, so it doesn’t distort the surrounding stitches.
  2. A different color than my working yarn, so I can see where it is in my knitted fabric.
  3. Smooth, so it’s easy to both insert and remove it.

For these reasons I usually use crochet thread, a relatively heavy one.

Materials used

Yarn: * Paintbox Yarns Simply DK, a good value, good quality 100% acrylic yarn, here in the color 155 Vintage Pink.

Needles: * KnitPro Zing Fixed Circular Needles. In this tutorial, I used the 4 mm (US 6) size with a cable length of 80 cm (32 inches).

Darning needle: * Hiya Hiya Darn It Yarn Needle, or any other tapestry needle, threaded with yarn.

Crochet cotton: Manuela N° 5 from Schoeller+Stahl, a 100% mercerized cotton 6-ply thread (200 m (219 yds) / 50 g)

Inserting a life line step by step

In this example I’m using a little stockinette swatch to show you how to insert a life line using a darning needle and thread. When doing so in a piece of knitted lace, you may find it easiest to do so after a plain knit of purl row if that’s possible in your patterning.

  1. First, make sure you have your thread and darning needle ready.

    Don’t cut your thread too short, or you may not have enough length to thread through all stitches, and allow for some stretch.Using life lines - getting everything ready

  2. Next, take your darning needle and insert it through the first couple of stitches on the needle.

    Move the darning needle behind the front leg of the various stitches. Take care not to pierce any strands of yarn.Step 2 of placing a life line

  3. After the first few stitches, pull the cotton thread through, taking care to leave a tail outside the piece of knitting.

    Then, you can insert the darning needle into the next couple of stitches and so on, to put all stitches on the thread.The life line is all threaded though

  4. Now we have to secure the life line.

    To do so, I prefer making a loose knot in the ends of the cotton thread.Securing the life line

  5. And this is the result!

    When the life line is no longer needed, just undo the knot and pull the thread out of the knitting. Or follow the path of the life line through the stitches with a knitting needle before ripping back your knitting…Life line inserted!

Patreon logo

Thanks to my Patreon supporters for bringing you this freebie! Creating quality patterns and tutorials is a lot of work and resource-intensive. However, I find it important to give you free content like this tutorial. Thanks to the generous support of my Patreon supporters, I can make it happen. Thank you, patrons! Click here to join, or click here to read more about La Visch Designs on Patreon.

tutorial – using life lines Read More »
worsted delft blue

Worsted Delft Blue by La Visch Designs
© Yayalovestoknit

Due to popular request here’s the worsted weight version of my bulky weight Delft Blue cowl design. My lovely tester Yayalovestoknit made the version pictured (in size S). Isn’t it pretty in these colors?! A wonderful way for stash busting odds and ends. Of course, I also included larger sizes in the pattern for those who prefer a longer loop.

The Worsted Delft Blue cowl is knit seamless in the round, with simple color work in the corrugated ribbing.


Pay what you want: (minimum €5.50)

€

Add to cart


Difficulty level

The Worsted Delft Blue cowl is seamless and knit in the round with simple color work patterning. Stitches used are knit and purl. This pattern is suitable for the advanced beginner to intermediate knitter.

Sizes and finished measurements

Sizes S (M, L, XL): With a circumference of 60 (74, 88, 102) cm (24 (29, 35, 40) inches), and 21.5 cm (8½ inches) high.

To further adjust the sizing, cast-on any number of stitches in a multiple of 4 and/or work a different number of repeats of the body pattern. This will, of course, change the amount of yarn needed.

Pattern details

  • Worsted Delft Blue is written for a gauge of 20 sts / 24 rounds = 10 cm (4 inches) over color work pattern after washing and gentle blocking.
  • Pattern language included: English.
  • Digital PDF has 3 pages (letter size).

Yarn

Premier yarns Everyday Worsted Solids, Marls & Heathers [100% acrylic; 160 m (181 yds) / 100 g] in the following colors and amounts:

  • C1: 107 (132, 157, 182) m (117 (144, 172, 199) yds) / 65 (80, 95, 111) g in Black
  • C2: 25 (31, 37, 43) m (27 (34, 40, 47) yds / 15 (19, 22, 26) g in Aubergine
  • C3: 25 (31, 37, 43) m (27 (34, 40, 47) yds / 15 (19, 22, 26) g in Grenadine
  • C4: 25 (31, 37, 43) m (27 (34, 40, 47) yds / 15 (19, 22, 26) g in Peacock

Substitute any worsted weight yarns of similar weight and in sufficient contrast to each other for a similar result.

Materials

  • Circular needles in the following sizes (or to match gauge): Size 4 mm (US 6) and size 4.5 mm (US 7). For sizes S and M, a cable length of 60 cm (24 inches) is advised. However, for the larger two sizes a length of 80 cm (32 inches) may be more appropriate.
  • Yarn needle.
  • 1 end-of-round stitch marker.

worsted delft blue Read More »
delft blue

Delft Blue Cowl by La Visch Designs

If you’re in need of a fast extra-bulky weight cowl project, look no further! The design for the Delft Blue cowl came into being because my daughter bikes to school every day. It can get cold in the 45 minutes she needs for that. So, I made her this nice and snug-fitting cowl (size S). It’s tall enough to keep her neck warm, even if she pulls it up over her nose. Of course, I also included larger sizes for those who prefer a longer loop.

Extra bulky-weight knitting not quite your thing? There is also a worsted weight version of this design!

The Delft Blue cowl is knit seamless and in the round, with simple color work in the corrugated ribbing.


Pay what you want: (minimum €5.50)

€

Add to cart


Difficulty level

The Delft Blue cowl is seamless and knit in the round with simple color work patterning. Stitches used are knit and purl. This pattern is suitable for the advanced beginner to intermediate knitter.

Sizes and finished measurements

Sizes S (M, L, XL): With a circumference of 60 (74, 88, 102) cm (24 (29, 35, 40) inches), and 34 cm (13 inches) high.

To further adjust the sizing, cast-on any number of stitches in a multiple of 4 and/or work a different number of repeats of the body pattern. This will, of course, change the amount of yarn needed.

Pattern details

  • Delft Blue is written for a gauge of 11.3 sts / 14.5 rounds = 10 cm (4 inches) over color work pattern after washing and gentle blocking.
  • Pattern language included: English.
  • Digital PDF has 3 pages (letter size).

Yarn

Debbie Bliss Merion [50% wool, 50% acrylic; 100 m (109 yds) / 100 g] in the following colors and amounts:

  • C1: 80 (99, 118, 136) m (88 (108, 129, 149) yds) / 80 (99, 118, 136) g in 10 Admiral
  • C2: 80 (99, 118, 136) m (88 (108, 129, 149) yds) / 80 (99, 118, 136) g in 09 Sky Blue

Substitute any single-ply type bulky weight yarns of similar weight and in sufficient contrast to each other for a similar result.

Materials

  • Circular needles in the following sizes (or to match gauge): Size 7 mm (US 10.75) and size 8 mm (US 11). For sizes S and M, a cable length of 60 cm (24 inches) is advised, for the larger two sizes a length of 80 cm (32 inches) may be more appropriate.
  • Yarn needle.
  • 1 end-of-round stitch marker.

delft blue Read More »
tutorial – working the Old Norwegian or Twisted German cast-on

Tutorial - Working the Old Norwegian or Twisted German cast-on

You may have heard of the Old Norwegian or Twisted German cast-on method; it’s a variation of the long tail cast-on that is somewhat stretchier. The extra stretch is because of a few extra steps and an extra twist when making it. This, in turn, makes it much better suited for things like top-down socks, and cuffs of mittens and gloves.

And, like the long tail cast-on, it has the challenge of guesstimating the current length for your yarn tail. If you run out of tail, there are no more stitches that can be cast on. Since this cast-on requires a tad more yarn than the regular long tail cast-on, I would suggest leaving a yarn tail that is 4 to 5 times instead of 3 to 4 times as long as the width you want your work to become.

Let’s go ahead and see how this cast-on is done!

Materials used

Yarn: * Paintbox Yarns Simply DK, a good value, good quality 100% acrylic yarn, here in the color 155 Vintage Pink.

Needles: * KnitPro Zing Fixed Circular Needles. In this tutorial, I used the 4 mm (US 6) size with a cable length of 80 cm (32 inches).

Working the Old Norwegian or Twisted German cast-on step by step

Let’s get started on working this Old Norwegian or Twisted German cast-on!

  1. Start by making a slip knot.

    Place the slip knot on the right-hand needle.Old Norwegian or Twisted German cast-on step 1

  2. Next, place your left thumb and index finger between the strands as shown while you hold the ends of both strands of yarn in your left hand with your other fingers.

    This is the same as for a regular long tail cast-on.Old Norwegian or Twisted German cast-on step 2

  3. Now rotate your left-hand upwards, while moving your right hand down, to dip the tip of the needle underneath both strands of yarn you see going around the thumb.

    In other words: move the tip of the needle from left to right underneath both strands of yarn.Old Norwegian or Twisted German cast-on step 3

  4. Next, move the needle tip over the strand at the right (top) and down into the loop at the thumb.

    Old Norwegian or Twisted German cast-on step 4

  5. In this step you see how it looks after I’ve pulled the needle tip down into the loop and rotated my thumb upwards a bit.

    Old Norwegian or Twisted German cast-on step 5

  6. When moving the needle tip upwards again it looks like this.

    See how the yarn around the thumb is now twisted into an “x” shape?Old Norwegian or Twisted German cast-on step 6

  7. Next, bring the needle over the top of the strand of yarn going around your index finger, and dip below it from right to left.

    Now we’ve caught this strand too, it’s time for the next step.Old Norwegian or Twisted German cast-on step 7

  8. Now we pull the last caught strand through the “thumb loop”, specifically through the gap of the x closest to your right hand.

    Bending your thumb a bit can help to open up the x to more easily see where the needle tip should go.Old Norwegian or Twisted German cast-on step 8

  9. This is how it looks after the strand has been pulled through.

    Old Norwegian or Twisted German cast-on step 9

  10. To finish the new stitch, gently draw out your thumb from the loop …

    Old Norwegian or Twisted German cast-on step 10

  11. … and tighten the stitch a bit by pulling on the strands.

    Old Norwegian or Twisted German cast-on step 11

  12. Repeat steps 2 to 11 as often as needed to arrive at the desired number of stitches.

    This is my result working the Old Norwegian or Twisted German cast-on:Old Norwegian or Twisted German cast-on: the result

Patreon logo

Thanks to my Patreon supporters for bringing you this freebie! Creating quality patterns and tutorials is a lot of work and resource-intensive. However, I find it important to give you free content like this tutorial. Thanks to the generous support of my Patreon supporters, I can make it happen. Thank you, patrons! Click here to join, or click here to read more about La Visch Designs on Patreon.

tutorial – working the Old Norwegian or Twisted German cast-on Read More »
tutorial – working the long tail cast-on

Tutorial - Working the long tail cast-on

The long tail cast-on method is one that is often used, because of the neat edge it makes. Also, it’s both firm and slightly elastic, making it quite suitable for a range of projects. It can be a bit tricky to get the hang of, but once you get the hang of it, it’s pretty fast to work.

The main challenge with this cast-on is that it uses its yarn tail together with the working yarn. In other words: if you don’t leave the tail long enough you may run short of yarn to cast-on all needed stitches. This is especially bothersome when casting on many stitches. A rule of thumb is to leave a yarn tail that is 3 to 4 times as long as the width you want your work to become. A somewhat more reliable guesstimate can be made by casting on 10 stitches, unravel those and leave a yarn tail in that length, multiplied as many times as needed to arrive at the number of required stitches. Plus a bit extra, of course, to weave in later on.

Another way to deal with it is not to calculate or guess anything, but just use 2 different strands of yarn. This can be from 2 different balls of yarn, or both ends of the same ball if you can find the end in the center.

Shall we go see how the cast-on is worked?

Materials used

Yarn: * Paintbox Yarns Simply DK, a good value, good quality 100% acrylic yarn, here in the color Marine.

Needles: * KnitPro Zing Fixed Circular Needles. In this tutorial, I used the 4 mm (US 6) size with a cable length of 80 cm (32 inches).

Working the long tail cast-on step by step

Let’s get started on this long tail cast-on!

  1. Start by making a slip knot.

    Place the slip knot on the right-hand needle.Long tail cast-on step 1

  2. Next, place your left thumb and index finger between the strands as shown while you hold the ends of both strands of yarn in your left hand with your other fingers.

    Just try it, it’s really less tricky than it sounds!Long tail cast-on step 2

  3. In this next picture I’ve rotated my left-hand upwards, while moving my right hand down.

    Doing this, the yarn basically makes a “v” between my thumb and index finger, making it possible to dip the tip of the needle underneath the strand of yarn you see going around my thumb.Long tail cast-on step 3

  4. Here I’ve caught that strand by passing the needle under the yarn that goes around my thumb.

    Long tail cast-on step 4

  5. Next, bring the needle over the top of the strand of yarn going around your index finger, and dip below it from right to left.

    Now we’ve caught this strand too, it’s time for the next step.Long tail cast-on step 5

  6. Now we pull the last caught strand through the “thumb loop”.

    This picture shows this step pretty well.Long tail cast-on step 6

  7. To finish the new stitch, gently draw out your thumb from the loop …

    Long tail cast-on step 7

  8. … and tighten the stitch a bit by pulling on the strands.

    Long tail cast-on step 8

  9. Repeat steps 2 to 8 as often as needed to arrive at the desired number of stitches.

    This is my result working the long tail cast-on:Long tail cast-on: the result

Patreon logo

Thanks to my Patreon supporters for bringing you this freebie! Creating quality patterns and tutorials is a lot of work and resource-intensive. However, I find it important to give you free content like this tutorial. Thanks to the generous support of my Patreon supporters, I can make it happen. Thank you, patrons! Click here to join, or click here to read more about La Visch Designs on Patreon.

tutorial – working the long tail cast-on Read More »
rosy does it

Rosy Does It - a shawl design by La Visch Designs

Sometimes a little bit of pink is all that’s needed to bring a bit of joy to your day. In this case, Rosy Does It. This design combines stunning lace with easy garter stitch stripes. And while I made my version in three colors, you can, of course, also make it in only two or even one color. This design is also very flexible in sizing, making it very easy to adjust to your preferences; what’s not to love?!

Rosy Does It is a triangle shawl worked from the top-down in one piece, starting at the neck with a garter stitch tab. Written and charted instructions are included for the lace body of the shawl.


Pay what you want: (minimum €6.50)

€

Add to cart


Skills required

Knit the Rosy Does It shawl from the top-down, starting with a garter tab cast-on. Patterning in the body of the shawl is on both RS and WS rows, and contains simple cables. Stitches used include knit, purl, k2tog, skp, yo, purl 1 below, bunny ears yo, and a centered double decrease. This pattern is suitable for the intermediate to advanced knitter.

Sizes and measurements

One size – finished dimensions: 185 cm (73 inches) along the upper edge and a depth of 81.5 cm (32 inches), measured after blocking.

Change the size of the shawl by using heavier or lighter weight yarn and/or working fewer (or more) repeats of the body patterning or the garter stitch edging. This will, of course, change the amount of yarn needed.

Pattern details

  • Worked flat from the top down.
  • Written for a gauge of 11 sts / 28 rows = 10 cm (4 inches) over garter stitch stripes measured after blocking. However, gauge is not critical in this design.
  • Pattern language: English.
  • Digital PDF has 4 pages (letter size)

Materials

  • Yarn: Nuna by Mirasol Yarn (40% merino, 40% silk, 20% rayon from bamboo; 175 m (191 yds) / 50 g). Substitute any plied wool/silk blend fingering or sport weight yarn for a similar result. In the sample shawl:
    • C1: 175 m (191 yds) / 50 g in Coral 1046
    • C2: 175 m (191 yds) / 50 g in Sangria 1042
    • C3: 175 m (191 yds) / 50 g in Warm gray 1002
  • Size 4 mm (US 6) / 80 cm (32 inches) circular needles. Choose a needle size appropriate for the yarn selected.
  • Yarn needle.
  • Cable needle.
  • 4 stitch markers to indicate the center and edge stitches.
  • Stitch markers to indicate repeats in the lace patterning (optional).

rosy does it Read More »