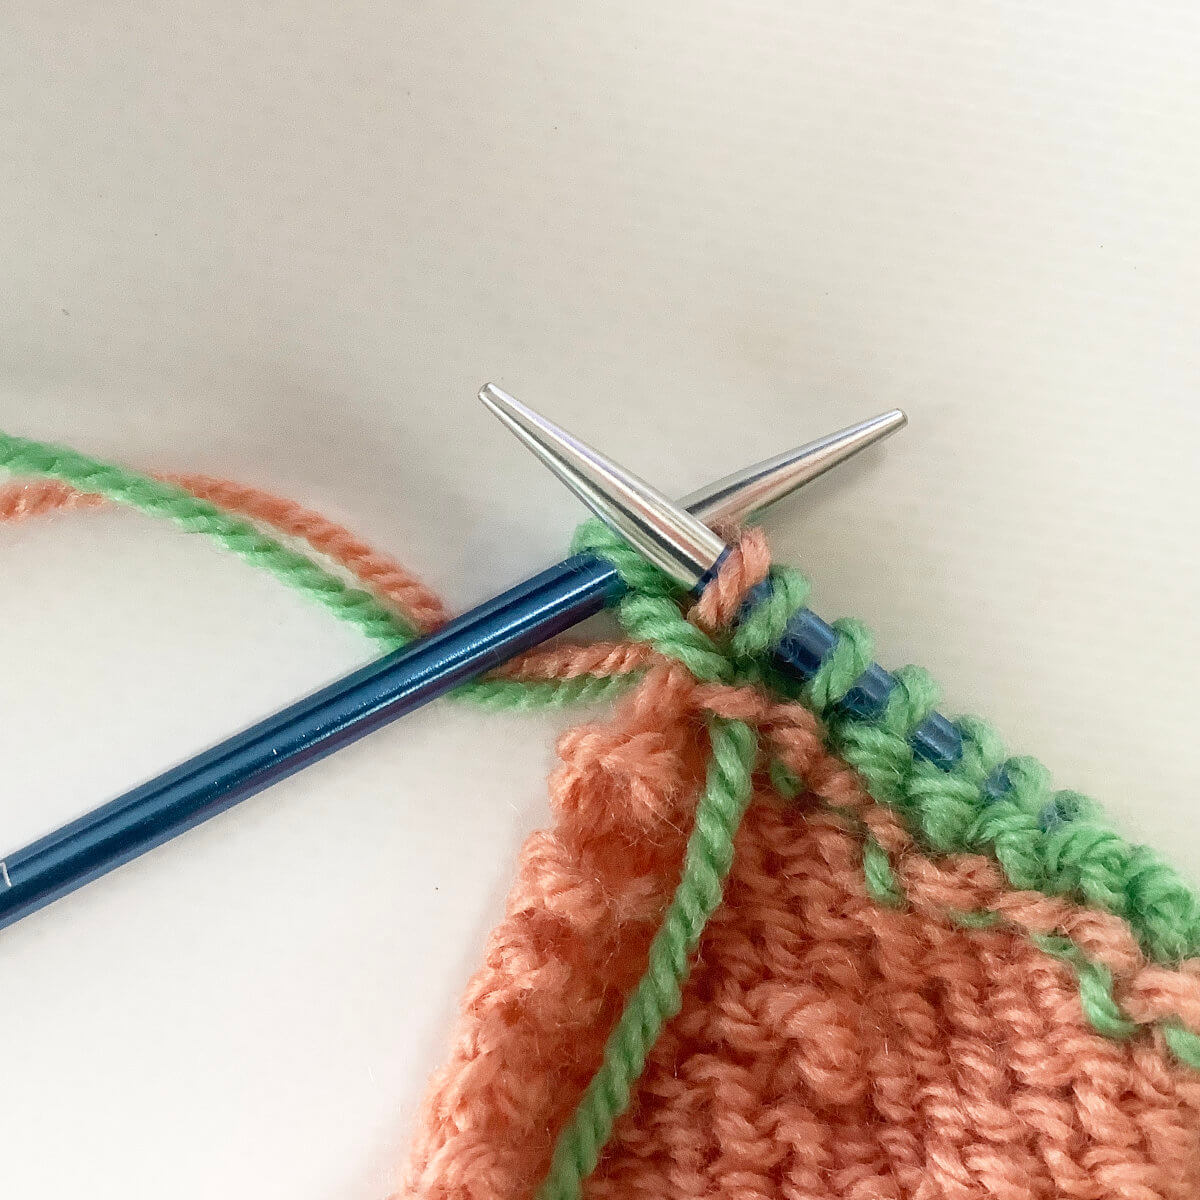
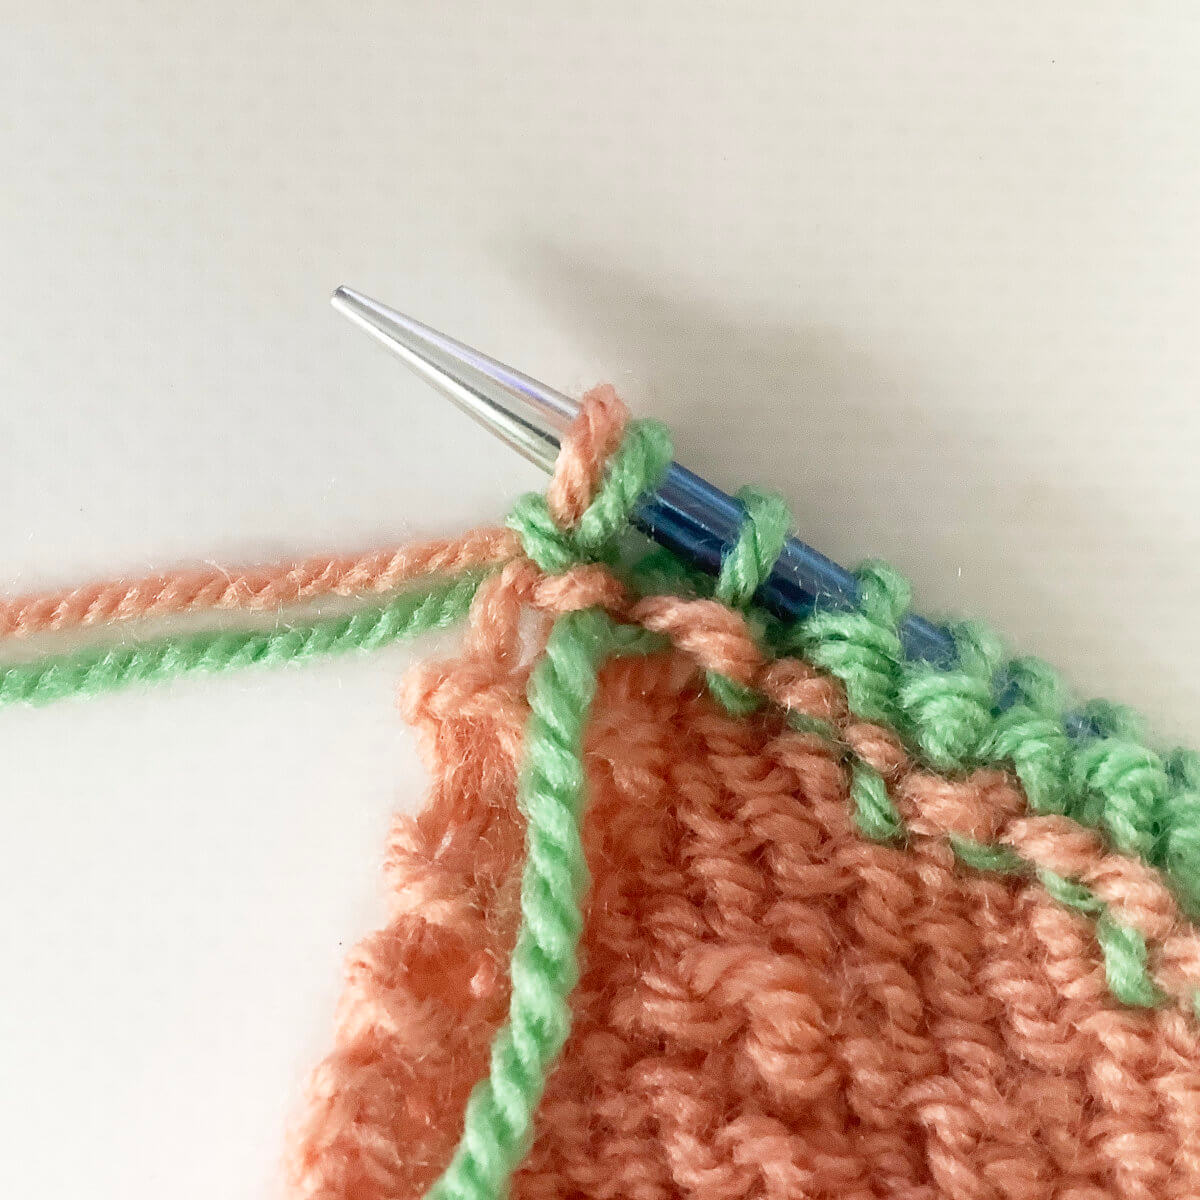
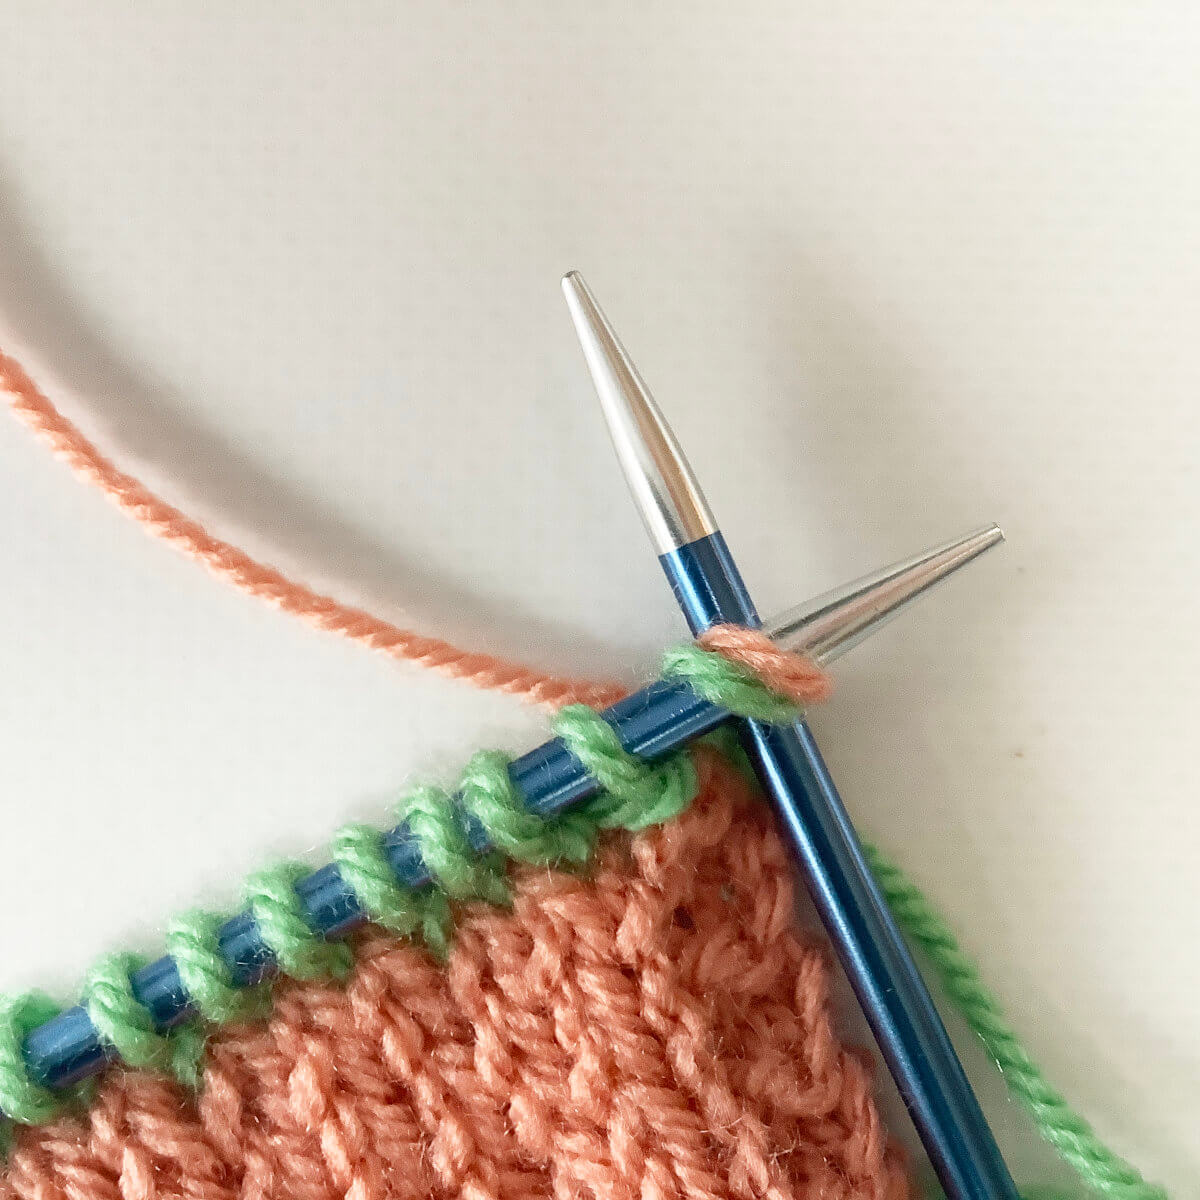
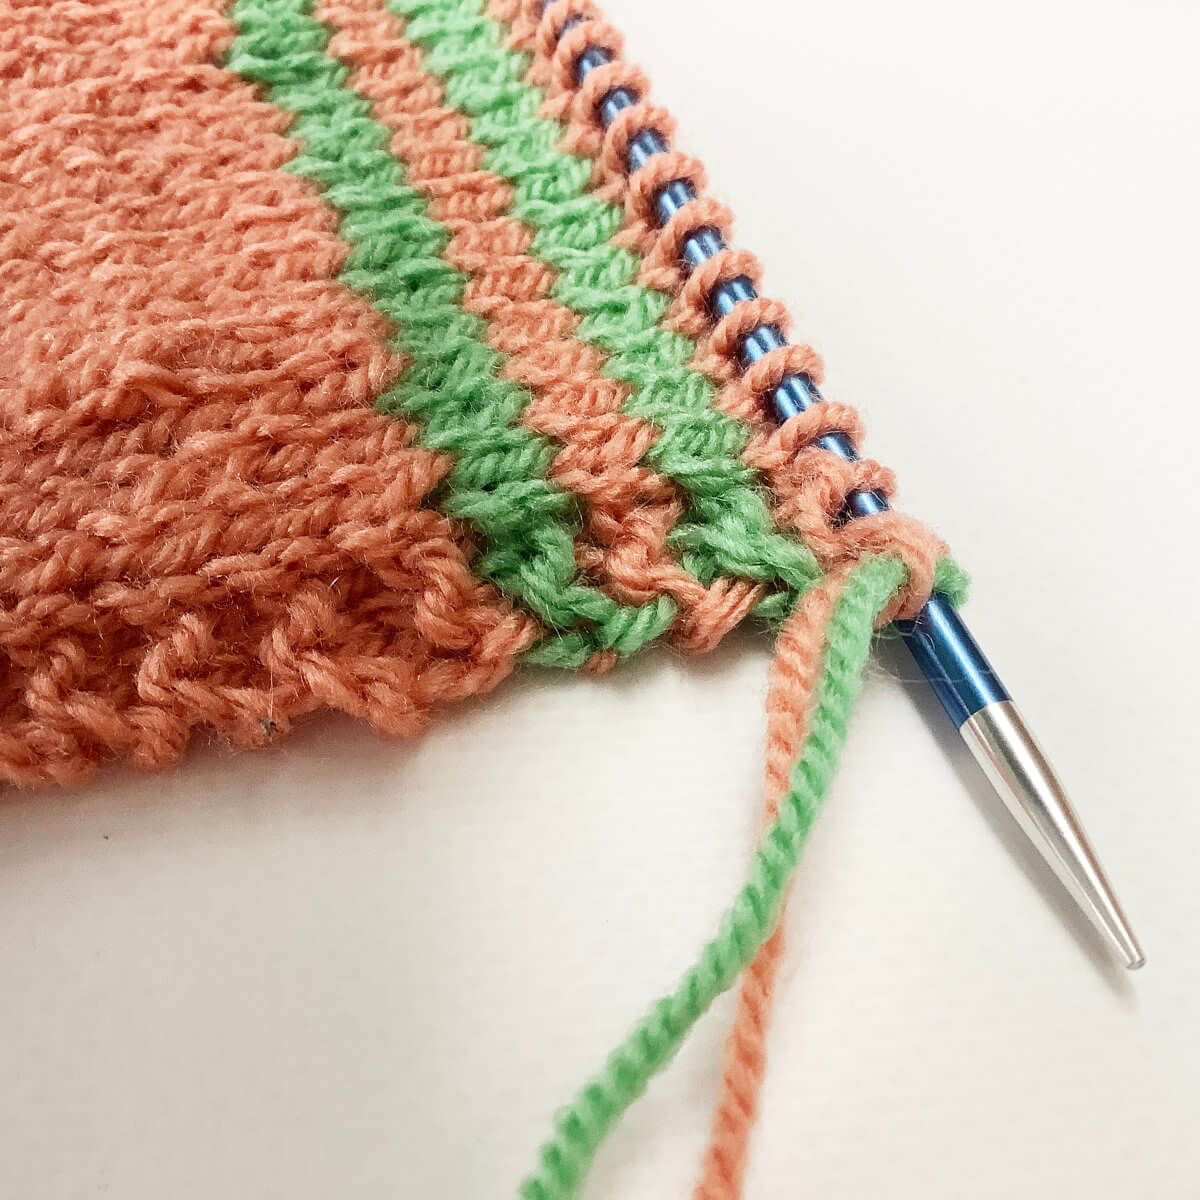
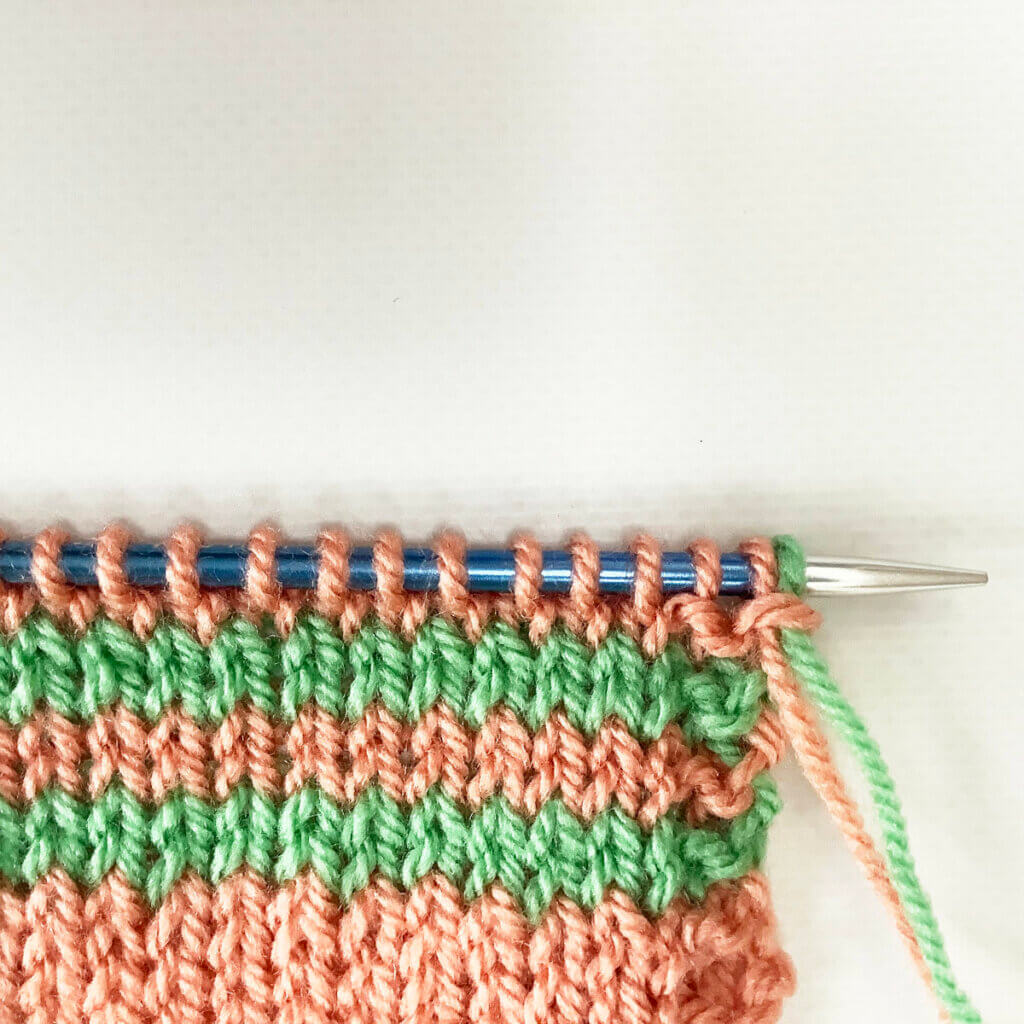
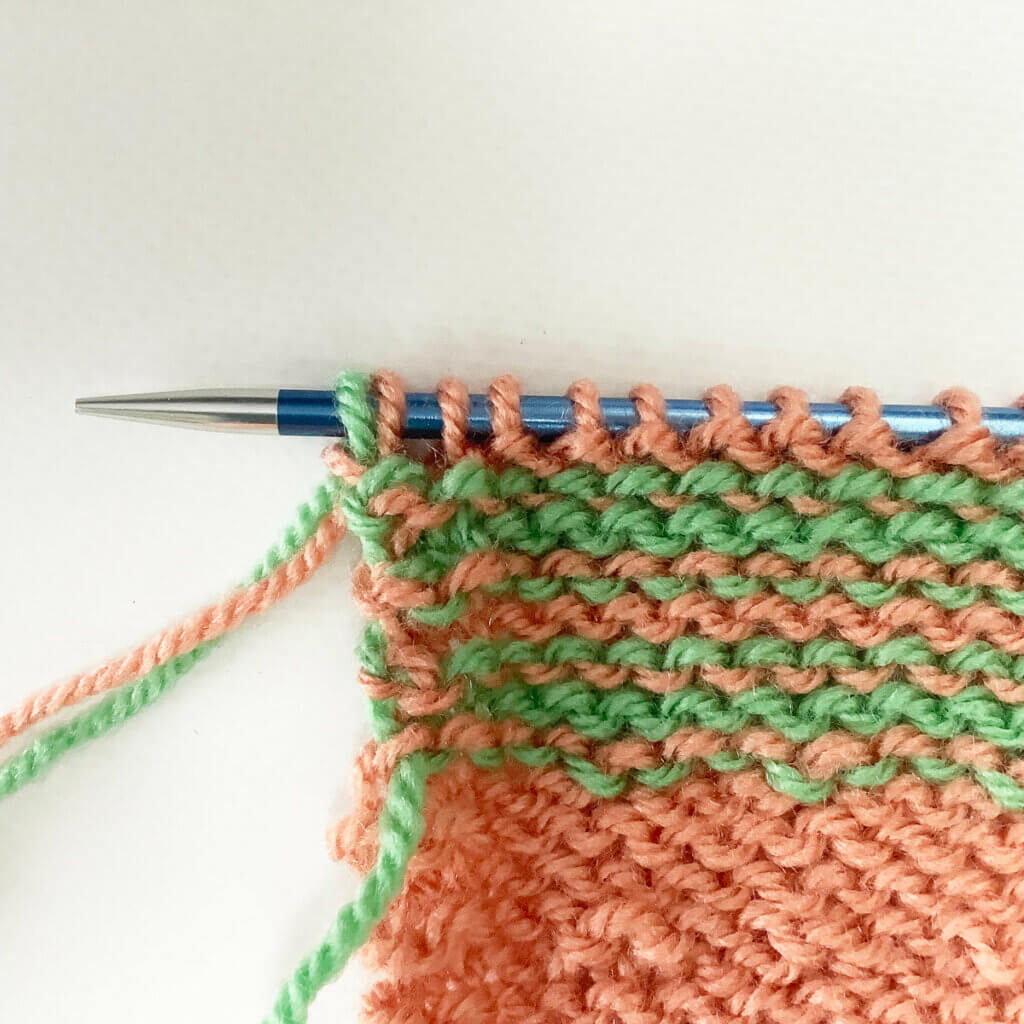
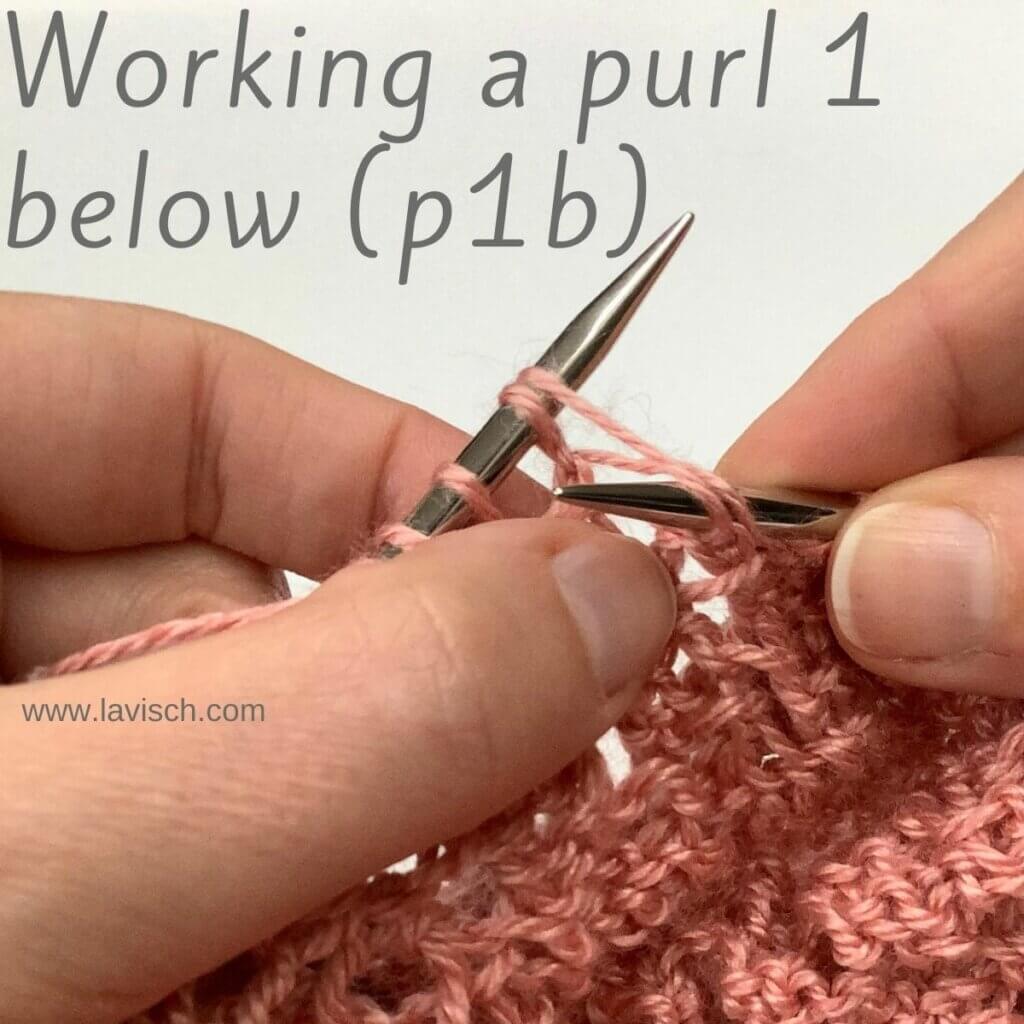
tutorial – working a purl 1 below (p1b)

Tutorial on working a purl 1 below (p1b)

There are cases in which skipping the row on your needle for particular stitches is desired, and one is to knit or purl in the row below that one. In other words: you knit/purl into the stitch below where you normally would, exactly as the name suggests. Think, for example, off Fisherman’s Rib, but also off the bunny ears yo stitch, on its following wrong-side row.

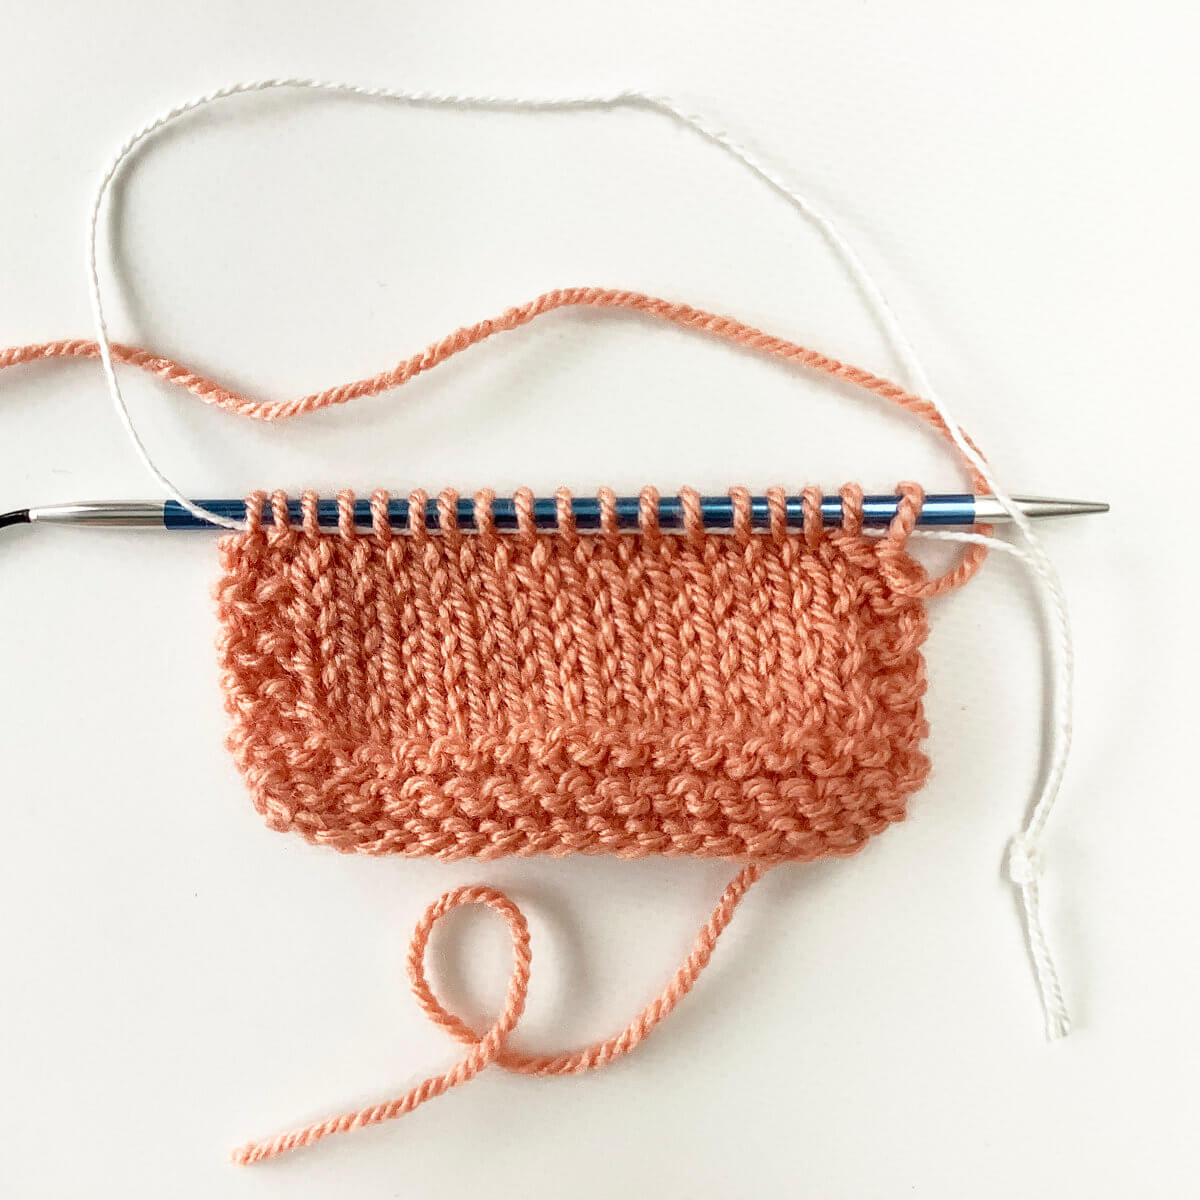
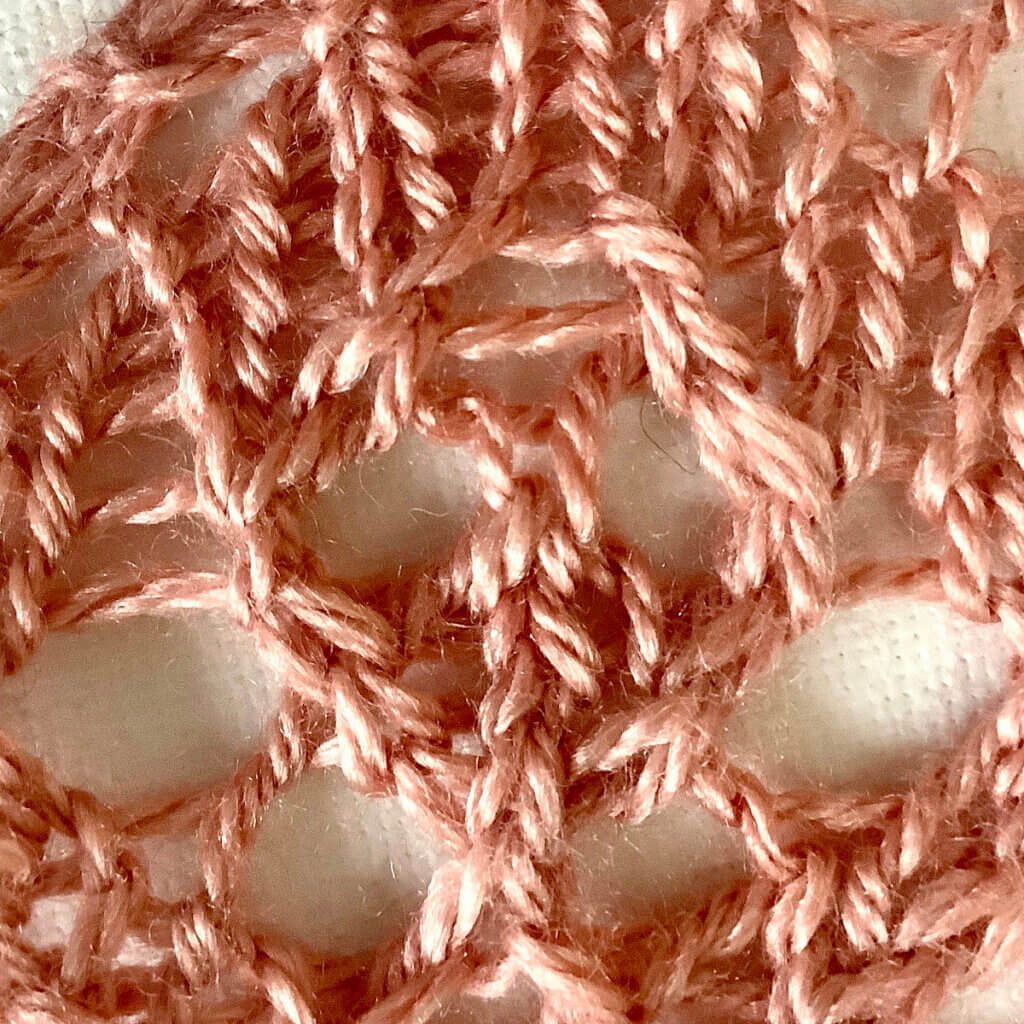
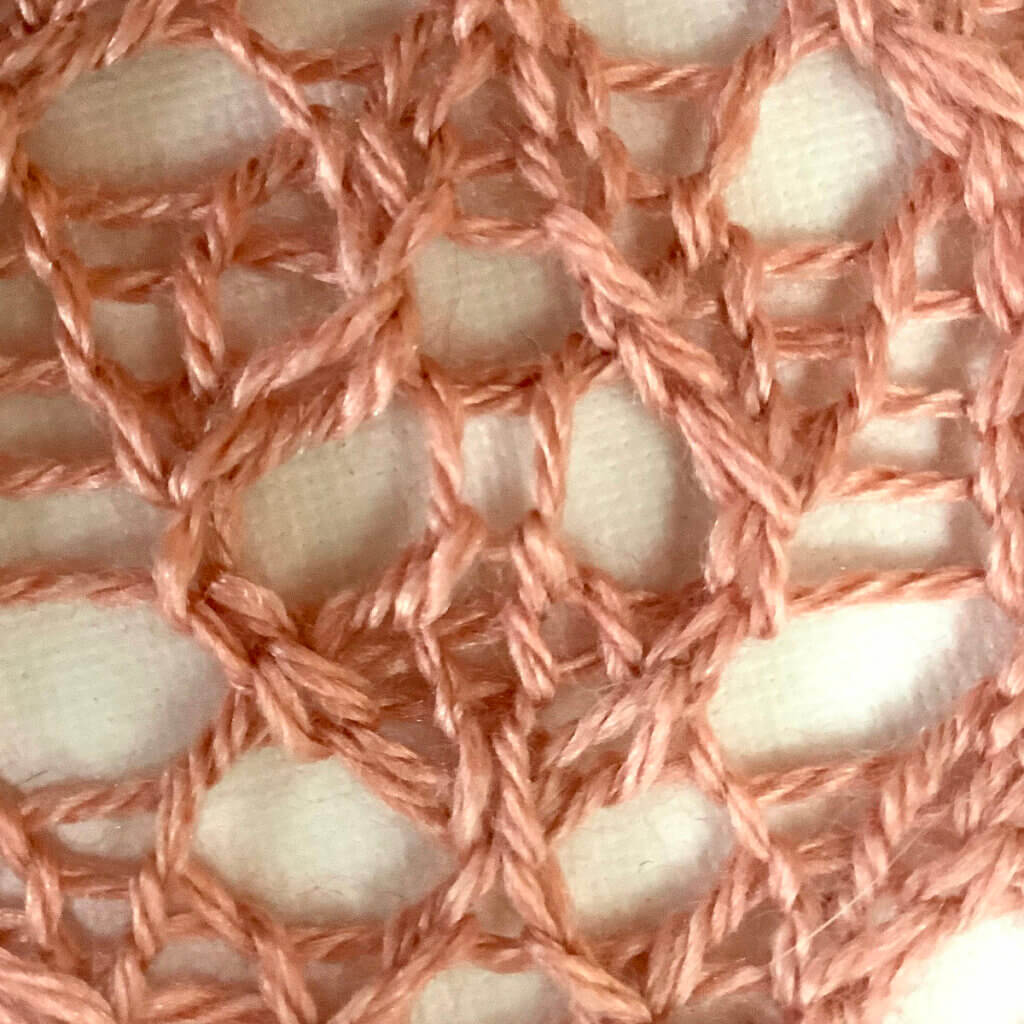
The challenge in working this stitch is recognizing the stitch to insert your needle in. So that’s what I’ll be showing you in this tutorial. I’ll be using the same project I also used for the bunny ears yo tutorial, so please don’t be alarmed by all the lace. The p1b stitch in itself does not involve any lace knitting. To show you the difference between using a regular purl and a p1b stitch in bunny ear yo lace, take a look below:

See how they differ? In the one on the left there is a horizontal thread over the yo part of the stitch. In the picture on the right the new stitch is made catching that horizontal thread too and thus keeping the yarn over open!

Materials used

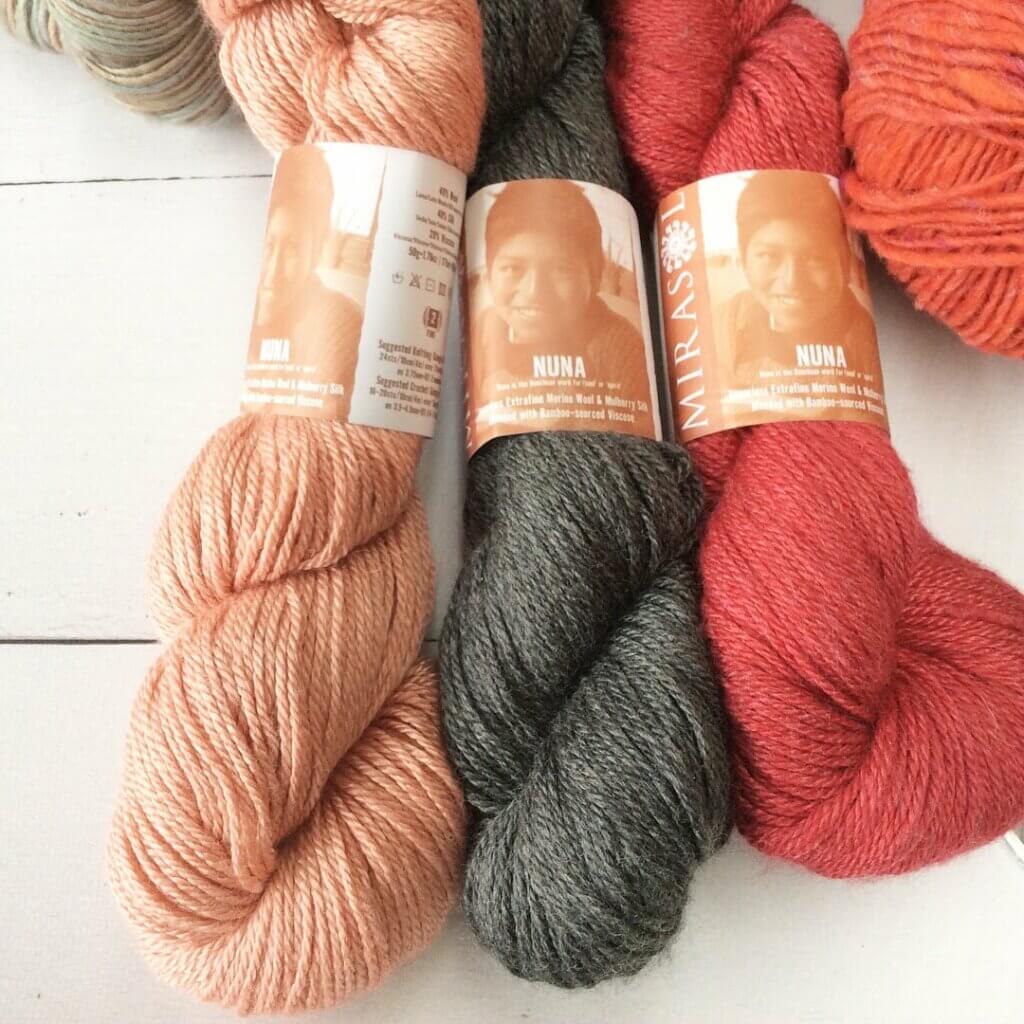
Yarn: Nuna by Mirasol Yarn (40% merino, 40% silk, 20% rayon from bamboo; 175 m (191 yds) / 50 g), here in the color 1046 Coral.

Needles: To be honest, I don’t recall what the brand is of the needles I used in this tutorial. I do know I used the 4 mm (US 6) size with a cable length of 80 cm (32 inches).

Working a p1b step by step

In patterns, you may encounter the following description of this stitch:
Purl 1 below (p1b): Purl into the stitch 1 row below the one on the needle by inserting the needle from back to front. Purl this stitch, then pull the worked stitch and the stitch above off the needle together.
But how to actually do this? Read on!

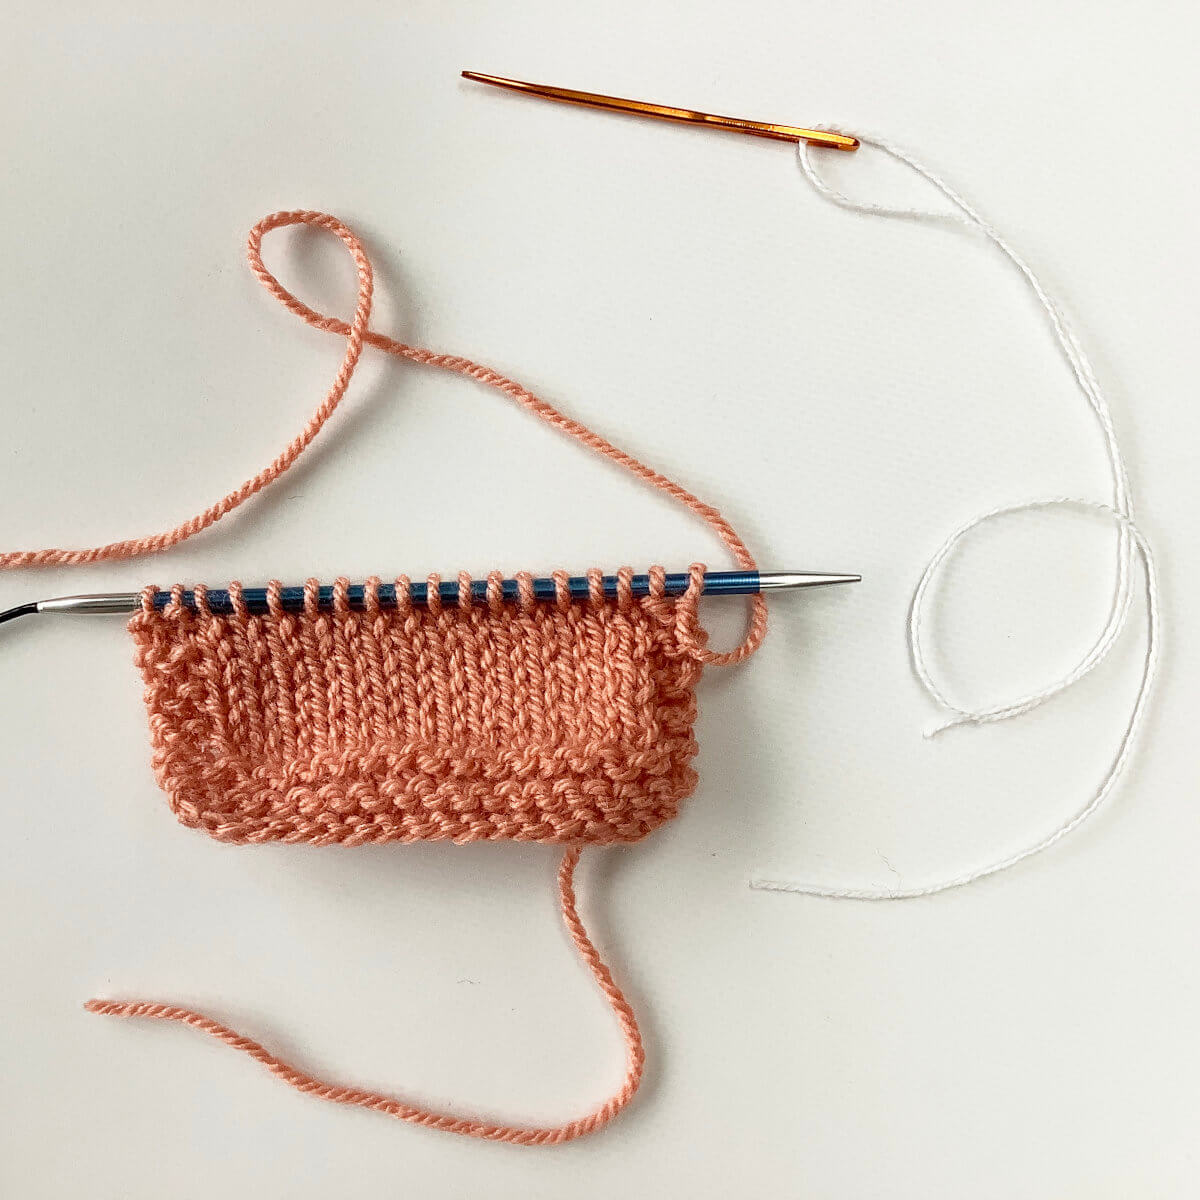
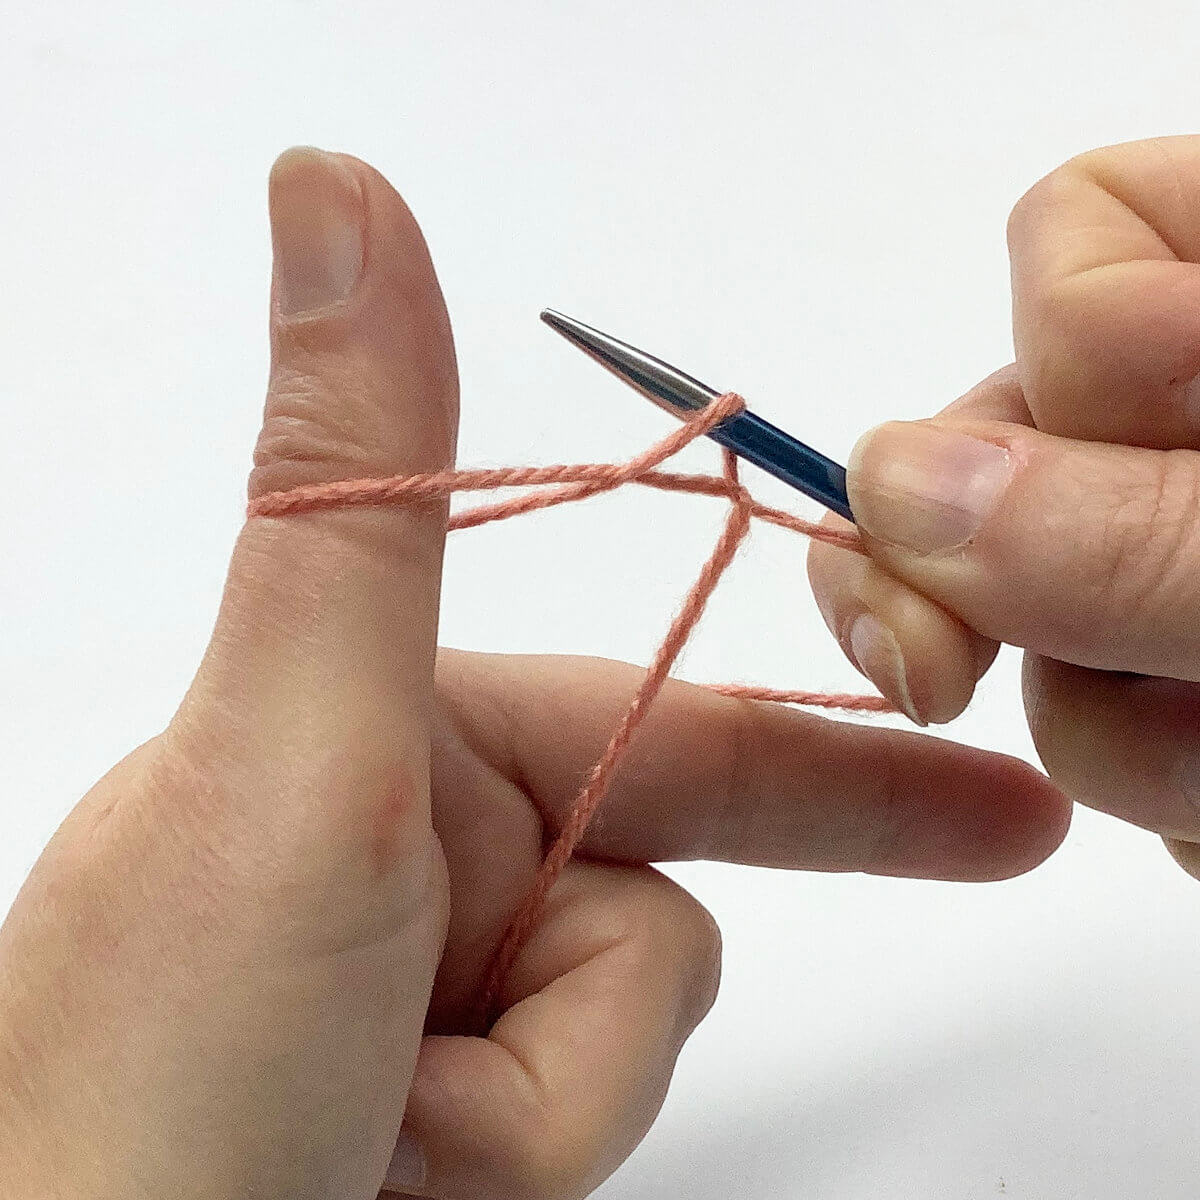
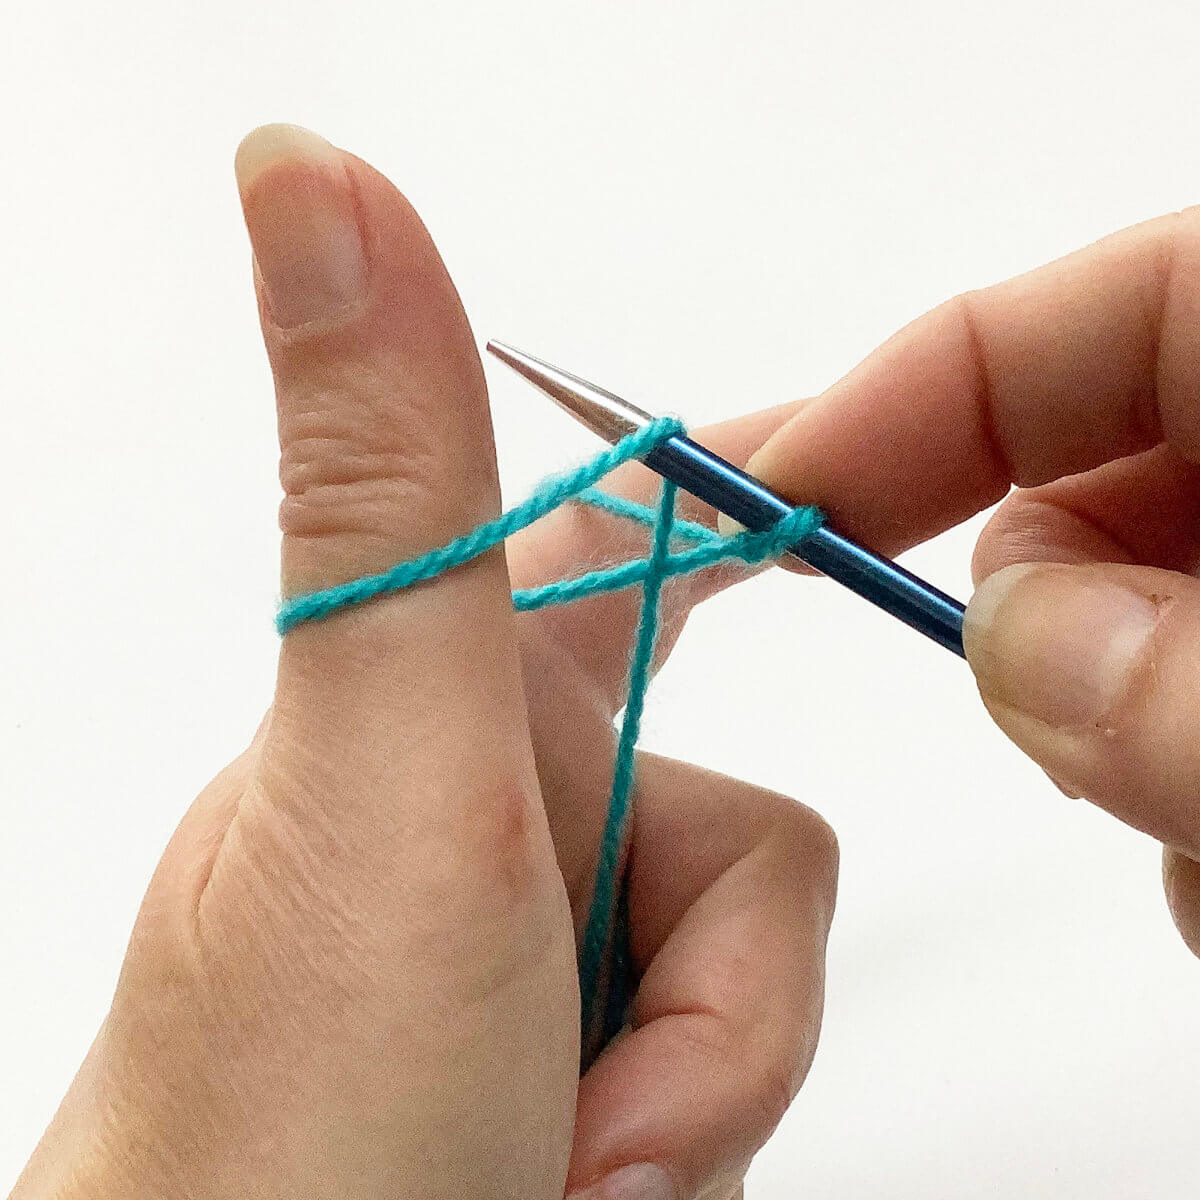
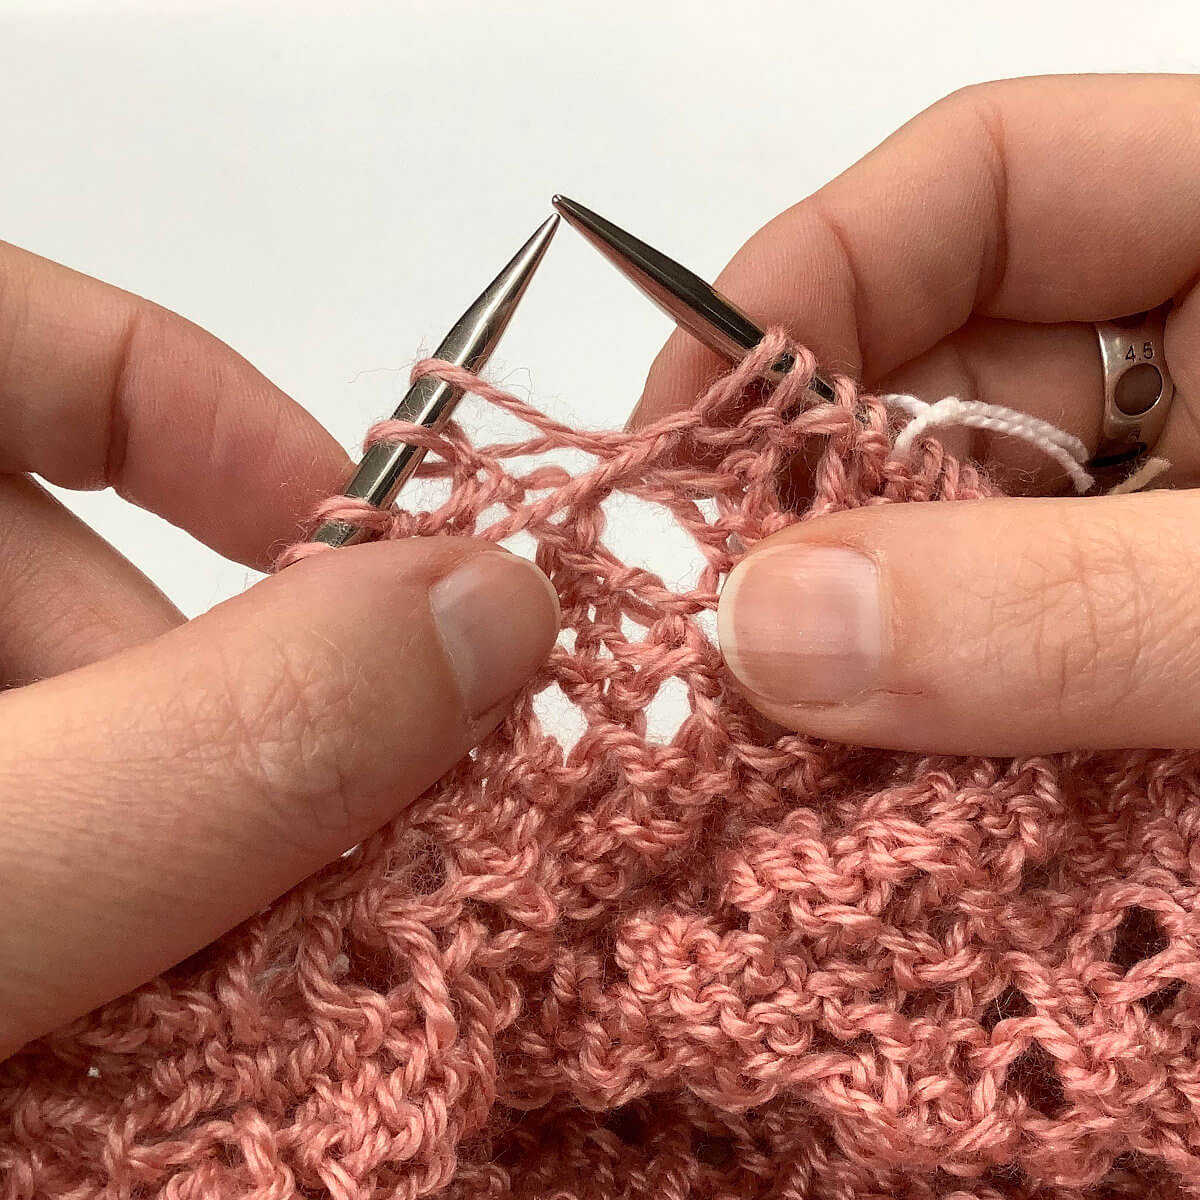
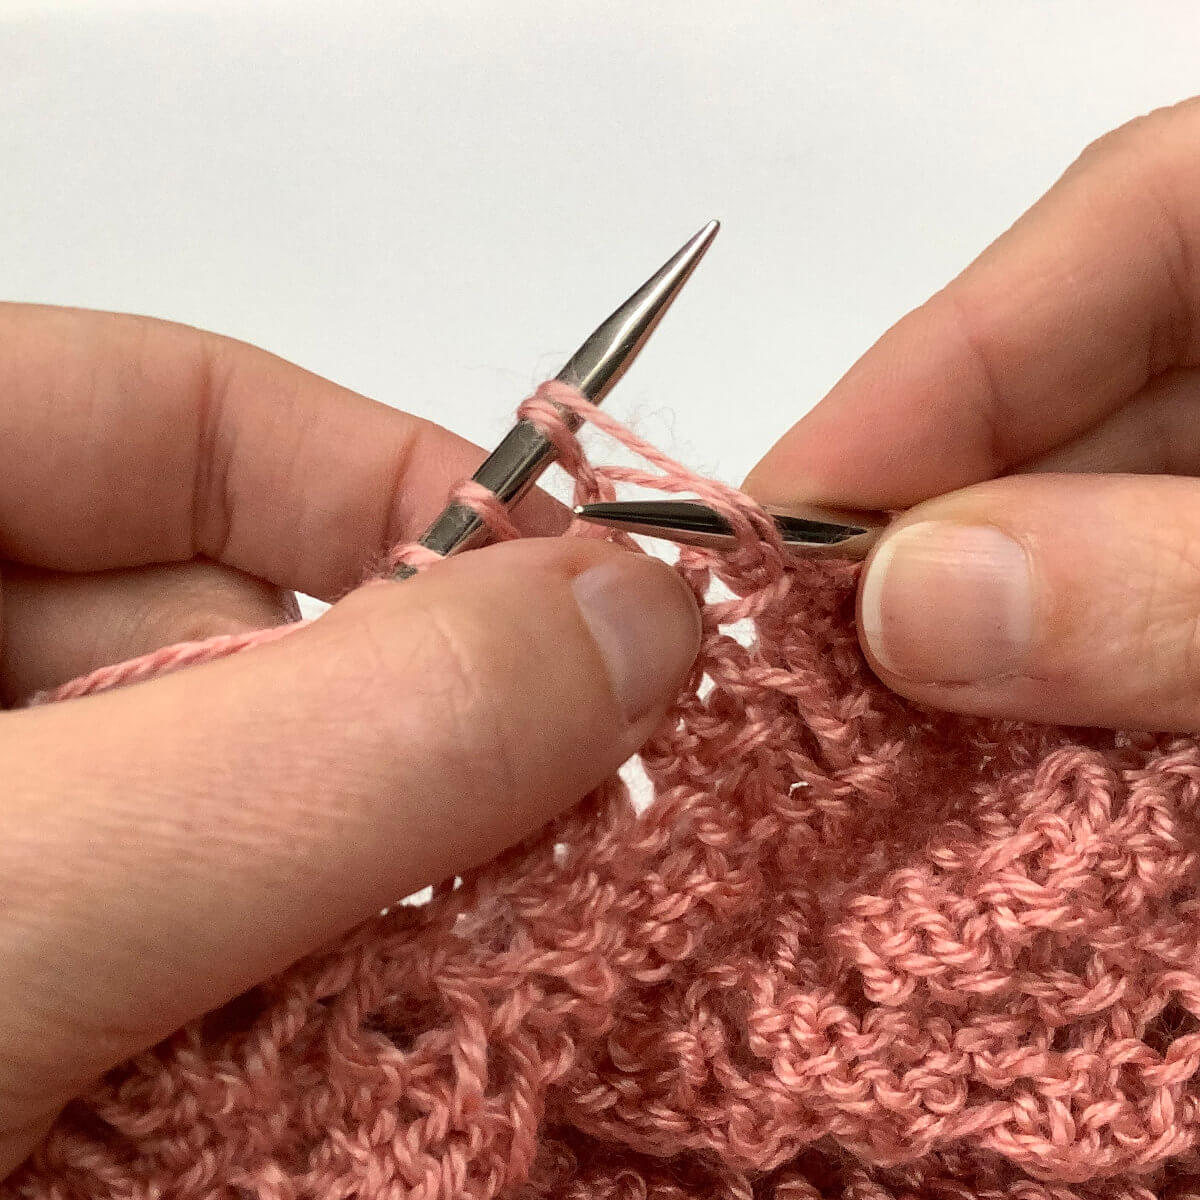
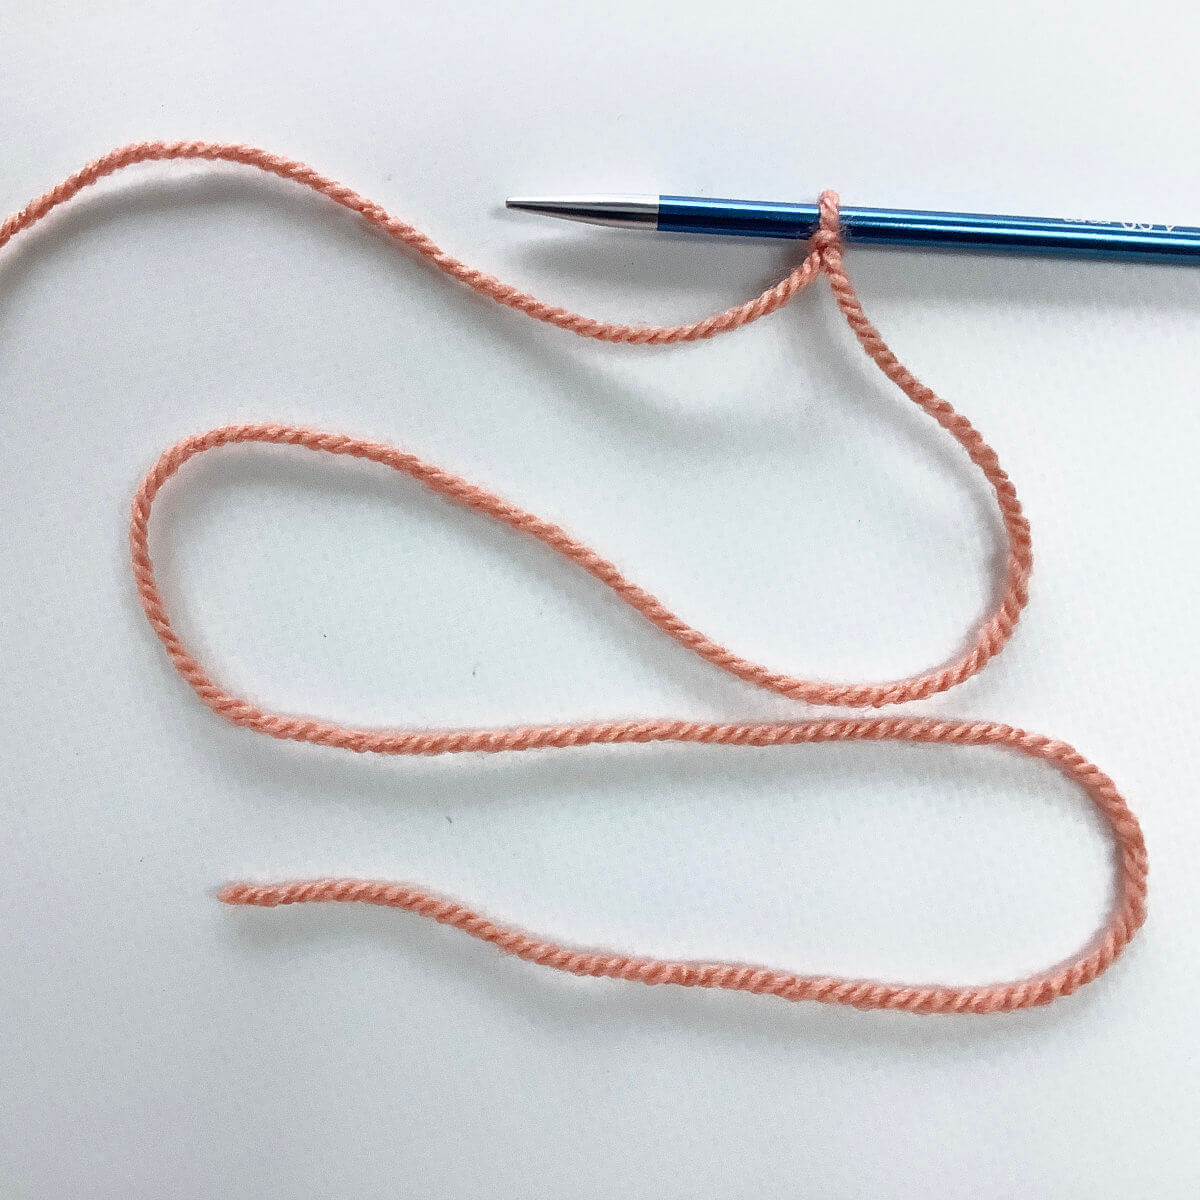
  1. First, work your way across the row until you’ve reached the point where you want to make the stitch.

    See that first stitch on the left-hand needle? That’s the yo in the middle of the bey stitch where I’ll be making the p1b stitch.P1b step 1

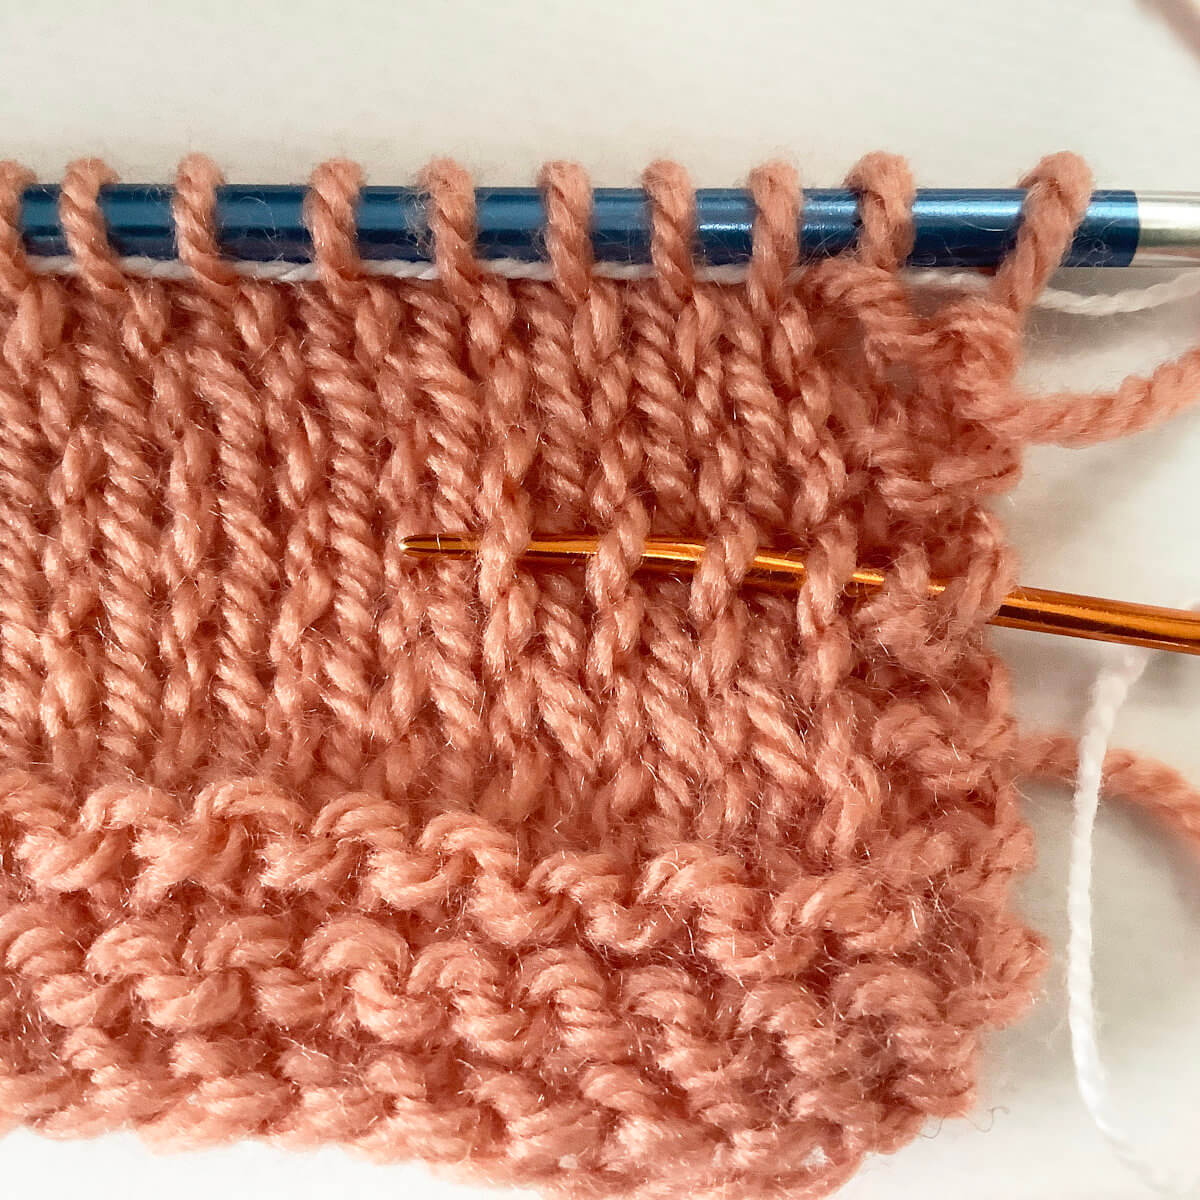
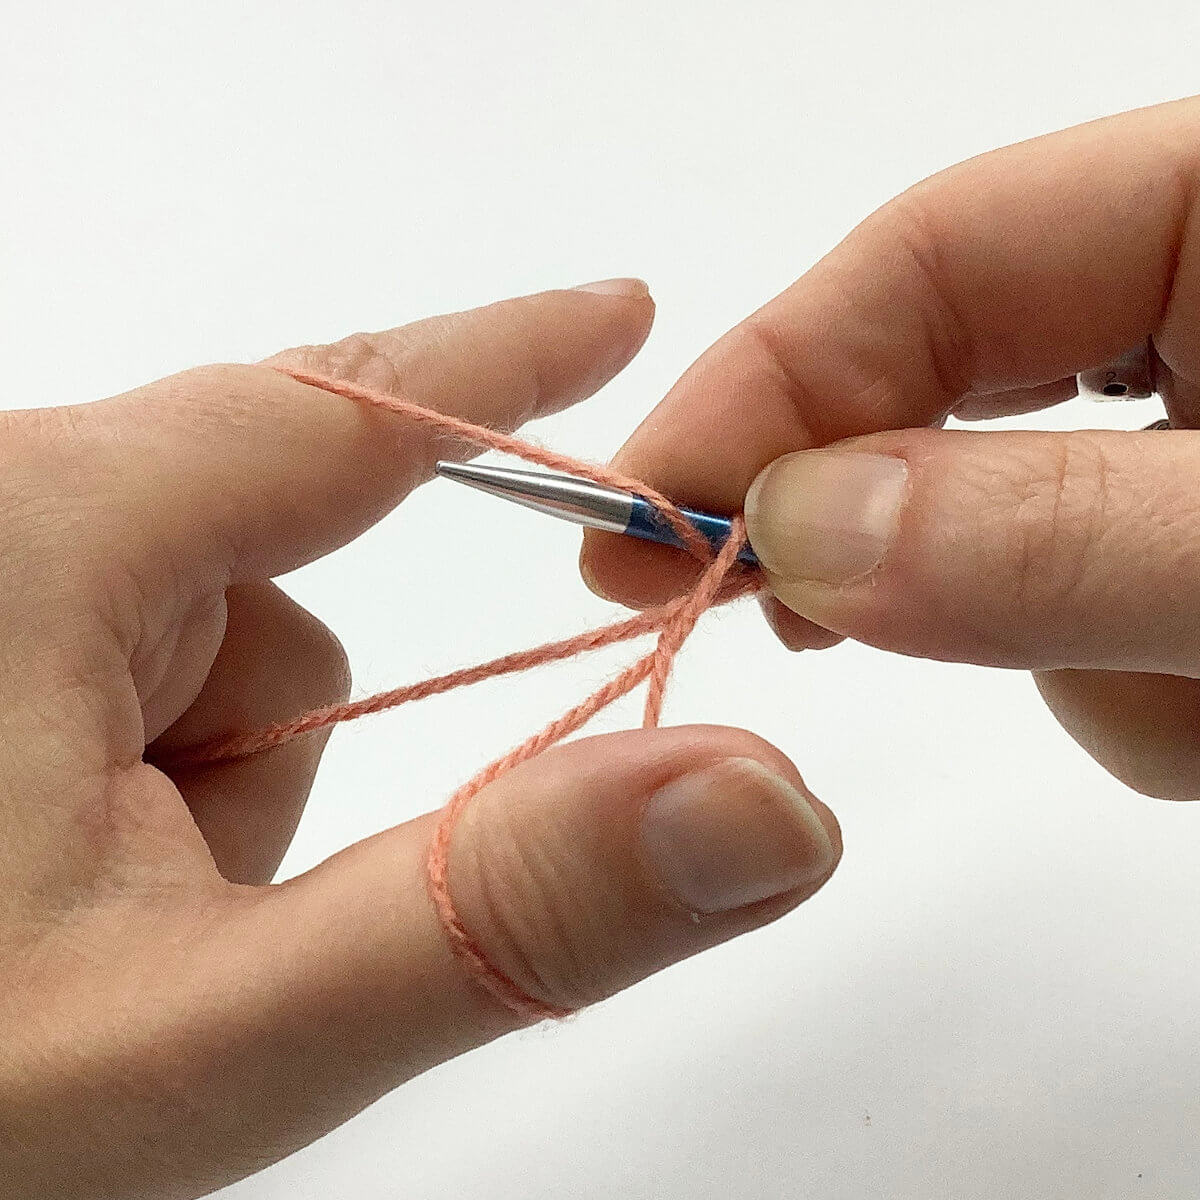
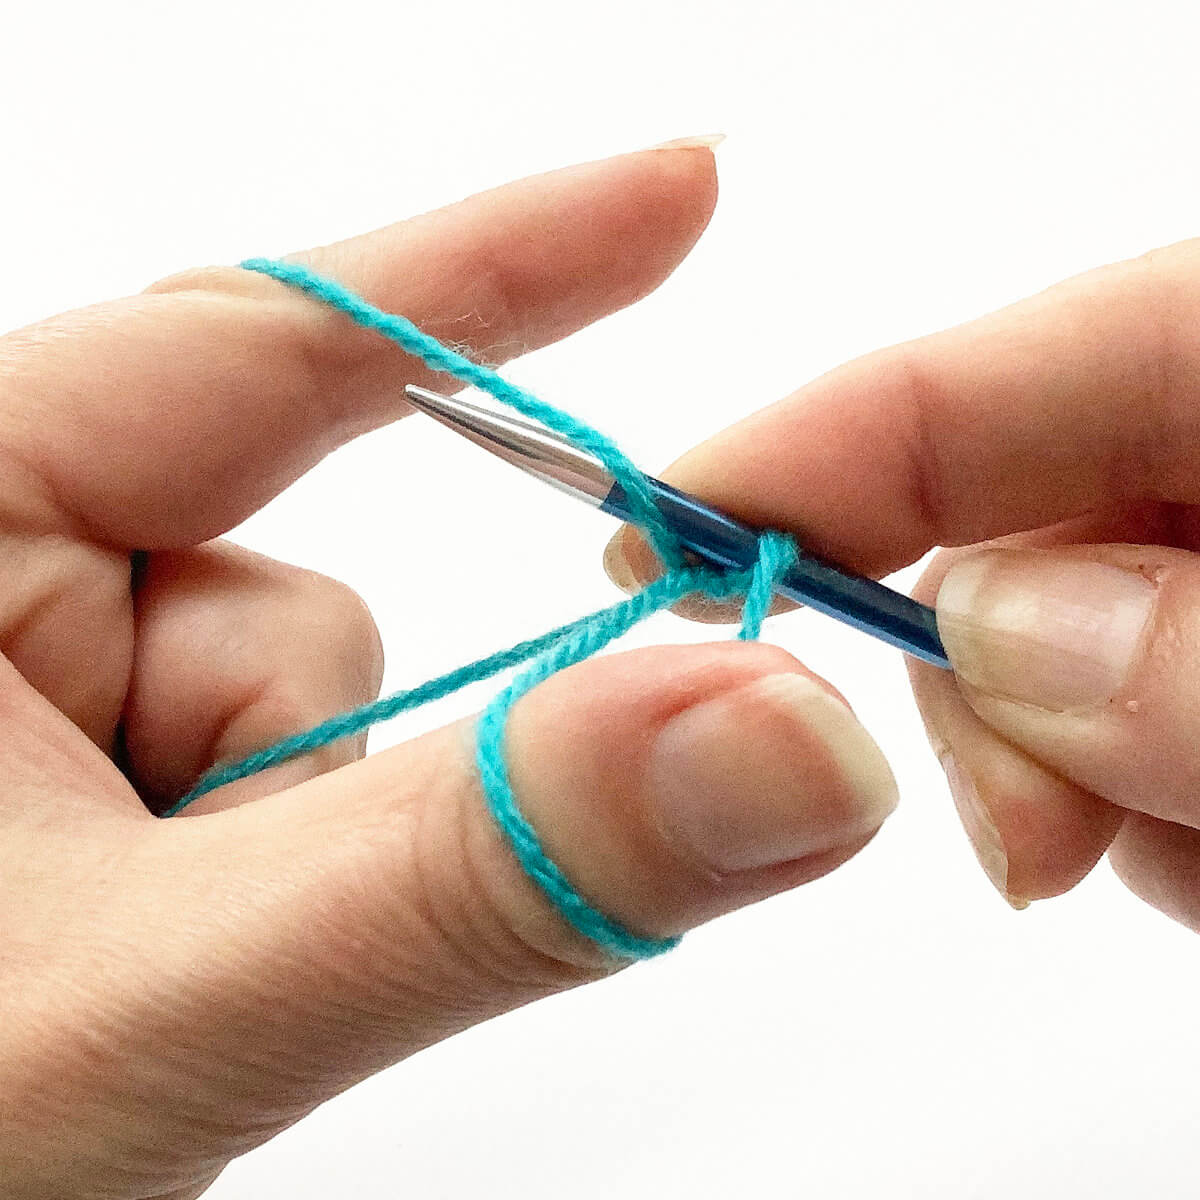
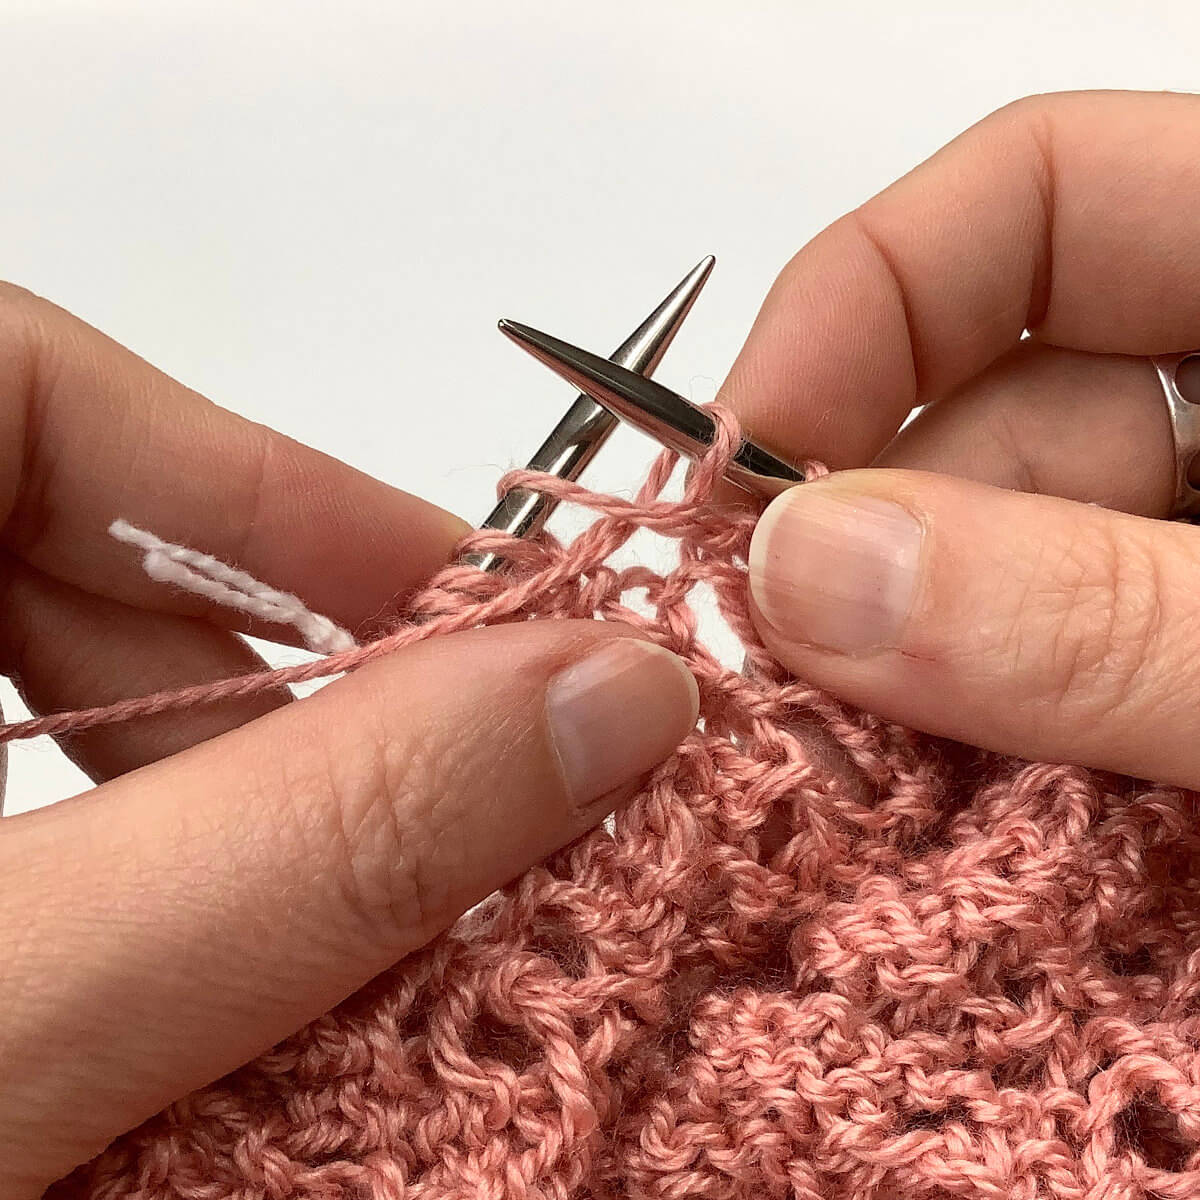
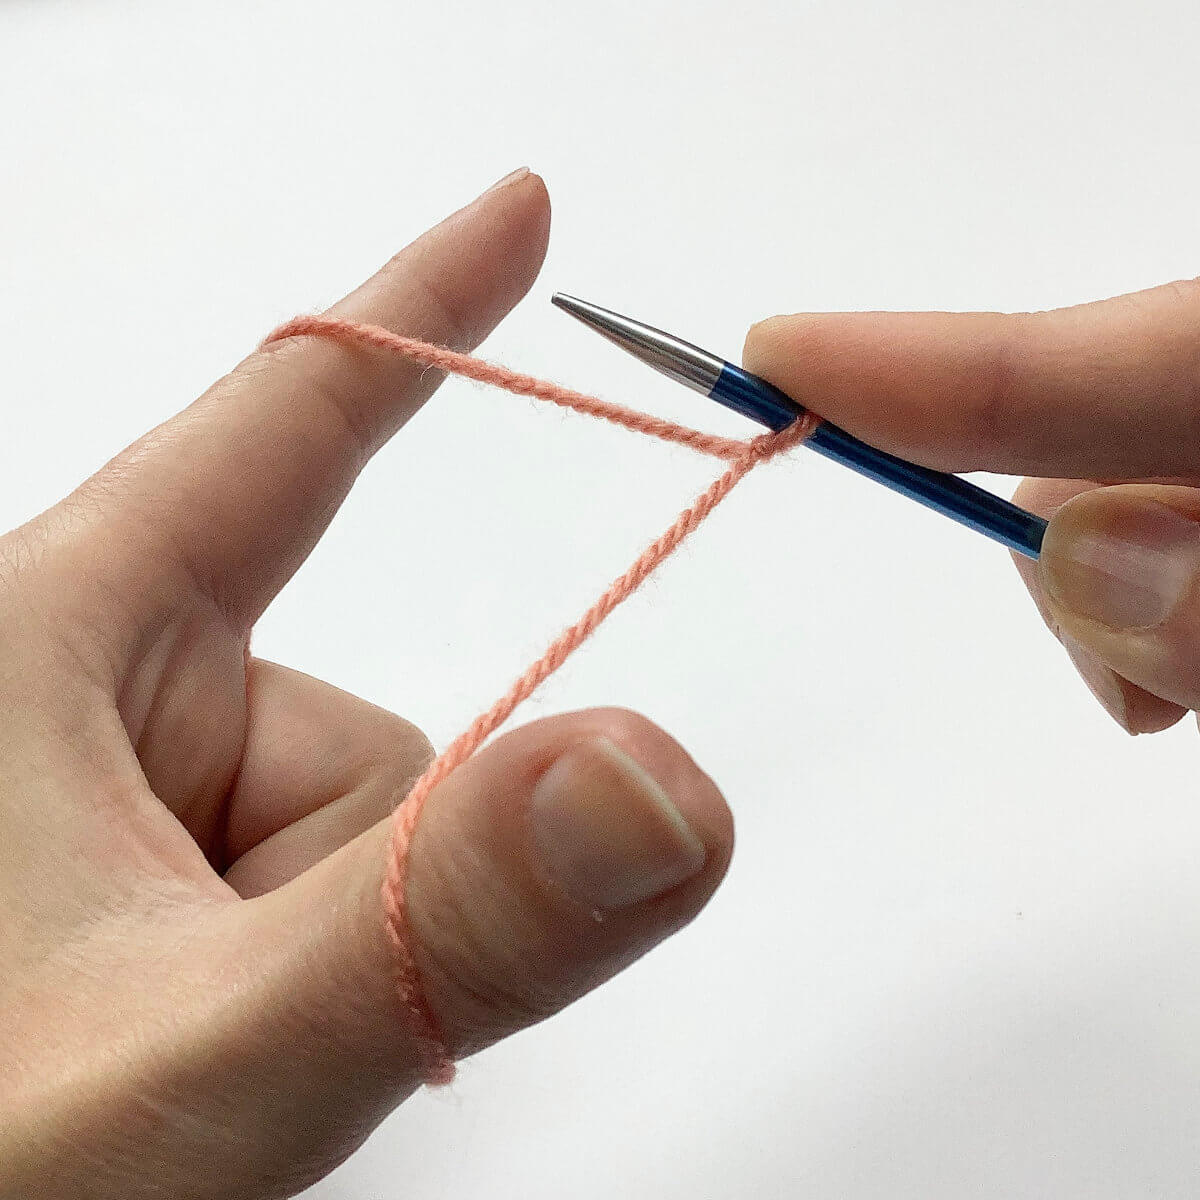
  2. Insert the right-hand needle purl wise

    Normally, you’d insert the needle directly into the loop that’s on the left-hand needle. However, in this case we want to insert the needle into the stitch below that one.P1b step 2

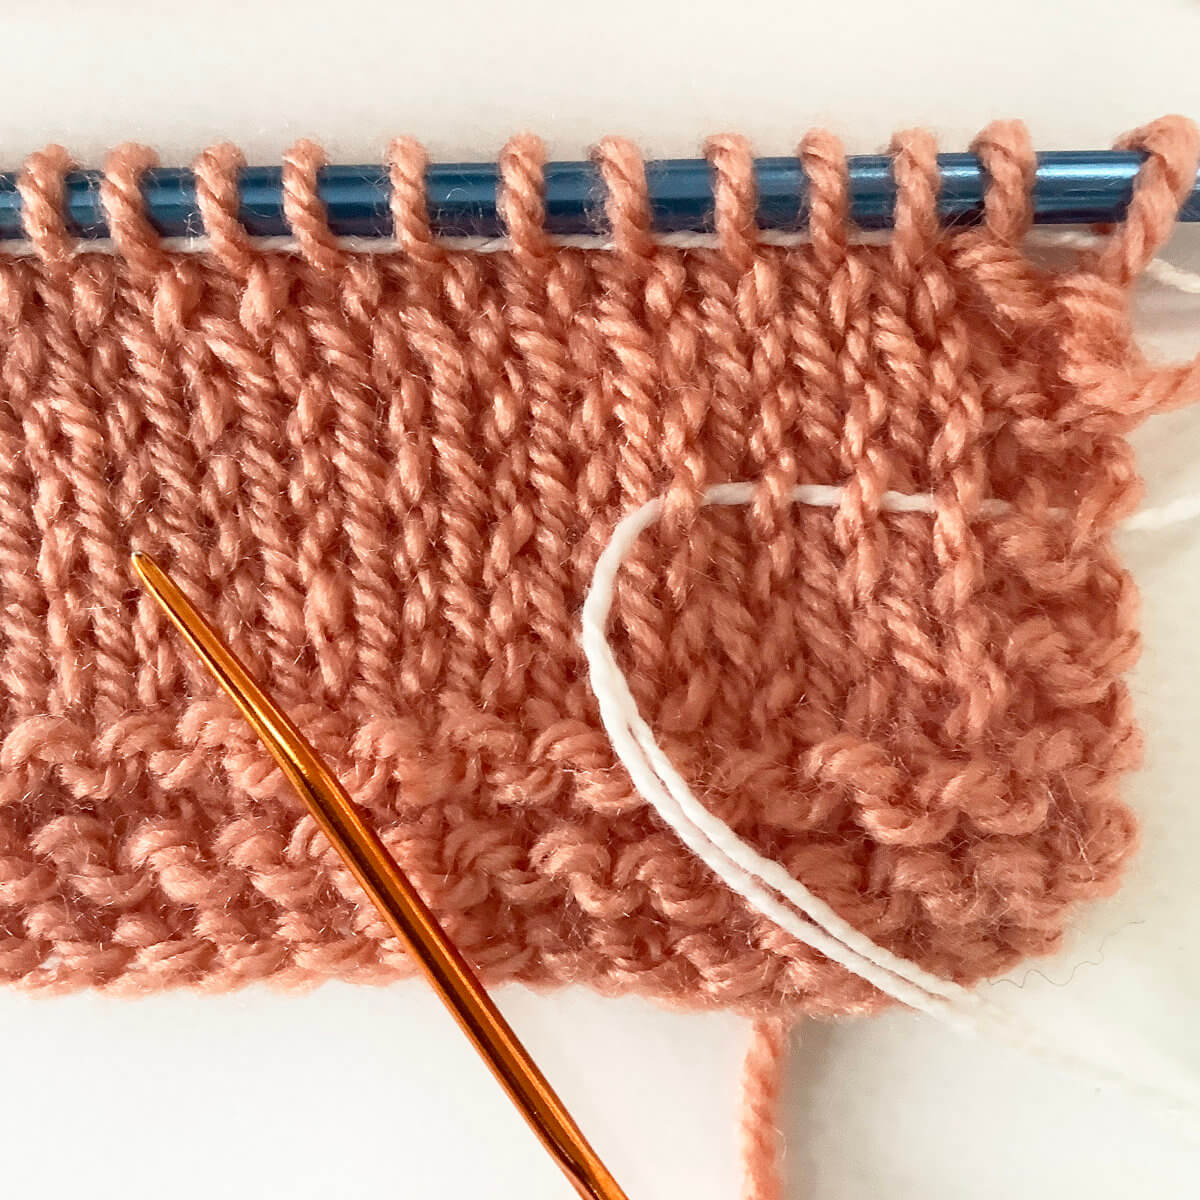
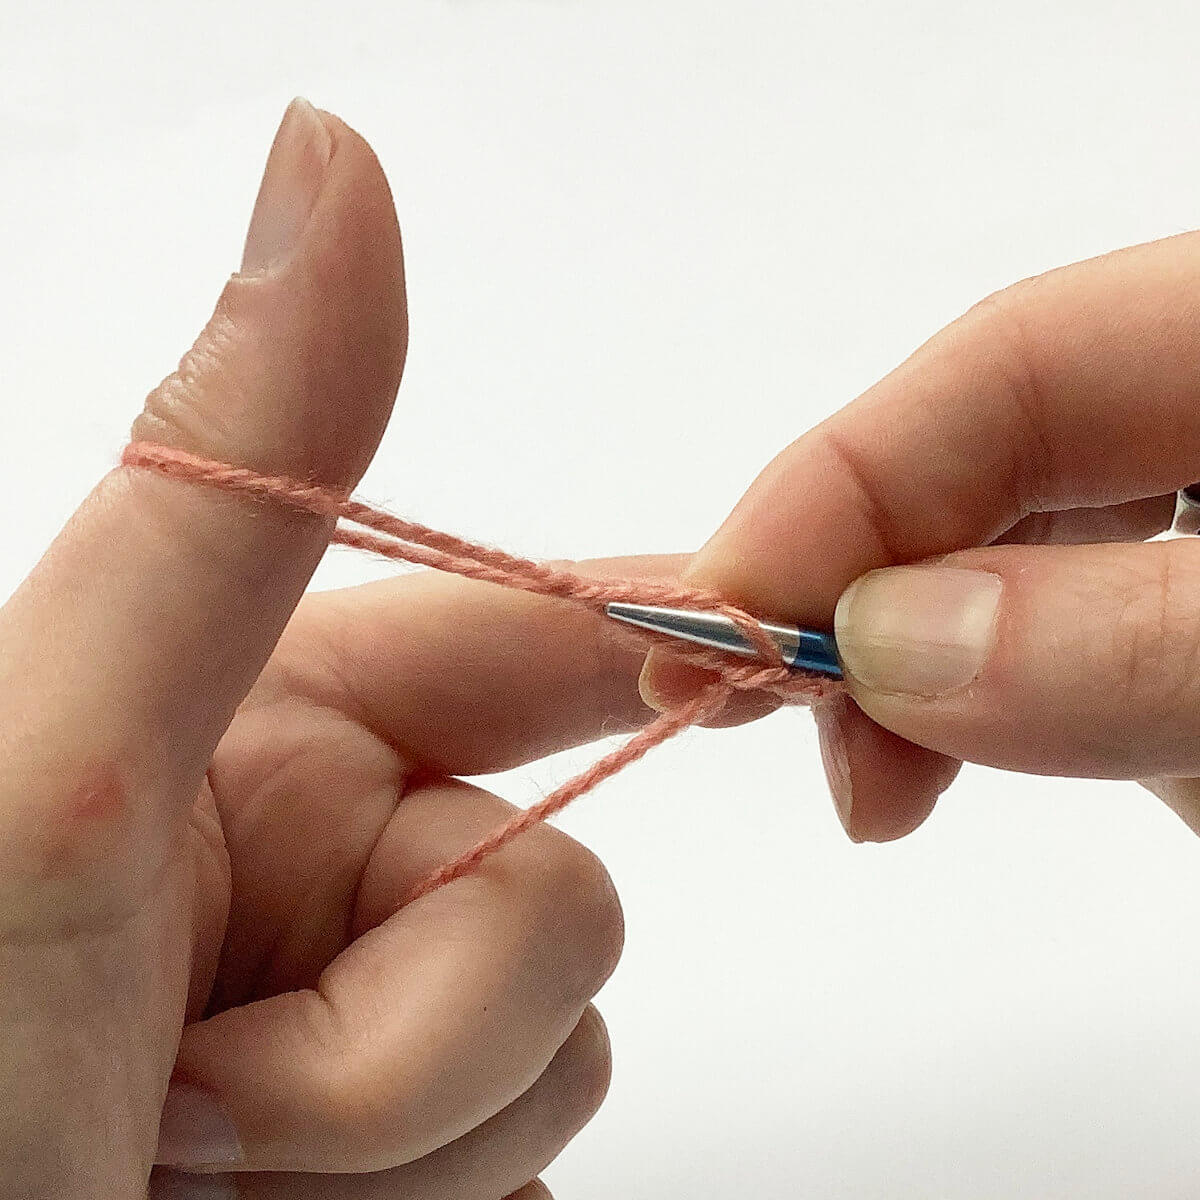
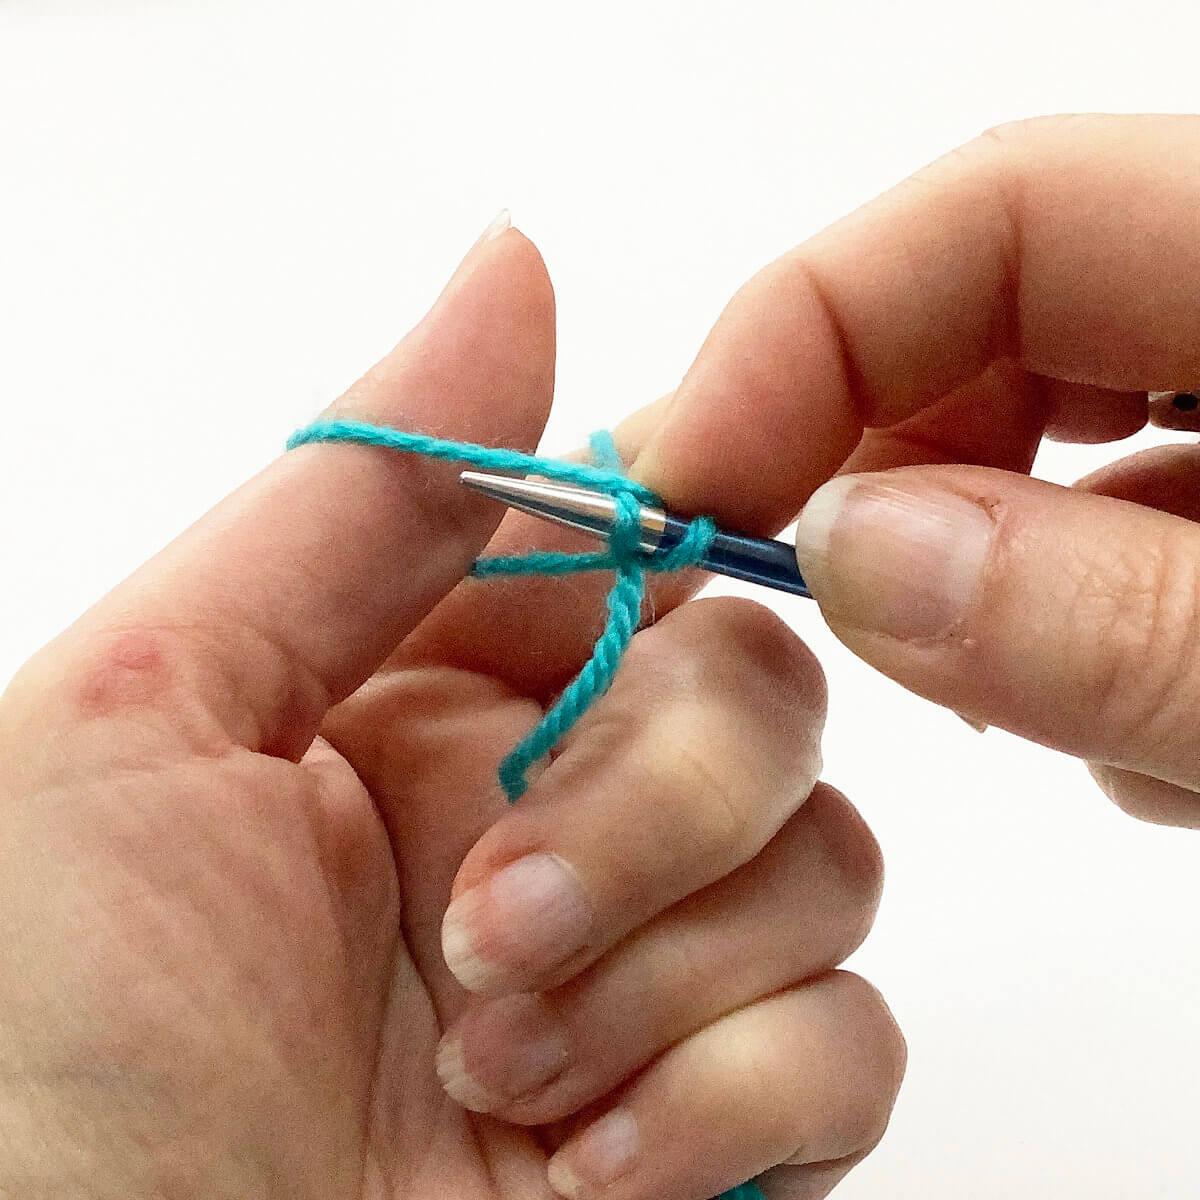
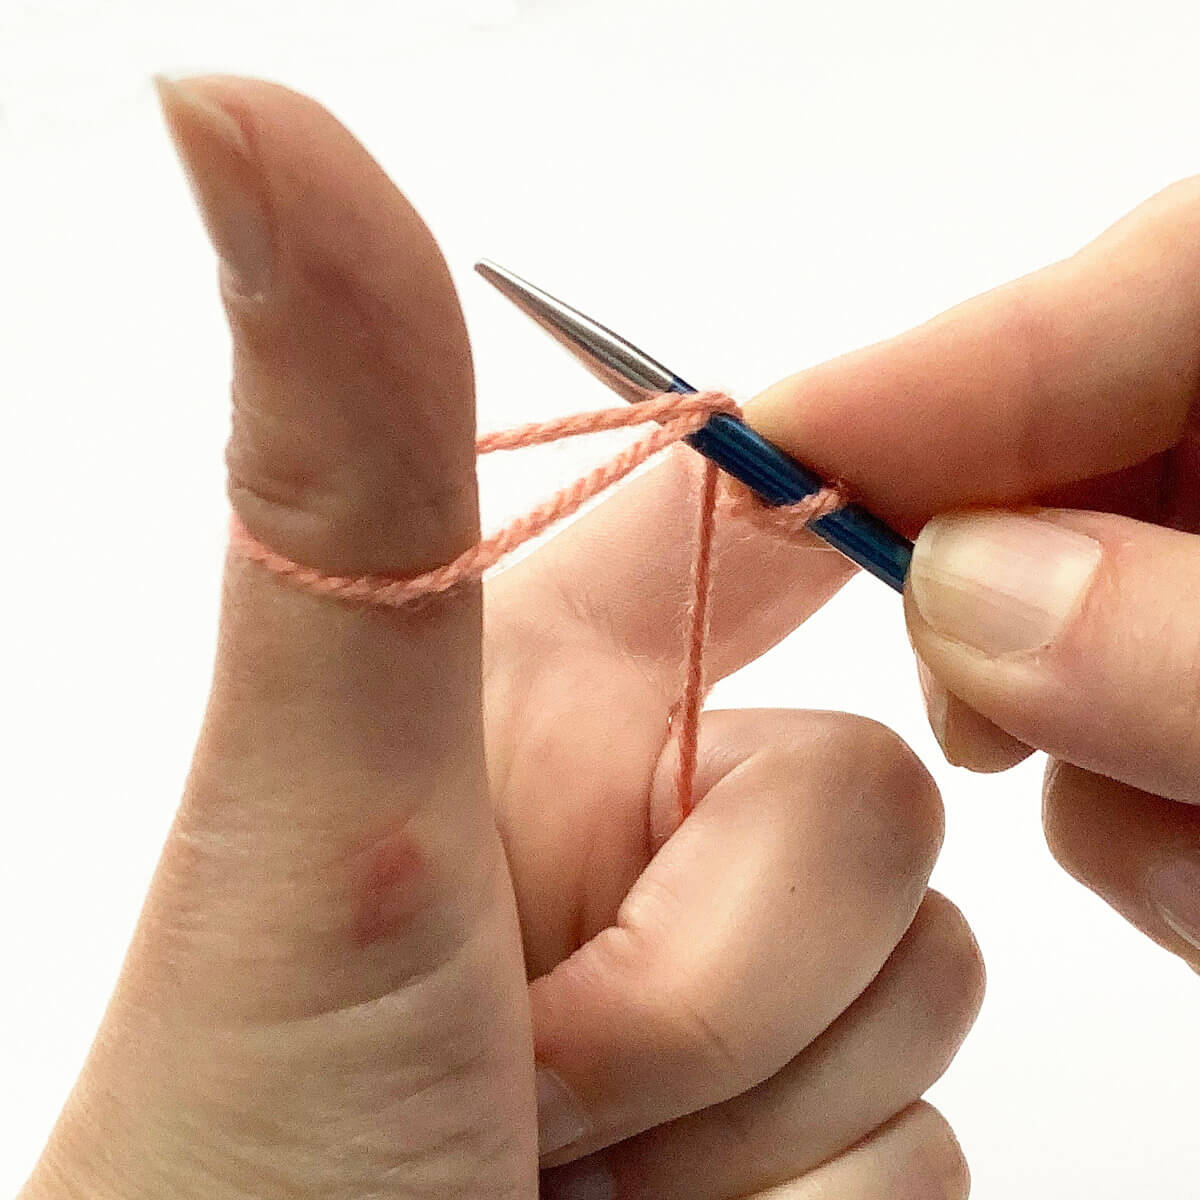
  3. Now wrap your working yarn around the needle and pull it through.

    See that you’re actually pulling it through 2 stitches at once? That is, the one on the needle and the one directly below it. To finish the stitch just slip the top stitch off the left-hand needle without actually working it. Because the fabric is secured by purling into the stitch below it, the stitch won’t run down unraveling.P1b step 3

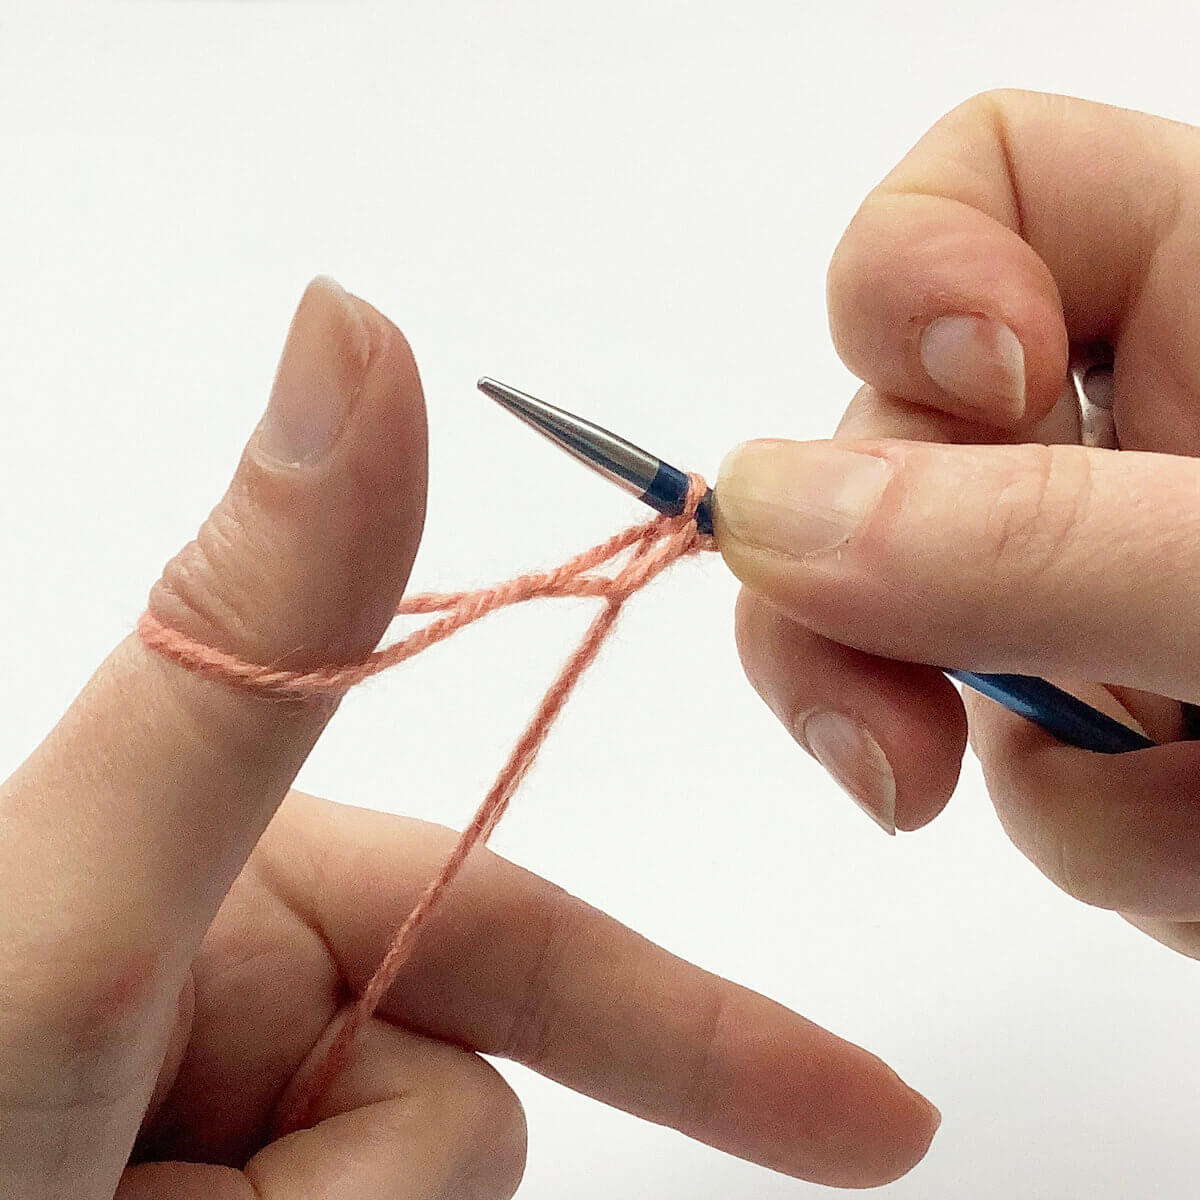
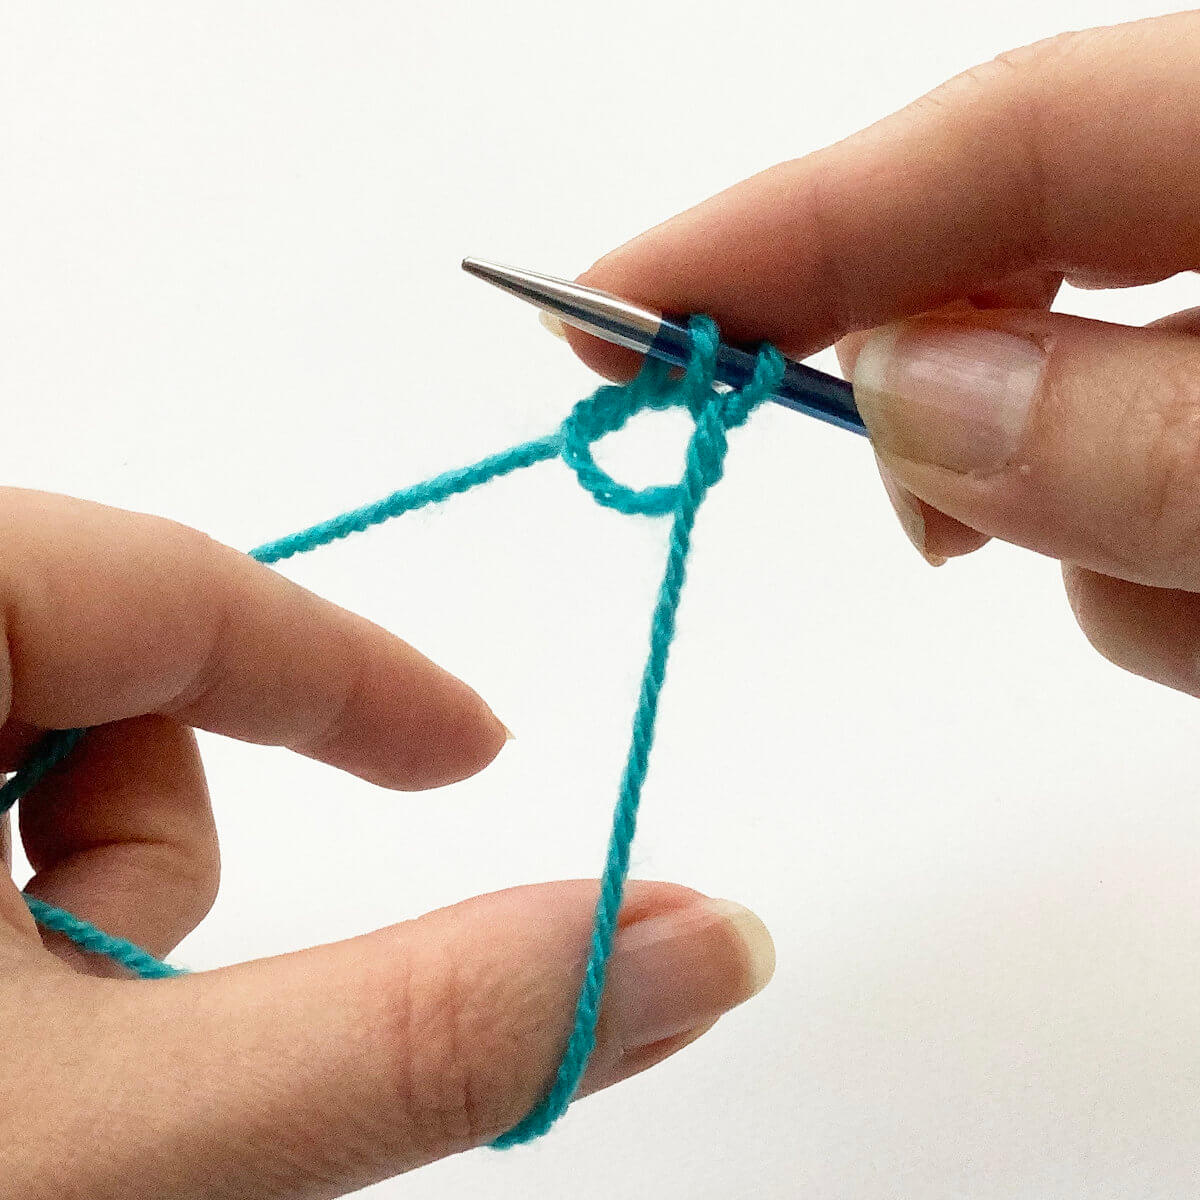
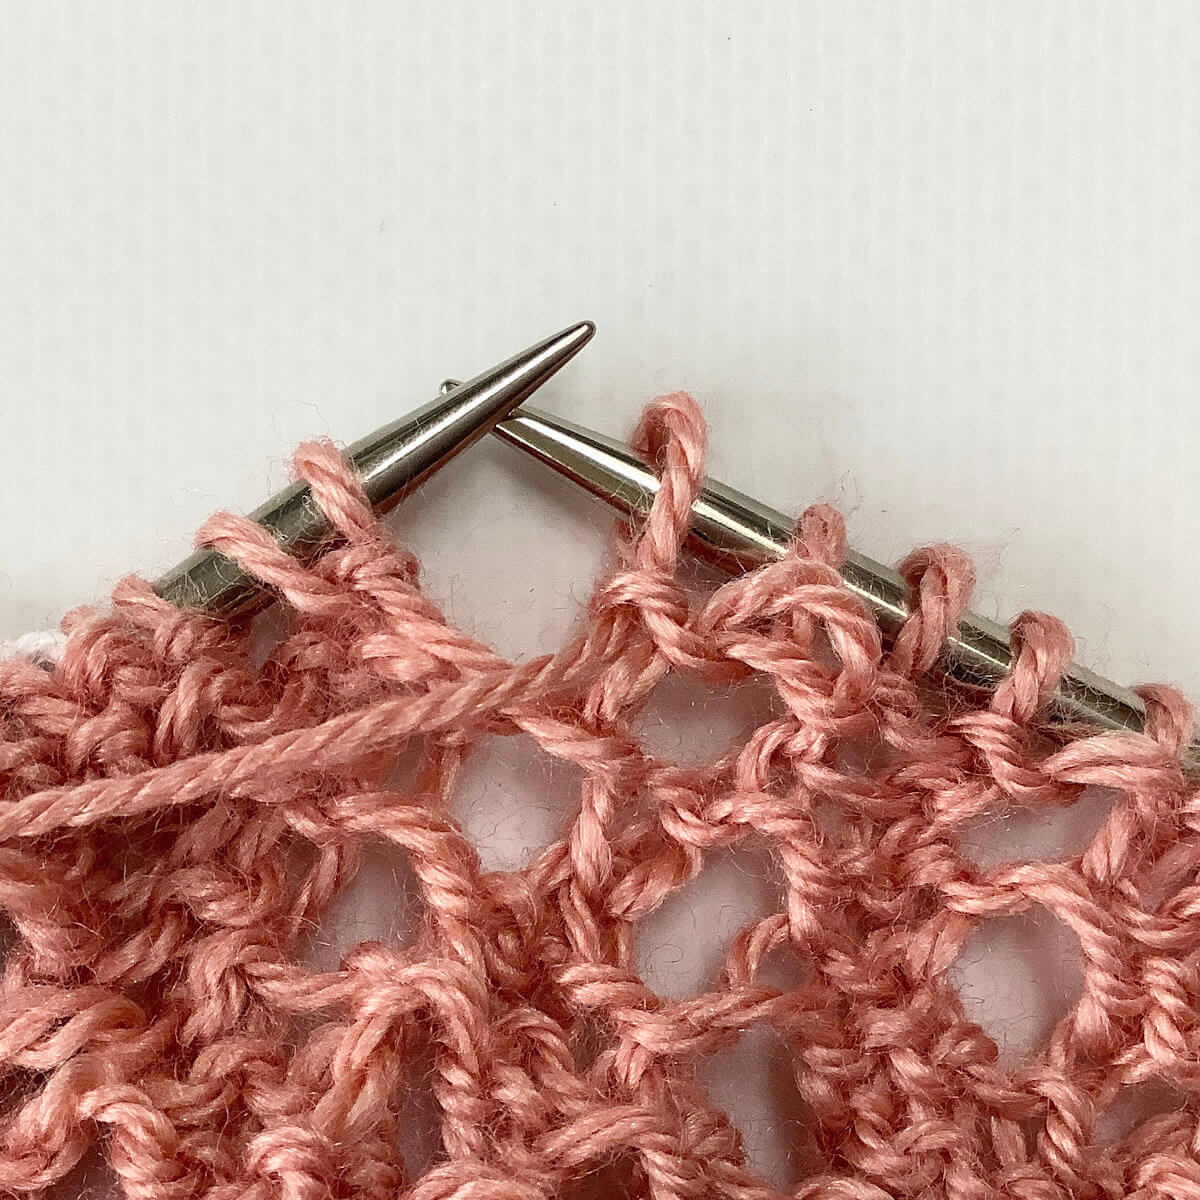
  4. The below picture shows how it looks on the purl side of the fabric after I’ve worked a regular purl stitch in the 3rd and last stitch of the bey.

    You can see the 2 strands that are caught by the p1b pretty well.P1b, the result on the purl side

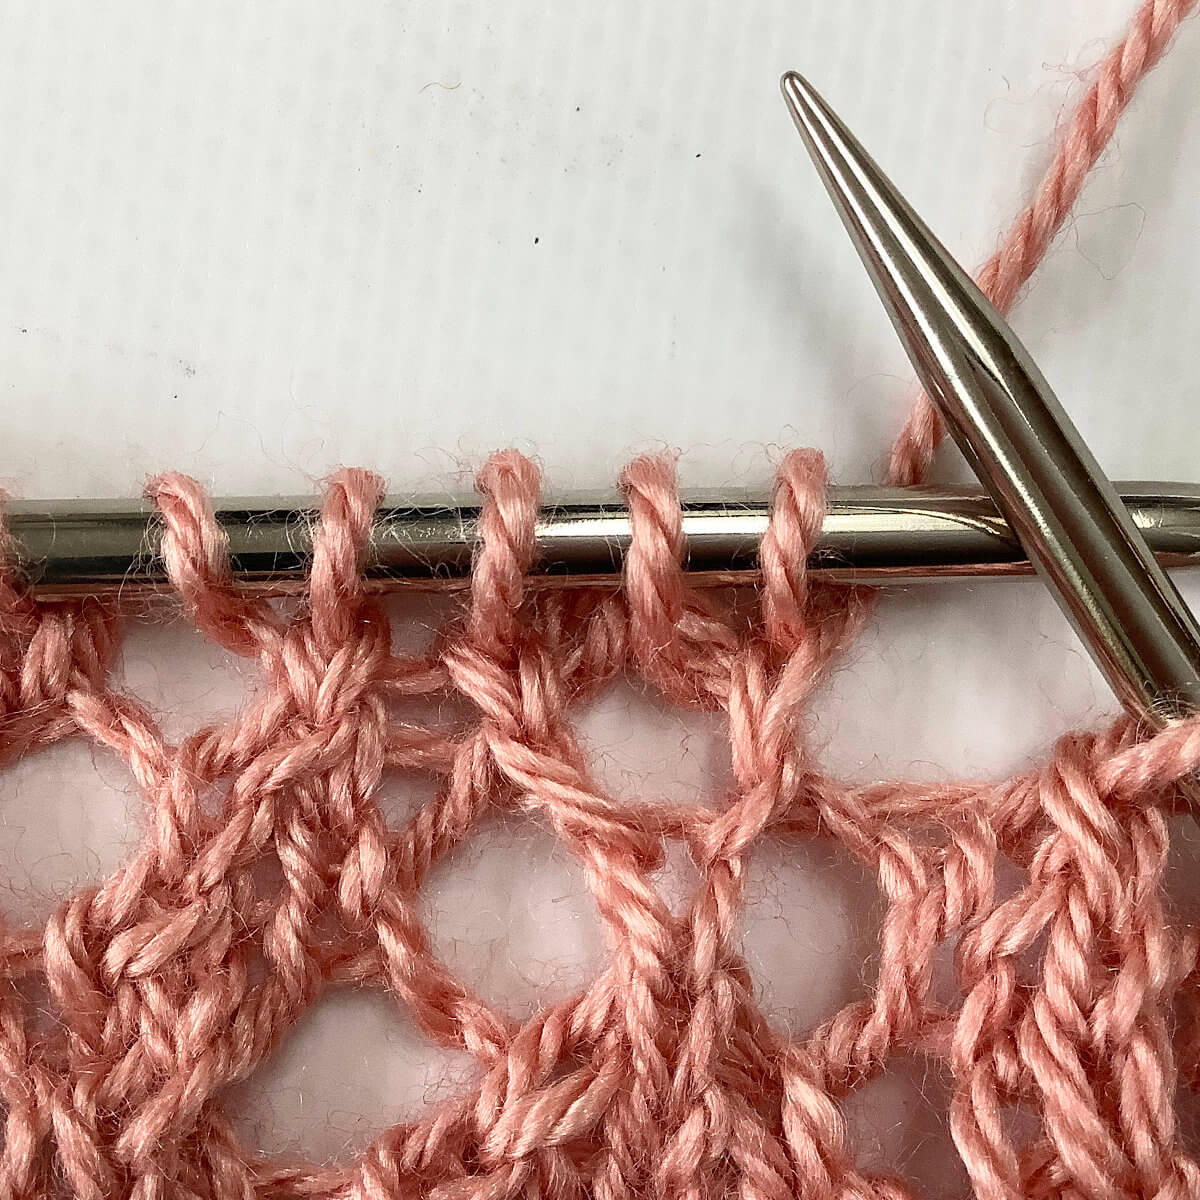
  5. Turning the fabric around, this is how it looks on the right (knit) side of the fabric.

    I really like how it looks!P1b, the result on the right (knit) side

Patreon logo

Thanks to my Patreon supporters for bringing you this freebie! Creating quality patterns and tutorials is a lot of work and resource-intensive. However, I find it important to give you free content like this tutorial. Thanks to the generous support of my Patreon supporters, I can make it happen. Thank you, patrons! Click here to join, or click here to read more about La Visch Designs on Patreon.

tutorial – working a purl 1 below (p1b) Read More »

tutorial – working the bunny ears yo stitch

tutorial - working the bunny ears yo stitch

In this tutorial I’m going to show you a stitch that I’m using in a new design: the bunny ears yarn over stitch, or “bey” for short. It uses a bunny ears decrease combined with a yarn over. Now, you may wonder what a bunny ears decrease is. I’ll tell you! It’s a symmetrical way of decreasing 3 stitches to only 2! I’ll be making a tutorial on this decrease and it’s variations soon.

Back to the bunny ears yo stitch. In this stitch a yarn over is placed between both parts of the decrease, essentially negating the decrease. Adding the yo in between both parts of the decrease make it look like 2 directional decreases on both sides of a yo, but without actually increasing or decreasing anything. The result is a very pretty stitch that does wonderfully in lace patterning as pictured here. Let’s get started with how to actually work this stitch!

Materials used

Yarn: Nuna by Mirasol Yarn (40% merino, 40% silk, 20% rayon from bamboo; 175 m (191 yds) / 50 g), here in the color 1046 Coral.

Needles: To be honest, I don’t recall what the brand is of the needles I used in this tutorial. I do know I used the 4 mm (US 6) size with a cable length of 80 cm (32 inches).

Working the bunny ears yo stitch step by step

In patterns, you may encounter the following description of this stitch:
Bunny ears yo (bey): Knit 2 stitches together but leave the second stitch on the left needle, yo, next work skp over the next 2 stitches.
But how to actually do this? Read on!

  1. First, work your way across the row until you’ve reached the point where you want to make the stitch.

    See those 3 stitches on the left-hand needle? That’s where I’ll be making the bey stitch.Bunny ears yo stitch - step 1

  2. Next, insert the tip of the right-hand needle into the first 2 stitches at the same time as if to knit.

    Over these stitches, we’ll be doing the first steps of a k2tog.Bunny ears yo - step 2

  3. Wrap the yarn around the needle…

    Bunny ears yo stitch - step 3

  4. … and pull the yarn through the 2 stitches.

    Bunny ears yo stitch - step 4

  5. Next, slide only 1 of the 2 original stitches of the left-hand needle.

    With a regular k2tog, both stitches would be moved off the needle. So this is where it starts to go different.Bunny ears yo stitch - step 5

  6. Next, wrap the yarn around the needle.

    This is where we make the “yarn over” part of the stitch.Bunny ears yo stitch - step 6

  7. Now we’re starting the left leaning decrease part of the stitch.

    This we’ll be working on the 2 remaining stitches on the left-hand needle: 1 stitch we haven’t handled yet, and 1 stitch that we didn’t move off the needle when working the k2tog right-leaning decrease. This part of the stitch can be worked both as ssk and skp, but since I personally prefer skp I’ll be showing this in the tutorial.

    To start insert the tip of the right-hand needle into the first stitch as if to knit …Bunny ears yo stitch - step 7

  8. … and slip it onto the right-hand needle without actually knitting it.

    This is how it then looks:Bunny ears yo stitch - step 8

  9. Next, we are going to knit the second stitch.

    To do so, we start with inserting the right-hand needle into the first stitch on the other needle as shown below.Bunny ears yo stitch - step 9

  10. Wrap the yarn around the needle…

    Bunny ears yo stitch - step 10

  11. . …pull it through the stitch you inserted the right-hand needle in…

    Bunny ears yo stitch - step 11

  12. …and slip the original stitch off the left-hand needle.

    Bunny ears yo stitch - step 12

  13. Next, insert the left-hand needle into the second stitch counted from the tip of the right-hand needle…

    Bunny ears yo stitch - step 13

  14. … after that, pull it over the first stitch from the tip of the right-hand needle to complete the decrease.

    Do you see how it slants to the left? With this the bunny ears yarn over stitch itself is finished. But, for optimal results, we’re not done yet. Take a look at the next section to see why.Bunny ears yo stitch - step 14

Working the WS row after the bey row

After working a row where bunny ear yo’s are worked there, of course, also follows a wrong side purl row. However, when working regular purl stitches over the bey stitches, this creates a horizontal thread over the yo part of the stitch. This is, of course, no problem if you like how this looks. You can see this below on the left. But, if you prefer the bey stitch to really look like a big yo, flanked by directional decreases, we really have to do something different from a regular purl stitch. The solution is working a purl 1 below or p1b instead. This gives the result as shown on the right:

Please note that the picture on the left was right at the beginning of my project, in the set-up section. The other one was further on in the body of the project, hence the difference in surrounding fabric.

A tutorial for the purl 1 below or p1b will follow soon!

Patreon logo

Thanks to my Patreon supporters for bringing you this freebie! Creating quality patterns and tutorials is a lot of work and resource-intensive. However, I find it important to give you free content like this tutorial. Thanks to the generous support of my Patreon supporters, I can make it happen. Thank you, patrons! Click here to join, or click here to read more about La Visch Designs on Patreon.

tutorial – working the bunny ears yo stitch Read More »

tutorial – working a p2tog tbl

Tutorial on working the p2tog tbl decrease

Last time I showed you how to do a decrease worked on the wrong side of the fabric, that looks like a k2tog right leaning decrease on the right side: p2tog. In this tutorial it’s time to focus on the left leaning equivalent. In other words: a decrease worked on the wrong side, that looks like a skp or ssk left leaning decrease on the right side of the fabric. This is the “purl 2 stitches together through the back loop” decrease, or “p2tog tbl” for short.

Below I’ll show you how to work this decrease step by step.

Materials

Yarn: * Paintbox Yarns Simply DK, a good value, good quality 100% acrylic yarn, here in the color 128 Lime Green.

Needles: * KnitPro Zing Fixed Circular Needles. In this tutorial, I used the 4 mm (US 6) size with a cable length of 80 cm (32 inches).

Working a p2tog tbl step by step

  1. Work your way across the row until you’ve reached the point where you want to make the decrease

    In this case, I want to work the decrease 4 stitches in from the left side of the swatch.Working a p2tog tbl - step 1

  2. Pull down the fabric below the 2 stitches you’ll be working the decrease on

    This will make it easier to both see where to insert the needle and to actually insert it.Working a p2tog tbl - step 2

  3. Insert the needle

    Now insert the needle from left to right through the back loop of the first two stitches on the left-hand needle.Working a p2tog tbl - step 3

  4. Wrap the working yarn around the right-hand needle …

    Working a p2tog tbl - step 4

  5. … and pull the yarn through the two stitches

    Working a p2tog tbl - step 5

  6. To finish the decrease slip the two stitches worked of the needle.

    This is how this then looks.Working a p2tog tbl - step 6

  7. The result

    When viewed from the right side of the fabric, this decrease looks exactly look a skp!Working a p2tog tbl - step 7

Patreon logo

Thanks to my Patreon supporters for bringing you this freebie! Creating quality patterns and tutorials is a lot of work and resource-intensive. However, I find it important to give you free content like this tutorial. Thanks to the generous support of my Patreon supporters, I can make it happen. Thank you, patrons! Click here to join, or click here to read more about La Visch Designs on Patreon.

tutorial – working a p2tog tbl Read More »

keten

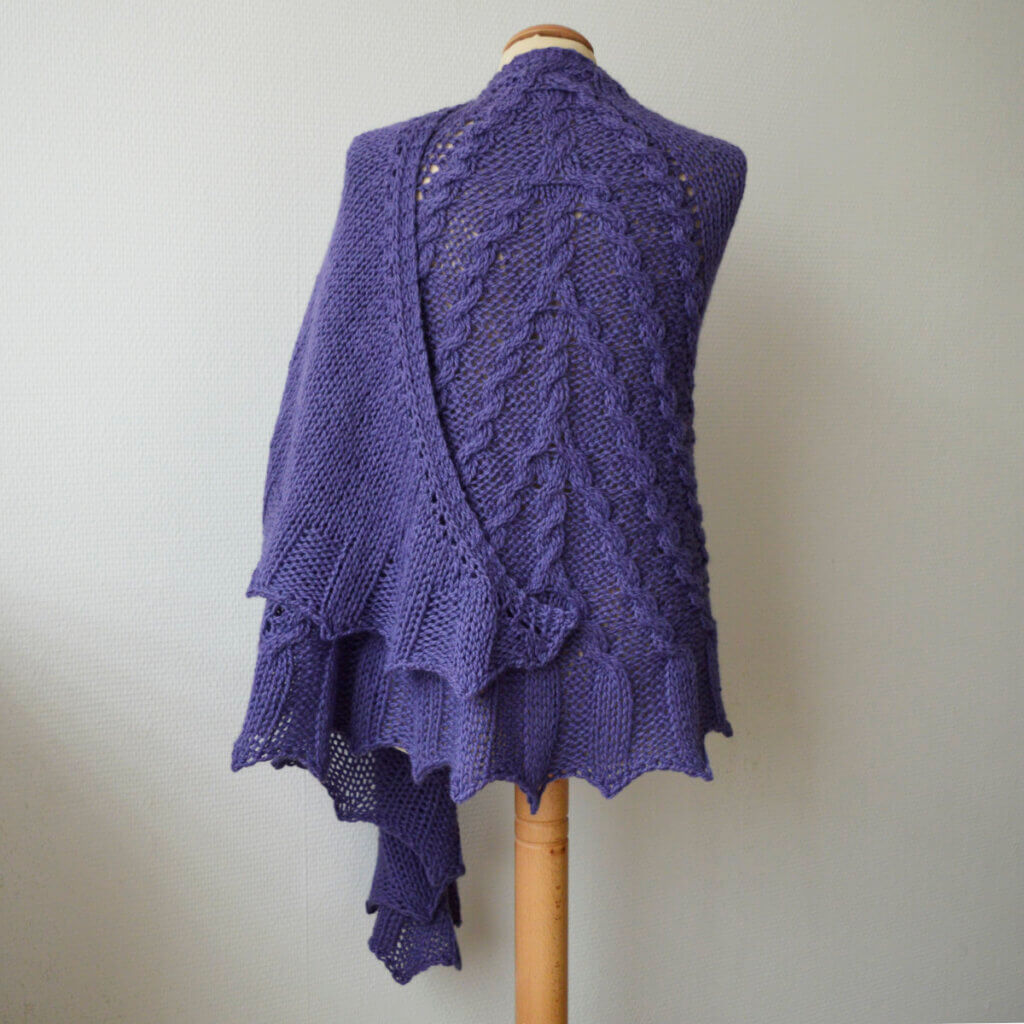
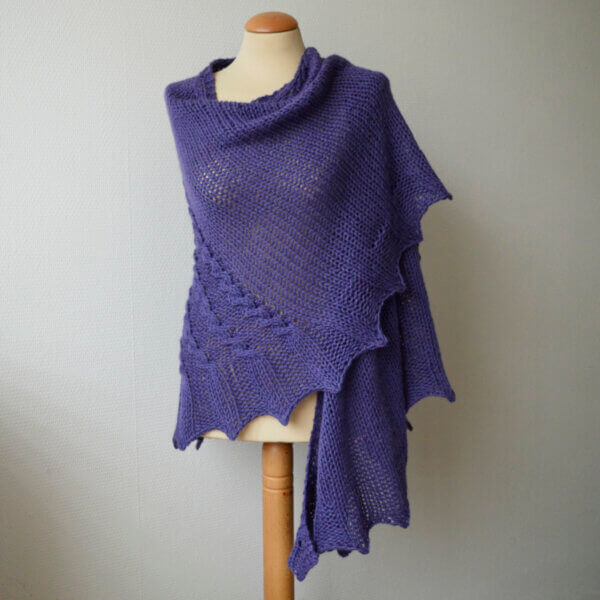
Keten stole - by La Visch Designs

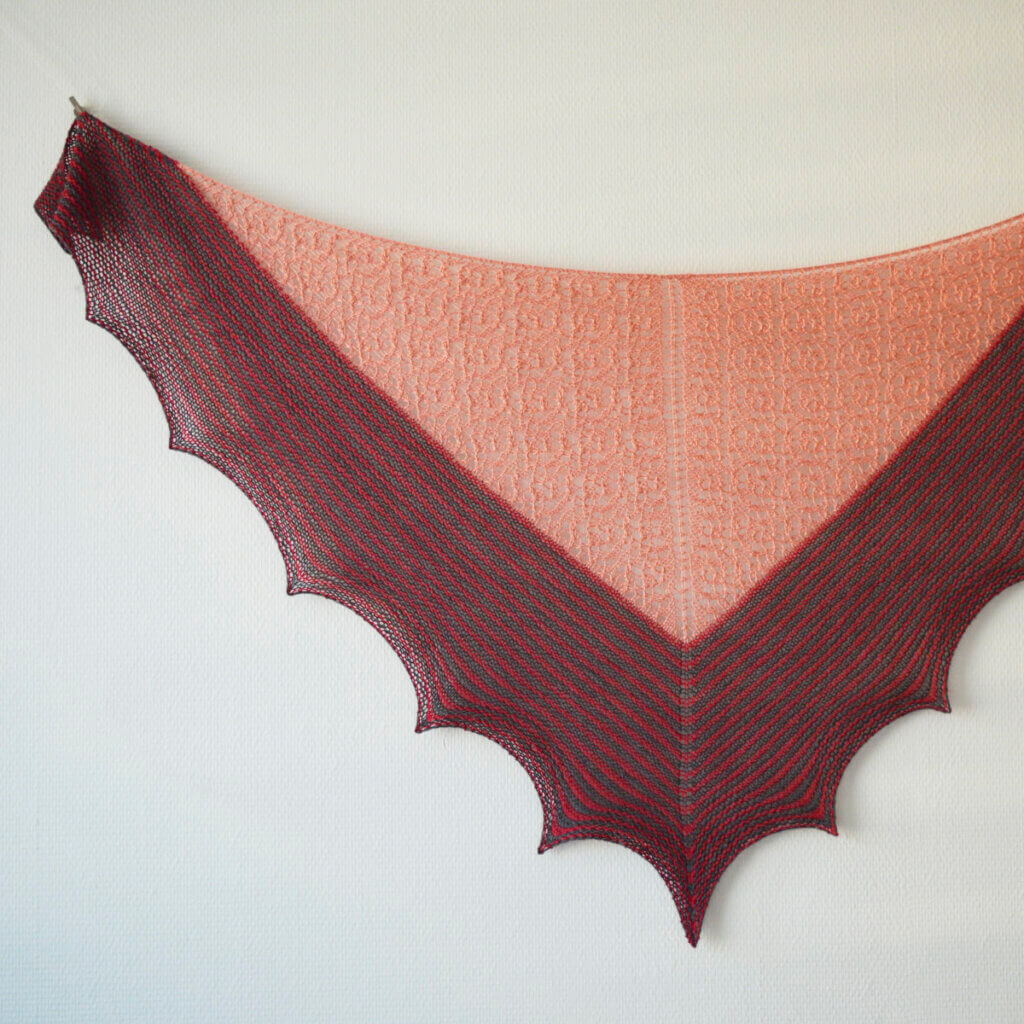
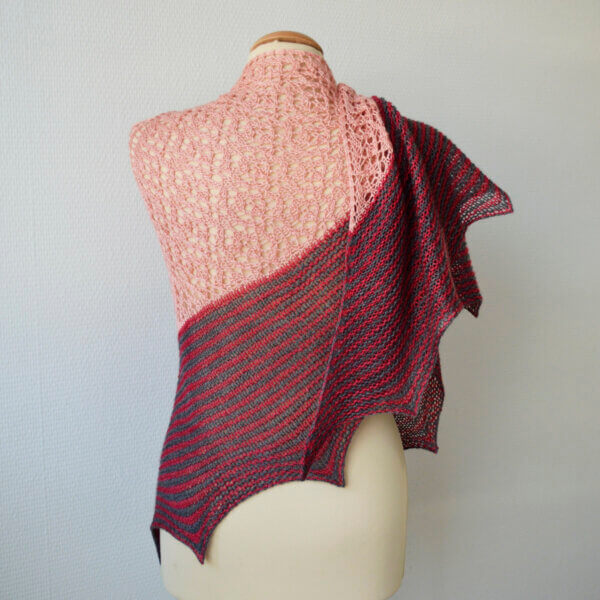
Keten is a simple stole, featuring mosaic slip stitch patterning. The combination with garter stitch makes it a perfect choice for both mindless relaxing and somewhat more challenging knitting. Don’t let the color work frighten you though; if you can knit stripes, you can do this! Keten is available in 2 sizes: a scarf and a wrap; pictured is the largest size.

The pattern contains fully written out instructions as well as charts for slip stitch sections.


Pay what you want: (minimum €6.50)

Add to cart


Skills required

This pattern features mosaic slip stitch patterning. Stitches used include knit, and slipping stitches. This pattern is suitable for the advanced beginner or intermediate knitter.

Sizes and measurements

Size S (L): 37.5 (51) cm (14 ¾ (20) inches) wide and 172.5 cm (77 inches) long, measured after blocking.

The size of this stole can easily be changed by casting on a different number of stitches and by adjusting the number of repeats worked in the various sections. This will, of course, impact the amount of yarn needed.

Pattern details

  • Worked flat
  • Written for a gauge of 18 sts / 18 rows = 10 cm (4 inches) over garter stitch, measured after blocking.
  • Pattern languages included: English and Dutch (Dit patroon omvat zowel een Nederlandse als een Engelse versie)
  • Digital PDF has 4 pages (letter size)

Yarn

Fleece Artist BFL Sport (100% Bluefaced Leicester wool; 330 m (361 yds) / 125 g) in the following amounts and colors:

  • C1: 152 (322) m (166 (352) yds) / 58 (122) g in Coral.
  • C2: 127 (269) m (139 (294) yds) / 48 (102) g in Granite.

This yarn and the Keten stole pattern are also available as a kit from Sweater Sisters! 

Substitute any wool sport weight yarn in colors with sufficient contrast for a similar result. Please note that this yarn grew upon washing and blocking the finished item. Substituting a different yarn may result in a smaller sized scarf or stole.

Materials

  • Size 4 mm (US 6) / 80 cm (32 inches) circular needles – for garter stitch sections.
  • Size 4.5 mm (US 7) / 80 cm (32 inches) circular needles (or larger as needed) – for mosaic sections, to minimize “pulling in”.
  • Yarn needle.
  • Stitch markers to separate repeats of the mosaic patterning (optional)

keten Read More »

tutorial – working a p2tog

Tutorial on working a p2tog

In a previous post, I already showed you how to work the right-leaning decrease, in which 2 stitches are reduced to one: the one abbreviated with “k2tog”. This stands for “knit 2 stitches together”. It’s a very easy and very common way to reduce the number of stitches in your project and make it narrower. It’s also often used in lace knitting.

But what when your lace also requires decreases to be worked on the wrong side of the fabric? This is where the purled decrease p2tog comes in! This decrease is worked on the wrong side and looks just like a k2tog when the result is viewed on the right side of the fabric. It’s a pretty straight-forward decrease to work; purl 2 stitches together, to decrease the total number of stitches by one. It is just like making a regular purl stitch but you work through two stitches instead of one.

Below you can find how to work this decrease step by step, so get your materials and follow along!

Materials

Yarn: * Paintbox Yarns Simply DK, a good value, good quality 100% acrylic yarn, here in the color 128 Lime Green.

Needles: * KnitPro Zing Fixed Circular Needles. In this tutorial, I used the 4 mm (US 6) size with a cable length of 80 cm (32 inches).

Working a p2tog step by step

  1. Work your way across the row until you’ve reached the point where you want to make the decrease.

    In this case, I want to work the decrease 4 stitches in from the right side of the swatch.Working a p2tog - step 1

  2. Insert the needle

    Now insert the needle purl wise through the first two stitches on the left-hand needle and wrap the working yarn around the right-hand needle.Working a p2tog - step 2

  3. Pull the yarn through the two stitches…

    Working a p2tog - step 3

  4. … and slip the two stitches worked of the needle to complete the decrease

    Working a p2tog - step 4

  5. The result

    When viewed from the right side of the fabric, this decrease looks exactly look a k2tog!Working a p2tog - the result

Patreon logo

Thanks to my Patreon supporters for bringing you this freebie! Creating quality patterns and tutorials is a lot of work and resource-intensive. However, I find it important to give you free content like this tutorial. Thanks to the generous support of my Patreon supporters, I can make it happen. Thank you, patrons! Click here to join, or click here to read more about La Visch Designs on Patreon.

tutorial – working a p2tog Read More »

tutorial – changing a k2tog to a skp

Tutorial changing a k2tog to a skp by La Visch Designs

This tutorial is part of the series on fixing mistakes in knitting. When knitting lace or shaping in garments it can easily happen that a left-leaning decrease is worked where a right-leaning one was needed. Or vice versa, of course. And because I really don’t like ripping out my work, I’m showing how to drop down several rows in your knitting and change a k2tog to a skp.

Materials used

Yarn: * Paintbox Yarns Simply DK, a good value, good quality 100% acrylic yarn, here in the color 142 Tea Rose.

A crochet hook in the same size or slightly smaller than your knitting needles. For example this * Pony Aluminum Crochet Hook in size 4 mm.

Changing a k2tog to a skp step by step

  1. First, slip the stitches purl-wise from the left-hand needle to the right-hand needle, until you reach the stitch directly above the wrongly worked decrease.
    Do you see it, 4 stitches below the needle?

    Changing a k2tog to a skp - step 1

  2. Drop down the stitch.

    Ladder it all the way down until the decrease is undone and you have 2 stitches instead of 1. Catch these 2 stitches with the crochet hook, from right to left.Changing a k2tog to a skp - step 2

  3. Starting the skp decrease

    To do so, insert the crochet hook below the first horizontal thread running directly above the 2 stitches on the hook.Changing a k2tog to a skp - step 3

  4. Next, pull the horizontal thread through the first stitch on the hook.
    This completes the “knit” part of the “slip 1, knit 1, pass slipped stitch over” sequence that makes up a skp.

    Changing a k2tog to a skp - step 4

  5. Completing the skp

    To finish the left leaning decrease, we now pull the second loop on the crochet over the first one.Changing a k2tog to a skp - step 5

  6. Finishing up

    Next, ladder your way up again by inserting the crochet hook underneath the horizontal thread directly above the hook, and pulling the thread through the loop already on the hook to make a new knit stitch. Repeat this until all horizontal threads have been worked. After this you can place the stitch back unto the knitting needle.Changing a k2tog to a skp - done!

And that is how you go about changing a k2tog to a skp, several rows down in your knitting! I prefer knitting skp instead of ssk for my left leaning decreases, but the same principles apply to that too:

  1. Just drop down the stitch directly above the decrease
  2. Catch the stitches
  3. Work the correct decrease using the first horizontal thread above the stitches as your working yarn
  4. Ladder your way back up again.

That’s all there is to it!

Patreon logo

Thanks to my Patreon supporters for bringing you this freebie! Creating quality patterns and tutorials is a lot of work and resource-intensive. However, I find it important to give you free content like this tutorial. Thanks to the generous support of my Patreon supporters, I can make it happen. Thank you, patrons! Click here to join, or click here to read more about La Visch Designs on Patreon.

tutorial – changing a k2tog to a skp Read More »

whiskey on the rocks

Whiskey on the Rocks shawl by La Visch Designs

Sometimes all that’s needed is a little scarf to show off that wonderful single skein of fingering weight yarn. Combine it with easy to remember shaping and easily adjusted sizing, and we have a definite winner! It doesn’t hurt either that the loopy i-cord bind off is perfect for using up odds and ends.

Whiskey on the Rocks is an asymmetrical triangle or “boomerang” shawl worked sideways on the bias in one piece. The instructions for the body with the eyelet patterning are provided both charted and written out.


Pay what you want: (minimum €6.50)

Add to cart


Skills required

Whiskey on the Rocks is a boomerang shaped shawl knit sideways, and includes an i-cord based bind off. Stitches used include knit, purl, k2tog, k4tog, yo, and make 1 with a backward loop. This pattern is suitable for the intermediate knitter.

Sizes and measurements

One size – finished dimensions: 186 cm (73 ¼ inches) along the upper edge and a depth of 60 cm (23 ½ inches), measured after blocking.

Change the size of the shawl by using heavier or lighter weight yarn and/or working fewer (or more) repeats of the body. This will, of course, change the amount of yarn needed.

Pattern details

  • Worked sideways on the bias
  • Written for a gauge of 15 sts / 20 rows = 10 cm (4 inches) over body patterning, measured after blocking.
  • Pattern languages included: English and Dutch (Dit patroon omvat zowel een Nederlandse als een Engelse versie)
  • Digital PDF has 4 pages (letter size)

Materials

  • Yarn:
    • MC: 384 m (420 yds) / 100 g Tosh Merino Light by Madeline Tosh (100% merino; 384 m (420 yds) / 100 g) in “Whiskey barrel”.
    • CC: 56 m (61 yds) / 15 g ONION knit Nettle Sock (70% wool, 30% cellulose; 185 m (202 yds) / 50 g) in Oker.
    • Substitute any single-ply type fingering weight yarn for the MC and any solid colored yarn for the CC for a similar result.
  • Size 4 mm (US 6) / 80 cm (32 inches) circular needles for the body of the shawl.
  • Size 3.5 mm (US 4) / 80 cm (32 inches) circular needles for the i-cord bind off.
  • Yarn needle.
  • Stitch markers (optional, for use between repeats of the lace patterning).

whiskey on the rocks Read More »
Working a m2 aka double m1 increase

Working a m2 increase

There are various ways of working a double increase. Take for example a double yarn over. In this tutorial I will focus on the make 2 increase or m2 for short. It can also be referred to as a “double make 1” (m1) increase. It basically consists of working 2 m1 increases directly after one other in the same strand of yarn between 2 stitches in the row directly below the one you’re currently working.

The m1 increase is a directional one. This means that there is a left leaning version (m1l) and a right leaning version (m1r). The m2 version that consists of first working a m1r, followed by a m1l, makes a very decorative horizontal strand in the fabric. This is the version I’ll show you below. Different looks can be achieved by first working a m1l, followed by a m1r, working m1r twice, or a m1l twice. Experiment and choose the one that gives the look you like for a particular project!

Please do note, that since this increase uses the strand of yarn already there between stitches, it tends to tighten up the knitting. For this reason I advise to work one or more plain rows between increase rows, especially when stacking them.

Materials used

Yarn: * Paintbox Yarns Simply DK, a good value, good quality 100% acrylic yarn, here in the color 128 Lime Green.

Needles: * KnitPro Zing Fixed Circular Needles. In this tutorial, I used the 4 mm (US 6) size with a cable length of 80 cm (32 inches).

Working a m2 increase step by step

  1. First take your knitting. Here I’ve continued with the little swatch I used with a previous tutorial.

    M2 increase - a tutorial by La Visch Designs

  2. Knit to the spot where you want to make the increase.

    First, work your way across the row until you’ve reached the point where you want to make the increase. In this case, I will be making the M2 increase 5 stitches in from the left edge. I’d make the increase in the middle of my swatch for a truly centered result, but alas, my swatch has an odd number of stitches.M2 increase - a tutorial by La Visch Designs

  3. First we start the m1r increase

    To do so, lift the thread between the stitch just knit and the next one from the back with your left needle.M2 increase - a tutorial by La Visch Designs

  4. Insert the right-hand knitting needle into the front of the loop.

    M2 increase - a tutorial by La Visch Designs

  5. Wrap the yarn around the needle…

    M2 increase - a tutorial by La Visch Designs

  6. … and pull in through, slide the stitch of the left-hand needle to complete the m1r part of this double increase.

    M2 increase - a tutorial by La Visch Designs

  7. Next, we’re going to tackle the m1l part of the increase.

    To do so, lift the thread between the stitch just knit and the next one from the front with your left-hand needle.M2 increase - a tutorial by La Visch Designs

  8. Insert the right-hand knitting needle into the back of the loop.

    M2 increase - a tutorial by La Visch Designs

  9. Wrap the yarn around the needle…

    M2 increase - a tutorial by La Visch Designs

  10. … and pull in through, slide the stitch of the left-hand needle to complete the m1l part of this double increase.

    M2 increase - a tutorial by La Visch Designs

  11. This is how it looks after this increase has been worked in 3 RS rows.

    Pretty, isn’t it? And that’s all there is to it!M2 increase - a tutorial by La Visch Designs

Patreon logo

Thanks to my Patreon supporters for bringing you this freebie! Creating quality patterns and tutorials is a lot of work and resource-intensive. However, I find it important to give you free content like this tutorial. Thanks to the generous support of my Patreon supporters, I can make it happen. Thank you, patrons! Click here to join, or click here to read more about La Visch Designs on Patreon.

Working a m2 aka double m1 increase Read More »
tutorial – joining yarn with a magic knot

Joining yarn with a magic knot.

There are many ways to join a new ball of yarn to your project, the magic knot is one of them. Personally I prefer to work a felted, braided or Russian join instead, but that’s just because I don’t like knots in my work. If done correctly, the join should not fail and leave a neat, nearly invisible connection between the old and the new yarn.

This join is basically 2 knots pulled tight, with the yarn ends trimmed of. Due to this, it’s less suited for the more fragile yarns: These may break when pulled to tighten. Very bulky yarns may leave a too big knot that can’t easily be hidden between the stitches or at the back of the work. So, other than that the magic knot join really is a viable option to connect two pieces of yarn.

Materials used

Yarn: * Paintbox Yarns Simply DK, a good value, good quality 100% acrylic yarn, here in the colors Tea Rose and Vintage Pink.

Making a magic knot step by step

Time to get this join started!

  1. Take your pieces of yarn

    Align the yarn from your project and from the new ball of yarn as pictured below.Magic knot, step 1

  2. Making the first knot, part a

    In this step one of the yarn tails is turned over, then under the other yarn tail, followed by turning it under itslef to form a loop.Magic knot, step 2

  3. Making the first knot, part b

    Next, fold the yarn tail over itself, and then underneath again to form a knot. Magic knot, step 3

  4. Tighten the knot a bit

    This is how it looks after this:Magic knot, step 4

  5. Making the second knot, part a

    Now we take the other yarn tail and fold it over, then under the other strand of yarn.Magic knot, step 5

  6. Making the second knot, part b

    Next, fold the yarn tail over itself, and then underneath again to form a knot.Magic knot, step 6

  7. This is how it looks after the second knot has also been tightened a bit:

    Magic knot, step 7

  8. The magic step!

    First tighten both knots a bit more, and then comes the fun part. Take both pieces of yarn and pull to slide the knots close to each other. Magic knot, step 8

  9. After pulling and tightening it should look something like this:

    Magic knot, step 9

  10. Removing the yarn ends

    On this step, after making sure the connection is tight and snug, we snip away the yarn ends as close as possible to the knot. Take care not to accidentally cut the wrong piece of yarn!Magic knot, step 10

  11. The end result!

    Magic knot, step 11

Patreon logo

Thanks to my Patreon supporters for bringing you this freebie! Creating quality patterns and tutorials is a lot of work and resource-intensive. However, I find it important to give you free content like this tutorial. Thanks to the generous support of my Patreon supporters, I can make it happen. Thank you, patrons! Click here to join, or click here to read more about La Visch Designs on Patreon.

tutorial – joining yarn with a magic knot Read More »
zomerzon

Zomerzon, a knitted lace shawl design by La Visch Designs

Zomerzon is a semi-circle Pi shawl, worked in a luxury merino lace weight singles yarn. Truly a ray of sunshine when it’s rainy and gray outside! This design can, of course, also be made in a (light) fingering weight yarn.

Zomerzon is worked from the top-down and is started with a garter stitch tab. The lace is patterned on both right and wrong side rows. The instructions for all patterning are, of course, both charted and fully written out.


Pay what you want: (minimum €6.50)

Add to cart


Skills required

Knit this half-circle shawl from the top down, starting with a garter tab cast-on. Lace patterning is worked on both RS and WS rows. Stitches used include knit, purl, yo, m1, skp, p2tog, k2tog, k3tog, and the 3-into-3 Estonian star stitch.

This pattern is suitable for the intermediate to advanced knitter.

Sizes and measurements

Finished dimensions of the sample shawl: Span width of 186 cm (73 ¼ inches) and a depth of 67 cm (26 ½ inches), measured after blocking.

Change the size of this shawl by using lighter or heavier yarn and/or working fewer (or more) repeats of the lace border. This will of course change the amount of yarn needed.

Pattern details

  • Top-down
  • Written for a gauge of 18 sts / 28 rows = 10 cm (4 inches) over stockinette, measured after blocking.
  • Pattern languages included: English and Dutch (Dit patroon omvat zowel een Nederlandse als een Engelse versie)
  • Digital PDF has 4 pages (letter size)

Materials

  • Yarn: 800 m (875 yds)/ 100 g The Coloured Cat Abyssinian Lace (100% Merino; 800 m (875 yds)/ 100 g) in “Setting Sun”. Substitute a tonal lace weight singles yarn for a similar result, or a (light) fingering weight yarn for a slightly larger shawl.
  • Size 3.5 mm (US 4) / 80 cm (32 inches) circular needles.
  • Yarn needle.
  • Stitch markers (optional, for use between repeats of the lace border).

zomerzon Read More »