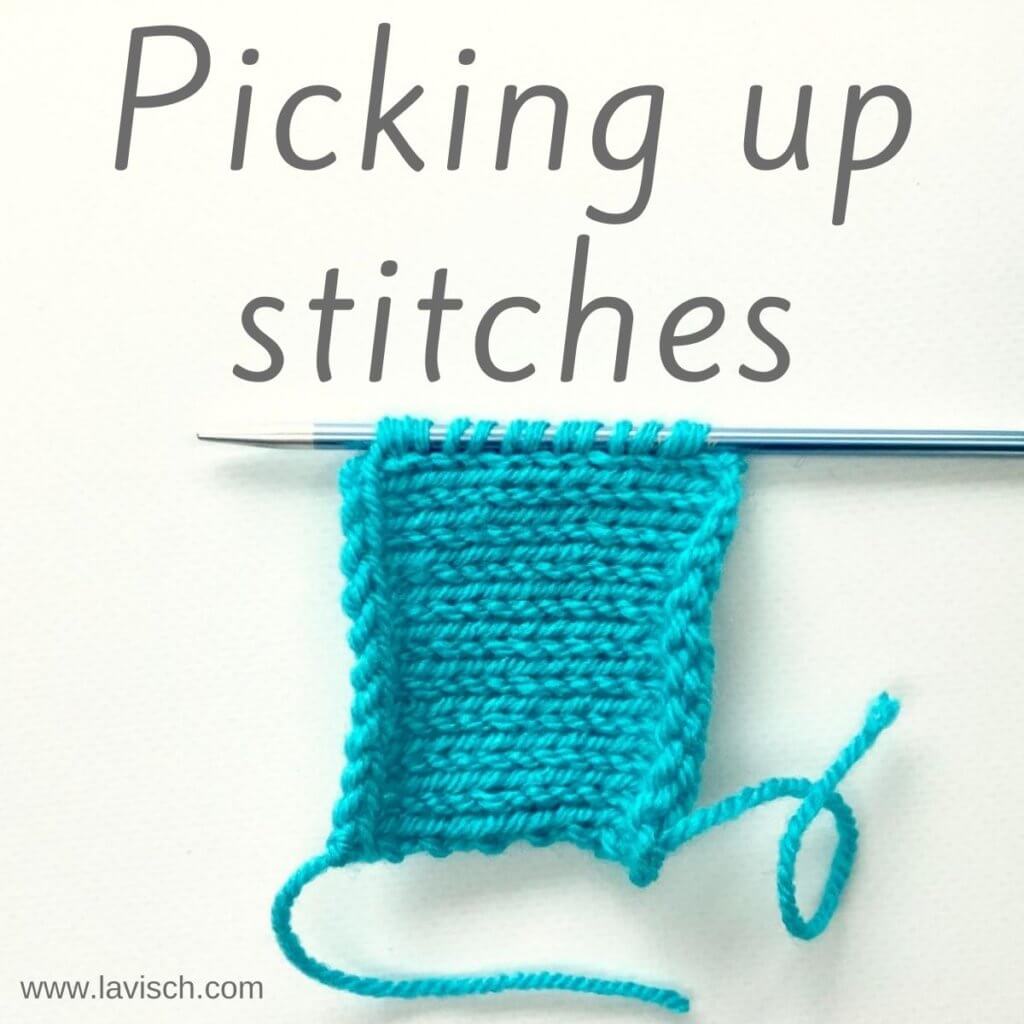
tutorial – working an Estonian 3-into-3 star stitch

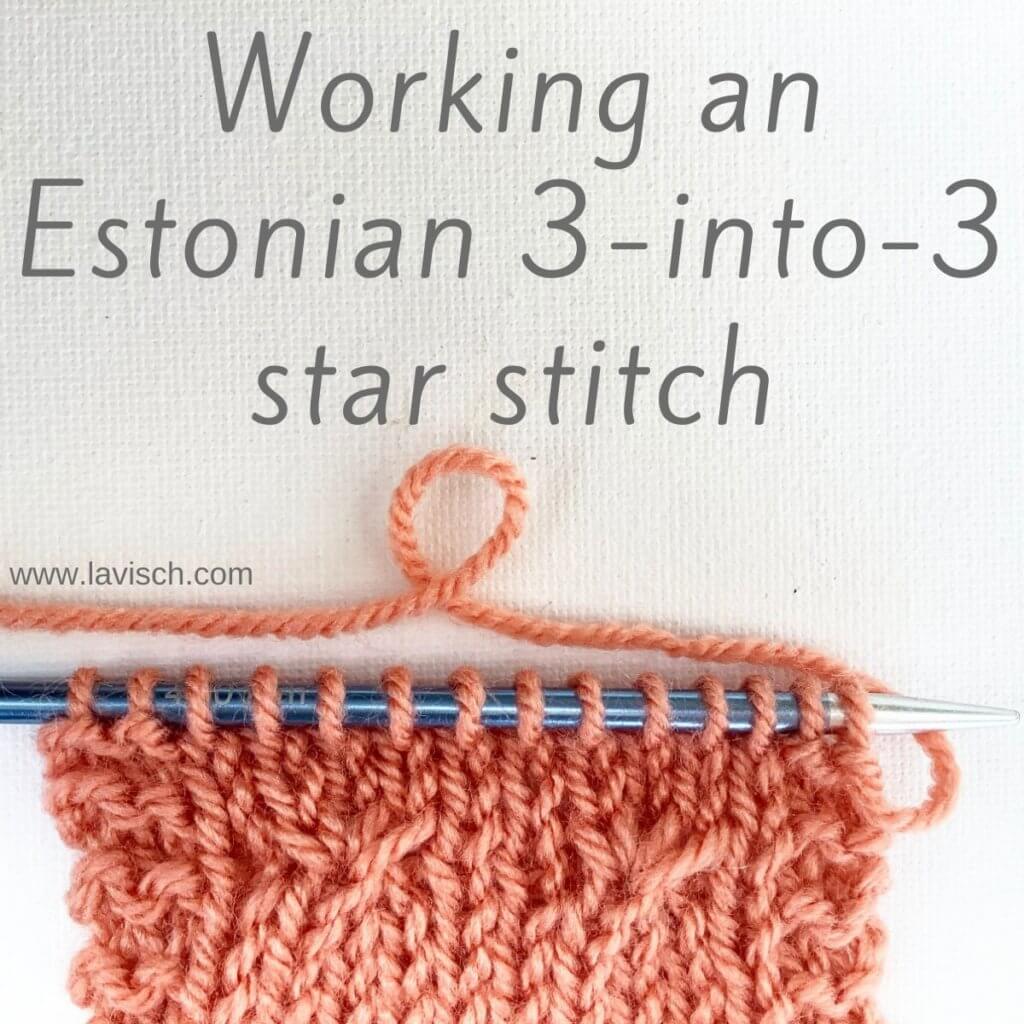
Tutorial - Working an Estonian 3-into-3 star stitch

Estonian knitting, especially the lace knitting, is quite a bit different from other types of lace knitting. This is in a large part due to combination of openwork and texture that is the most prominent feature of Estonian lace knitting. You may have heard of the book * Pitsilised Koekirjad by Leili Riemann, for those interested in Estonian lace knitting, it’s a true treasure trove!

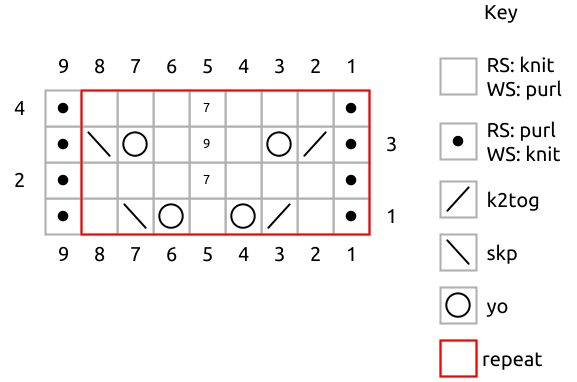
Anyway, often-used design elements include nupps and gathers. Another type of stitch that’s often used is the star stitch. This is the generic name for the type of stitch where interesting patterns are created by making 3 stitches out of 3; or 5 stitches out of 5 and then purling all stitches on the next row.

It’s also possible to decrease or increase stitches this way, by, for example, making 3 stitches out of 5, or 9 out of 5. Increasing with the star technique can be used to start flower-like lace shapes by first increasing 5 stitches to 9 (or 11) and over the next couple of rows gently decreasing the extra stitches away again.

Focus of this tutorial

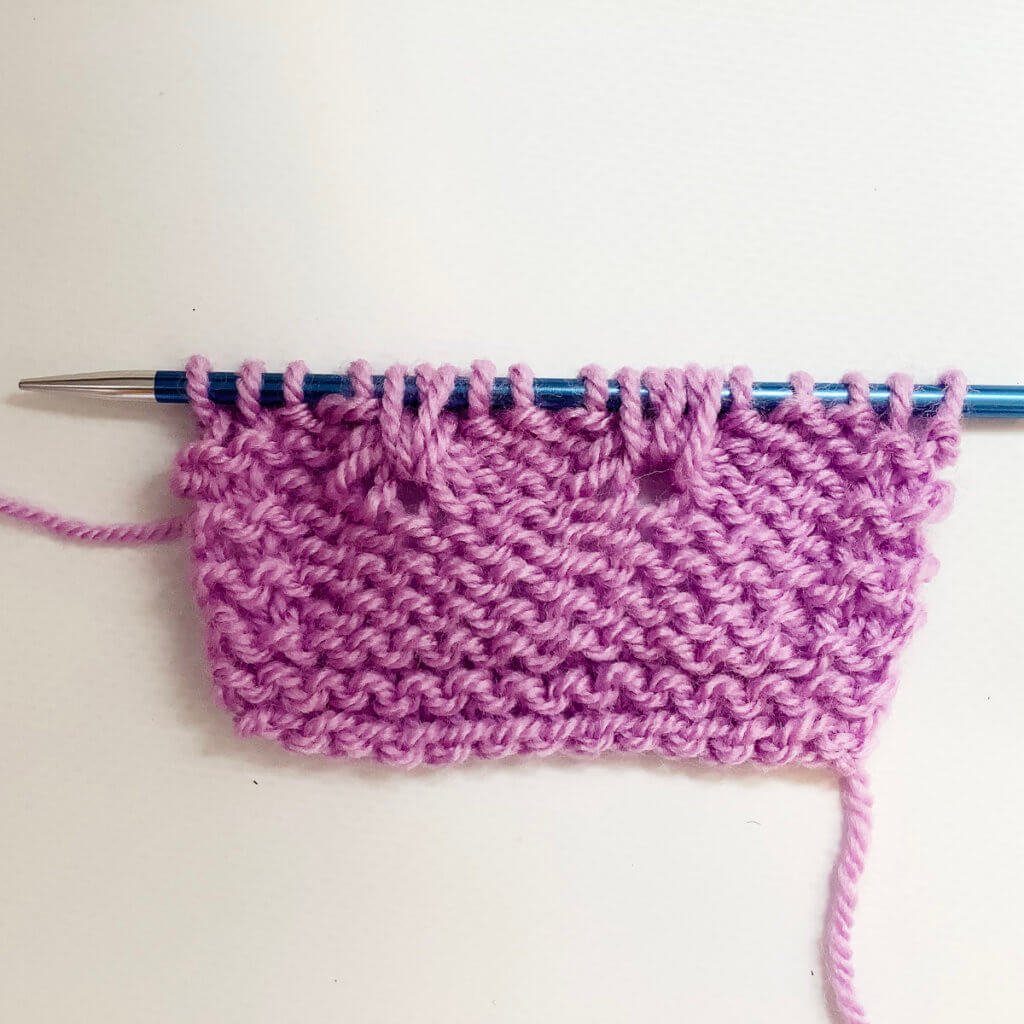
In this tutorial I will focus on a basic 3-into-3 star stitch on a stockinette background. A 3-into-3 star stitch is made by knitting 3 stitches together without dropping stitches from left-hand needle; yarn over, knit the same 3 stitches together again before dropping it all from the left-hand needle.

When worked in the yarn-needle combination shown here, the results will be a nicely textured fabric. When worked with relatively large needles for the yarn chosen, a more lacy effect will be the result.

Materials used

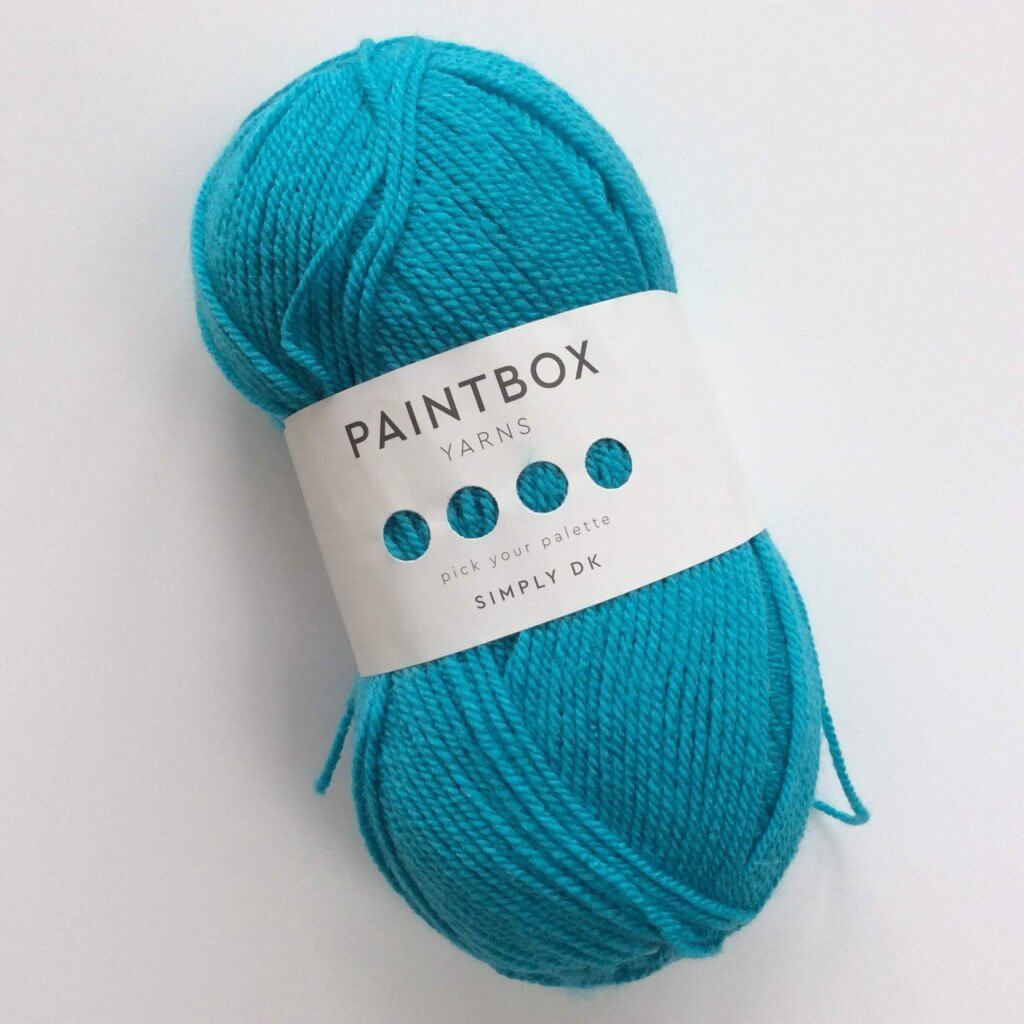
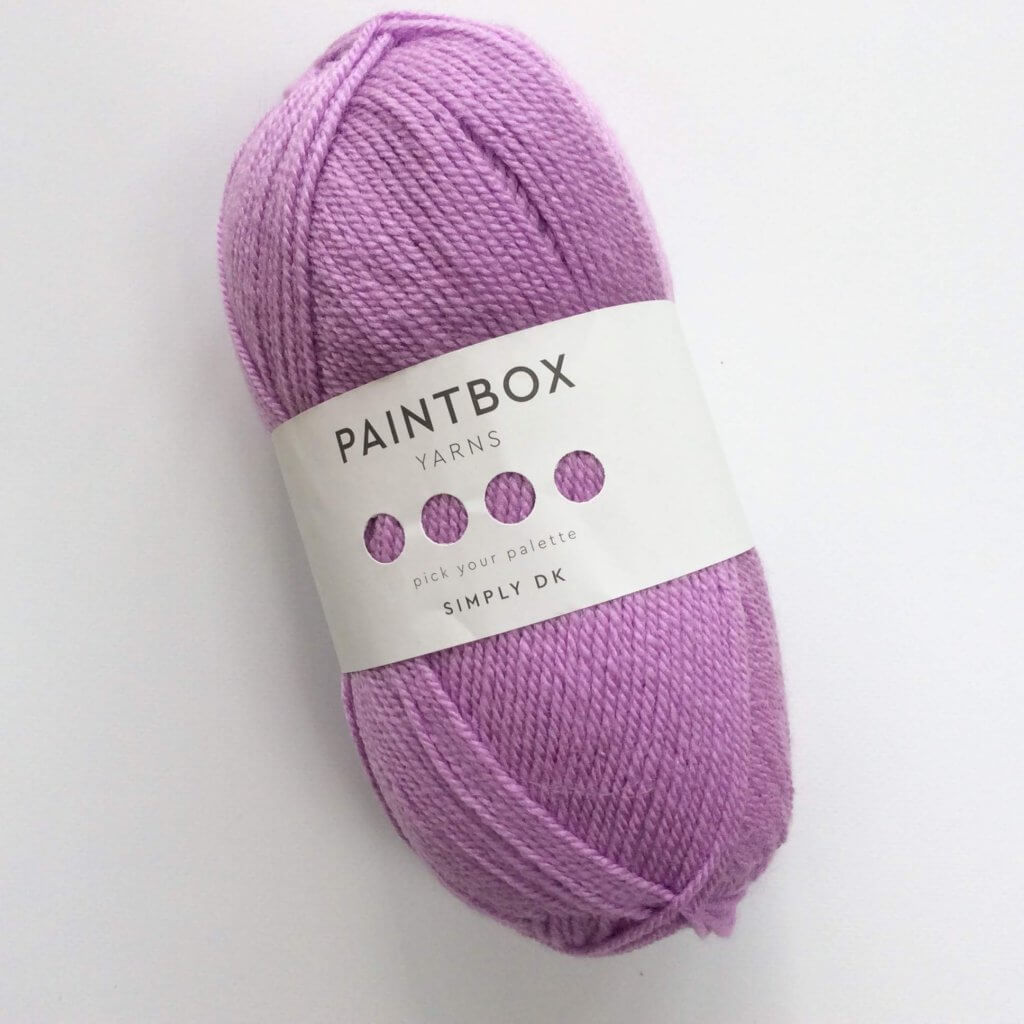
Yarn: * Paintbox Yarns Simply DK, a good value, good quality 100% acrylic yarn, here in the color 155 Vintage Pink.

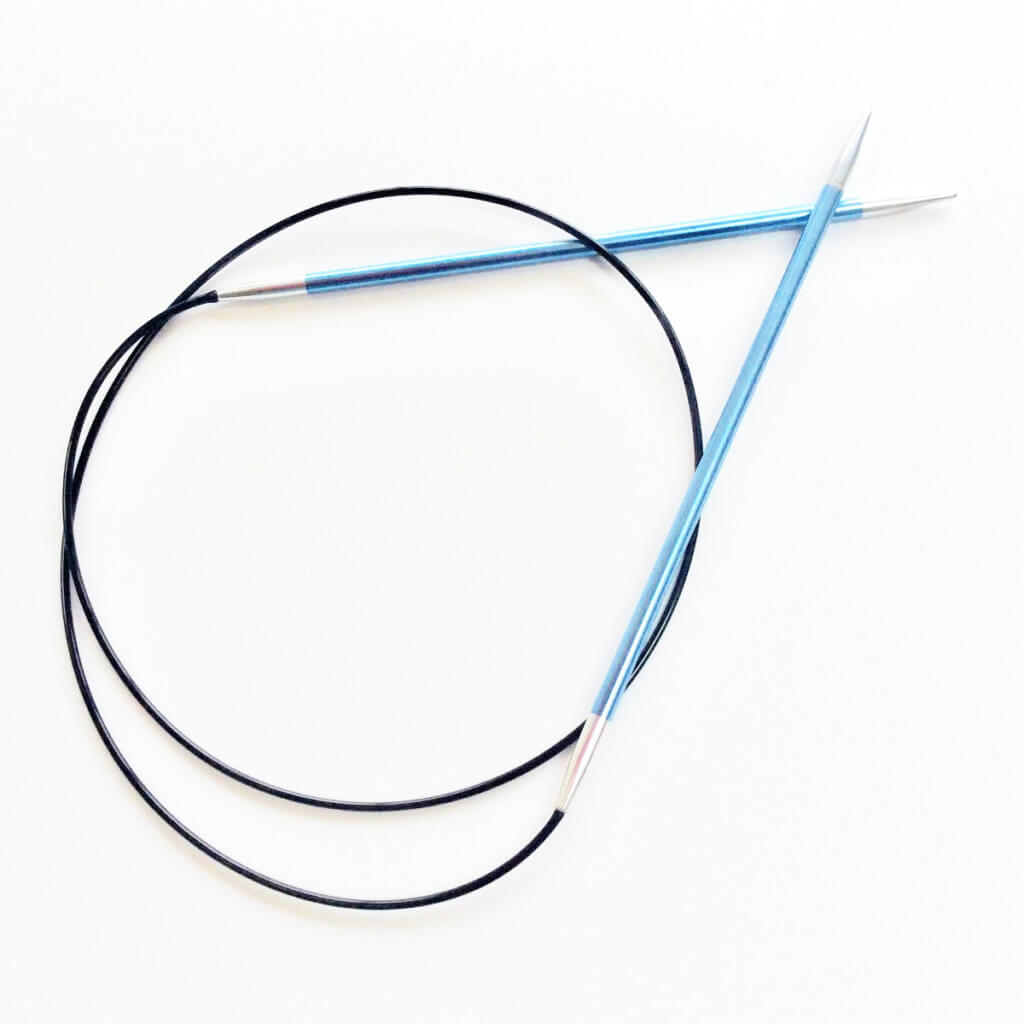
Needles: * KnitPro Zing Fixed Circular Needles. In this tutorial, I used the 4 mm (US 6) size with a cable length of 80 cm (32 inches).

Working an Estonian 3-into-3 star stitch step by step

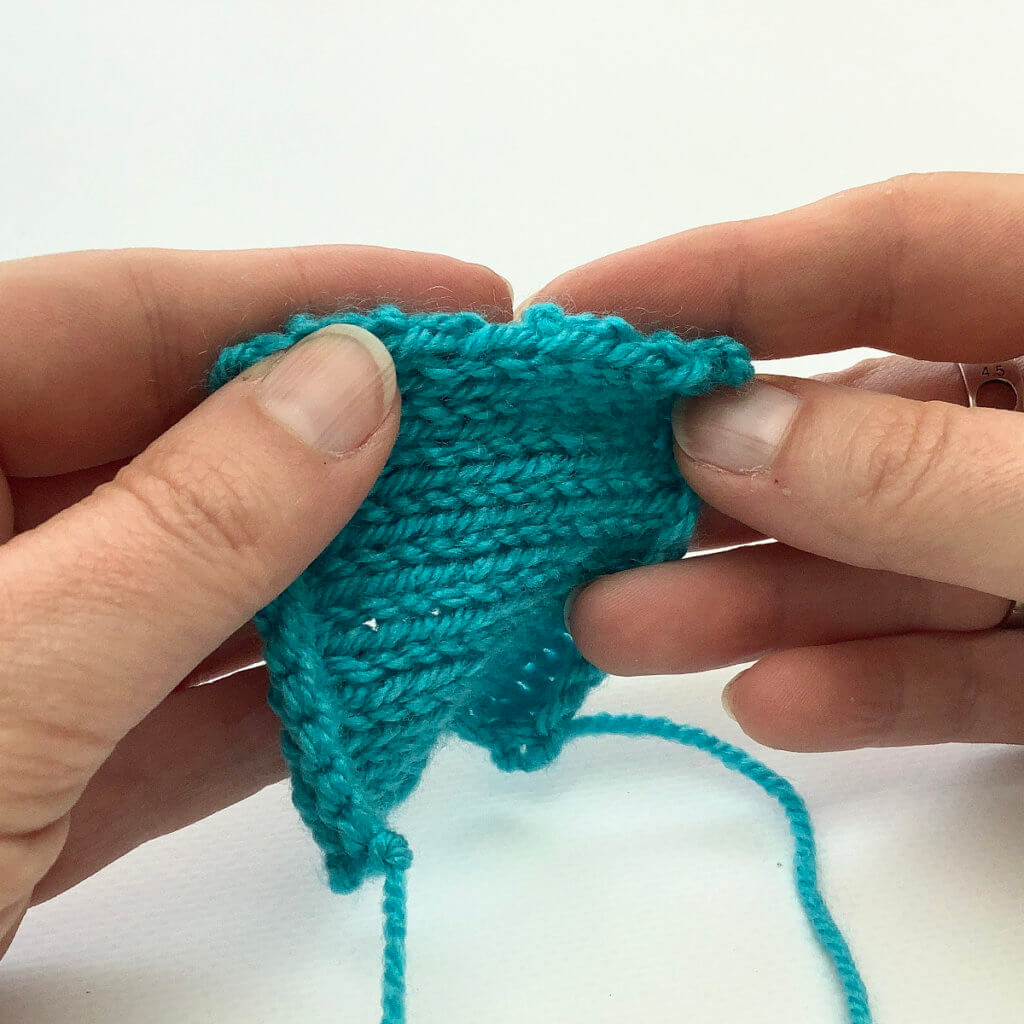
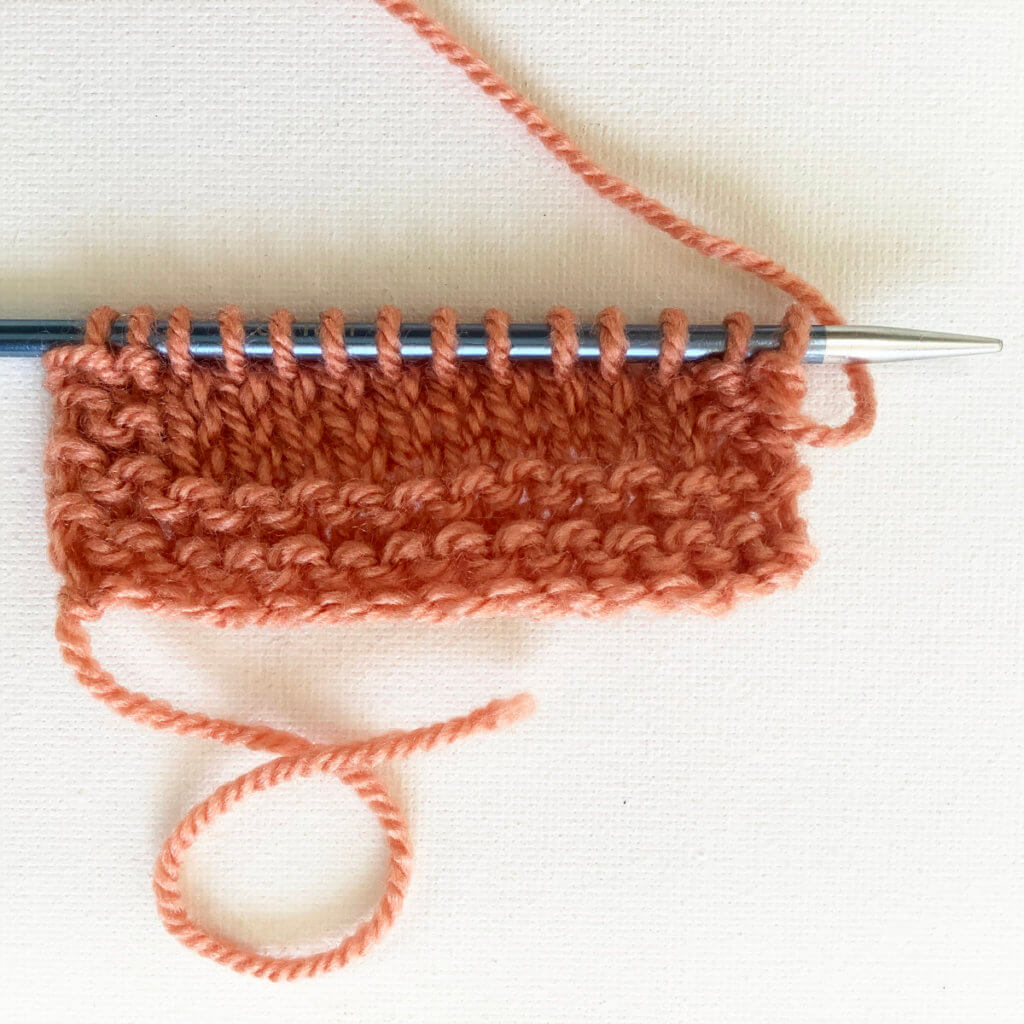
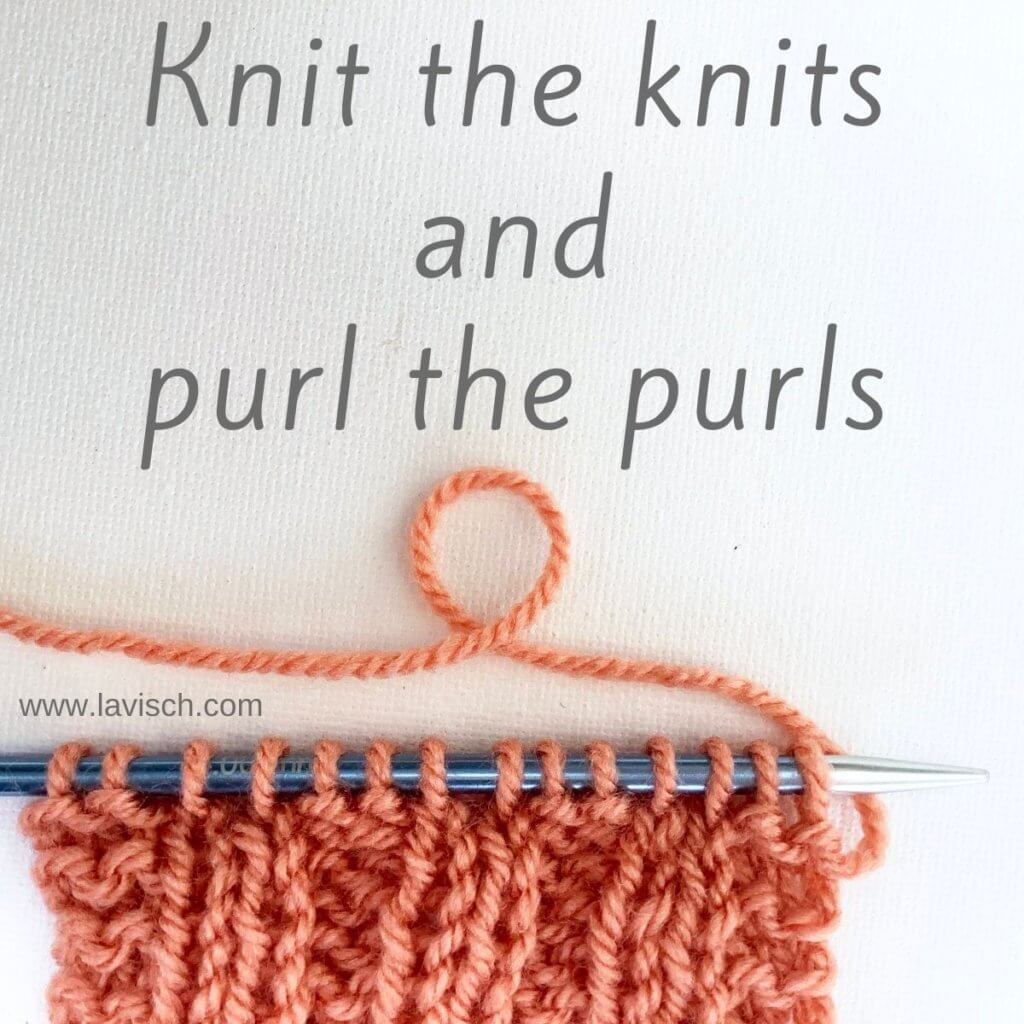
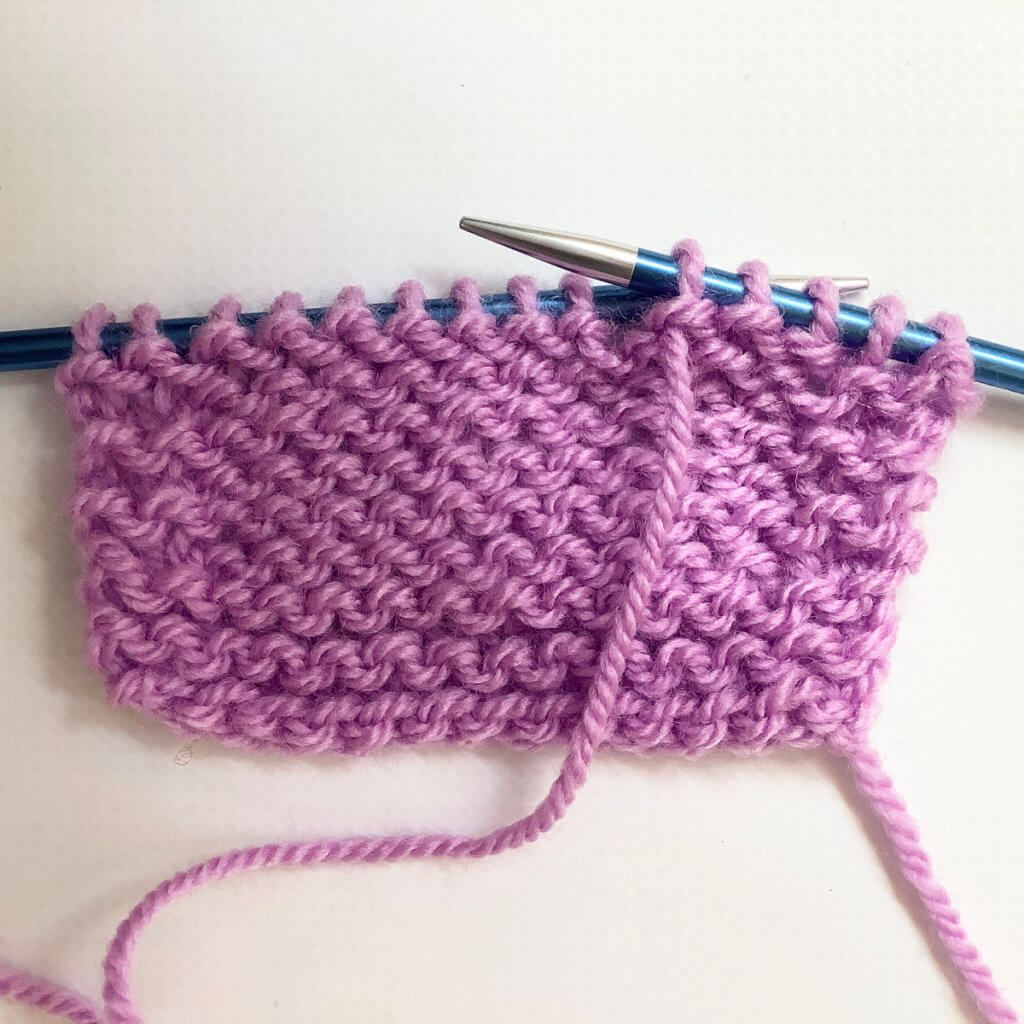
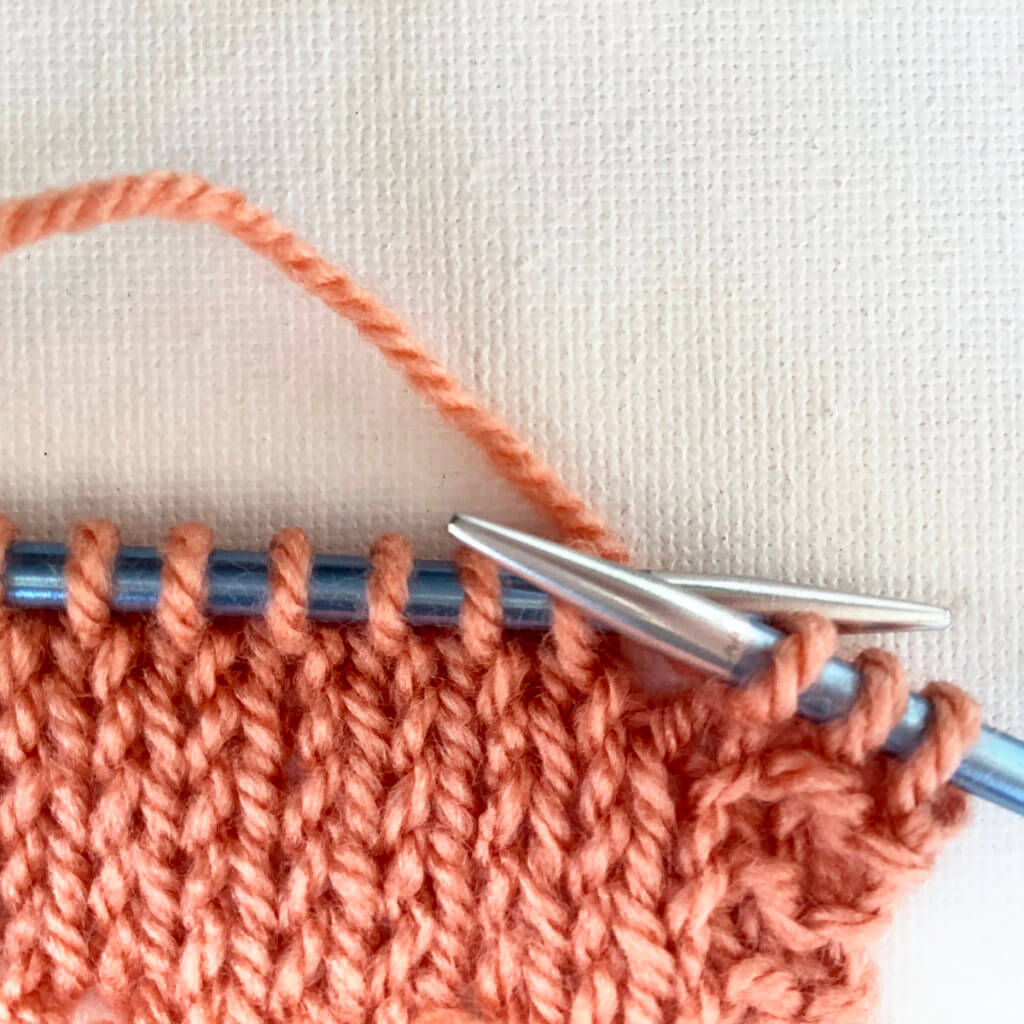
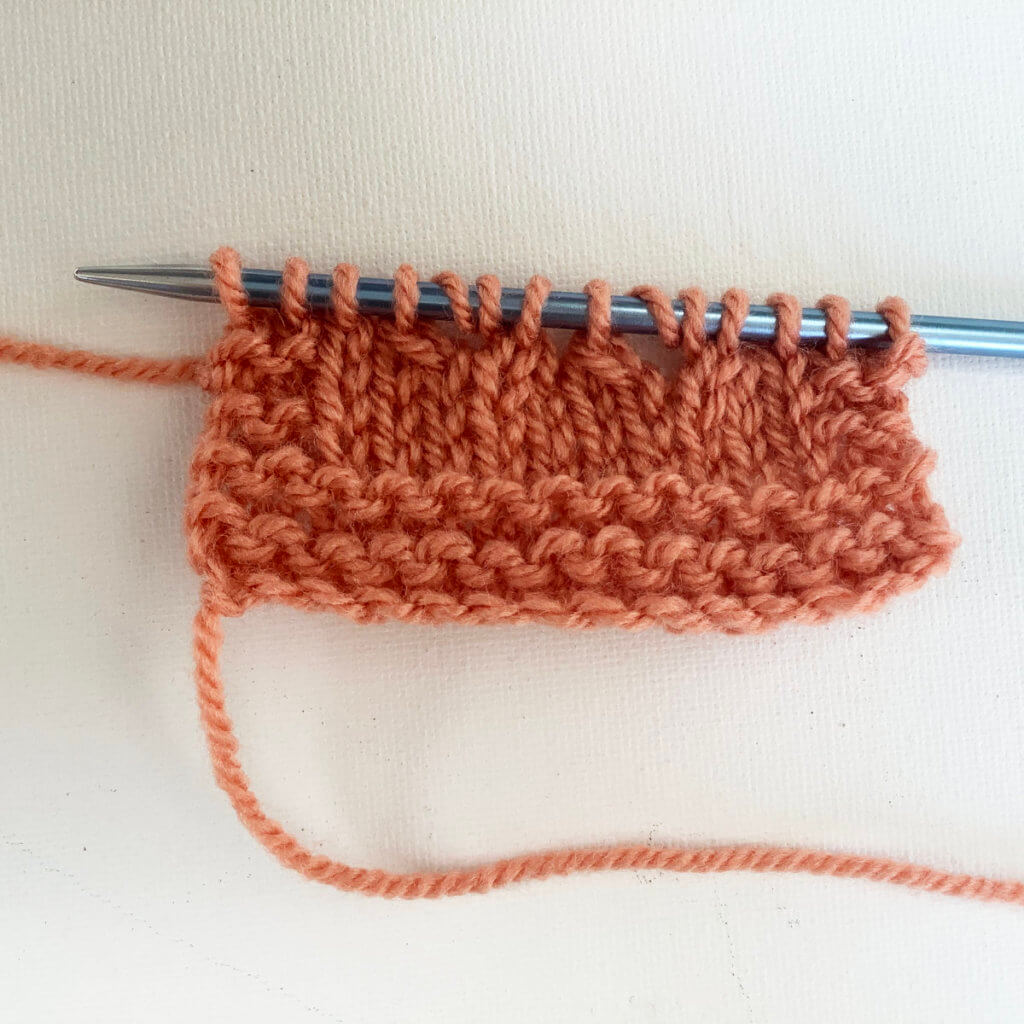
1. First, work your way across the row until you’ve reached the point where you want to make the star stitch.

Step 1

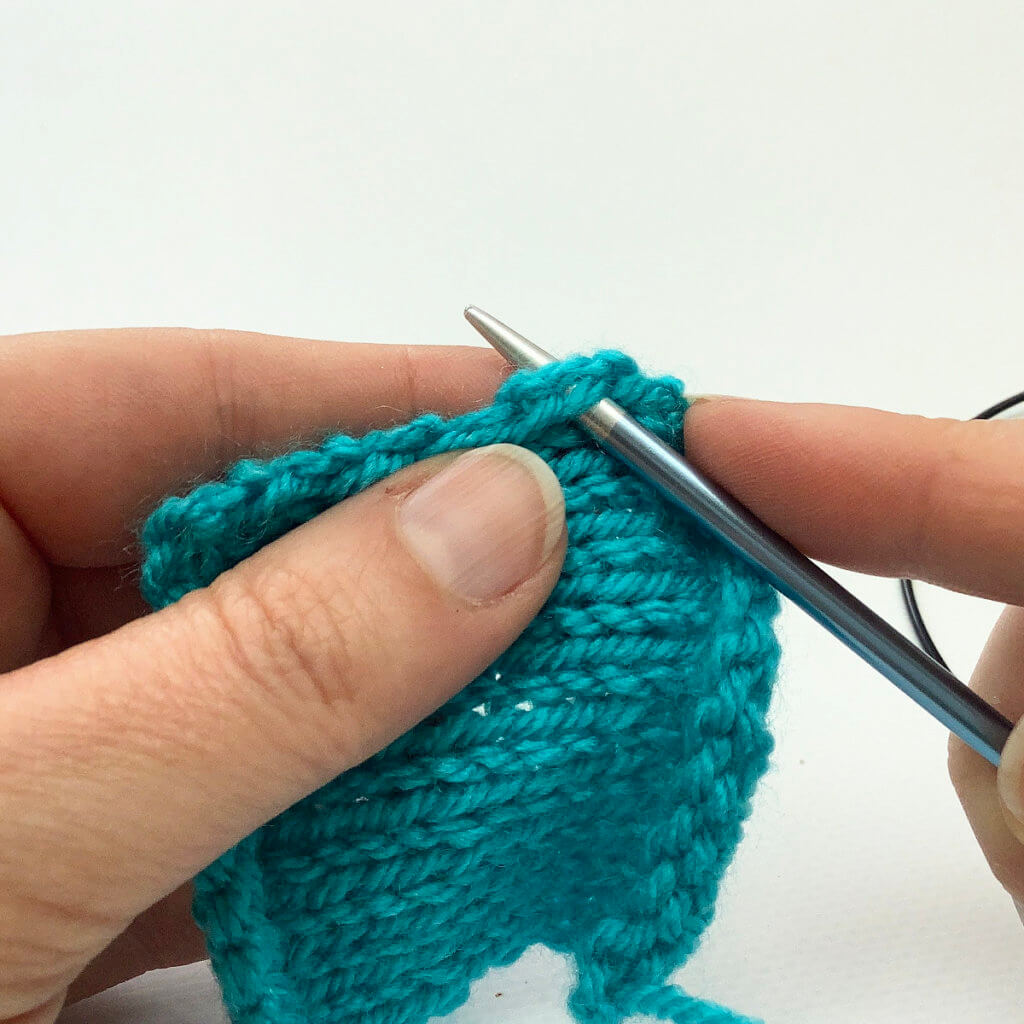
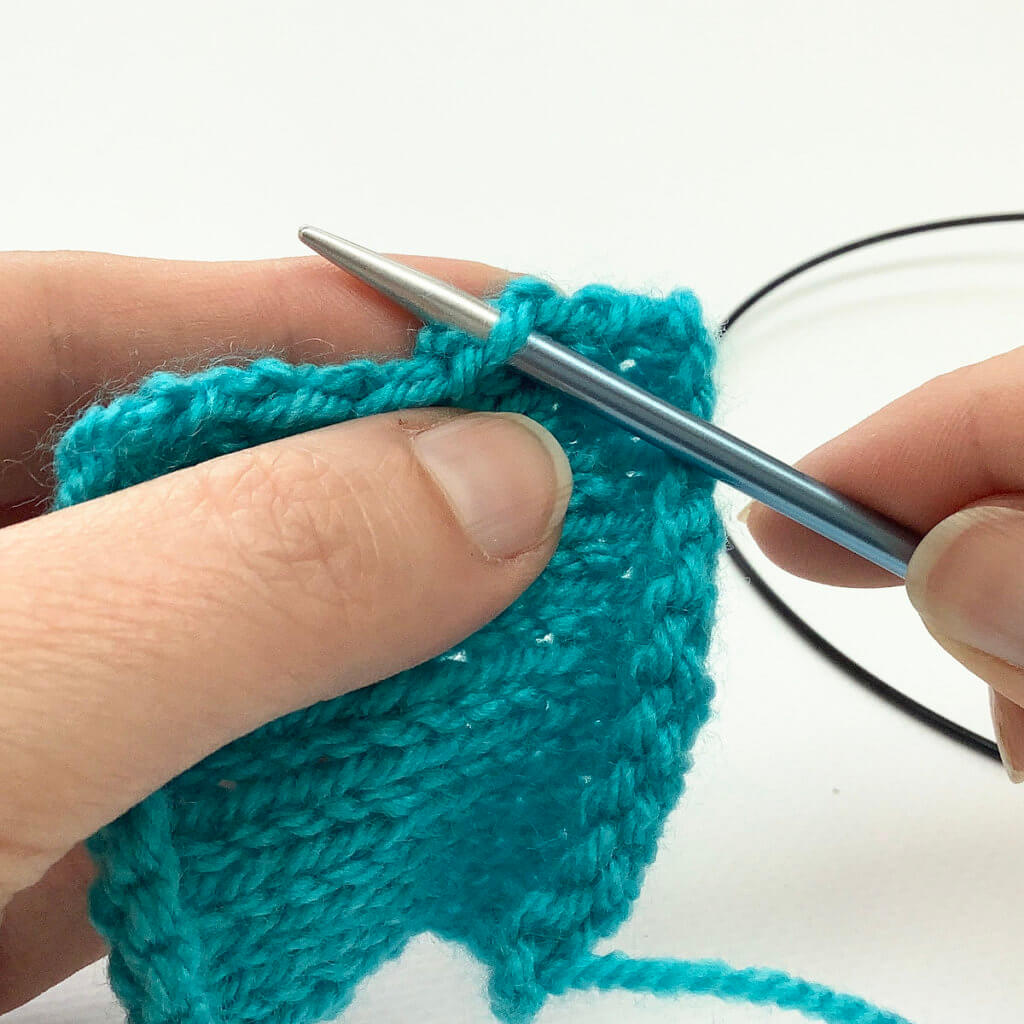
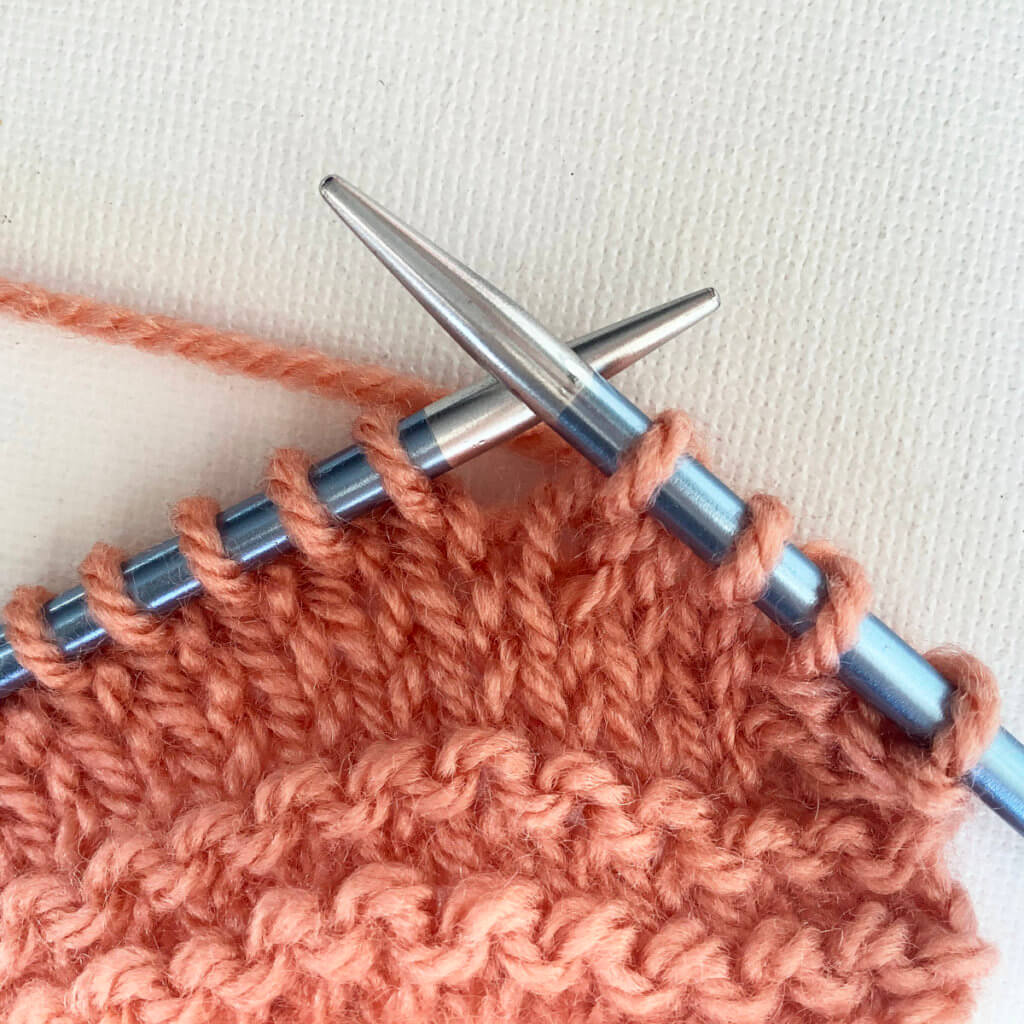
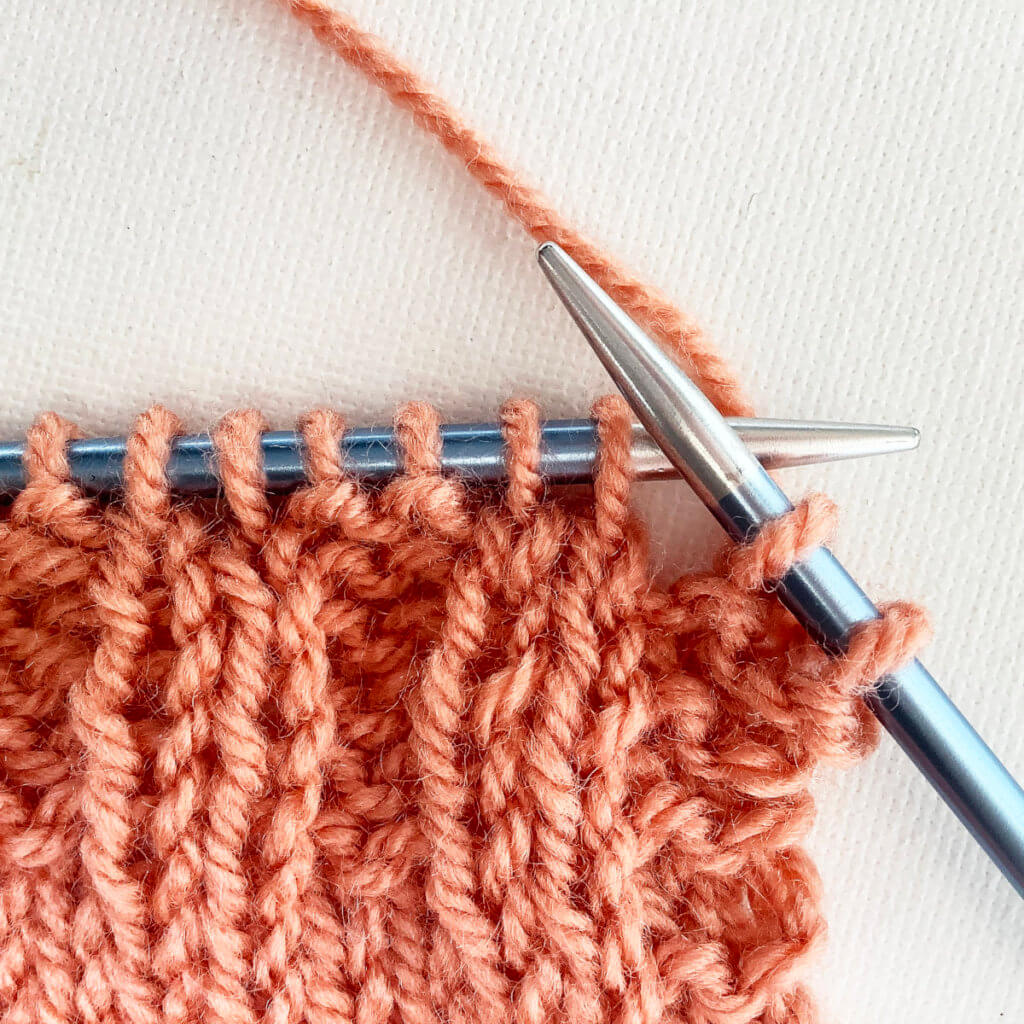
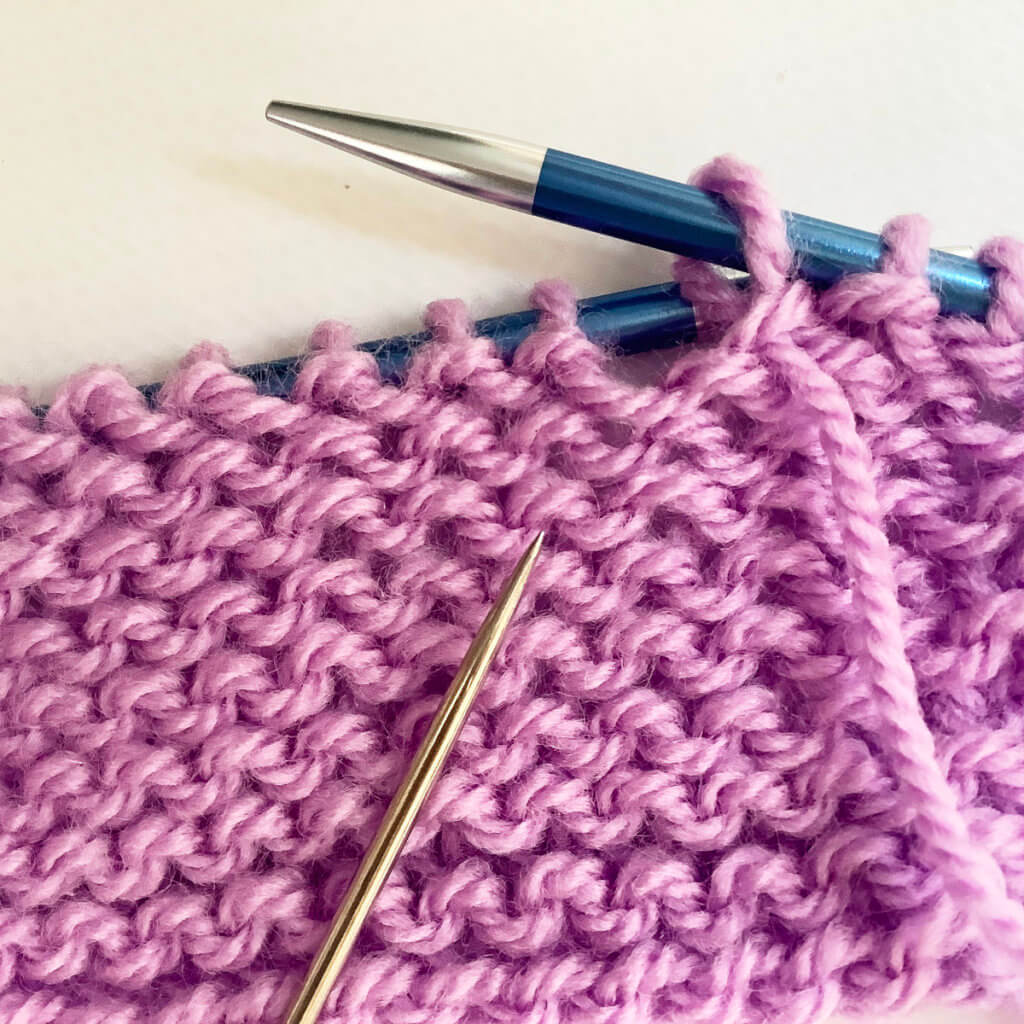
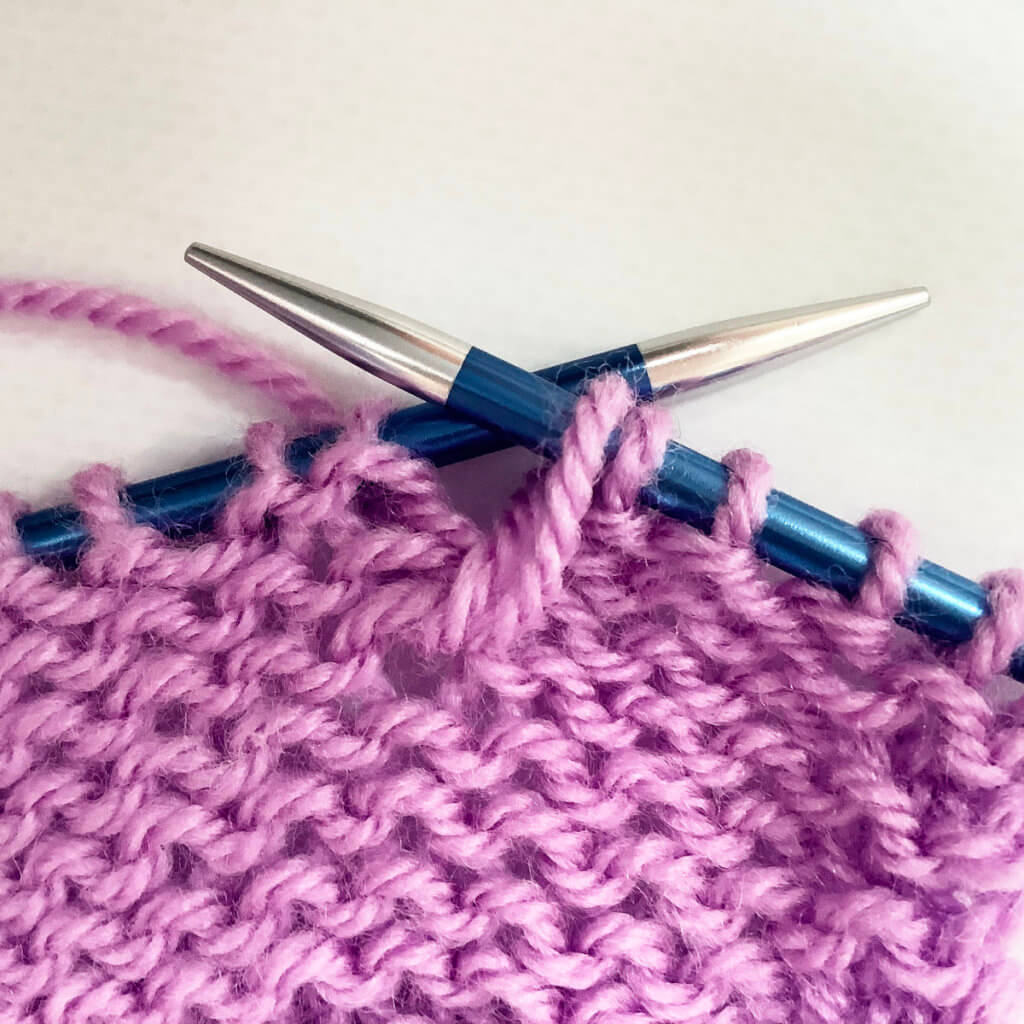
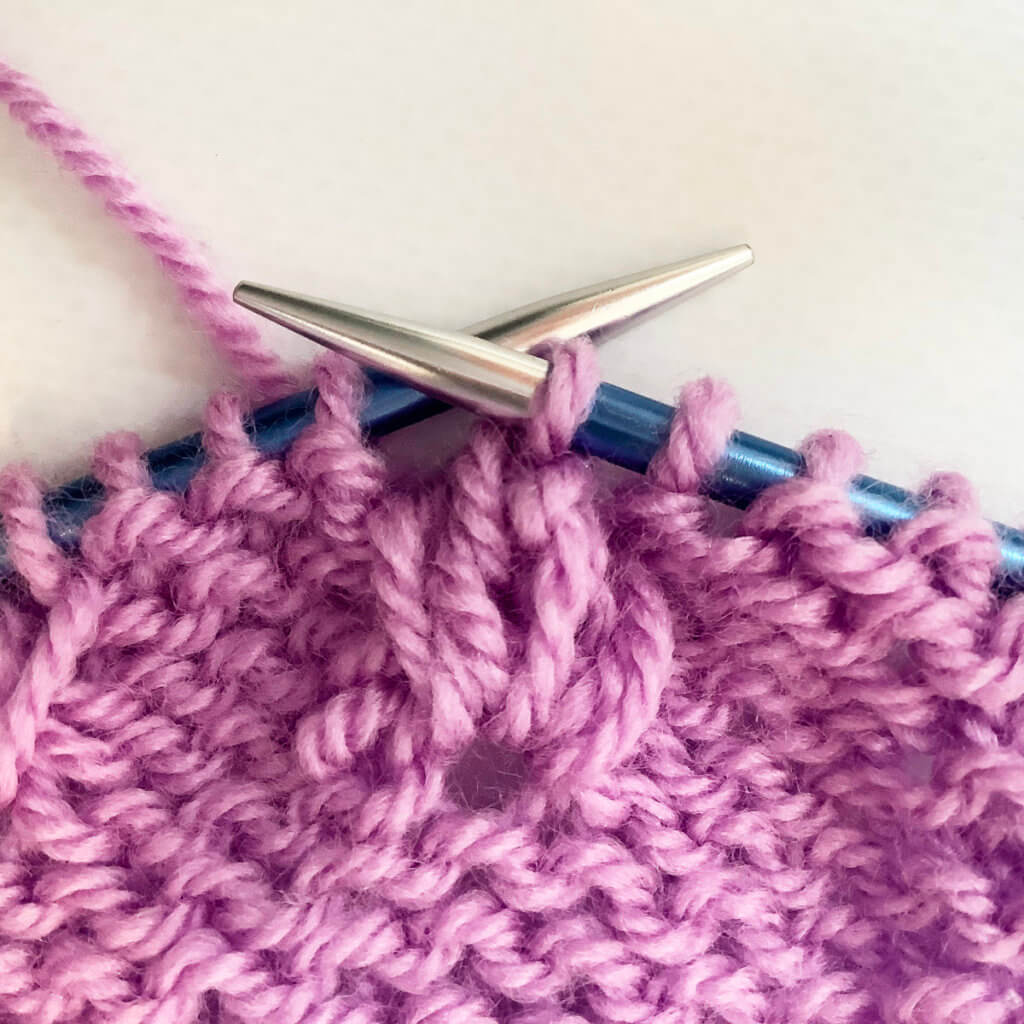
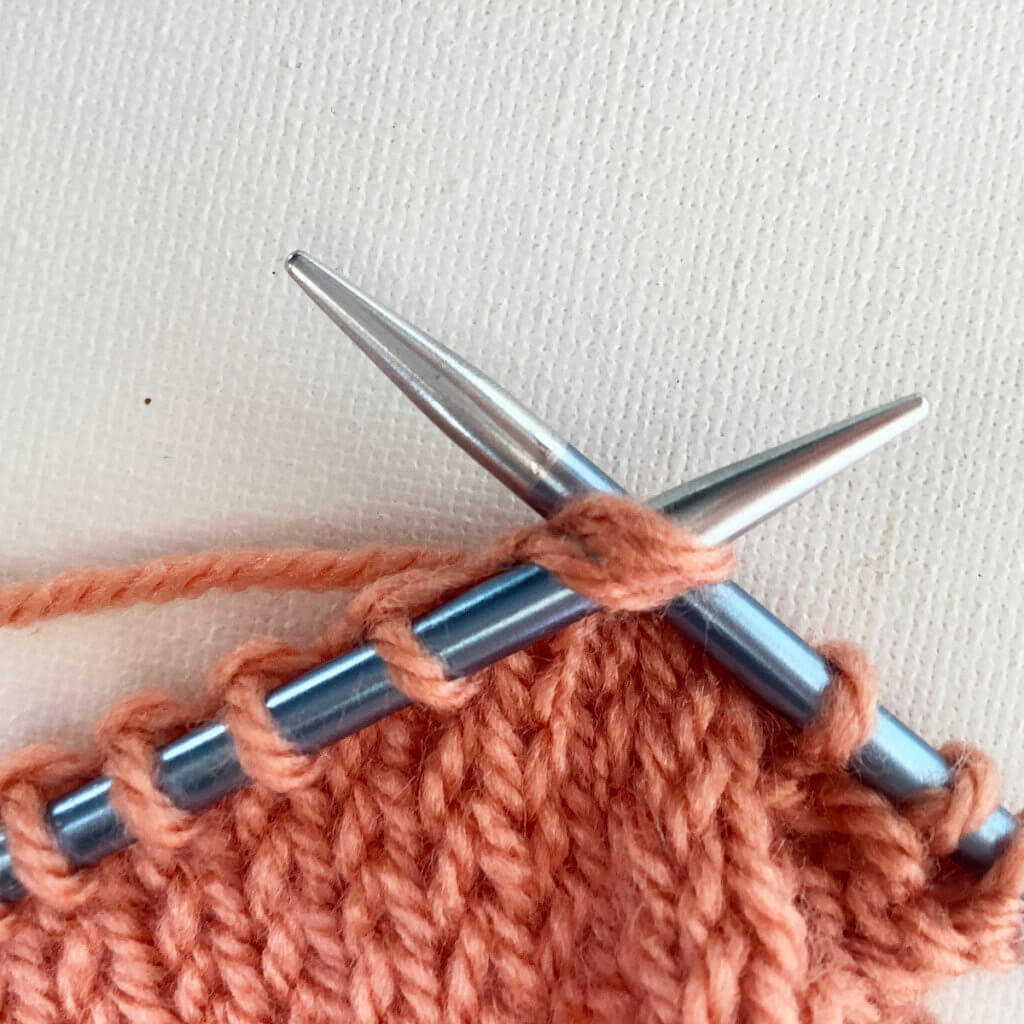
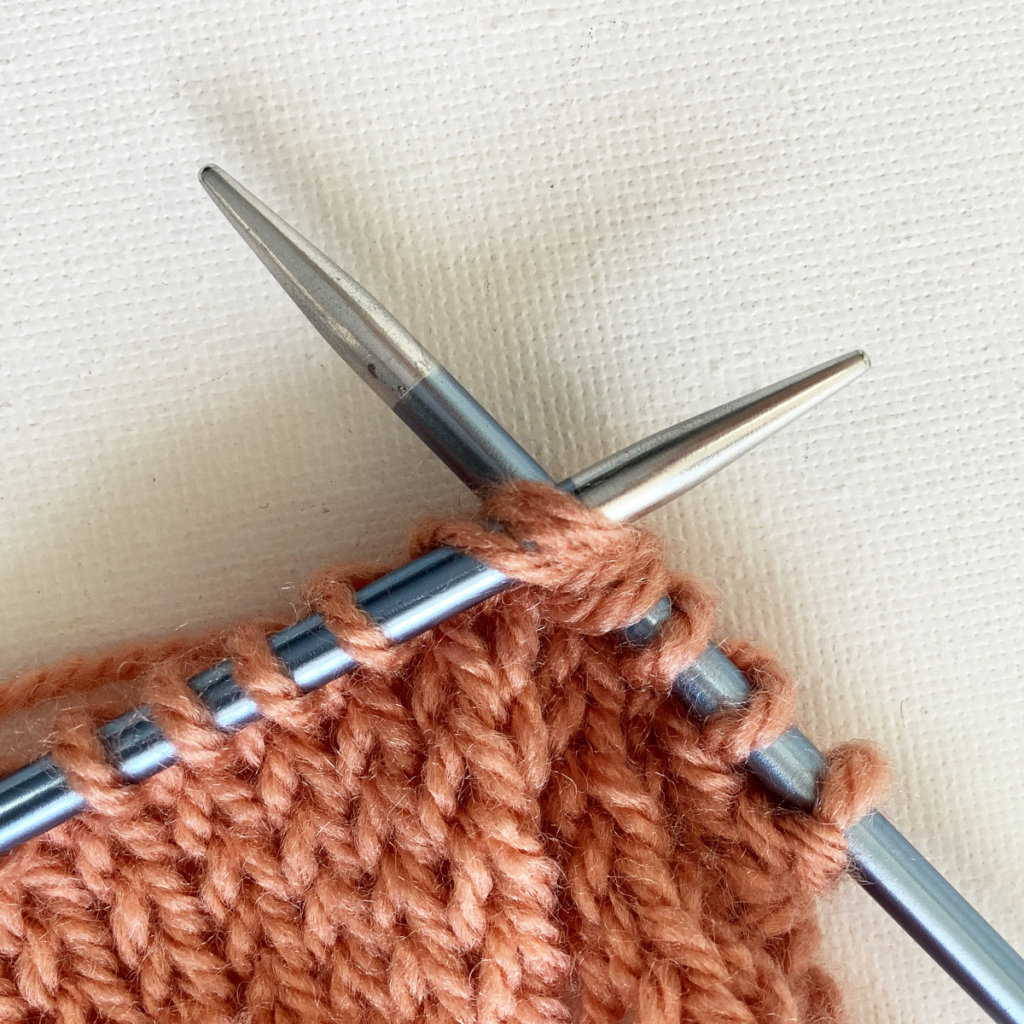
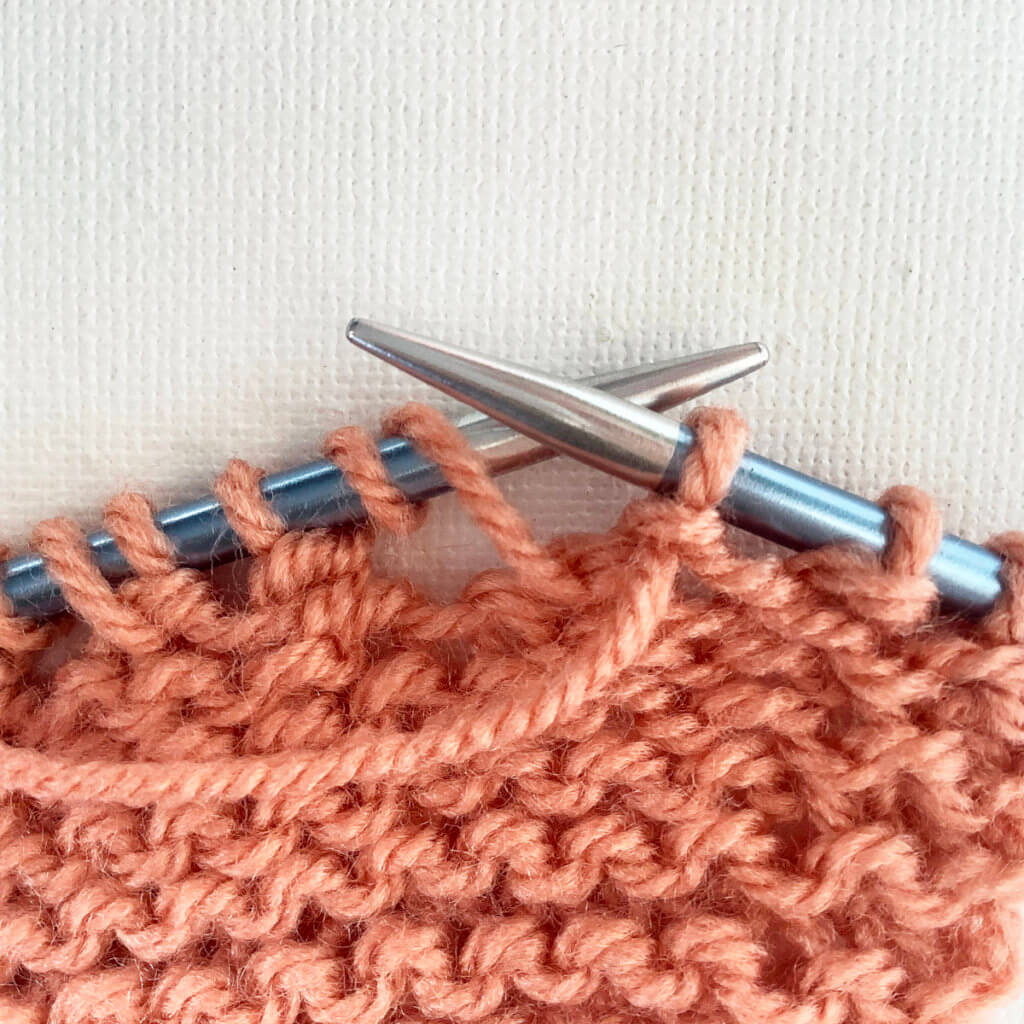
2. Next, insert the tip of the right-hand needle into the first 3 stitches at the same time as if to knit.

Step 2 in working an Estonian star stitch

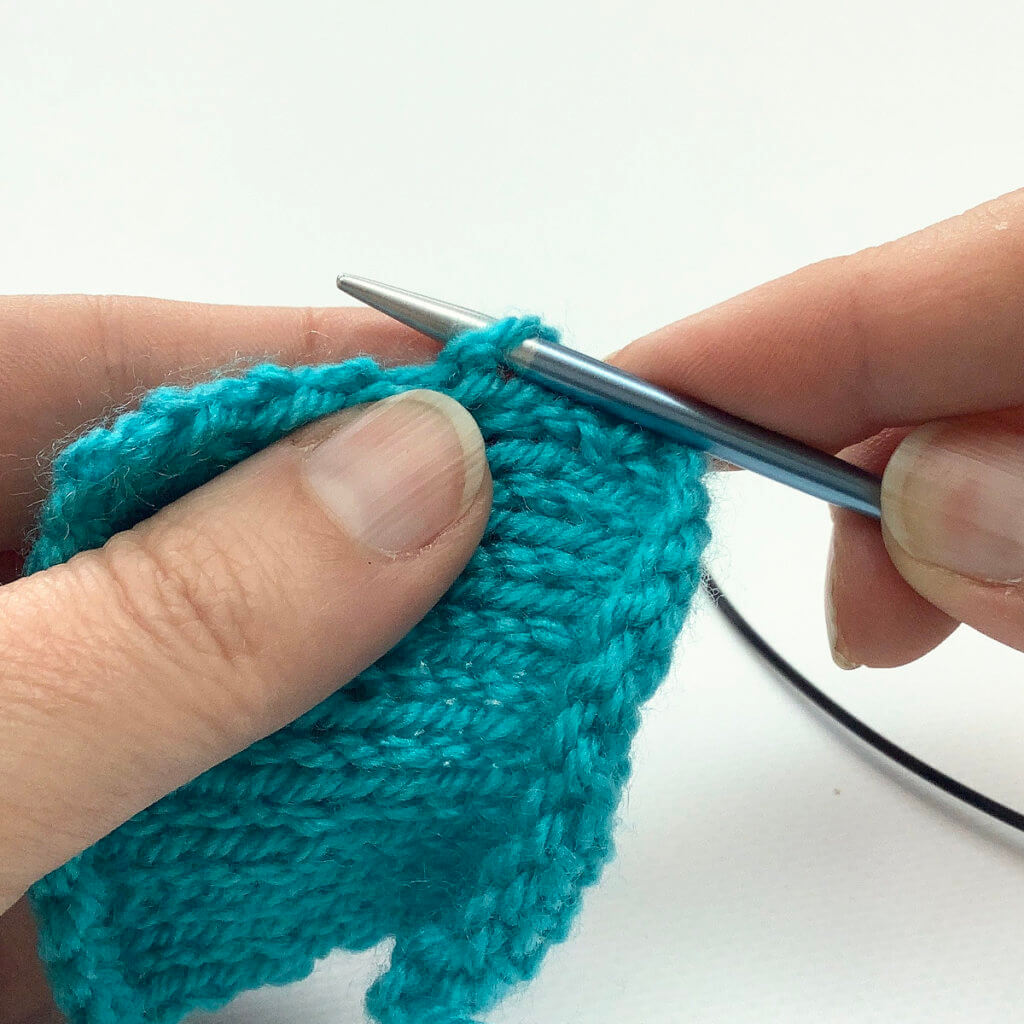
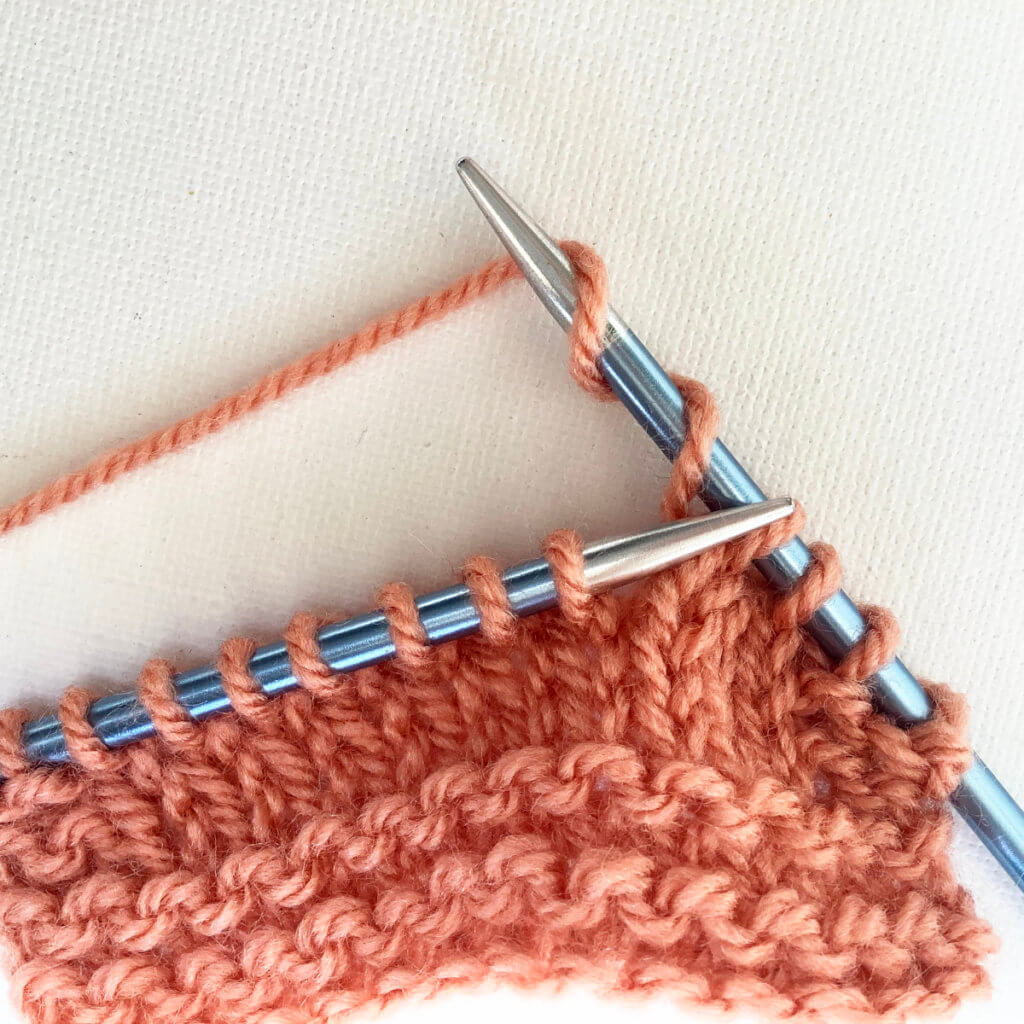
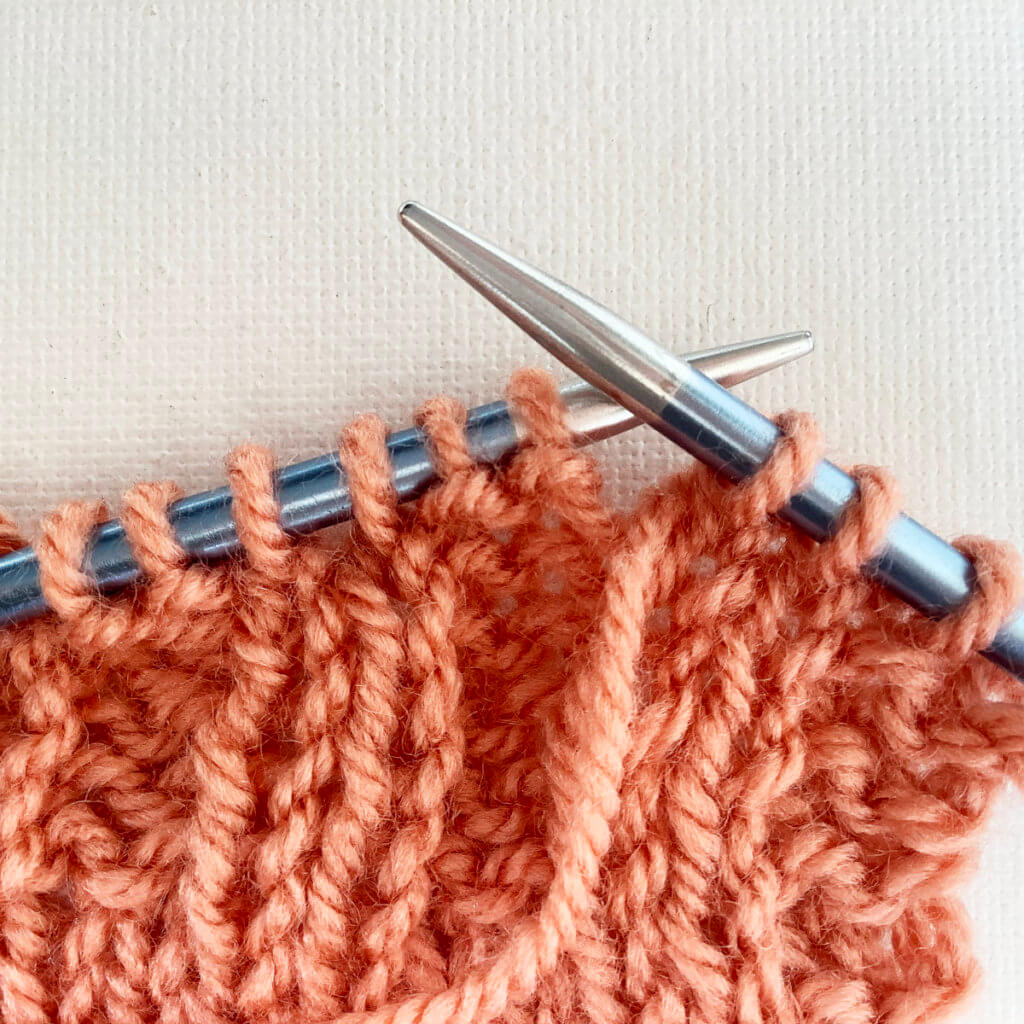
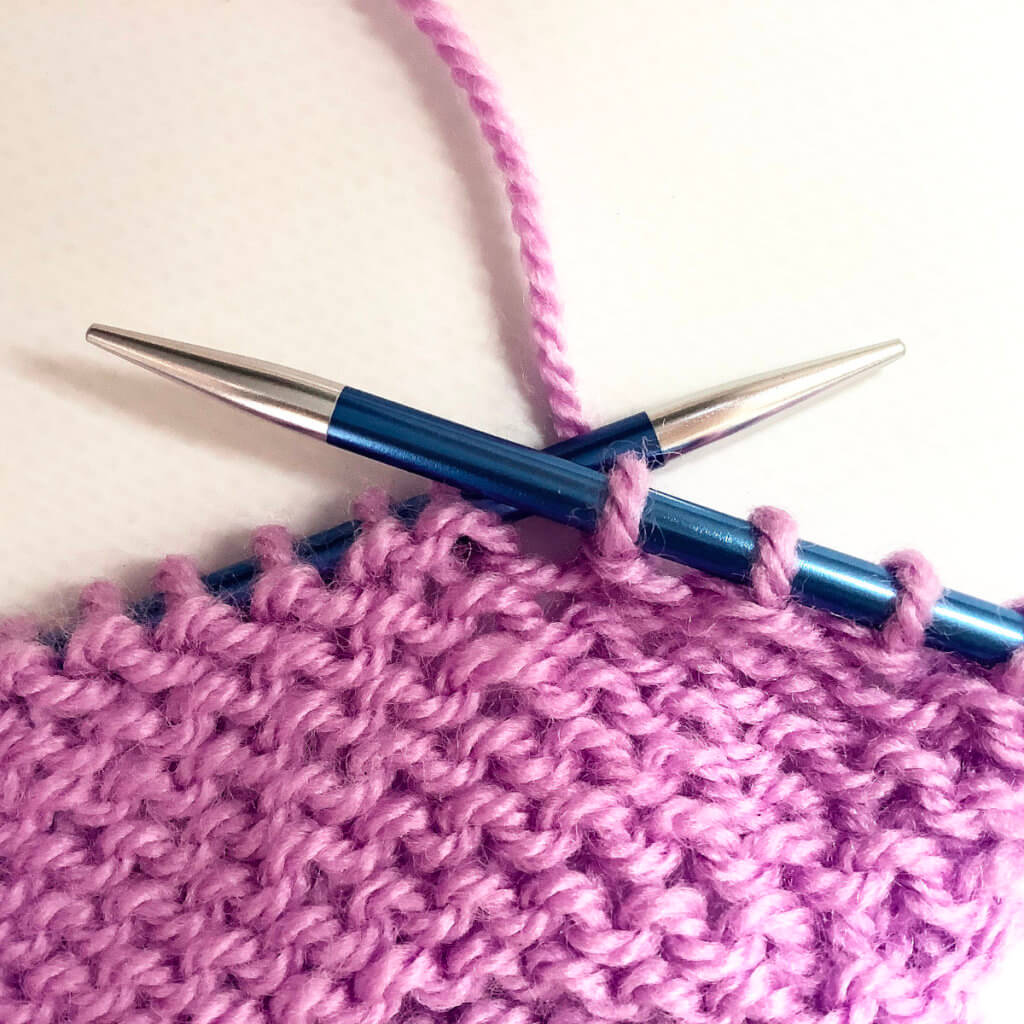
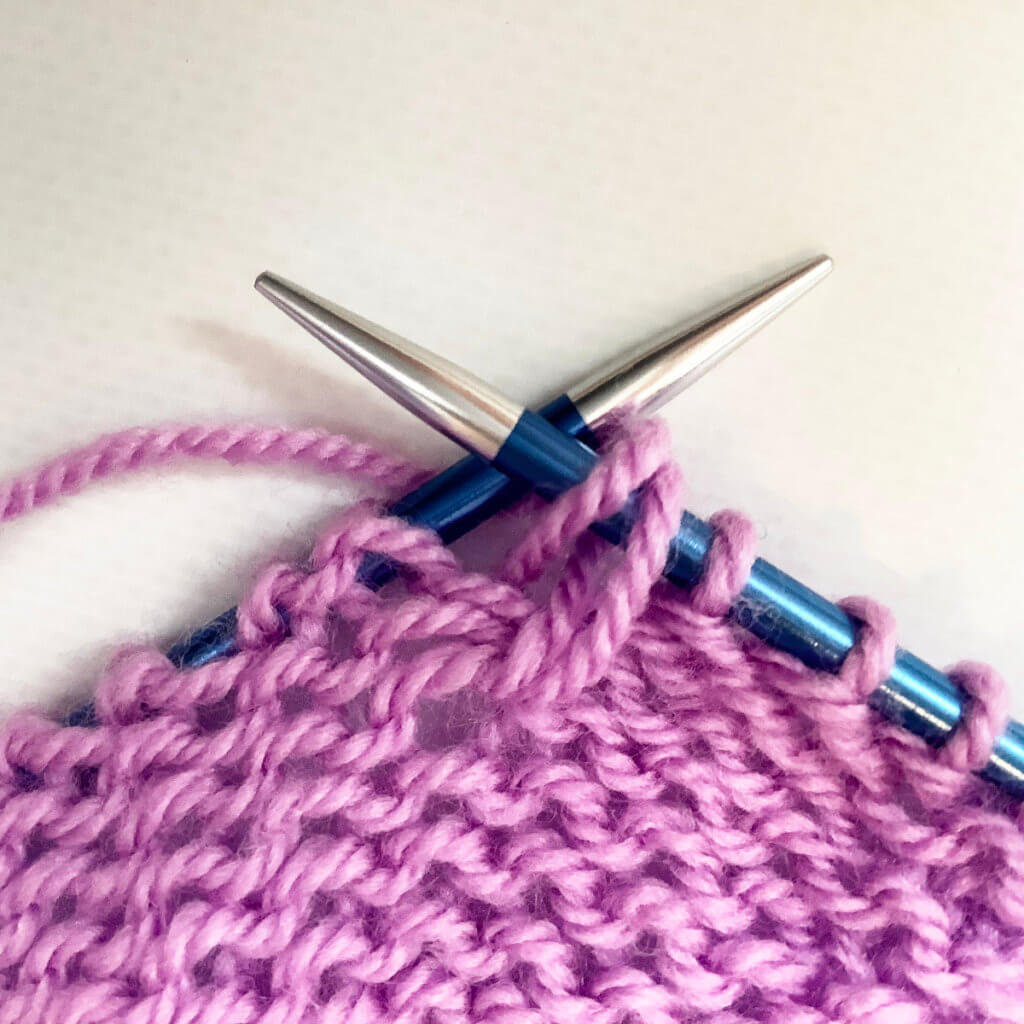
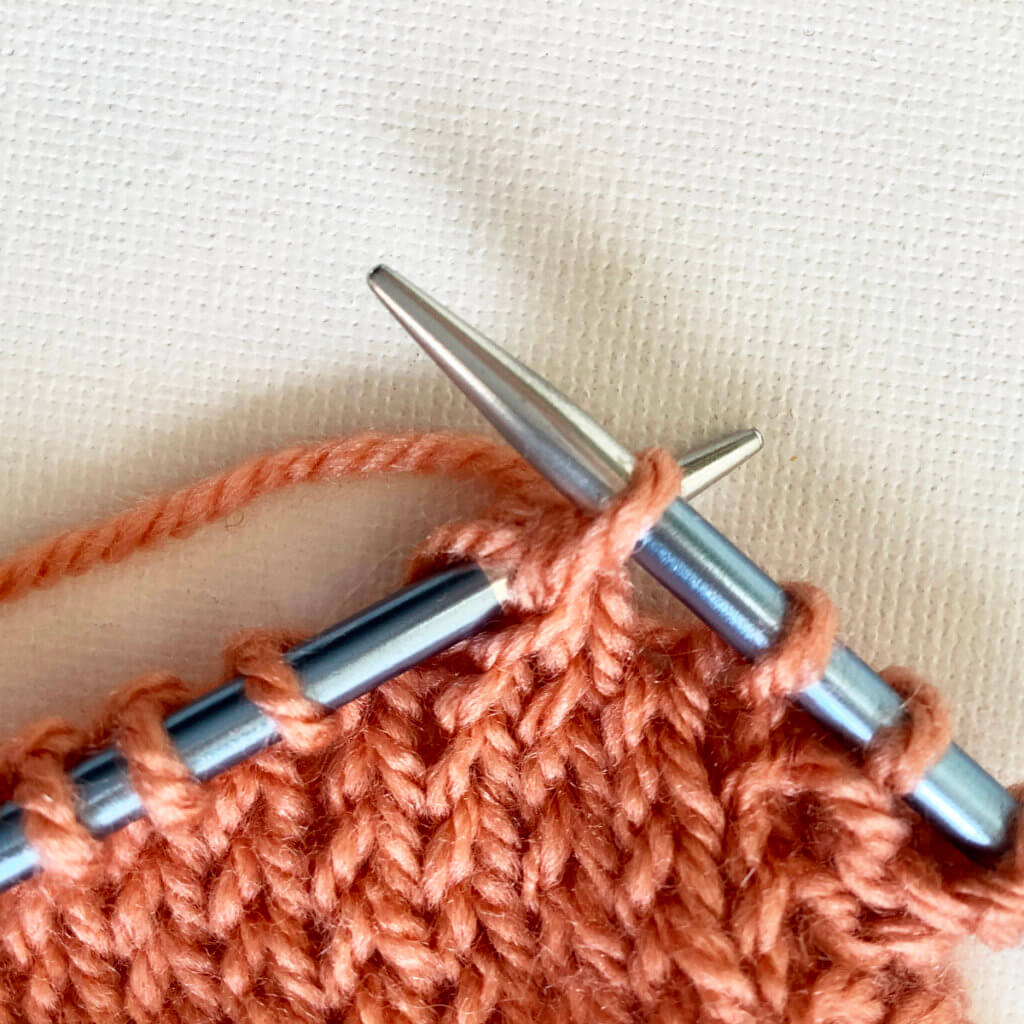
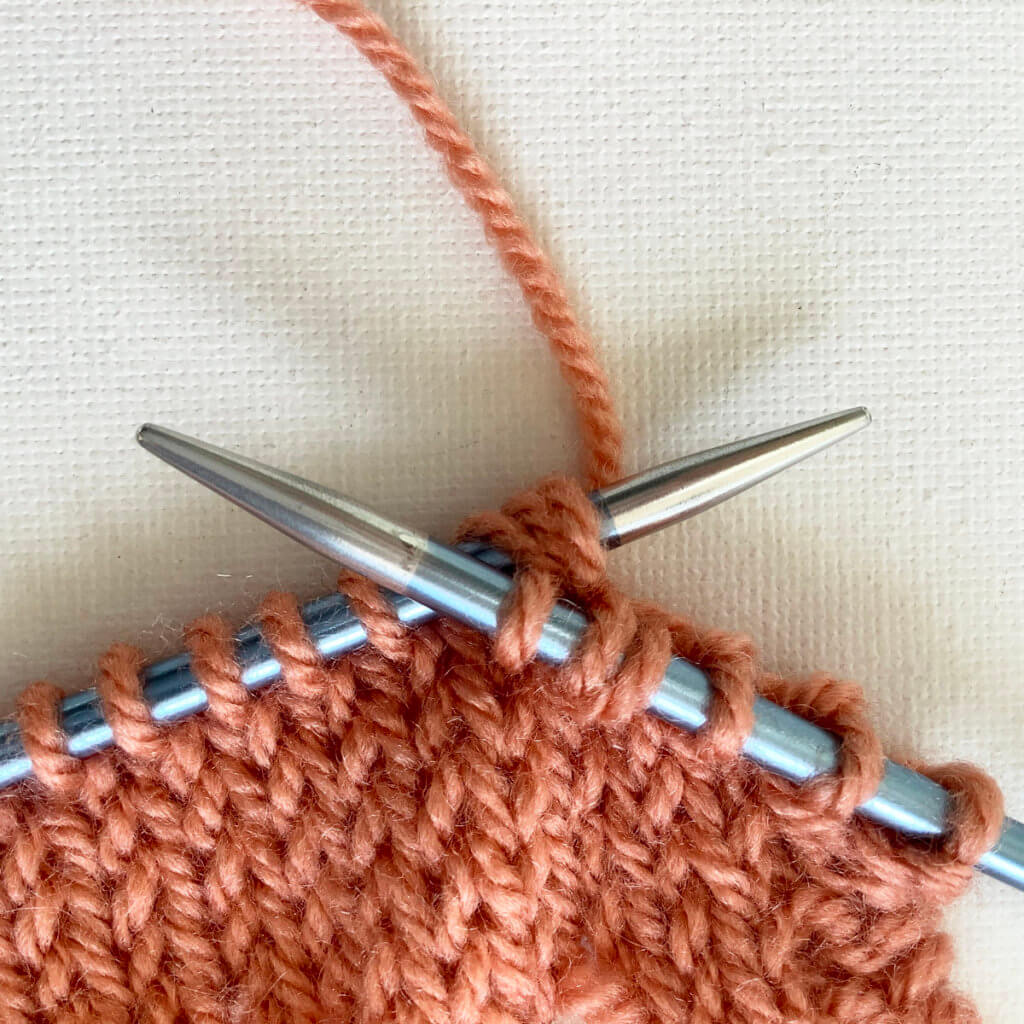
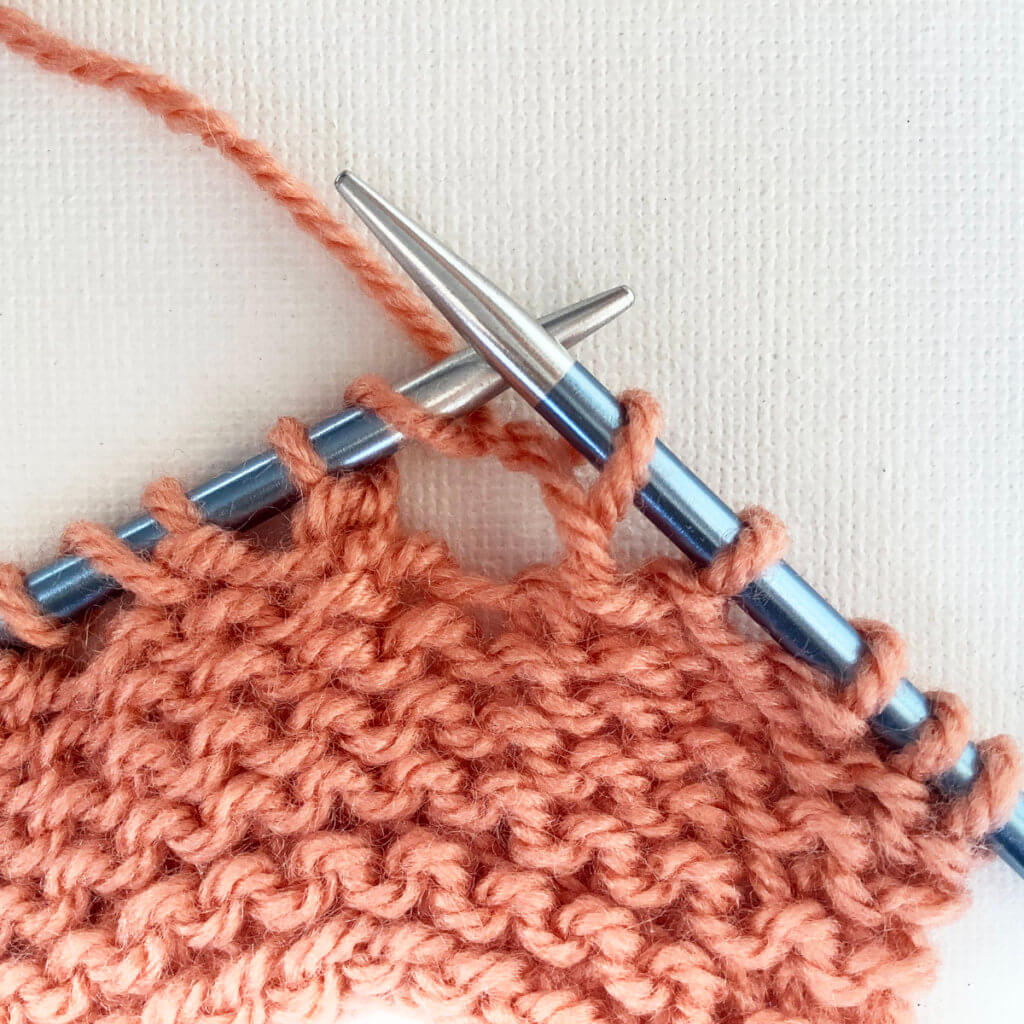
3. Wrap the yarn around the needle and pull it through the stitches you inserted the right-hand needle in. Don’t drop the stitches off the left-hand needle yet!

Step 3 in working an Estonian star stitch

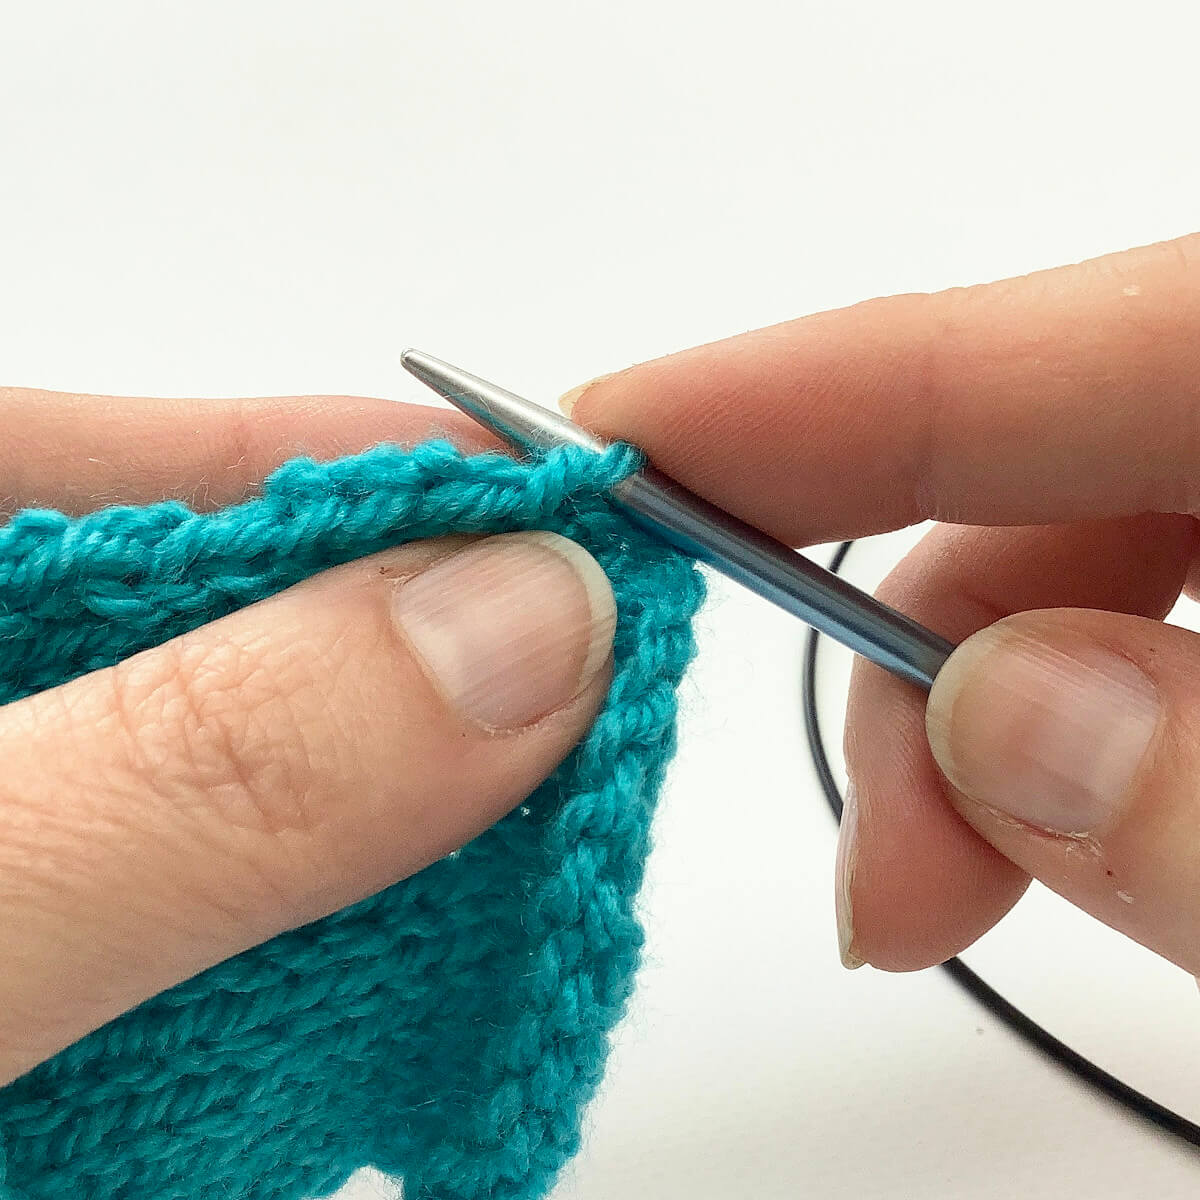
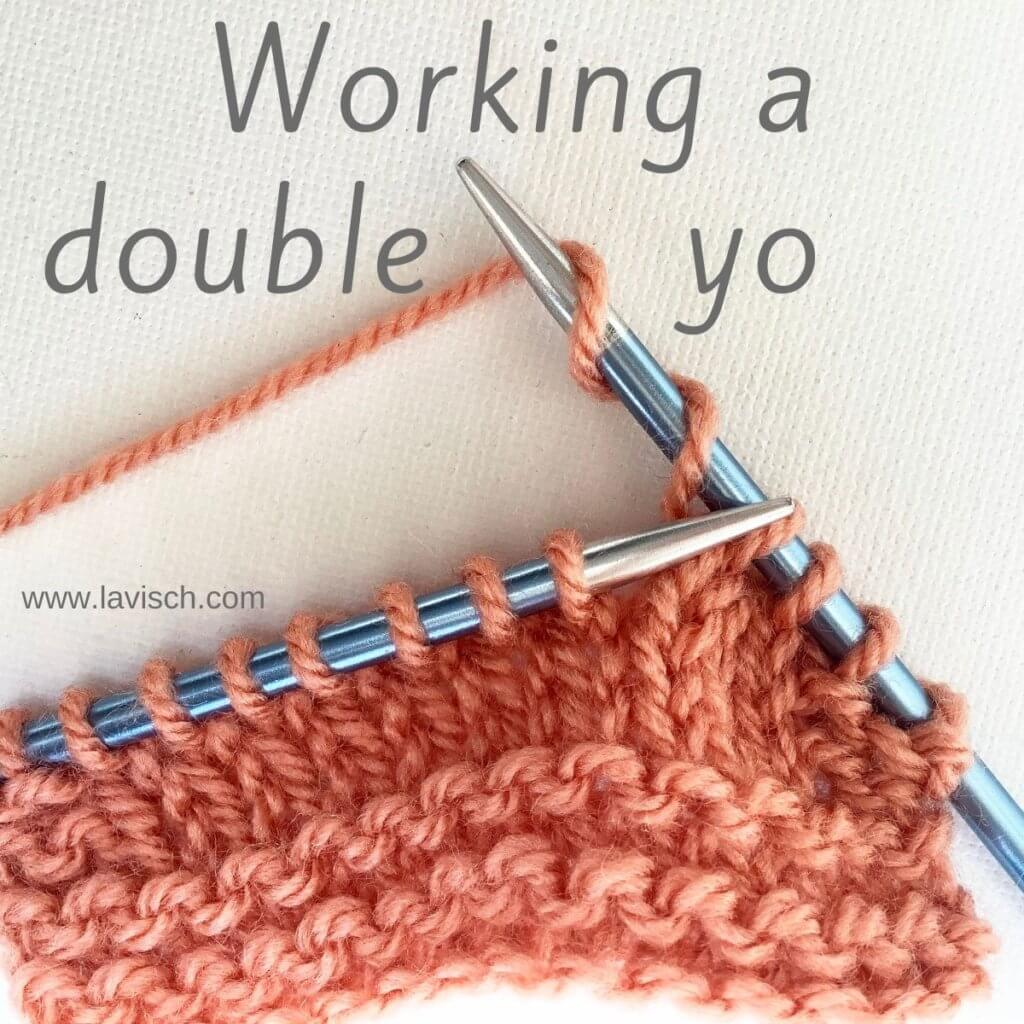
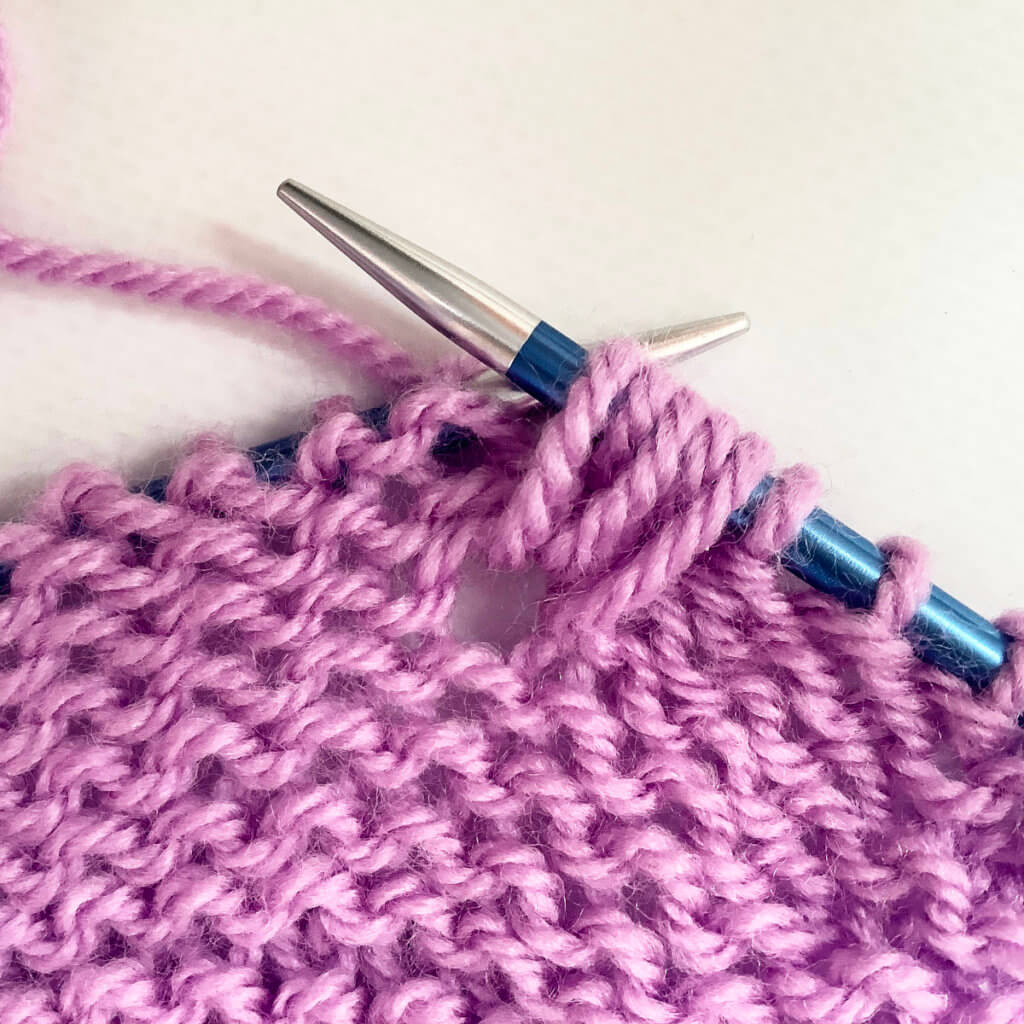
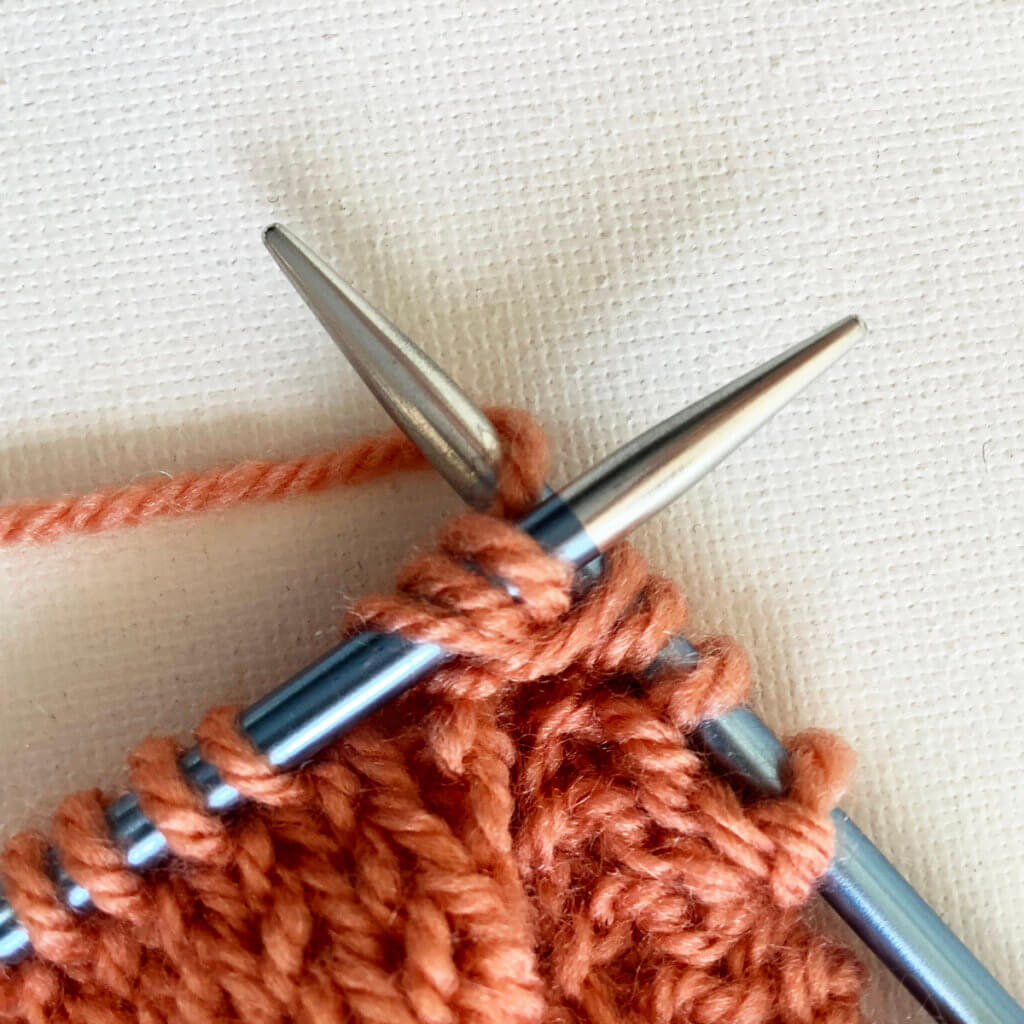
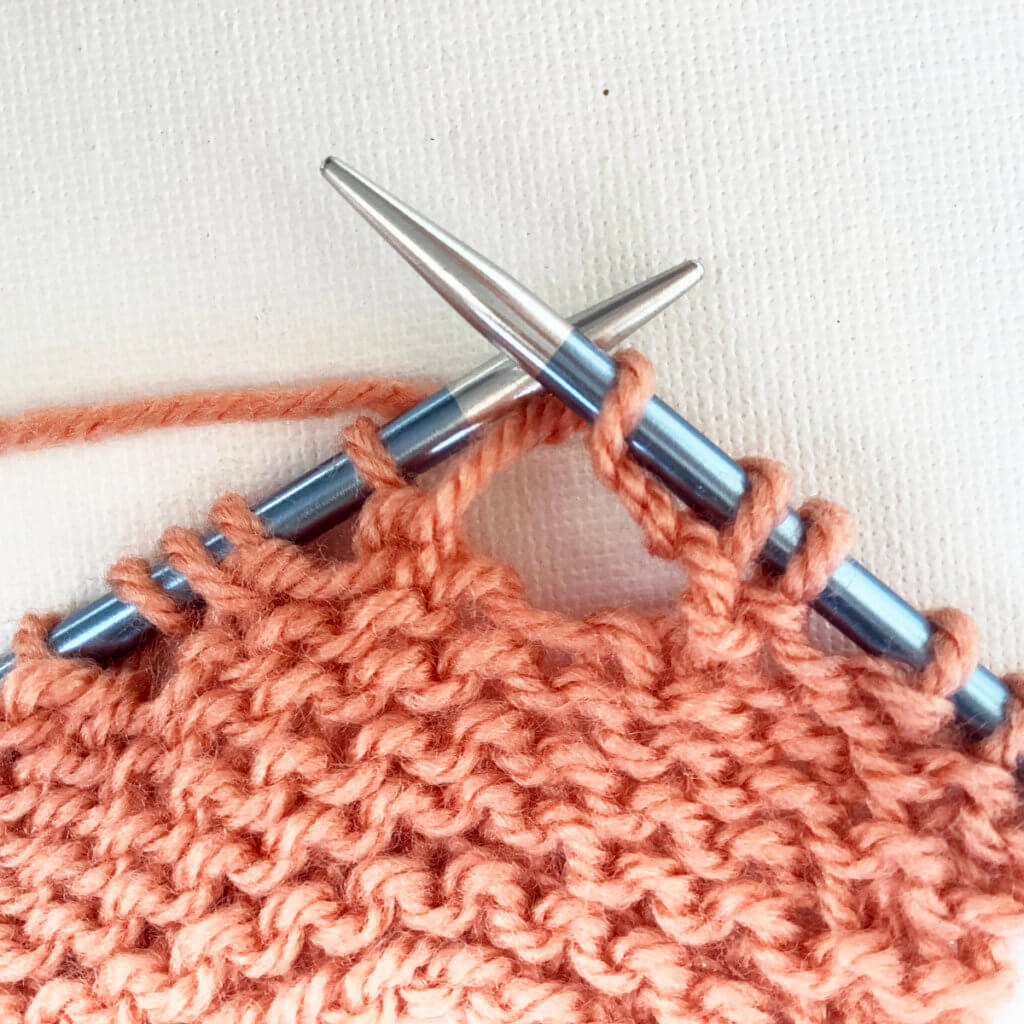
4. Wrap the yarn around the right-hand needle to form a yarn over.

Step 4, working a yo

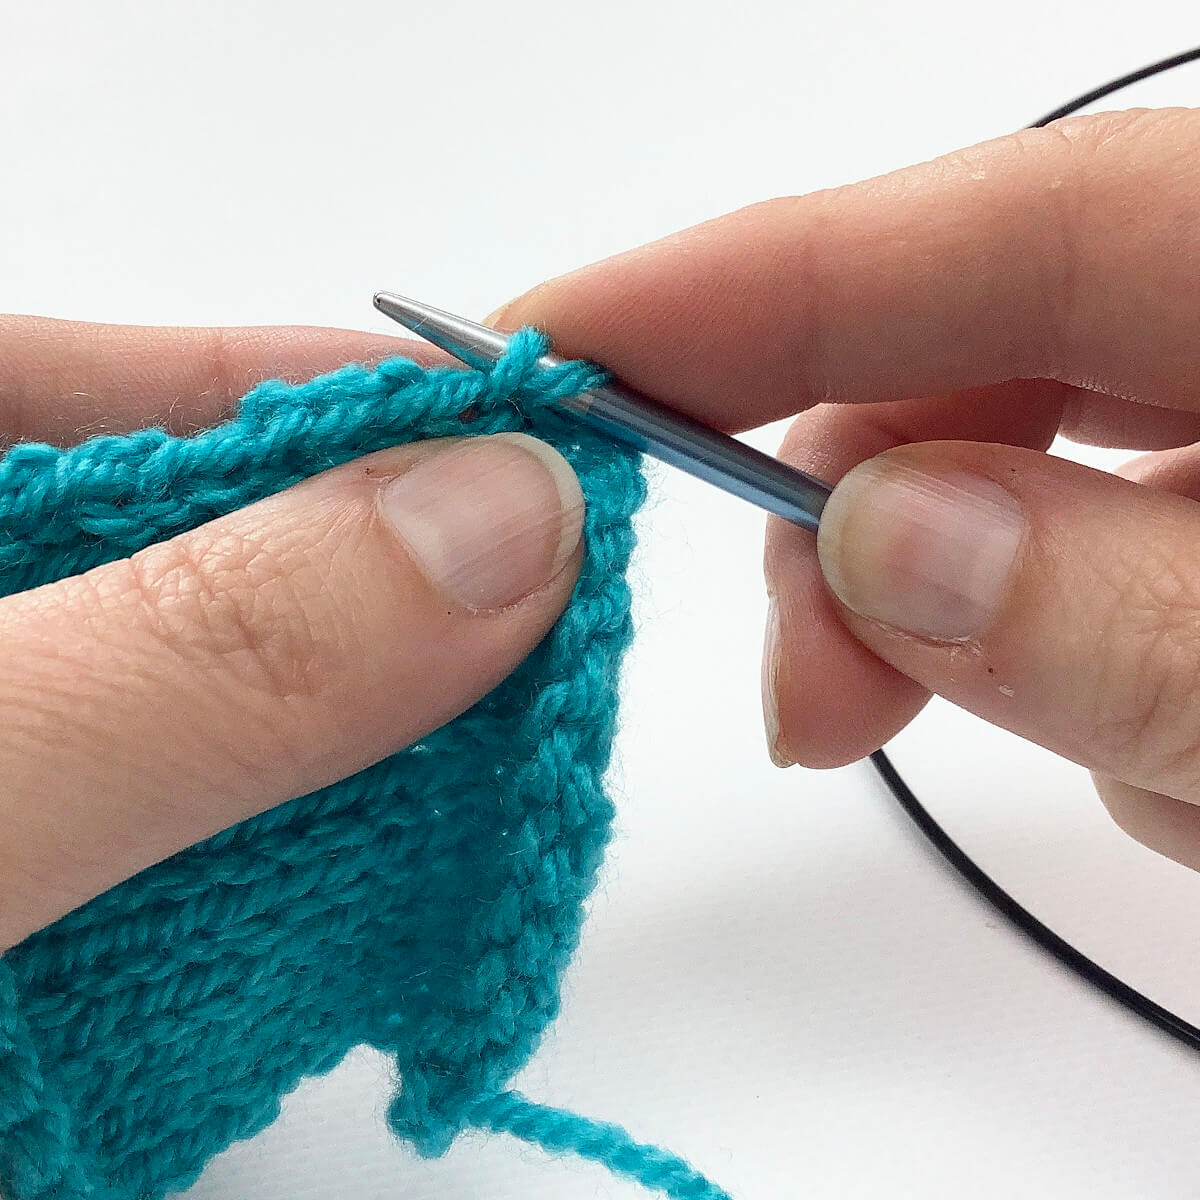
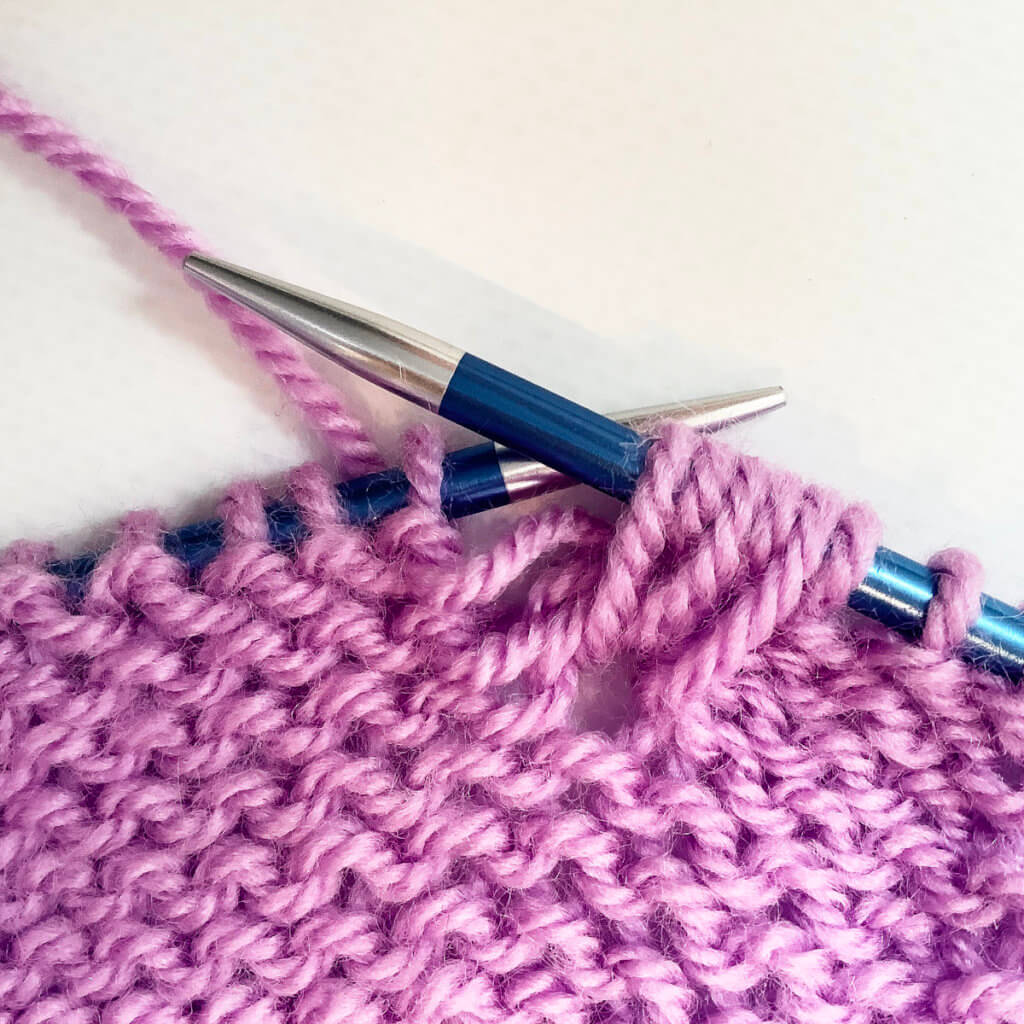
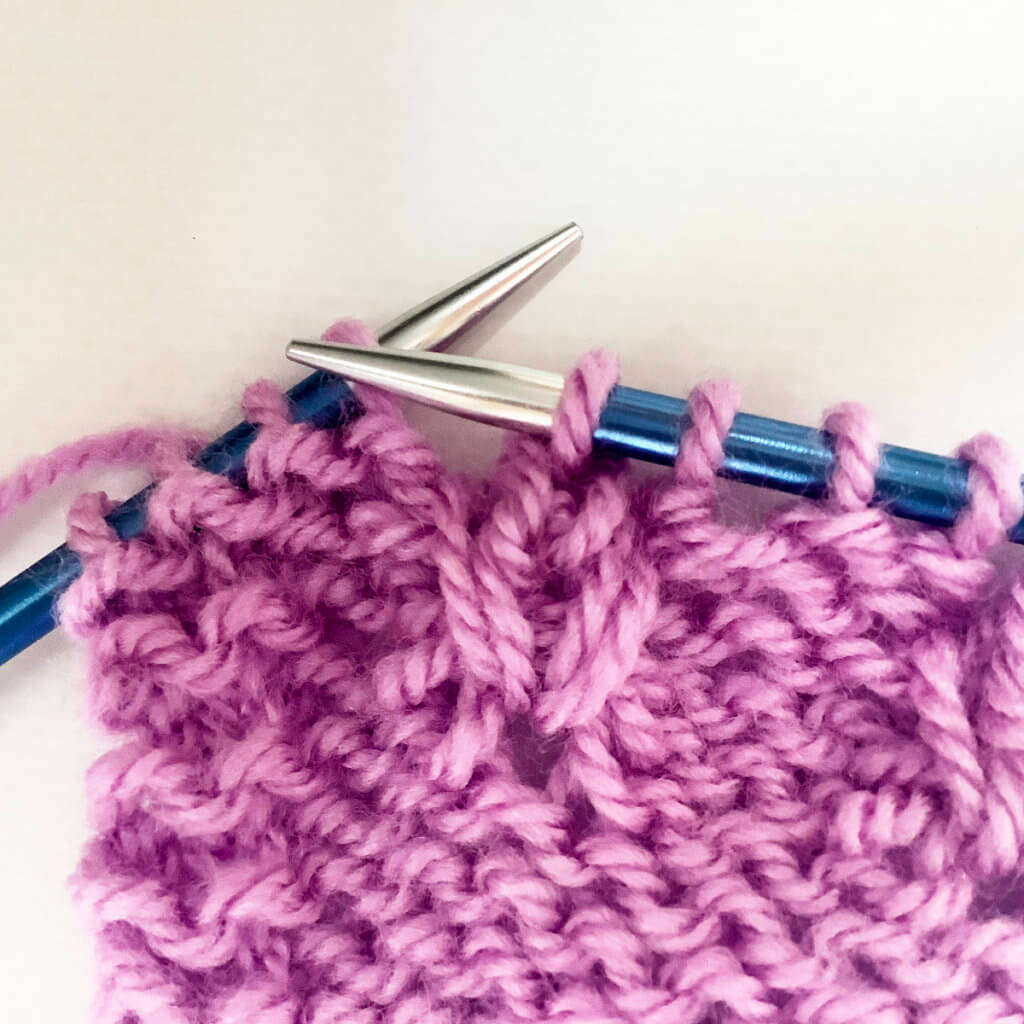
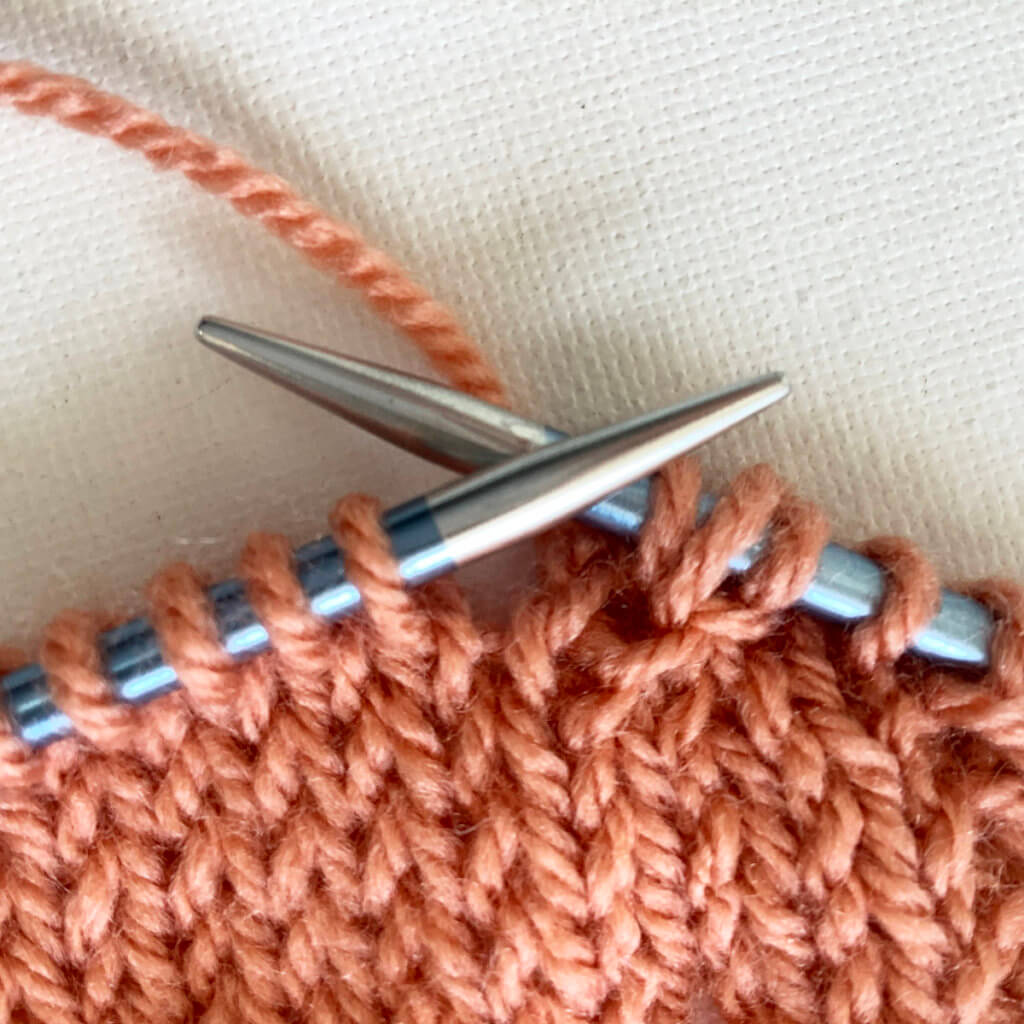
5. Again, insert the tip of the right-hand needle into the 3 stitches at the same time as if to knit.

Step 5 in working an Estonian star stitch

6. Again, wrap the yarn around the needle and pull it through the stitches you inserted the right-hand needle in.

7. Now you can drop the stitches off the left-hand needle to finish the star stitch.

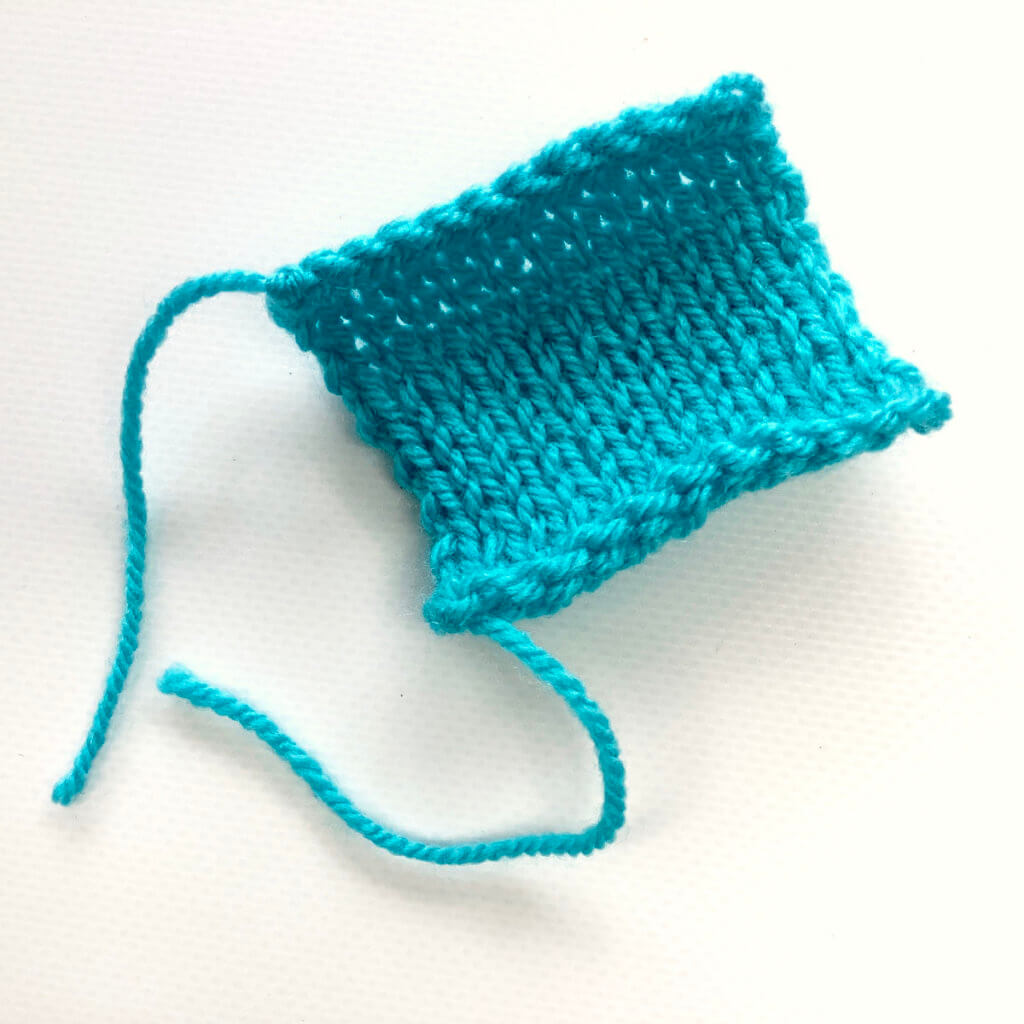
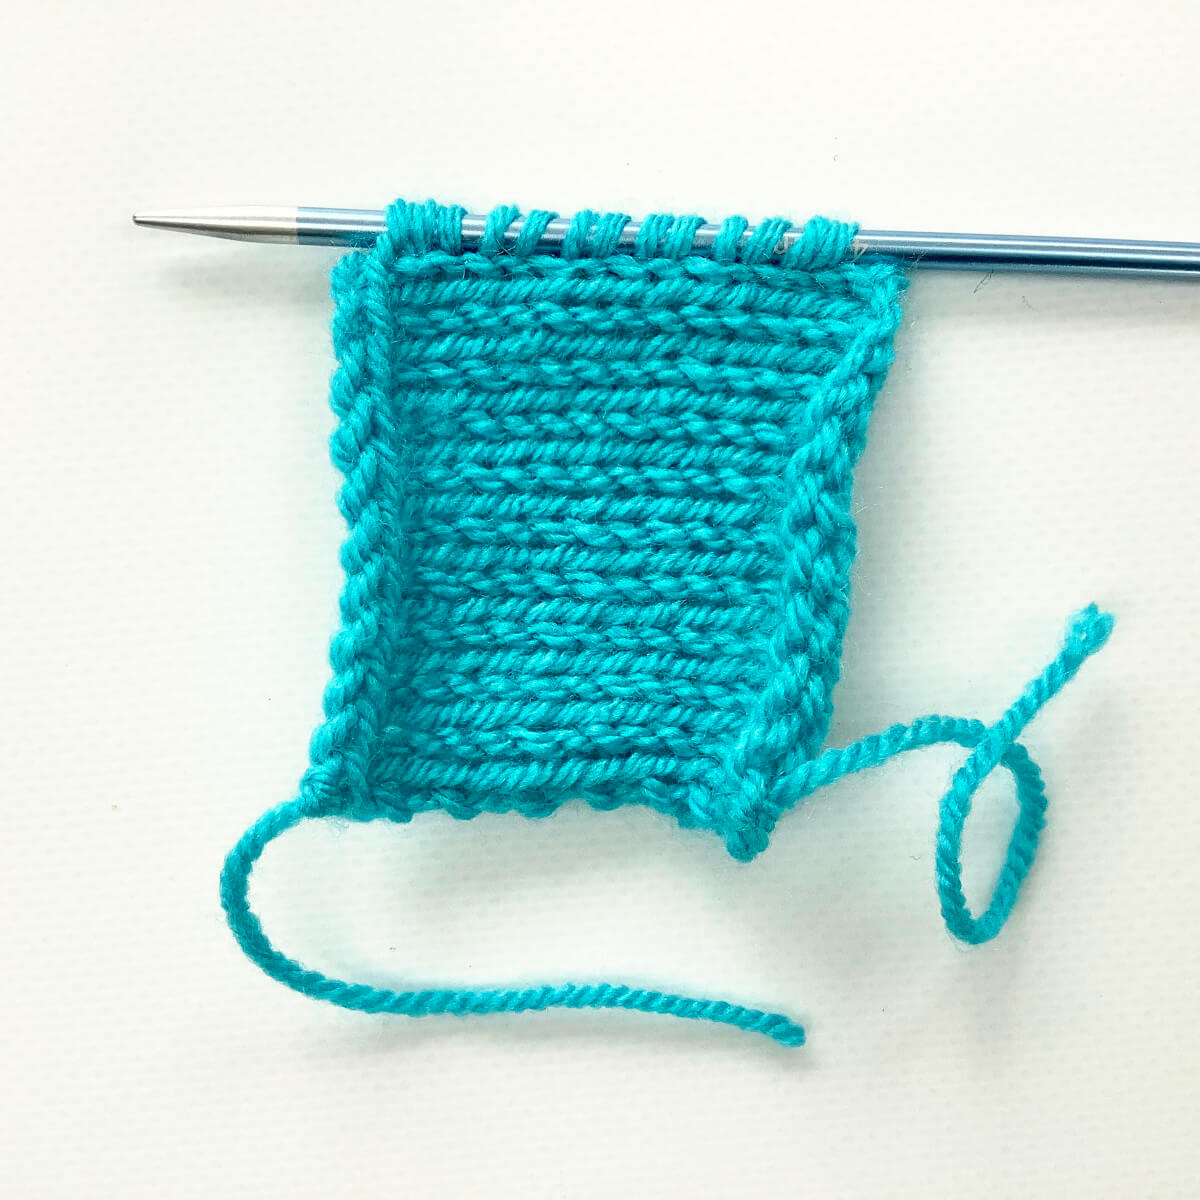
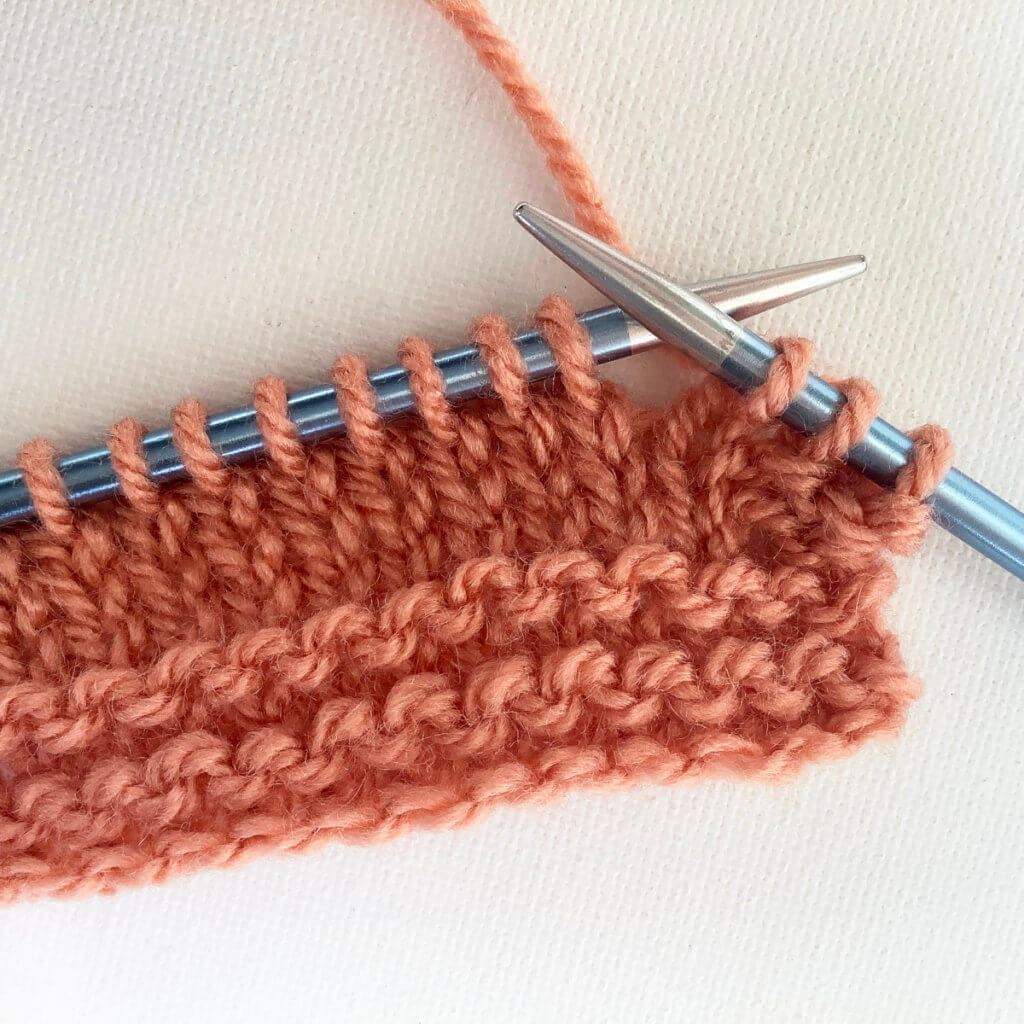
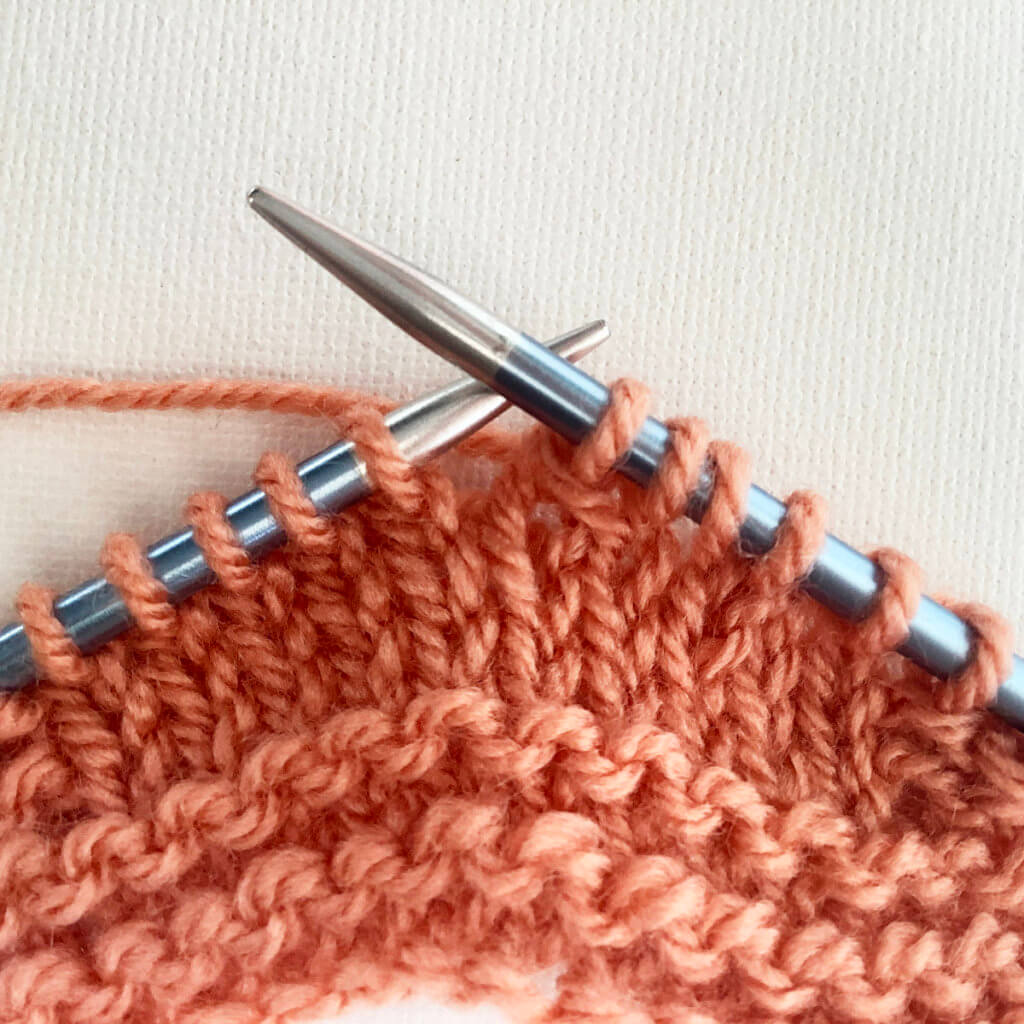
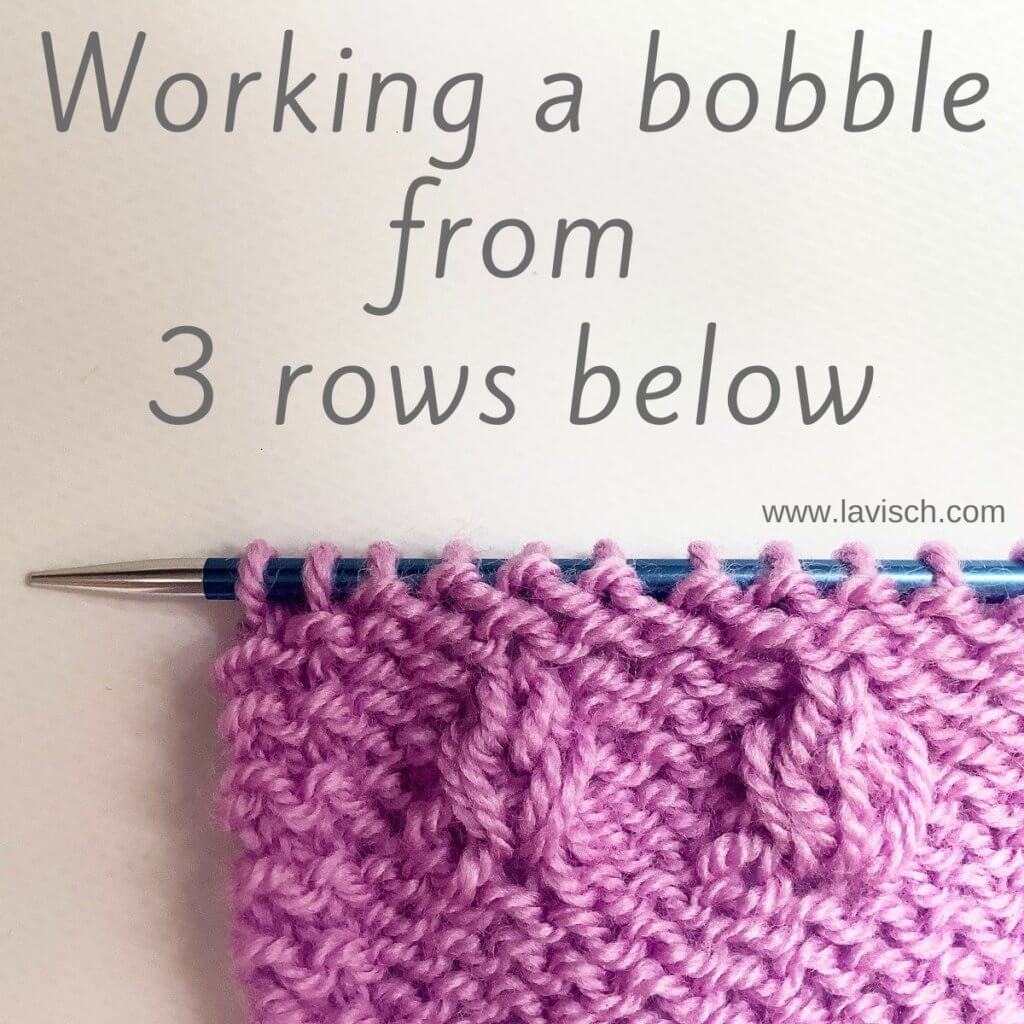
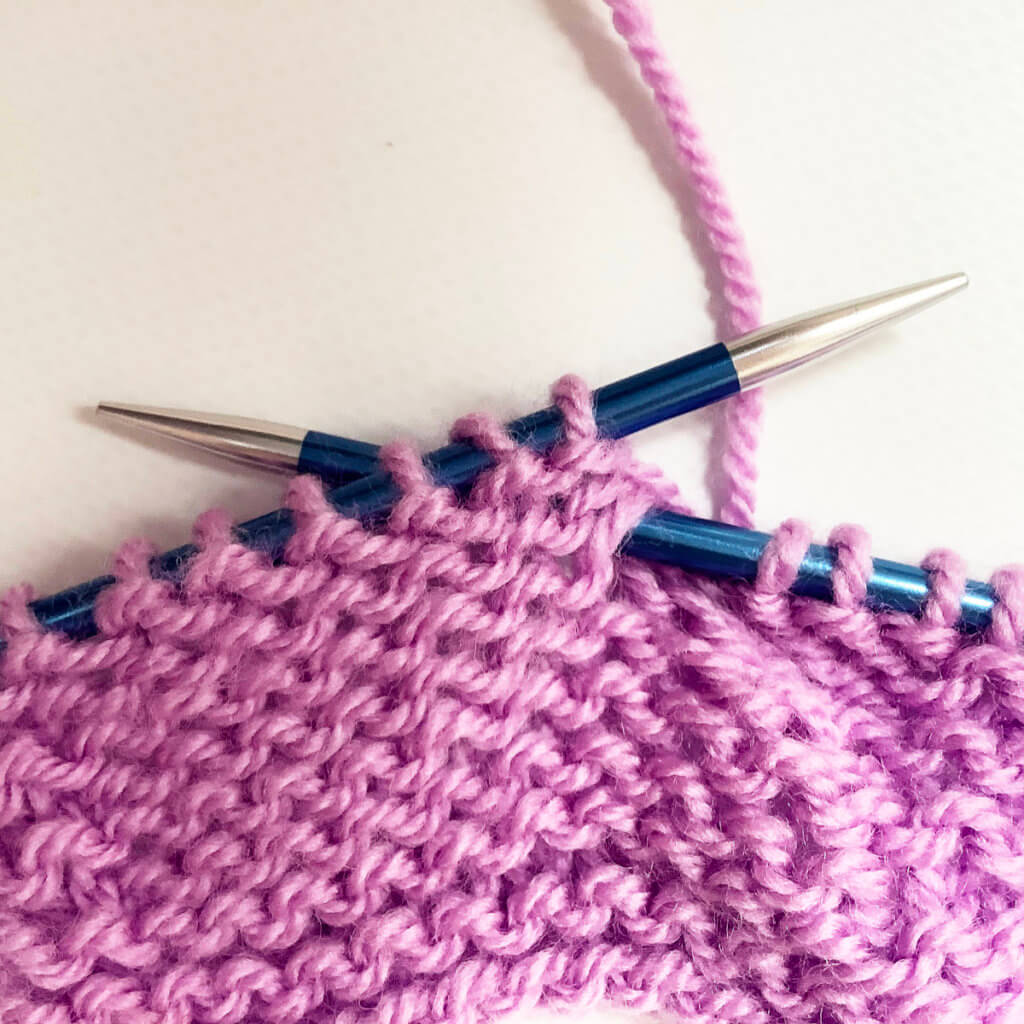
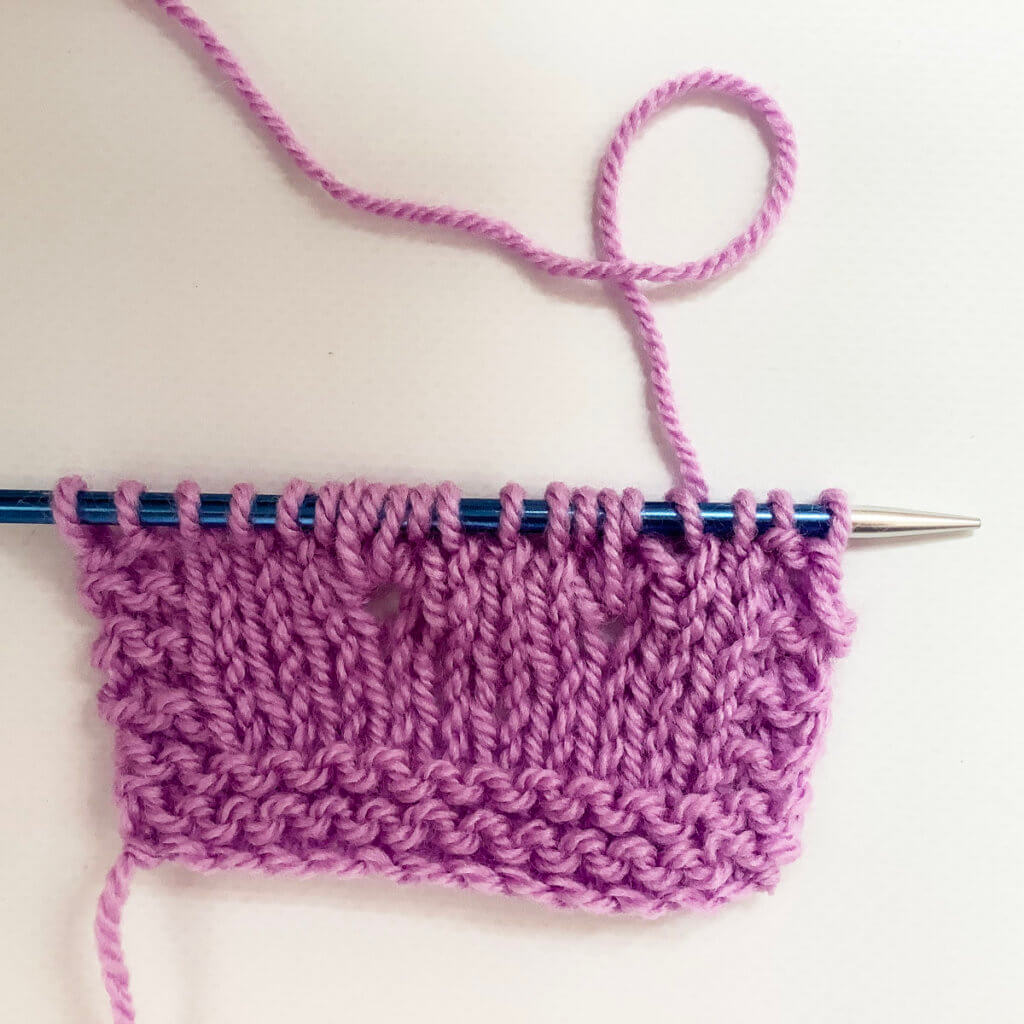
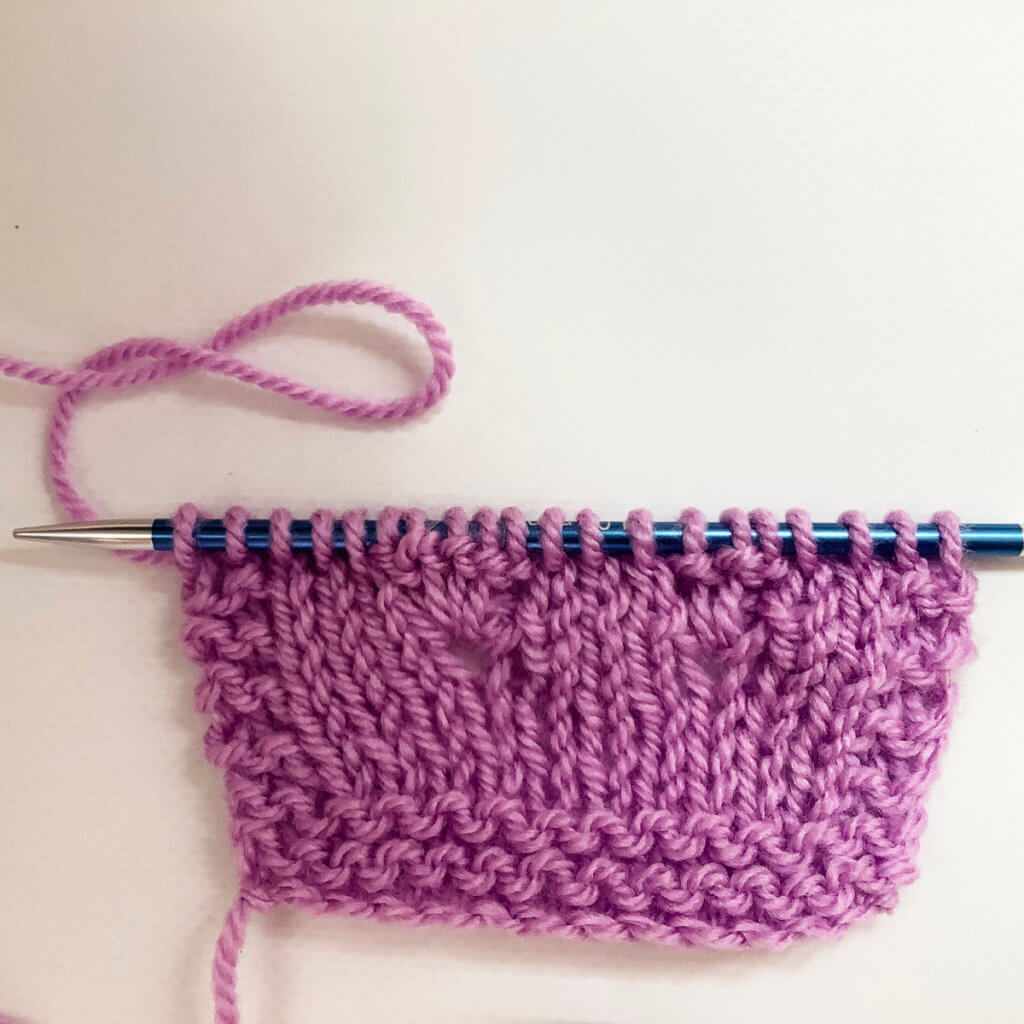
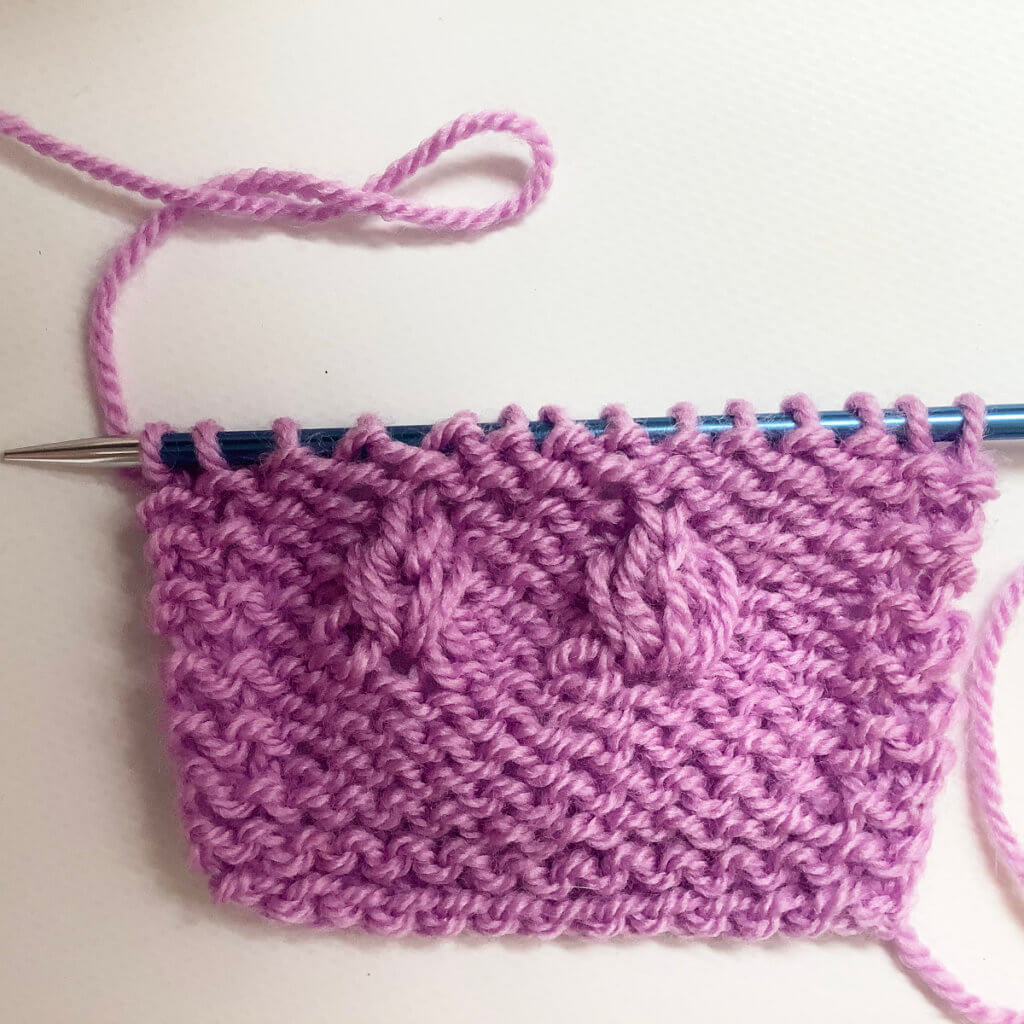
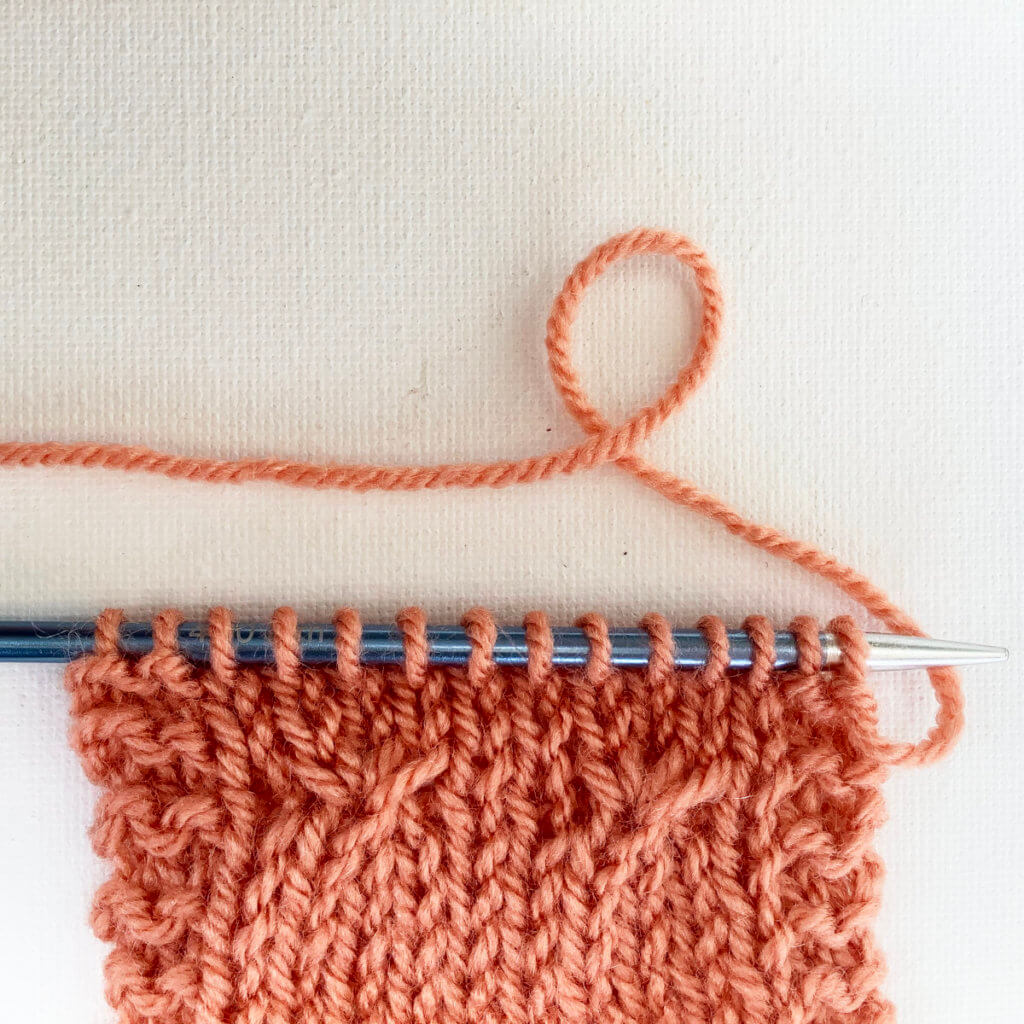
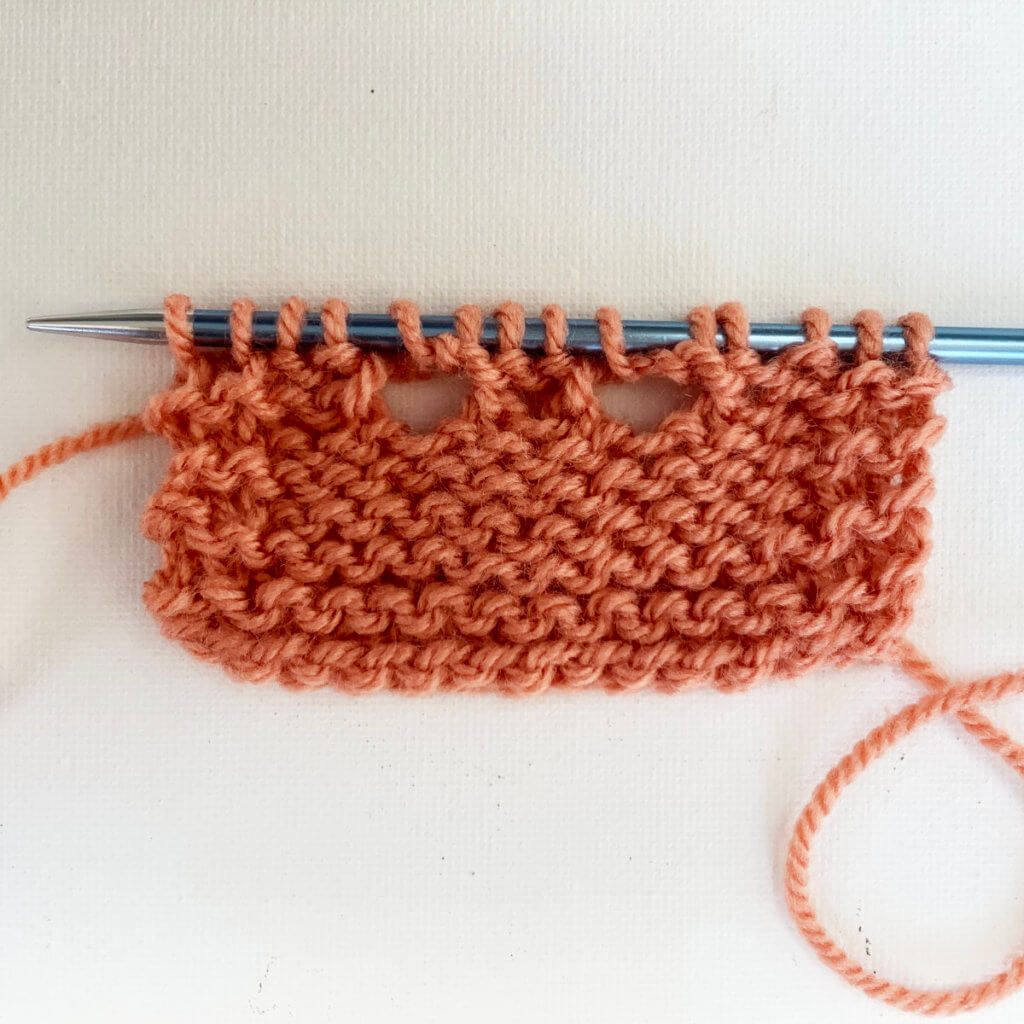
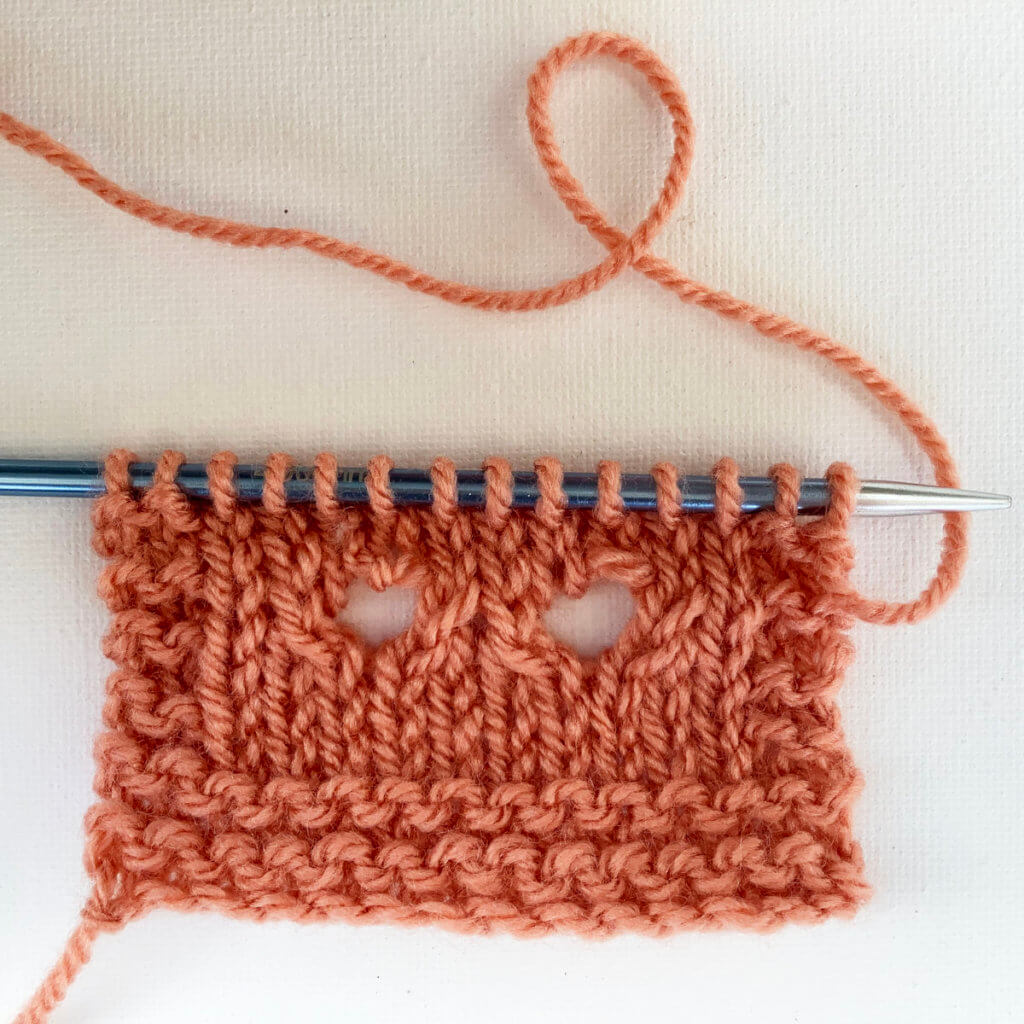
And this is how it looks after 3 more rows in stockinette have been worked, with 2 star stitches in a single row. Pretty, isn’t it?!

The result: a 3-into-3 star stitch!
Patreon logo

Thanks to my Patreon supporters for bringing you this freebie! Creating quality patterns and tutorials is a lot of work and resource-intensive. However, I find it important to give you free content like this tutorial. Thanks to the generous support of my Patreon supporters, I can make it happen. Thank you, patrons! Click here to join, or click here to read more about La Visch Designs on Patreon.

tutorial – working an Estonian 3-into-3 star stitch Read More »
green madeira in tinyStudio Creative Life magazine

Green Madeira shawl

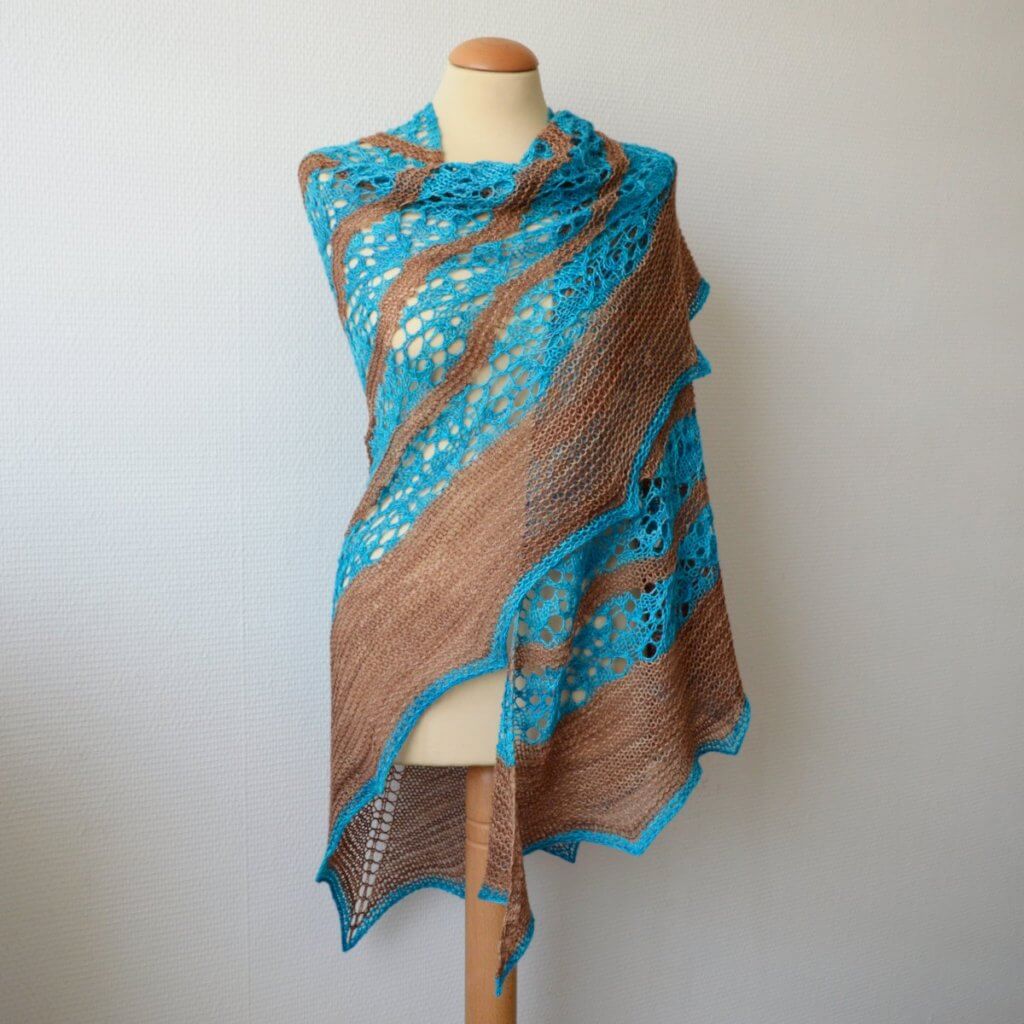
I’ve got some exciting news for you: my Green Madeira shawl pattern makes an appearance in the Q2 edition of tinyStudio Creative Life magazine!

I don’t know if you’re familiar with it, so I’ll just tell you. It’s a quarterly digital publication, with rich content like embedded videos, and slideable galleries of eye candy. It focuses on mindfulness, freedom from stress and clutter, and a conscious approach to fiber crafts. tinyStudio Creative Life is not just a magazine for spinners and fiber artists. There is also the tinyStudio TV video podcast. This gives hands on demonstrations of techniques, interviews with contributors, etc. to enrich and enhance the content of each issue. Below you can find the table of contents of this issue:

Q2 2020 tinyStudio Creative Life magazine table of contents

The underlying focus of this issue is celebration of design and inspiration, which sometimes comes from ‘time out’! This can mean different things to different people. For some, time out is aimed at taking a complete break from a difficult or challenging project. We sometimes talk of putting our knitting “in time out because it is not behaving!”

Other times it can mean taking “time out” for ourselves, to find inspiration and relaxation. This, in turn, that allows our creativity to replenish and flow again when we return. Which ever way you look at it, this issue has plenty to offer.

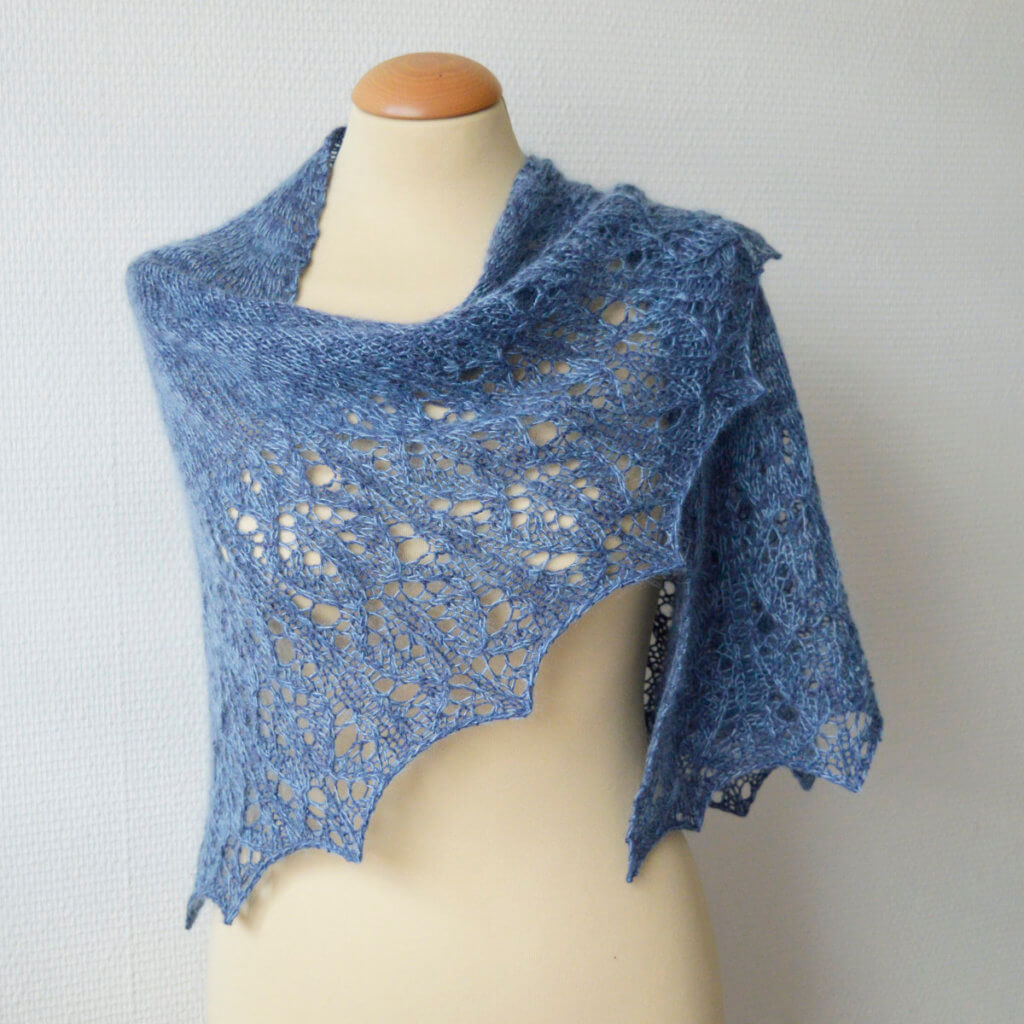
Green Madeira, a design by La Visch Designs

To get your copy of this issue of tinyStudio Creative Life, visit this link. Not sure yet whether you’d like it? Visit this page to download the free anniversary issue of tinyStudio magazine, and see all the rich content each and every issue provides.

green madeira in tinyStudio Creative Life magazine Read More »
tutorial – correcting a wrongly worked purl stitch

tutorial - correcting a wrongly worked purl stitch

If you’ve ever worked some sort of patterning in your knitting, you know it can happen easily: a short distraction. And when your attention is somewhere else a purl stitch is worked instead of knit stitch, or vice versa. It may even be that you won’t notice it until several more rows or rounds have been worked.

Personally, I have a very big aversion against ripping out my work, just because I made a little mistake a couple of rows back. I mean, it certainly is an option, but I consider it to be more of a last resort type of option.

So, in this tutorial I’ll show you how to deal with a wrongly worked purl stitch that should have been a knit stitch.

Materials used

Yarn: * Paintbox Yarns Simply DK, a good value, good quality 100% acrylic yarn, here in the color 142 Tea Rose.

A crochet hook in the same size or slightly smaller than your knitting needles. For example this * Pony Aluminum Crochet Hook in size 4 mm.

Fixing the wrongly worked stitch step by step

In this example, 2 stitches next to each other are purled instead of knitted in the stockinette fabric. Since there are only 2, I correct them one by one and not at the same time.

1. First, slip the stitches purl-wise from the left-hand needle to the right-hand needle, until you reach the first wrong stitch.

Fixing the wrongly worked stitch step 1

2. Drop this stitch and ladder down up to and including the purl stitch.

Fixing the wrongly worked stitch step 2

3. Since we want to create stockinette stitch fabric, we now insert the crochet hook through the correct stitch directly below the laddered-down purl stitch from the front to the back.

Fixing the wrongly worked stitch step 3

4. Next, ladder your way up again by inserting the crochet hook underneath the horizontal thread directly above the hook, and pulling the thread through the loop already on the hook to make a new knit stitch. Repeat this until all horizontal threads have been worked. After this you can place the stitch back unto the knitting needle.

Fixing the wrongly worked stitch step 4

5. Next, repeat steps 1 to 4 for the next wrongly worked purl stitch. The result should look something like this:

Fixing the wrongly worked stitch step 5.

But what if I need to fix a knit into a purl?

Good question! Well, as you know the wrong side of a knit stitch is a purl stitch and vice versa. So, the easiest way to fix the reverse situation as pictured in this tutorial, is to just turn your work so the wrong side is facing! This way you’ve got the exact situation as pictured here.

If you do want to ladder up a purl stitch, do the following:

1. To start, move the next horizontal thread directly above the stitch from the back to the front of the work.

2. Next, insert the crochet hook into the stitch from the back to the front, grab the loose thread and pull it through the stitch on the hook.

If you’d like pictures with these last steps, take a look at the second part of my tutorial on how to fix a dropped stitch in garter stitch.

Patreon logo

Thanks to my Patreon supporters for bringing you this freebie! Creating quality patterns and tutorials is a lot of work and resource-intensive. However, I find it important to give you free content like this tutorial. Thanks to the generous support of my Patreon supporters, I can make it happen. Thank you, patrons! Click here to join, or click here to read more about La Visch Designs on Patreon.

tutorial – correcting a wrongly worked purl stitch Read More »
strawberry confetti cupcake

Strawberry Confetti Cupcake by La Visch Designs

Strawberry Confetti Cupcake is a shawl designed to use that skein of speckled yarn you just couldn’t resist. In this design, it is paired with the lovely lace border in a contrasting solid color. Go wild with the color combinations!

This shawl is knitted from the top-down in one piece, starting at the neck edge with a garter tab. The patterning in the edging is based on a stitch pattern by Naomi Parkhurst and is worked on both right and wrong side rows. The instructions for the edging are both charted and written out.


Pay what you want: (minimum €6.50)

Add to cart


Difficulty level

Patterning in the edging of the shawl is on both RS and WS rows and contains simple cables. Stitches used include knit, purl, skp, k2tog, left and right leaning double decreases, yo, and double yo. This pattern is suitable for the intermediate to advanced knitter.

Sizes and finished measurements

One size: Wingspan of 223 cm (87 ¾ inches) and a depth of 100 cm (39 ½ inches), measured after blocking.

Change the size of this shawl by using lighter or heavier yarn and/or working fewer (or more) repeats of the various sections in the body of the shawl. This will of course change the amount of yarn needed.

Pattern details

  • Gauge: approx. 14 sts / 27 rows = 10 cm (4 inches) over stockinette, after blocking.
  • Pattern languages included: English and Dutch (Dit patroon omvat zowel een Nederlandse als een Engelse versie)
  • Digital PDF has 5 pages (letter size)

Materials

  • Yarn: Diva Sock Star by Dutch Wool Diva (75% merino wool, 25% nylon; 425 m (465 yds) / 100 g) in the following colors and amounts: MC: 425 m (465 yds) / 100 g in Ariël and CC: 425 m (465 yds) / 100 g in Tannenbaum. Substitute wool fingering weight yarn of comparable thickness, in a speckled colorway for the MC and a solid or tonal colorway as a CC for a similar result.
  • Size 4 mm (US 6) / 80 cm (32 inches) circular needles.
  • Yarn needle.
  • Cable needle.
  • 4 stitch markers to indicate the center stitch and the edge stitches.
  • Stitch markers to indicate repeats of the lace patterning (optional).

strawberry confetti cupcake Read More »
tutorial – the k3tog tbl left-leaning double decrease

tutorial – the k3tog tbl left-leaning double decrease

In another post I’ve already showed you how to work the sl1-k2tog-psso left-leaning double decrease. In this tutorial I’ll show you another way to reduce 3 stitches down to 1 stitch in a left-leaning way: knit 3 together through the back loop, or k3tog tbl for short.

This decrease requires fewer steps than the sl1-k2tog-psso one, but it can be a tad fiddly to work. And while the result may look a tad different, in most patterns it really won’t matter that much which specific left-leaning double decrease you use. So, just try it out and use the one that works best for you.

Materials

Yarn: * Paintbox Yarns Simply DK, a good value, good quality 100% acrylic yarn, here in the color 128 Lime Green.

Needles: * KnitPro Zing Fixed Circular Needles. In this tutorial, I used the 4 mm (US 6) size with a cable length of 80 cm (32 inches).

Working a k3tog tbl step by step

1. First, work your way across the row until you’ve reached the point where you want to make the decrease. In this case, I want to work the double decrease over the 3 stitches in the middle of the swatch.

Working a k3tog tbl step 1

2. To start, insert the right-hand needle knit wise (from right to left) into the back loop of the next 3 stitches on the left-hand needle.

Working a k3tog tbl step 2

3. Wrap the yarn around the needle…

Working a k3tog tbl step 3

4. … and pull it through the 3 stitches.

Working a k3tog tbl step 4

5. To finish the k3tog tbl decrease, slide the original 3 stitches off the left-hand needle.

Working a k3tog tbl step 5

The below picture shows how it looks after 2 more decrease rows have been worked.

Tutorial k3tog tbl
Patreon logo

Thanks to my Patreon supporters for bringing you this freebie! Creating quality patterns and tutorials is a lot of work and resource-intensive. However, I find it important to give you free content like this tutorial. Thanks to the generous support of my Patreon supporters, I can make it happen. Thank you, patrons! Click here to join, or click here to read more about La Visch Designs on Patreon.

tutorial – the k3tog tbl left-leaning double decrease Read More »
Kasjmier

Kasjmier shawl by La Visch Designs

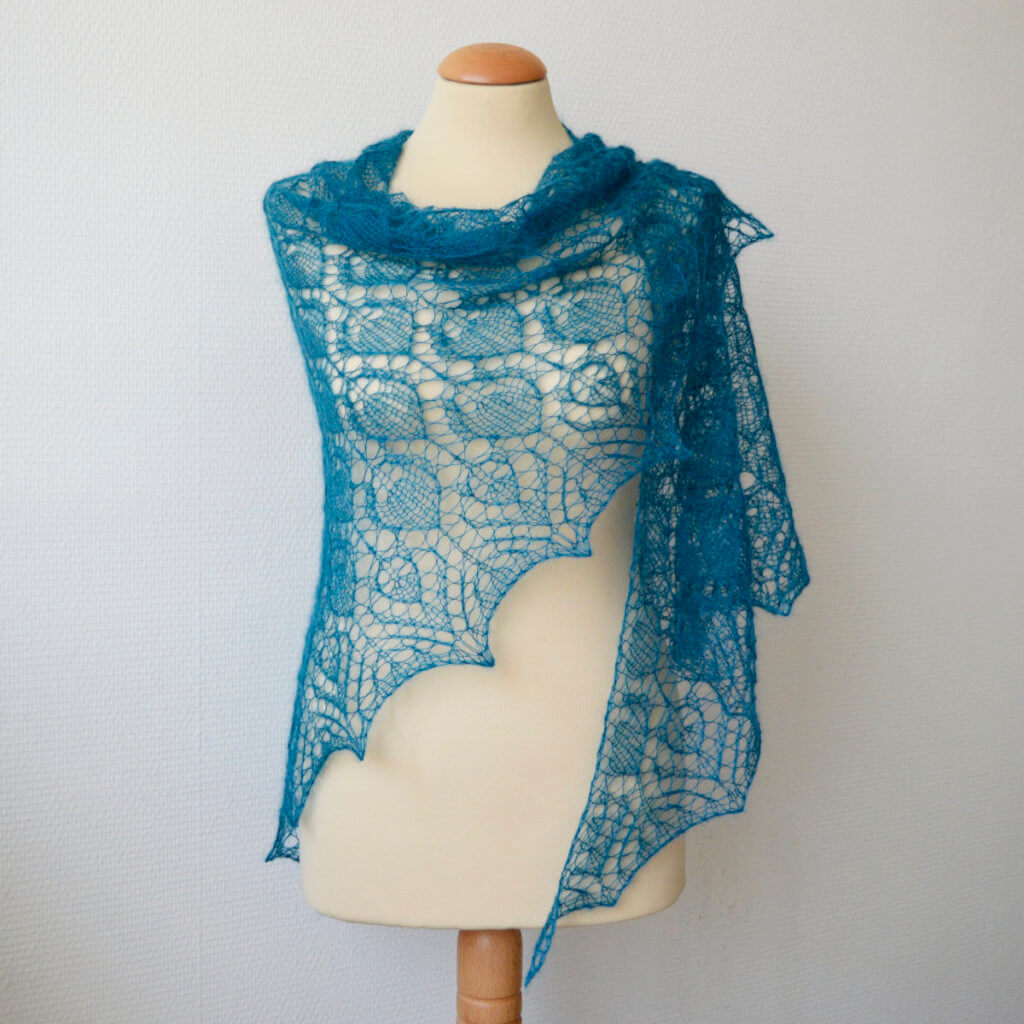
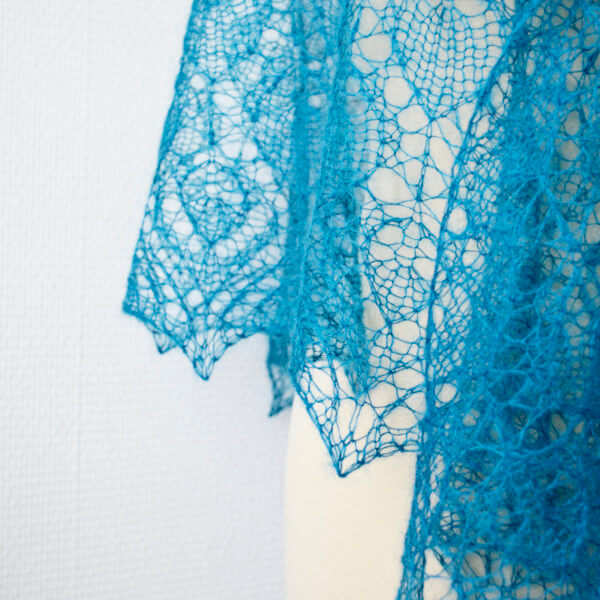
Looking for a delightfully fluffy layering piece for when the temperatures are low? A knit that combines both relaxing stockinette as well as some lace patterning? Look no further! The Kasjmier shawl has you covered. And yes, pun intended! It can, of course, also be made in a different material.

This shawl is worked from the top-down in one piece. Both written and charted instructions for the patterned edging are included. The pattern is available in 3 sizes; the shawl pictured is in the smallest size.


Pay what you want: (minimum €6.50)

Add to cart


Difficulty level

The Kasjmier shawl starts with a garter stitch tab. The lace in the edging is worked on both RS and WS rows. Stitches used include knit, purl, yok2tog, skp, m1l and m1r increases as well as a centered double decrease.

This pattern is suitable for the intermediate knitter.

Sizes and finished measurements

Size S (M, L): Wingspan of 142 (160, 178) cm (56 (63, 70) inches) along the upper edge and a depth of 56 (65, 74) cm (22 ( 25 ½, 29 ¼) inches), measured after blocking.

Adjust the sizing further by working a different number of repeats of the body. This will, of course, change the amount of yarn needed.

Pattern details

  • Gauge: approx. 12.5 sts / 18 rows = 10 cm (4 inches) over stockinette, after blocking.
  • Pattern languages included: English and Dutch (Dit patroon omvat zowel een Nederlandse als een Engelse versie)
  • Digital PDF has 4 pages for the English version and 5 pages for the Dutch version (letter size)

Materials

  • Yarn: 340 (510, 680) m (372 (558, 744) yds) / 100 (150, 200) g Lang Yarns Cashmere Light (88% Cashmere goat, 12% Nylon; 85 m (93 yds) / 25 g) in 950.0015 Cognac. Substitute any soft worsted weight yarn with a halo for a similar result. For best results, choose a natural fiber that blocks well.
  • Size 6 mm (US 10) / 80 cm (32 inches) circular needles were used for the sample shawl in size S.
  • Yarn needle
  • 2 stitch markers to indicate the center stitch
  • Stitch markers to indicate repeats of the lace patterning (optional)

Kasjmier Read More »
tutorial – working a purl-side left-leaning lifted increase

Tutorial working a purl-side left-leaning lifted increase

In previous tutorials I already showed you how to work a Right Leaning Lifted Increase on both knit– and purl-side of your project. The knit-side version of the Left Leaning Lifted Increase, we’ve also covered. This one is usually named Left Lifted Increase with the abbreviation LLI. So, now it’s time to focus on the purl-side Left Leaning counterpart! The purl-side version is called the same, only with “purl” added after it. Left Lifted Increase (Purl) with the abbreviation LLIP.

You may remember it from before: A lifted increase is an increase that you work from a stitch below the one next on the needle. To work this stitch, lift it to work into it.

Materials used

Yarn: * Paintbox Yarns Simply DK, a good value, good quality 100% acrylic yarn, here in the color 128 Lime Green.

Needles: * KnitPro Zing Fixed Circular Needles. In this tutorial, I used the 4 mm (US 6) size with a cable length of 80 cm (32 inches).

Working a purl-side Left-Leaning Lifted Increase step by step

I’ve made a little swatch, continuing the same one from the previous tutorial. And since this increase is worked on the purl-side, I’m knitting this bit in reverse stockinette.

The swatch

1. To make the increase a left-leaning one, we have to lift the left-side of a stitch unto to the needle to work into it. This means we will work the increase 2 stitches below the last stitch knit. In other words: You’re not looking at the stitch below the loop on the right-hand needle, but the one below it. I’ve indicated this stitch with the tip of the third needle pictured below.

2. To start, insert your left-hand needle from bottom to top into the second horizontal purl bump below the last worked stitch on the right-hand needle.

Step 2 in working a purl-side left-leaning lifted increase

3. Next, place the lifted stitch on the left-hand needle…

Step 3 in working a purl-side left-leaning lifted increase

4. …. wrap the yarn around the needle as you usually would to make a purl stitch …

5. … pull the yarn through the stitch …

6. … and complete the stitch by slipping the worked stitch off the needle. You have now increased one stitch.

That's how to work the left-leaning lifted increase!

The below picture shows how the left-leaning lifted increase looks after 2 more increase rows. The first picture shows the purl-side, the second the knit-side. Increases are worked 2 stitches in from both garter stitch edges.

The left-leaning lifted increase
Patreon logo

Thanks to my Patreon supporters for bringing you this freebie! Creating quality patterns and tutorials is a lot of work and resource-intensive. However, I find it important to give you free content like this tutorial. Thanks to the generous support of my Patreon supporters, I can make it happen. Thank you, patrons! Click here to join, or click here to read more about La Visch Designs on Patreon.

tutorial – working a purl-side left-leaning lifted increase Read More »
tutorial – the k3tog right-leaning double decrease

Tutorial on working the k3tog right-leaning double decrease

In a previous post, I showed you how to work the sl1-k2tog-psso left-leaning double decrease. In this tutorial, I will tell you all about the matching right-leaning double decrease, the one abbreviated with “k3tog”. This stands for “knit 3 stitches together”. It’s a common way to reduce the number of stitches in your project and make it narrower. With its matching left-leaning decrease it’s often found in lace patterning. Also not unimportant: the k3tog is a very easy to work double decrease which gives a lovely texture to your knitting.

Below you can find how to work this decrease, so get your materials and follow along!

Materials

Yarn: * Paintbox Yarns Simply DK, a good value, good quality 100% acrylic yarn, here in the color 128 Lime Green.

Needles: * KnitPro Zing Fixed Circular Needles. In this tutorial, I used the 4 mm (US 6) size with a cable length of 80 cm (32 inches).

Working a k3tog step by step

1. First, work your way across the row until you’ve reached the point where you want to make the decrease. In this case, I want to work the double decrease over the 3 stitches in the middle of the swatch.

Step 1 of working a k3tog

2. Next, insert the tip of the right-hand needle into the first 3 stitches at the same time as if to knit.

3. Wrap the yarn around the needle…

4. …and pull it through the stitches you inserted the right-hand needle in.

5. To finish the k3tog decrease, slip the original stitches of the left-hand needle.

The below picture shows how it looks after 2 more decrease rows have been worked. Please note that the bottom half of the swatch pictured shows the sl2-k1-p2sso centered double decrease I showed you in a previous tutorial.

 The k3tog right-leaning double decrease used in several rows.

And that’s all there is to it!

Patreon logo

Thanks to my Patreon supporters for bringing you this freebie! Creating quality patterns and tutorials is a lot of work and resource-intensive. However, I find it important to give you free content like this tutorial. Thanks to the generous support of my Patreon supporters, I can make it happen. Thank you, patrons! Click here to join, or click here to read more about La Visch Designs on Patreon.

tutorial – the k3tog right-leaning double decrease Read More »
mint chocolate

Mint Chocolate shawl by La Visch designs

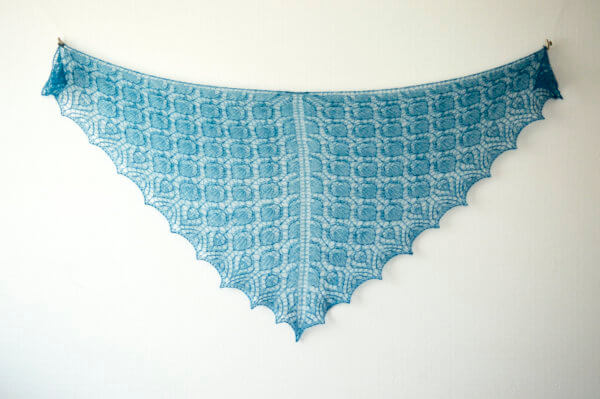
Mint Chocolate is a shallow triangular shawl knit sideways. There is just something about the combination of striped garter stitch and openwork that appeals to me: Lazy mindless knitting, together with patterning that requires a tad more attention. The perfect project for me!

The pattern contains both fully written out as well as charted instructions for the lace. The lace section is worked on both wrong and right side rows. However, increases and decreases are only worked every 4th row, making it quite suitable for new “true lace” knitters.


Pay what you want: (minimum €6.50)

Add to cart


Difficulty level

The lace in this pattern is worked on both RS and WS rows. The points in the pictured shawl are blocked that way. You can, however, block it straight instead of scalloped, if you prefer.
Stitches used include knit, purl, yo, kfb, k2tog and a centered double decrease.

This pattern is suitable for the intermediate knitter.

Sizes and finished measurements

Finished dimensions of the sample shawl: Span width of 186 cm (73 ¼ inches) along the upper edge and a max. depth of 91 cm (36 inches), measured after blocking.

Change the size of this shawl by using lighter or heavier yarn and/or working fewer (or more) repeats of the various sections in the body of the shawl. This will, of course, change the amount of yarn needed.

Pattern details

  • Gauge: approx. 13.5 sts / 23 rows = 10 cm (4 inches) over garter stitch stripes, after blocking.
  • Pattern languages included: English and Dutch (Dit patroon omvat zowel een Nederlandse als een Engelse versie)
  • Digital PDF has 4 pages (letter size)

Materials

  • Yarn: The Dutch Yarn Barn Double Dutch (100% Texel wool; 200 m (218 yds) / 50 g) in the following colors and amounts – MC: 400 m (437 yds) / 100 g in Linden Green, and CC: 200 m (218 yds) / 50 g in Madder/Indigo brown. Substitute wool fingering or sport weight yarn of comparable thickness, in solid or tonal colorways for a similar result.
  • Size 4 mm (US 6) / 80 cm (32 inches) circular needles
  • Yarn needle

mint chocolate Read More »
tutorial – working a knit-side left-leaning lifted increase

Tutorial on working a knit-side left-leaning lifted increase or LLI for short

In a previous tutorial, I already showed you how to work a Right Leaning Lifted Increase on both knit- and purl-side of your project. That means it’s now time to focus on the Left-Leaning counterparts! The knit-side version of the Left-Leaning Lifted Increase is usually named the somewhat shorter Left Lifted Increase. This is abbreviated as LLI. The purl-side version is called the same, only with “purl” added after it: Left Lifted Increase (Purl) with the abbreviation LLIP. I will focus on the latter in another tutorial.

With left-leaning I mean that the increase leans to the right, relative to the surrounding “normal” stitches. Pair it together with its right-leaning companion to symmetrically increase the number of stitches on your project.

What is a lifted increase?

Basically, it’s exactly how it’s called: an increase that is worked from a stitch below the one just worked on the right-hand needle. This stitch is lifted to be able to work into it.

Materials

Yarn: * Paintbox Yarns Simply DK, a good value, good quality 100% acrylic yarn, here in the color 128 Lime Green.

Needles: * KnitPro Zing Fixed Circular Needles. In this tutorial, I used the 4 mm (US 6) size with a cable length of 80 cm (32 inches).

Working a knit-side Left-Leaning Lifted Increase step by step

1. First, work your way across the row until you’ve reached the point where you want to make the increase. In this case, I want the increase 2 sts in from the garter stitch border on the right. 

Step 1

2. To make the increase a left-leaning one, we have to lift the left-side of a stitch unto to the needle to work into it. This means we will work the increase 2 stitches below the last stitch knit. In other words: You’re not looking at the stitch below the loop on the needle, but the one below it. I’ve indicated this stitch with the tip of the third needle pictured below.

3. To start the decrease, insert your left-hand needle from back to front into the left leg of the stitch as identified above. Note that the stitch mount is different from usual. The right leg of the stitch is not in front of the needle but in the back.

4. We don’t want to have a twisted result. So, we now untwist the stitch by inserting the right-hand needle into the back loop.

5. Wrap the yarn around the needle…

6. … and pull it through the stitch.

7. Complete the new stitch by slipping the worked stitch off the needle as usual. You have now increased one stitch.

The below picture shows how it looks after 2 more increase rows have been worked. Increases are worked 2 stitches in from both garter stitch edges.

Patreon logo

Thanks to my Patreon supporters for bringing you this freebie! Creating quality patterns and tutorials is a lot of work and resource-intensive. However, I find it important to give you free content like this tutorial. Thanks to the generous support of my Patreon supporters, I can make it happen. Thank you, patrons! Click here to join, or click here to read more about La Visch Designs on Patreon.

tutorial – working a knit-side left-leaning lifted increase Read More »