cherry blossoms stole

cherry blossoms stole

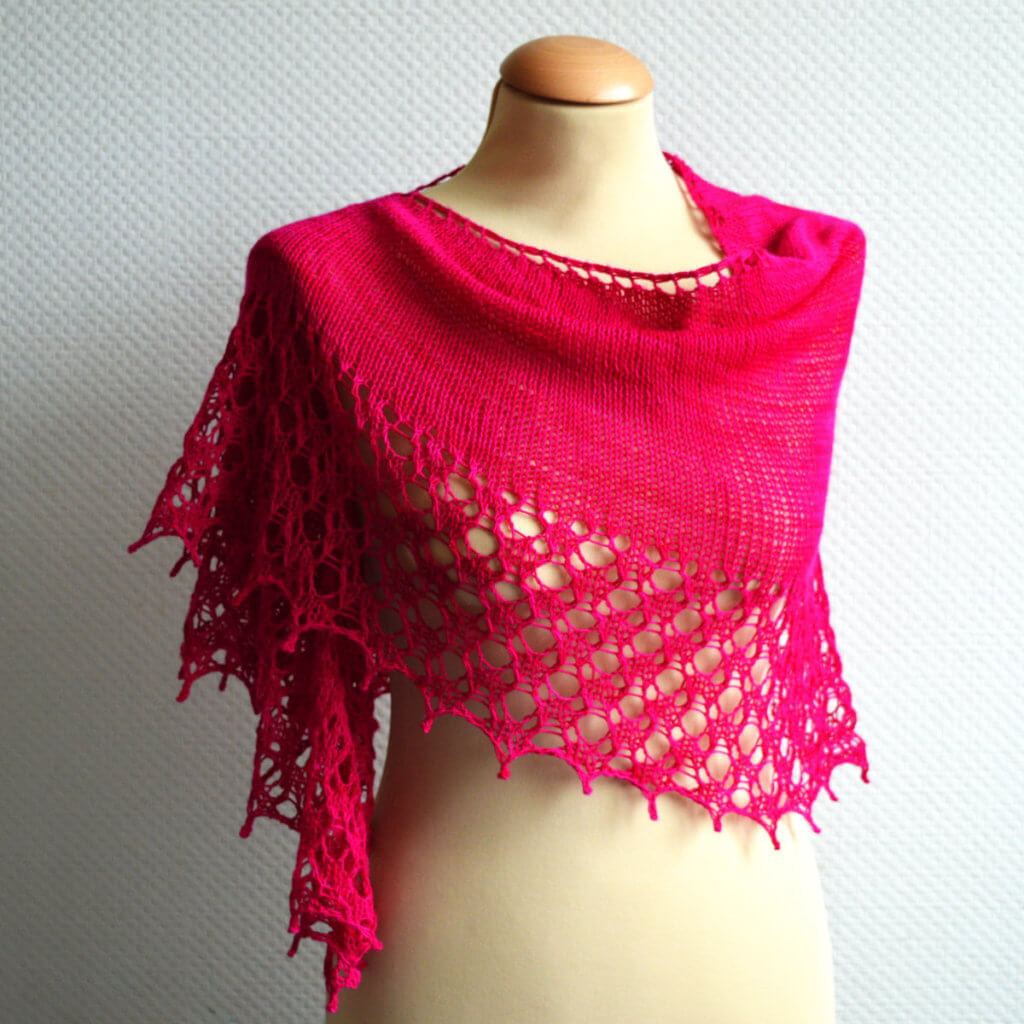
In the April 2016 issue of I Like Crochet it is all about the change of seasons: Melting icicles, green grass, flowers emerging from once-frozen soil—Spring is here! This issue is filled with light and lacy projects for that transition between cool-to-warm weather.

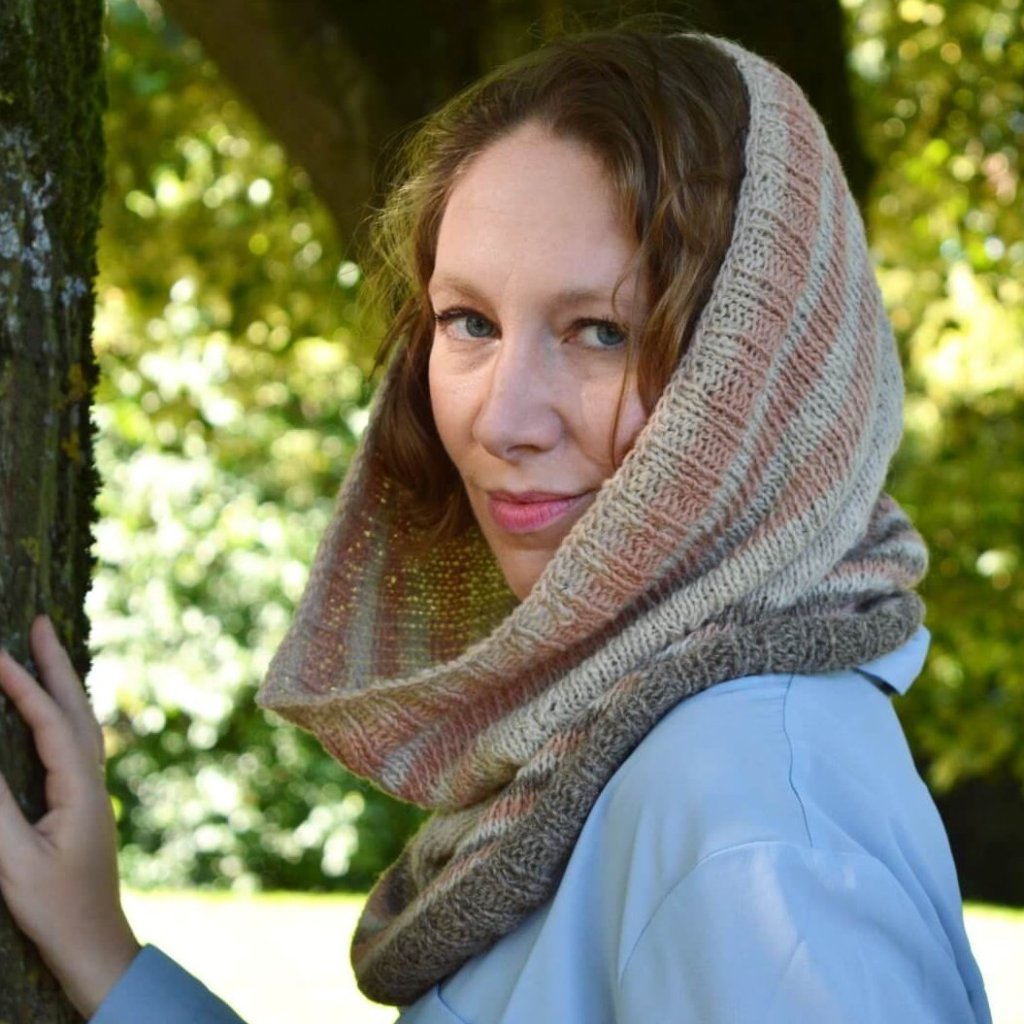
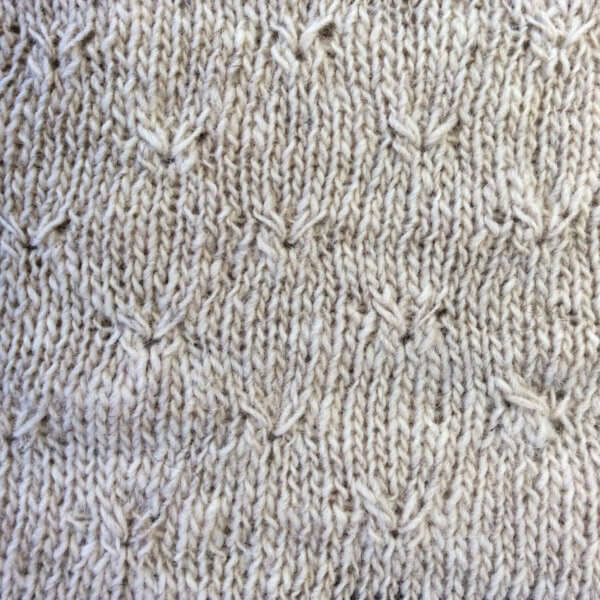
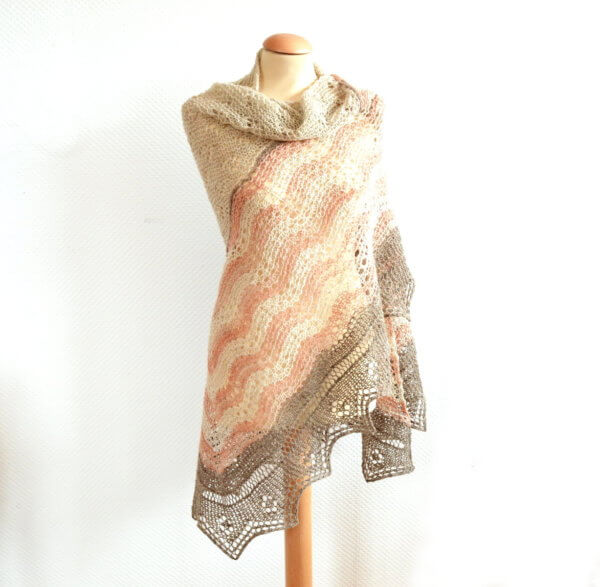
For the “fantastic florals” section in this issue, I have designed the Cherry Blossoms Stole. Pictures courtesy of I like Crochet Magazine.

This lovely stole features a dainty floral lace pattern, perfect to dress up any outfit. Wear it as a shoulder wrap to show off the full stunning flower pattern, or as a simple lacy scarf. Take advantage of a beautiful fingering weight yarn with long color runs, as pictured, for a truly spectacular look.

This pattern is now also available through La Visch Designs!

cherry blossoms stole

cherry blossoms stole Read More »

tutorial: picot cast-on

Working a picot cast-on - a tutorial by La Visch Designs

Casting on your knitting project using either the thumb or backward loop method, knitting-on, the long-tail cast-on or a similar method is of course perfectly fine. But sometimes using a cast-on that is just a little more decorative can be so much more fun. In this post I want to show you how to work a picot cast-on. There are various ways to do a picot CO, all giving slightly different results, this is just one possible variation.

In this example, I am using needles size 4 mm (US 6) and a generic worsted weight acrylic yarn.

Materials used in the tutorial

Picot cast-on step by step

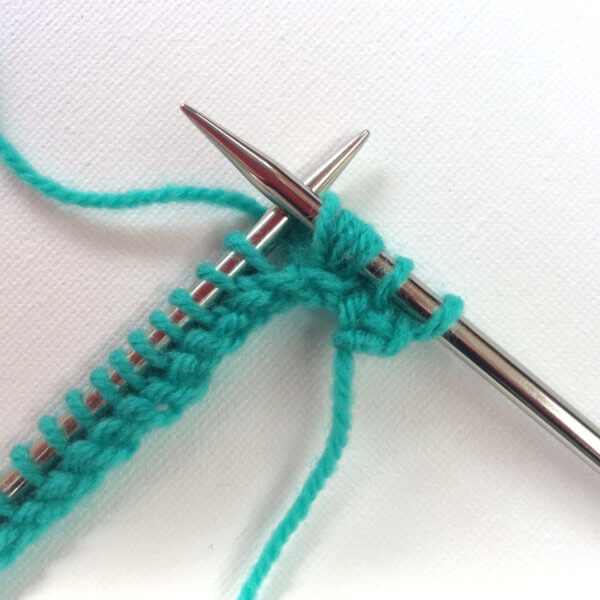
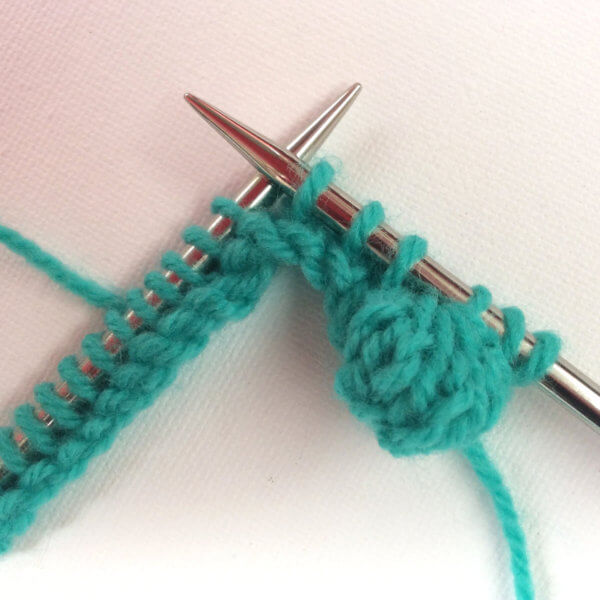
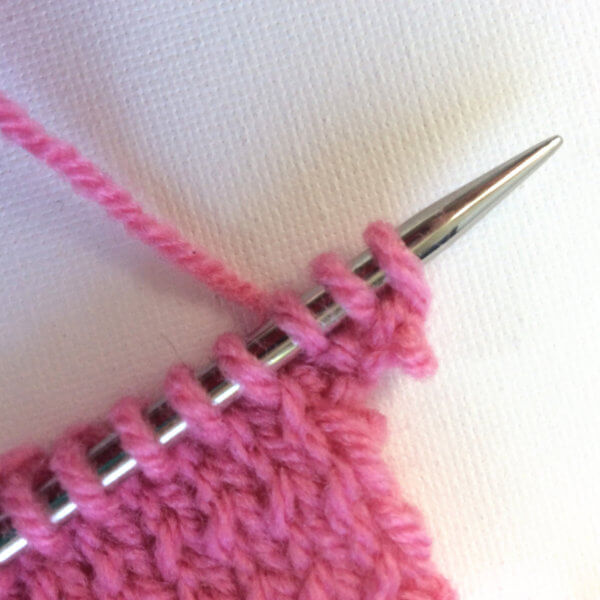
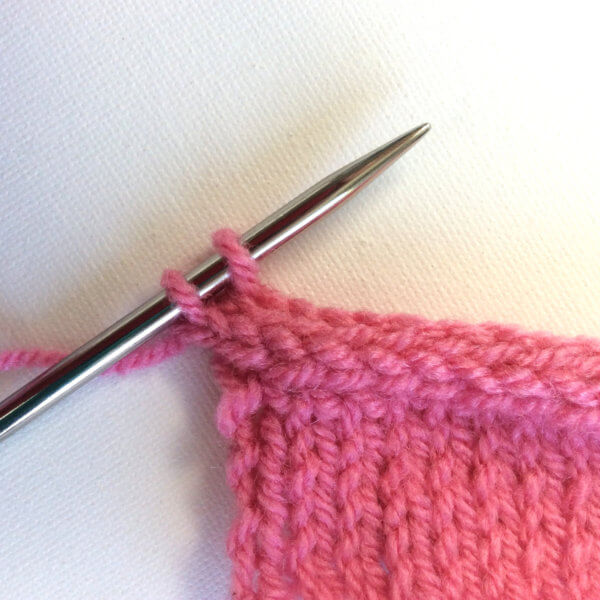
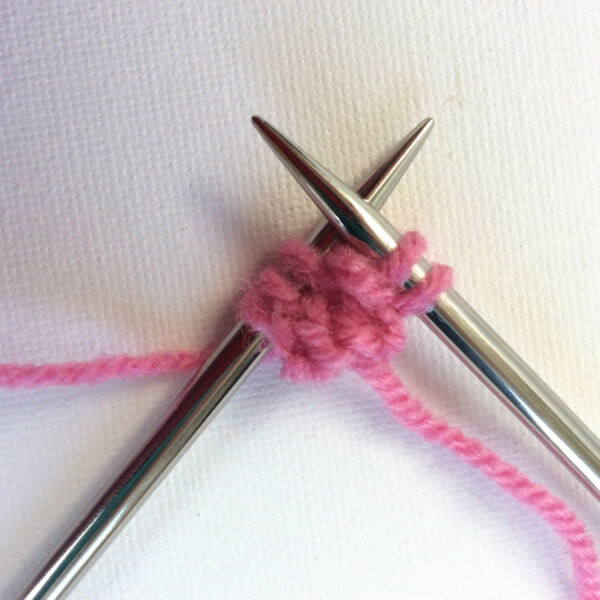
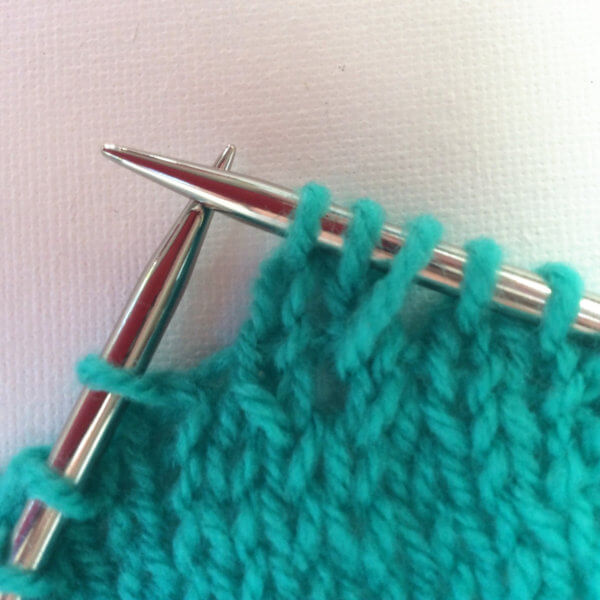
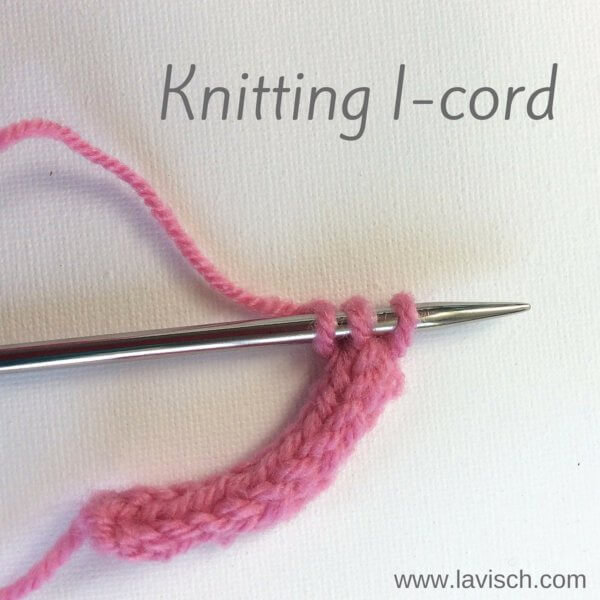
1. Cast-on 3 stitches with any preferred method, in this example I have used the cable cast-on. However, the long-tail or thumb method, or another method can also be used.

Step 1 in the picot CO

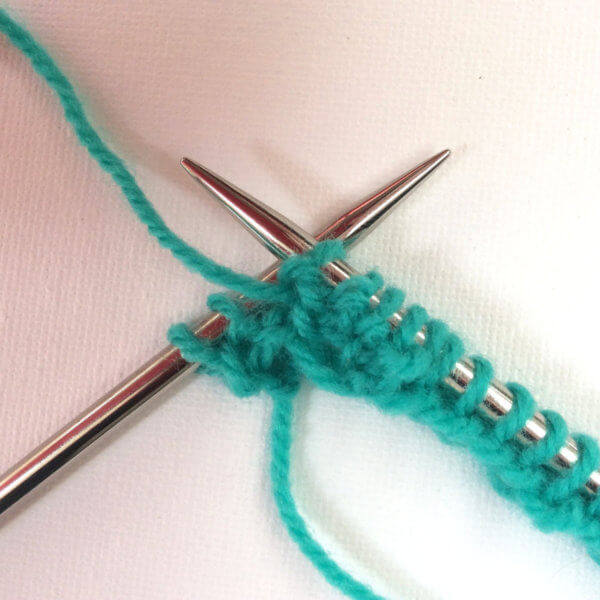
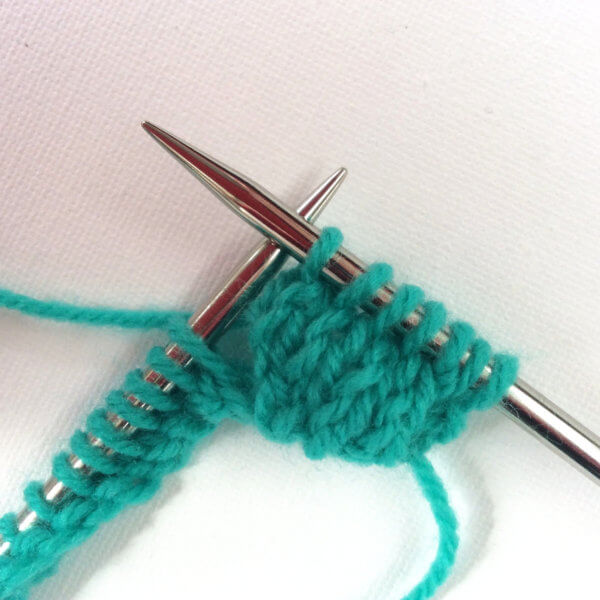
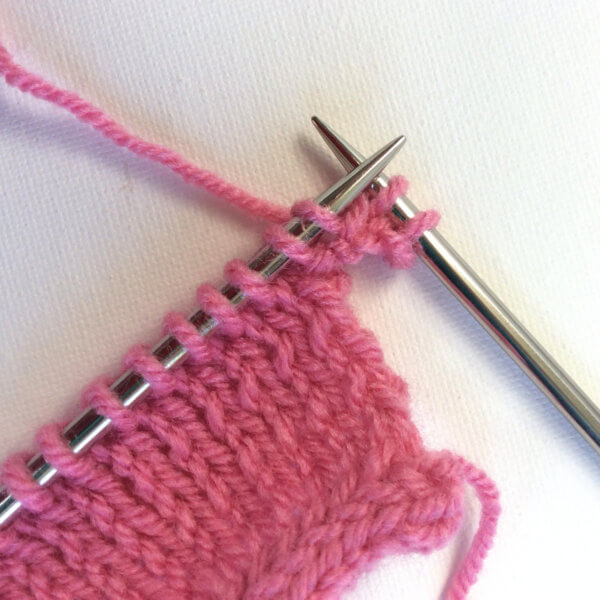
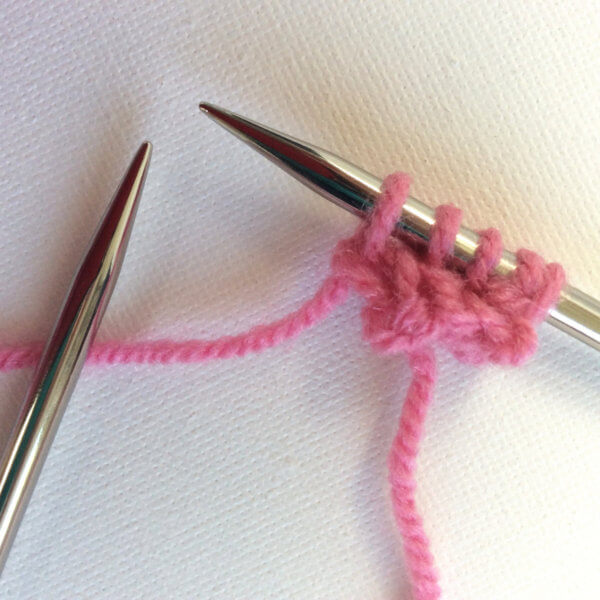
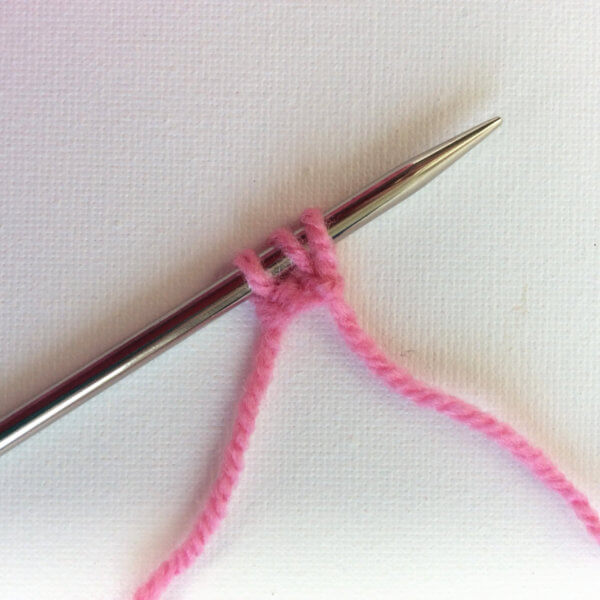
2. Insert the left needle into the second stitch on the right needle and pass this stitch over the first stitch.

Step 2 in the picot CO

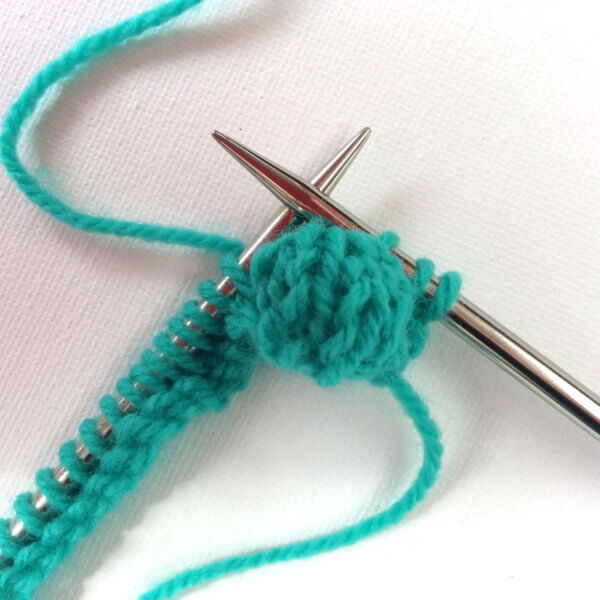
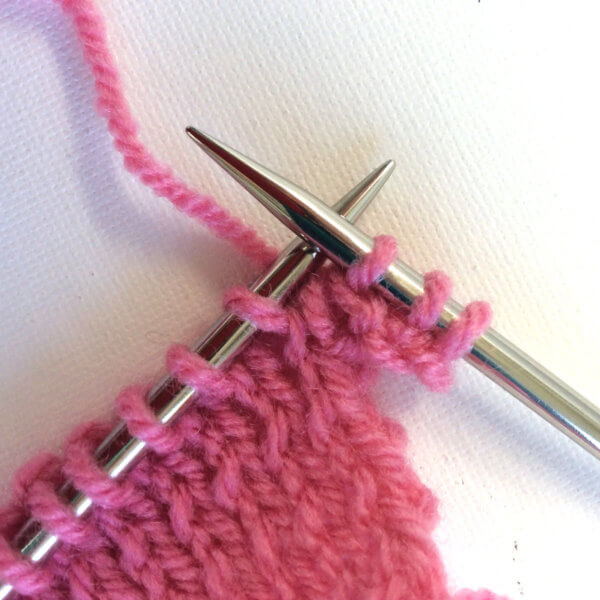
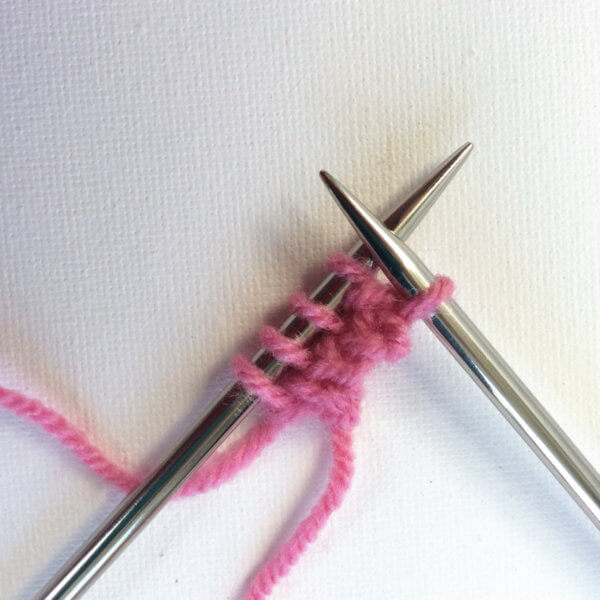
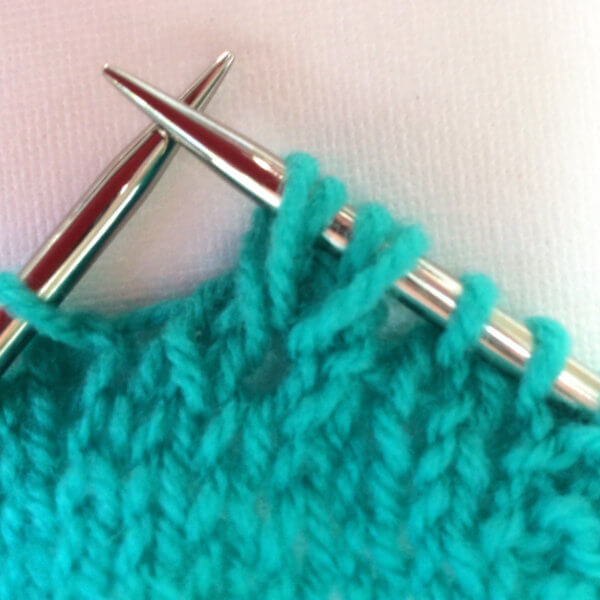
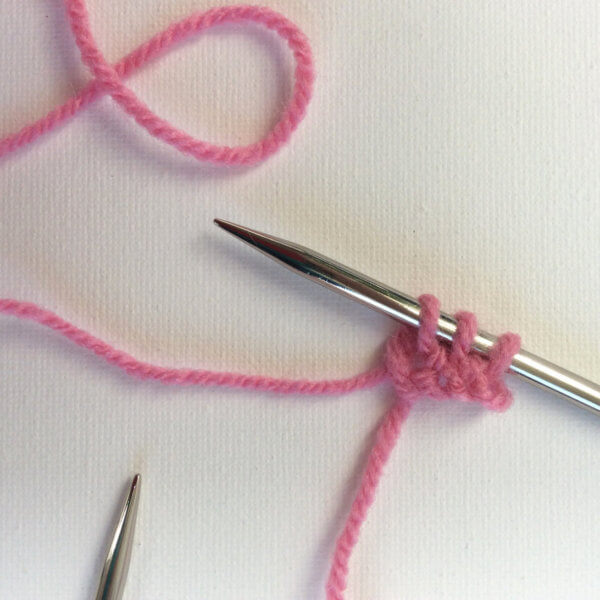
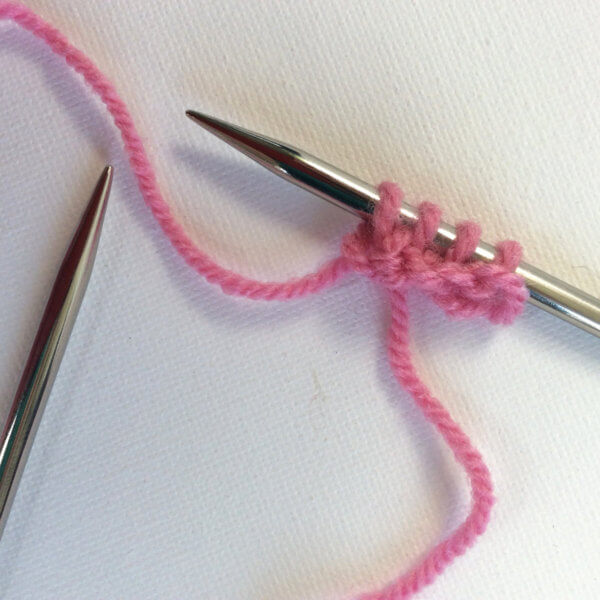
3. Insert the left needle again in the second stitch on the right needle and pass it over the first stitch. From the initial 3 stitches you had CO, there is now only 1 left and 1 picot has been completed.

Step 3 in the picot CO

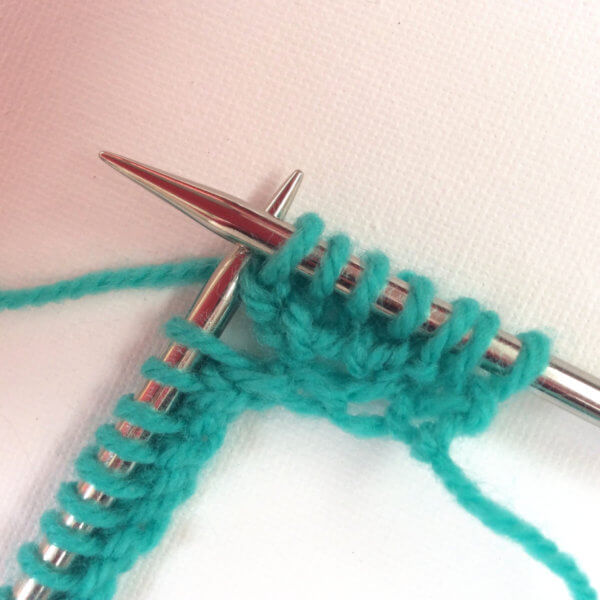
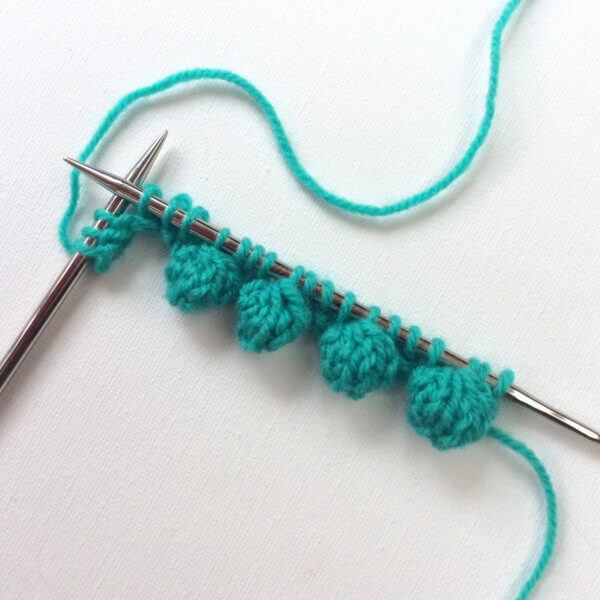
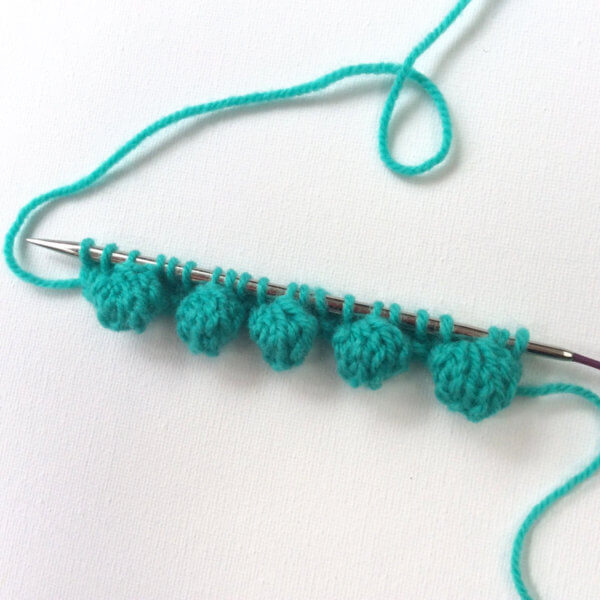
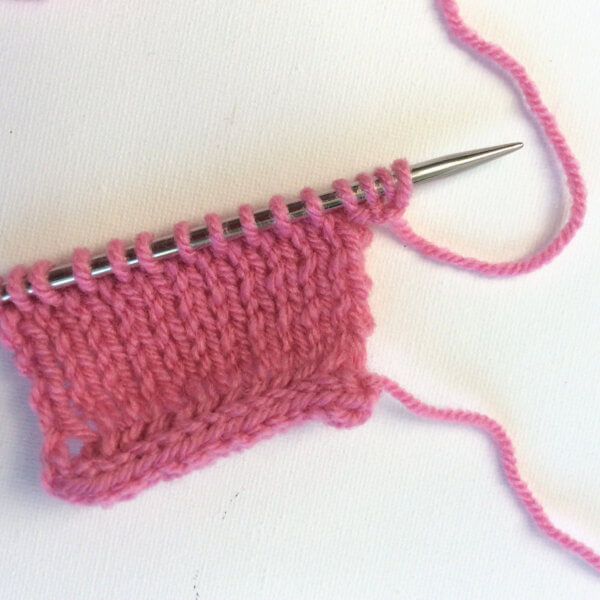
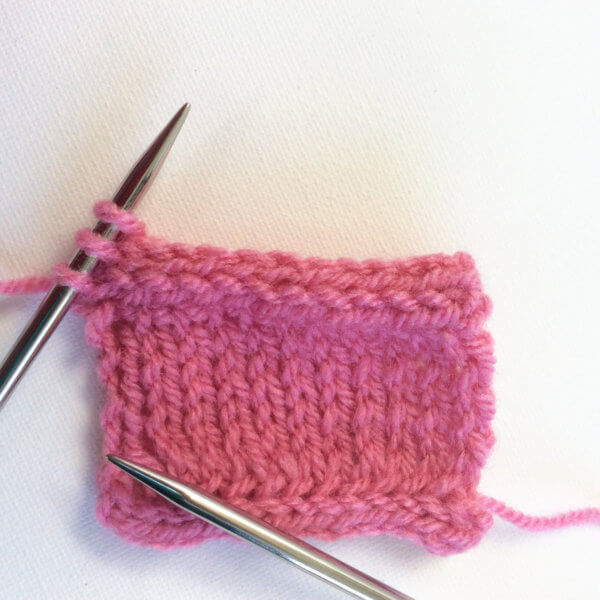
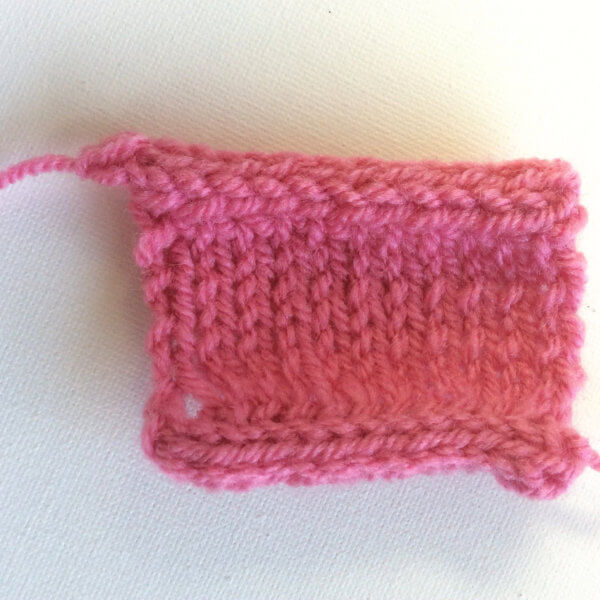
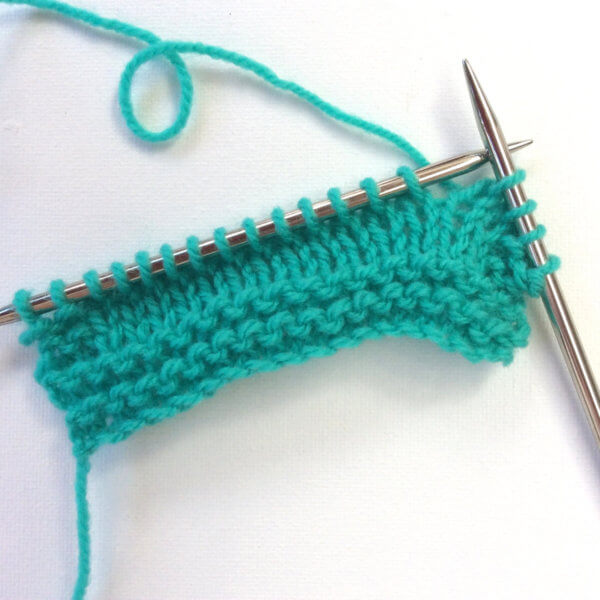
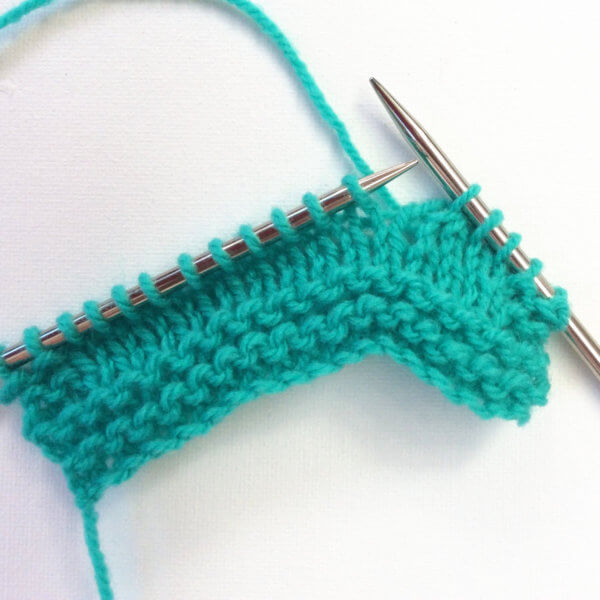
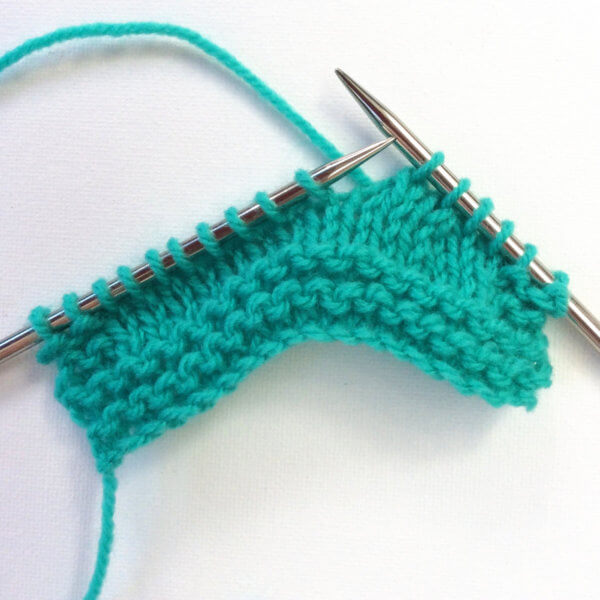
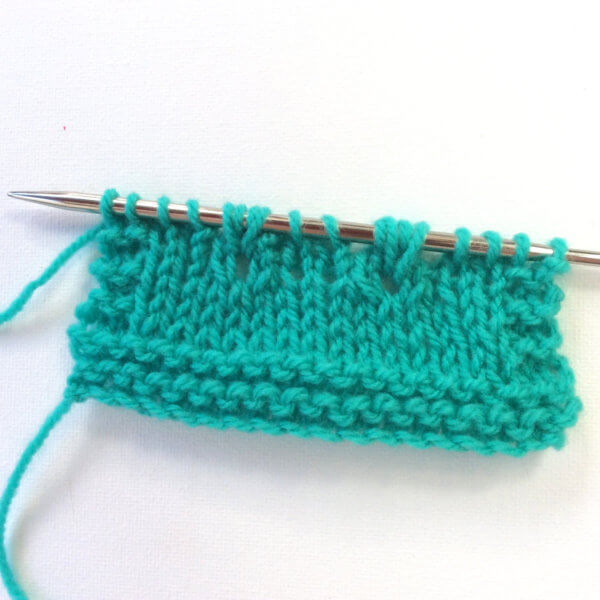
4. Repeat steps 1 to 3 as often as desired for your project. The result will look something like this:

The result of the picot CO

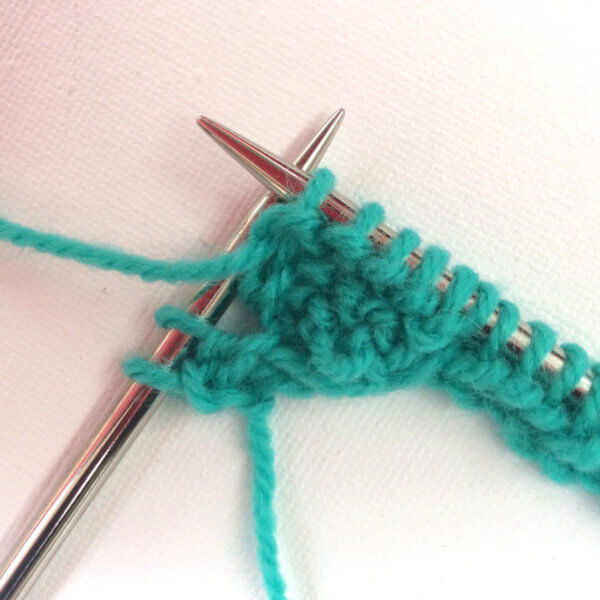
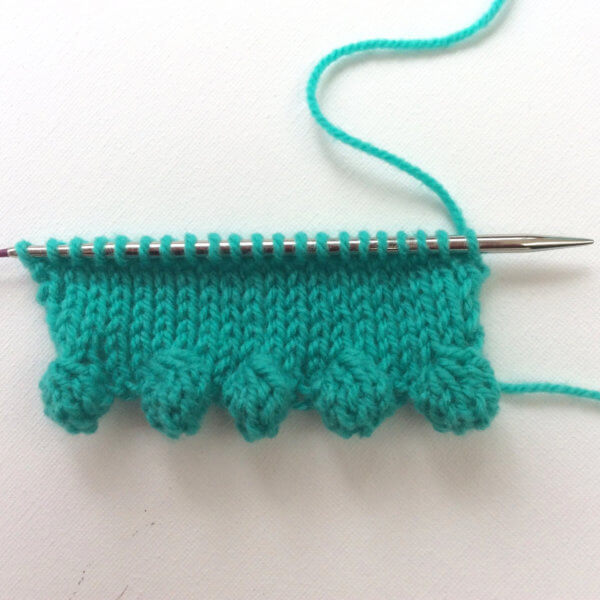
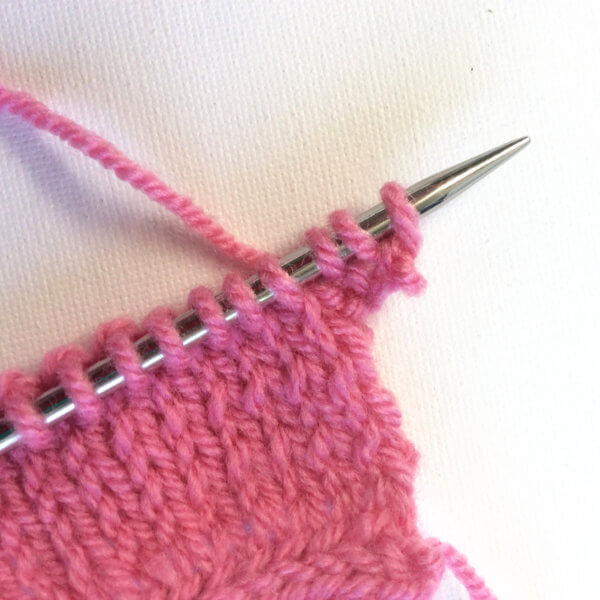
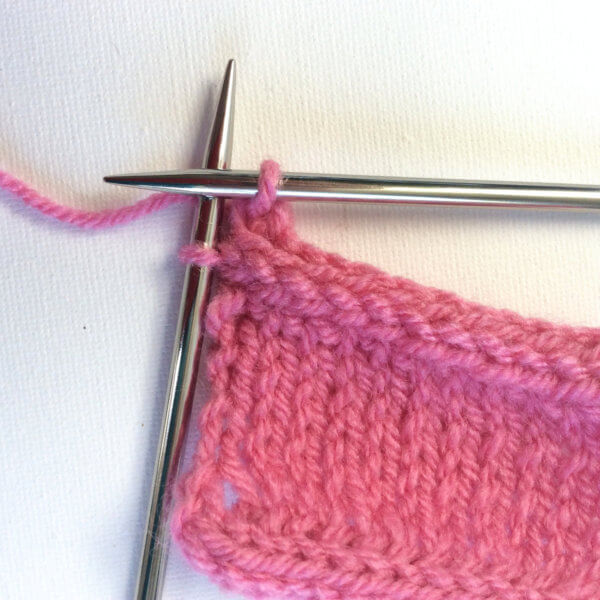
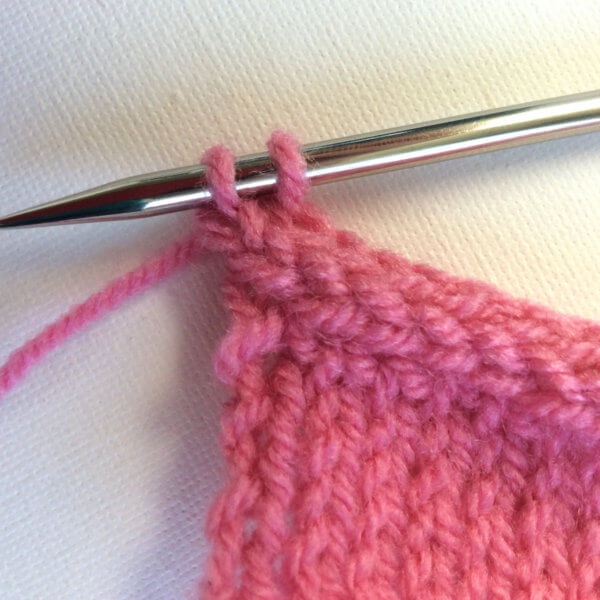
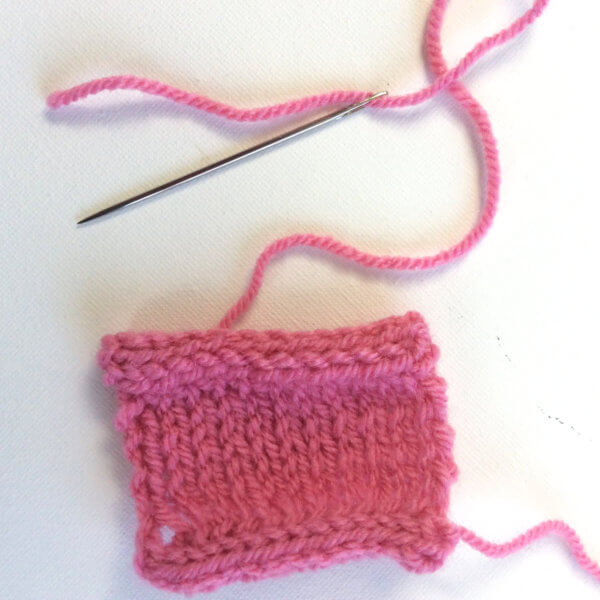
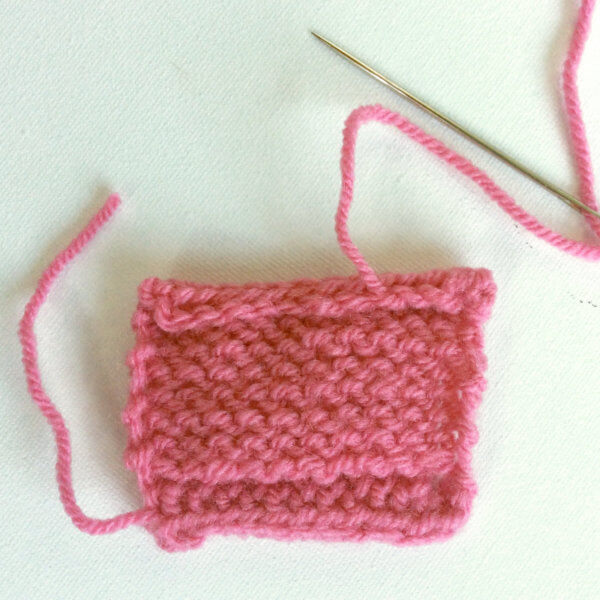
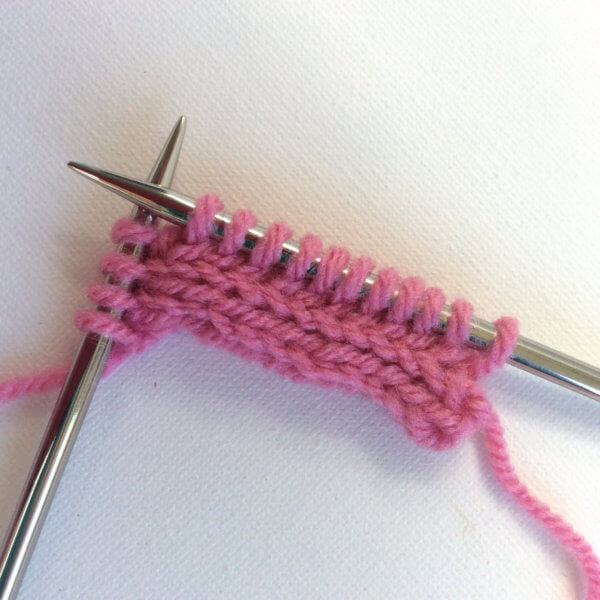
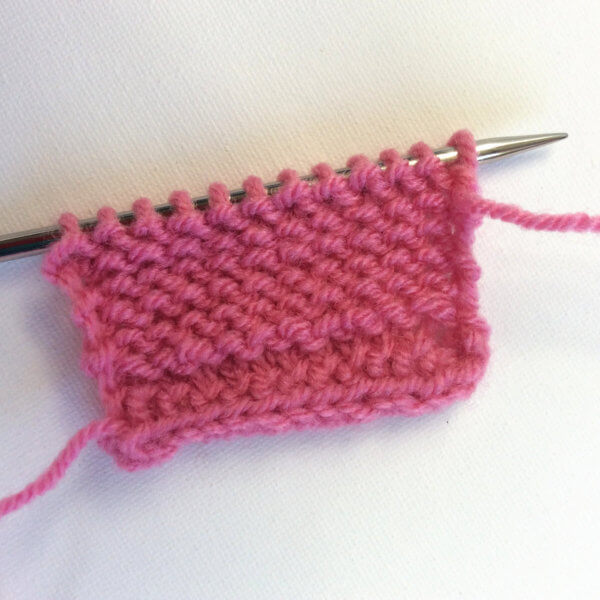
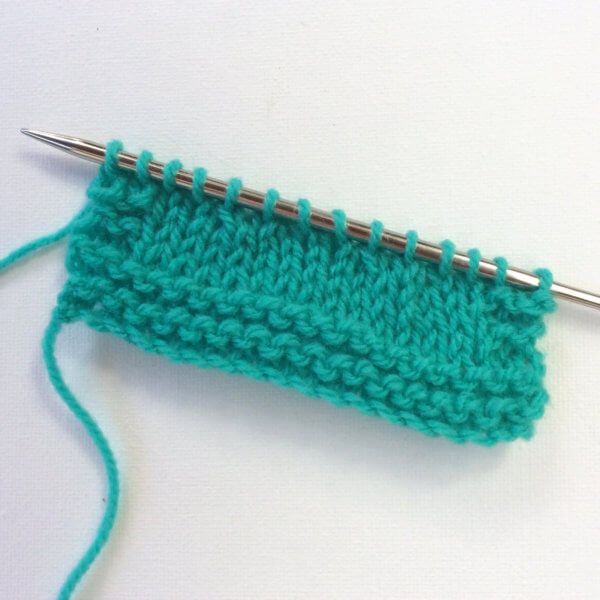
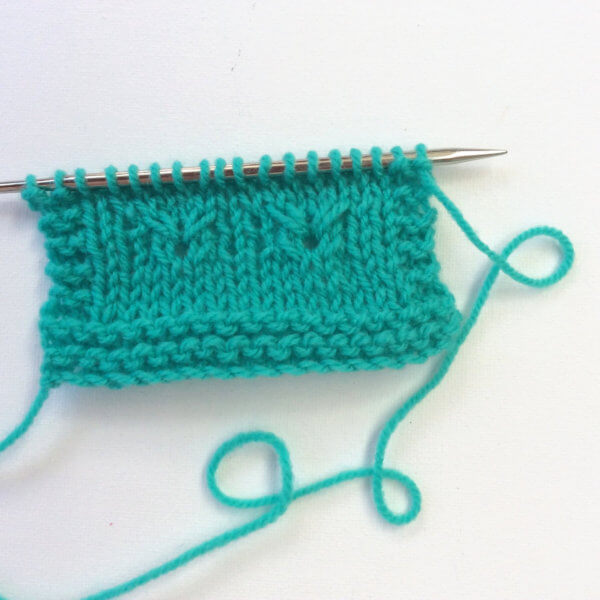
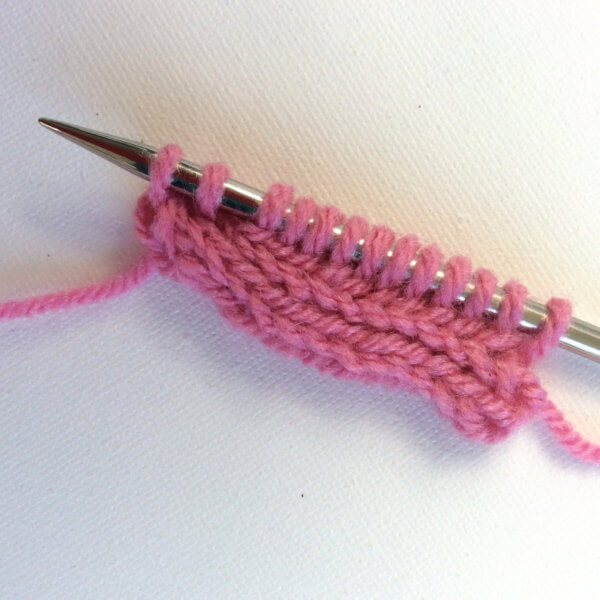
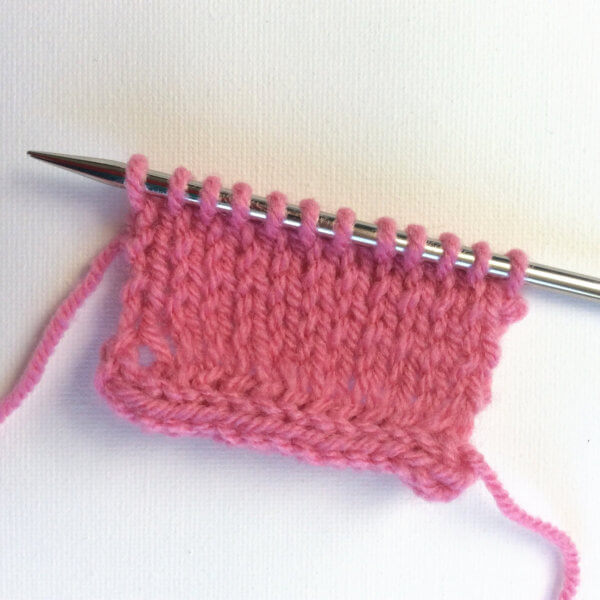
5. You can then continue to knit in any pattern desired. In this example, I knitted a few rows in stockinette stitch, this will however not always be the best choice because of rolling of the fabric.

The result with a few more rows in stockinnete picot CO

What you need to consider with this casting-on method, is that you are actually casting-on three times the number of stitches that you will eventually need. This means that also three times the usual amount of yarn is needed. Good to know if you like to use the long-tail cast-on!

Patreon logo

Thanks to my Patreon supporters for bringing you this freebie! Creating quality patterns and tutorials is a lot of work and resource-intensive. However, I find it important to give you free content like this tutorial. Thanks to the generous support of my Patreon supporters, I can make it happen. Thank you, patrons! Click here to join, or click here to read more about La Visch Designs on Patreon.

tutorial: picot cast-on Read More »
diva

Diva Shawl by La Visch Designs

Like a true Diva, this design is glamorous and truly eye-catching with its exquisite lace border. The stockinette body lets that special skein of fingering weight yarn really shine.

Diva is a semi-circle Pi shawl worked from the top-down, started with a garter stitch tab. The lace in the border is patterned on both right side and wrong side rows. Instructions are provided both charted and written out.


Pay what you want: (minimum €6.50)

Add to cart


Size and finished measurements

Finished dimensions of the sample shawl: span width of 142 cm (56 inches) and a depth of 50 cm (19 ½ inches), measured after blocking.

Difficulty

Knit this half-circle shawl from the top down, starting with a garter tab cast-on. The lace border contains patterning on both sides of the fabric. Stitches used include knit, purl, yo, M1, kfb, skp, k2tog, p2tog, p2tog tbl as well as a centered double decrease.

The pattern is therefor suitable for the intermediate to advanced knitter.

Pattern details

  • Worked flat back and forth
  • Gauge is not critical in this design. For the sample shawl: 15 sts / 12 rows = 10 cm (4 inches) over stockinette, measured after blocking.
  • Pattern languages included: English and Dutch (Dit patroon omvat zowel een Nederlandse als een Engelse versie)
  • Digital PDF has 4 pages (letter size)

Materials

  • Yarn: 100 g / 400 m (437 yds) Diva Sock Glitter by Dutch Wool Diva [75% Merino wool, 20% nylon, 5% silver stellina]. Substitute any fingering weight yarn for a similar result. Please note that while this pattern can use more variegation in the yarn than most lace, it will be best displayed using a solid or tonal colored yarn.
  • Size 4 mm (US 6) / 80 cm (32 inches) circular needles.
  • Yarn needle
  • 31 stitch markers (optional)

diva Read More »

paris pillbox hat & cowl

Paris Pillbox by La Visch Designs

Originally published as an exclusive design inside Issue #20 of Happily Hooked Magazine, the Paris Pillbox Hat & Cowl is now also available directly from La Visch Designs! The hat in this set is in the pillbox shape reminiscent of the Forties and Fifties of the previous century. A most stylish way of keeping your head warm! To complete the set there is also a matching cowl.

The Paris Pillbox Hat and Cowl are worked from the top down and feature an eye-catching textured stitch pattern.

This pattern is written in American English crochet terminology.


Pay what you want: (minimum €6.50)

Add to cart


Size and finished measurements

Hat: Sizes S (M, L): 48.5 (58, 65) cm (19 (23 ¾, 26 ½) inches) circumference.
Cowl: Sizes S (M, L): 67 (84, 101) cm (26 (33, 40) inches) circumference and 20 cm (8 inches) high.

Difficulty

Techniques used consist of puff stitches, dc, dc increases, sc, bphdc and ch stitches. Because of this, the pattern is suitable for the intermediate crocheter.

Pattern details

  • Worked in the round
  • Gauge Hat: 14 sts / 11.4 rounds = 10 cm / 4 inches measured over dc in the crown of the hat.
  • Gauge Cowl: Gauge is not critical in this cowl design. For the sample cowl: 12.6 sts / 9 rounds = 10 cm (4 inches) in stitch pattern (after blocking).
  • Pattern language is English
  • Digital PDF has 4 pages (letter size)

Materials

  • Yarn: Garnstudio DROPS Alaska (100% wool; 69 m (75 yards) / 50 g) in red 01 in the following quantities:
    Hat: 94 (114, 135) m (103 (125, 148) yds) or 2 (2, 2) balls of yarn.
    Cowl: 175 (220, 265) m (190 (240, 285) yds) or 3 (4, 4) balls of yarn.
    Substitute for any aran weight yarn for a similar result.
  • Crochet hook Hat: 5 mm / US # H-8 (or size to get gauge).
  • Crochet hook Cowl: 6 mm / US # J-10.
  • Yarn needle
  • 1 removable stitch marker to indicate the end of rounds (optional)

paris pillbox hat & cowl Read More »

tutorial: seed stitch crochet

Seed stitch crochet - a tutorial by La Visch DesignsIn this post I will show you how to crochet the “seed stitch”. In this stitch single crochet stitches are alternated with double crochet stitches (US crochet terminology!). This gives a really lovely and dense fabric, very suitable for projects like scarves, blankets and bags. Let me show you step by step how it is done.

Seed stitch step by step

1. Start with a loose chain, when working flat back and forth it doesn’t really matter if you start with an even or odd number of chain stitches. If you will however be working in the round, start with a multiple of 2 + 1 turning chain. In this example, I started with a chain of 12.

Seed stitch crochet - a tutorial by La Visch Designs


2. Turn and make 1 single crochet in the second stitch from the hook. In this example, I made my stitch in the back of the chain, instead it can of course also be made in one of the other parts of the chain.

Seed stitch crochet - a tutorial by La Visch Designs

3. Make 1 double crochet in the next stitch.

Seed stitch crochet - a tutorial by La Visch Designs

4. Make one single crochet in the next stitch.

Seed stitch crochet - a tutorial by La Visch Designs

5. Repeat steps 3 and 4 until the end of the row.

seed-stitch_5

6. In this example, I ended the previous row with a single crochet. The new row will therefore start with 2 turning chains, followed by a double crochet in the first . If your previous row ended with a double crochet, the new row would begin with 1 turning chain, followed by a single crochet in the first stitch.

Seed stitch crochet - a tutorial by La Visch Designs

7. Work 1 single crochet in next stitch, or (if your previous stitch was a single crochet) 1 double crochet.

Seed stitch crochet - a tutorial by La Visch Designs

8. Continue the row by alternating double crochet stitches with single crochet stitches. Please note, that you always crochet a double crochet in the single crochet of the previous row. Similarly, if the stitch of the previous row was a double crochet, you are making a single crochet into it.

Seed stitch crochet - a tutorial by La Visch Designs

9. Repeat steps 6 to 8 until your piece has the desired size.


tutorial: seed stitch crochet Read More »

tutorial: 3-needle bind-off

a tutorial by La Visch Designs

Binding off with the 3-needle bind off method is a way to bind off and connect two sets of live stitches, each on their own knitting needle. It is often used to close the shoulder seams from sweaters that are knitted bottom-up. It can for example also be used to close a cowl in the round, that has been started with a provisional cast on and knit flat.When connecting the pieces of your work with the right sides against each other, then the seam will be on the inside of your work. When placing wrong sides together, then the seam on the outside. This can be very nice as a design element because this method of binding off / closing the seam yields a very neat seam.

The 3-needle bind off step by step

1. To bind off this way, you will need two sets of stitches, each in their own knitting needle, and a third knitting needle to work with. Please note that both sets should contain the same number of stitches. Otherwise, you will have a problem with remaining stitches that cannot be cast off, because the other needle is already “empty.”

3-needle bind off - a tutorial by La Visch Designs

2. Hold in one hand both needles with stitches. In this example I have placed the right sides together, to get the seam on the wrong side of the work.

3-needle bind off - a tutorial by La Visch Designs

3. Insert the third knitting needle into the first stitch on the front needle as if to knit as usual, then immediately after that do the same with the first stitch on the needle at the back.

3-needle bind off - a tutorial by La Visch Designs

4. Wrap yarn around the needle as usual …

3-needle bind off - a tutorial by La Visch Designs

5. … and pull it through both stitches.

3-needle bind off - a tutorial by La Visch Designs

6. Next slip both first stitches from the 2 left-hand needles to complete the stitch.

3-needle bind off - a tutorial by La Visch Designs

7. Repeat steps 3 to 6, you now have two stitches on your right-hand needle.

3-needle bind off - a tutorial by La Visch Designs

8. Slip the first stitch on your right-hand needle over the second stitch to bind off one stitch.

3-needle bind off - a tutorial by La Visch Designs

9. Repeat steps 3 to 8 until all stitches have been worked. You can now break your yarn and pull it through the last live stitch on your right-hand needle to finish.

3-needle bind off - a tutorial by La Visch Designs

The result will be as pictured below. On the left, you see how the seam is on the right side of the work looks and on the left how it looks on the wrong side.

3-needle bind off - a tutorial by La Visch Designs

tutorial: 3-needle bind-off Read More »

tutorial: crochet provisional cast on

Making a crochet provisional cast-on - a tutorial by La Visch Designs

A provisional cast on is a way to make it possible to “release” the initially cast on stitches and knit with them in the other direction of the piece. This can be very useful, for example when knitting a completely symmetrical stole. Most cast ons have a different look than the bind off, but when completely avoiding a visible cast on, both ends will have exactly the same bind off look.

I really like the crochet provisional cast on, because it is also very simple and can be undone quickly. Besides the yarn for your project, you will also need a length of (smooth) waste yarn in a contrasting color and a crochet hook.Making a crochet provisional cast-on - a tutorial by La Visch Designs

Crochet provisional cast-on step by step

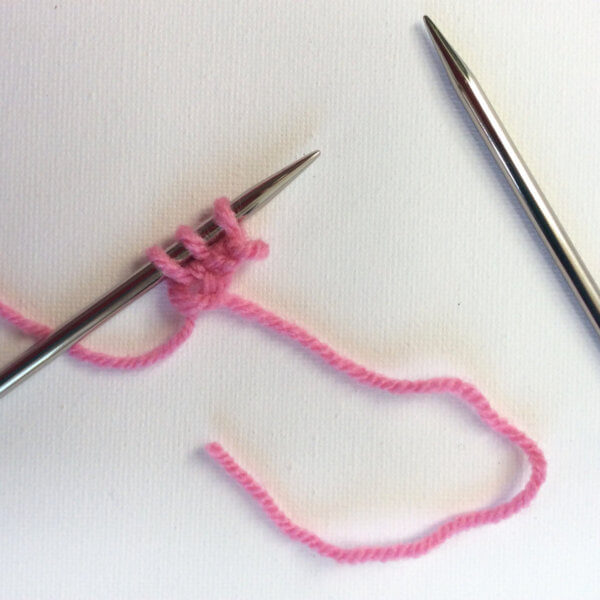
1. Make slipknot with the waste yarn (pink in the example) and place it around the hook.

Making a crochet provisional cast-on - a tutorial by La Visch Designs

2. Get your knitting needle and put it on the piece of yarn as pictured and pull up a loop through the loop on the hook. This is actually pretty similar to crochet a slip stitch around the knitting needle.

Making a crochet provisional cast-on - a tutorial by La Visch Designs

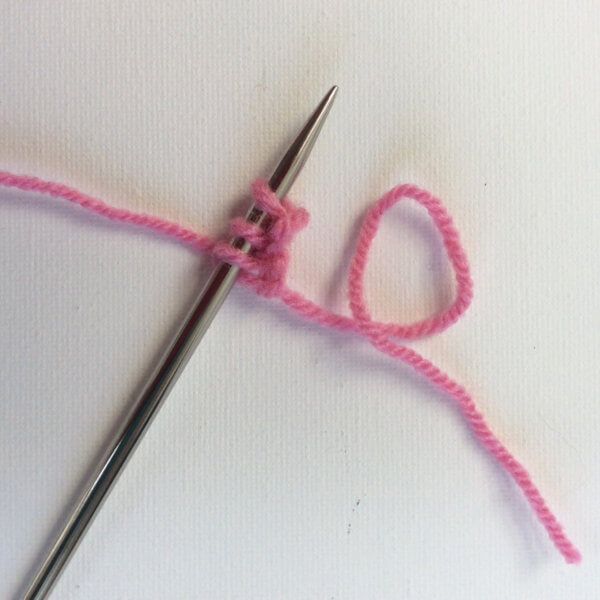
3. Wrap the yarn around the knitting needle again and make another slip stitch around the needle.

Making a crochet provisional cast-on - a tutorial by La Visch Designs


4. Repeat this until you have made the desired number of stitches (loops) on the knitting needle.

Making a crochet provisional cast-on - a tutorial by La Visch Designs

5. Next, crochet a small chain of about five stitches, break the yarn and pull the yarn tail through the last stitch.

Making a crochet provisional cast-on - a tutorial by La Visch Designs

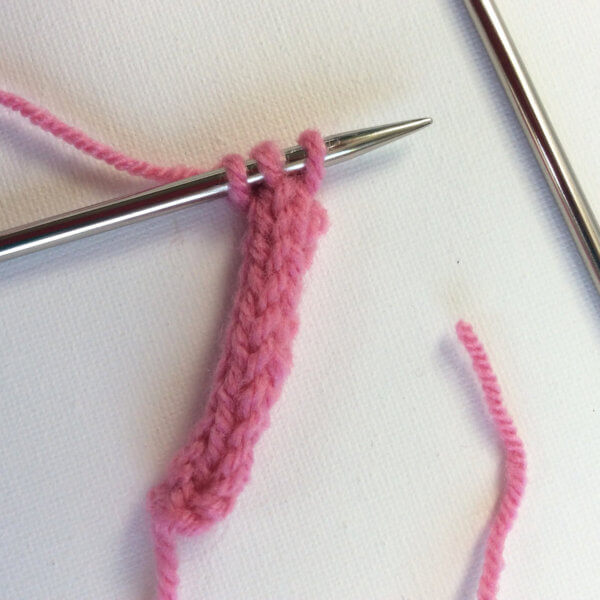
Now you can start your knitting project with the good yarn, using the temporary stitches on the needle. In the example after the temporary set-up I started with a small swatch of green.

Undoing the crochet provisional cast-on

The whole idea of a provisional cast on is of course that this is a temporary cast on. In the next couple of steps I will show you how to undo the cast on and free up the stitches for further knitting.

6. The side where you have created the crocheted chain, is the beginning. Loosen the yarn tail again and gently pull out the stitches of the chain.

Making a crochet provisional cast-on - a tutorial by La Visch Designs

7. Once a stitch of the project itself is released, catch it with your knitting needle. Note: In this example, I catch the stitches from the wrong side of the work from bottom to top. This releases the stitches in such a manner that their orientation on the needle will be twisted. If you catch the stitches from top to bottom instead, the orientation of the stitches will be as usual.

Making a crochet provisional cast-on - a tutorial by La Visch Designs

8. Pull for each stitch the waste yarn a bit more out of the work.

Making a crochet provisional cast-on - a tutorial by La Visch Designs

9. The last stitch might look like a weird half kind of stitch. Count your stitches to be sure that you have the correct number.

Now you can continue knitting on this side of the piece! Take care to see whether the stitches are positioned normal or twisted:

Making a crochet provisional cast-on - a tutorial by La Visch DesignsLeft in this picture is the regular orientation, on the right, there is a twisted stitch on the needle. This is no problem though: Just knit (or purl) the twisted stitch through the back loop to untwist the stitch mount.

tutorial: crochet provisional cast on Read More »
tutorial: binding off when yarn has run out

a tutorial by La Visch Designs

Of course, you always make sure that you have enough yarn left to bind off your project. I myself like to weigh the amount of yarn each row or round uses when I’m nearing the end of the project (or yarn!). This way I can make sure I have enough left to bind off. Depending on the type of bind off I plan on using, I know I have to reserve about twice or three times the amount of the last row.

However, it won’t hurt to know more about binding off when yarn has run out, in case of emergency. You know, in that very rare situation that you have lost that game of yarn chicken… Mind you, this is really only an option in special cases, because this bind off tends to be quite tight. This lack of elasticity makes it not really suitable for things like neck openings of sweaters. I wouldn’t use it for projects to be blocked out significantly for best results, like lace, either.

Binding off when yarn has run out – step by step

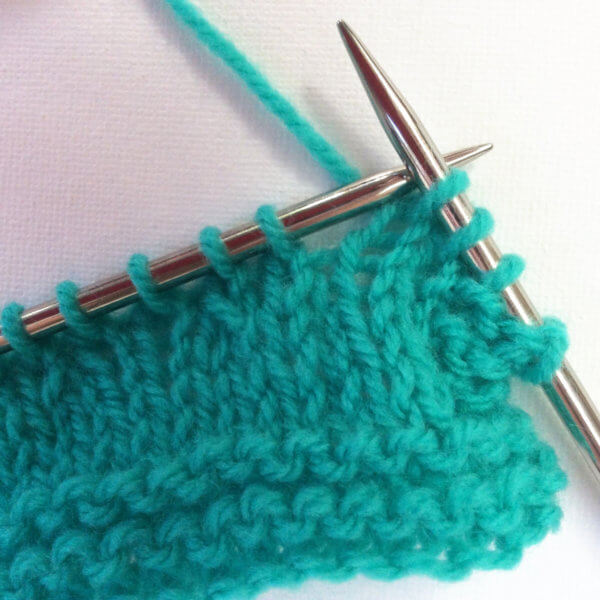
1. In the picture below you can see that there is very little yarn left: Too little to bind off the normal way.

Binding off when yarn has run out - a tutorial by La Visch Designs

2. Slip the first stitch knit-wise from the left to the right needle.

Binding off when yarn has run out - a tutorial by La Visch Designs

3. Slip the next stitch from your left needle knit-wise to the right needle.

Binding off when yarn has run out - a tutorial by La Visch Designs

4. Pass the first slipped stitch on the right needle over the second stitch.

Binding off when yarn has run out - a tutorial by La Visch Designs

5. Repeat steps 2 to 4 until all stitches have been bound off.

Binding off when yarn has run out - a tutorial by La Visch Designs

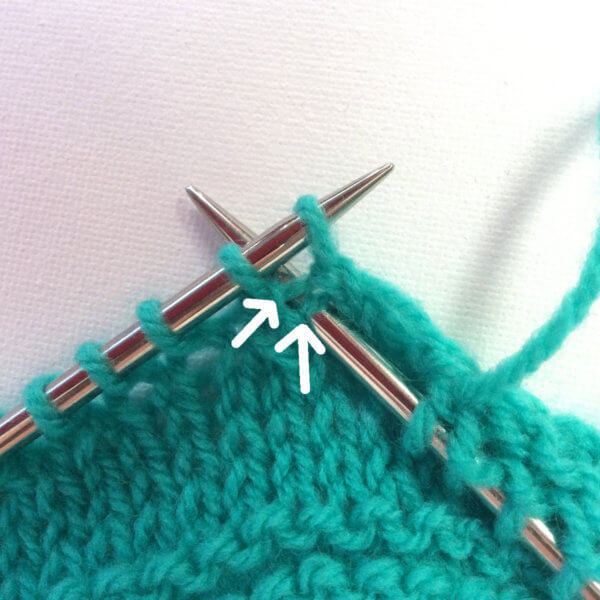
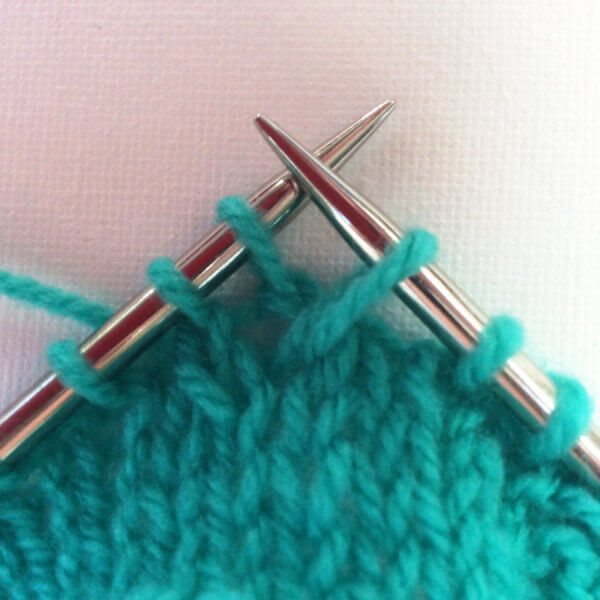
6. As you can see in the picture above, there will be leftover yarn on the right while you have one last loop remaining on the left side. If the work must be joined in the round, you can connect it by pulling the remaining yarn through the last live stitch, securing the end by weaving it in. If the work will remain flat, you need about 10 cm of yarn from the yarn end to secure this last live stitch. Cut this length, pull it through the stitch and weave all the loose ends in.

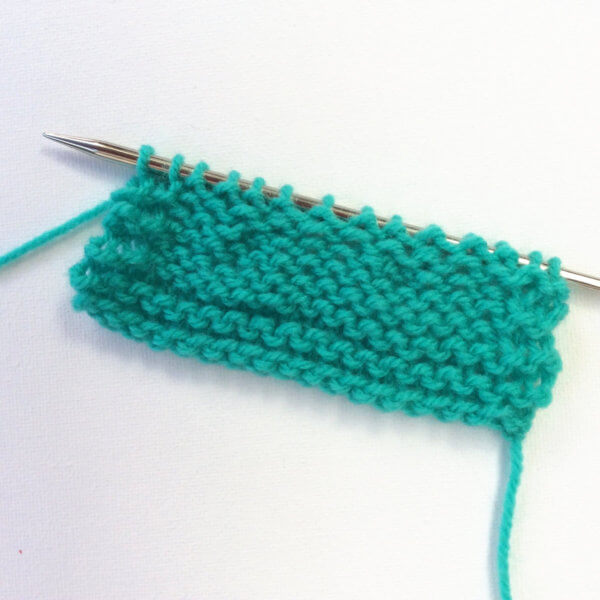
Not ideal, but a good technique to know in case it is ever needed!

tutorial: binding off when yarn has run out Read More »

tutorial – Solomon’s knot aka lover’s knot

Crochet the Solomon's knot - a tutorial by La Visch Designs

In this post, I want to introduce you to a very lovely crochet stitch: The Solomon’s knot stitch. This particular crochet stitch is also known as the “Lovers Knot.” This stitch is ideal for scarves and shawls with an open and airy structure.

The Solomon’s knot stitch gives a beautiful result when worked in a very thin yarn, as well as when it is made in a thicker yarn. And because the stitch is very “airy”, it also gives very quick results. Perfect for when you need a last minute present!

Do not be put off by the many steps, this stitch is easier than it seems!

Solomon’s knot step by step

In this example, I used a relatively thick acrylic yarn, to be able to show you well how to work it. However, as said, the result is also very nice when using a very thin and light fluffy yarn like a kid-silk type yarn. These instructions are written in American English crochet terminology.

Row 1

1. Crochet 2 chains.

Crochet the Solomon's knot - a tutorial by La Visch Designs

2. Make a single crochet in the first stitch of the chain. Insert your hook under both loops of this first stitch.

Crochet the Solomon's knot - a tutorial by La Visch Designs

3. Make the loop on the hook bigger, with this it is important to maintain a constant size. I used my finger to assist with this. Next, make a yarn over and loosely pull up a loop through the enlarged loop.

Crochet the Solomon's knot - a tutorial by La Visch Designs

4. Insert the hook from front to back through the enlarged loop you just created. Yarn over and pull up a loop through the first loop on the hook. You now have two loops on your hook.

Crochet the Solomon's knot - a tutorial by La Visch Designs

5. Again make a yarn over and pull through both loops on the needle. You have now created one elongated loop.

Crochet the Solomon's knot - a tutorial by La Visch Designs

6. Repeat steps 2 to 5 for a multiple of 2 + 3 times. When starting with Step 2, insert the hook in the single crochet (the “knot”) that has been made last. In this example, I repeated steps 2 to 5 for a total of 7 times.

Crochet the Solomon's knot - a tutorial by La Visch Designs

Row 2

7. Turn piece, skip the first four knots, insert the needle in the middle of the next knot (the fifth from the hook) and make 1 single crochet.

Crochet the Solomon's knot - a tutorial by La Visch Designs

8. Make 2 elongated loops by working steps 3 to 5 as before, followed by steps 2 to 5 once more.

Crochet the Solomon's knot - a tutorial by La Visch Designs

9. Skip 1 knot, insert the hook in the middle of the next knot and make 1 single crochet.

Crochet the Solomon's knot - a tutorial by La Visch Designs

10. Repeat 8 and 9 until the end of the row, finish with 1 single crochet in the last knot.

Crochet the Solomon's knot - a tutorial by La Visch Designs

Row 3

11. Make 2 elongated loops by working steps 3 to 5 as before, followed by steps 2 to 5 once more. Turn the piece.

Crochet the Solomon's knot - a tutorial by La Visch Designs

12. Make 1 single crochet in the next knot.

Crochet the Solomon's knot - a tutorial by La Visch Designs

13. Make 2 elongated loops by working steps 3 to 5 as before, followed by steps 2 to 5 once more. Skip 1 knot, insert the hook in the middle of the next knot and make 1 single crochet. Repeat this until the last knot of the previous row.

Crochet the Solomon's knot - a tutorial by La Visch Designs

14. Make 2 elongated loops by working steps 3 to 5.

Crochet the Solomon's knot - a tutorial by La Visch Designs

15. Then insert the hook into the knot of two rows below and make an extended loop. Then, make a yarn over and loosely pull up a loop through the enlarged loop. Next, repeat steps 4 and 5.

Crochet the Solomon's knot - a tutorial by La Visch Designs

Row 4

16. Make 2 elongated loops by working steps 3 to 5 as before, followed by steps 2 to 5 once more. Turn the piece.

Crochet the Solomon's knot - a tutorial by La Visch Designs

17. Skip 1 knot and crochet 1 single crochet in the next knot.

Crochet the Solomon's knot - a tutorial by La Visch Designs

18. Repeat steps 16 and 17 until the end of the row, and finish the row with 1 single crochet in the last single crochet/knot.

Crochet the Solomon's knot - a tutorial by La Visch Designs

Repeat rows 3 and 4 until your work has the desired height.

And this is how to work the Solomon’s knot stitch!

tutorial – Solomon’s knot aka lover’s knot Read More »
old school gaming hat

Old School Gaming hat by La Visch Designs

Old School Gaming Hat is a simple hat with a folded brim and fun stranded color work depicting old school gaming characters. With only two colors for the color work, this hat knits up super quick and is a great first stranded project for anyone who has never attempted this technique before.

This pattern contains instructions for three adult sizes when worked in an aran weight yarn. Use a DK or light worsted weight yarn instead for sizes suitable for children from 3 months old and upwards.

The Old School Gaming Hat is completely seamless and knitted from the bottom up. The color work pattern for the body of the hat is provided charted only. All other instructions are in written form


Pay what you want: (minimum €4.90)

Add to cart


Difficulty level

The Old School Gaming Hat is seamless and knit in the round from the bottom up. This pattern involves following a color chart and working in stranded knitting. An alternative technique for creating the design is to duplicate stitch this design onto the hat after knitting.

Stitches used include knit, purl, k2tog and the M1 increase. This pattern is suitable for the intermediate to advanced knitter.

Sizes and finished measurements

Adult sizes S (M, L) to fit size: 46-53 (53-60, 60-67) cm, 18-21 (21-24, 24-27) inches.
Children’s sizes 3M (6-12M, child-teen) to fit size: 33-38 (38-43, 43-48) cm, 13-15 (15-17, 17-19) inches.

Pattern details

  • Worked in the round
  • Gauge for adult sizes in aran weight yarn: 17 sts / 24 rows = 10 cm (4 inches) over stockinette, knit with larger needles and measured after blocking.
  • Gauge for children’s sizes in DK or light worsted weight yarn: 19 sts / 26 rows = 10 cm (4 inches) over stockinette, knit with larger needles and measured after blocking.
  • Pattern languages included: English and Dutch (Dit patroon omvat zowel een Nederlandse als een Engelse versie)
  • Digital PDF has 3 pages (A4 size)

Materials

  • Yarn: In the adult sized aran weight sample Peruvian Highland Wool by Filcolana [100% wool; 100 m (109 yds) per 50 g skein] was used. Substitute any wool aran weight yarn for a similar teen/adult sized result. For a child sized hat, choose a DK or light worsted weight yarn instead.
    • Main color: 100 (125, 150) m (110 (135, 165) yds) / 50 (62, 75) g in gray.
    • Contrast color 1: 21 (26, 32) m (22 (28, 33) yds) / 27 (30, 32) g in pink.
    • Contrast color 2: 21 (26, 32) m (22 (28, 33) yds) / 27 (30, 32) g in yellow.
  • Needles in your preferred style for small circumference knitting in the round in the following sizes (or to match gauge):
    • Adult sizes knit in aran weight yarn: Size 4 mm (US 6) and size 4.5 mm (US 7).
    • Children’s sizes knit in DK or light worsted weight yarn: Size 3.5 mm (US 4) and size 4 mm (US 6).
  • Yarn needle
  • 1 end-of-round stitch marker
  • 3 (4, 5) differently colored stitch markers (optional)

old school gaming hat Read More »