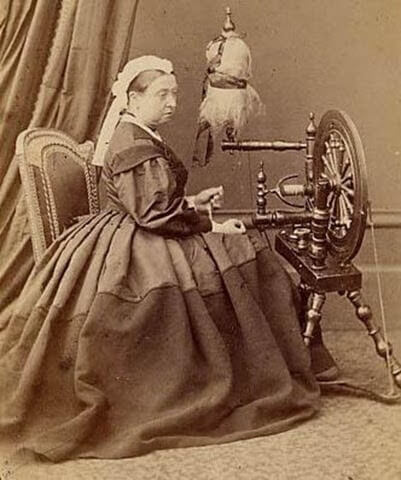
I find spinning to be a very relaxing pastime. Do you think Queen Victoria (pictured below), also spun for relaxation? In my first post on the anatomy of spinning wheels, I told you about the various parts most spinning wheels have in common. Now that you know something about the different parts, I can also tell you about the various types of spinning wheels out there.
Mind you, this is not an exhaustive list, but rather a very rough classification based on the appearance of most common western spinning wheels. Wheels like the Indian Charkha (used to spin cotton) I left out of this overview.
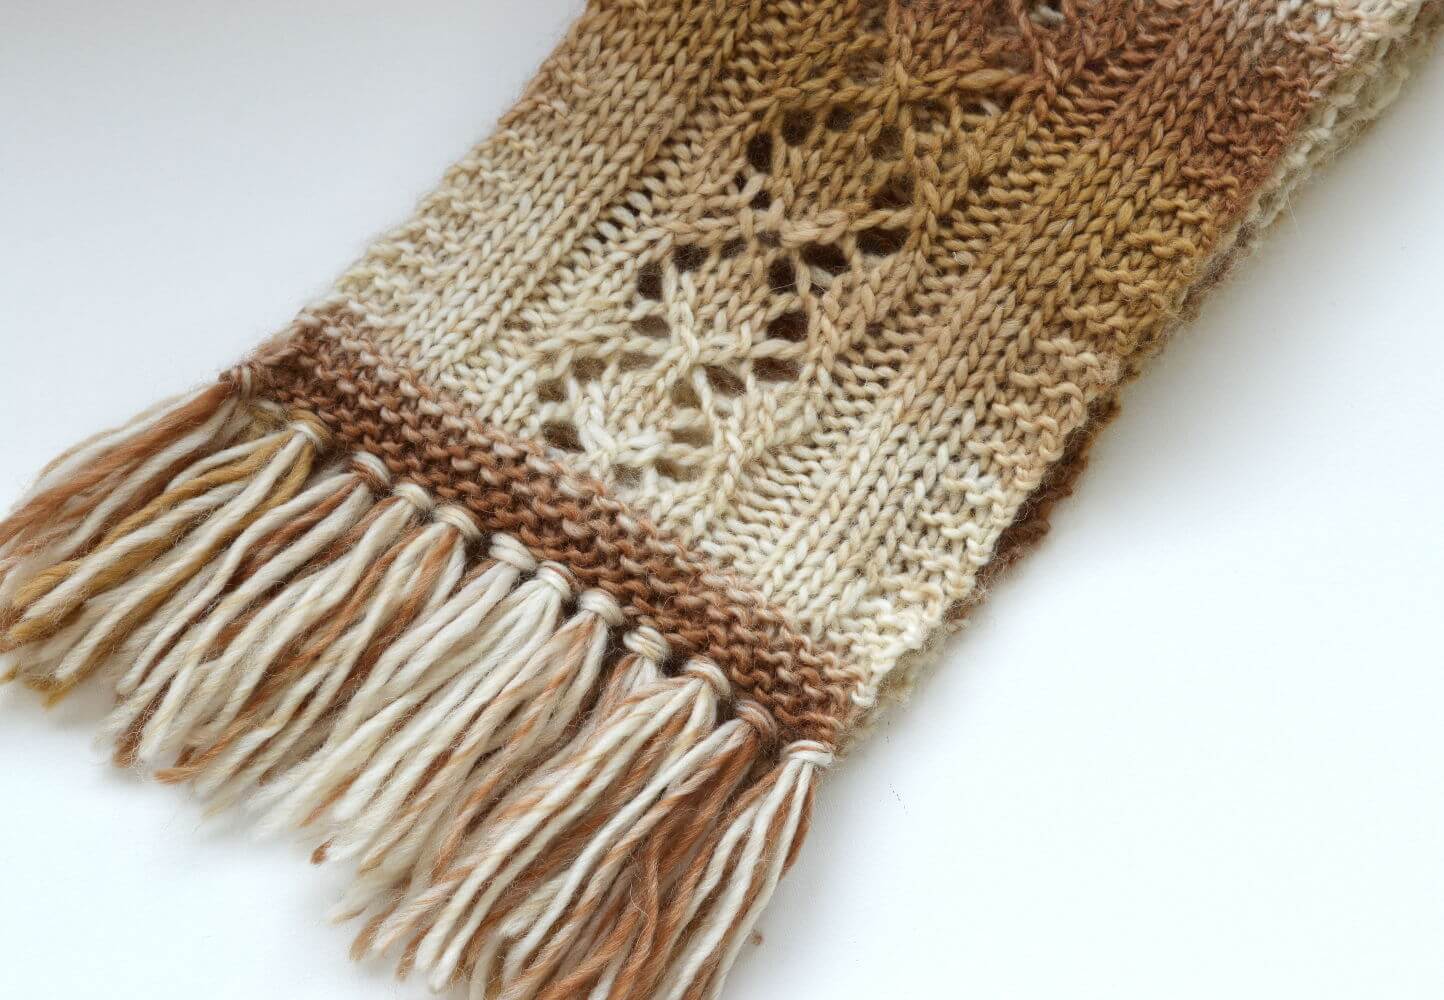
Saxony wheel
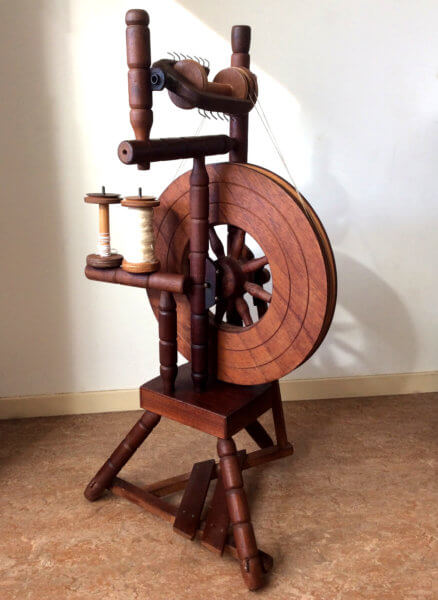
Saxon spinning wheels are characterized by a horizontally oriented table with the wheel on one side and the spin head with the flyer on the other side. The table itself usually is placed a bit on an angle. The spinning wheel shown below is a typical example.
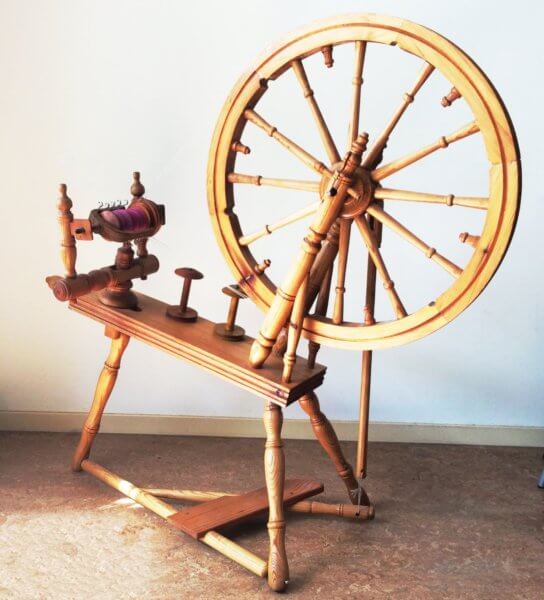
This particular wheel is indeed a very special one. Noortje (yes I have given my spinning wheel a name, a wheel with character deserves a name!) is in fact handmade by the grandfather of an acquaintance: Wim Vogel. He was a carpenter and made in the 70’s two spinning wheels in his spare time, based on plans by the Norske Husflidsforening. Noortje is one of those two wheels.
Castle wheel
This type of wheel has a vertical structure with first the table top, then the wheel and above this the flyer assembly. Because of this construction, this type of spinning wheel requires relatively little space. This was the feature that ensured that these spinning wheels were very popular with barge captain’s wives. On ships, room happens to be a scarce commodity. This is also the reason that this type of spinning wheel is in the Netherlands, also known as “schippertje.” This translates roughly to “little skipper”. Some modern castle type wheels can even be folded for compact storage or travel.
My schippertje picture here is Dutch-made: It was made by Jan Lobs from Oostvoorne. Lobs had in the 70’s a spinning wheel atelier where these wheels with their distinctive design were made. Being very robust, I encounter these wheels regularly on the Dutch version of Craigs List (Markplaats). I myself have two wheels of this model.
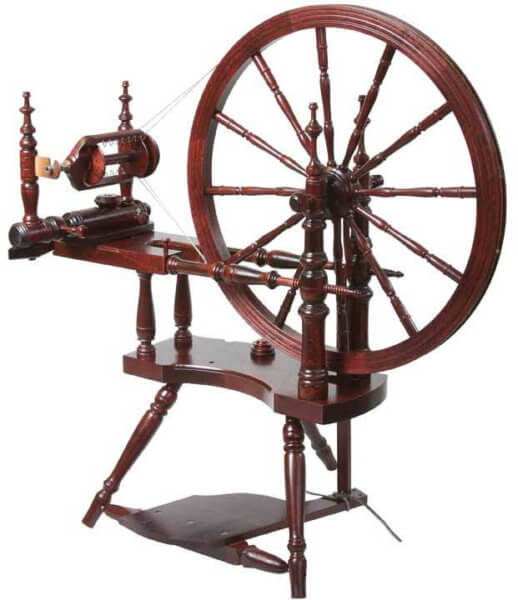
Norwegian spinning wheel
This type of wheel is very similar to the Saxony spinning wheels. Norwegian spinning wheels have usually also a big wheel, 3 to 4 legs in combination with a horizontal build-up with the flyer next to the wheel. The table is however entirely horizontally and is sometimes combined with a smaller upper table in which the flyer assembly can be found.
Modern spinning wheels
Besides the already mentioned types of spinning wheels, there are of course also the modern wheels. In these wheels, modern technology is combined with the traditional principles of spinning. Think for instance of foldable wheels to make them easier to carry and travel with them. Wheels fitted with modern (ball) bearings so they make for light treadling and hardly any noise. Wheels that automatically change the position of where the thread is wound on the bobbin. This is very handy because then you don’t need to stop to pass the thread through the next flight hook.
These wheels often have a very traditional look. Because of it, they usually fall in one of the aforementioned categories of the various types of spinning wheels. There are also spinning wheels with a totally different appearance. Spinning wheels made of plastic, or for example electrically powered wheels for those individuals who have less use of their legs. An overview of variations can be found in the picture below.
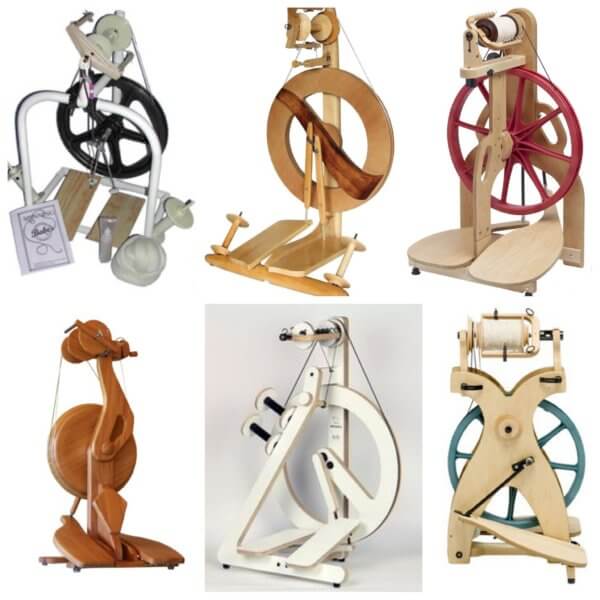
Modern spinning wheels come in so many variations, that there really is no common appearance. And that really makes it so much fun!
In a next post, I will consider the various working principles on which most spinning wheels operate. Stay tuned!