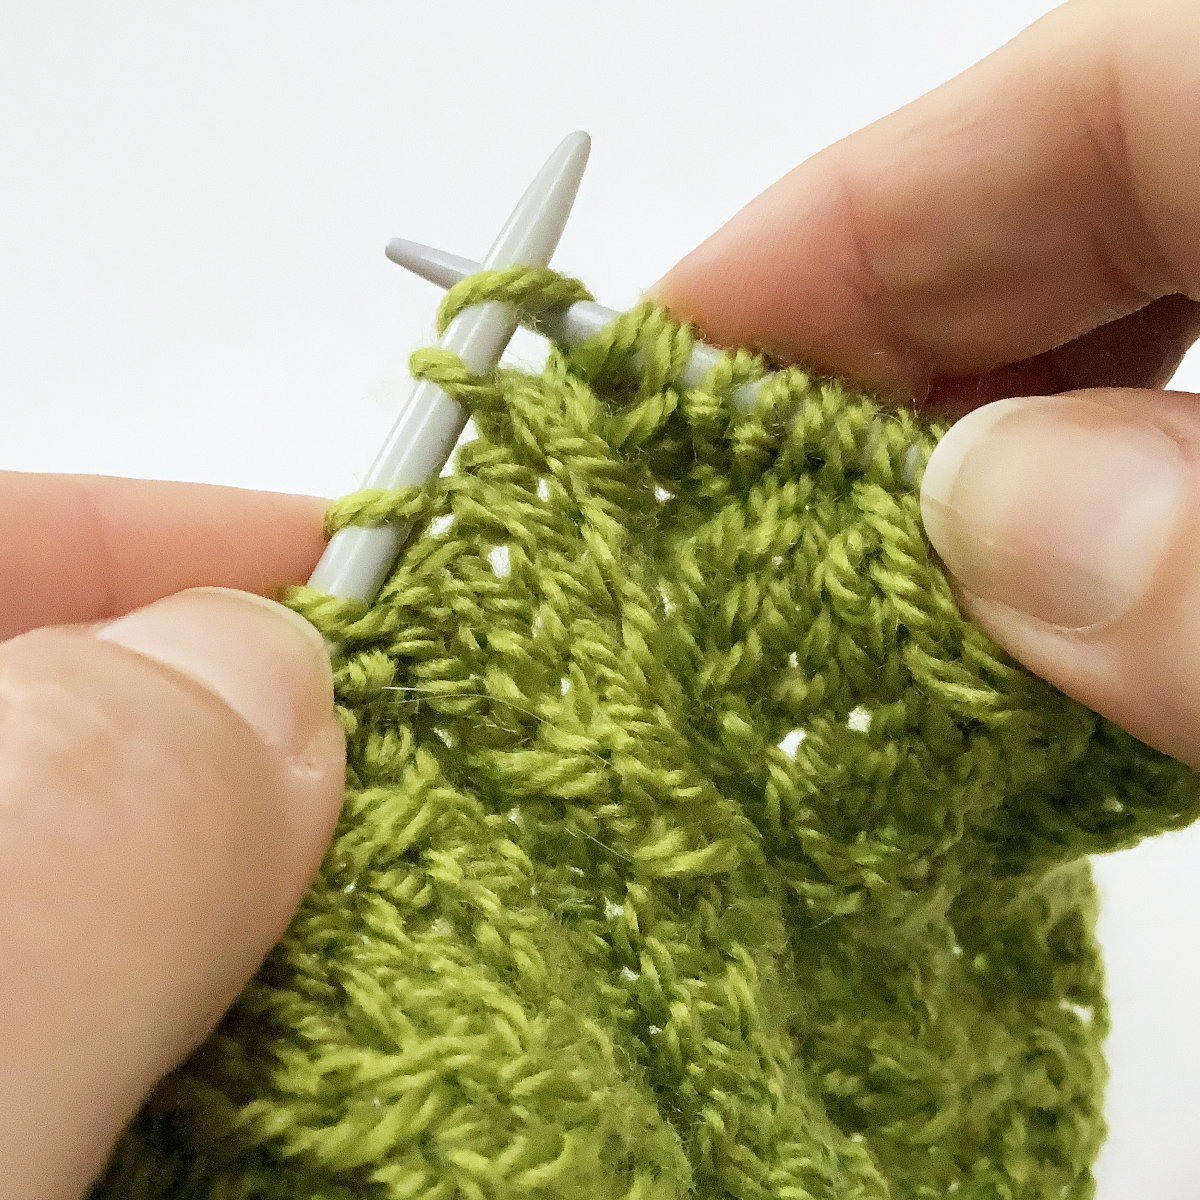
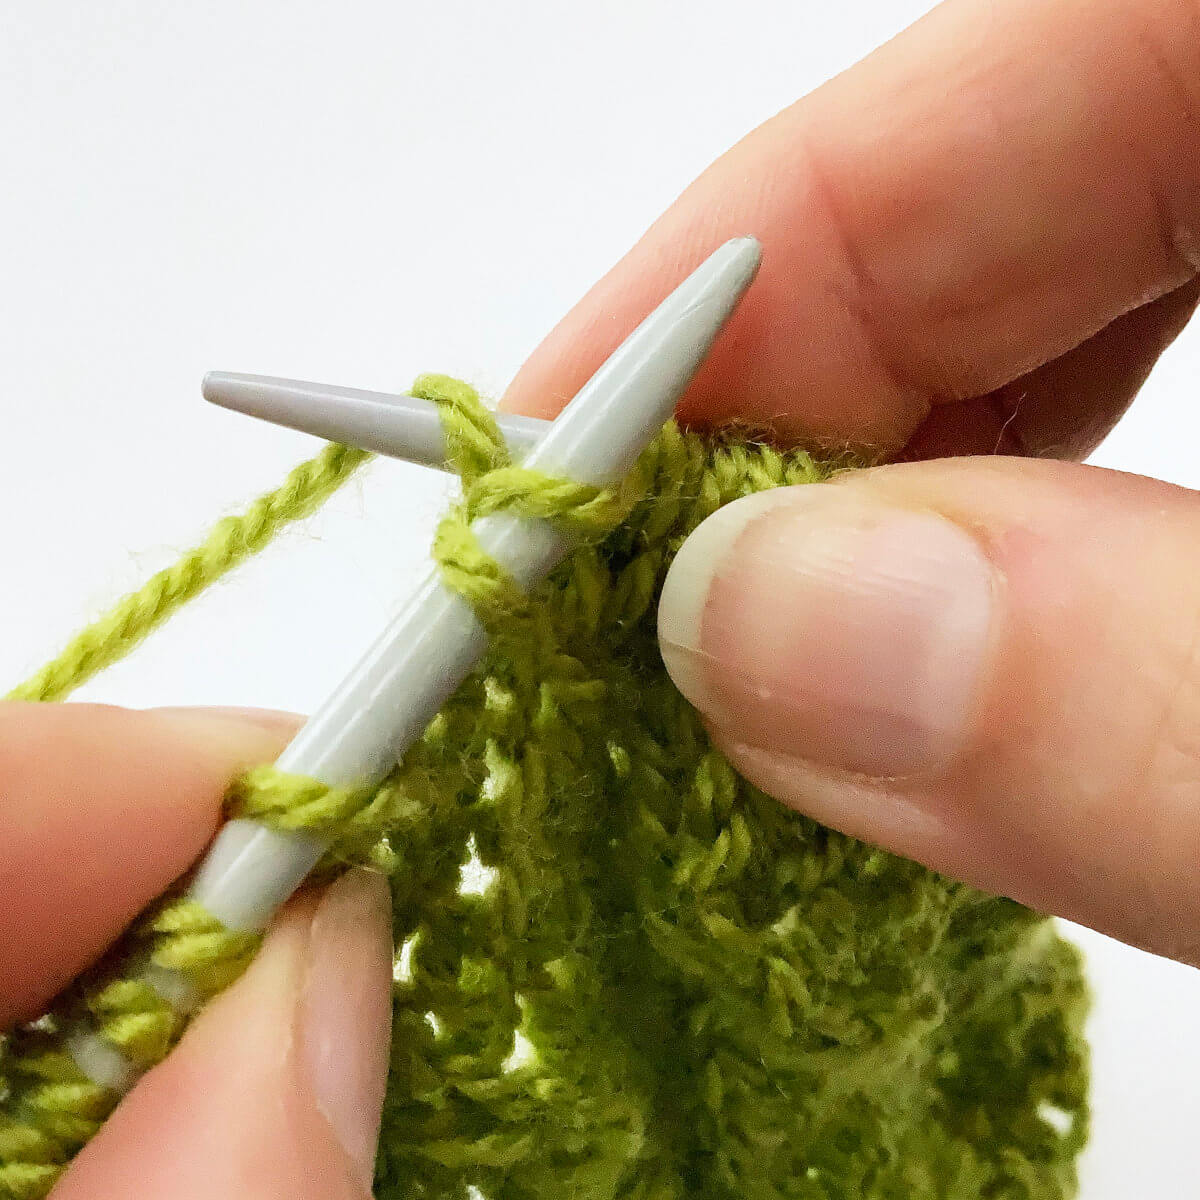
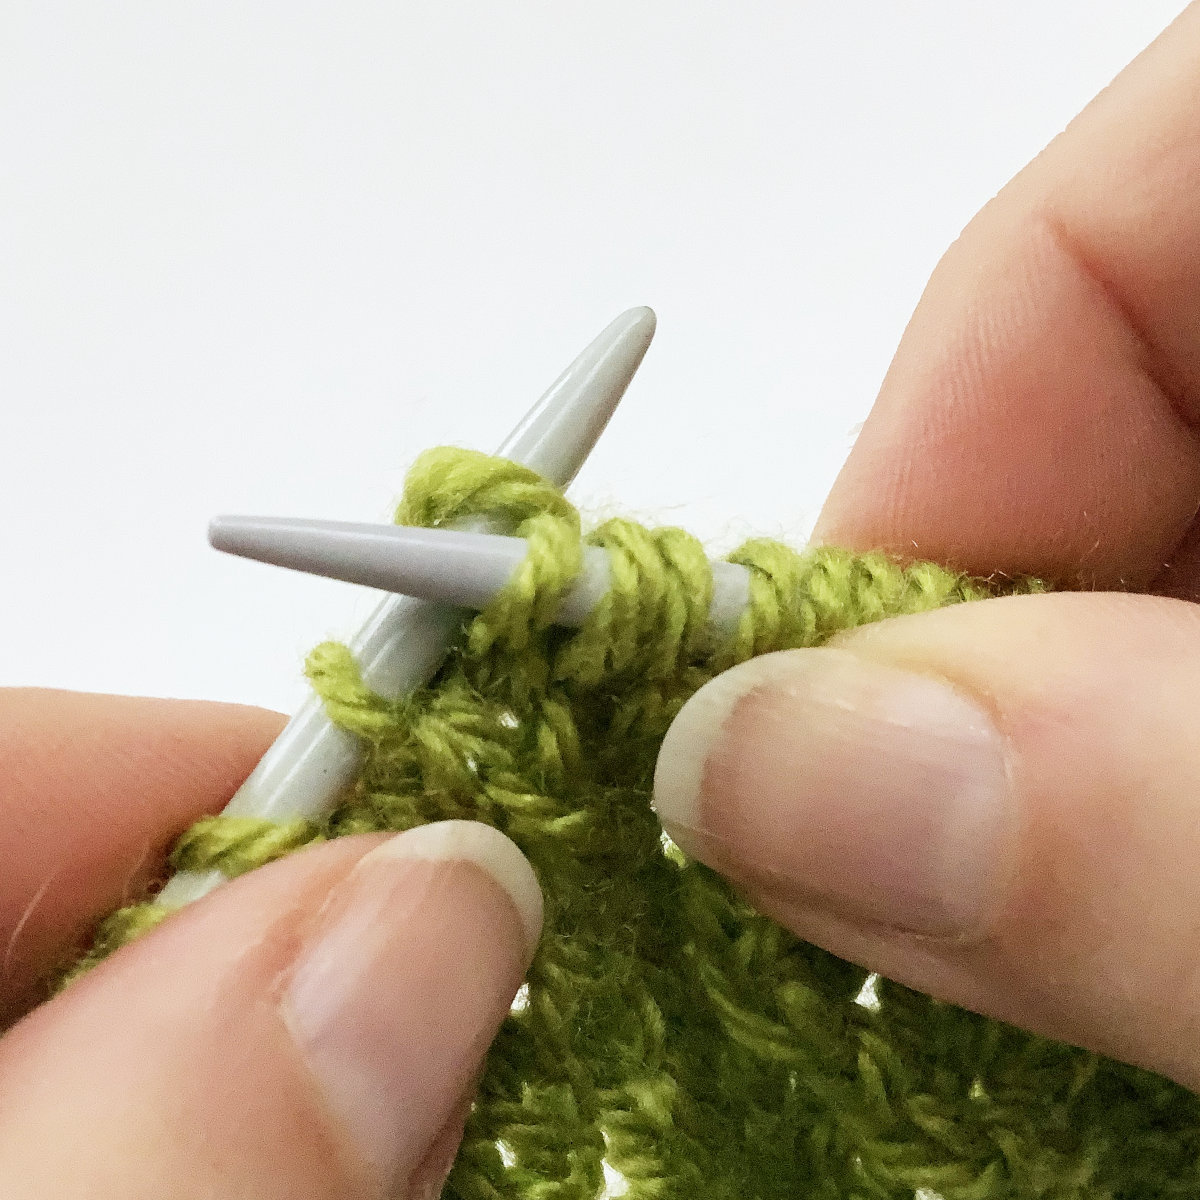
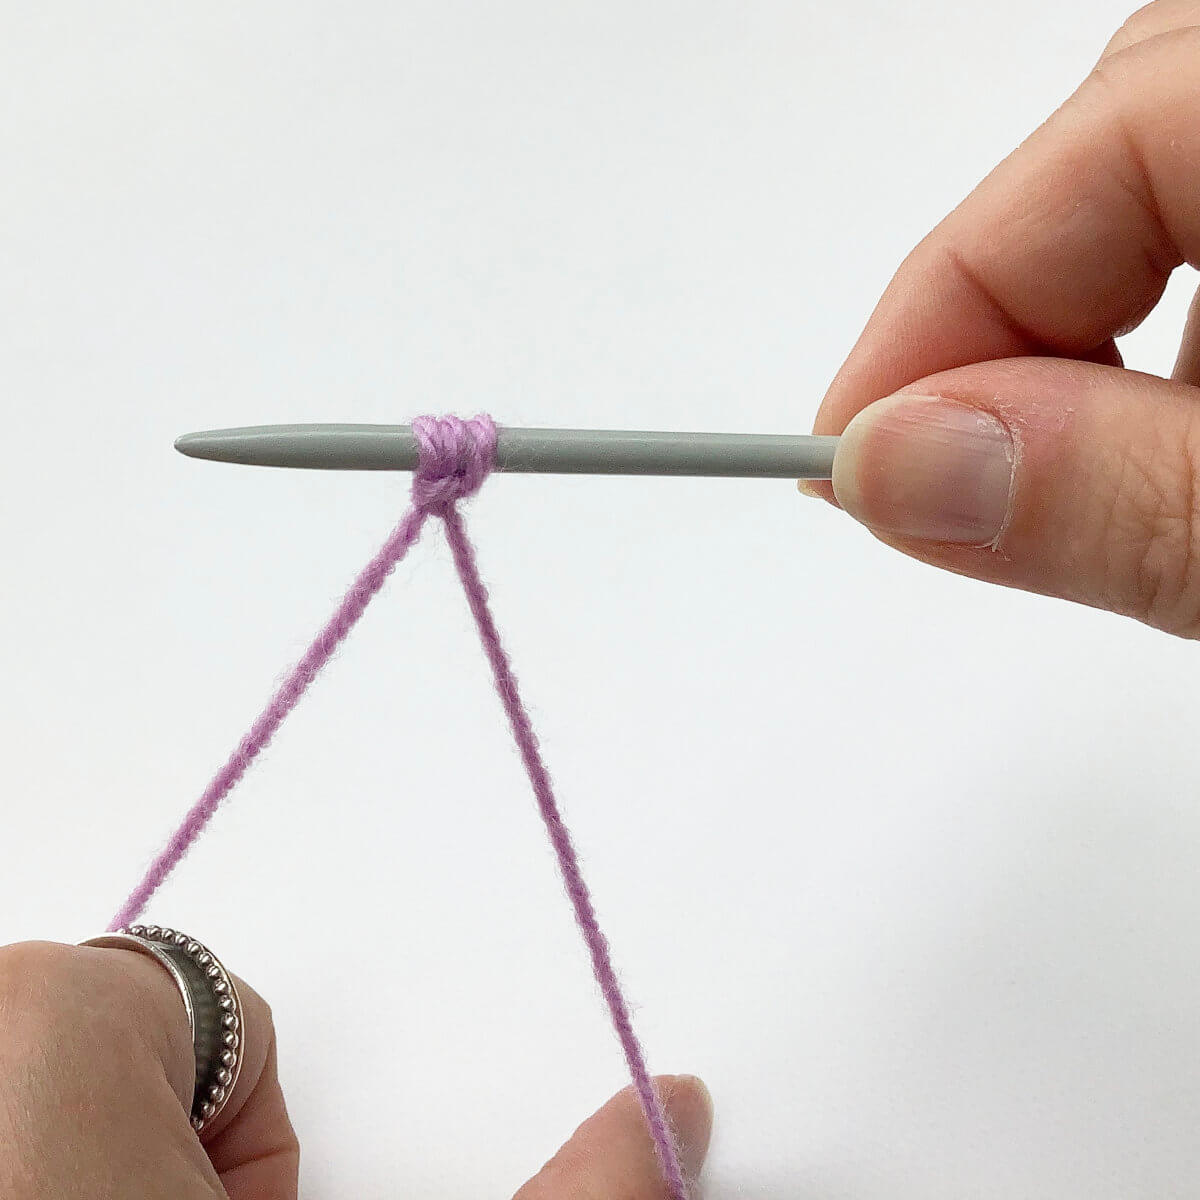
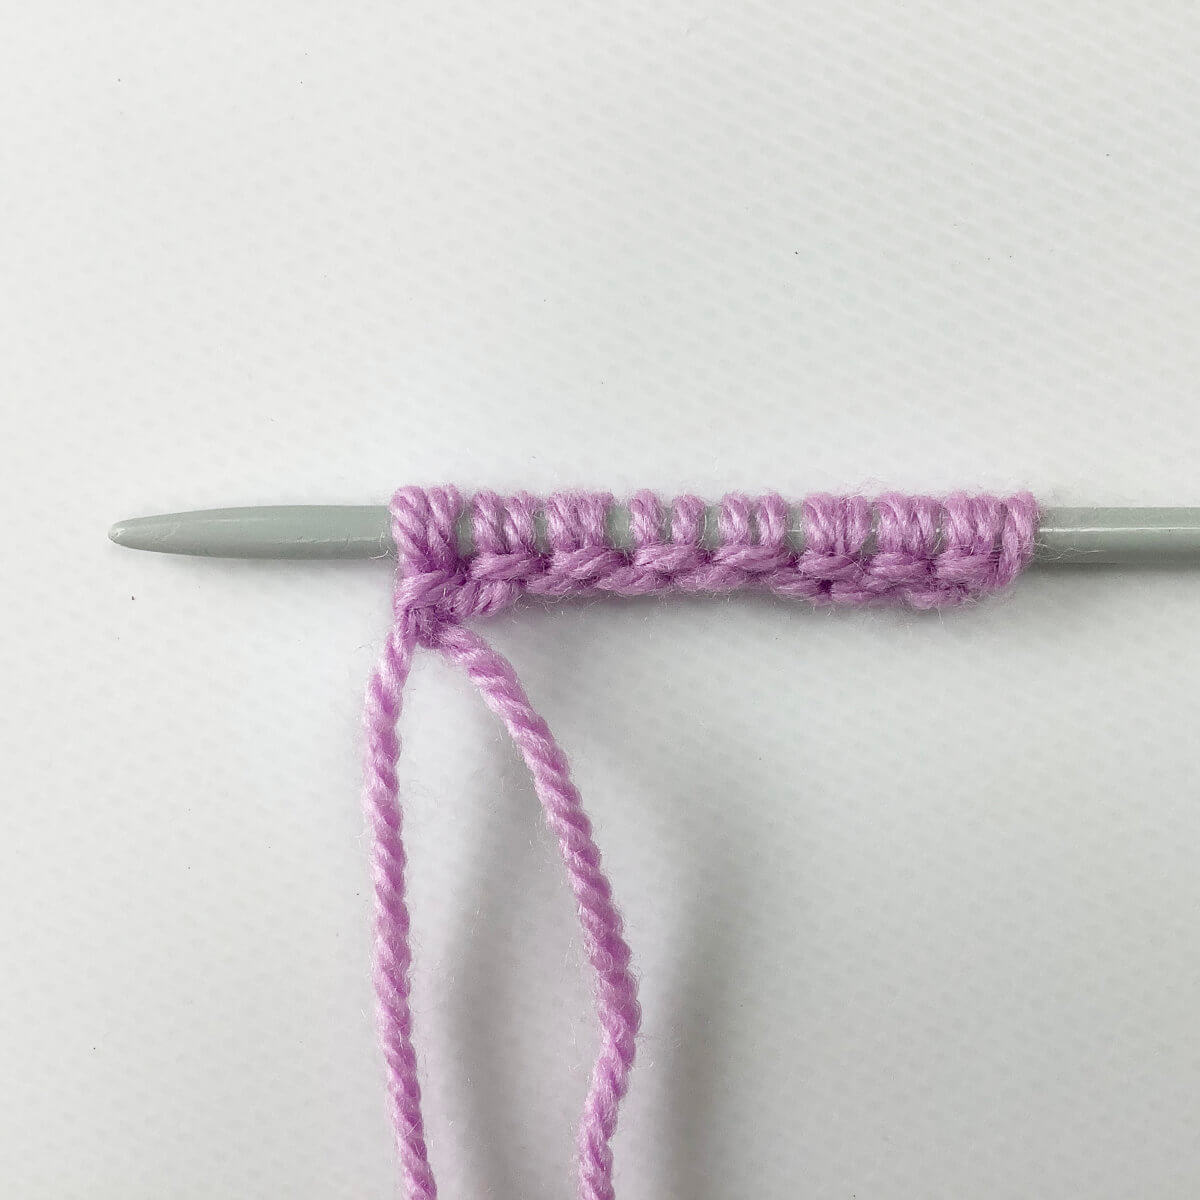
stitch pattern – berry stitch

Berry stitch

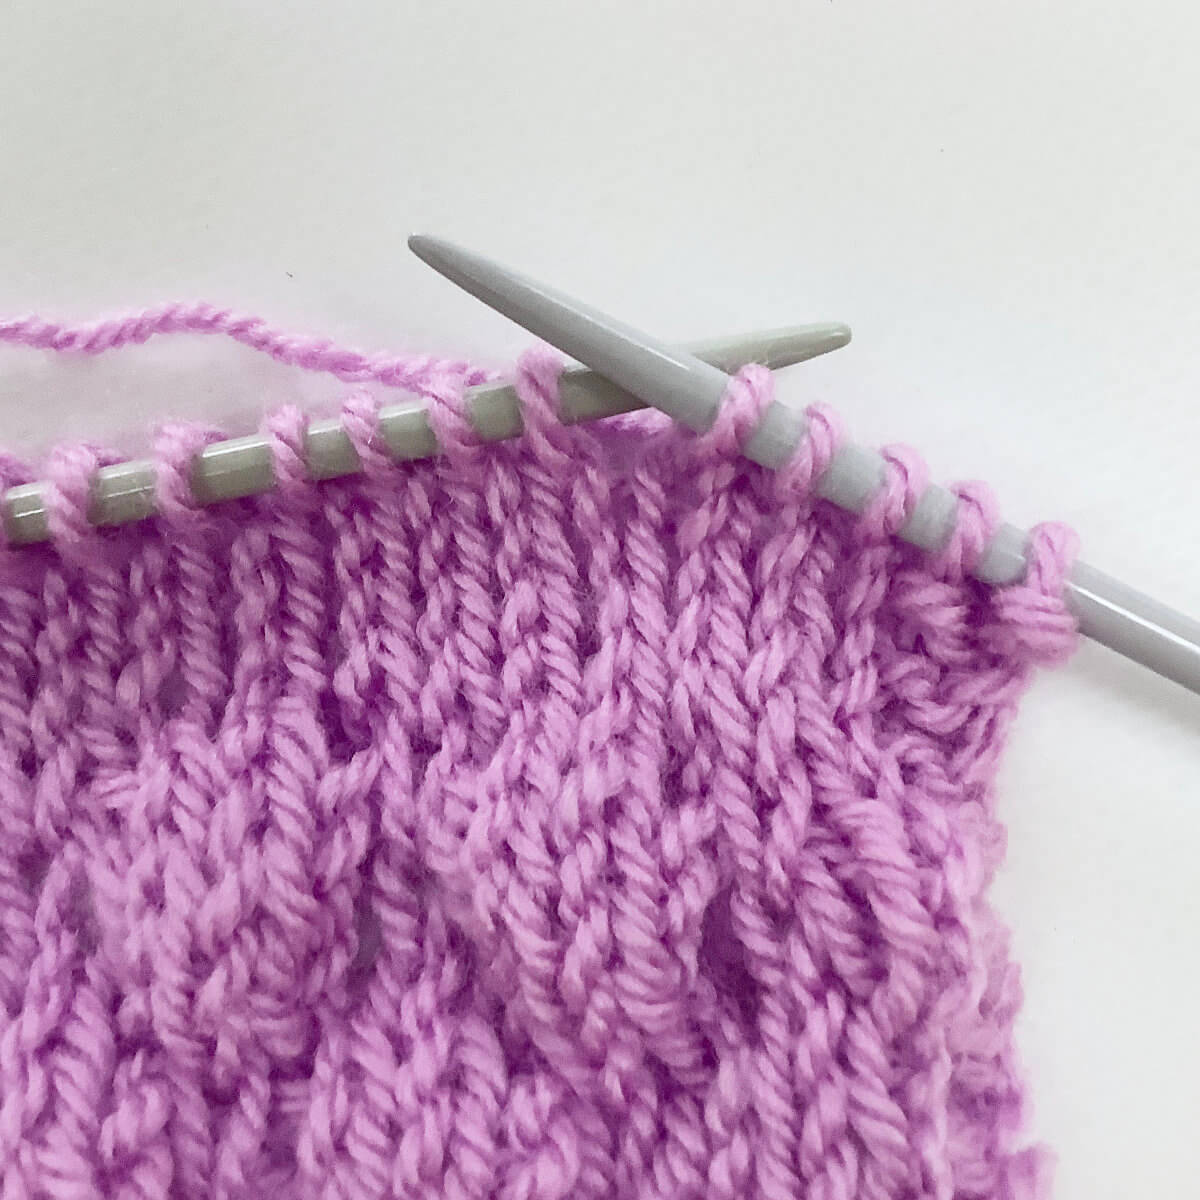
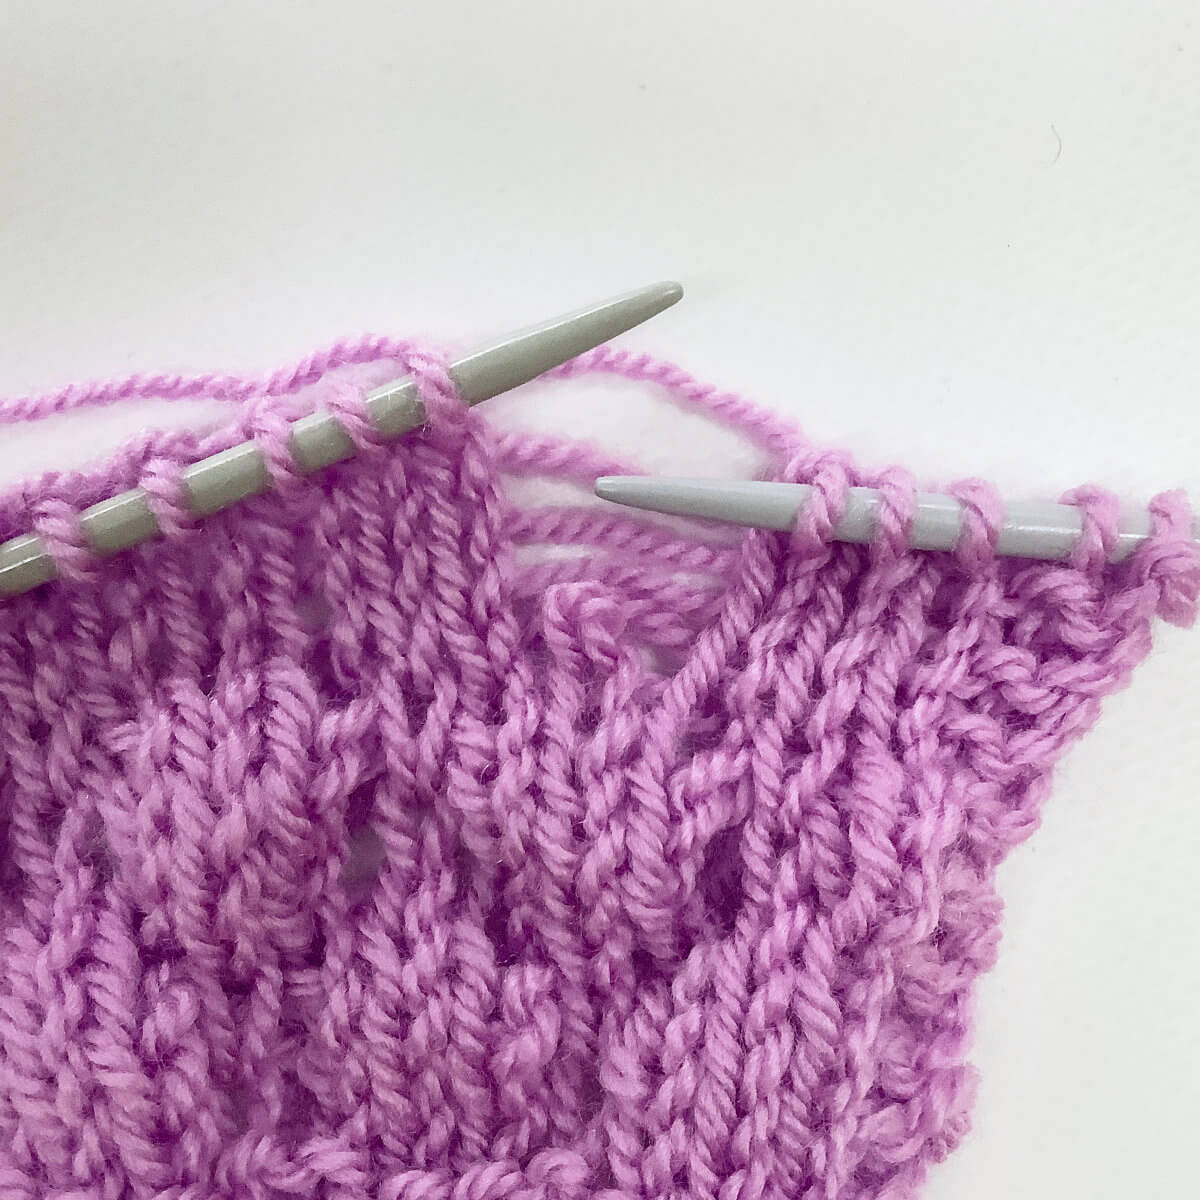
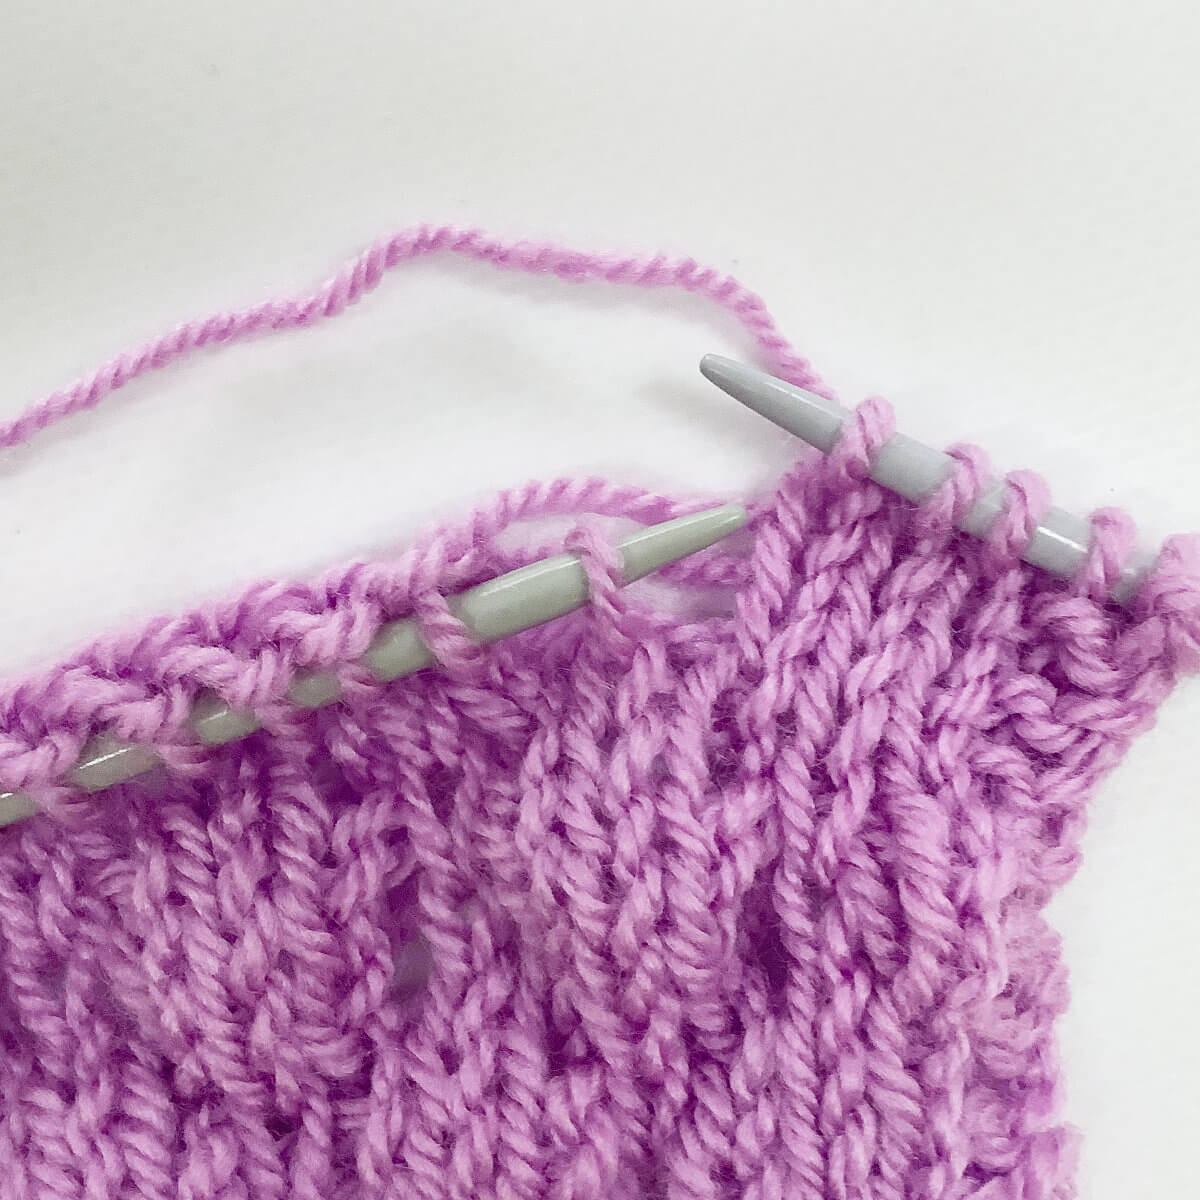
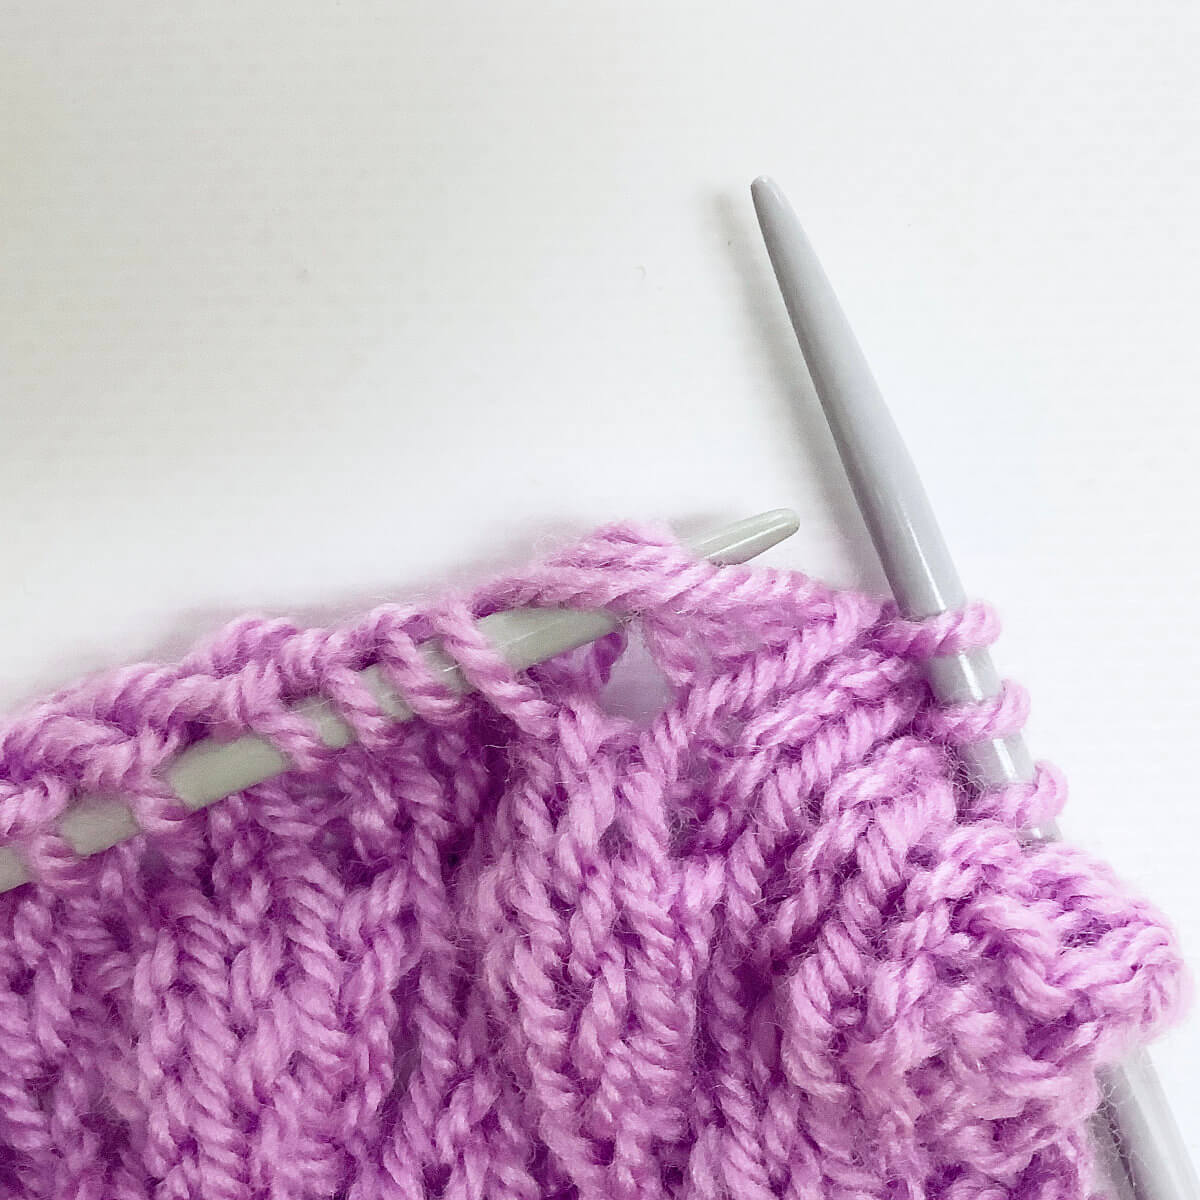
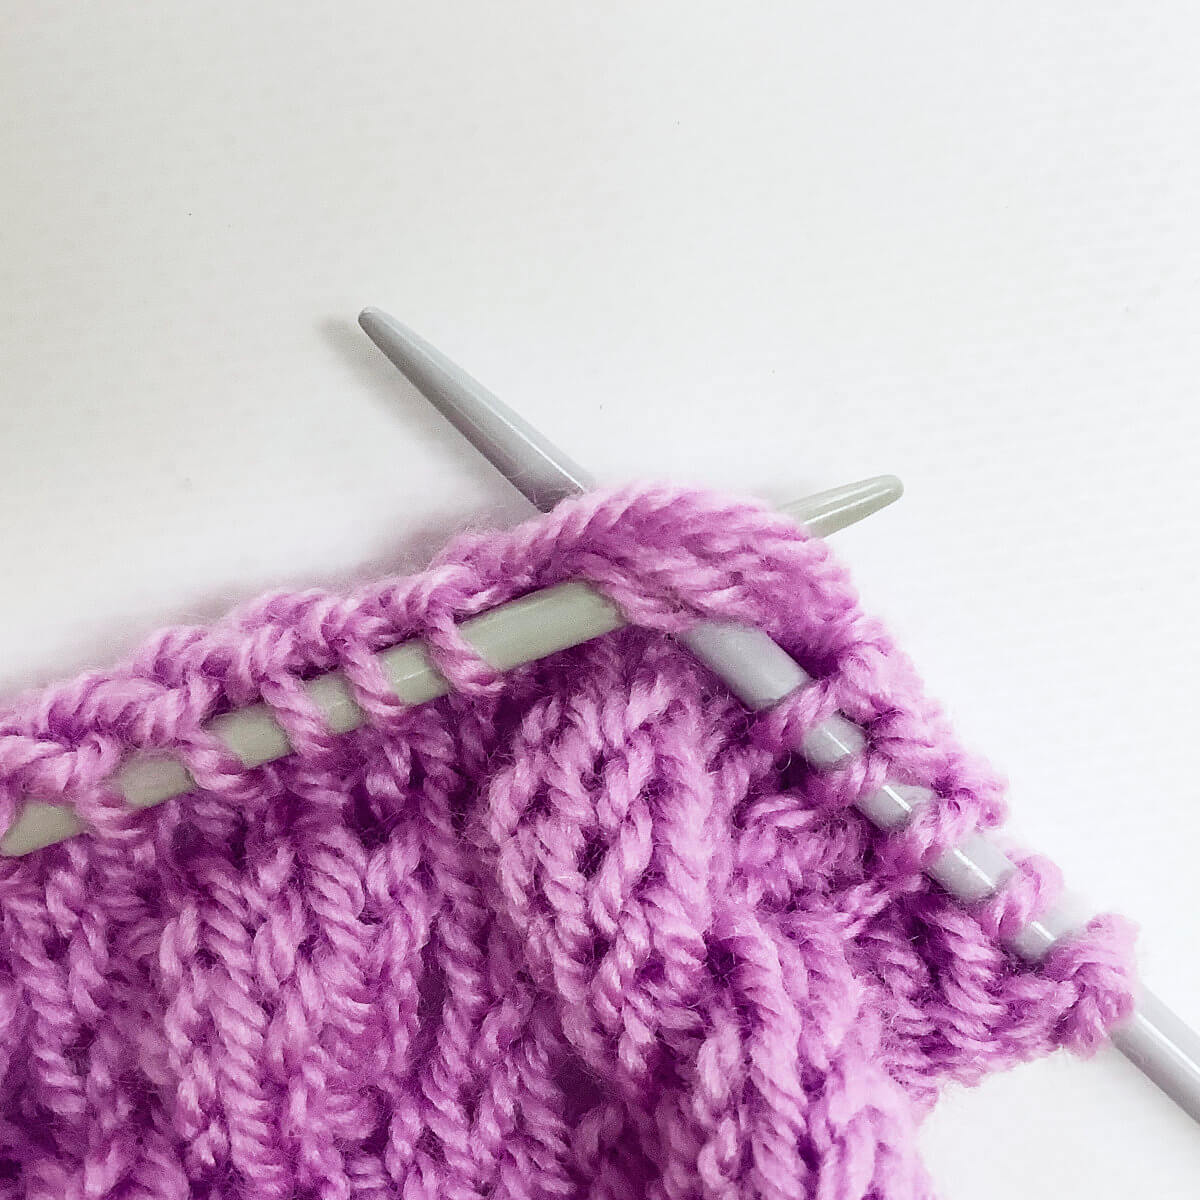
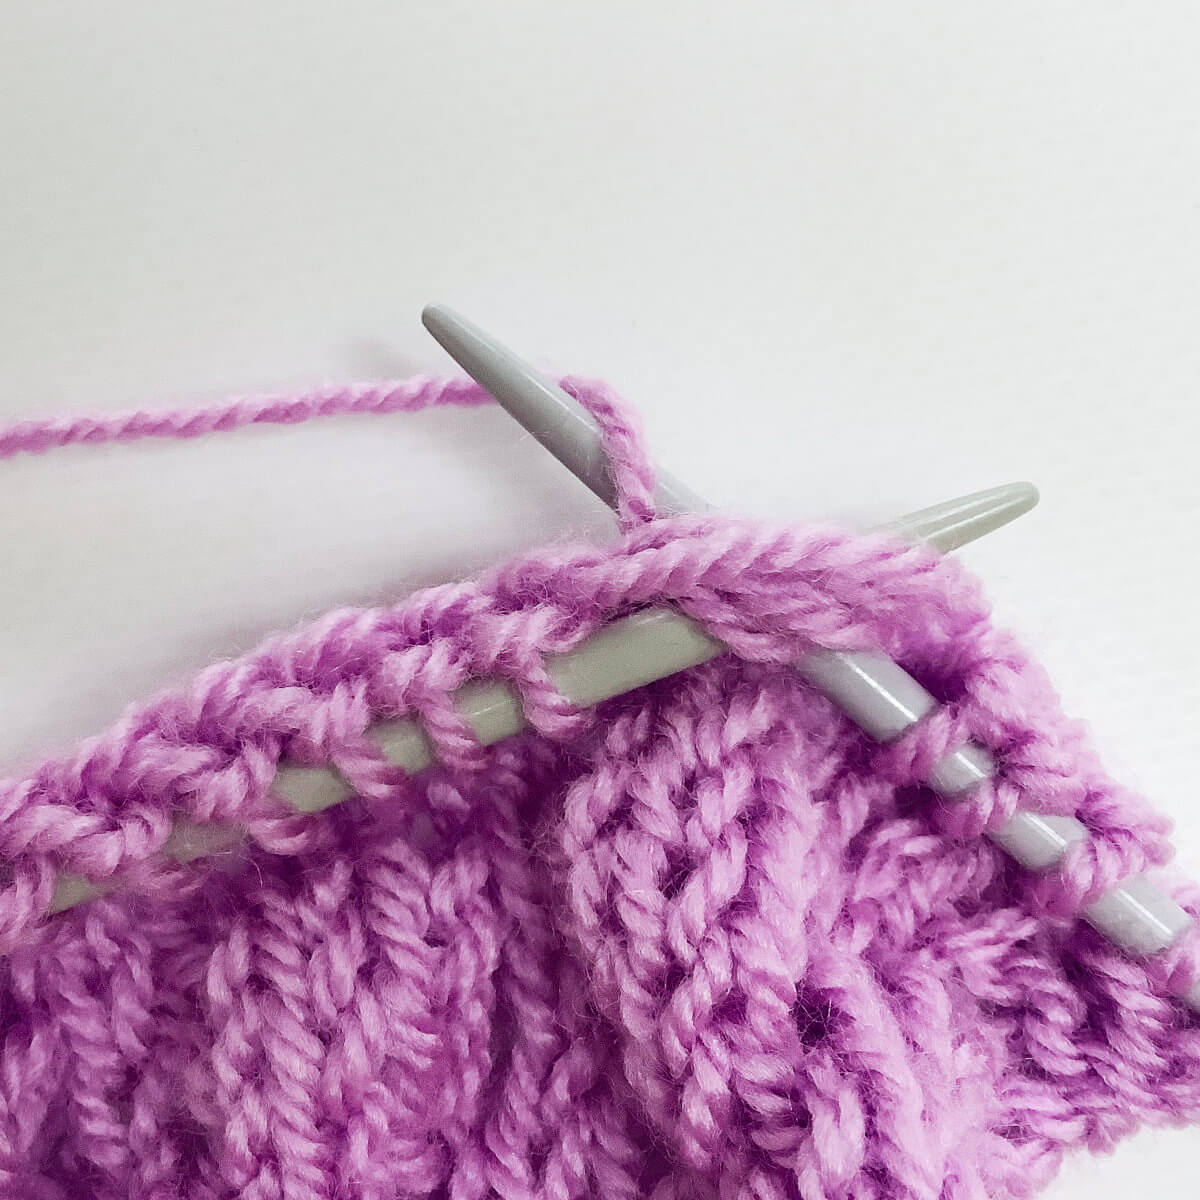
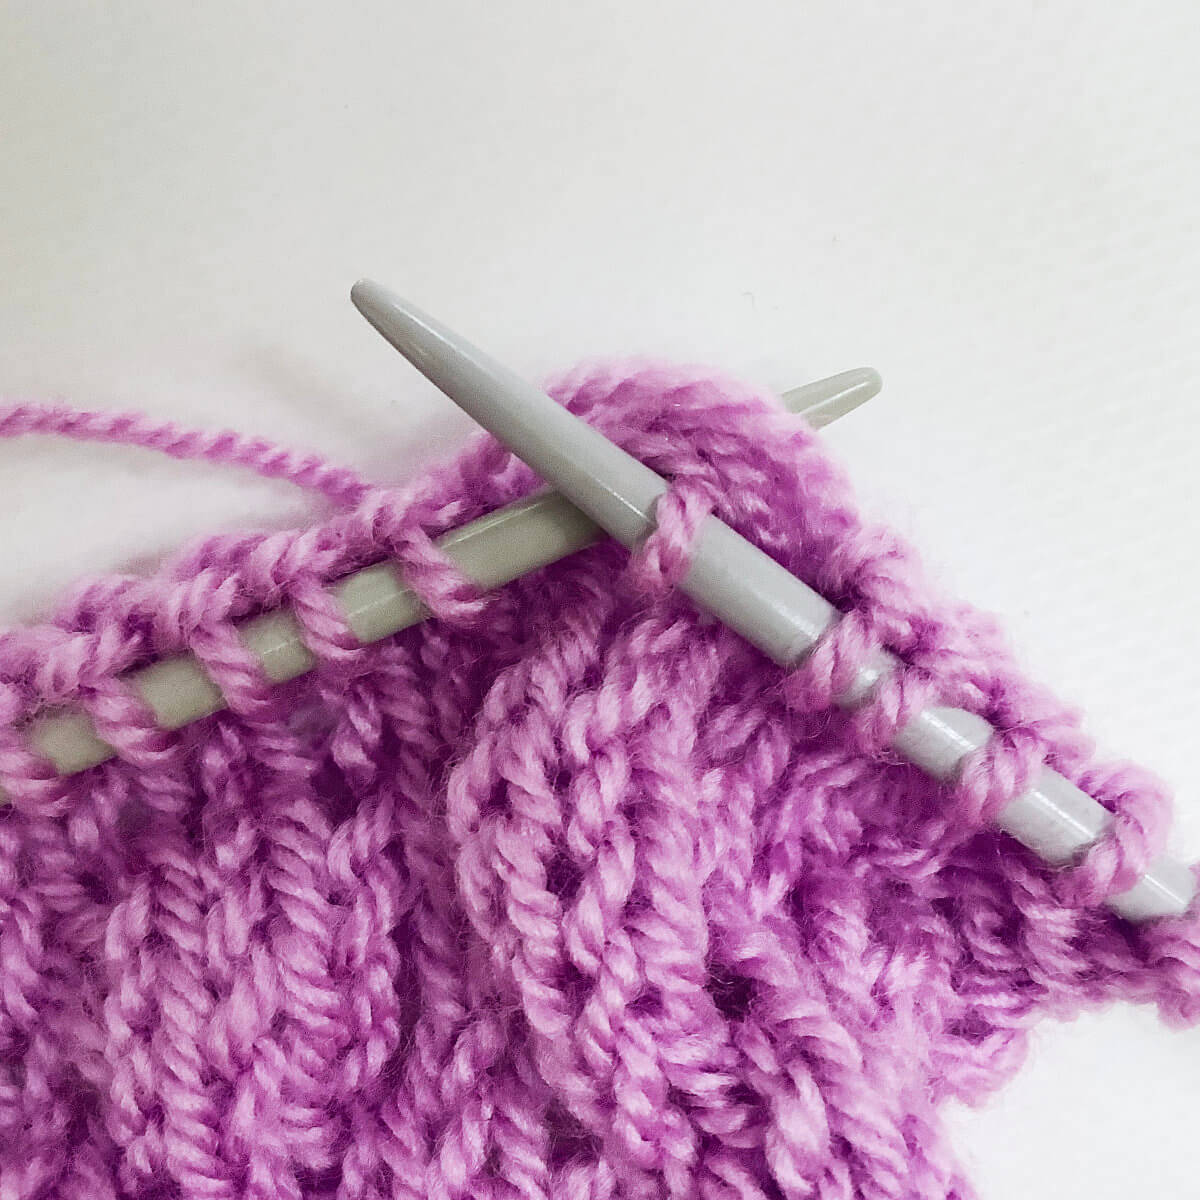
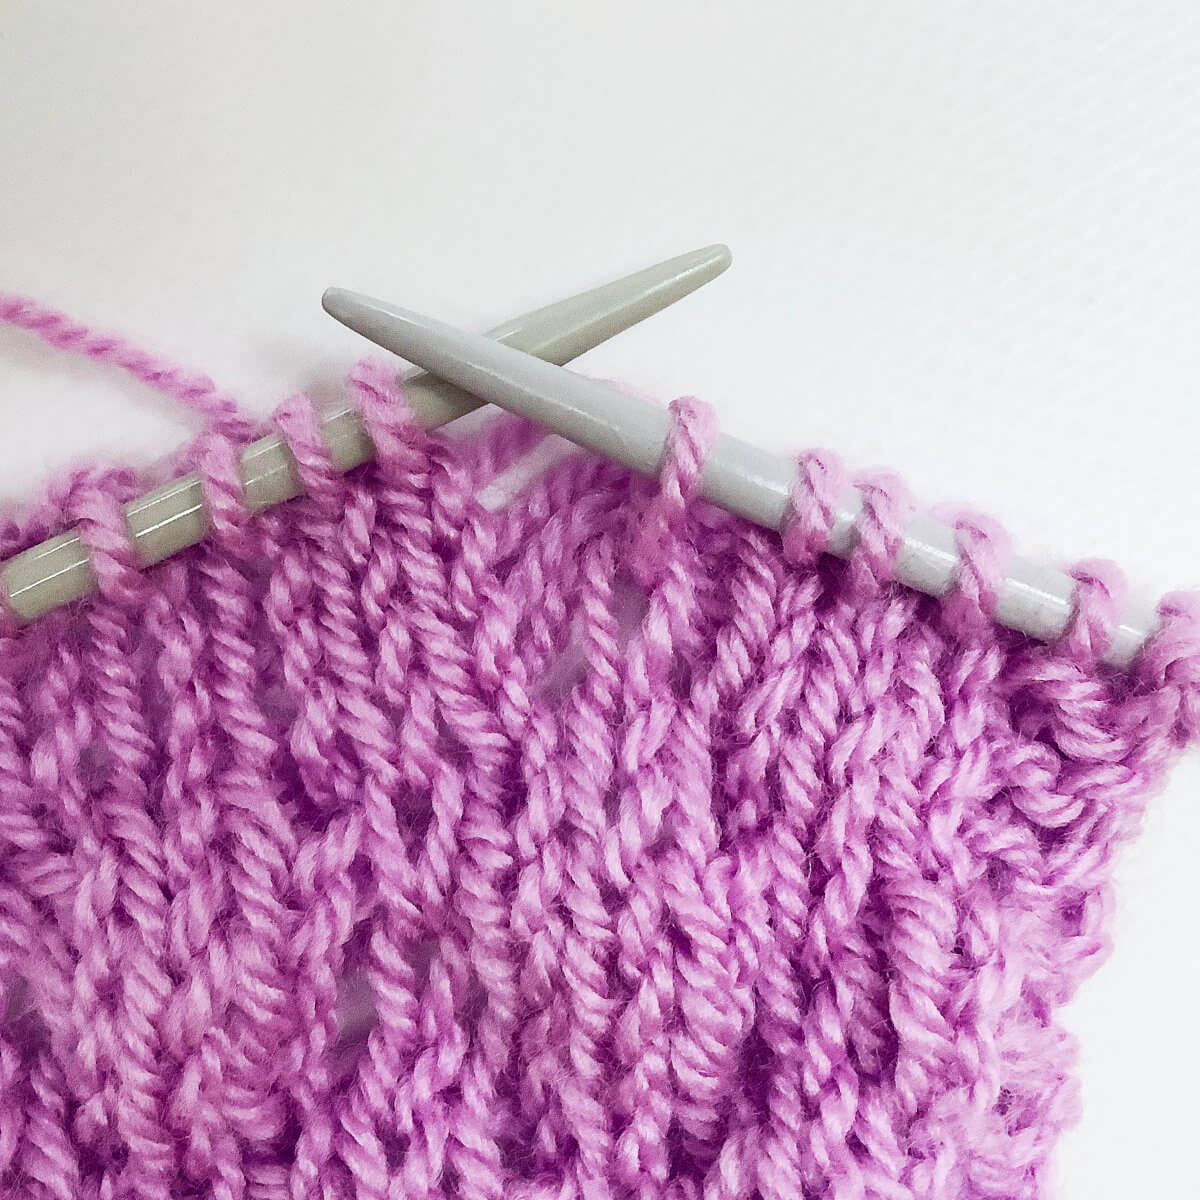
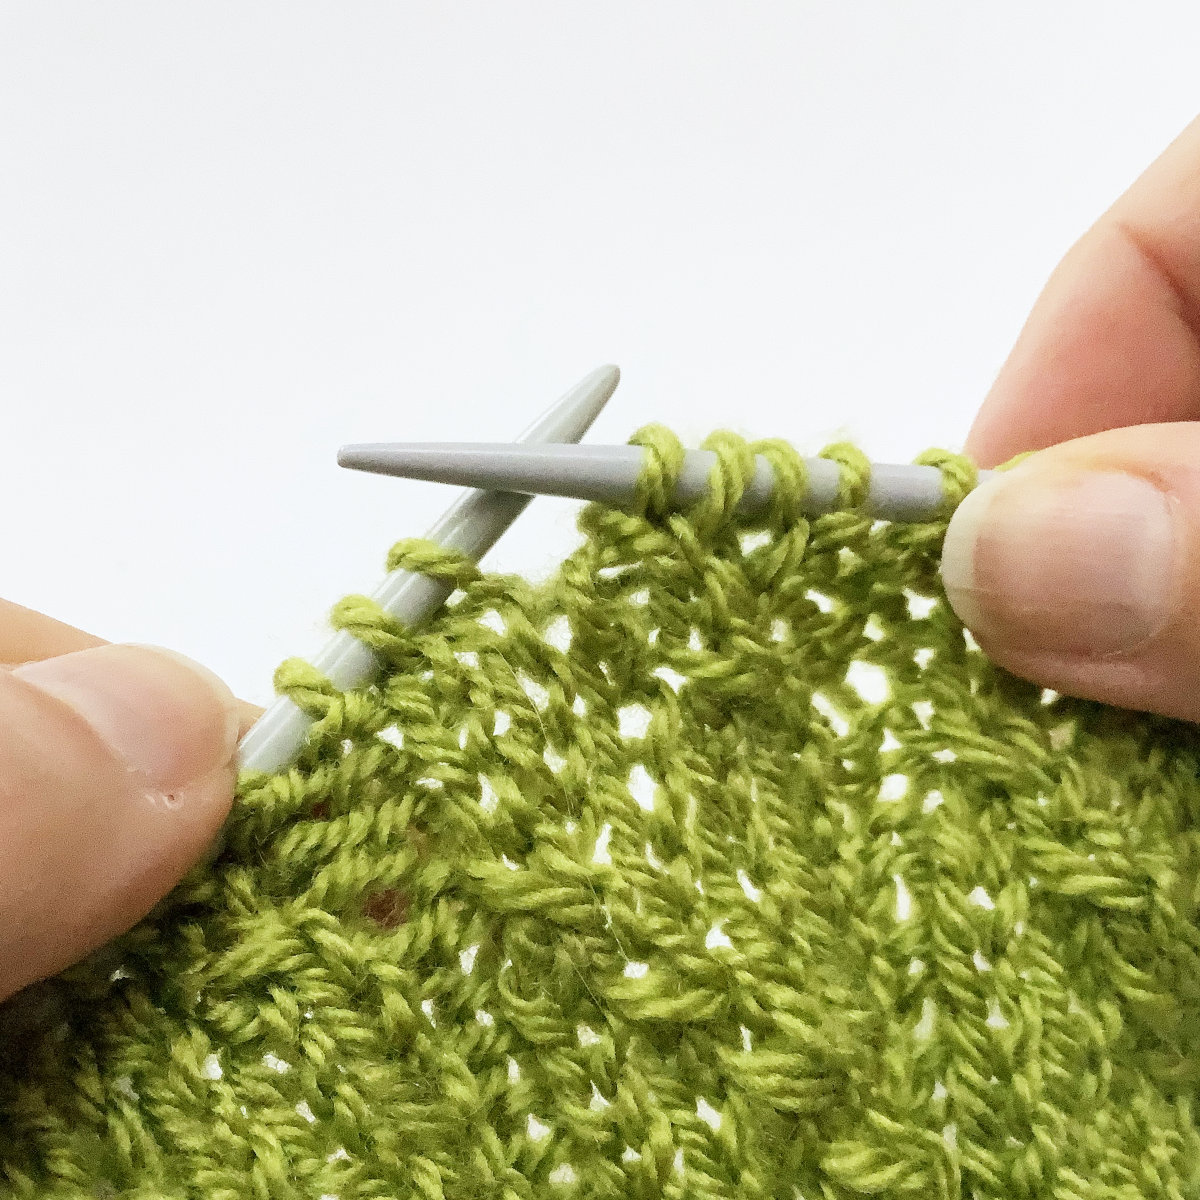
The Berry stitch consists of patterning that creates little alternating clusters. They are pretty reminiscent of berries, hence the name. However, you can also encounter similar patterning as raspberry stitch, trinity stitch, cluster stitch, or bramble stitch. As with all types of bobbles, this stitch pattern creates the little clusters by a combination of increasing and decreasing. In this particular example, I used needles that were somewhat large for the weight of the yarn, this made the effect more lacy than would otherwise be the case.

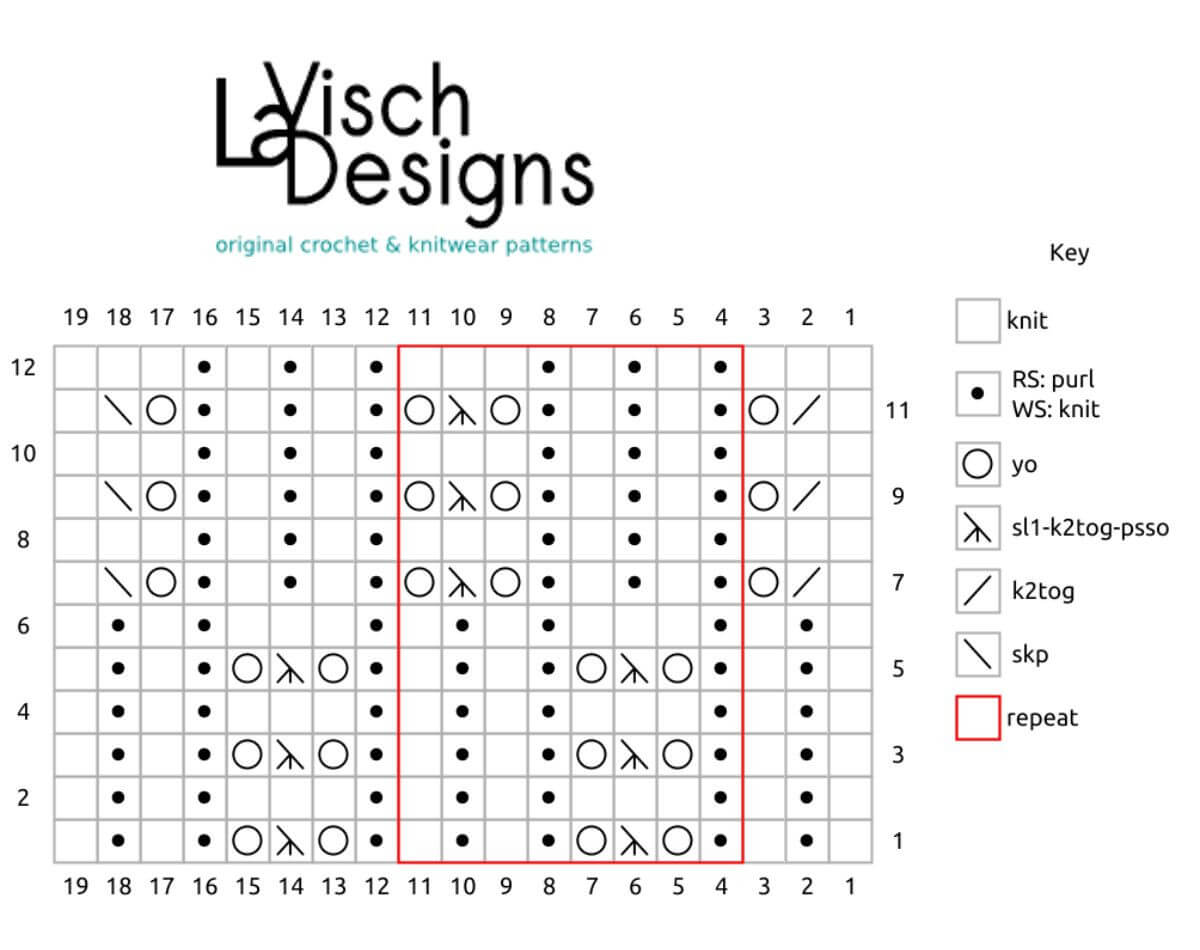
This stitch pattern is worked as a multiple of 4 stitches, and in a four-row repeat. However, if you want it to fill a whole panel symmetrically, it’s a multiple of 4 stitches + the first 3 stitches of the next four-stitch repeat. Please note that I’ve added 2 edge stitches in garter stitch on both sides of the swatch. These are not included in the stitch pattern description.

Materials used

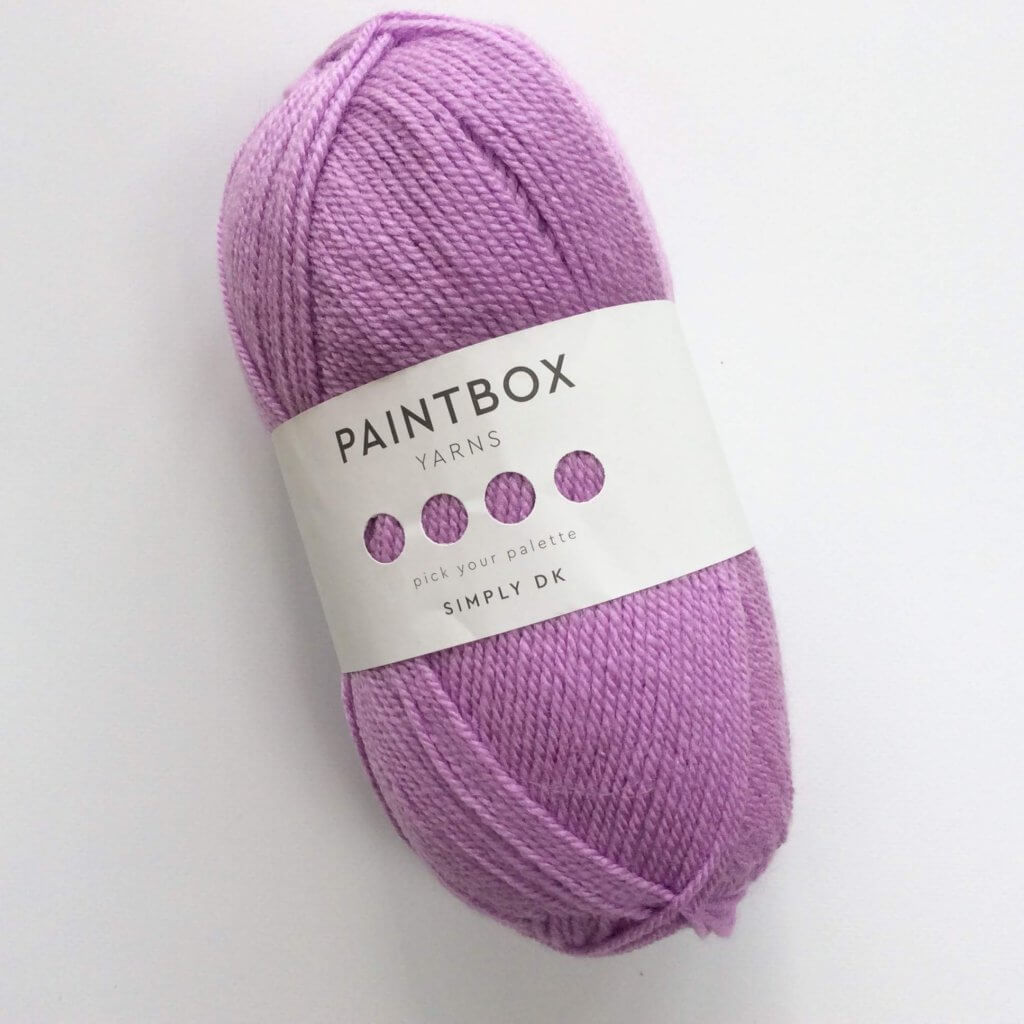
Yarn: Paintbox Yarns Simply DK, a good value, good quality 100% acrylic yarn, in the color Marine Blue.

Needles: This is a pair of straights that I picked up at the second-hand store when I started knitting, brand unknown.

Stitches used

  • k – knit
  • k3tog – knit 3 stitches together
  • p – purl
  • RS / WS – right side / wrong side
  • rep – repeat
  • st(s) – stitch(es)

Berry stitch

Row 1 (RS): *K3tog, (p1, k1, p1) into the same st; rep from * to end.
Row 2 (WS): Knit.
Row 3: *(P1, k1, p1) into the same st, k3tog; rep from * to end.
Row 4: Knit.

Repeat rows 1-4 for pattern until desired length.

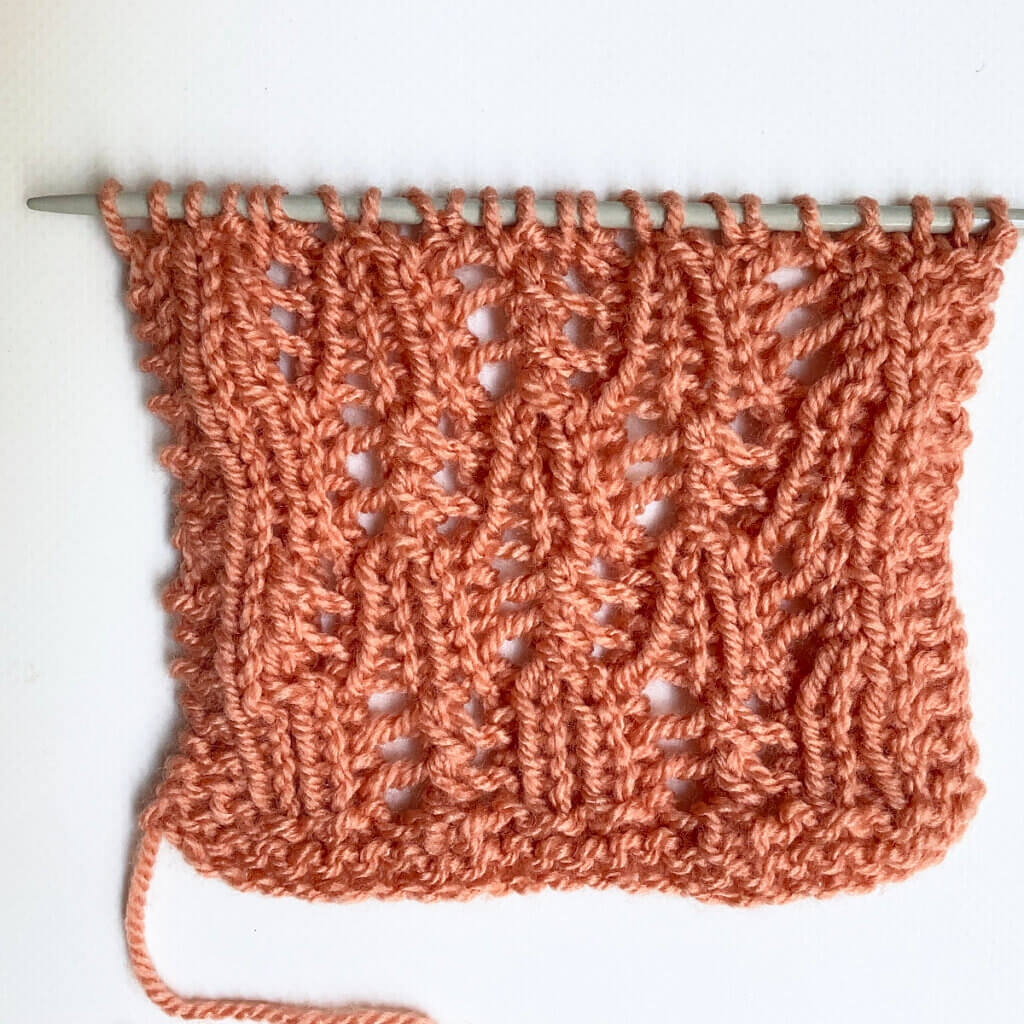
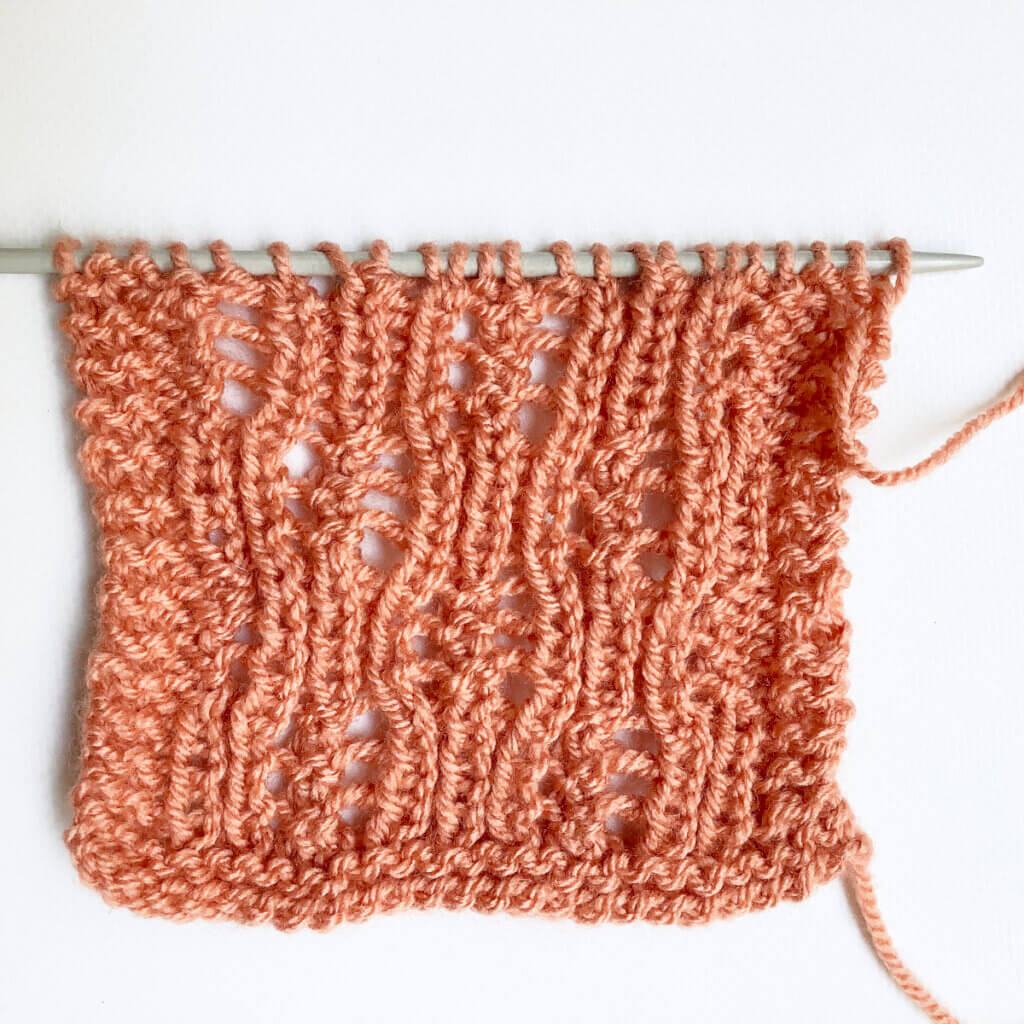
In the below pictures, you see the patterning first from the right, and then also from the wrong side of the fabric:

Berry stitch from the RS
The stitch as seen from the RS.
Berry stitch from the WS
The stitch as seen from the WS.
Patreon logo

Thanks to my Patreon supporters for bringing you this freebie! Creating quality patterns and tutorials is a lot of work and resource-intensive. However, I find it important to give you free content like this tutorial. Thanks to the generous support of my Patreon supporters, I can make it happen. Thank you, patrons! Click here to join, or click here to read more about La Visch Designs on Patreon.

stitch pattern – berry stitch Read More »
tutorial – in between tinking and frogging

In between tinking and frogging - a tutorial by La Visch Designs

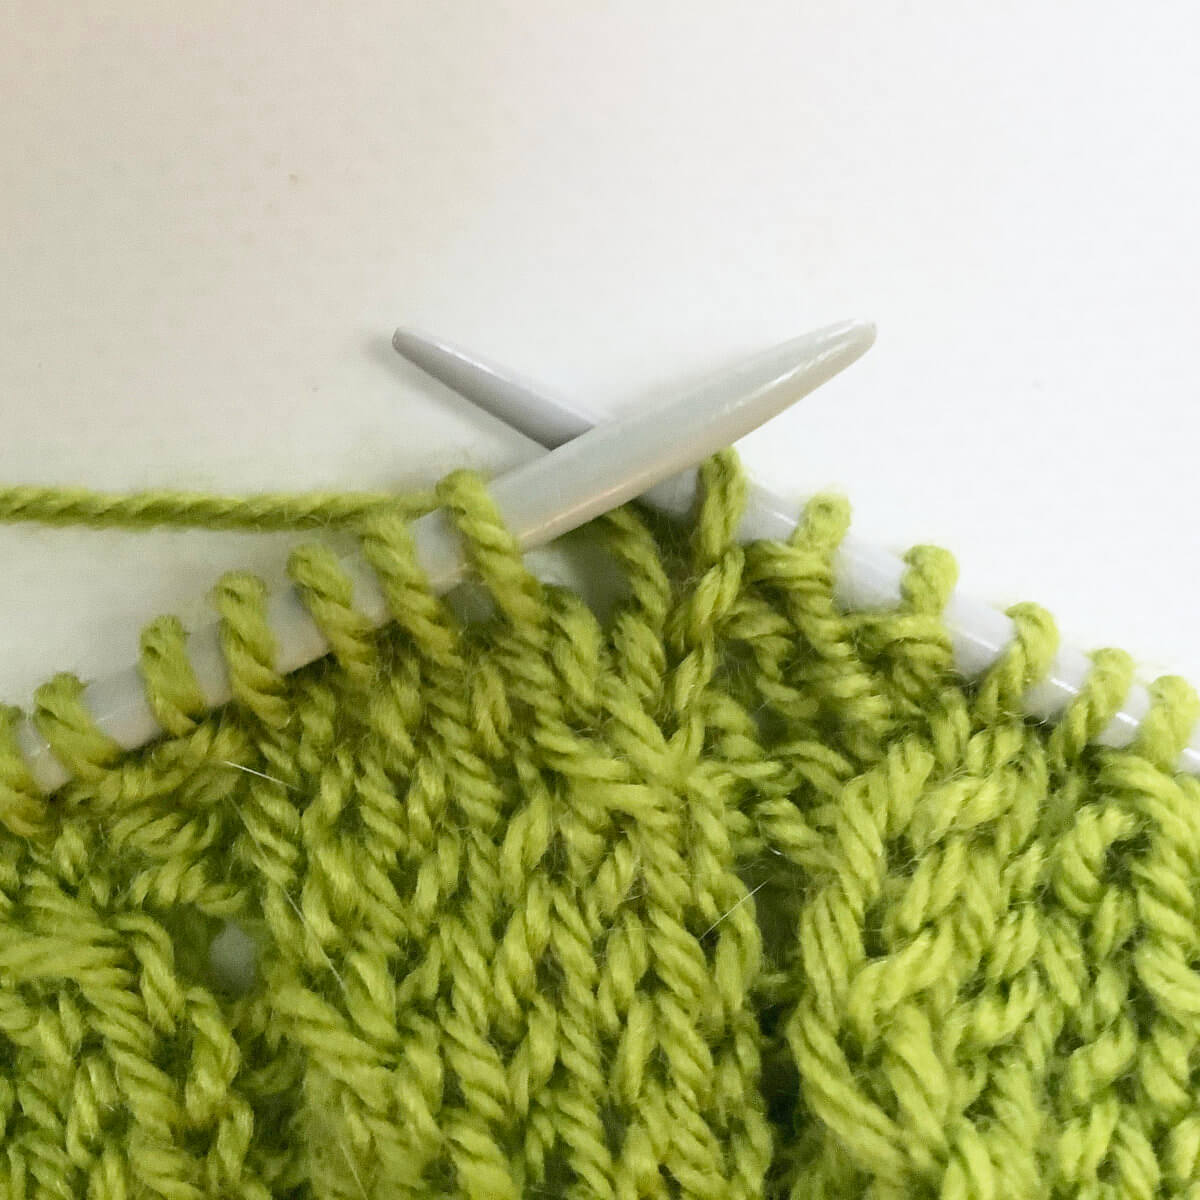
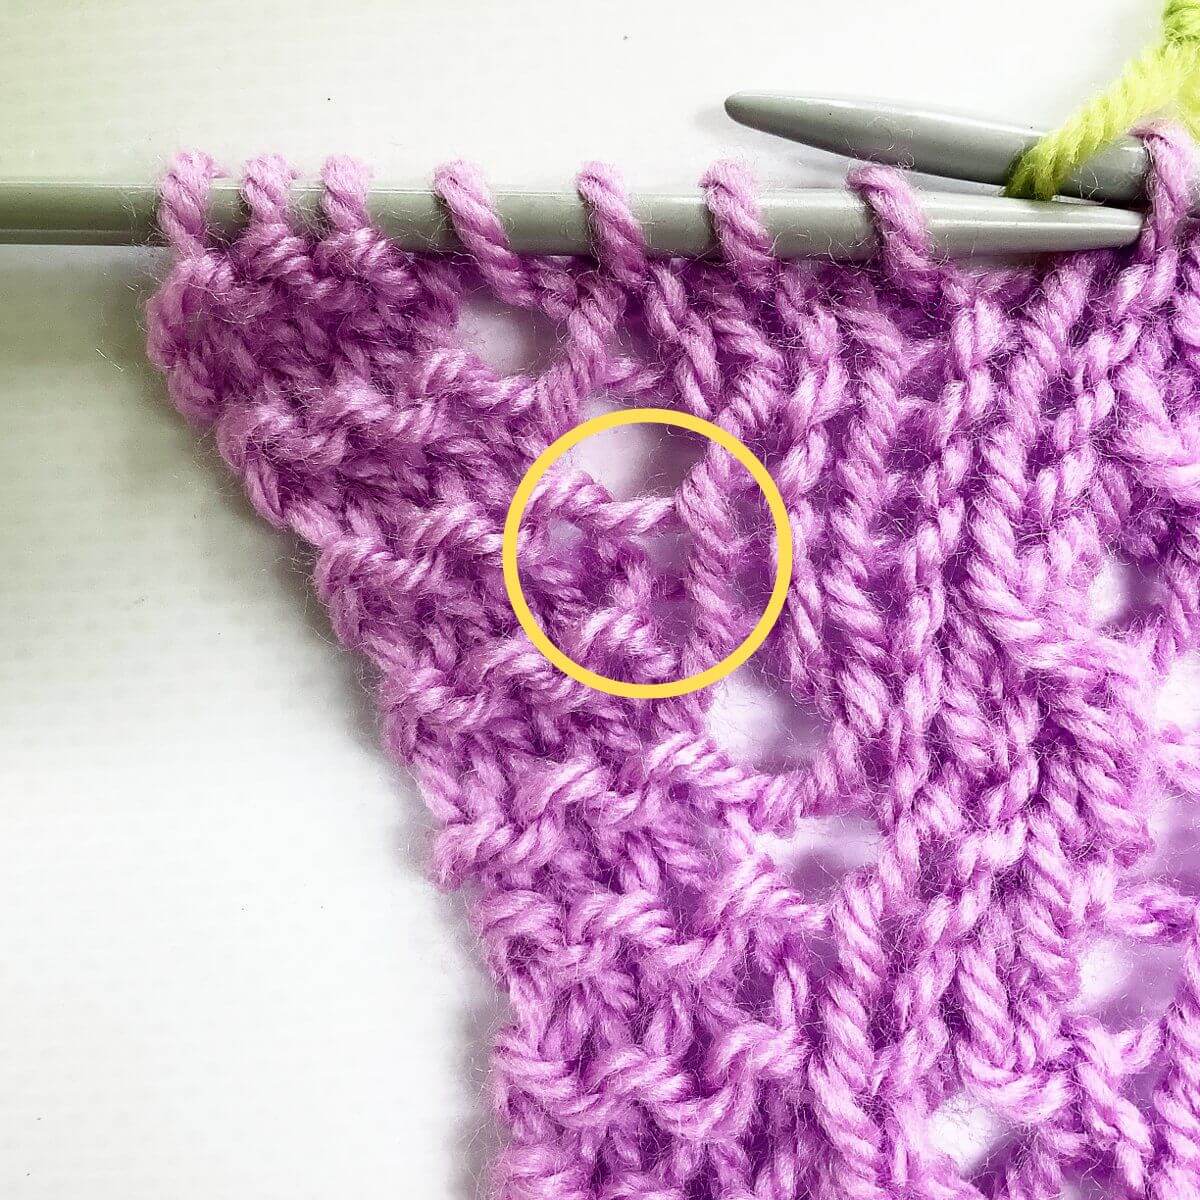
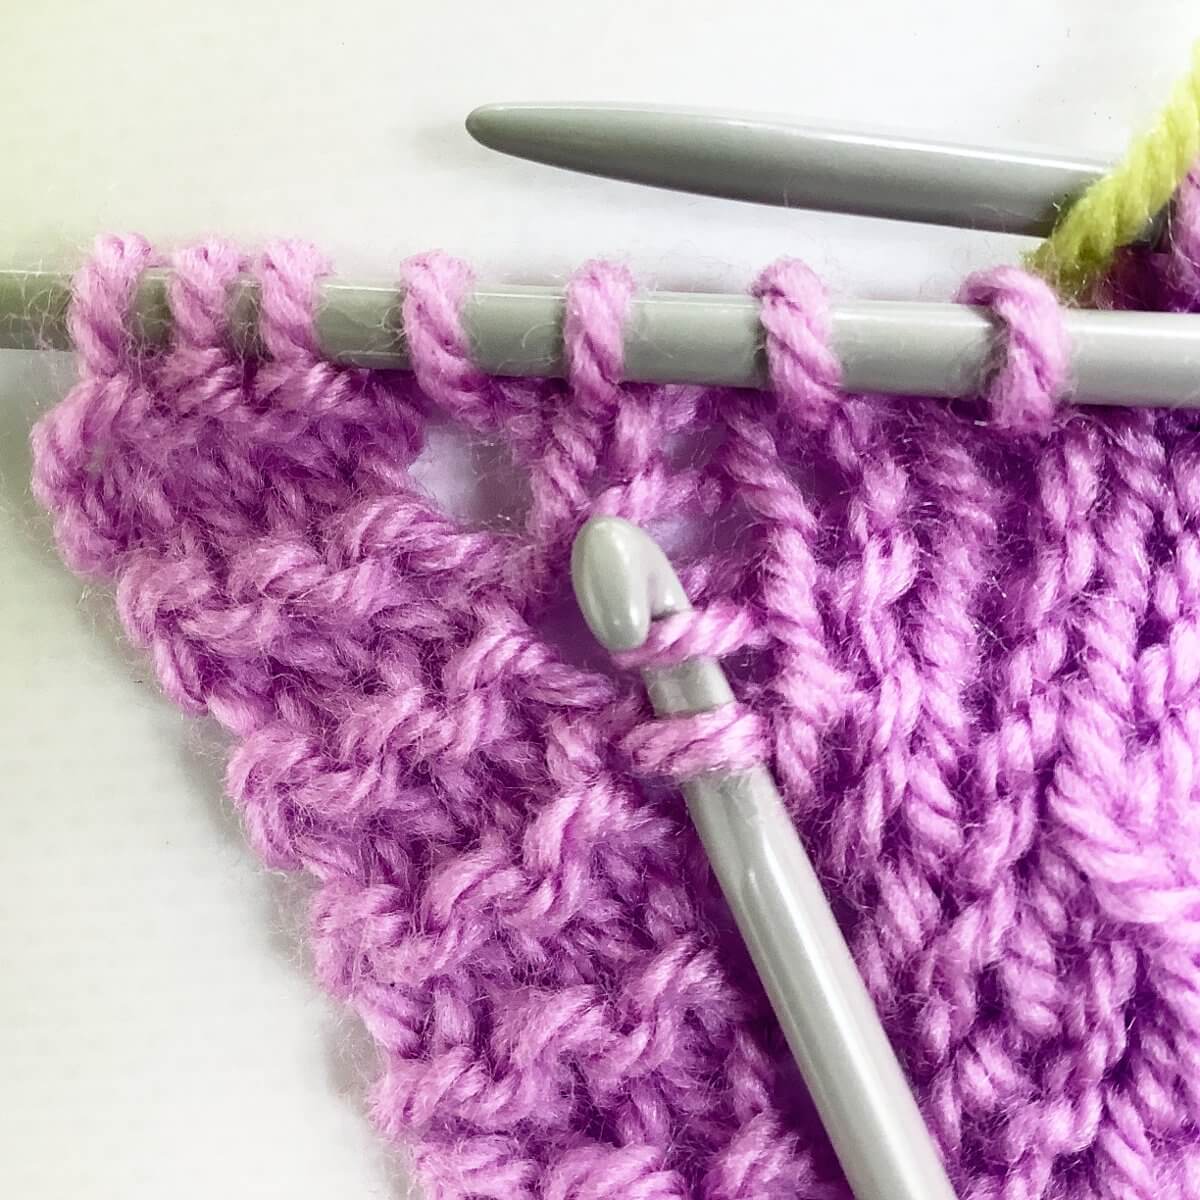
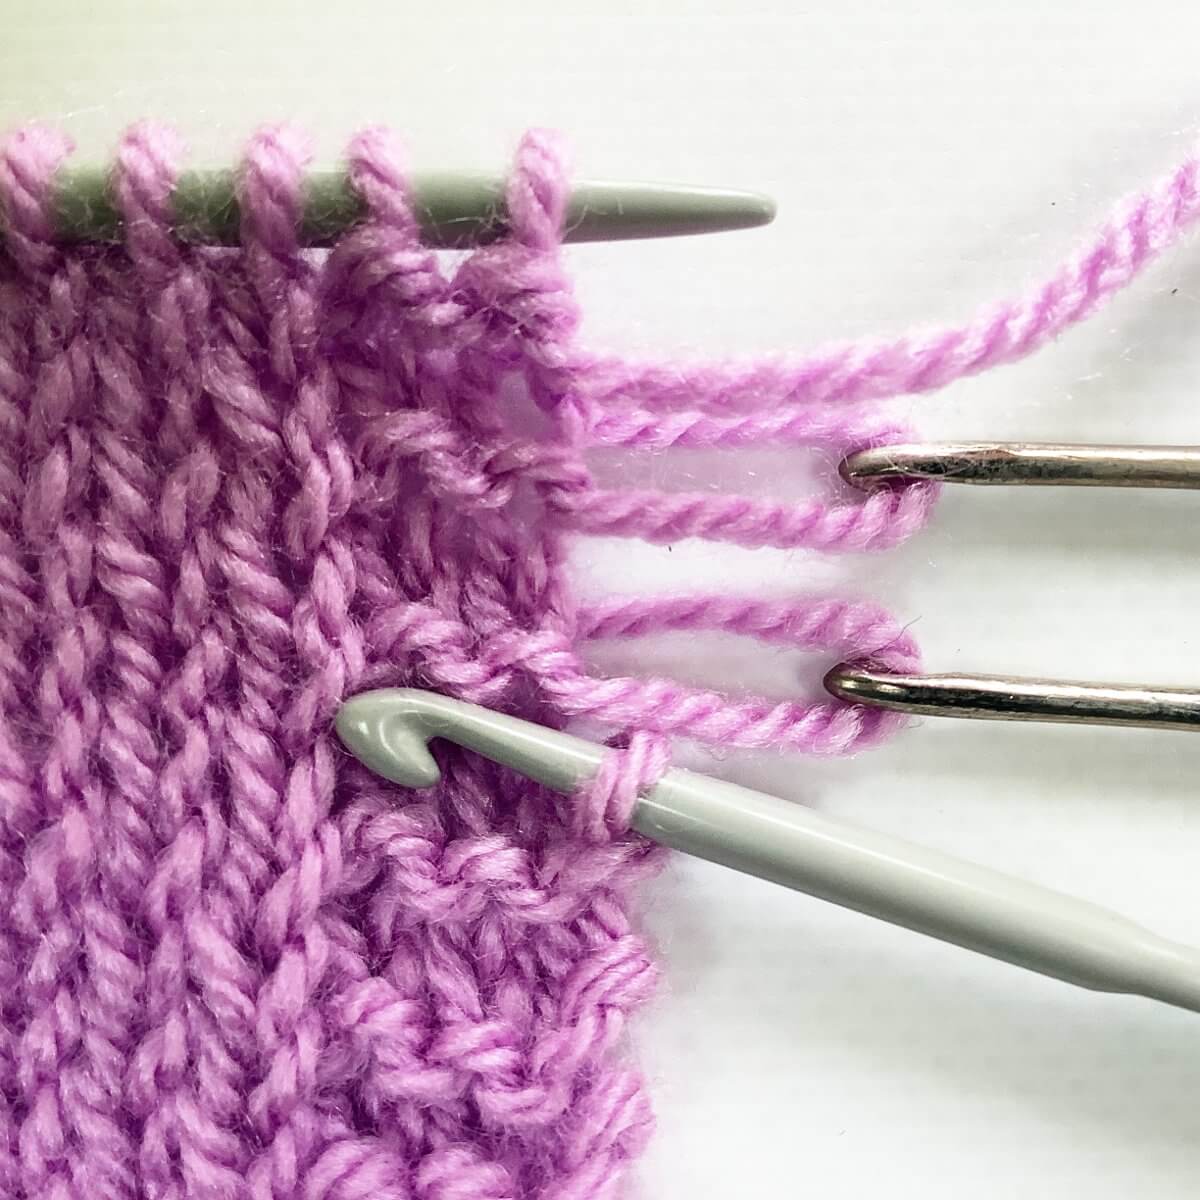
In a shawl project, I encountered a hiccup that I had to fix. When finishing the diamond patterning after a full repeat, and then working a garter stitch ridge to mirror the beginning of this section, this is what I noticed:

Do you see those plain rows of stockinette just above the needle and garter stitch ridge on the right? This did not mirror the start of the section at all… So, I undid some rows to start the garter stitch ridge earlier. With a rather “sticky” yarn, I would just remove the knitting needle, rip it out and place the stitches back on the needle at the right point. However, the yarn used in this project contains 50% tencel, making it rather slippery. I certainly didn’t want to drop any stitches in this patterning. But tinking (knitting spelled and done backwards) back 3 rows wasn’t a good option as well, with over 350 sts on the needle.

The solution: a technique that is something in between tinking and frogging! Below, I’ll show you how I went about it step by step.

Materials

Yarn: Hearthside Fibers Crystal in the colors “Vermont”, and “Lake”.

Needles: A pair of Addi circular needles in the size 4 mm (US 6)

In between tinking and frogging step by step

  1. I positioned my project in such a way, that I had a good view of the row I wanted to put back on the needle from the right side of the fabric.

    In this case, that meant holding the work as shown.Step 1

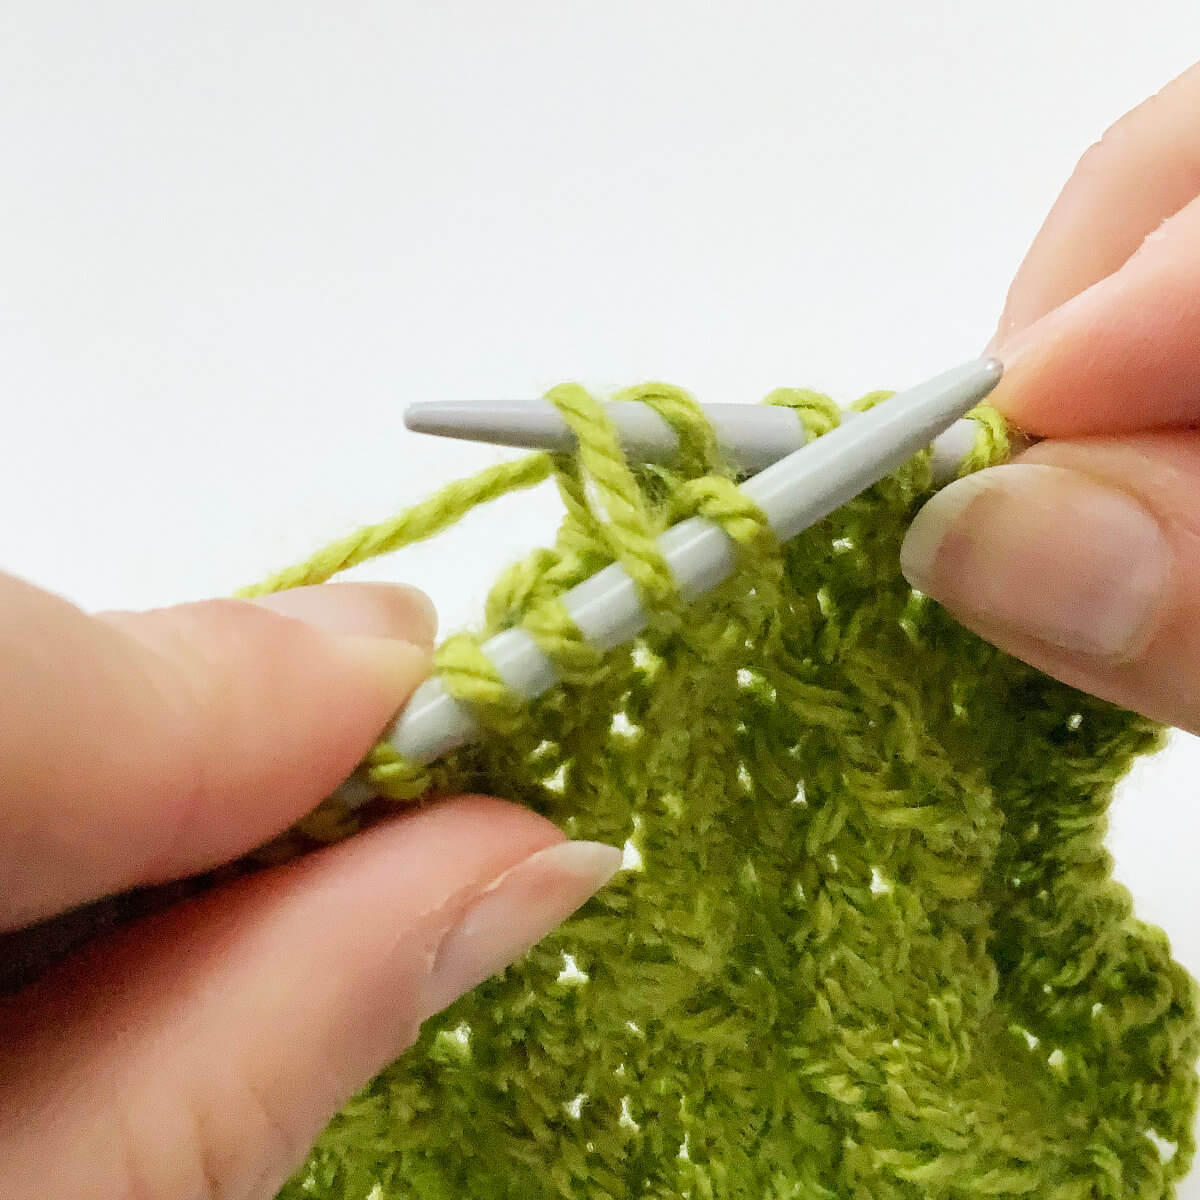
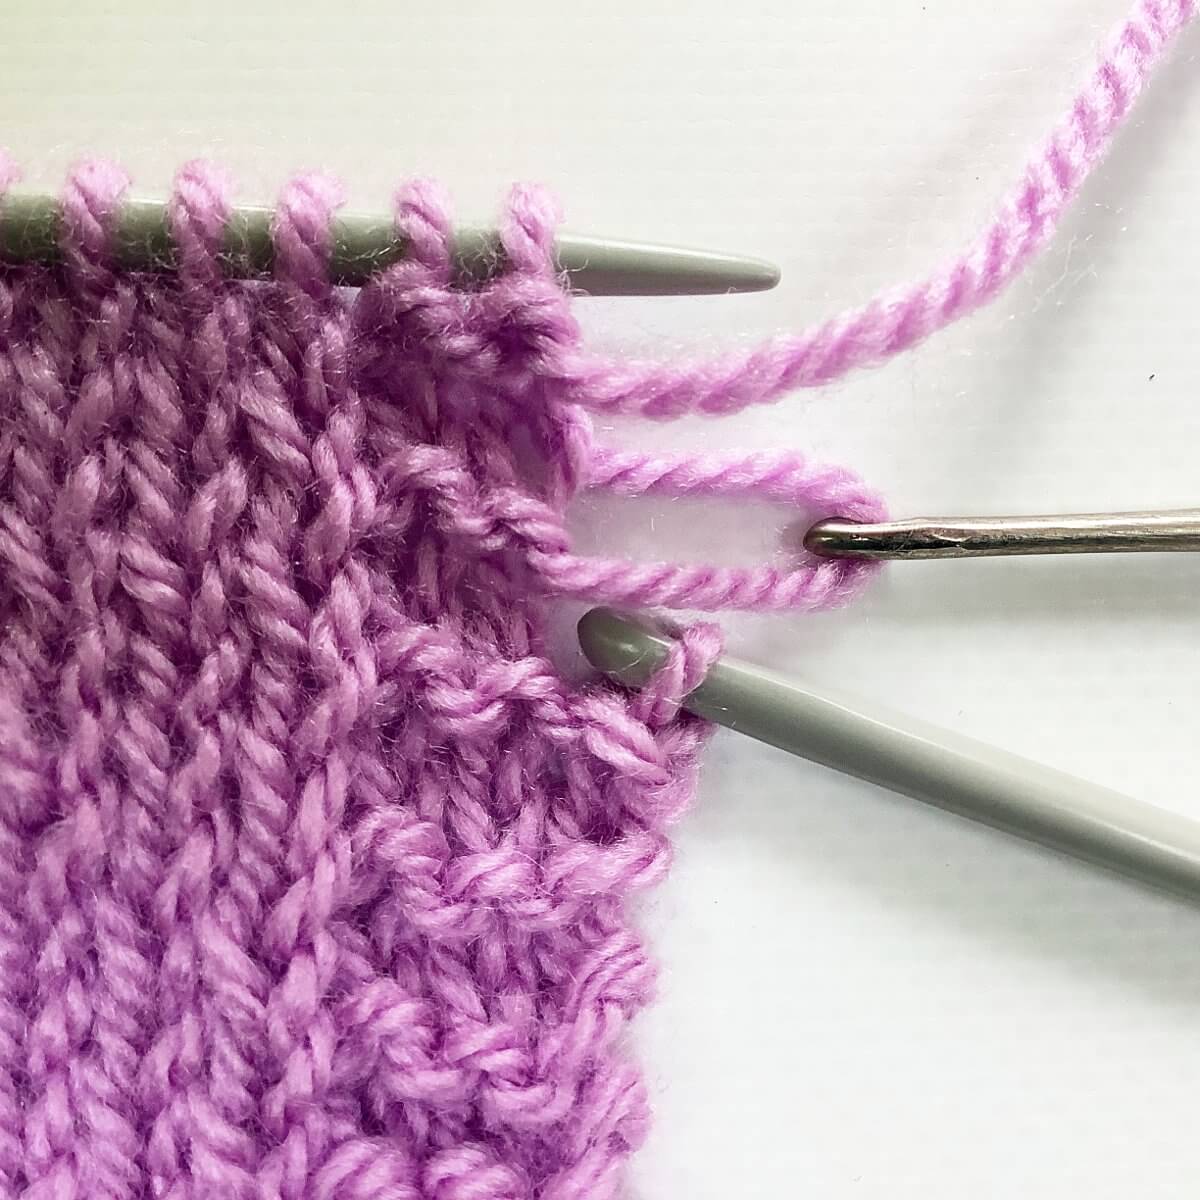
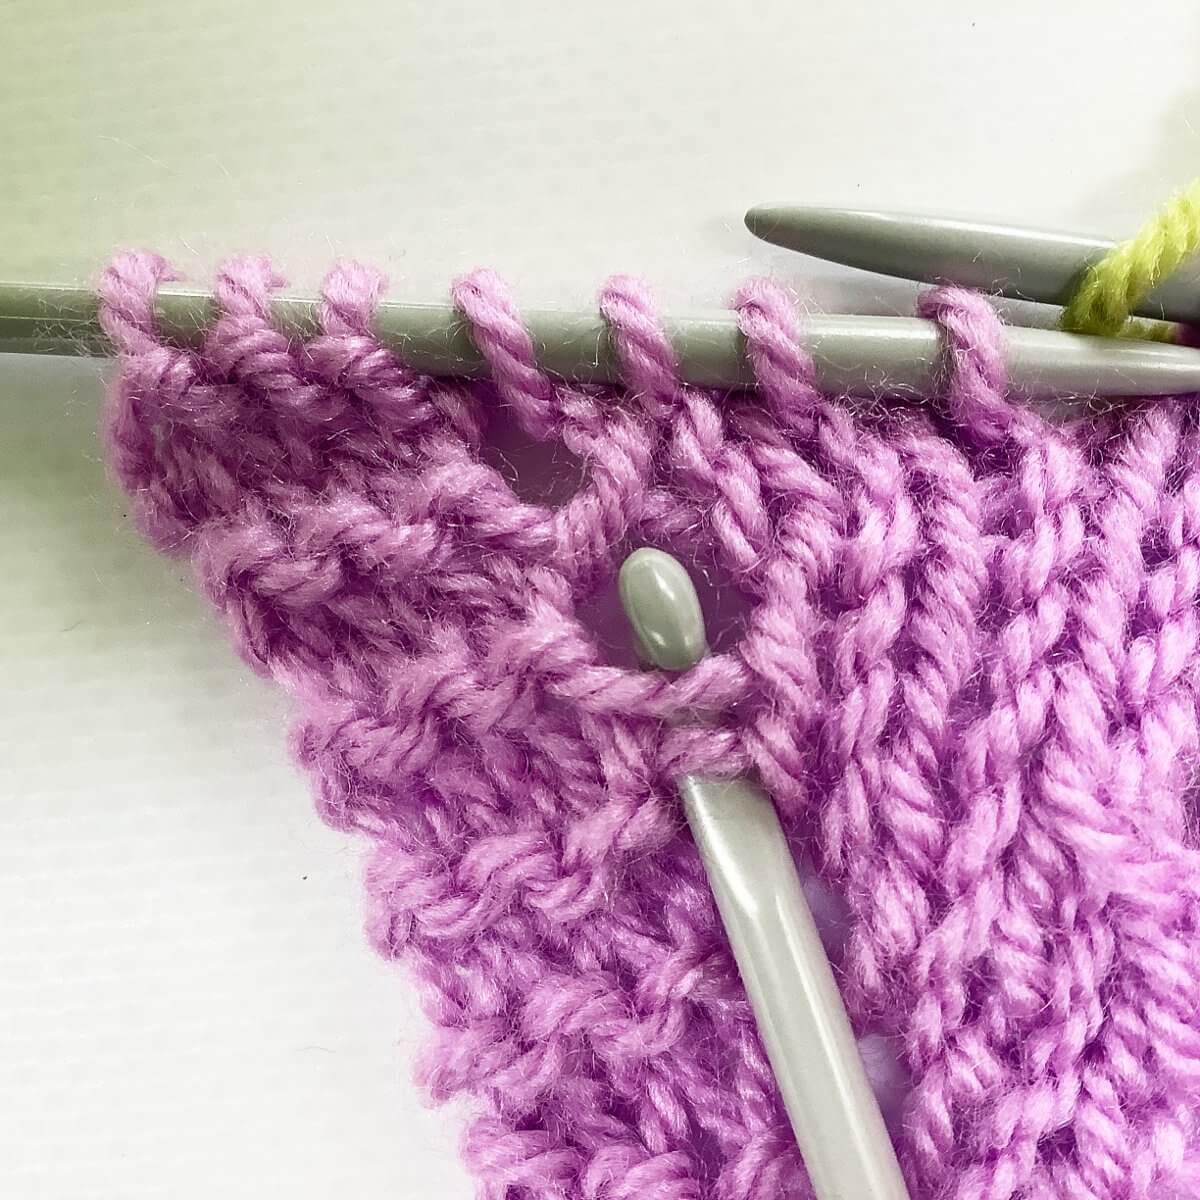
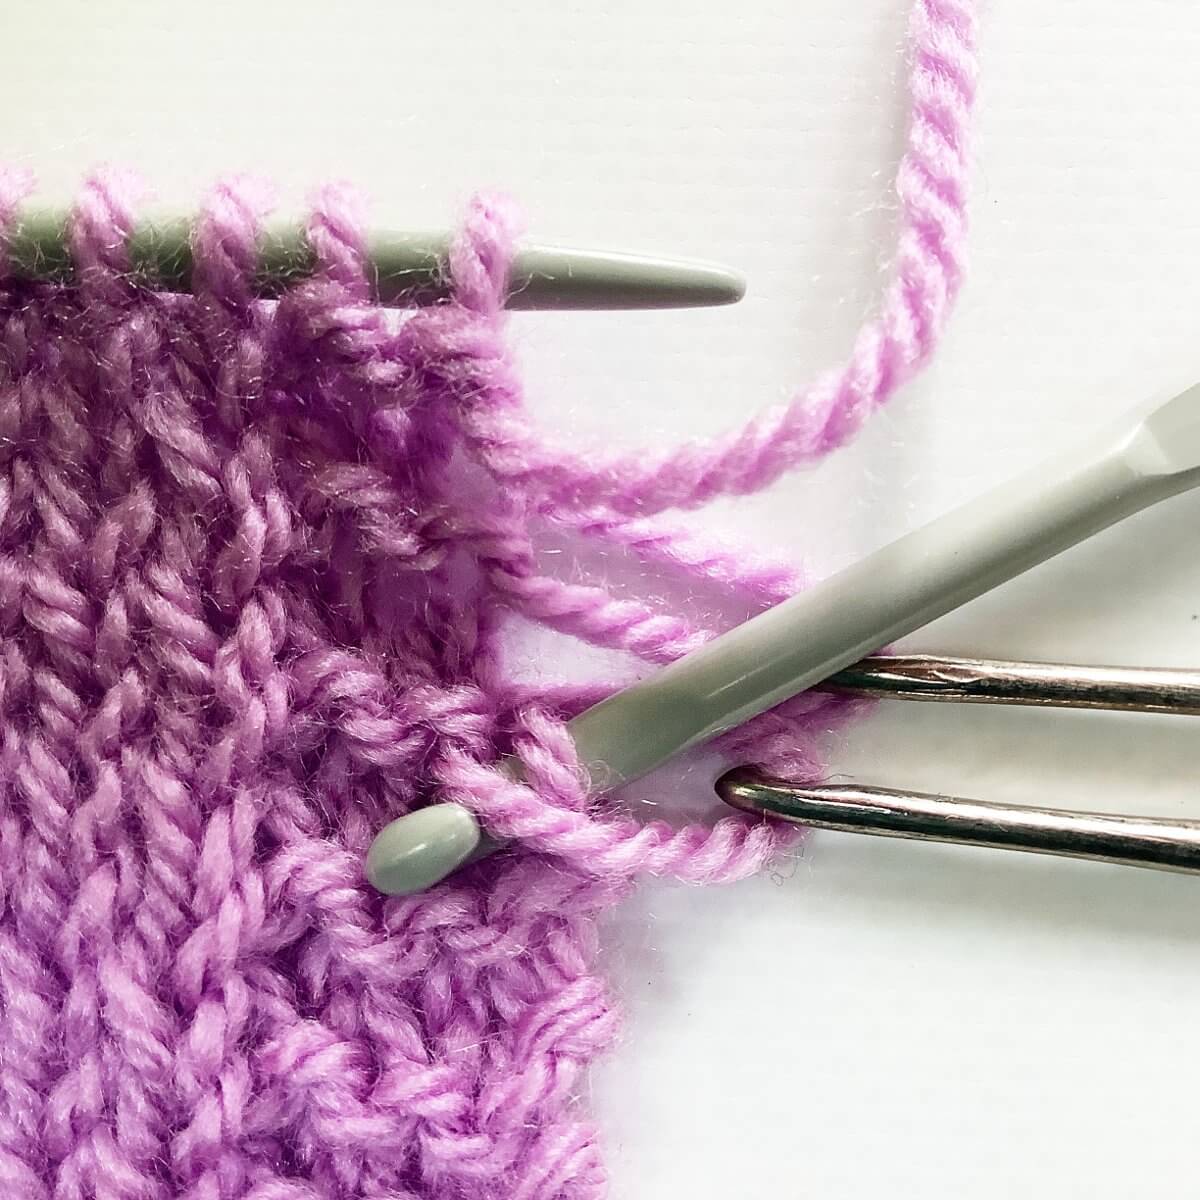
  2. Do you see the little “V” just above the knitting needle, positioned in between the loops on that needle? Insert the needle into the left leg of the first “V”

    You could, of course, insert the needle under the other leg, but that would mean that the loops are placed on the needle with a twisted orientation. Not a big issue, but it would mean working a first row of the project through the back loops to get them oriented correctly again.
    I do hope I haven’t mixed up my stitch legs here, though…Step 2 of in between tinking and frogging

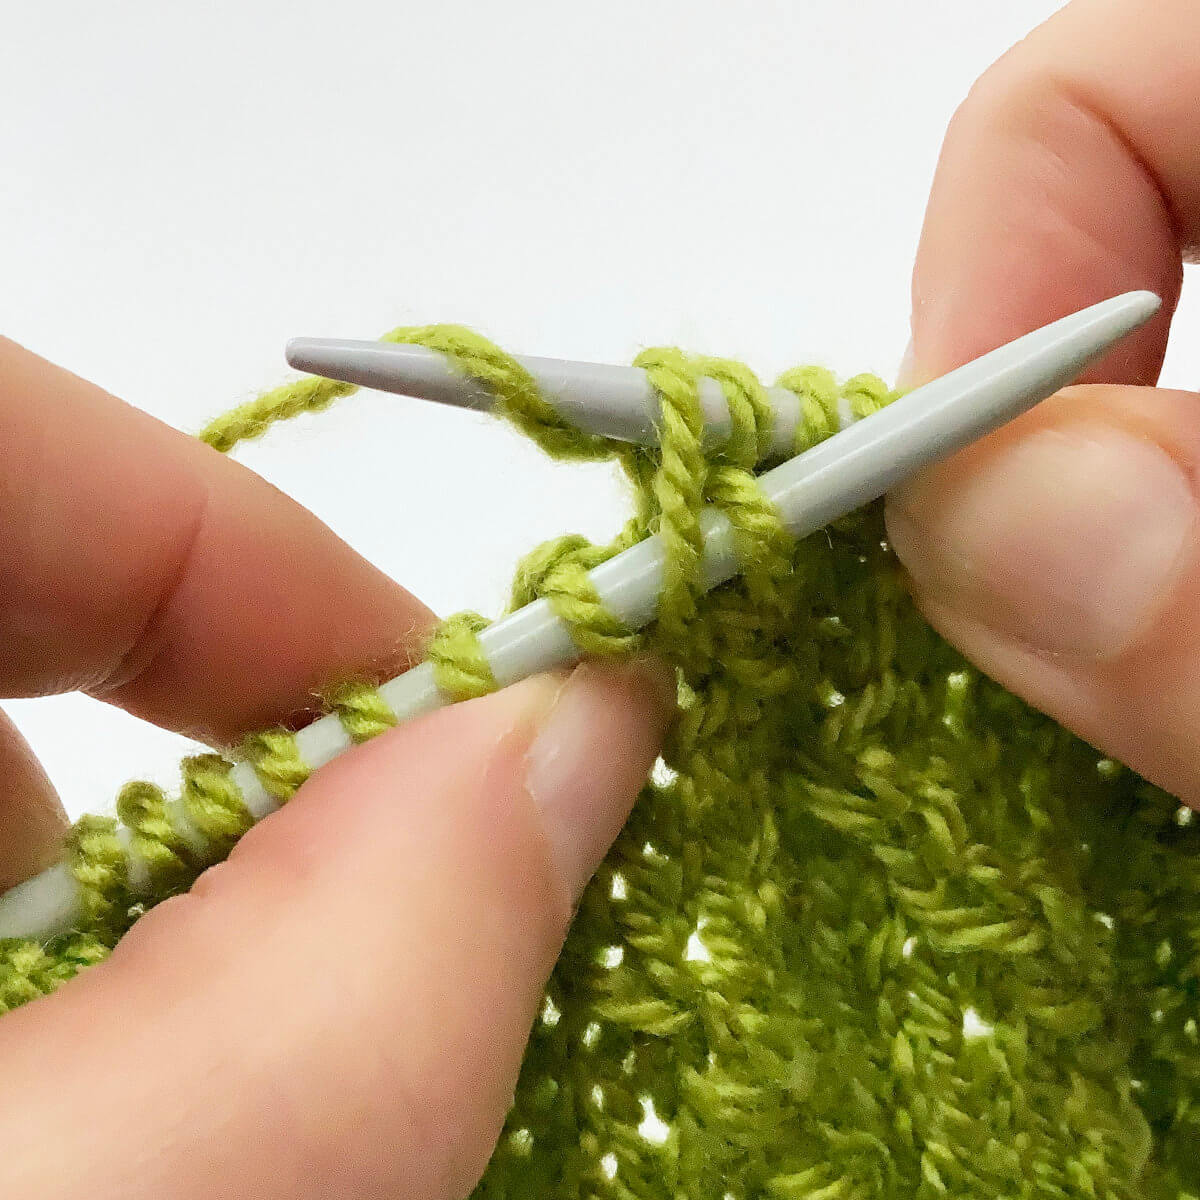
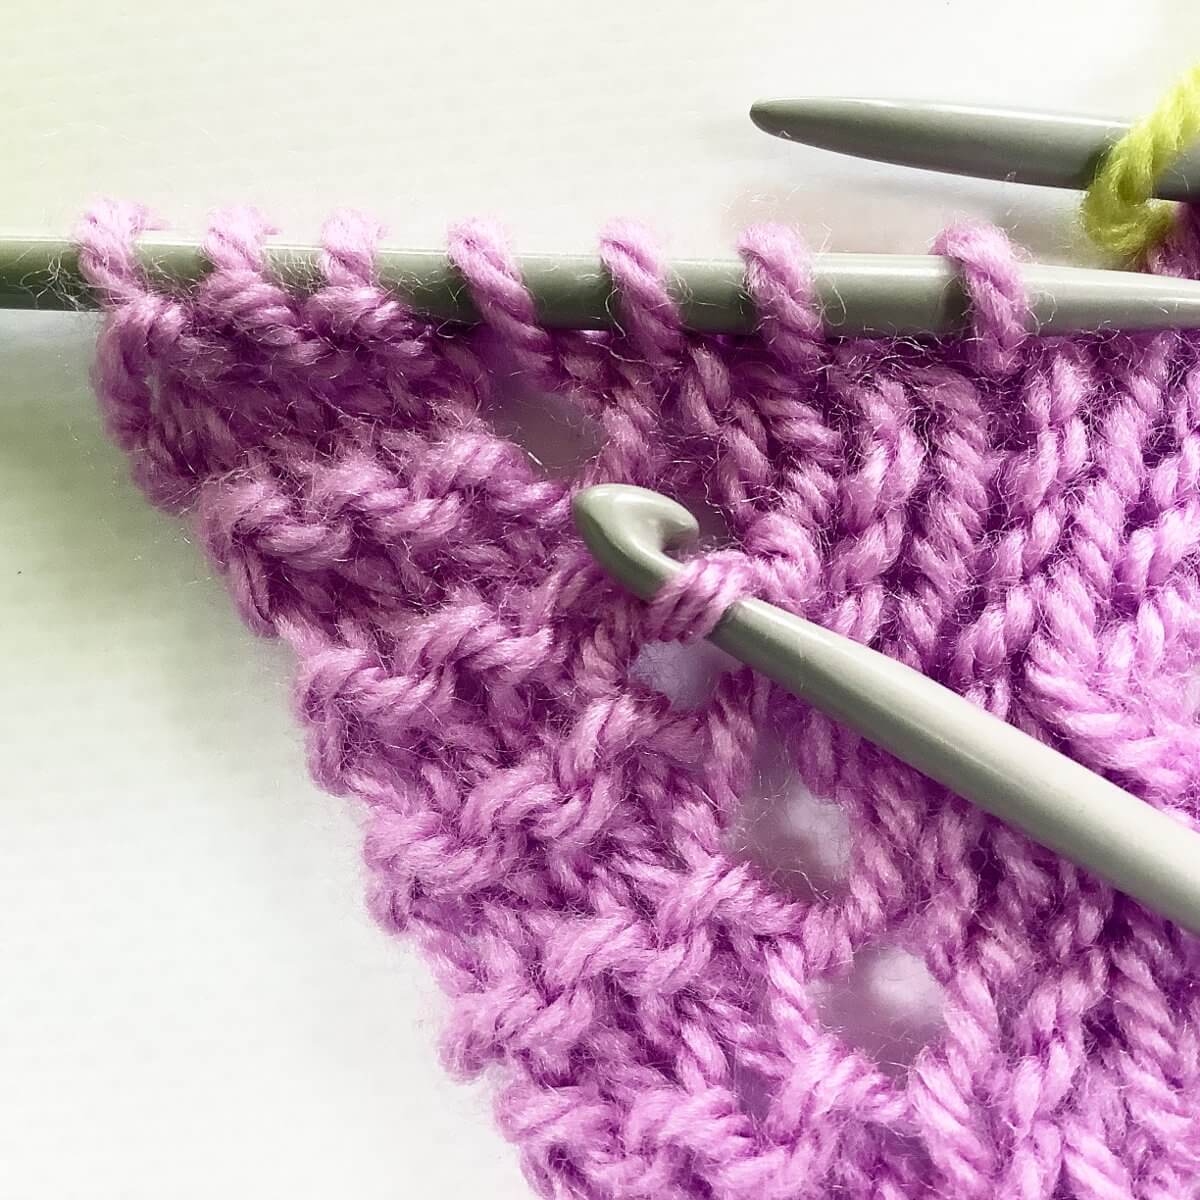
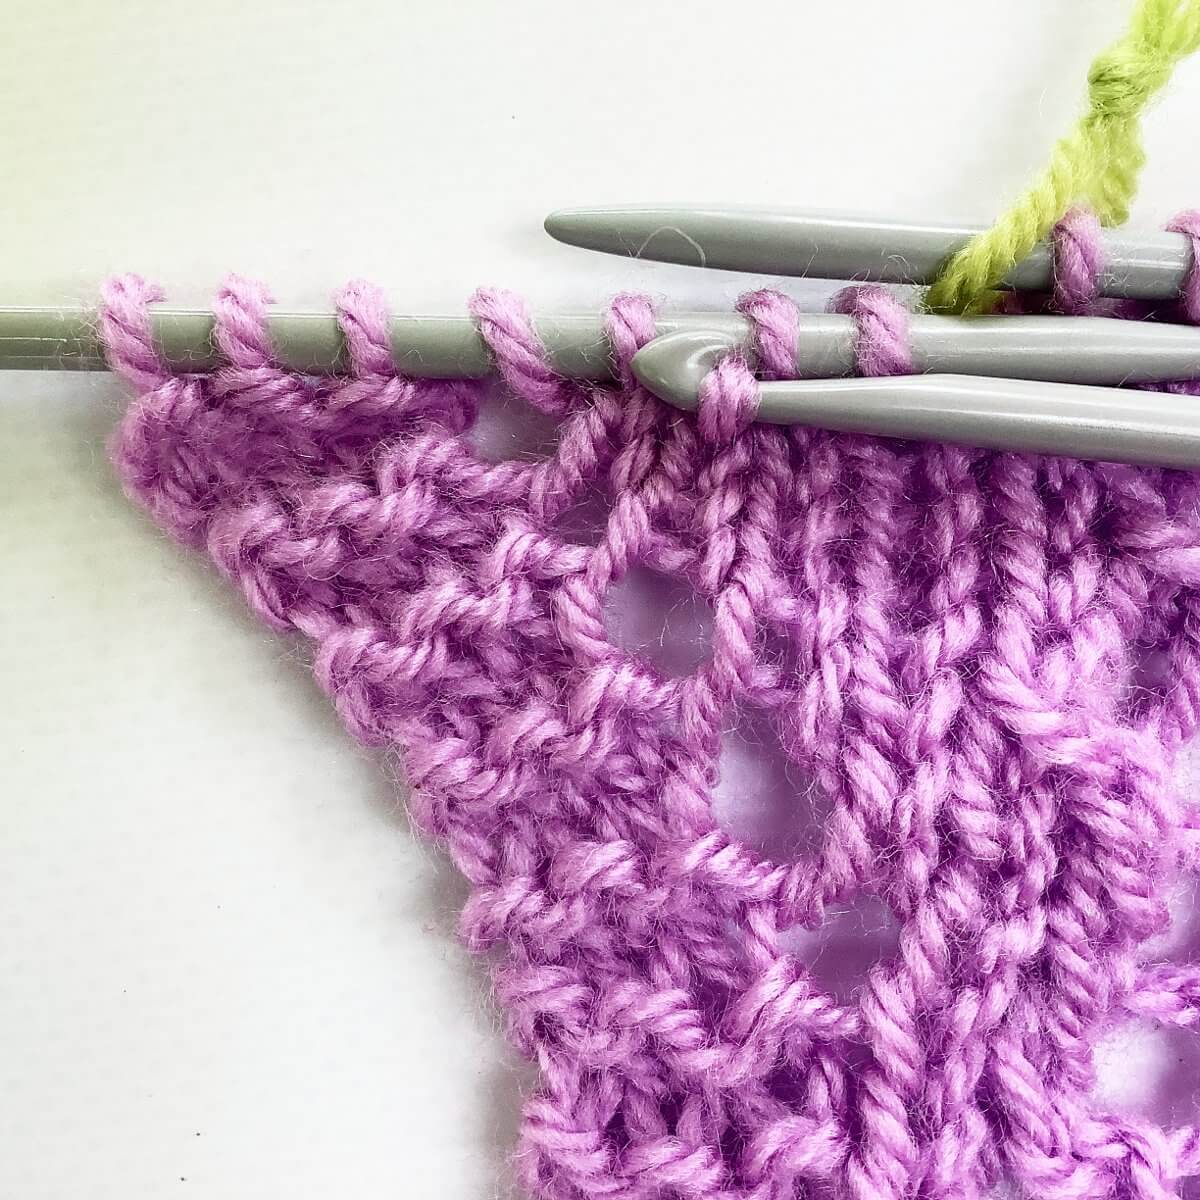
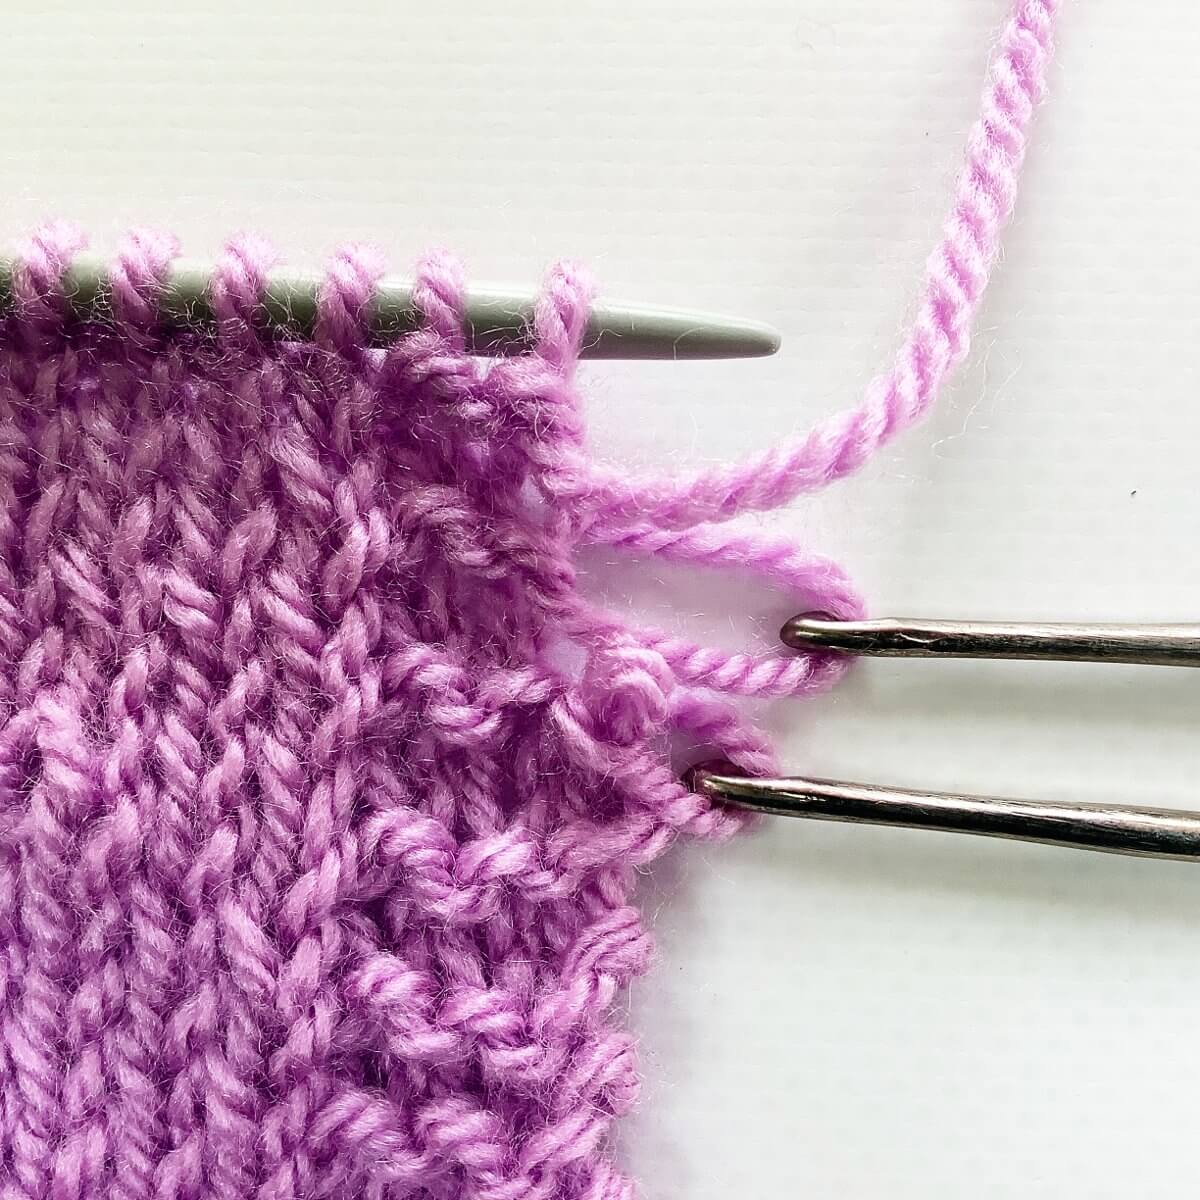
  3. Repeat step 2 until you have a decent number of stitches on your needle.

    When working with circulars, that’s about 15 to 20 stitches for me.Step 3

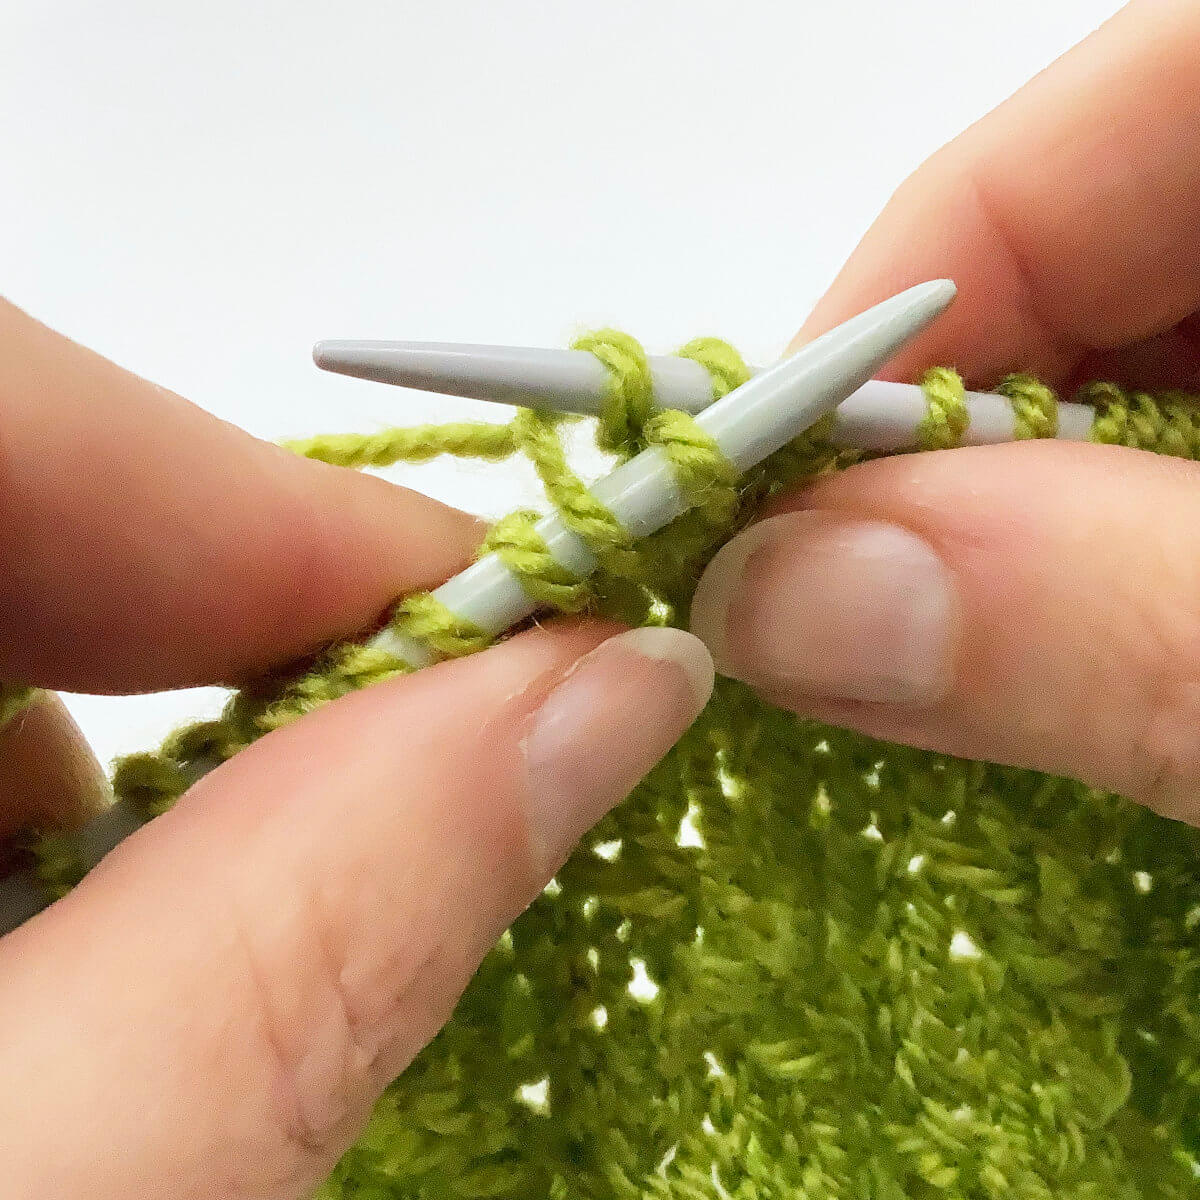
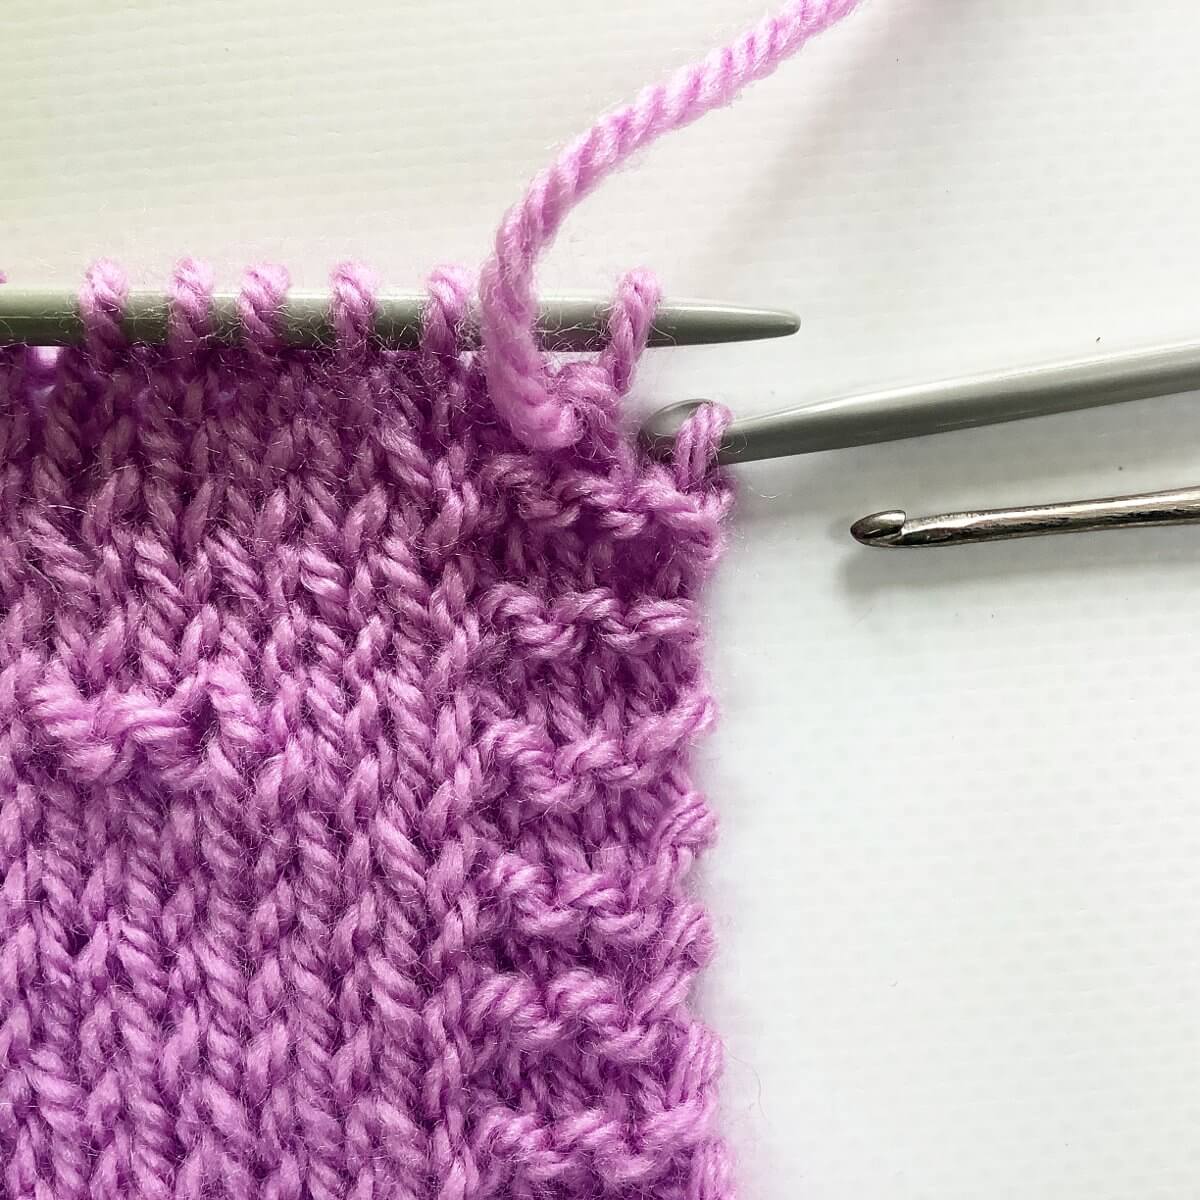
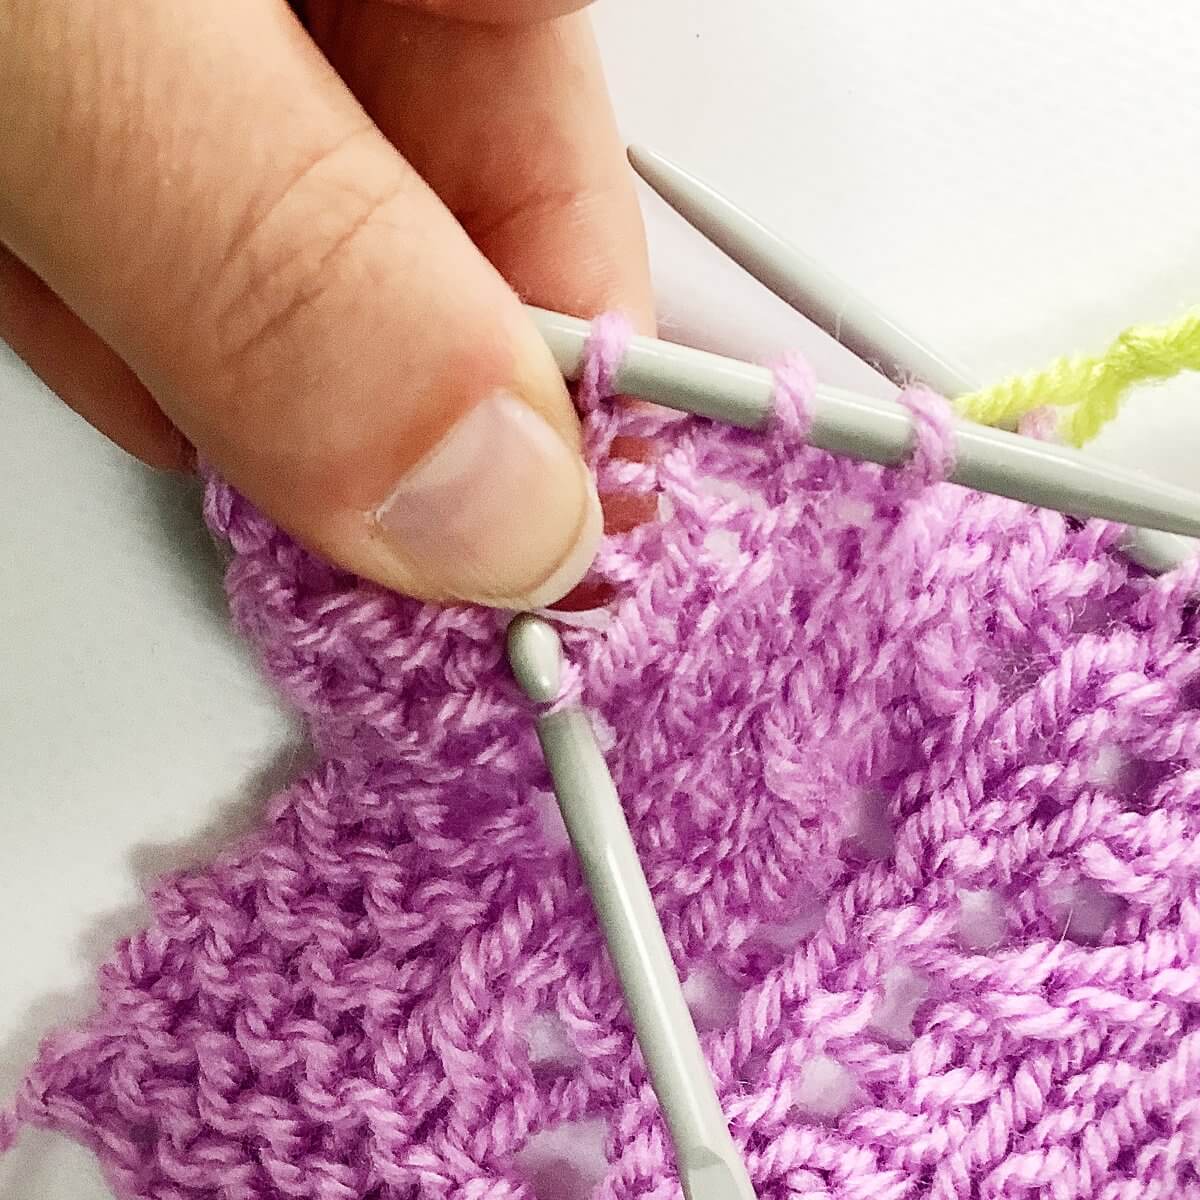
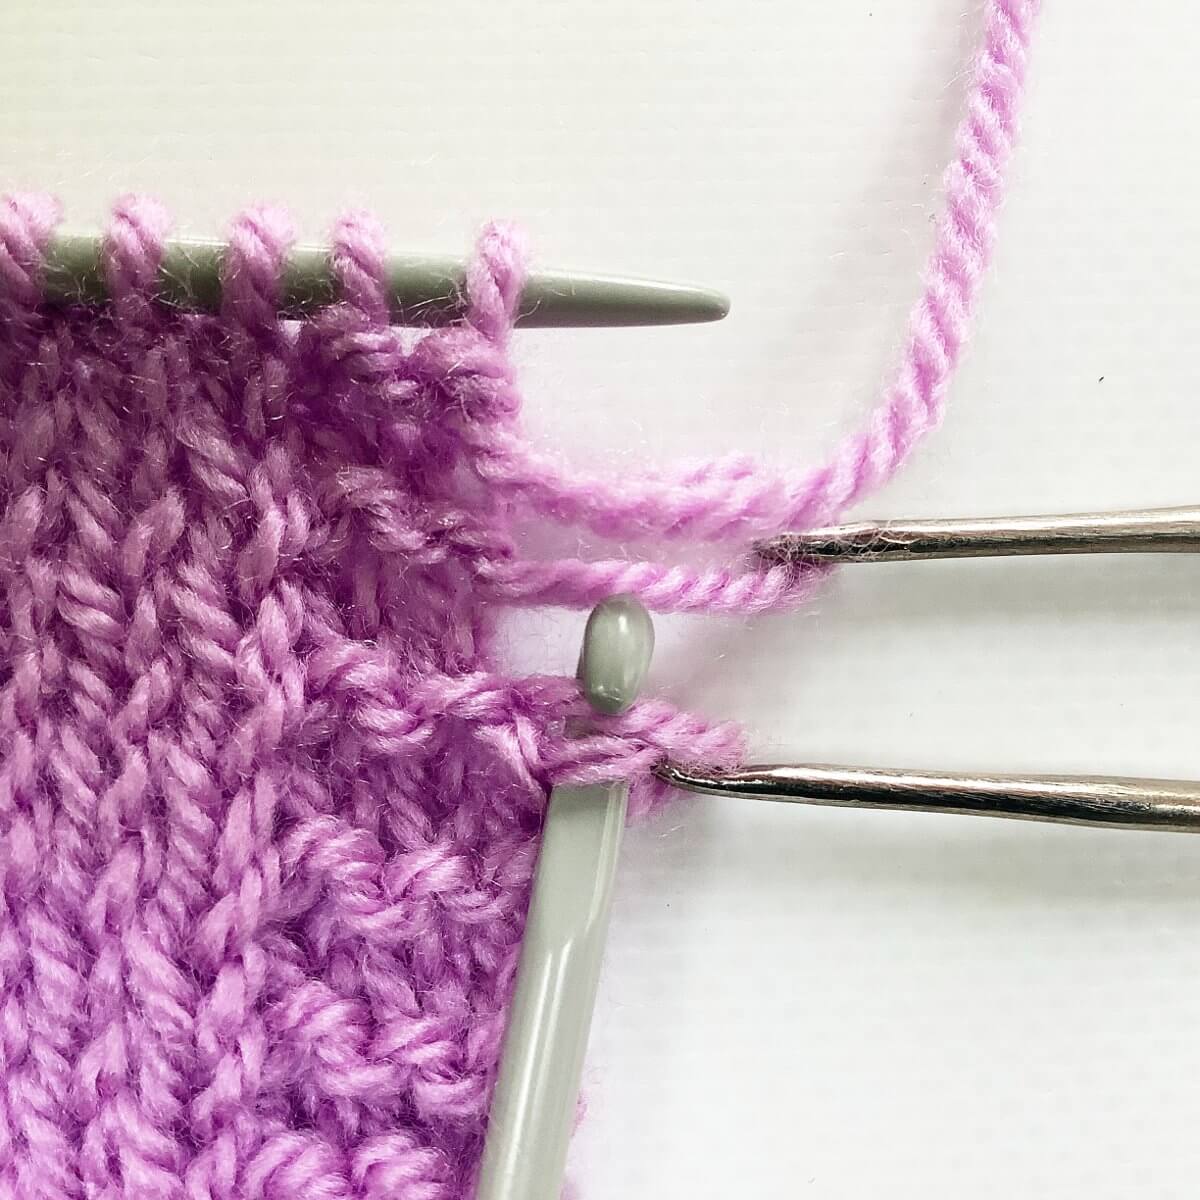
  4. Next, slide the knitting needle that holds all non-tinked back stitches out of the stitches below which you’ve just picked up stitches with the other needle.

    Step 4

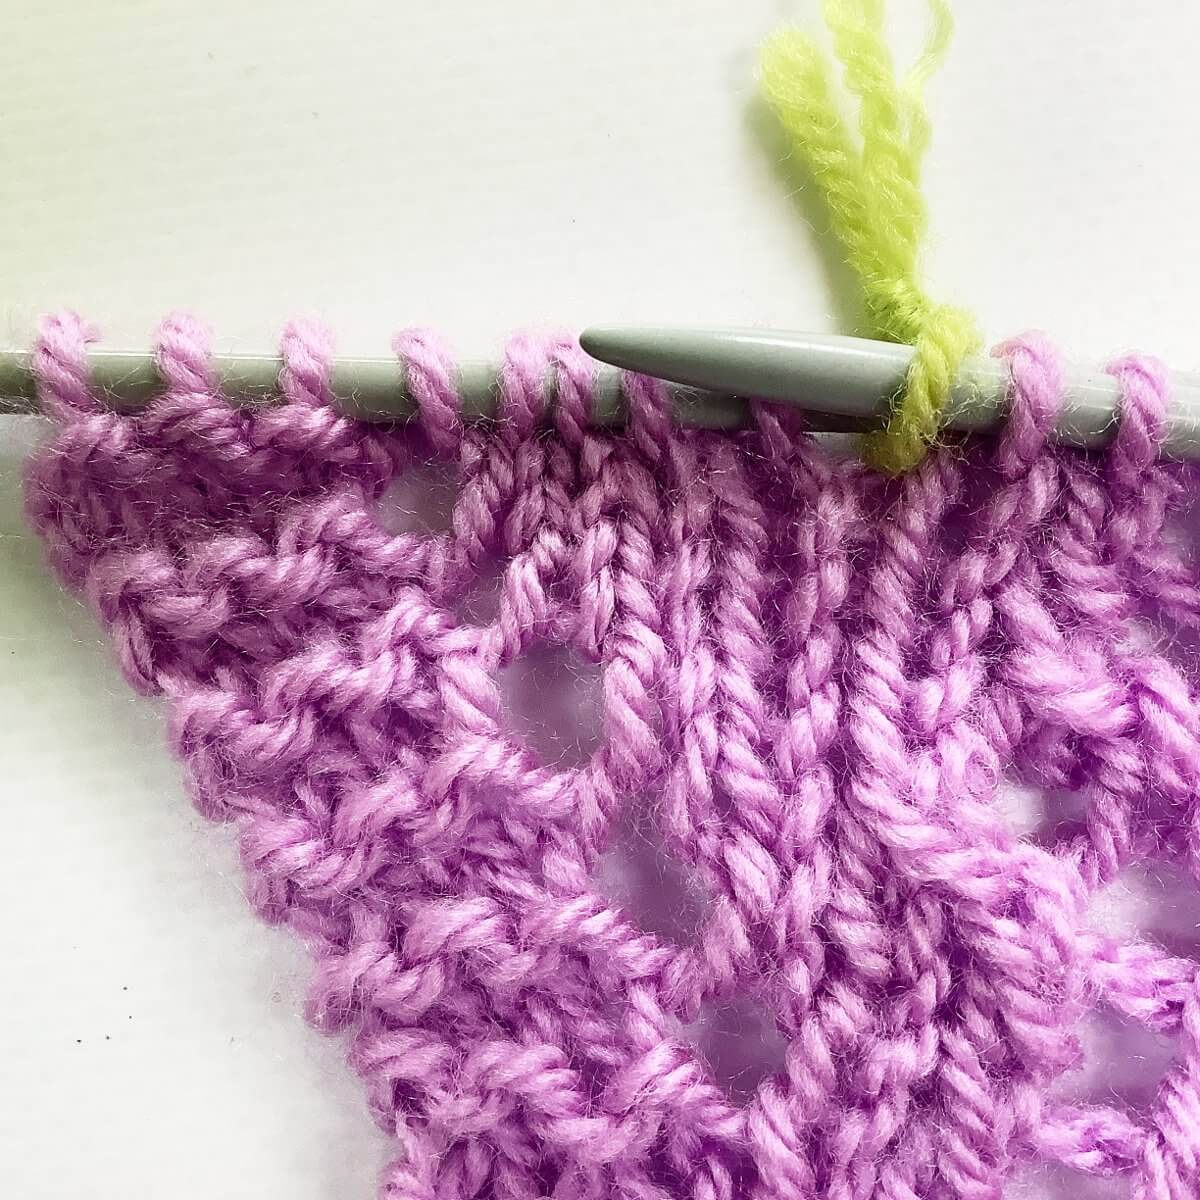
  5. Now gently pull out the working yarn out of these stitches.

    Make sure to watch out for any missed stitches, now it’s easy to fix it without any runners in your fabric. This will be less so when you’ve already moved on to a new section of stitches.Step 5 of in between tinking and f rogging

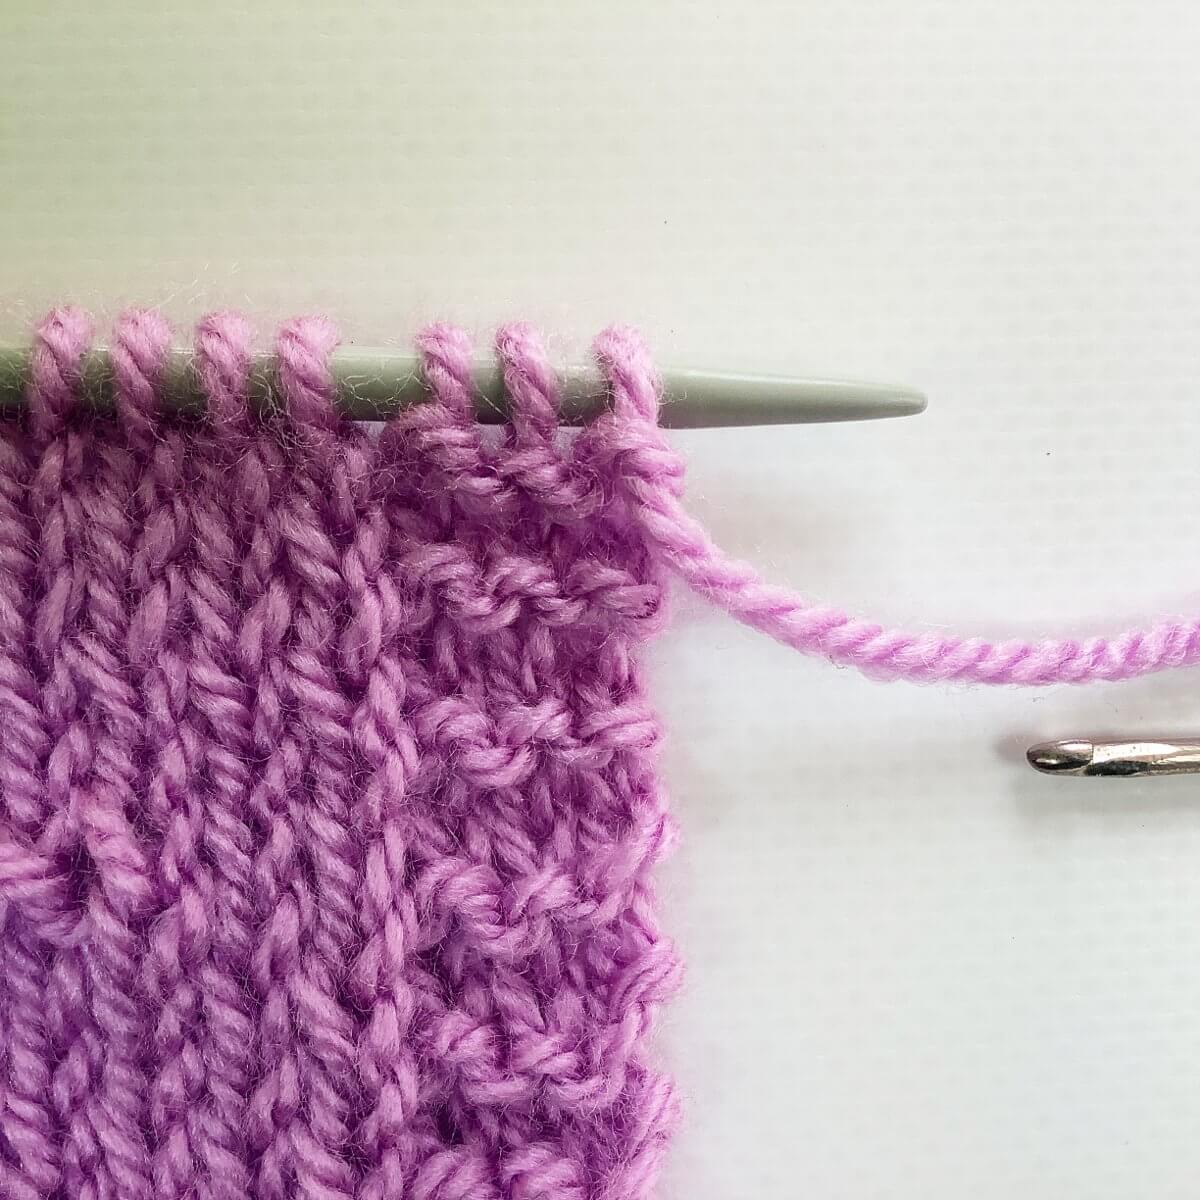
  6. And there you have it: a whole set of stitches safely on the needle, without either tinking or frogging.

    Step 6

This way really is between tinking and frogging; a lovely compromise! And my project? I got the offending rows out and did the garter stitch ridge earlier. This is how I intended it to look!

Result in my project
Patreon logo

Thanks to my Patreon supporters for bringing you this freebie! Creating quality patterns and tutorials is a lot of work and resource-intensive. However, I find it important to give you free content like this tutorial. Thanks to the generous support of my Patreon supporters, I can make it happen. Thank you, patrons! Click here to join, or click here to read more about La Visch Designs on Patreon.

tutorial – in between tinking and frogging Read More »

stitch pattern – tiny bobble stitch

Tiny bobble stitch

This tiny bobble stitch is a nicely textured stitch pattern, suitable for allover application. In my swatch, I’ve shown how it looks both in a single color all-over, and with the bobble part of the pattern in a contrasting color. I rather like the effect of both. I think the one with the contrast color would also work very well as a single accent near the hem and wrists of garments, for example. How would you use this lovely textured stitch pattern?

The tiny bobble stitch pattern is worked as a multiple of 2 + 1 stitches, and in a six-row repeat. In other words: any odd number of stitches will work. Please note that I’ve added 2 edge stitches in garter stitch on both sides of the swatch. These are not included in the stitch pattern description.

Materials used

Yarn: Paintbox Yarns Simply DK, a good value, good quality 100% acrylic yarn, in the colors Vintage Pink and Lime.

Needles: This is a pair of straights that I picked up at the second-hand store when I started knitting, brand unknown.

Stitches used

  • k – knit
  • k3tog tbl – knit 3 stitches together through the back loop
  • p – purl
  • RS / WS – right side / wrong side
  • yo – yarn over
  • rep – repeat
  • sl1 wyib – slip 1 stitch purl-wise with the yarn held in the back
  • st(s) – stitch(es)

Tiny bobble stitch

Row 1 (RS): Knit.
Row 2 (WS): Purl.
Rows 3-4: Rep rows 1-2.
Row 5: K1, *sl1 wyib, (k1, yo, k1) into the next st; rep from * to last 2 sts, sl1 wyib, k1.
Row 6: P1, *sl1 wyib, k3tog tbl; rep from * to last 2 sts, sl 1wyib, p1.

Repeat rows 1-6 for pattern until desired length.

Please note that for the first part of the example, I’ve worked all 6 rows of the patterning in the same color twice. In the last repeat, though, rows 5 and 6 were worked in the green contrast color.

In the below pictures, you see the patterning first from the right, and then also from the wrong side of the fabric:

Tiny bobble stitch - view from the front
The stitch as seen from the RS.
Tiny bobble stitch - view from the back
The stitch as seen from the WS.
Patreon logo

Thanks to my Patreon supporters for bringing you this freebie! Creating quality patterns and tutorials is a lot of work and resource-intensive. However, I find it important to give you free content like this tutorial. Thanks to the generous support of my Patreon supporters, I can make it happen. Thank you, patrons! Click here to join, or click here to read more about La Visch Designs on Patreon.

stitch pattern – tiny bobble stitch Read More »
tutorial – knitwear examined: a Missoni tee

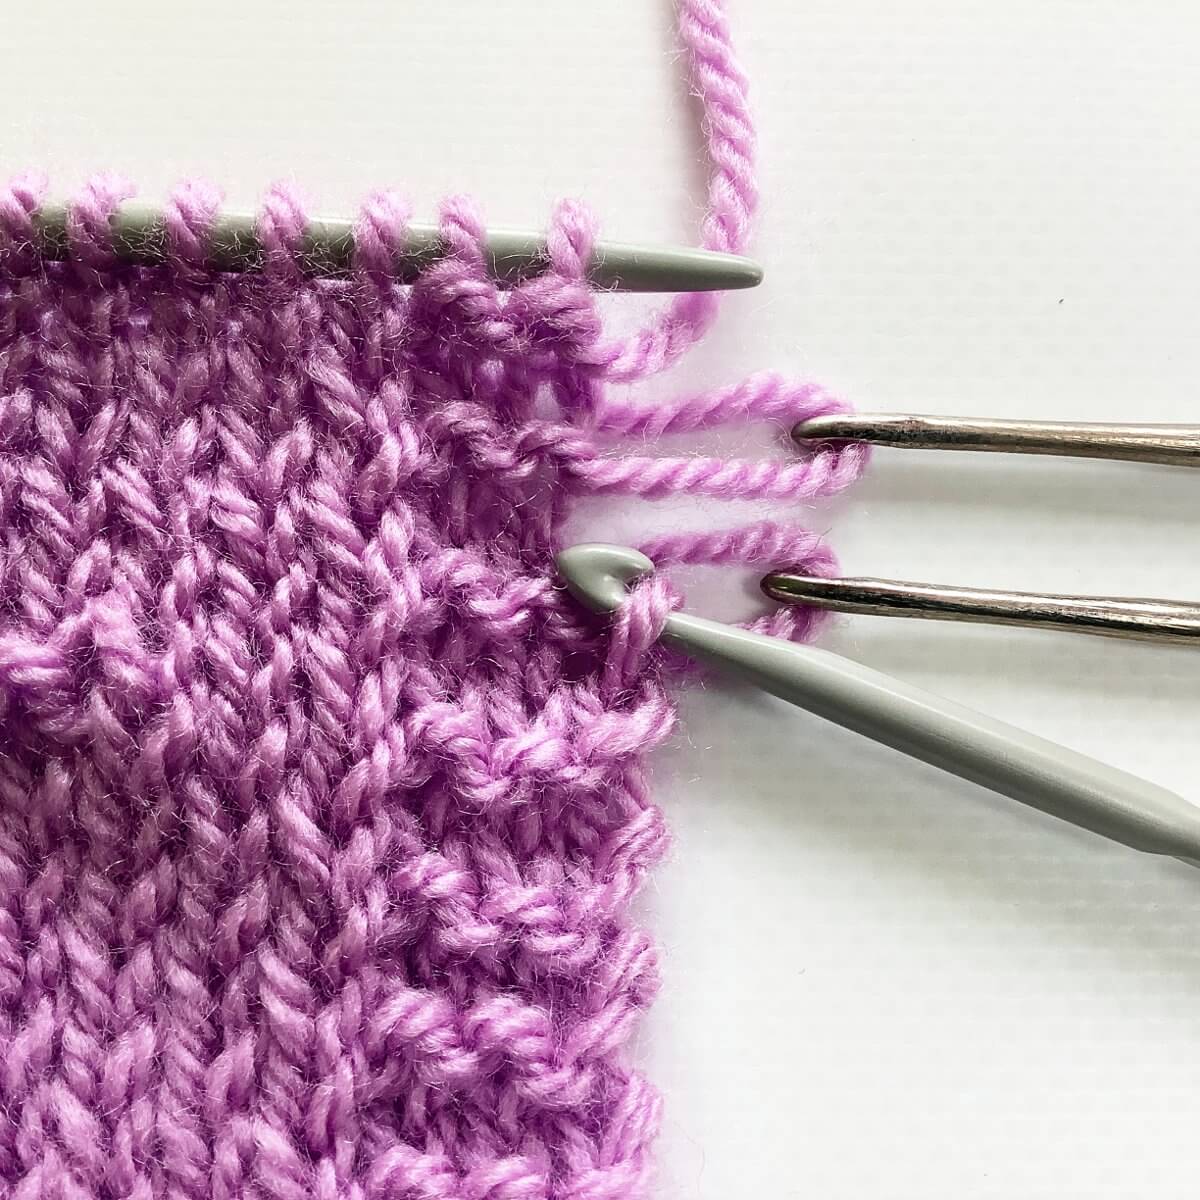
A closeup of the top of a mannequin, it's wearing a Missoni tee in yellows.

When talking about knitwear, at a certain point Missoni is bound to be named. Missoni is an Italian brand and fashion house, famous for its colorful zigzag patterns and vibrant floral prints. Due to this, many of their pieces have a very exuberant seventies aesthetic. According to Wikipedia, the company was founded in 1953, when Ottavio and Rosita Missoni set up a small knitwear workshop in Gallarate, Italy. They presented their first collection under the Missoni label in Milan in 1958. According to this website, Missoni revolutionized knitwear by introducing slinky sweaters and crochet tracksuits. Originally using lines, the Missoni family discovered a way to make the emblematic chevron pattern by using Raschel knitting machines. The new technique allowed the fashion house to use knits to create any shape of garment, allowing them to cut and sew material without loosening the threads.

As luck would have it, I have a Missoni knitwear tee. It’s a vintage one that my mother used to have, and at a certain point gifted to me. I have been wearing it a lot the last couple of years. So let’s take a look at it!

In the below pictures, I have put the tee on my mannequin. It has a simple round neck as well as the famous chevron pattern in multiple colors of yellow, green and lilac. A design aspect that jumps out to me, is that the fabric of the sleeves is positioned in such a way that the larger chevron is centered on the top of both sleeves.

A closer look

the neck of the tee

This tee is an Italian size 48, this is similar to an EU 40-42 and US 12.

The neckband looks like a folded hem, covering the edge where the fabric appears to be cut. On the inside of the garment, the fabric of the side seams is serged. So, it’s reasonable to assume that underneath the folded hem, there is also a serged edge to prevent the fabric from unraveling.

Again, the patterning is centered relative to the neck opening and body of the tee.

label of the tee

The yarn used in this garment is very thin. As a hand knitter, I would classify this as lace weight. That said, commercial knitwear is often in much thinner yarn than hand knit ones. The yarn composition consists of 65% linen, 20% rayon, and 15% nylon.

The color runs in the yarn are of medium length, and change abruptly from one color to the next.

The sleeves are set-in, again with serged edges on the inside. In this picture, you can see very well how the centering of the pattern on the top of the sleeve results in a larger “point”.

And last, but not least: the patterning itself. I have not charted it out, but the repeat seems to consist of something like:

K7, CDD, k7, yo, k1, yo, k2tog, k1, yo, k2tog, skp, yo, k1, skp, yo, k1, yo.

The WS rows are alternating in knit and purl. So, I think we’re looking at a 4-row repeat.

If you test this out, I’m looking forward to hearing whether the above indeed matches the patterning in my tee.

Patreon logo

Thanks to my Patreon supporters for bringing you this freebie! Creating quality patterns and tutorials is a lot of work and resource-intensive. However, I find it important to give you free content like this tutorial. Thanks to the generous support of my Patreon supporters, I can make it happen. Thank you, patrons! Click here to join, or click here to read more about La Visch Designs on Patreon.

tutorial – knitwear examined: a Missoni tee Read More »

stitch pattern – alternating bobble stitch

Alternating bobble stitch

The bobble stitch is a nicely textured stitch pattern, suitable for allover application. Bobbles are a great way to make your knitting 3-dimensional instead of just flat. For that very reason, they are also often used in conjunction with lace patterning or with cables. The bobble pattern, described here, was used in my Moerbei shawl. The thing with bobbles is that there are so many ways to make them, there really is no right or wrong way. They can be made in 3, 4, 5 or even more stitches to make them less or more fat. To do so, stitches have to be increased and later decreased. There are, of course, many ways to do either things. Here, I will be showing a 5-stitch bobble.

As with most bobbles, it may be necessary to push the bulk of the bobble to the right side of the fabric to show it at its best. During knitting, it may be end up somewhere in between, or even pushed to the wrong side. Easily fixed, though!

This stitch pattern is worked as a multiple of 8 stitches, and in a twelve-row repeat. Please note that I’ve added 2 edge stitches in garter stitch on both sides of the swatch. These are not included in the stitch pattern description.

Materials used

Yarn: Paintbox Yarns Simply DK, a good value, good quality 100% acrylic yarn, in the color Spearmint green.

Needles: This is a pair of straights that I picked up at the second-hand store when I started knitting, brand unknown.

Stitches used

  • k – knit
  • k2tog – knit 2 stitches together
  • mb – make bobble: Work [k1, yo, k1, yo, k1] into the same st, turn, p5, turn, slip 3 stitches together as if to knit, k2tog, pass 3 slipped sts over; bobble made
  • p – purl
  • RS / WS – right side / wrong side
  • yo – yarn over
  • rep – repeat
  • st(s) – stitch(es)

Alternating bobble stitch

Row 1 (RS): Knit.
Row 2 and all following WS rows: Purl.
Rows 3-4: Rep rows 1-2.
Row 5: *K2, mb, k5; rep from * to end.
Rows 7-10: Rep rows 1-4.
Row 11: *K6, mb, k1; rep from * to end.
Row 12: Purl.

Repeat rows 1-12 for pattern until desired length.

In the below pictures, you see the patterning first from the right, and then also from the wrong side of the fabric:

Alternating bobble stitch from the RS
The stitch as seen from the RS.
Alternating bobble stitch from the WS
The stitch as seen from the WS.

To get an impression of how this stitch looks as an all-over pattern:

Alternating bobble stitch - all-over
Patreon logo

Thanks to my Patreon supporters for bringing you this freebie! Creating quality patterns and tutorials is a lot of work and resource-intensive. However, I find it important to give you free content like this tutorial. Thanks to the generous support of my Patreon supporters, I can make it happen. Thank you, patrons! Click here to join, or click here to read more about La Visch Designs on Patreon.

stitch pattern – alternating bobble stitch Read More »
tutorial – working the improved SSK decrease

Working the improved SSK decrease

Previously, I told you about the SSK decrease. SSK stands for “slip slip knit”, but working the decrease entails a bit more than that, visit the tutorial to learn more about it! However, because you slip 2 stitches with a traditional SSK, you also risk stretching the stitches out a bit. So, smart folks thought of a different way that involves less slipping and therefor less risk of stretched out stitches, and thus a smoother left-leaning decrease.

Below, I’ll show you how to work the improved SSK decrease step by step.

Materials

Yarn: Paintbox Yarns Simply DK, a good value, good quality 100% acrylic yarn, here in the color Marine Blue.

Needles: This is a pair of straights that I picked up at the second-hand store when I started knitting, brand unknown.

Working the SSK decrease step by step

  1. Work your way across the row until you’ve reached the point where you want to make the decrease.

    In this case, I’m using the same swatch as I did for the regular SSK. This time, I’m working the decrease 4 stitches in from the left side of the swatch. Including the edge stitches in garter stitch.Step 1

  2. Insert the needle into the first stitch on the left-hand needle as if to knit…

    Step 2 of the improved SSK

  3. … and slip the stitch to the right-hand needle.

    With this action, you twist the stitch mount of the stitch. Do you see how it sits differently on the needle when compared with the other stitches?Step 3

  4. Next, slip the stitch back to the left-hand needle, to do so I insert the left-hand needle into the front loop of the slipped stitch…

    Step 4

  5. …. and put it back on the left-hand needle.

    step 5

  6. Now we want to work a k2tog tbl. To do so, insert the right-hand needle through the back loops of the first 2 stitches on the left-hand needle…

    step 6

  7. … wrap the yarn around the needle….

    Step 7

  8. … Pull the yarn through…

    Step 8

  9. … and slip the stitch of the needle to finish the decrease.

    This is how it then looks:The result of working an improved SSK

The below picture shows how it looks after 2 more decrease rows have been worked. You can compare the improved SSK decreases with the regular ones on the bottom half of the swatch. To be honest, I don’t see a lot of difference, but I’m sure it’s just my knitting that’s to blame. Try it yourself, your results may very well be better than mine!

The result of several improved SSK decreases
Patreon logo

Thanks to my Patreon supporters for bringing you this freebie! Creating quality patterns and tutorials is a lot of work and resource-intensive. However, I find it important to give you free content like this tutorial. Thanks to the generous support of my Patreon supporters, I can make it happen. Thank you, patrons! Click here to join, or click here to read more about La Visch Designs on Patreon.

tutorial – working the improved SSK decrease Read More »

stitch pattern – quatrefoil stitch

Quatrefoil stitch

The quatrefoil stitch is a stitch pattern in the category of eyelet stitches. It’s made by working a group of 4 yarn overs, each flanked by a single decrease. Each group of 4 eyelets is alternated, making this a lovely pattern to use allover in a project.

This stitch pattern is worked as a multiple of 8 stitches, and in a sixteen-row repeat. Please note that I’ve added 2 edge stitches in garter stitch on both sides of the swatch.

Materials used

Yarn: Paintbox Yarns Simply DK, a good value, good quality 100% acrylic yarn, in the color Spearmint green.

Needles: This is a pair of straights that I picked up at the second-hand store when I started knitting, brand unknown.

Stitches used

  • k – knit
  • k2tog – knit 2 stitches together
  • p – purl
  • RS / WS – right side / wrong side
  • yo – yarn over
  • rep – repeat
  • skp – slip 1 stitch, knit 1 stitch, pass the slipped stitch over
  • st(s) – stitch(es)

Quatrefoil stitch

Row 1 (RS): Knit. (15 sts)
Row 2 and all following WS rows: Purl.
Row 3: K2, *k1, yo, skp, k5; rep from * to 5 sts before end, k1, yo, skp, k2.
Row 5: K1, k2tog, *yo, k1, yo, skp, k3, k2tog; rep from * to 4 sts before end, yo, k1, yo, skp, k1.
Row 7: K2, *k1, yo, k2tog, k5; rep from * to 5 sts before end, k1, yo, k2tog, k2.
Row 9: Knit.
Row 11: K2, *k5, yo, skp, k1; rep from * to 5 sts before end, k5.
Row 13: K2, *k3, k2tog, yo, k1, yo, skp; rep from * to 5 sts before end, k5.
Row 15: K2, *k5, yo, k2tog, k1; rep from * to 5 sts before end, k5.
Row 16: Purl.

Repeat rows 1-16 for pattern until desired length.

Quatrefoil stitch chart

In the below pictures, you see the patterning first from the right, and then also from the wrong side of the fabric:

Quatrefoil stitch as seen from the RS
The stitch as seen from the RS.
Quatrefoil stitch as seen from the WS
The stitch as seen from the WS.

To get an impression of how this stitch looks as an all-over pattern:

Quatrefoil stitch as seen from the RS - all over
Patreon logo

Thanks to my Patreon supporters for bringing you this freebie! Creating quality patterns and tutorials is a lot of work and resource-intensive. However, I find it important to give you free content like this tutorial. Thanks to the generous support of my Patreon supporters, I can make it happen. Thank you, patrons! Click here to join, or click here to read more about La Visch Designs on Patreon.

stitch pattern – quatrefoil stitch Read More »
tutorial – working the SSK decrease

Tutorial on working the SSK decrease

When we’re talking about a single, left-leaning decrease, I usually prefer working the SKP decrease. This abbreviation stands for “slip 1, knit 1, pass slipped stitch over”. However, many people prefer the SSK decrease instead. SSK stands for “slip slip knit”, but working the decrease entails a bit more than that. Don’t get me wrong, it’s not a hard decrease to work, but you do have to know how to slip the stitches.

Below, I’ll show you how to work this decrease step by step.

Materials

Yarn: Paintbox Yarns Simply DK, a good value, good quality 100% acrylic yarn, here in the color Marine Blue.

Needles: This is a pair of straights that I picked up at the second-hand store when I started knitting, brand unknown.

Working the SSK decrease step by step

  1. Work your way across the row until you’ve reached the point where you want to make the decrease

    In this case, I want to work the decrease 7 stitches in from the left side of the swatch. That is including the edge stitches in garter stitch.Step 1 of working the SSK

  2. Insert the needle into the first stitch on the left-hand needle as if to knit…

    Step 2

  3. … and slip the stitch to the right-hand needle.

    With this action, you twist the stitch mount of the stitch. Do you see how it sits differently on the needle when compared with the other stitches?Step 3

  4. Repeat steps 2 and 3 with the next stitch on the left-hand needle.

    Step 4 of working the SSK

  5. Now, we have to put those 2 stitches back onto the left-hand needle. To do so, insert the left-hand needle into the front loops of the 2 stitches on the right-hand needle.

    Step 5

  6. With the action of the last step, we have already positioned these 2 stitches for the next step: Knitting them together through the back loop (k2tog tbl). This means we now only have to wrap the yarn around the needle….

    Step 6

  7. … Pull the yarn through…

    Step 7

  8. … and slip the stitch of the needle to finish the decrease.

    This is how it then looks:The result of working the SSK

The below picture shows how it looks after 2 more decrease rows have been worked. 

The result of several SSK decreases
Patreon logo

Thanks to my Patreon supporters for bringing you this freebie! Creating quality patterns and tutorials is a lot of work and resource-intensive. However, I find it important to give you free content like this tutorial. Thanks to the generous support of my Patreon supporters, I can make it happen. Thank you, patrons! Click here to join, or click here to read more about La Visch Designs on Patreon.

tutorial – working the SSK decrease Read More »

stitch pattern – fountain stitch

Fountain stitch

The fountain stitch is an elegant lace pattern, that looks rather like water flowing from a fountain. Hence, the name! It really looks much more intricate and complex than it really is. The stitch pattern consists of yarn overs and a left-leaning double decrease. You can easily adjust the looks of this lace pattern, by replacing the decrease by a centered double decrease. In this example, I have worked the pattern in acrylic yarn, the swatch has not been blocked. The patterning will pop a lot more if you do block your project.

This stitch pattern is worked as a multiple of 4 stitches + 1, and in a four-row repeat. Something to keep in mind, is that the increases are decreased away again on another row, so your stitch count will differ from row to row. Please note that I’ve added 2 edge stitches in garter stitch on both sides of the swatch.

Materials used

Yarn: Paintbox Yarns Simply DK, a good value, good quality 100% acrylic yarn, in the color Vintage Pink.

Needles: This is a pair of straights that I picked up at the second-hand store when I started knitting, brand unknown.

Stitches used

Fountain stitch

Row 1 (RS): K1, * yo, k3, yo, k1; rep from * to end.
Row 2 (WS): Purl.
Row 3: K1, * k2, sl1-k2tog-psso, k3; rep from * to end.
Row 4: Purl.

Repeat rows 1-4 for pattern until desired length.

Fountain stitch chart

In the below pictures, you see the patterning first from the right, and then also from the wrong side of the fabric:

Fountain stitch shown from the RS
Fountain stitch as seen from the right side
Fountain stitch shown from the WS
Fountain stitch as seen from the wrong side

To get an impression of how this stitch looks as an all-over pattern:

fountain stitch -all-over
Patreon logo

Thanks to my Patreon supporters for bringing you this freebie! Creating quality patterns and tutorials is a lot of work and resource-intensive. However, I find it important to give you free content like this tutorial. Thanks to the generous support of my Patreon supporters, I can make it happen. Thank you, patrons! Click here to join, or click here to read more about La Visch Designs on Patreon.

stitch pattern – fountain stitch Read More »
tutorial – replacing the toe of a hand-knit sock

Replacing the worn-down toe of a hand-knit sock

My youngest is a big fan of wearing hand knit socks. To make sure he gets enough wear out of a pair before growing out of them, I make him tube socks. The pattern I use is usually the No-Heel Spiral Socks by La Maison Rililie. Anyway, he wears these socks a lot, and that means they also get a lot of wear. With the sock pictured, a hole developed in the lilac toe section. On further inspection, it became clear that the whole lilac toe was thin all over, but that the rest of the sock was still good for a lot of wearing. So, time to learn how to go about replacing the worn-down toe of a hand-knit sock!

In this post, I show you how I go about it. There are probably many more ways to tackle this, this is just the one that I used here.

Materials used

Yarn: New sock yarn to work the new toe.

Tools: A pair of circular needles in size 2 mm (US 00) and a small circular in the same size.

Replacing the toe, step by step

I determined that all the lilac was bad, but that the pink variegated yarn was still good.

  1. To start, I snipped some of the lilac yarn to free up the stitches in the pink and to put those on a circular needle.

    This sock was originally knit toe-up, but the replacement toe will be knit the other way around. Because of this difference in knitting direction, I can’t unravel the lilac yarn easily. Instead, I have to tease it loose stitch by stitch with the smaller needle. This is not a problem, because it greatly reduces the risk of dropped stitches and running down stitches.Picking up stitches

  2. Tease all the pink stitches loose and put them on the needle.

    When this is done, you have a loose, worn-out toe and a project ready for knitting.A loose toe

  3. Attach your new yarn and work the new toe.

    In this picture, I’m ready to join the new yarn.ready to attach new yarn

The result

The result of replacing the worn-down toe of a hand-knit sock: A sock with a new toe, ready for some more wearing!

The result of replacing a worn-out toe
Patreon logo

Thanks to my Patreon supporters for bringing you this freebie! Creating quality patterns and tutorials is a lot of work and resource-intensive. However, I find it important to give you free content like this tutorial. Thanks to the generous support of my Patreon supporters, I can make it happen. Thank you, patrons! Click here to join, or click here to read more about La Visch Designs on Patreon.

tutorial – replacing the toe of a hand-knit sock Read More »