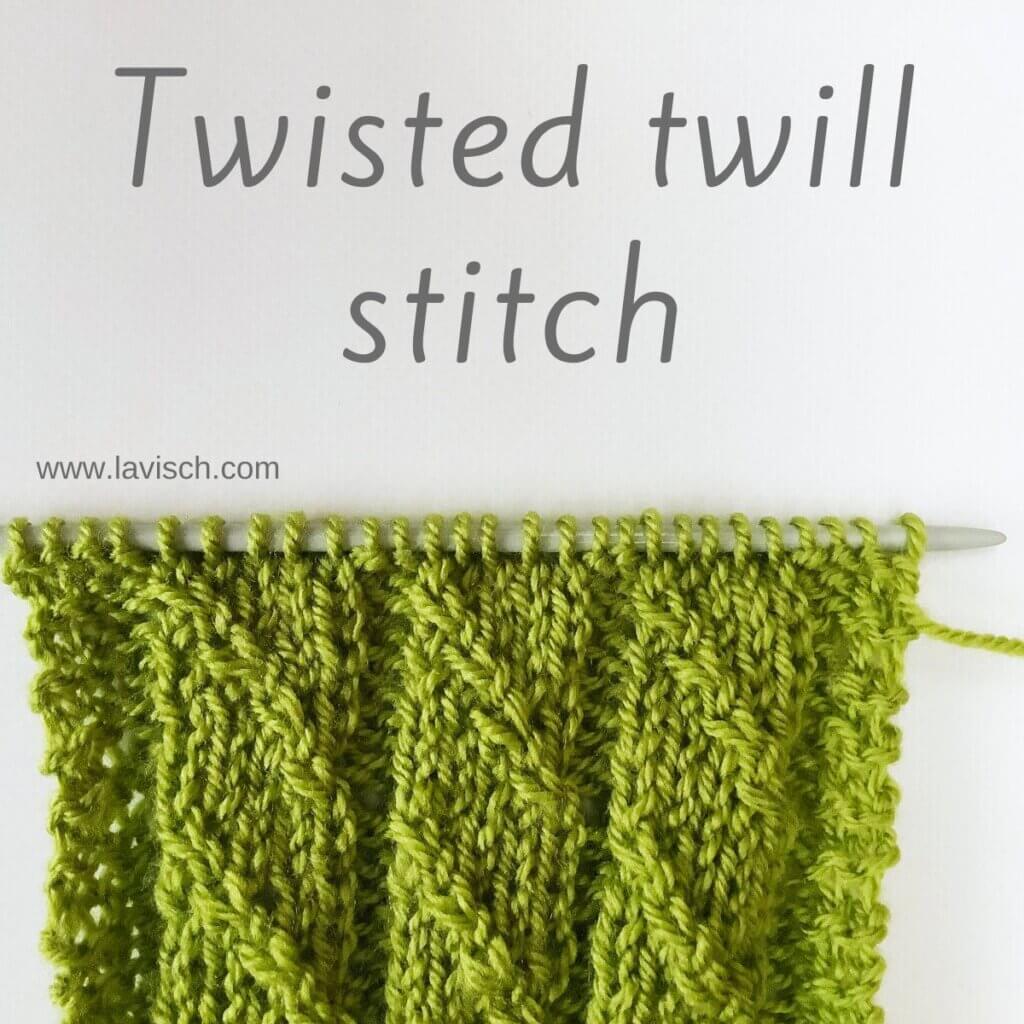
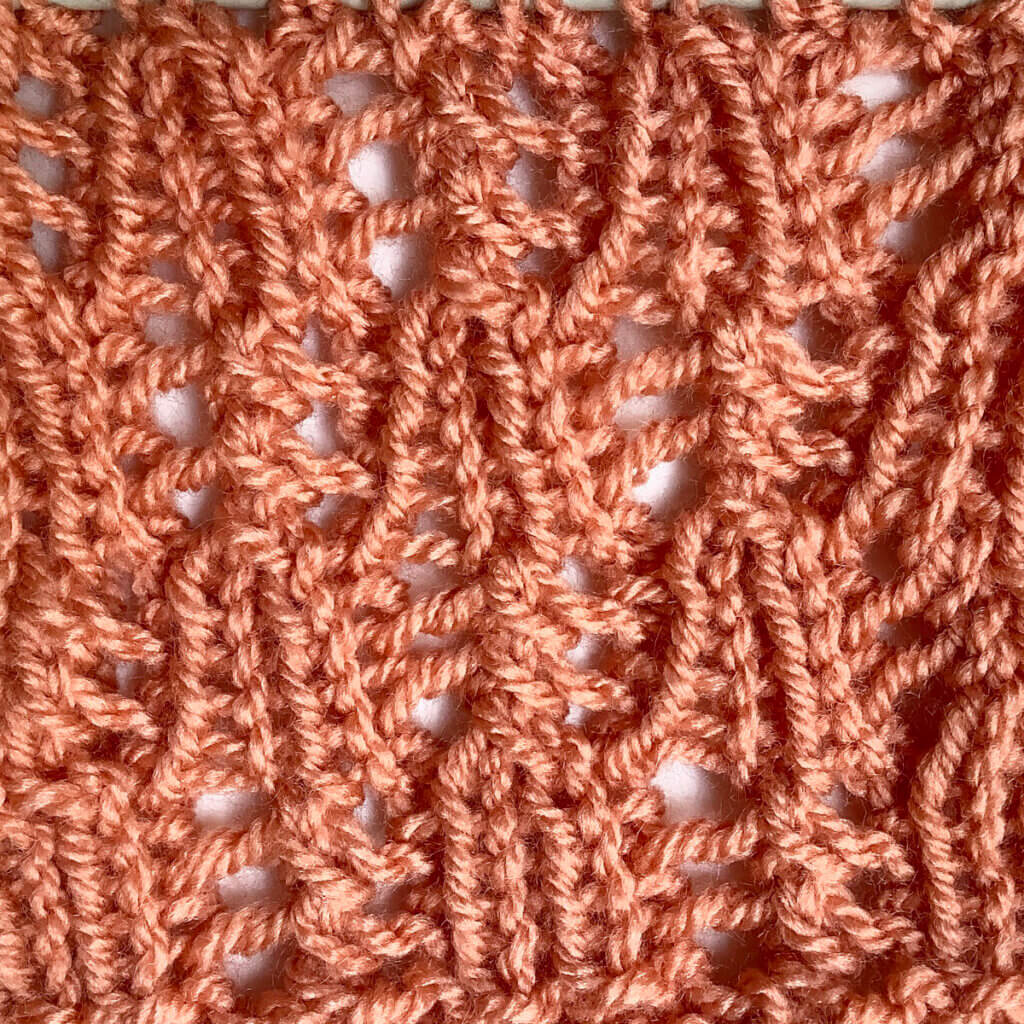
tutorial – left twist in stockinette
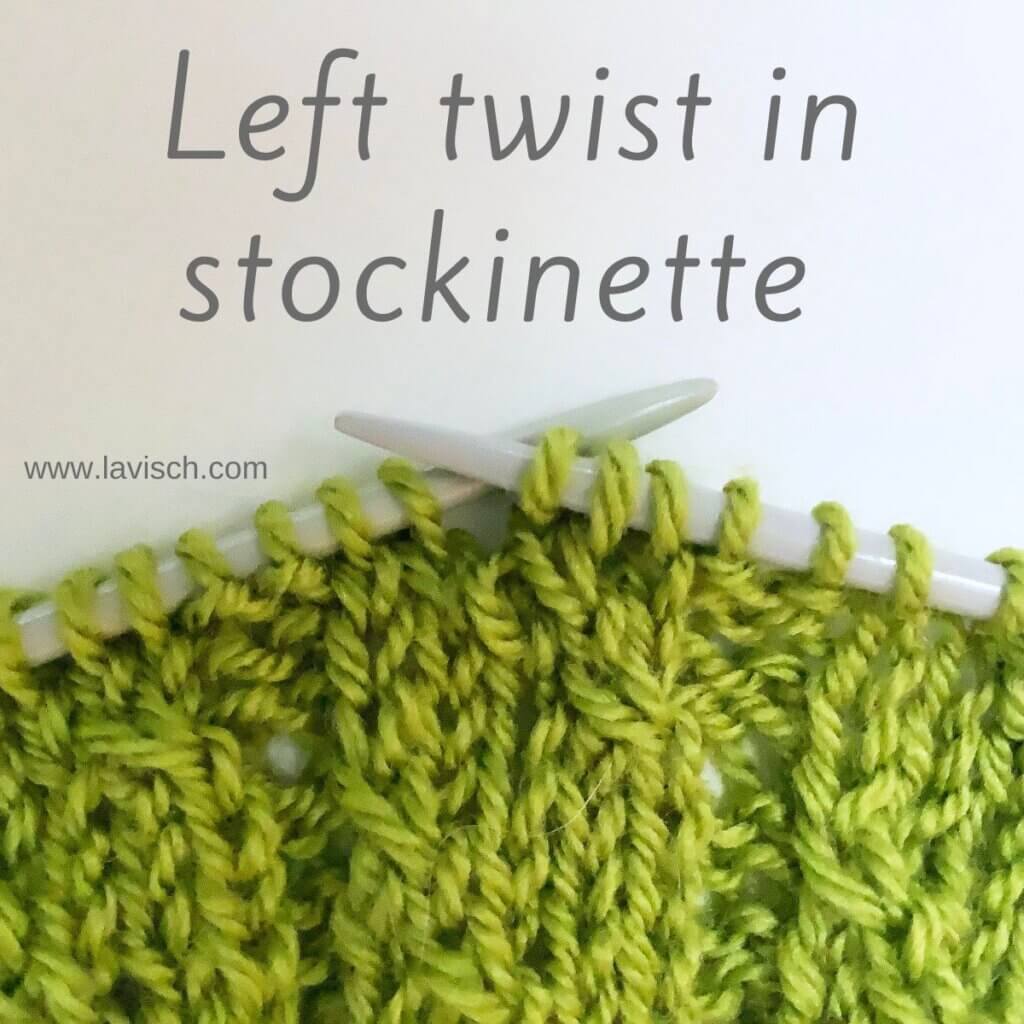
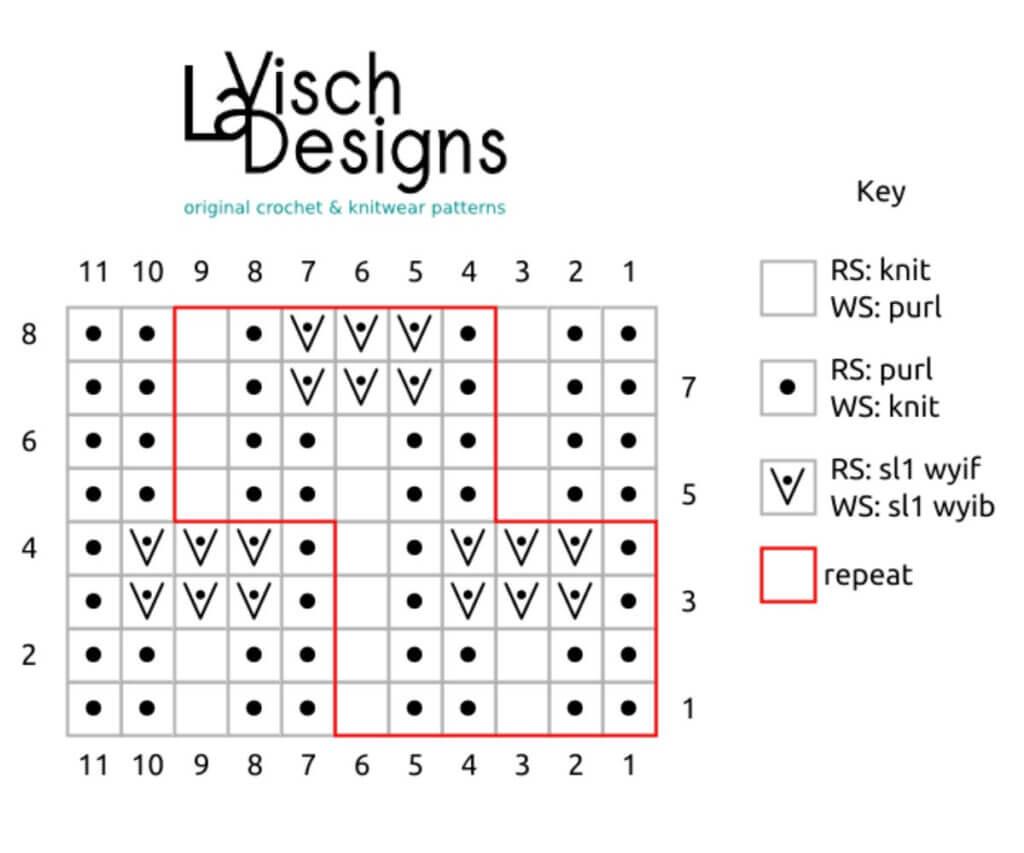
The basic characteristic of a left twist is that it switches the order of 2 adjoining stitches. One “main stitch” and one “background stitch”. This makes it appear that the main stitch travels to the left. In a previous tutorial, I showed you how to work the left twist used in a stitch pattern from the Japanese Knitting Stitch Bible by Hitomi Shida. However, in that tutorial, I worked the left twist as a single traveling stitch against a background of reverse stockinette. I used the method of manually manipulating the stitches in the correct order. In this tutorial, I will show you a different way to work a left twist, against a background of stockinette stitch:
Skip the next stitch on the left-hand needle, knit into the back loop of the second stitch, leaving the stitch on the needle. Next, bring the right-hand needle to the front of the left-hand needle and knit into the skipped stitch. Pull both loops off of the left needle to finish the stitch.
Materials used


Yarn: Paintbox Yarns Simply DK, a good value, good quality 100% acrylic yarn, here in the color Lime Green.
Needles: This is a pair of straights that I picked up at the second-hand store when I started knitting, brand unknown.
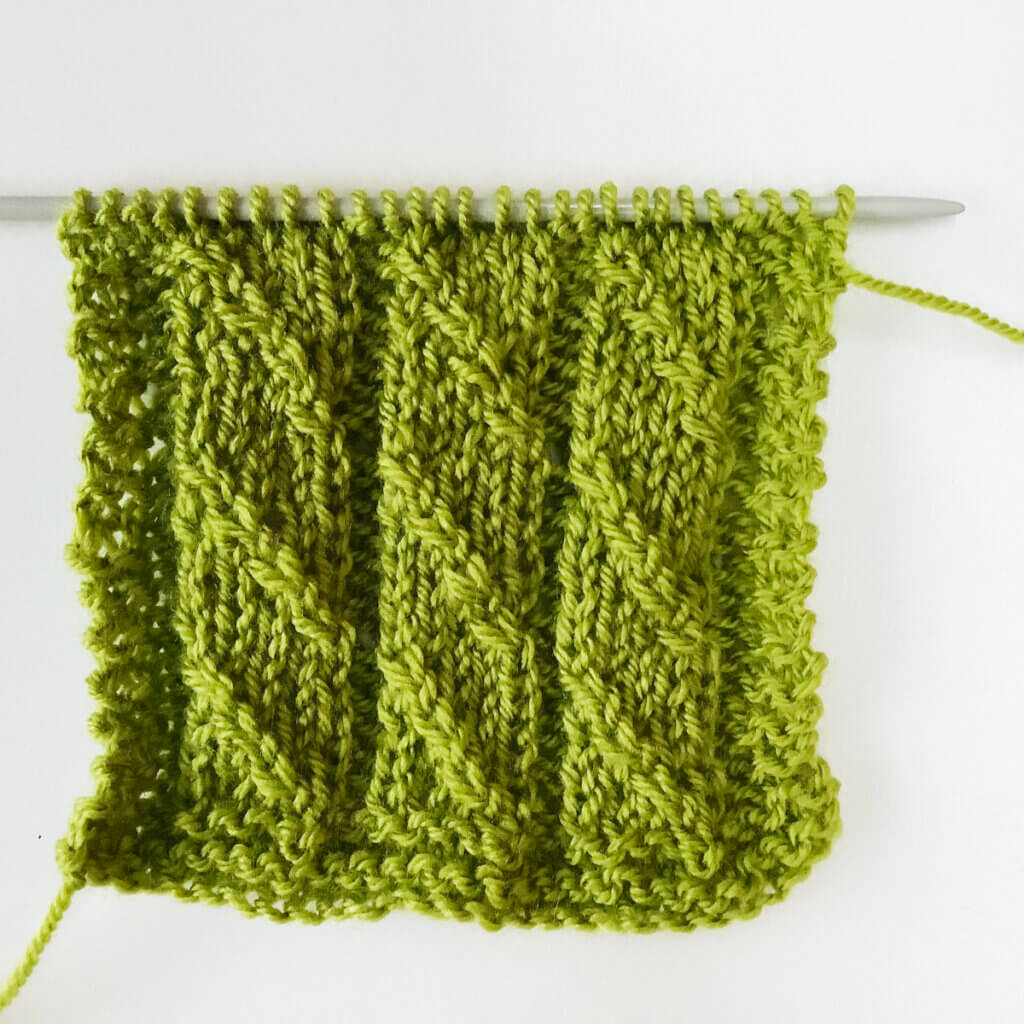
Working a left twist in stockinette step by step
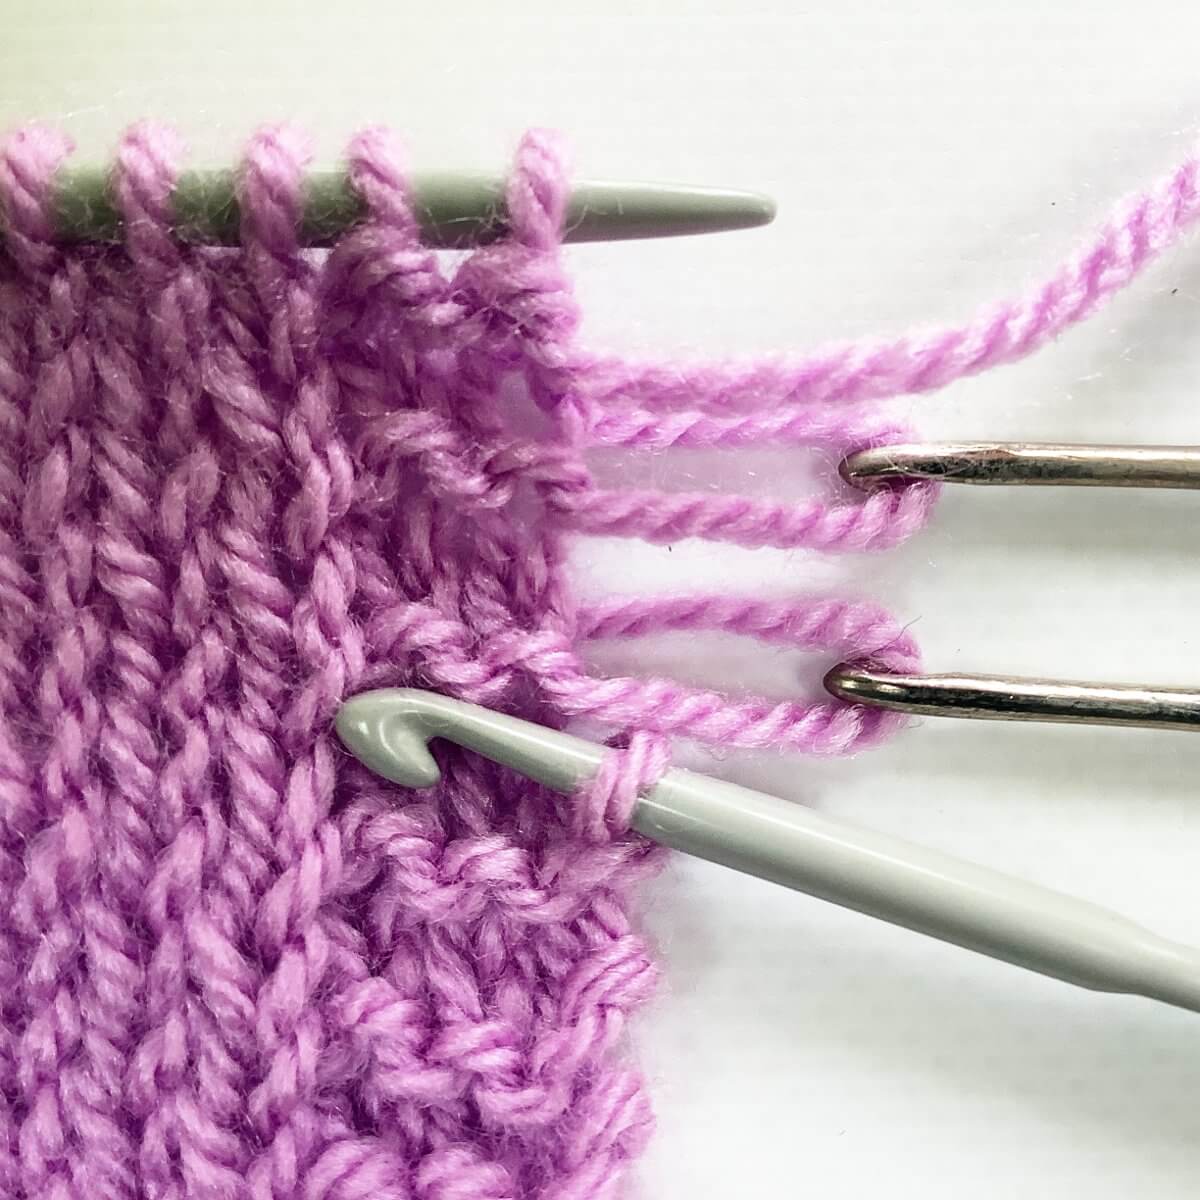
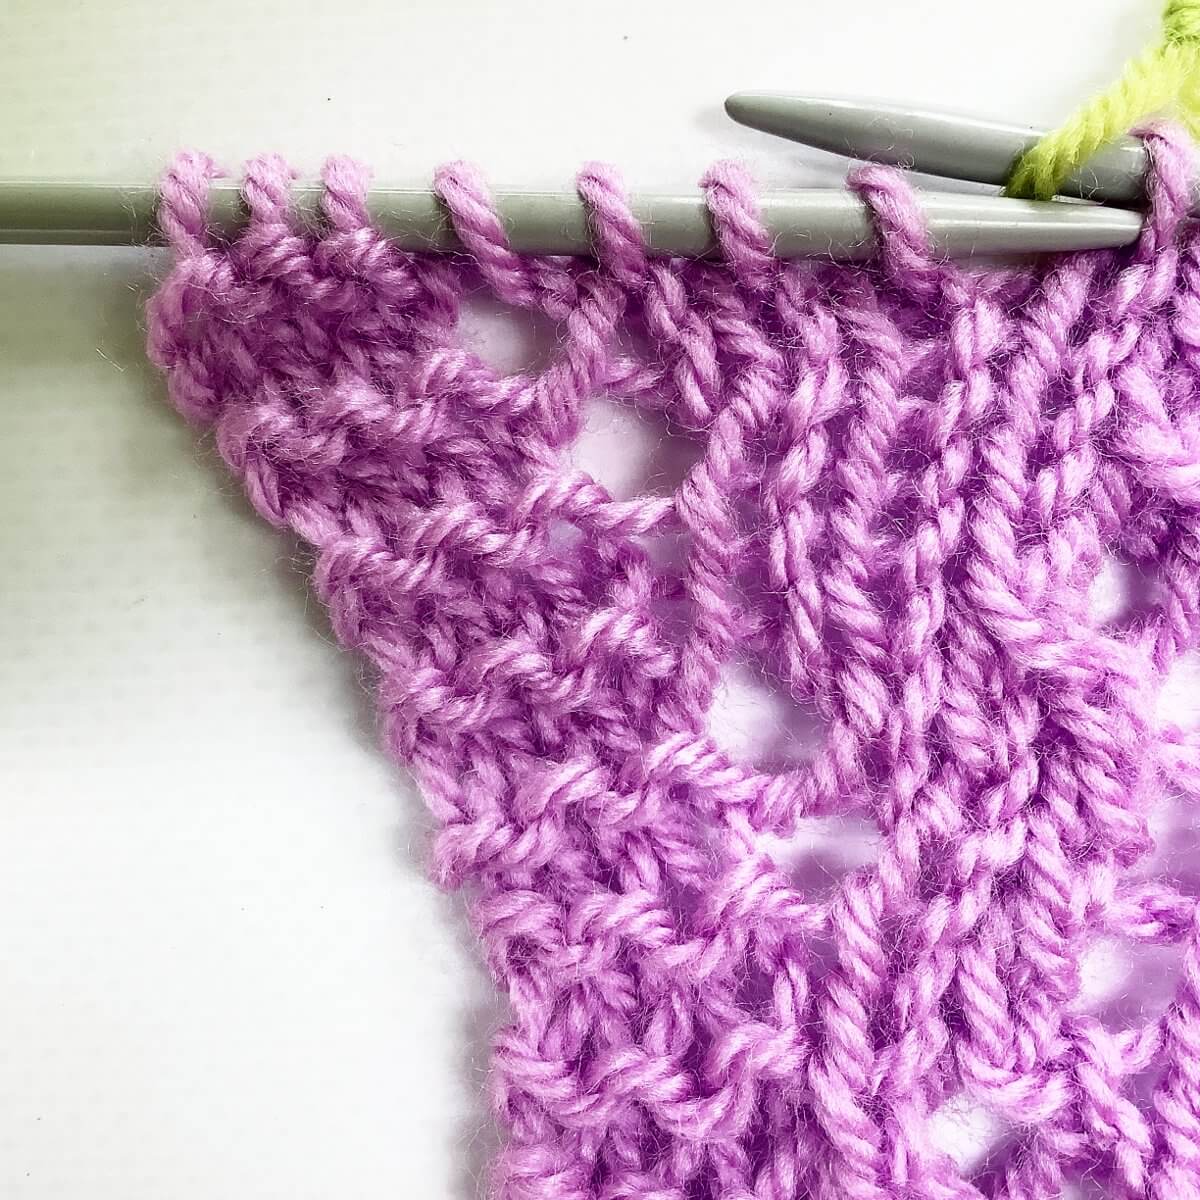
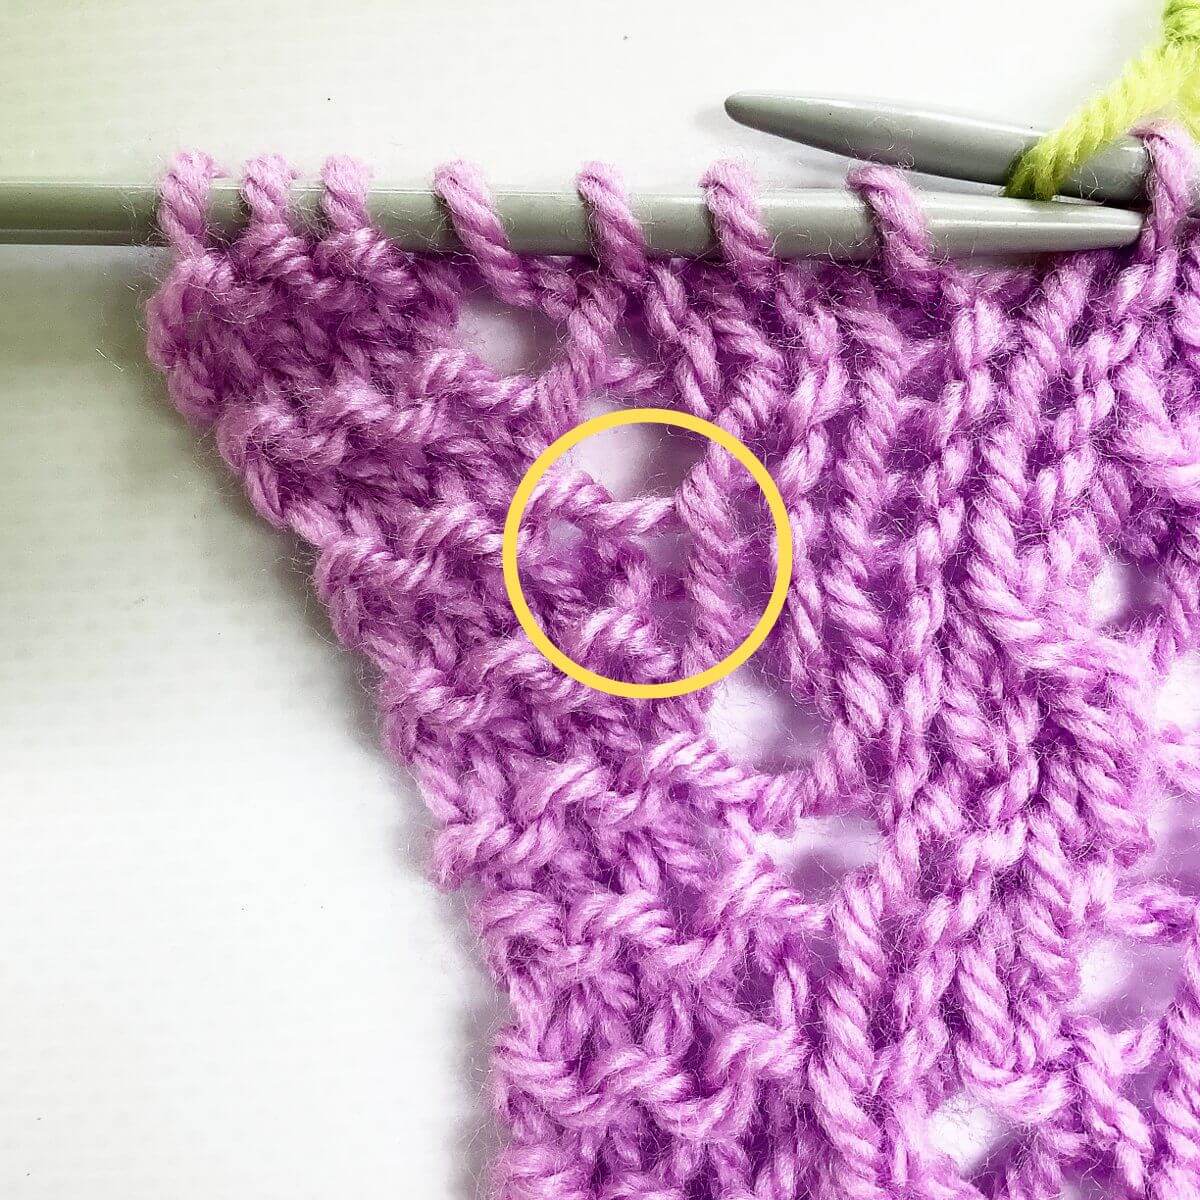
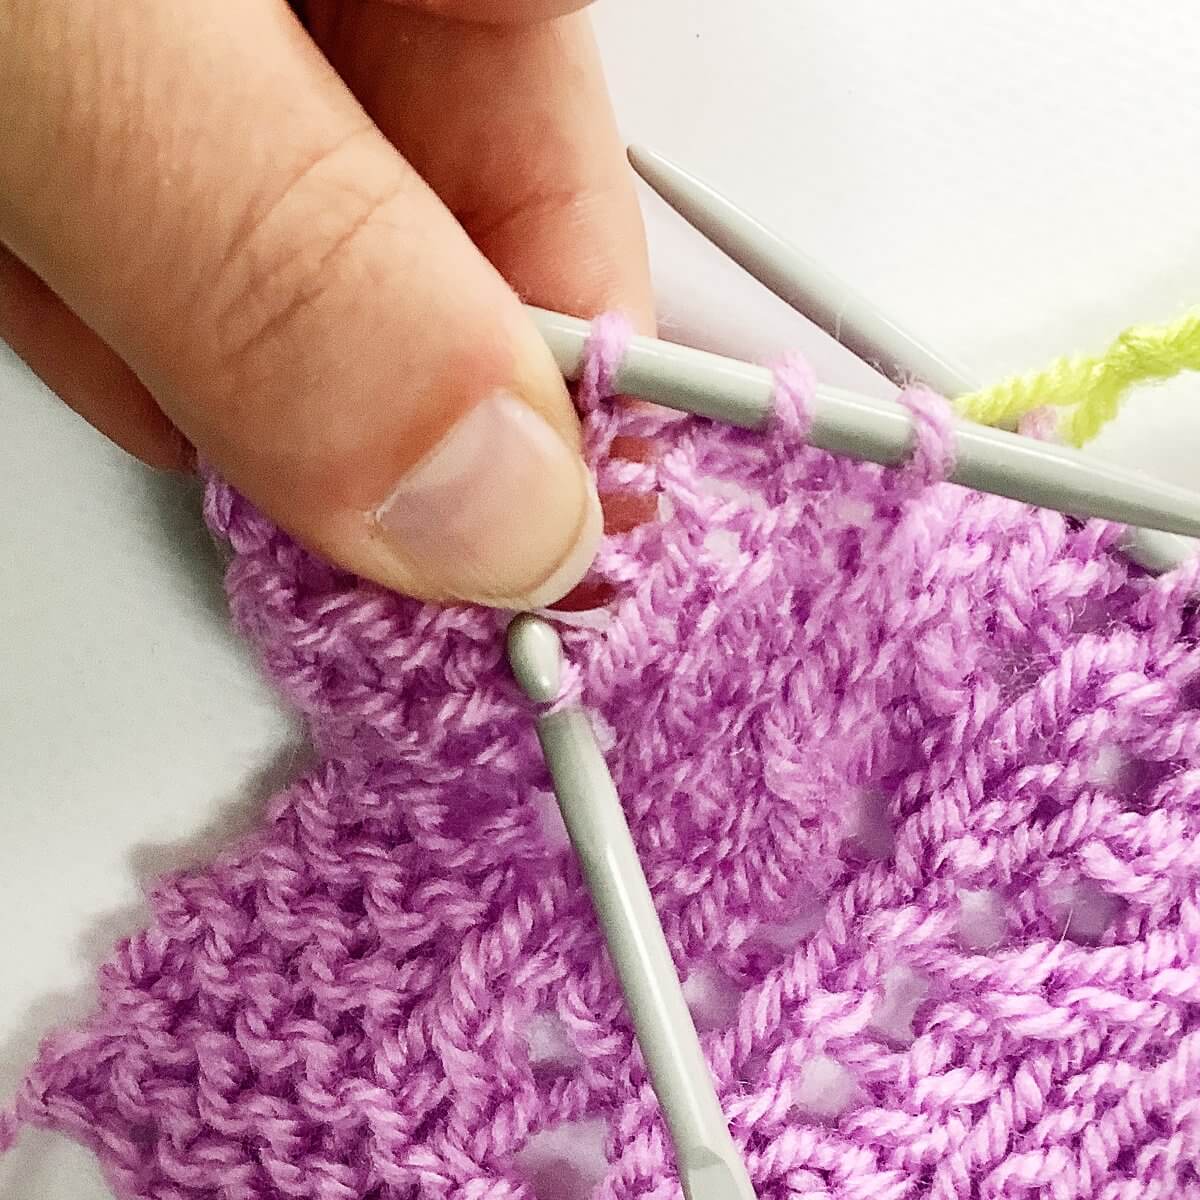
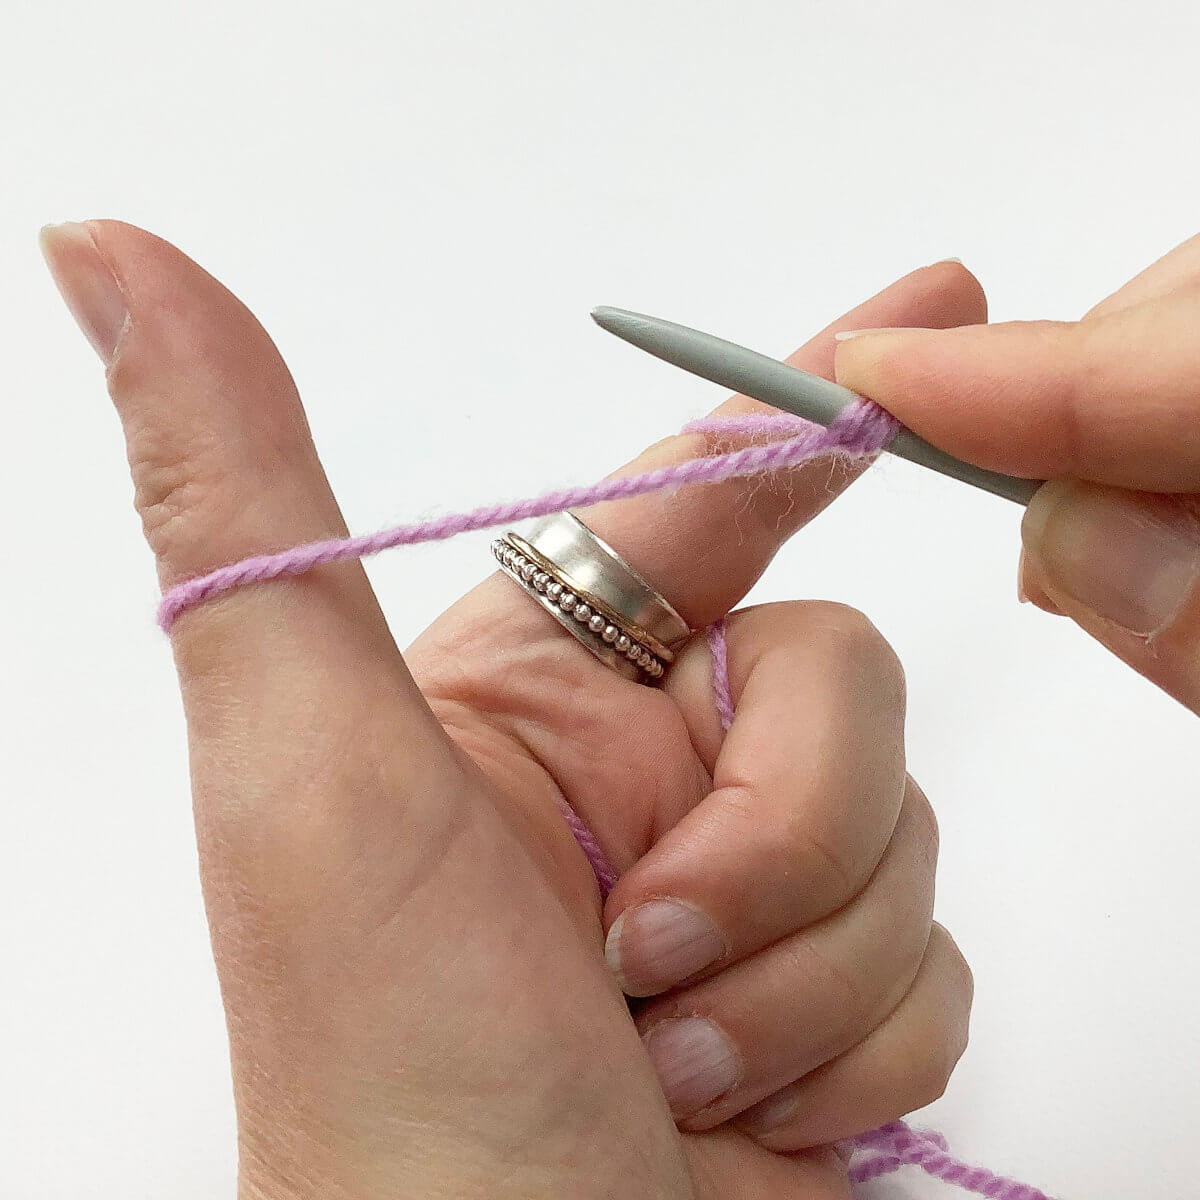
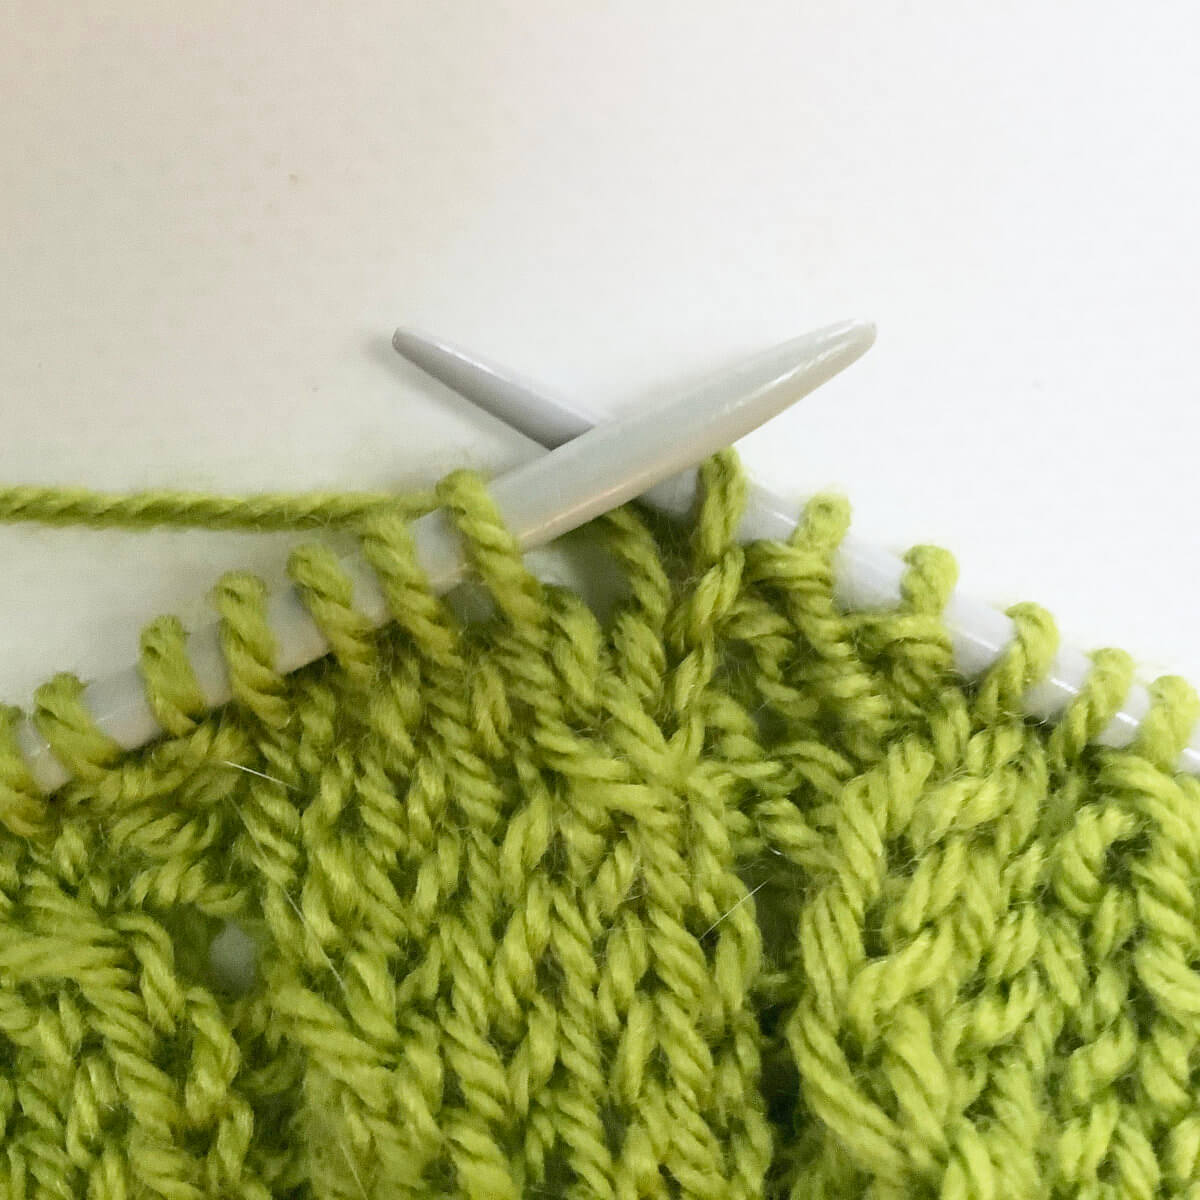
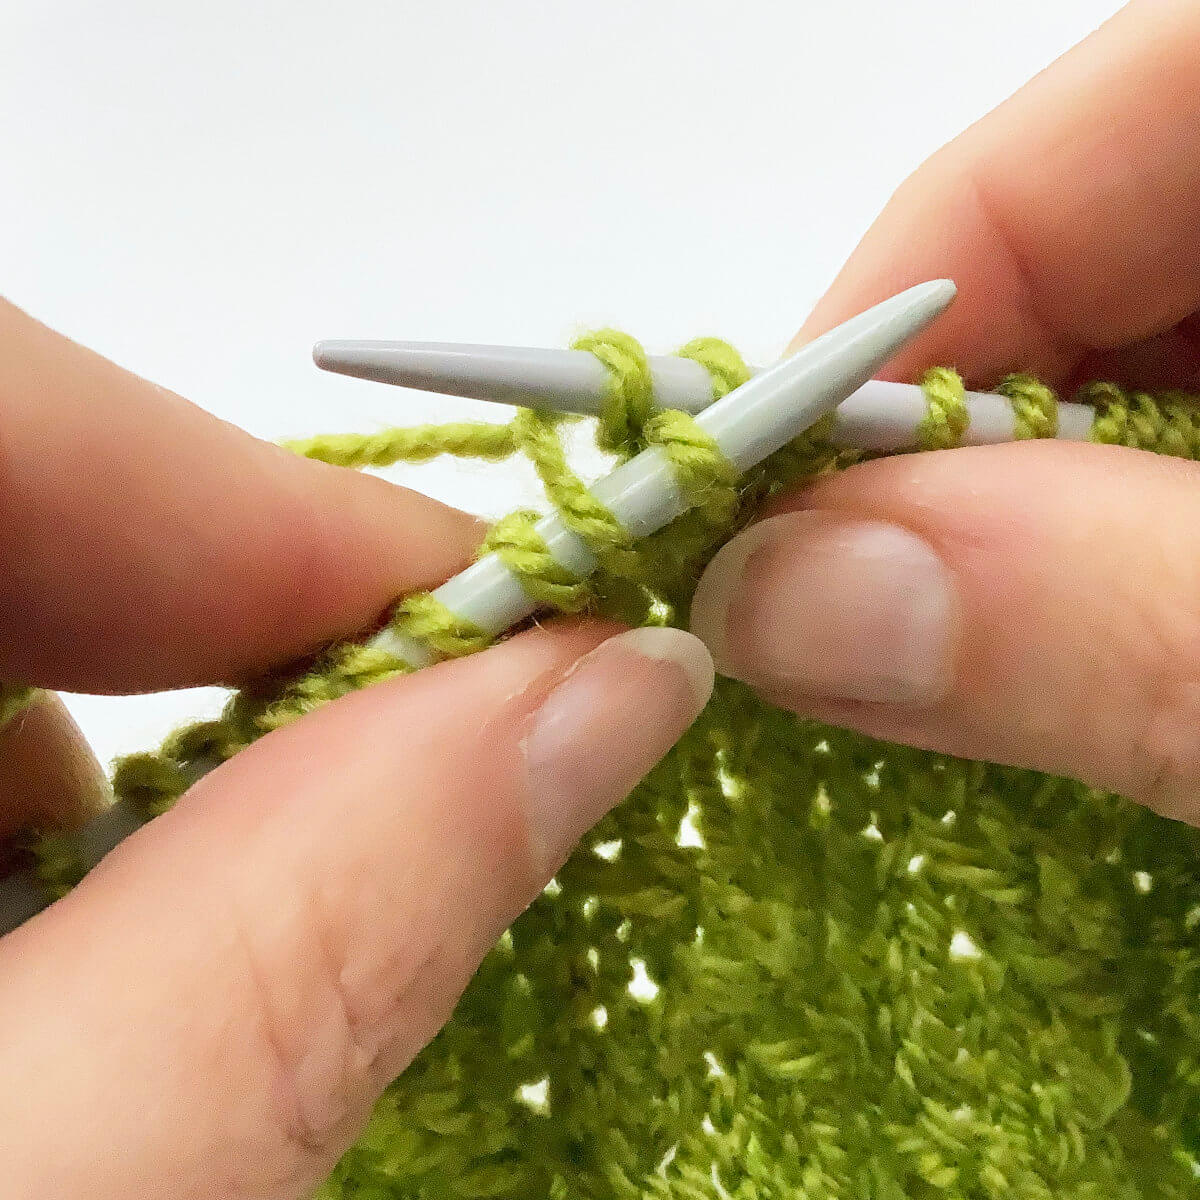
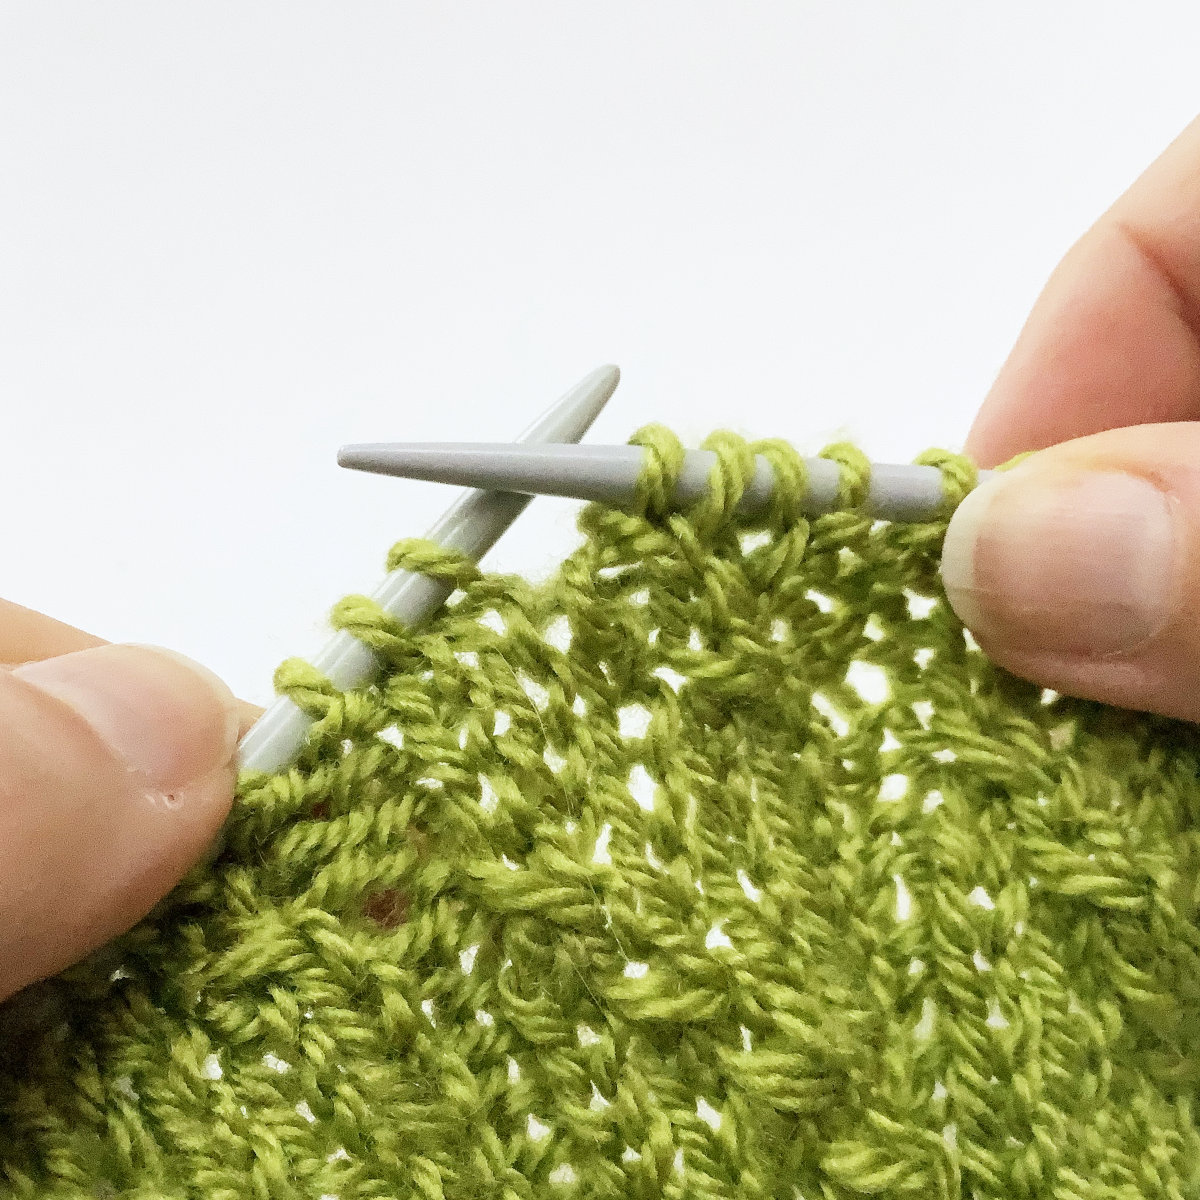
- Do you see the first 2 stitches on the left-hand needle, in the picture below? These are the ones we’re going to work the left twist over.
In other words: we’re going to switch the order of both knit stitches. This will make it appear that the stitches travel to the left.
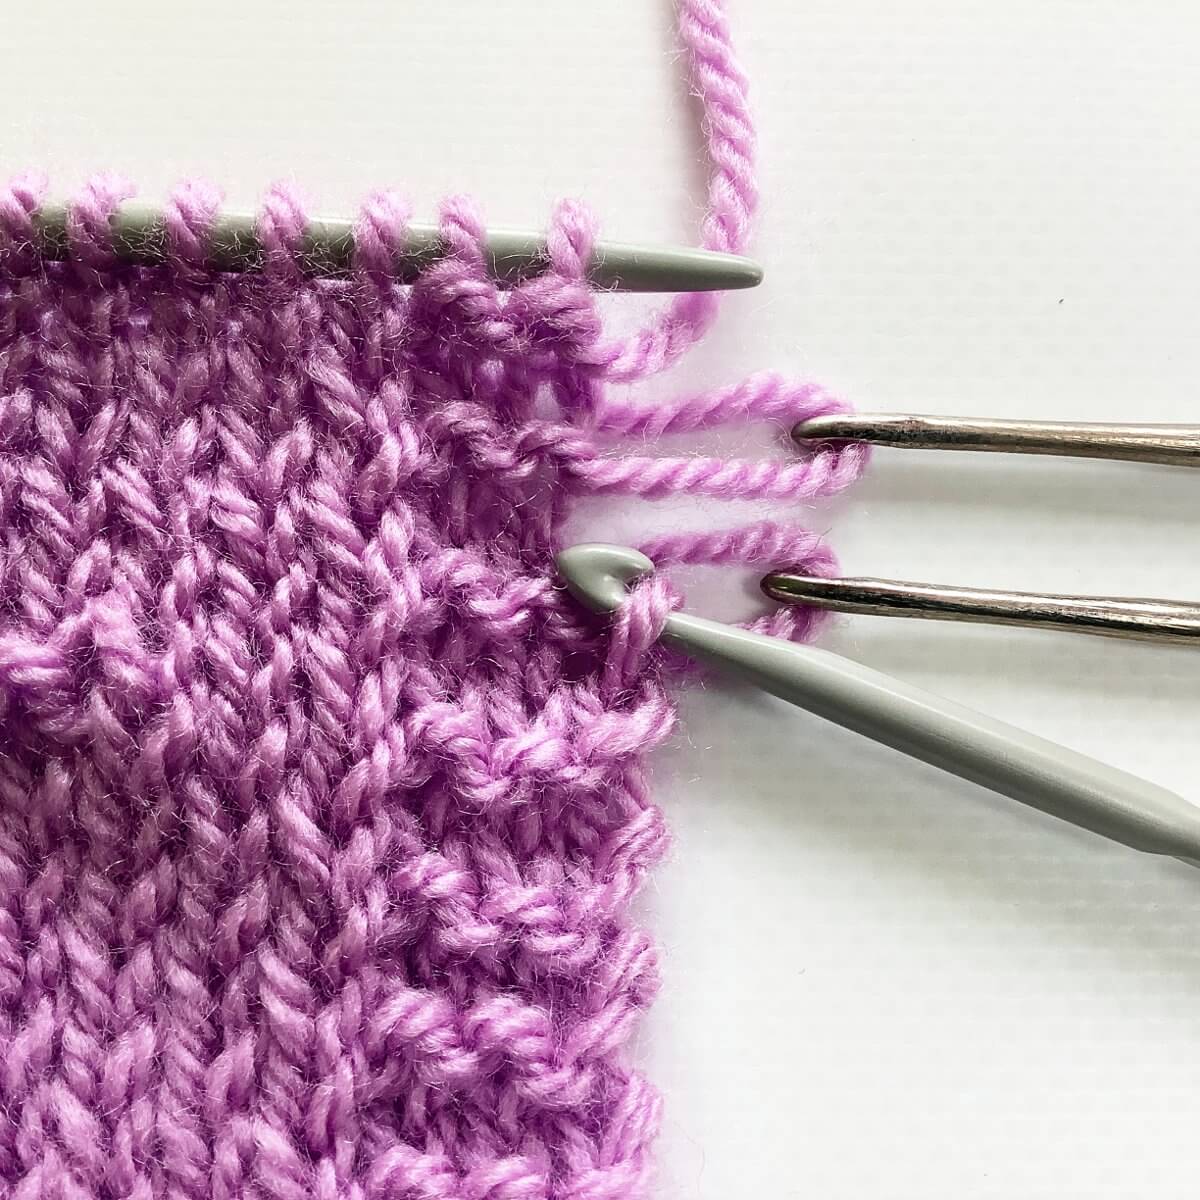
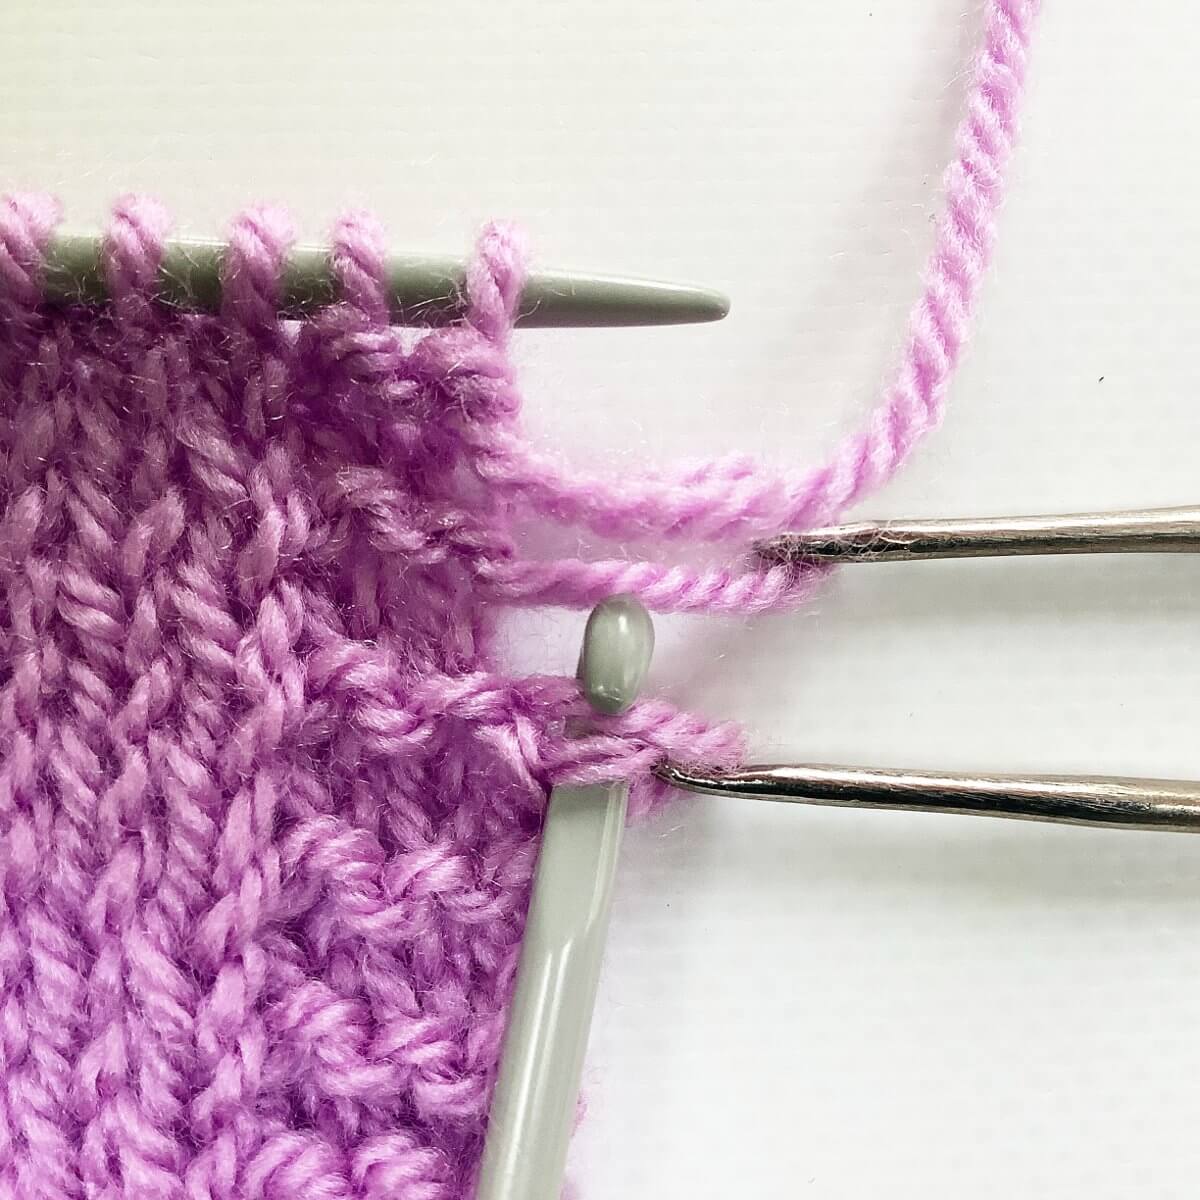
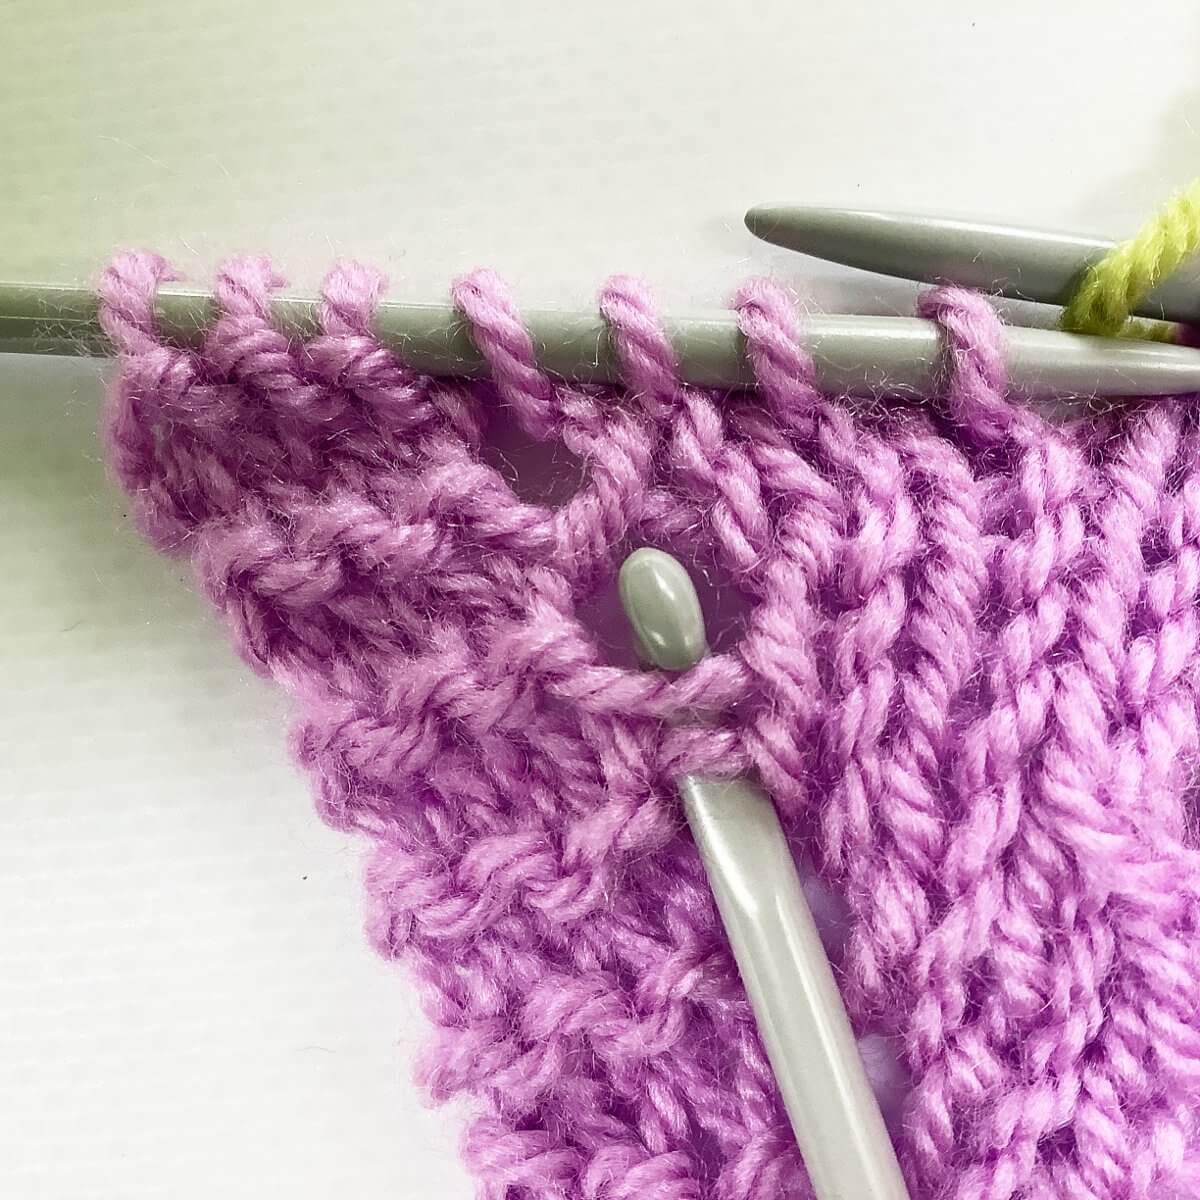
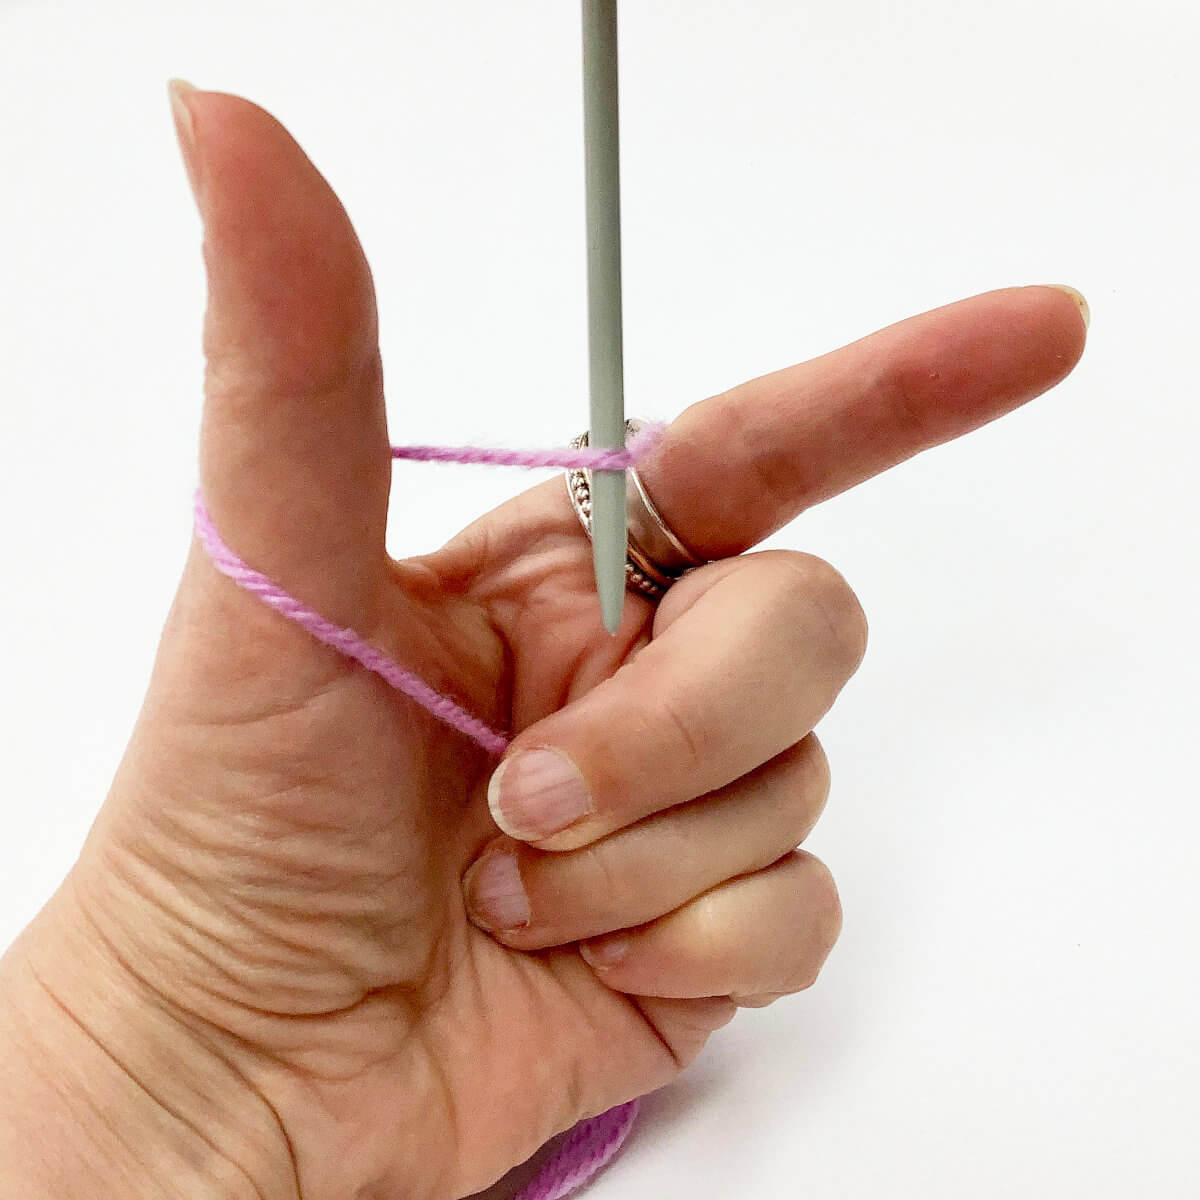
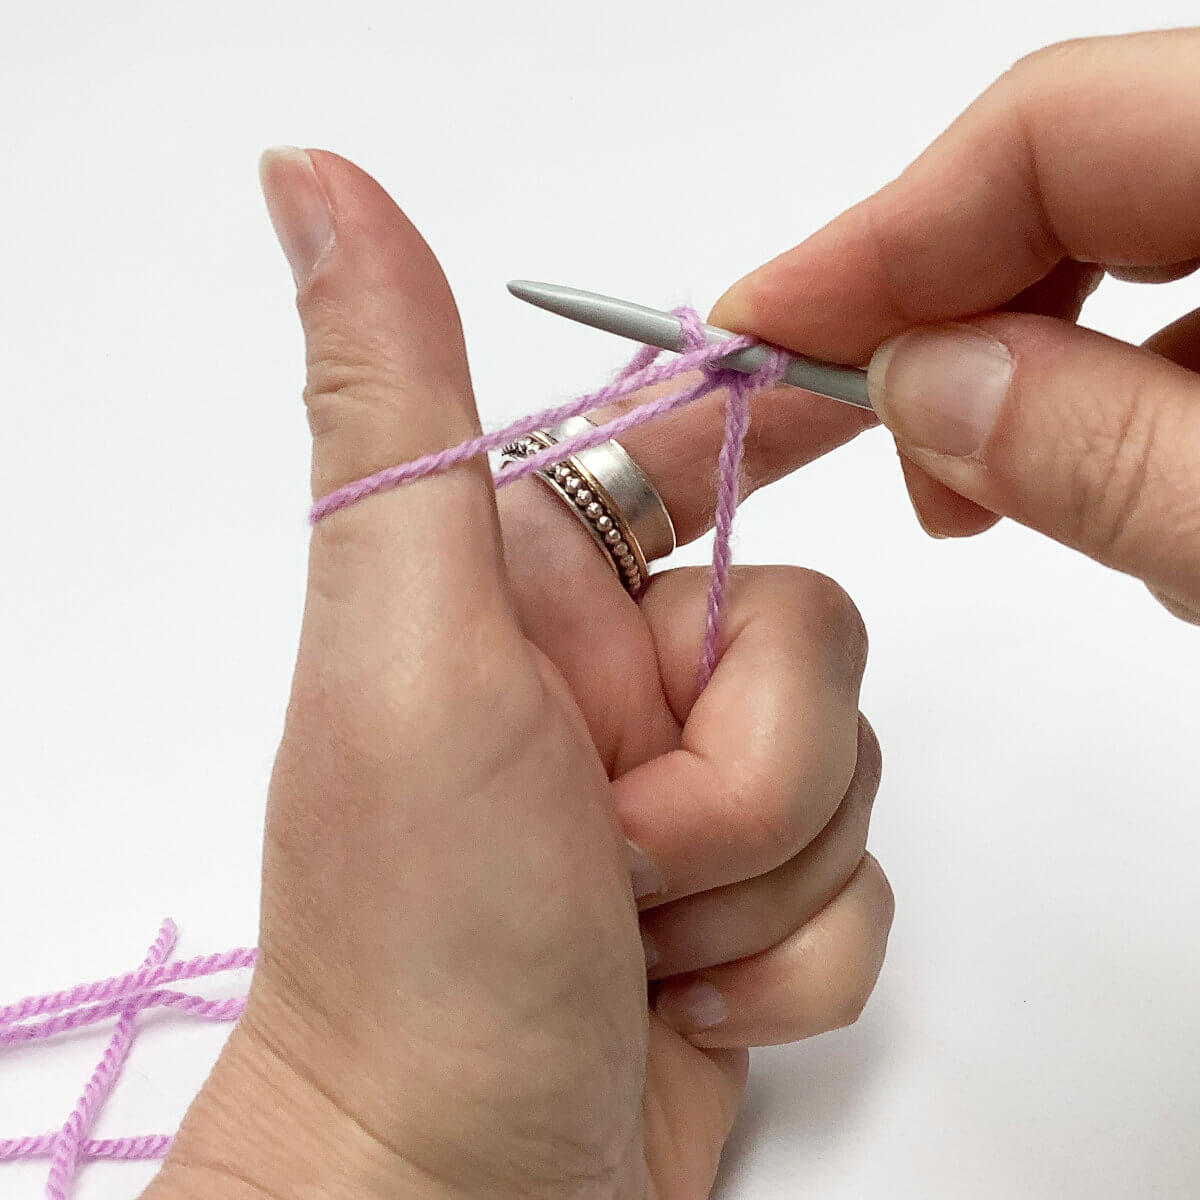
- Insert the right-hand needle knit-wise into the back loop of the second stitch on the left-hand needle, skipping the stitch nearest to the tip.
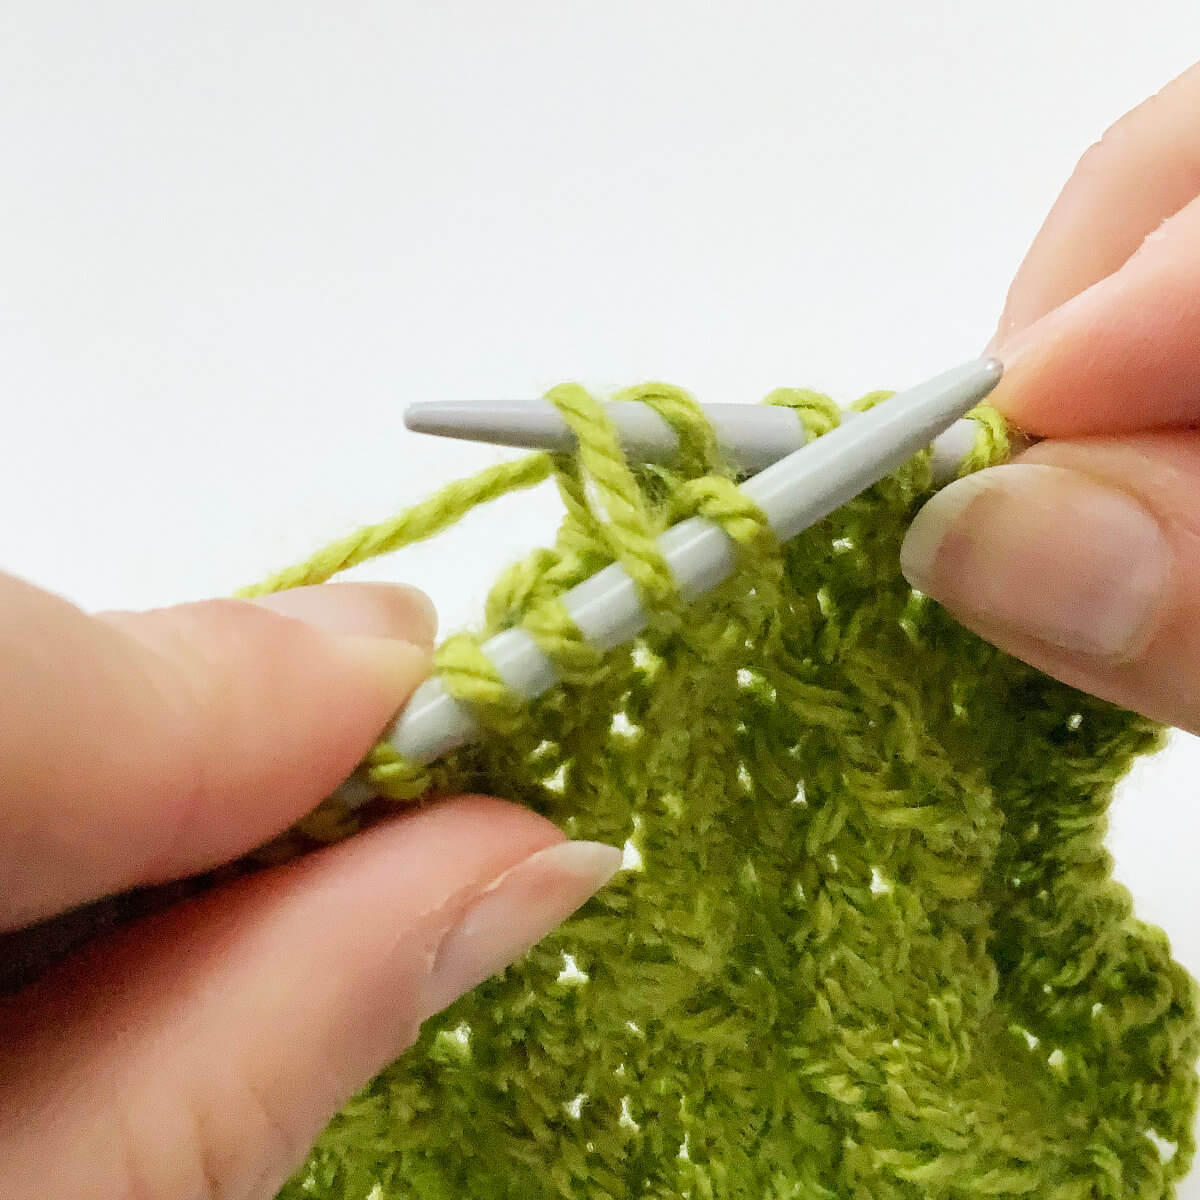
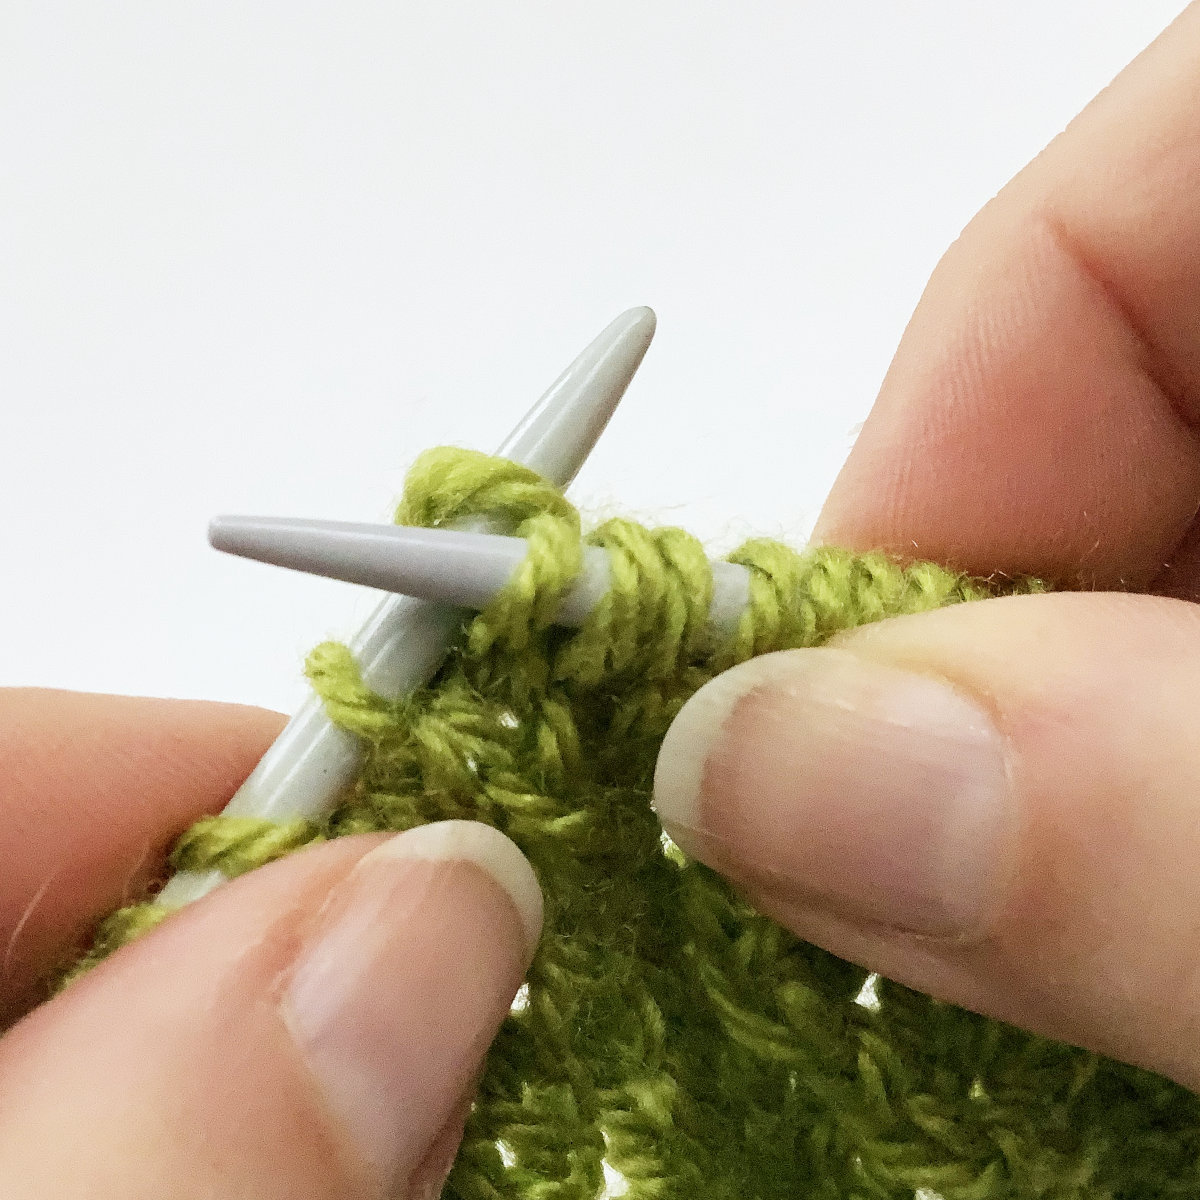
- Wrap the yarn around and the needle….
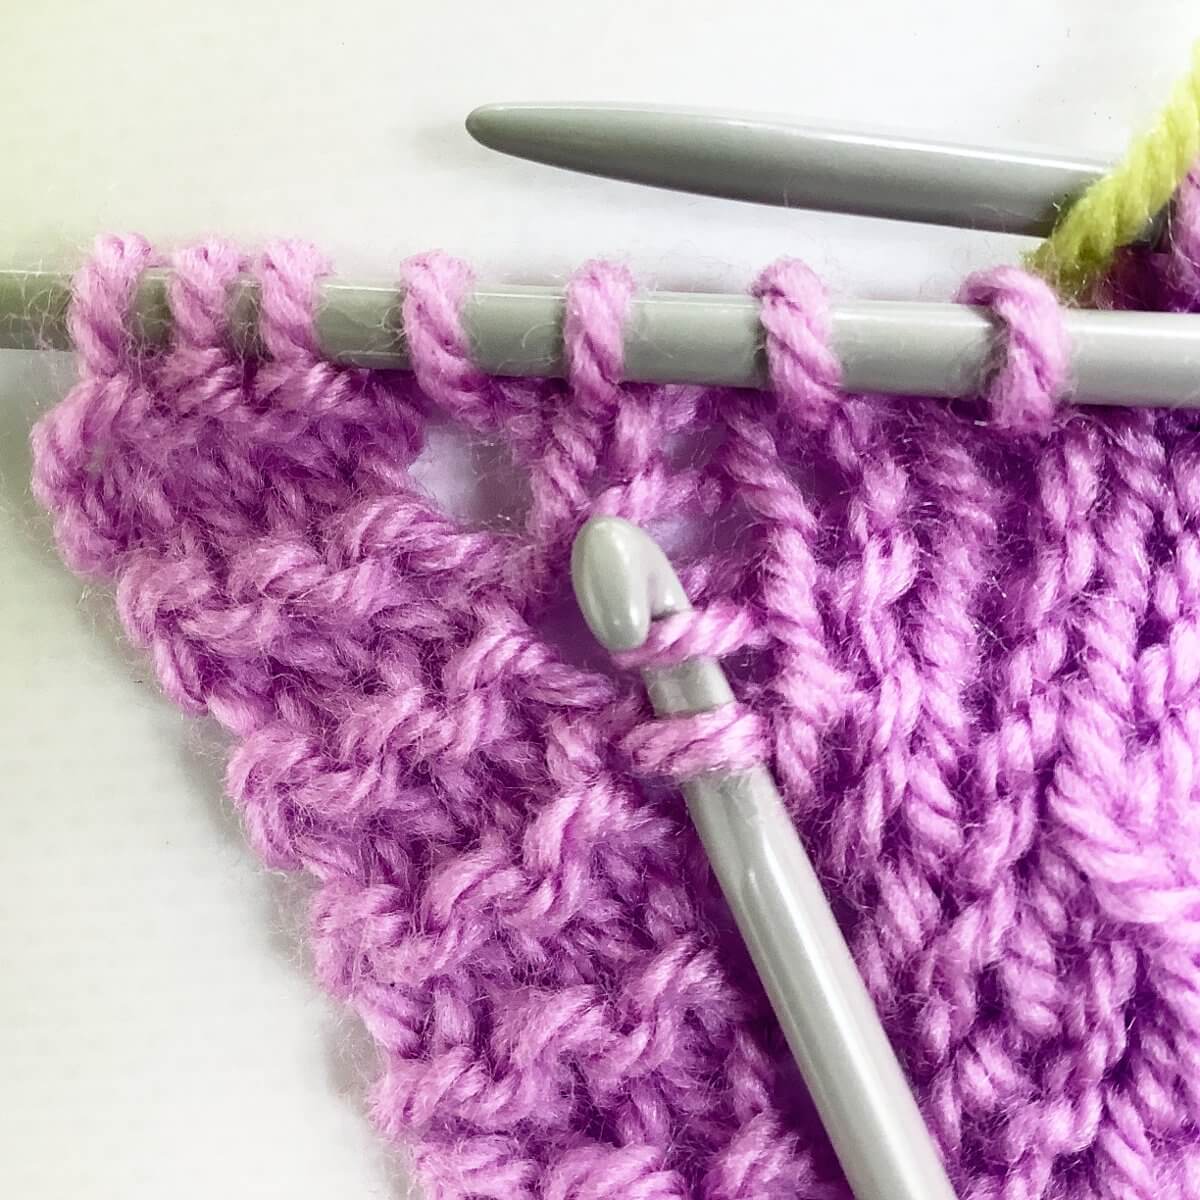
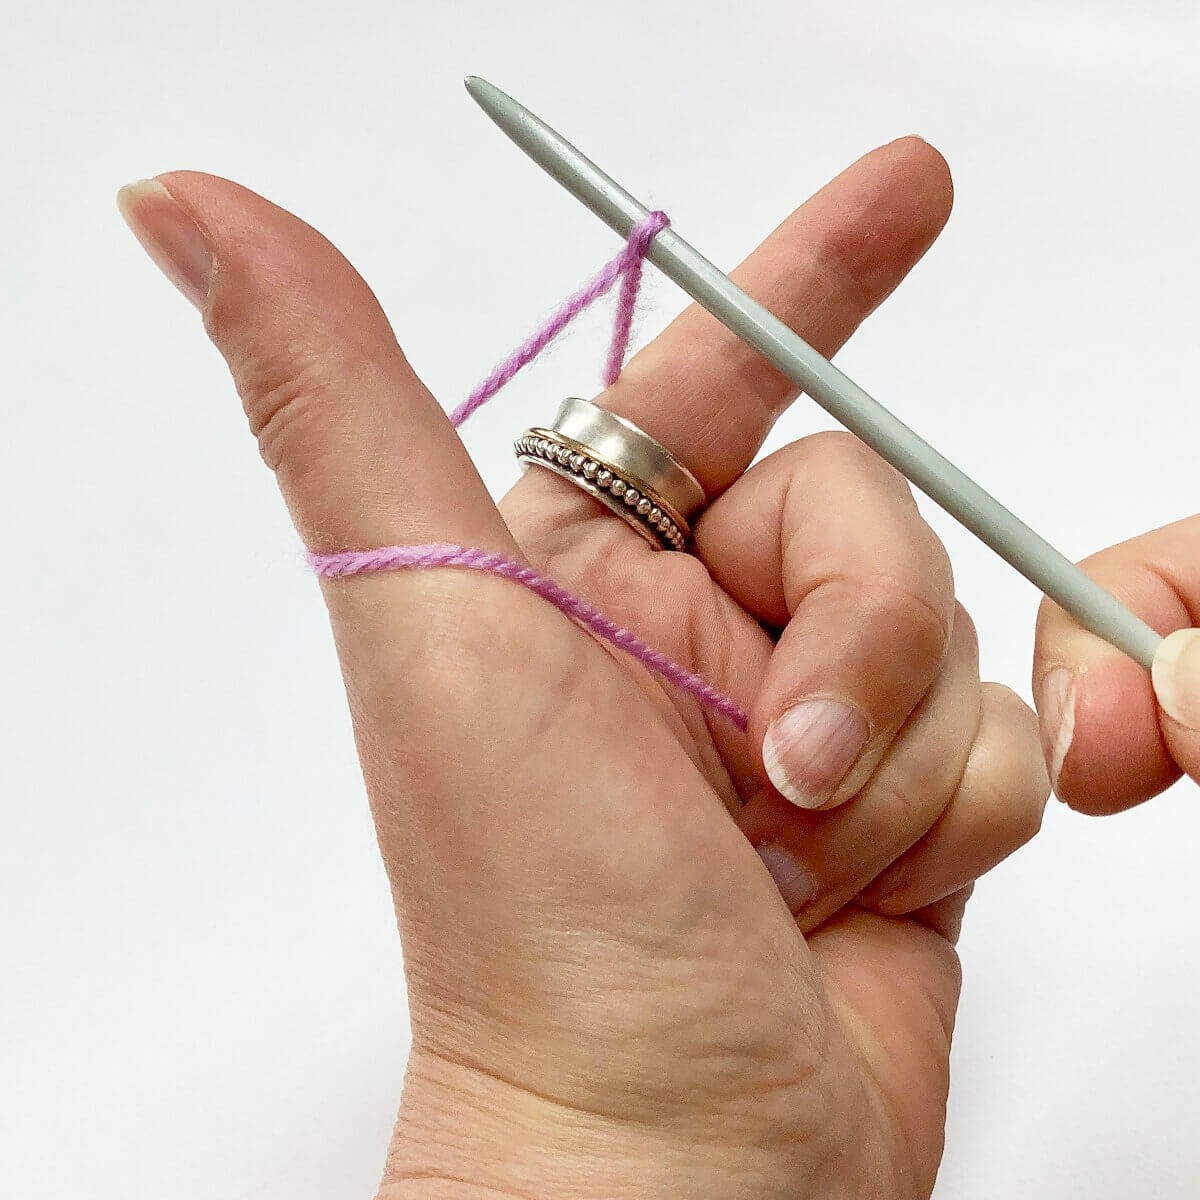
- … and pull it through. Do not slip the original stitch off the needle yet!
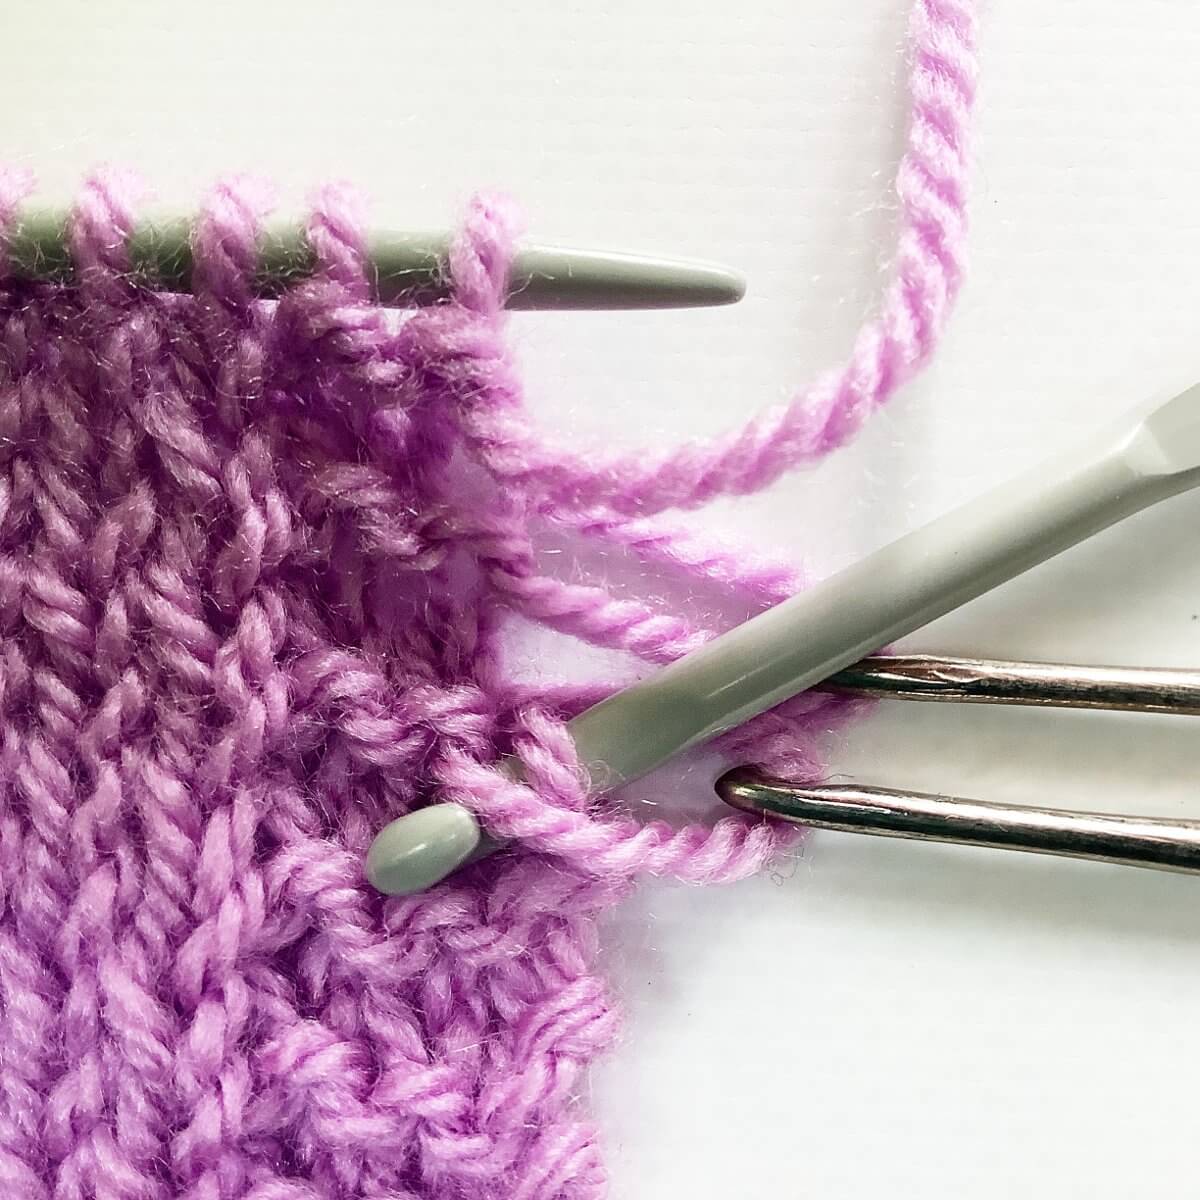
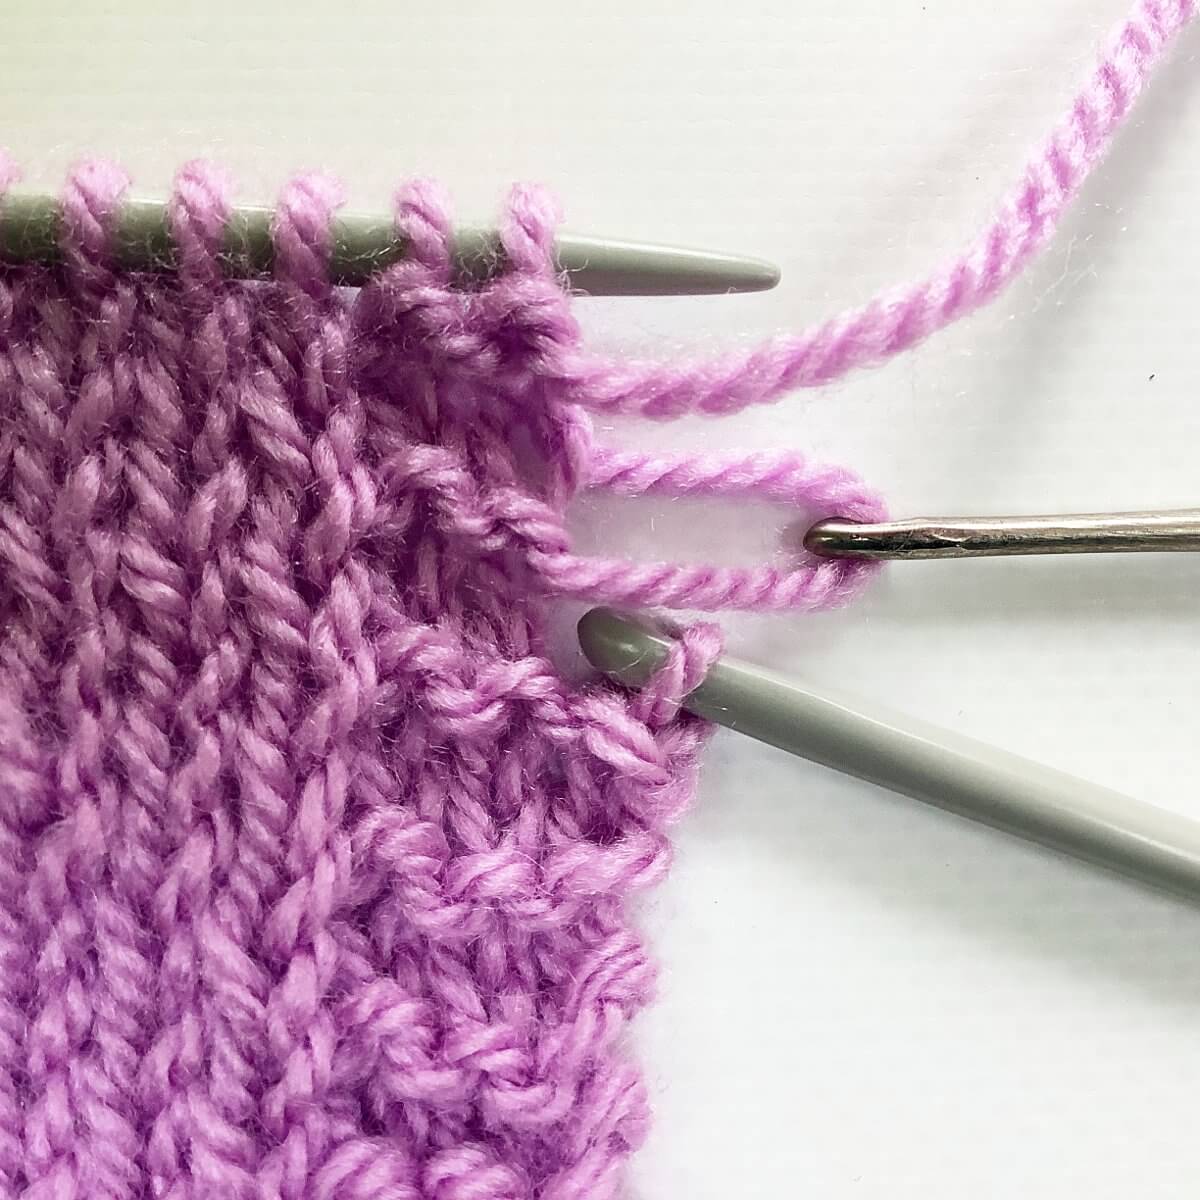
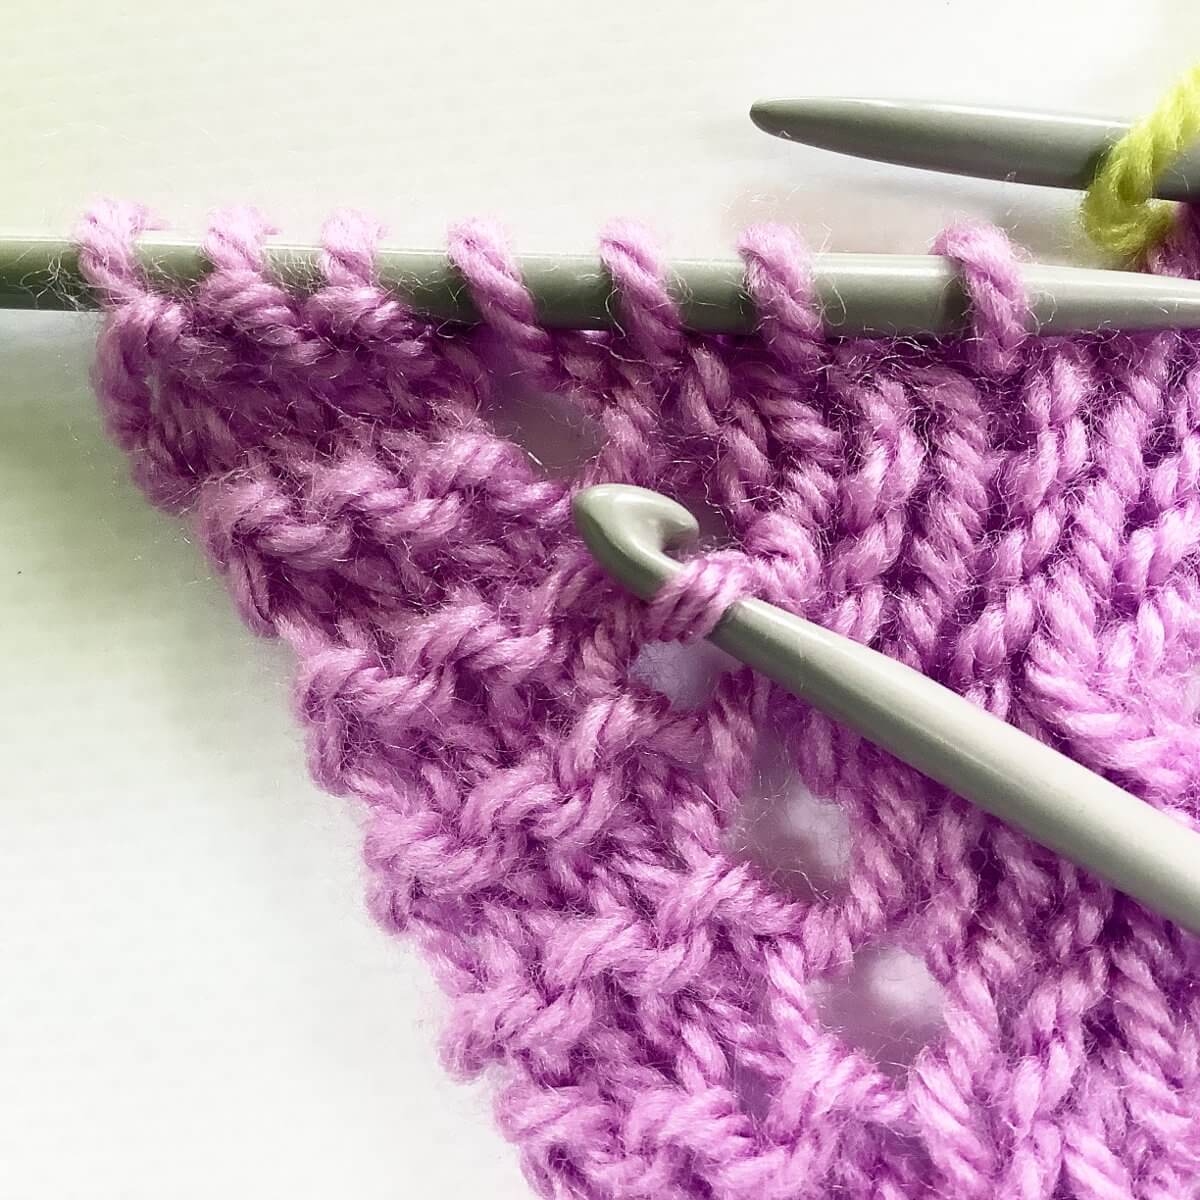
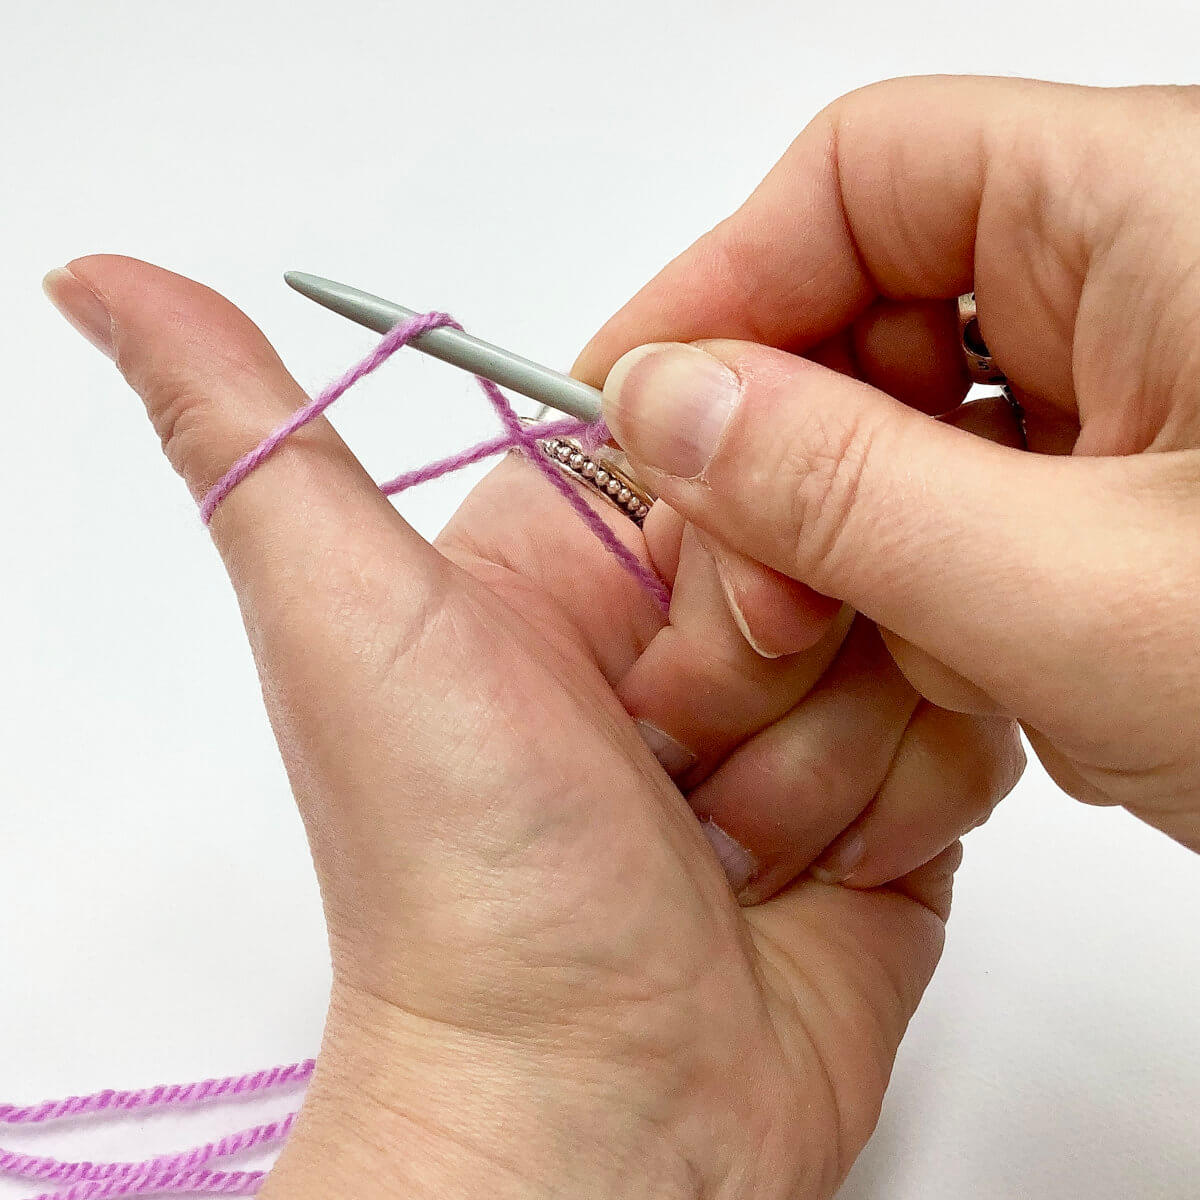
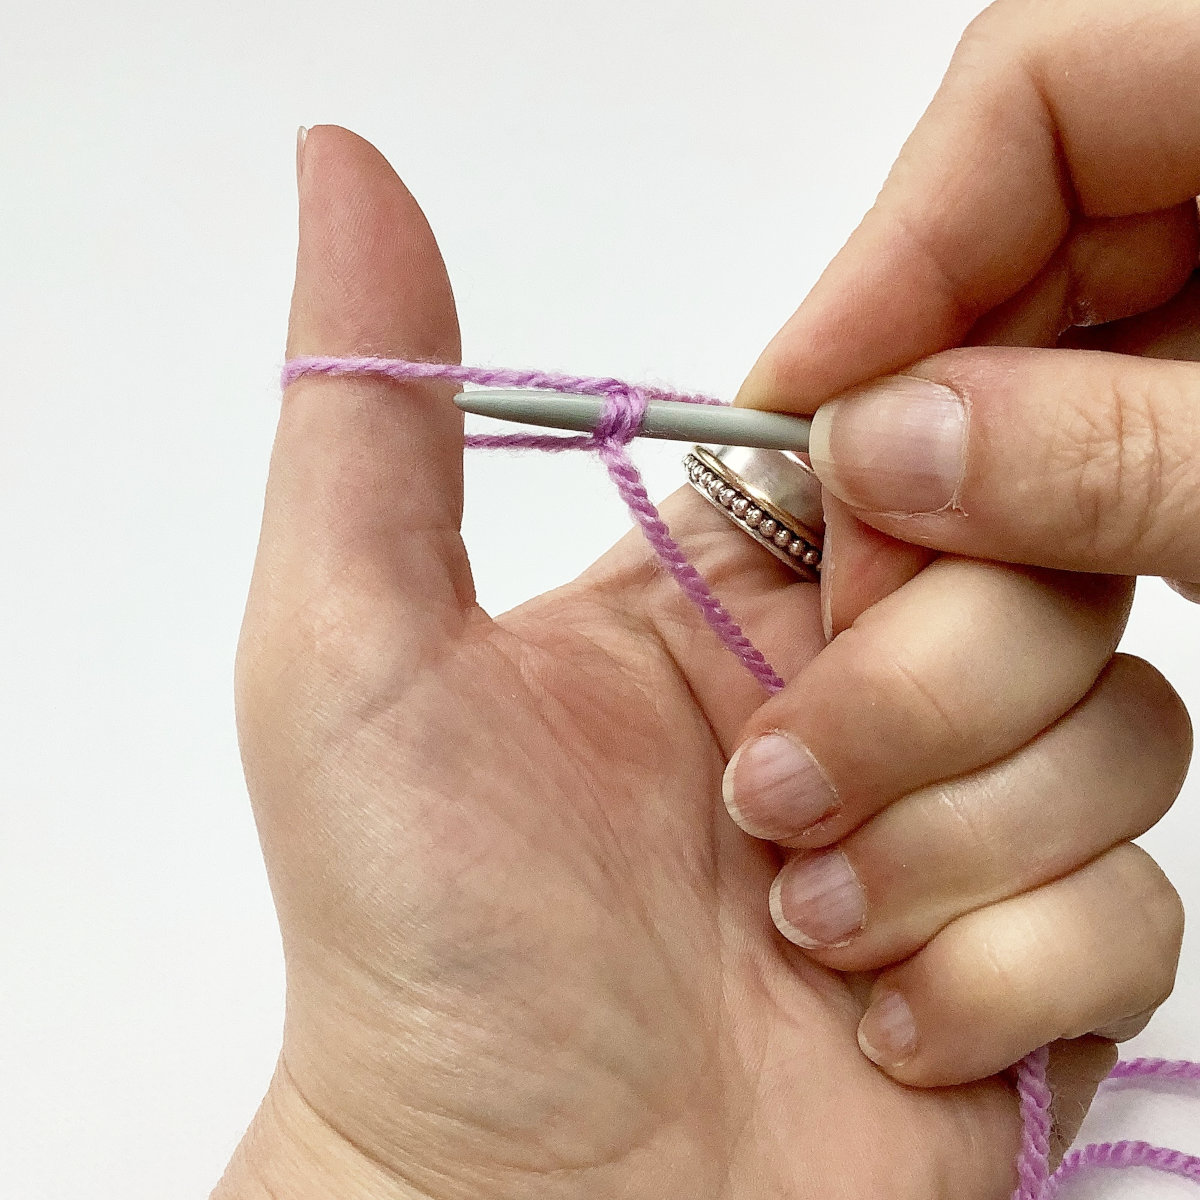
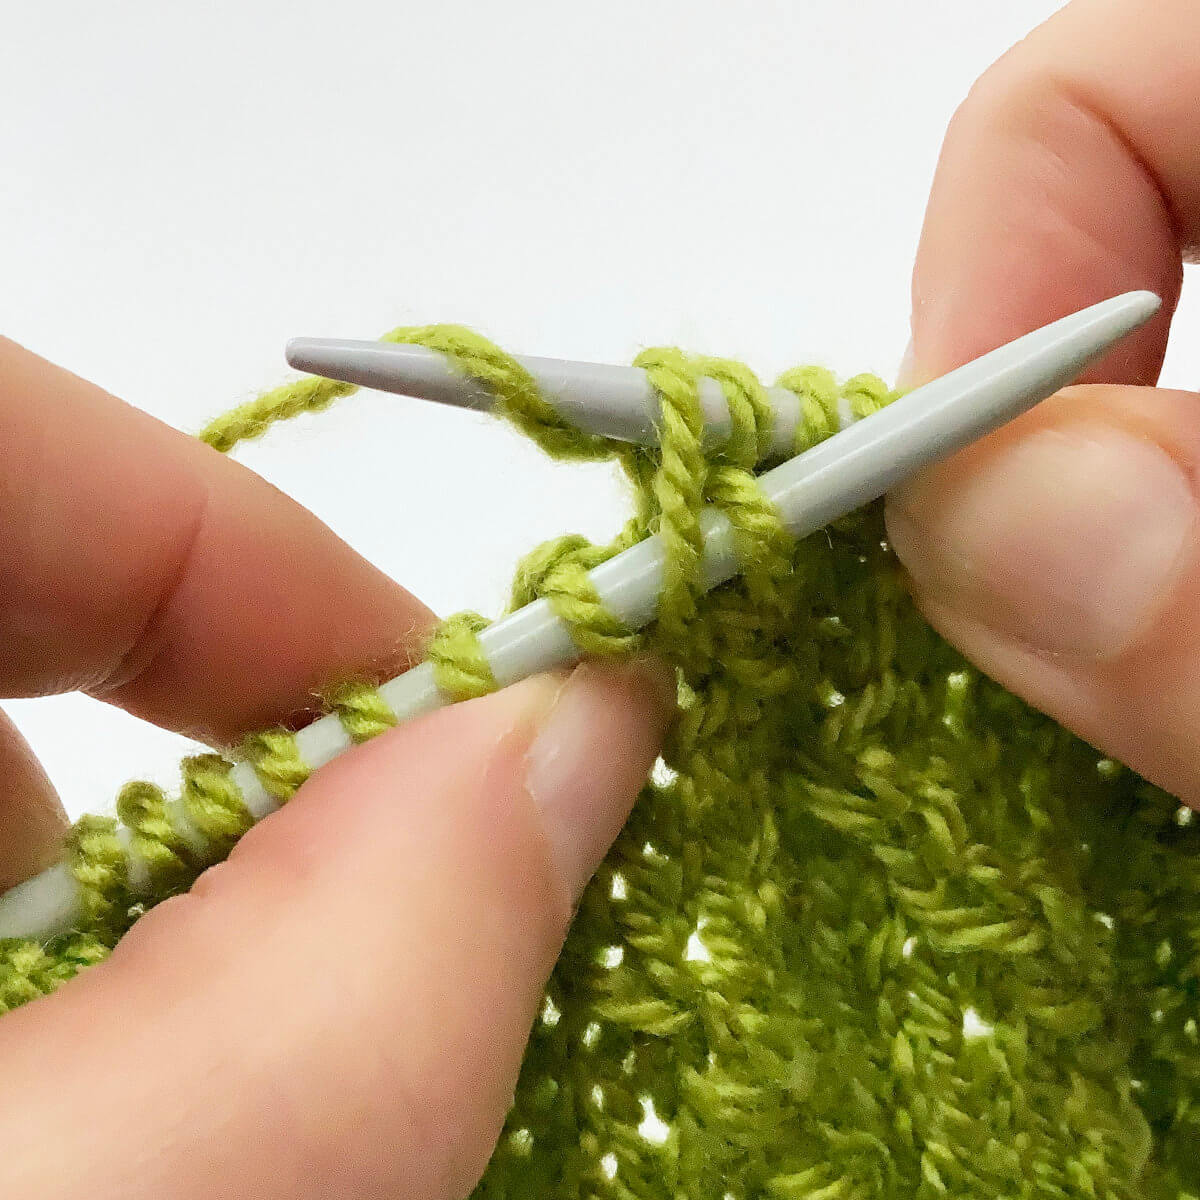
- Next, insert the right-hand needle knit-wise into the stitch that was skipped.
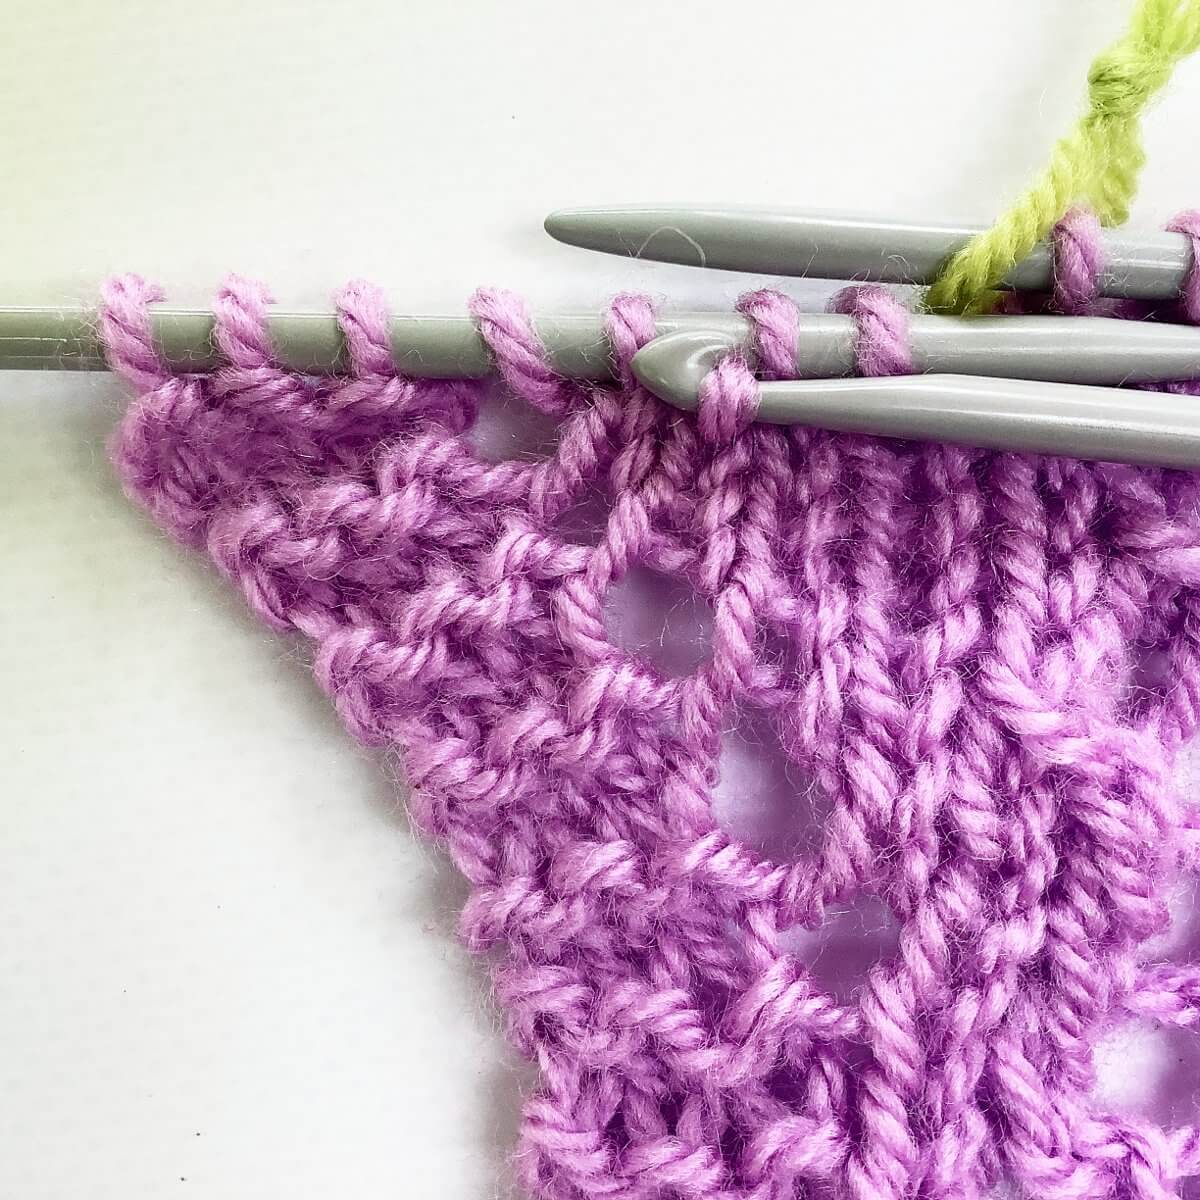
- Wrap the yarn around and the needle….
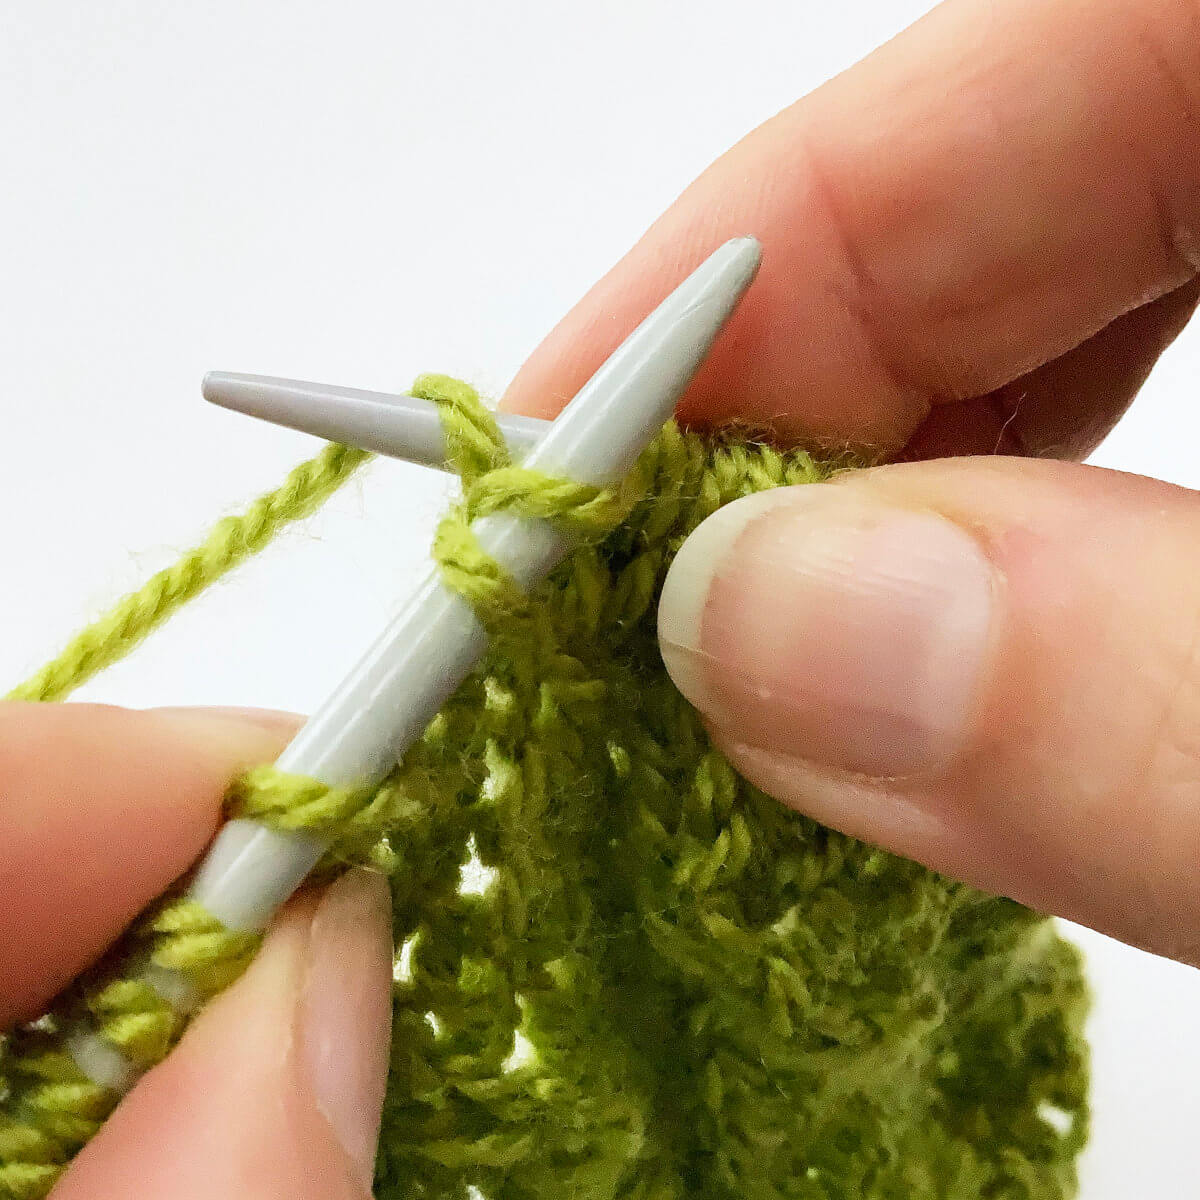
- … and pull it through.
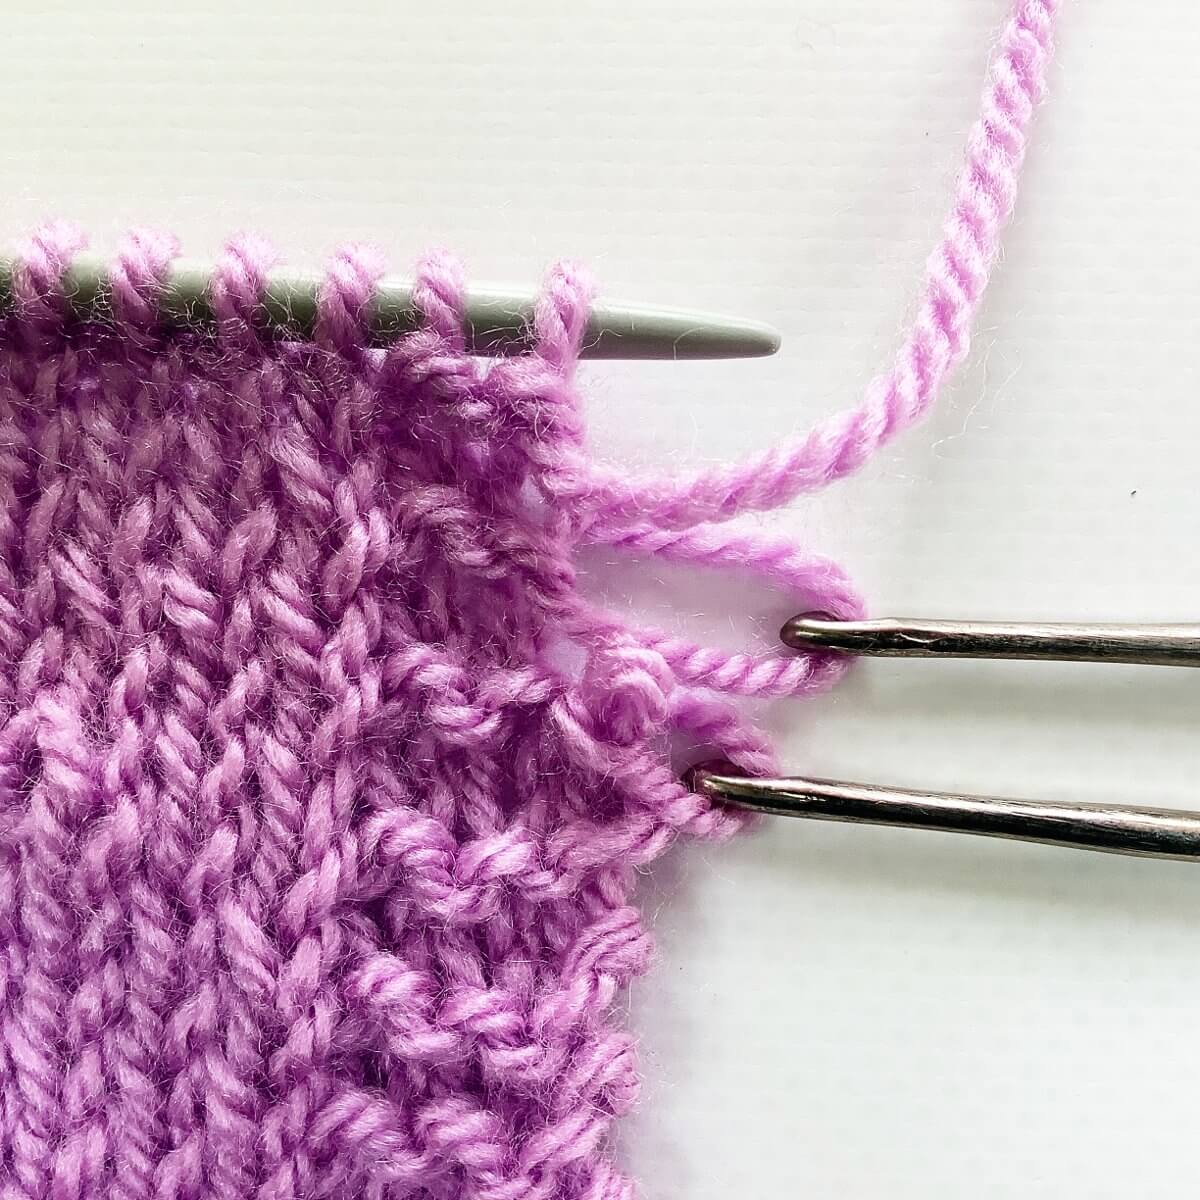
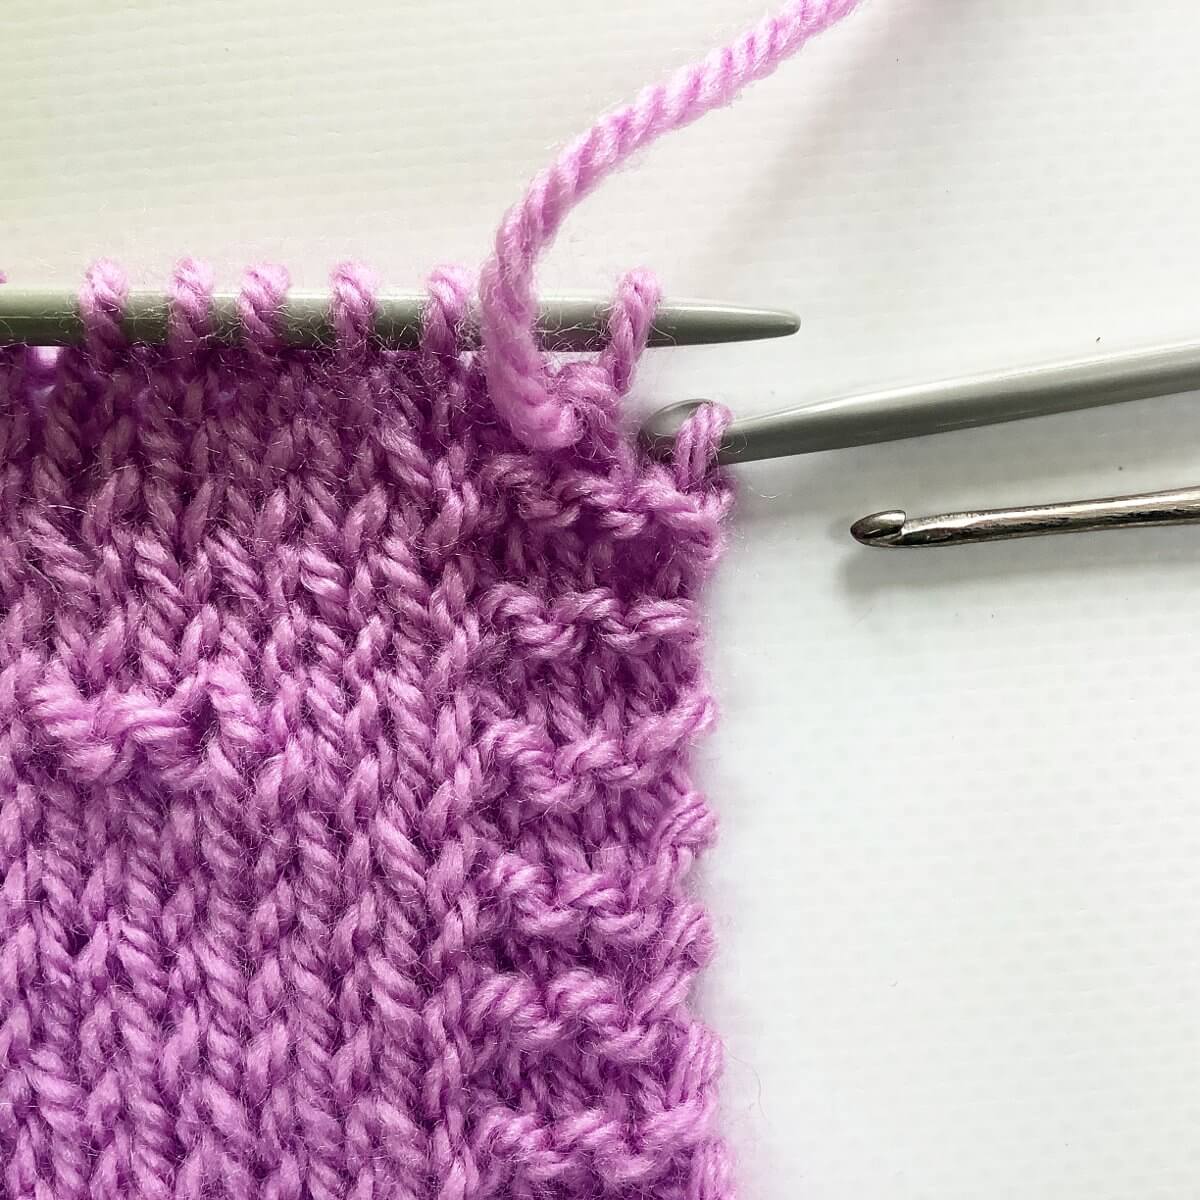
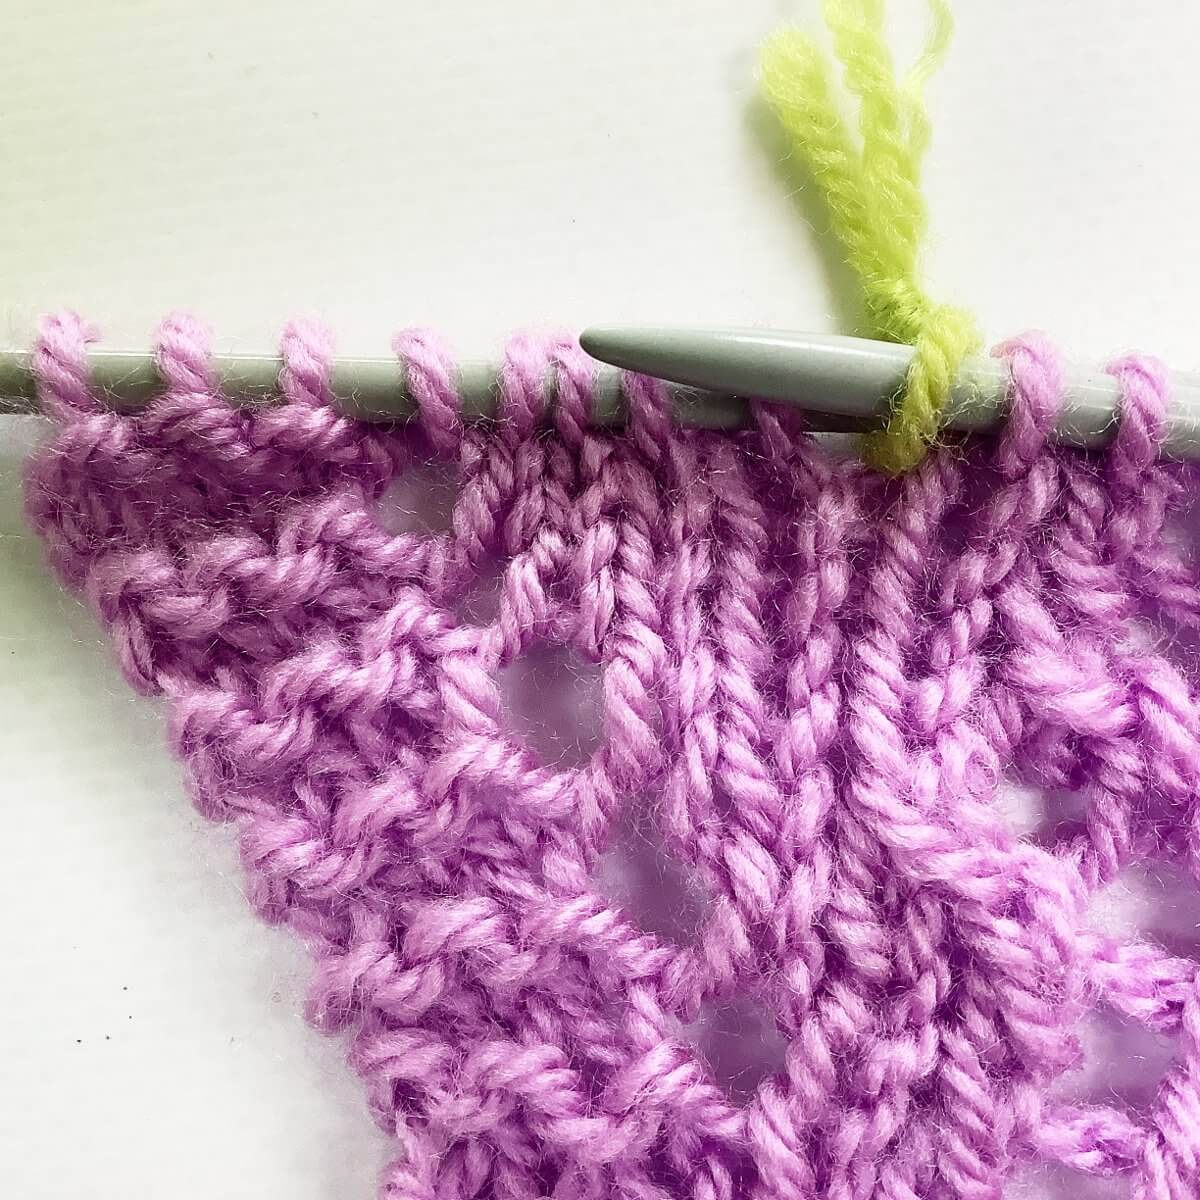
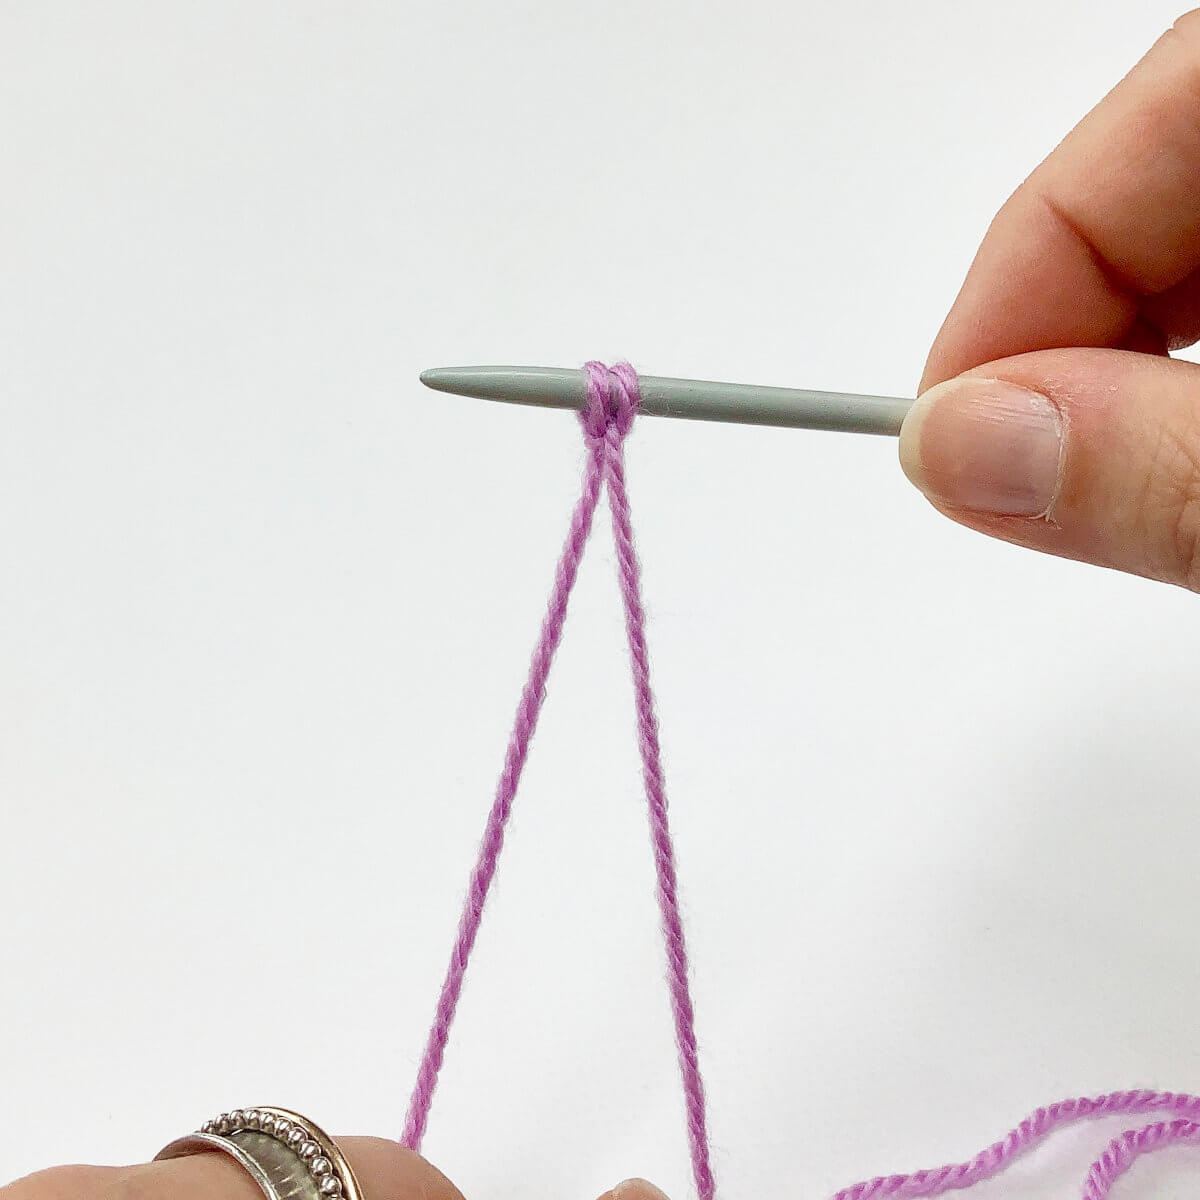
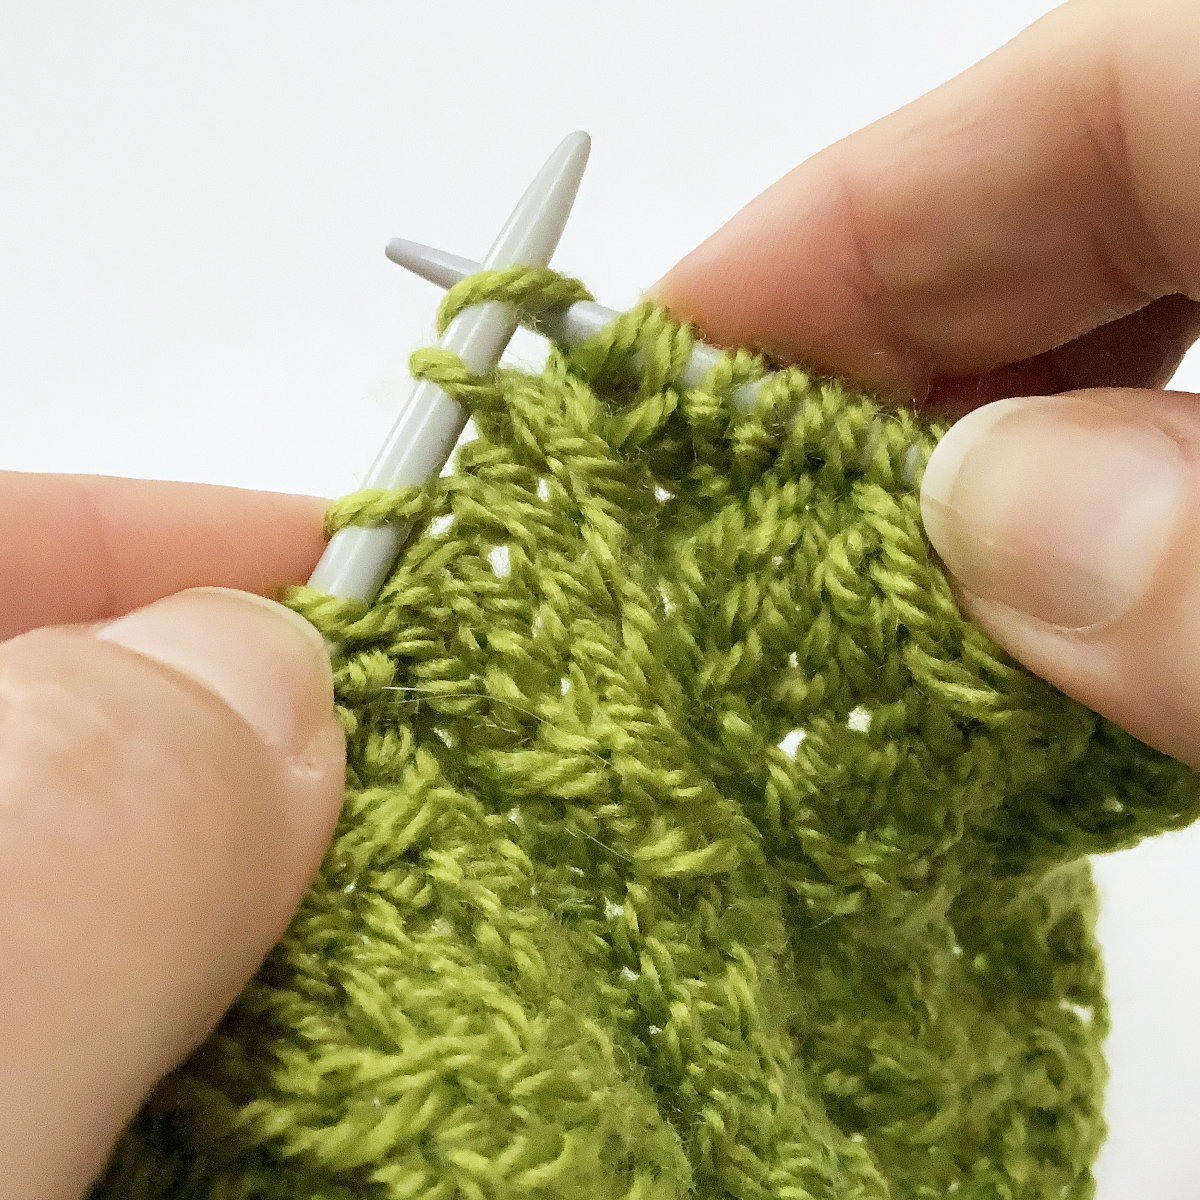
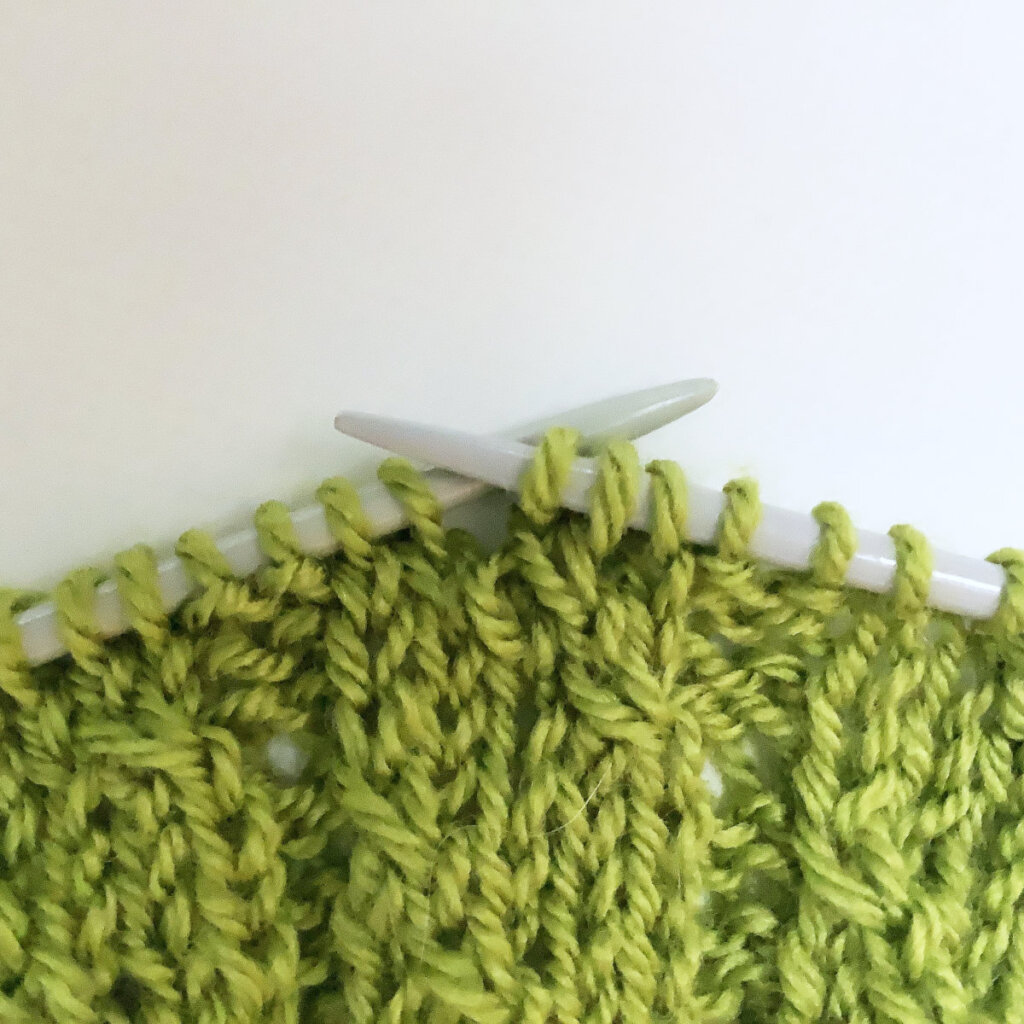
- To finish the left twist, slide both original stitches off the left-hand needle.
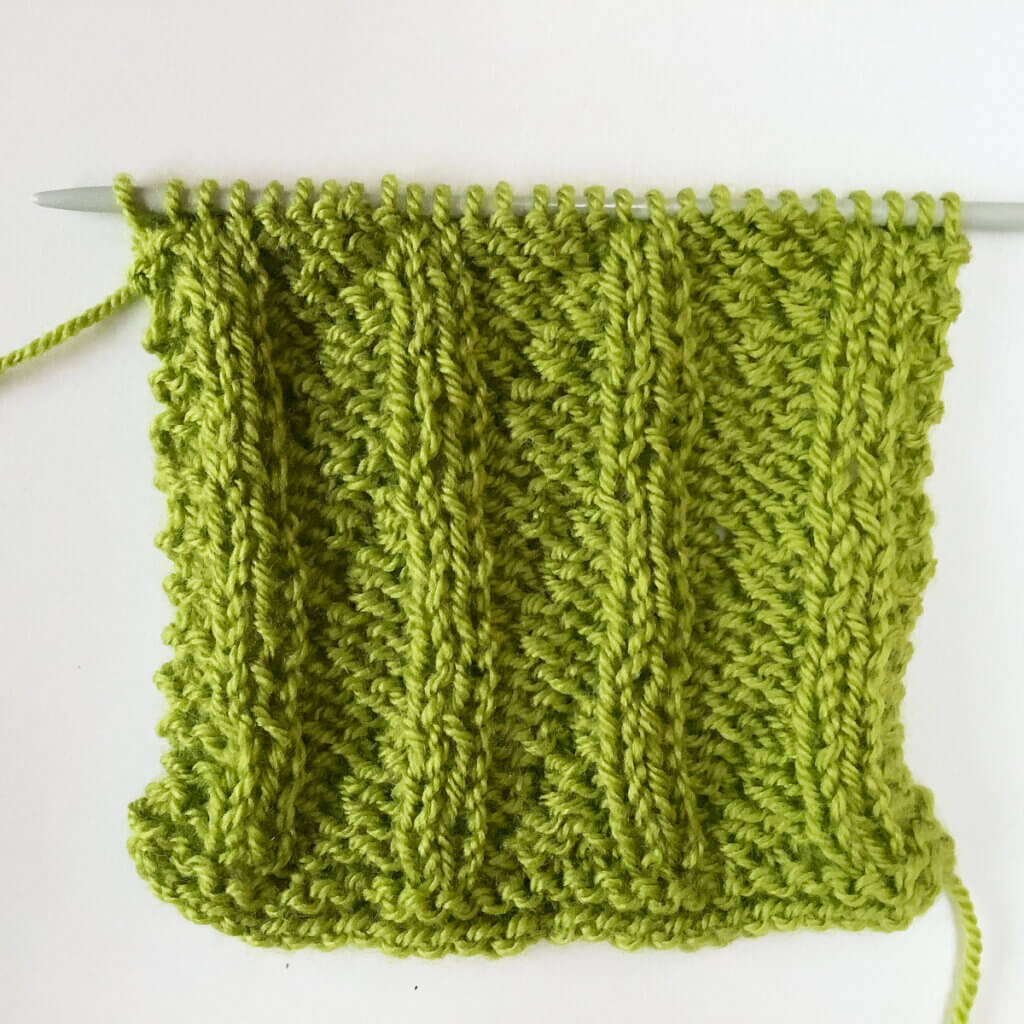
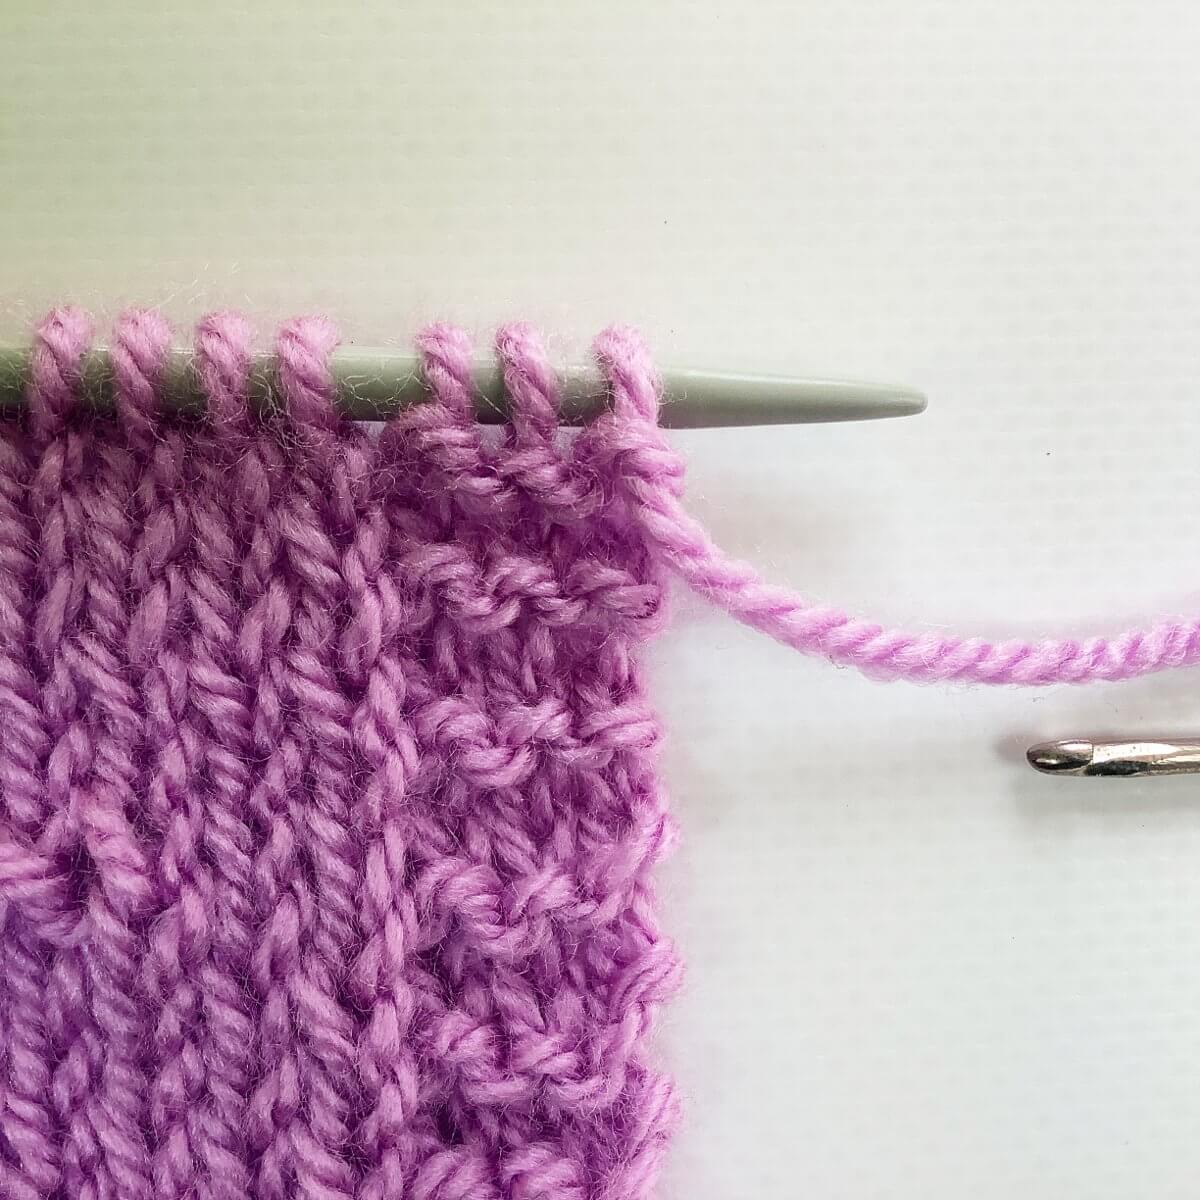
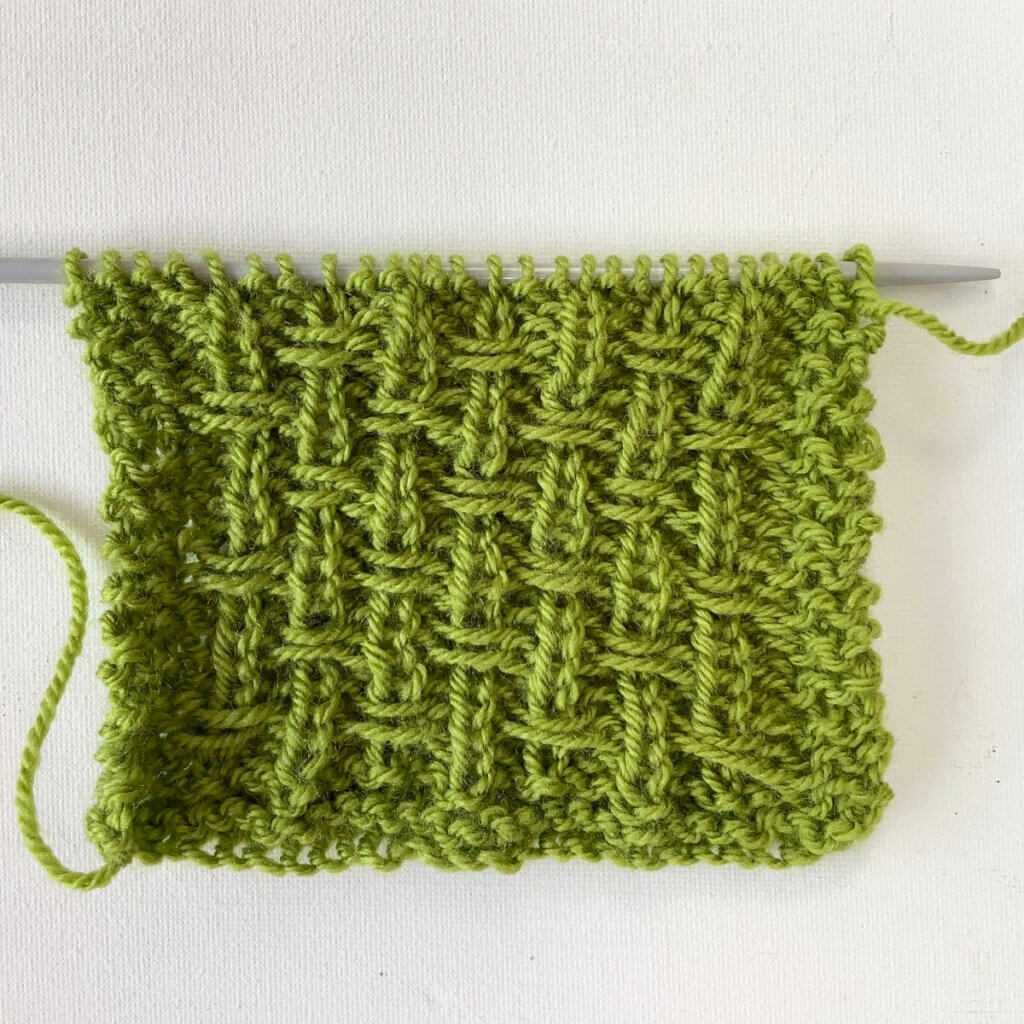
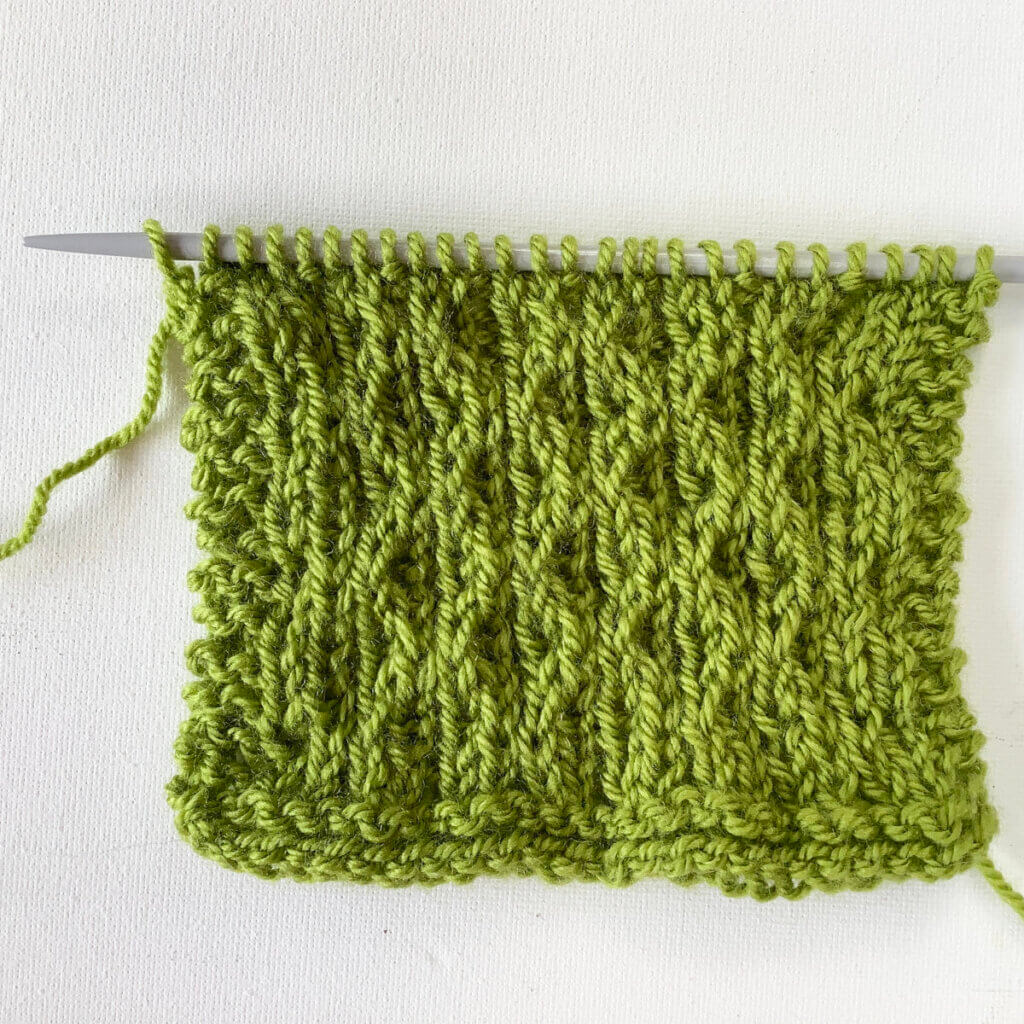
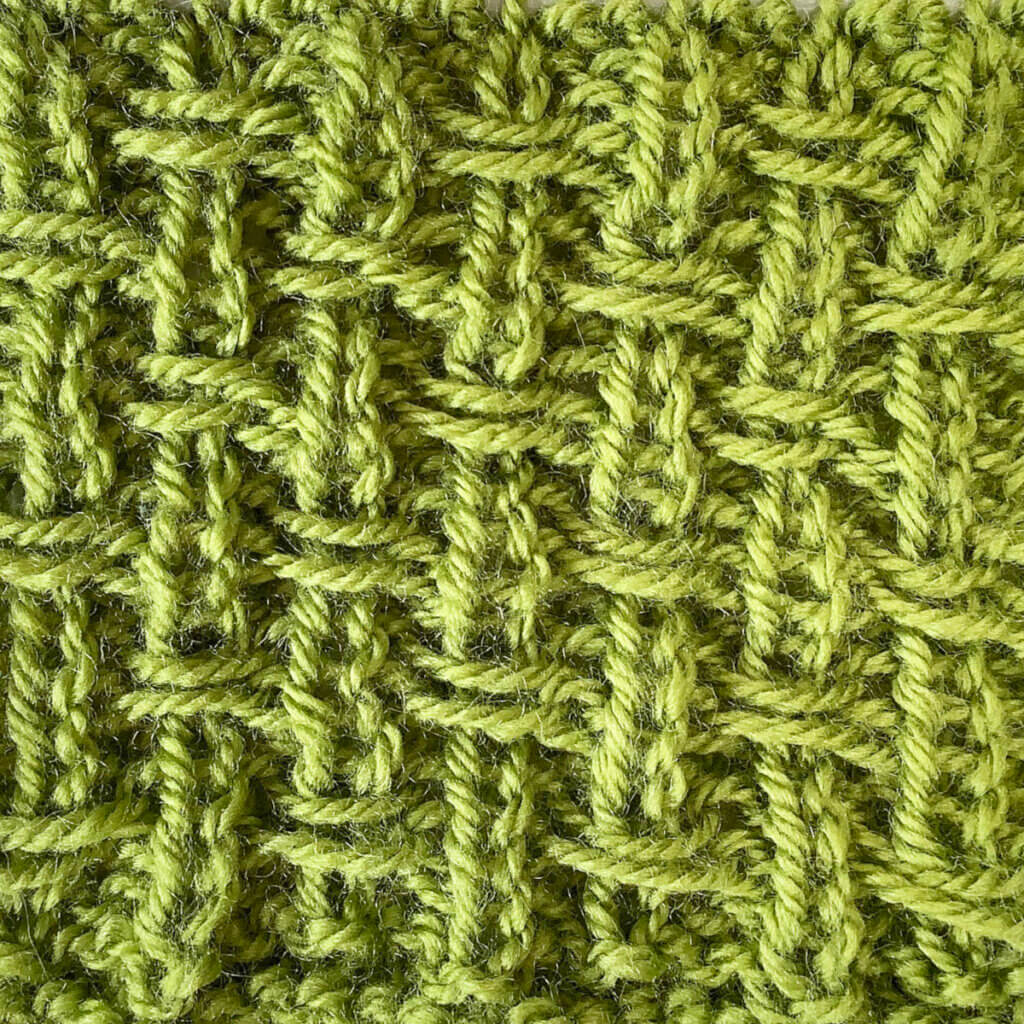
This is the result:

Thanks to my Patreon supporters for bringing you this freebie! Creating quality patterns and tutorials is a lot of work and resource-intensive. However, I find it important to give you free content like this tutorial. Thanks to the generous support of my Patreon supporters, I can make it happen. Thank you, patrons! Click here to join, or click here to read more about La Visch Designs on Patreon.
tutorial – left twist in stockinette Read More »