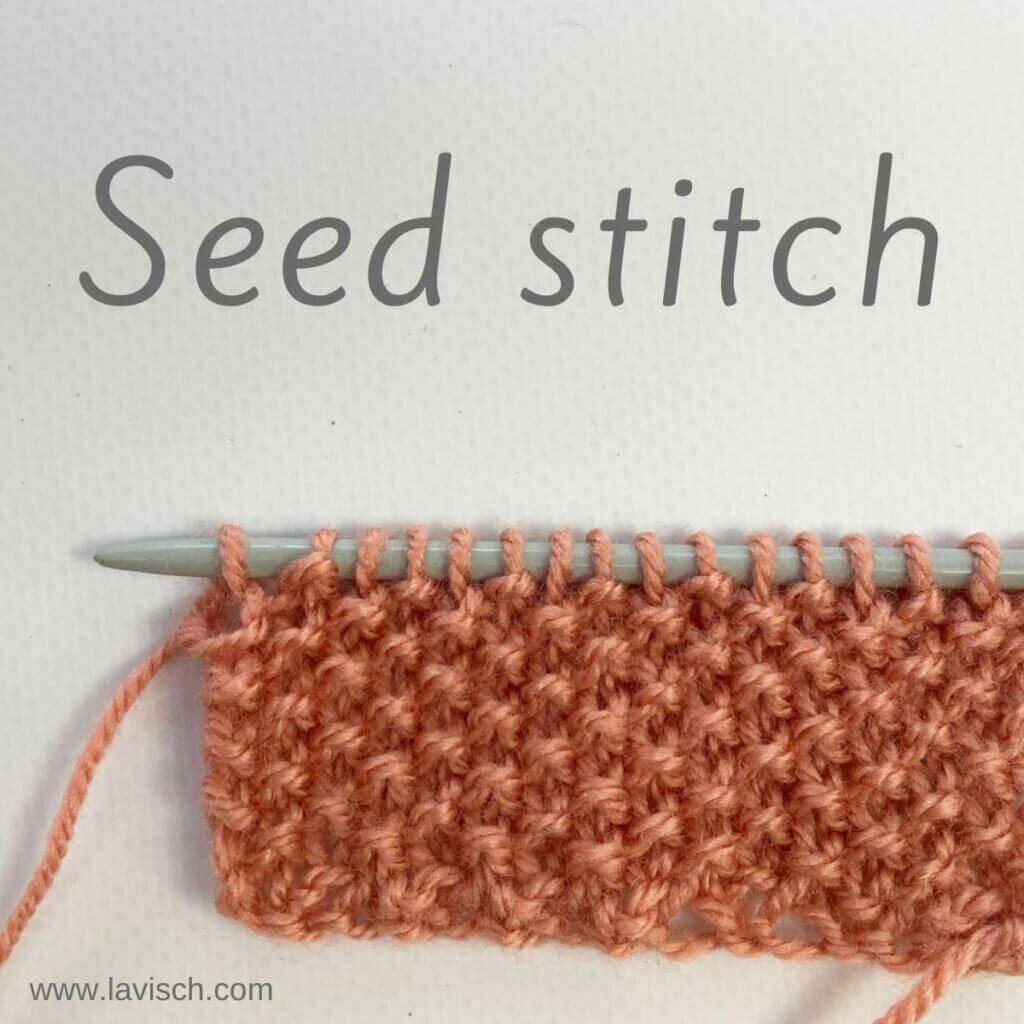
This post will give you the instructions for working seed stitch. It’s a very simple stitch pattern, using only knits and purls. This stitch pattern is worked on both right side and wrong side rows, and is a multiple of 2 stitches. Because the patterning alternates knits and purls, it creates a fabric that does not curl. This makes it a very lovely alternative for garter stitch or rib stitch to create non-rolling edges for your project.
A good thing to keep in mind when working seed stitch, is that this is a stitch pattern where you always purl the knits and knit the purls. No matter if you’re working the wrong side or the right side of the fabric, over an even or an odd number of stitches, work flat back and forth or in the round. My post about “knit the knits and purl the purls” gives you some pointers on how to read your knitting to make this easier.
Ok, let’s get started!
Materials used
Yarn: Paintbox Yarns Simply DK, a good value, good quality 100% acrylic yarn, here in the color 155 Vintage Pink.
Knitting needles: This is a pair of straights that I picked up at the second-hand store when I started knitting, brand unknown.
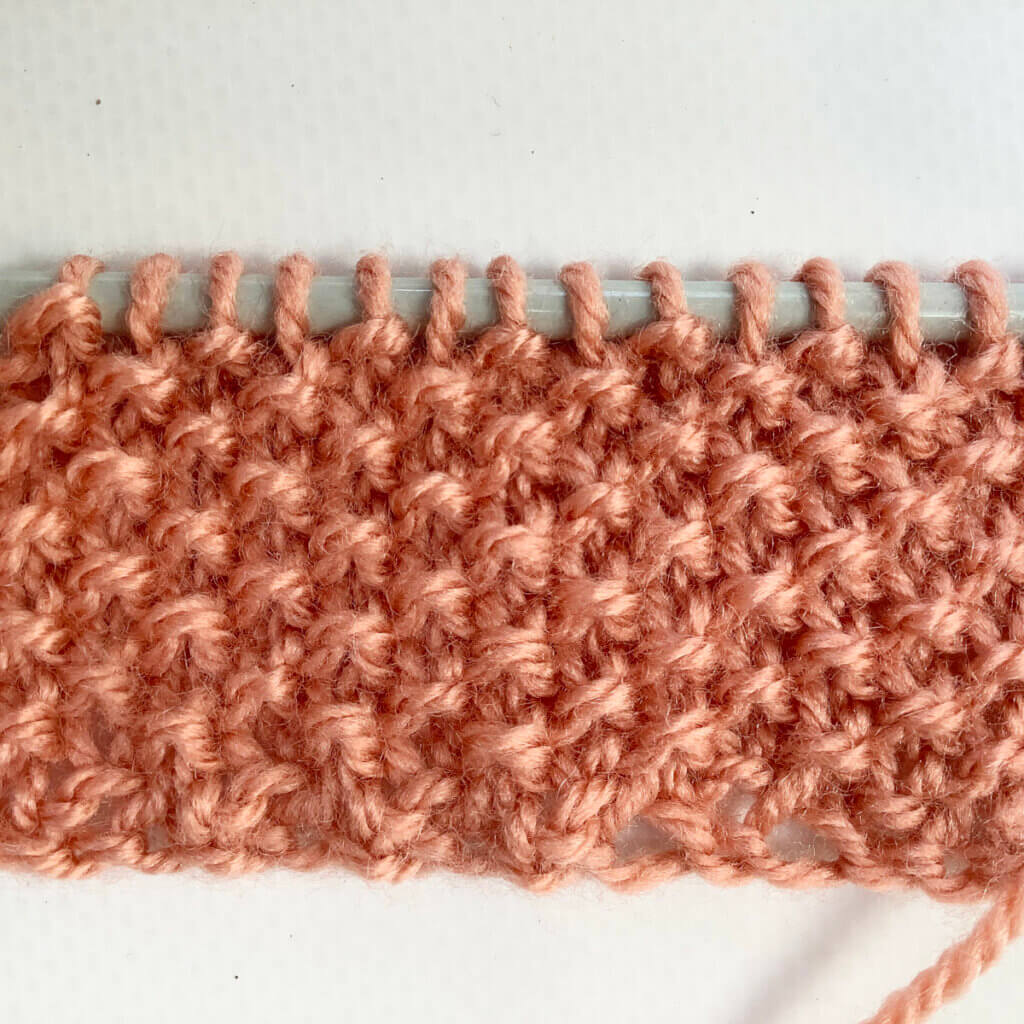
Seed stitch instructions – even number of stitches
On an even number of stitches, work the following 2 rows for the pattern:
Row 1 (right side): *K1, p1; rep from * to end.
Row 2: (wrong side): *P1, k1; rep from * to end.
Seed stitch instructions – odd number of stitches
In the case of an odd number of stitches, work the following instead:
Row 1: *K1, p1; rep from * to 1 st before end, k1.
Repeat row 1 for all following rows.
Thanks to my Patreon supporters for bringing you this freebie! Creating quality patterns and tutorials is a lot of work and resource-intensive. However, I find it important to give you free content like this tutorial. Thanks to the generous support of my Patreon supporters, I can make it happen. Thank you, patrons! Click here to join, or click here to read more about La Visch Designs on Patreon.
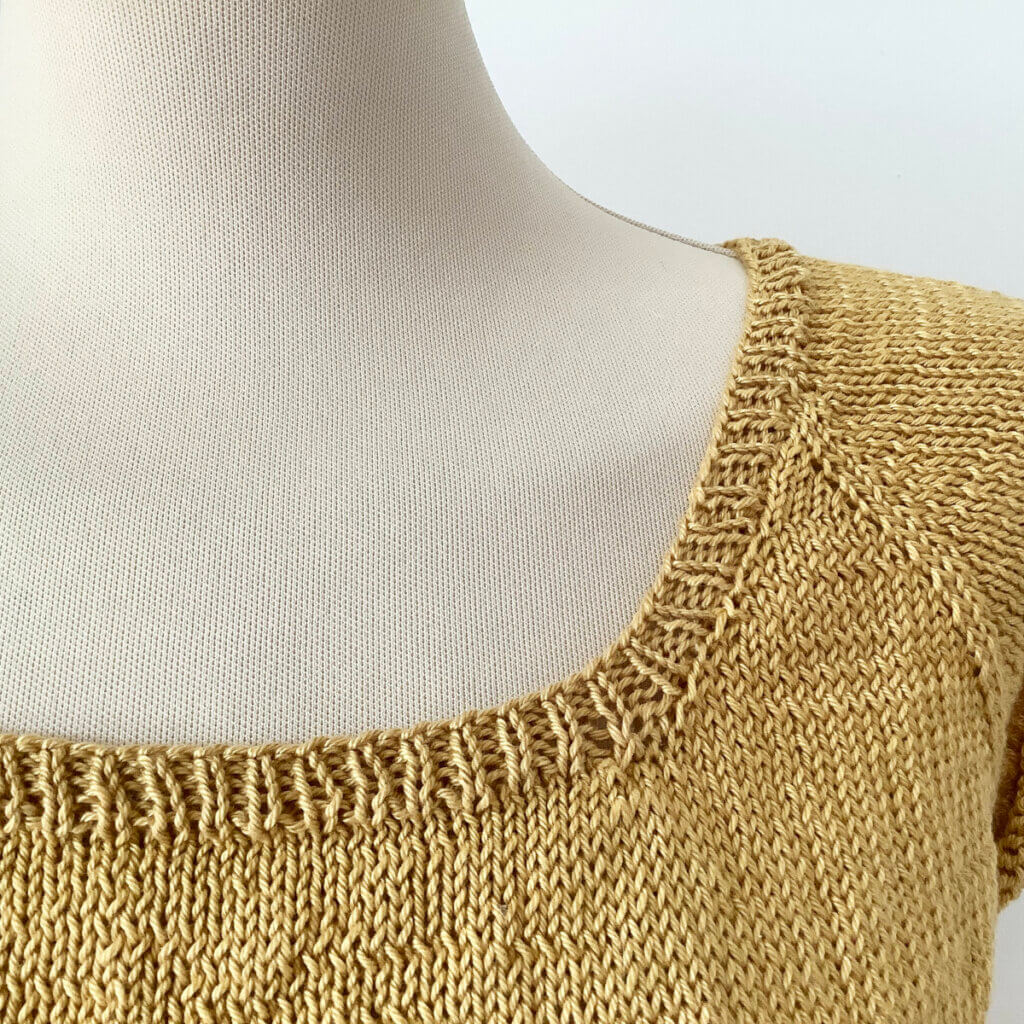
Stumped by how to go about picking up stitches to work a neckline? Many garment designs consist of working the body first, and working the neckband later on. This is often done to have the cast-on or bind-off edge at the neck help in stabilizing the fabric. This prevents it from sagging when worn. In those cases, picking up the stitches to work the neckband, is one of the last steps in completing the garment.
Usually, patterns give an indication of how many stitches to pick up. Still, it can be a challenge to pick up the correct number. And, more importantly, have them distributed evenly over all sections of the neckline. As with all knitting things, there are multiple ways and techniques for picking up stitches around a neckline. In this tutorial, I’ll show you how I go about it.
In this tutorial, I’m using my Hay tee as an example. It’s a design by Annarita Ceretti, you can find the pattern here (LoveCrafts link). On a side note, I often work the neckband when I’m midway the miles of stockinette of a garment body. It breaks it up a bit. It also has the added benefit that the neckband already done by the time most of the knitting is completed.
Materials used
Garment WIP: Hay tee work-in-progress, you’ll also need yarn to work the neckband. Here I’m using a mercerized cotton.
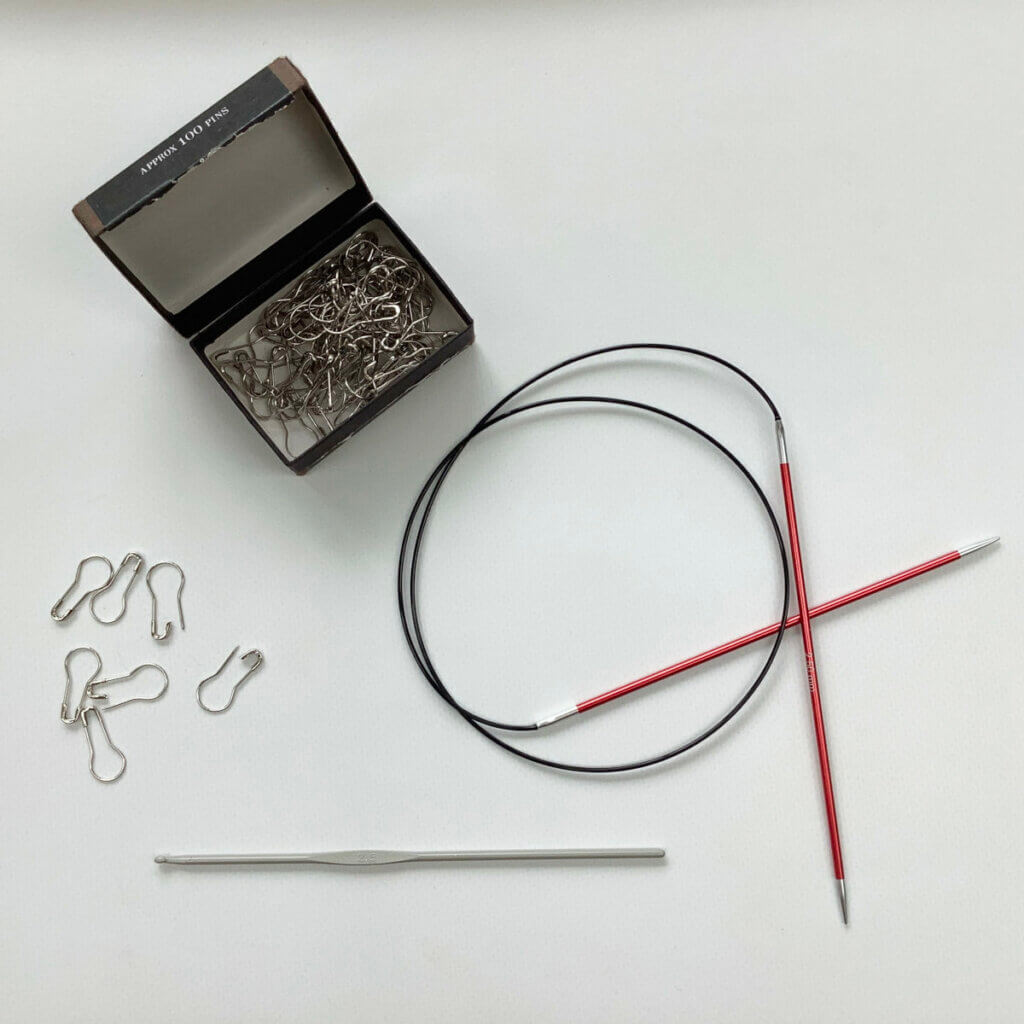
Other materials: Bulb pins or removable stitch markers, a circular knitting needle in a size 0.5 mm smaller than used for the body of the garment and a crochet hook in a similar size. The crochet hook is optional, but I find it makes picking up stitches a lot easier. Therefor, I certainly recommend using one.
Marking the sections
Let’s get started with picking up stitches to work a neckline! Every neckline consists of sections. Picking up the correct number of stitches from them is easier if you plan ahead. Part of this is marking the sections with your bulb pins or removable stitch markers. Most necklines have a combination of types of sections. Horizontal sections; bound off or cast on, depending on if you’re working bottom-up or top-down. Diagonal edges shaped with decreases, and vertical edges that are worked even.
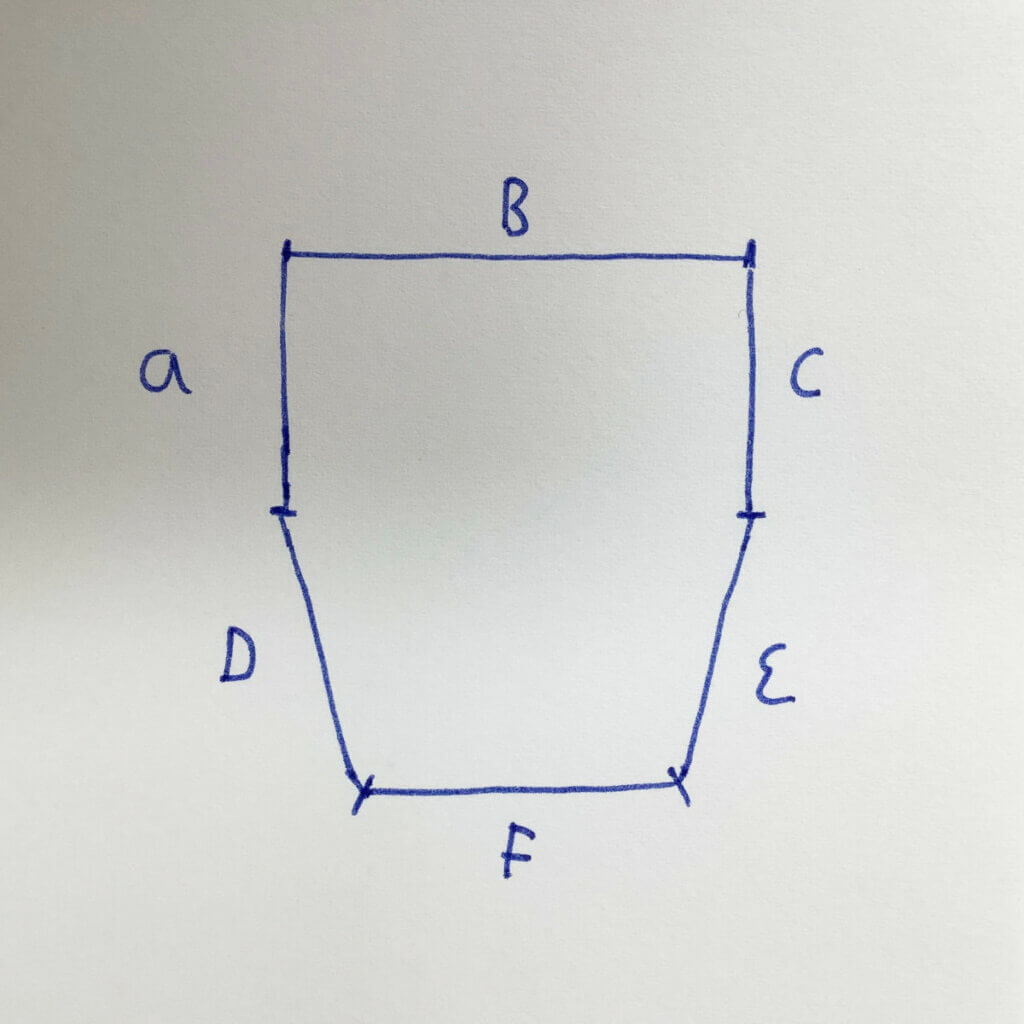
Let’s take a look at how my neckline actually looks when put in a schematic. In the below picture, A en C are the stitches over the shoulders. B is for the back stitches. F for the stitches that were cast on for the horizontal bit of the neckline in the front of the garment. D and E are the diagonal parts of the neckline, where shaping was worked.
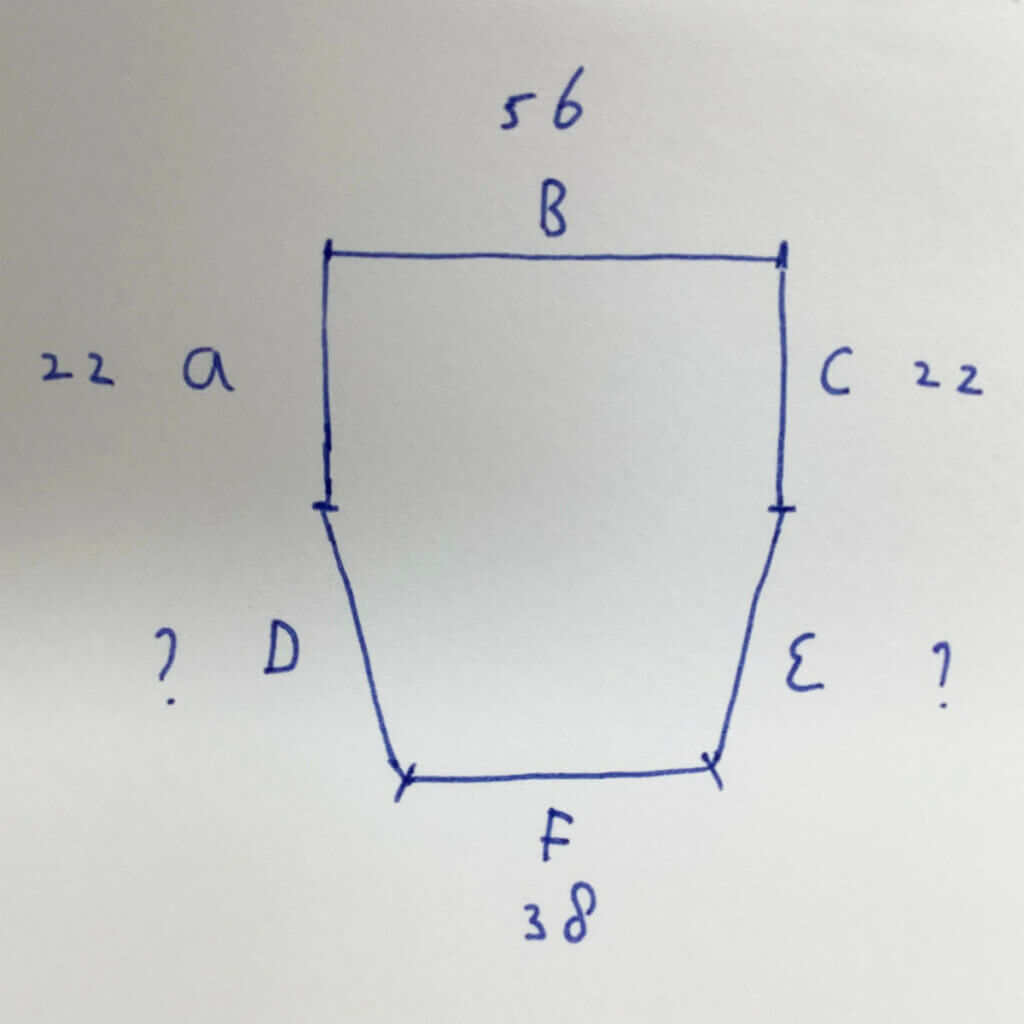
Now we have to take a look at the pattern to see how many stitches are in every section for the size we’re making. The neckband instructions in the pattern may indicate a specific number of stitches to pick up for each section. Alternatively, the pattern may indicate how many stitches to pick up in total. This is often paired with suggested pick-up ratios in each section to help you hit the target number. For my size, my Hay tee pattern instructs me to pick up a total of 162 sts. But how are those to be divided over the various sections?
In my tee, I had to CO 100 sts for A + B +C. A further instruction on the placement of stitch markers gave me the information that my B = 56 sts, and A = C = 22 sts. The instructions for the front yoke CO tell me my F = 38 sts.
But how to deal with D and E?
Pick-up ratio’s
For sections D and E we will have to pick up stitches along the diagonal edge. This means we can’t just pick up every stitch at the edge that we encounter. This is because stitches are usually wider than that they are tall, and there will be more rows than stitches per given length. In other words: picking up every single one would end up in a distorted neckline. That’s where the pick-up ratio’s come in.
If no ratio is specified in the pattern, picking up approx. 2 stitches for every 3 rows or 3 stitches for every 4 rows for stockinette fabric is a good rule of thumb. Do you have a different kind of fabric, or does your gauge differ a lot from the one in the pattern? Then you can easily calculate the ratio by dividing your stitch gauge by your row gauge. Don’t forget to wash and dry the swatch as you would do with the garment before measuring, though, or the results won’t be reliable.
The diagonal edges in my tee
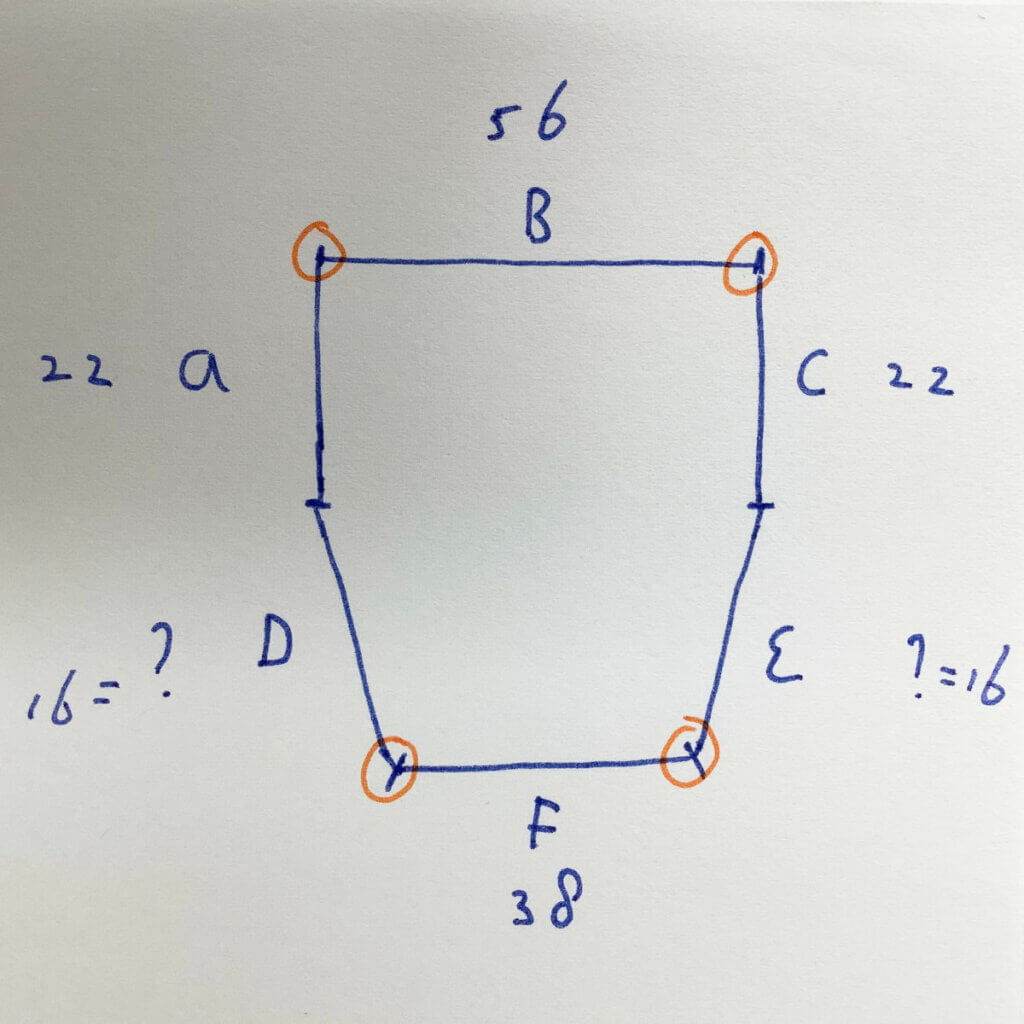
Going back to my tee! My pattern said to pick up 162 sts total, which would mean that I would need to pick up 12 sts for both D and E. However, my gauge is a tad tighter than the pattern was written for. To counter that, I worked more rows in the yoke increase section. This means that for me, it’s a better approach to see how many rows of knitting are actually in the diagonal section and use the rule of thumb to calculate my stitches. I counted 24 rows, using the 2 stitches for every 3 rows ratio, this gives me D = E = 16 sts.
Please note that I also like to pick up stitches in the corners on both sides of the front yoke CO to prevent any gaps there. These I decrease away again on the first round of knitting the neckband.
Now we have the totals of stitches, we should also check to see if we run in any issues with the ribbing. In my case, I’ll be working 1×1 rib, so it works out alright. If you’re working 2×2 rib or another pattern requiring a certain multiple of stitches, you should do the check and adjust if necessary. You can do this by decreasing in one or more of the orange corners indicated above. You can also adjust the pick-up of stitches in the diagonal sections D and E towards the other pick-up ratio to get a number that works better.
Once we have all our numbers, we can go ahead and put the bulb pins or locking stitch markers in place for the various sections.
Let’s start picking up those stitches!
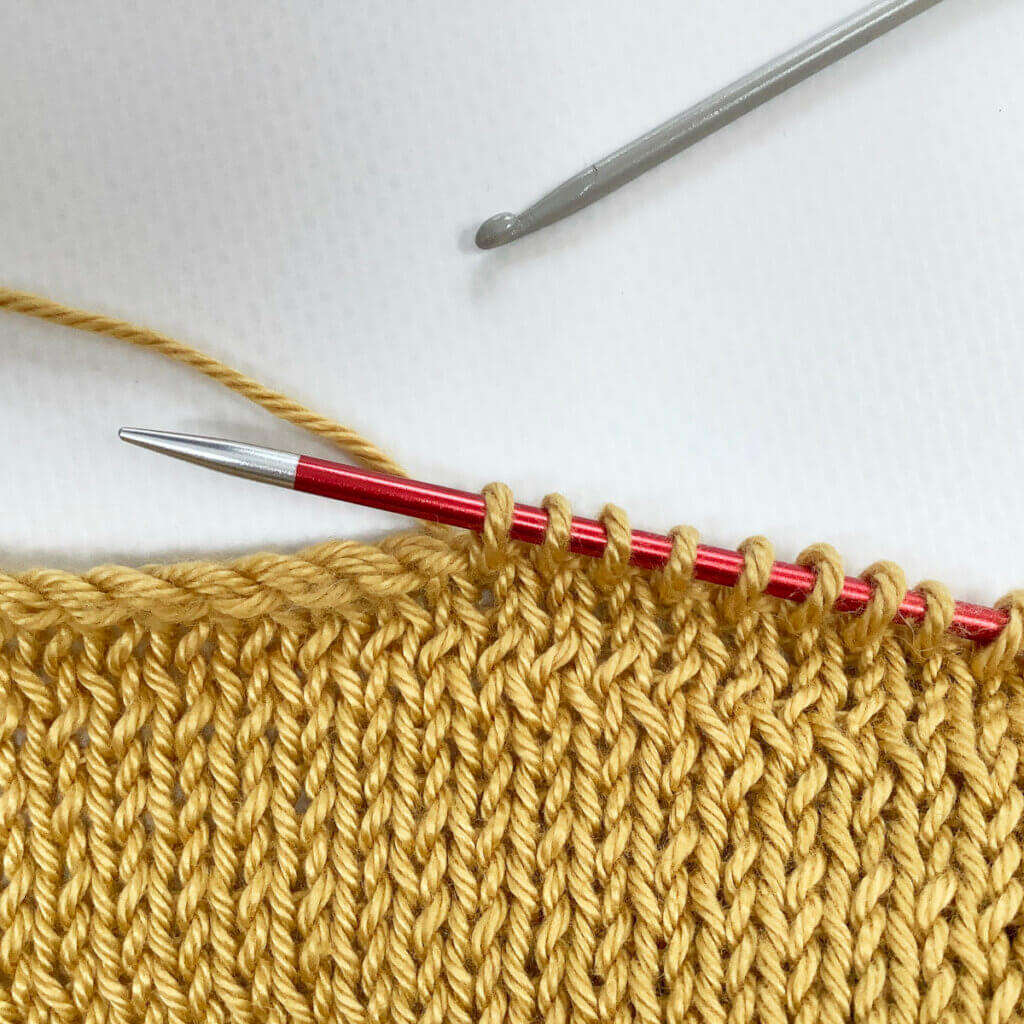
I like to start at the back because it makes it easier to hide the ends that have to woven in later on. Also, it means I can start with an “easy” section, just pick and knit one stitch for every stitch in the CO or BO edge that I encounter. For this, I insert my crochet hook through the center of a stitch below the edge, wrap the working yarn around the hook, pull it through the stitch to the front, then place it on my knitting needle.
You can find a detailed tutorial on doing this without a crochet hook here.
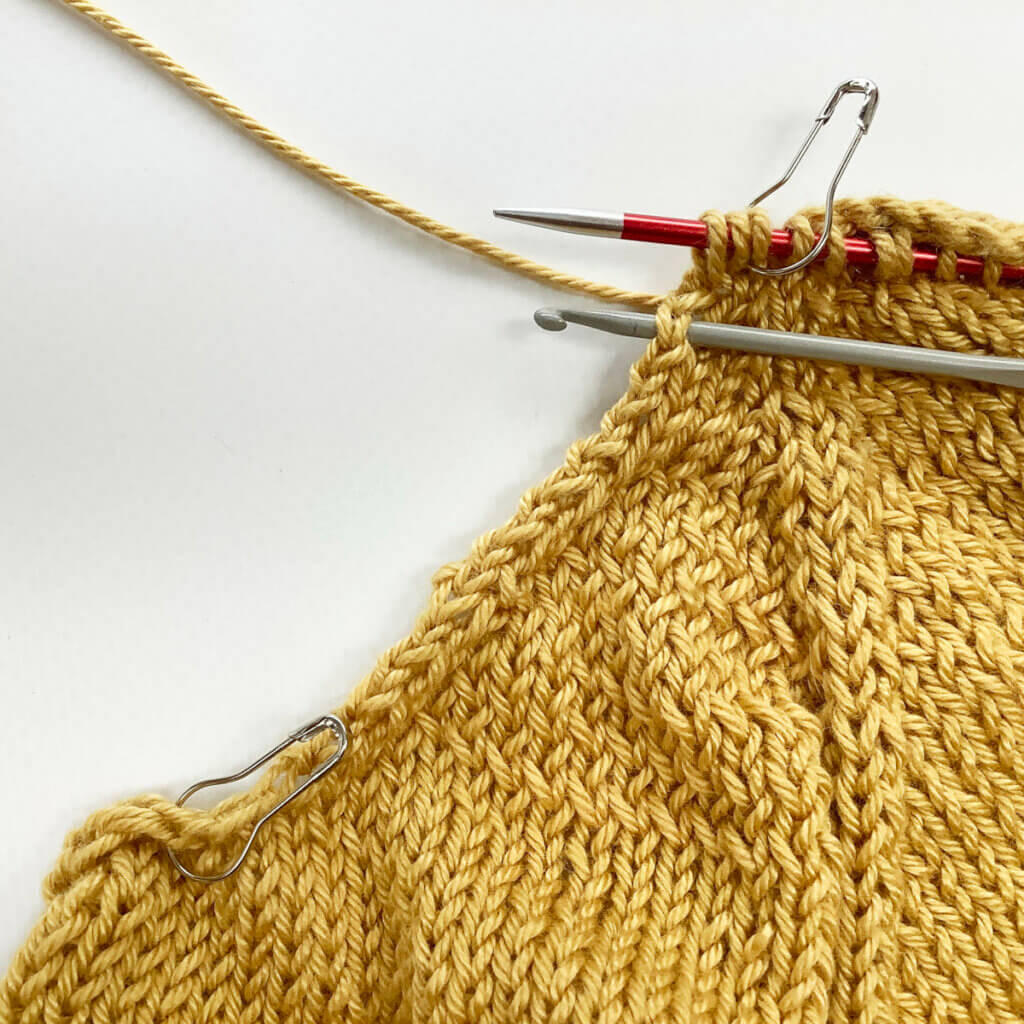
From the back stitches (B) I continue with the shoulder stitches (C). I’m putting the bulb pins on my knitting needle whenever I encounter one. This is also a good point to count the number of stitches picked up in the previous section, to make sure that we’re on track. The bulb pins or stitch markers on the needle form an indication of the transition points between the various neckline sections, and help in keeping track of the stitch count per section.
Next up, is picking up the stitches along the first diagonal edge (E). To do so, insert the crochet hook through the space between the selvedge stitch and the next stitch, wrap the working yarn around the hook, pull it through to the front, and put it on the knitting needle.
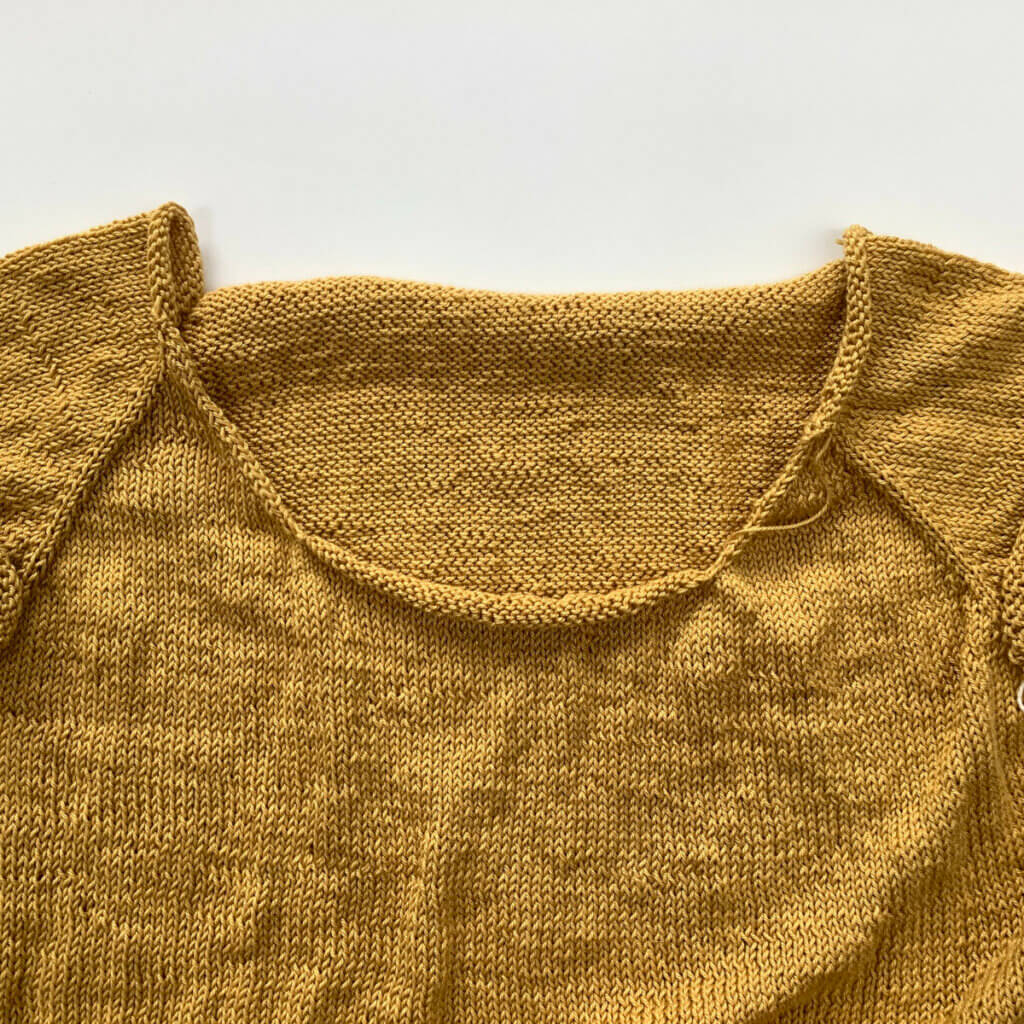
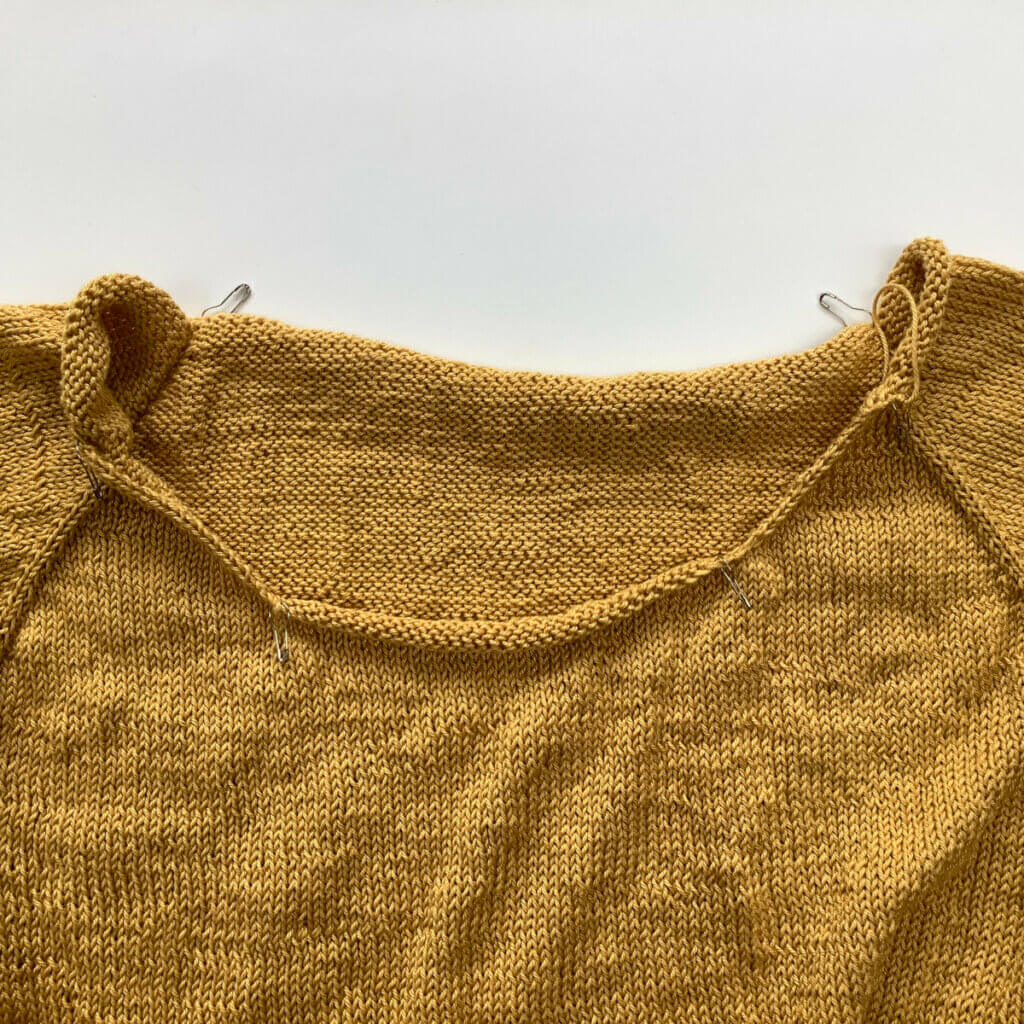
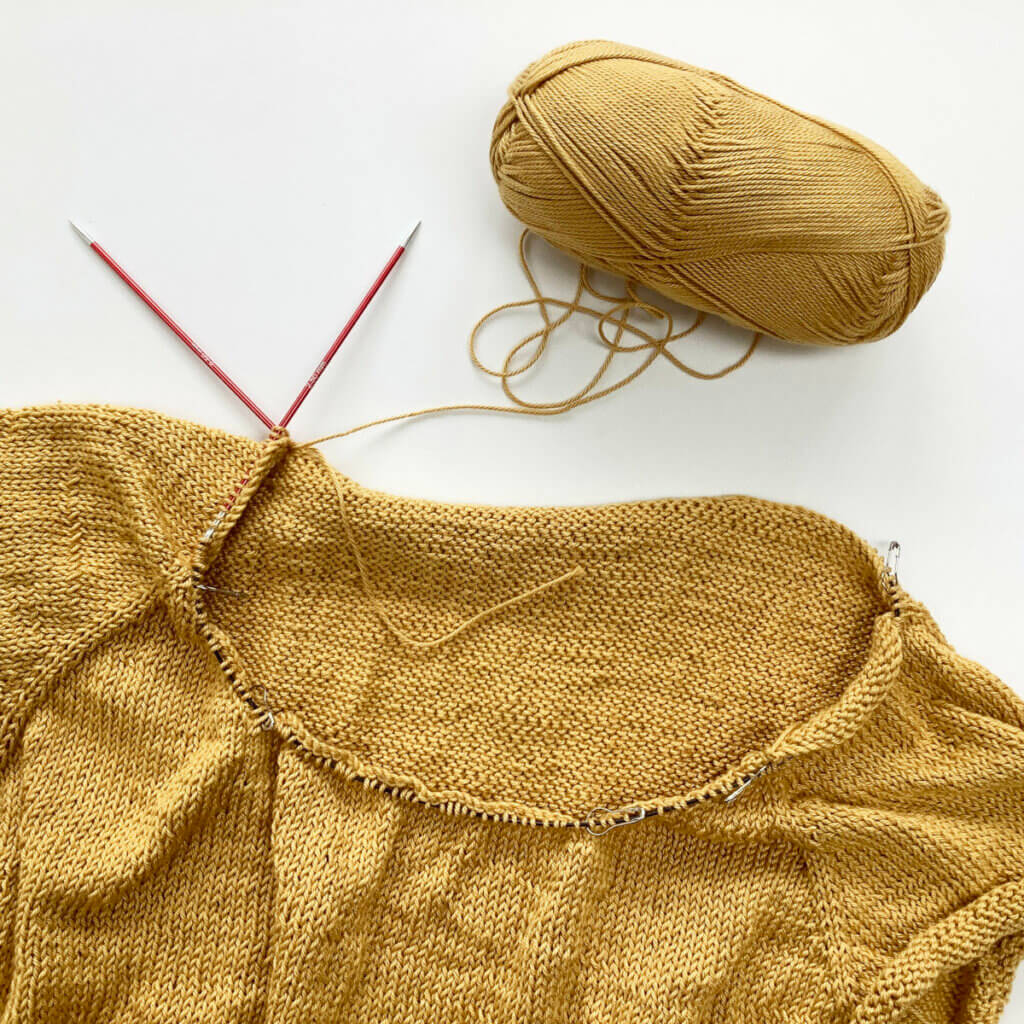
Continue picking up and knitting the stitches along the various horizontal and diagonal sections. The result you can see below, ready to work the neckband!
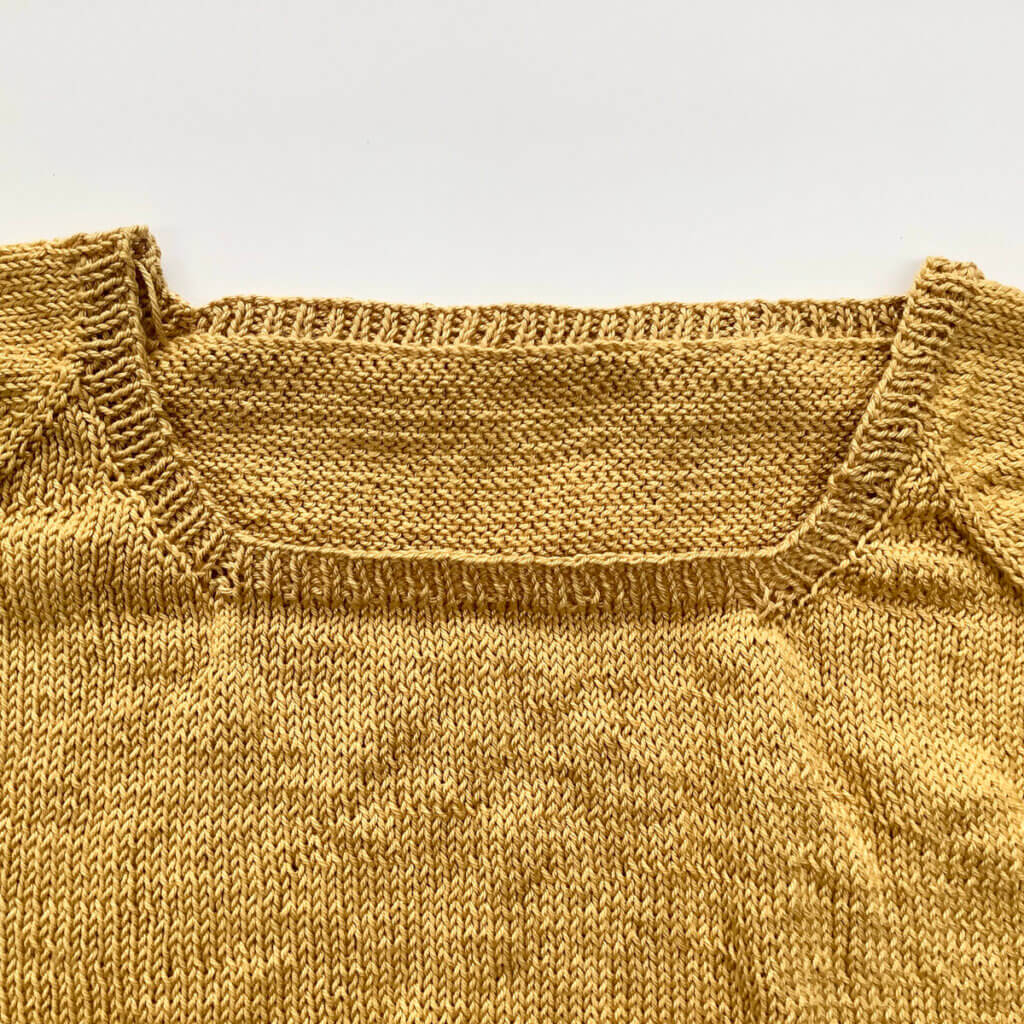
The result
After working the neckband (in my case in 1×1 rib), not forgetting the decreases in the first round, and working the BO in pattern, this is the result. Please note, both pictures are before blocking!
This is how to go about picking up stitches to work a neckline!
Thanks to my Patreon supporters for bringing you this freebie! Creating quality patterns and tutorials is a lot of work and resource-intensive. However, I find it important to give you free content like this tutorial. Thanks to the generous support of my Patreon supporters, I can make it happen. Thank you, patrons! Click here to join, or click here to read more about La Visch Designs on Patreon.
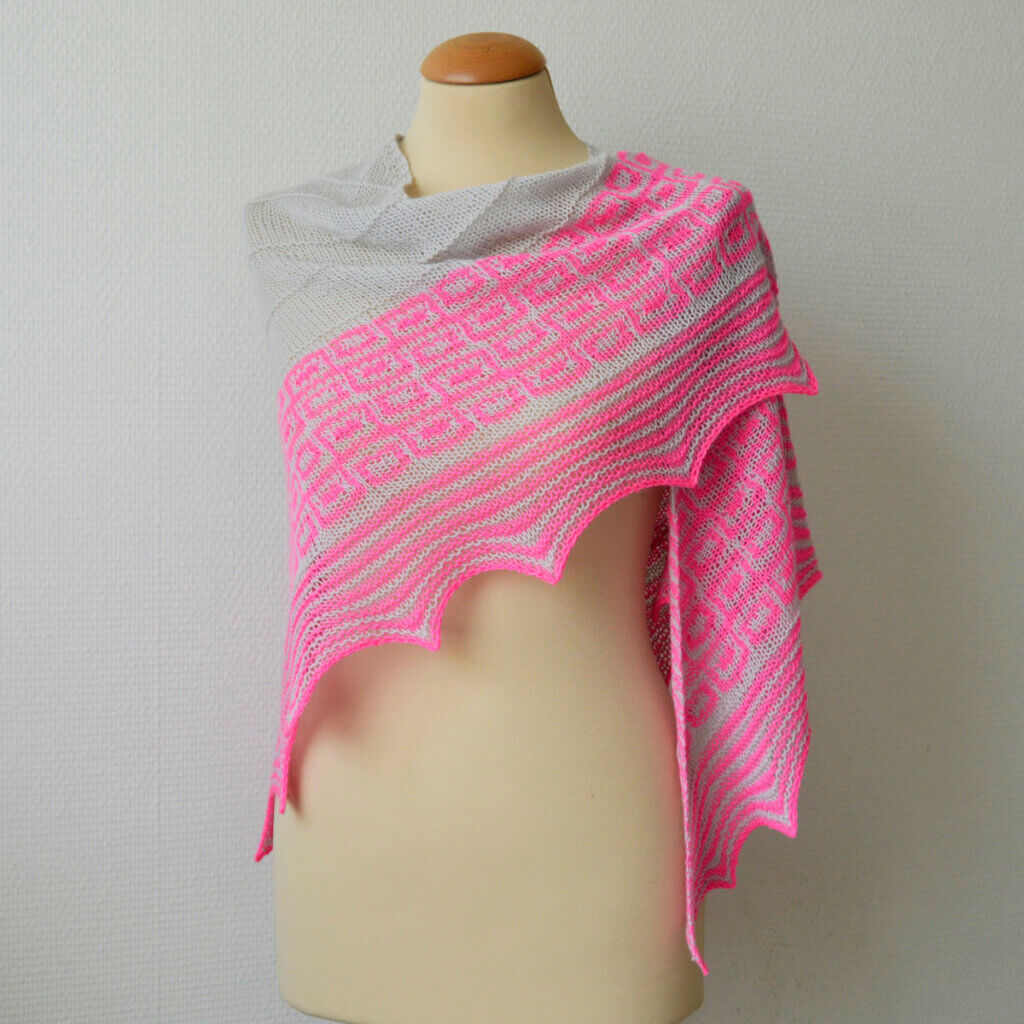
Twilight Disco is a delightfully whimsical shawl – a lovely layering piece with a lot of playful character. From the easy mindless knitting in the body of the shawl, to the colorful patterning in the border, what’s not to like?!
The shawl is started with a garter tab. The color work in the border is done using the slip-stitch mosaic technique, so you will be handling only one strand of yarn at all times. The border patterning is both charted and written out.
Pay what you want: (minimum €6.95)
€
Difficulty level
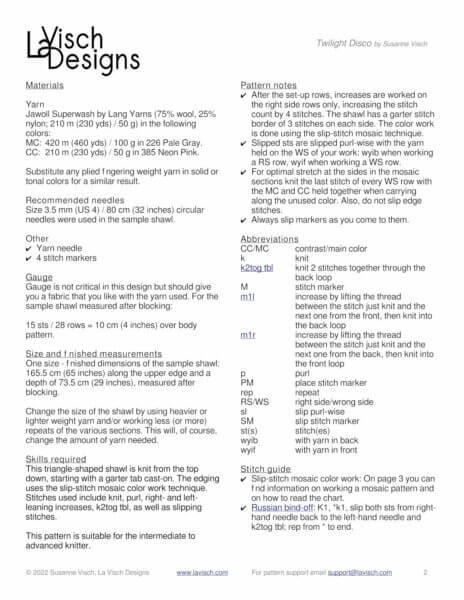
This triangle-shaped shawl is knit from the top down, starting with a garter tab cast-on. The edging uses the slip-stitch mosaic color work technique. Stitches used include knit, purl, right- and left-leaning increases, k2tog tbl, as well as slipping stitches. This pattern is therefor suitable for the intermediate to advanced knitter.
Sizes and finished measurements
Finished dimensions of the sample shawl: 165.5 cm (65 inches) along the upper edge and a depth of 73.5 cm (29 inches), measured after blocking.
Change the size of the Twilight Disco shawl by using heavier or lighter weight yarn and/or working less (or more) repeats of the various sections. This will, of course, change the amount of yarn needed.
Pattern details
Gauge: Approx. 15 sts / 28 rows = 10 cm (4 inches) over body pattern, measured after blocking. Gauge is not critical in this design, but should give you a fabric that you like with the yarn used.
Pattern languages included: English.
Digital PDF has 6 pages (letter size)
Materials
Yarn: Jawoll Superwash by Lang Yarns (75% wool, 25% nylon; 210 m (230 yds) / 50 g) in the following colors. Substitute any plied fingering weight yarn in solid or tonal colors for a similar result.
MC: 420 m (460 yds) / 100 g in 226 Pale Gray.
CC: 210 m (230 yds) / 50 g in 385 Neon Pink.
Size 3.5 mm (US 4) / 80 cm (32 inches) circular needles, choose needles appropriate for the yarn chosen.
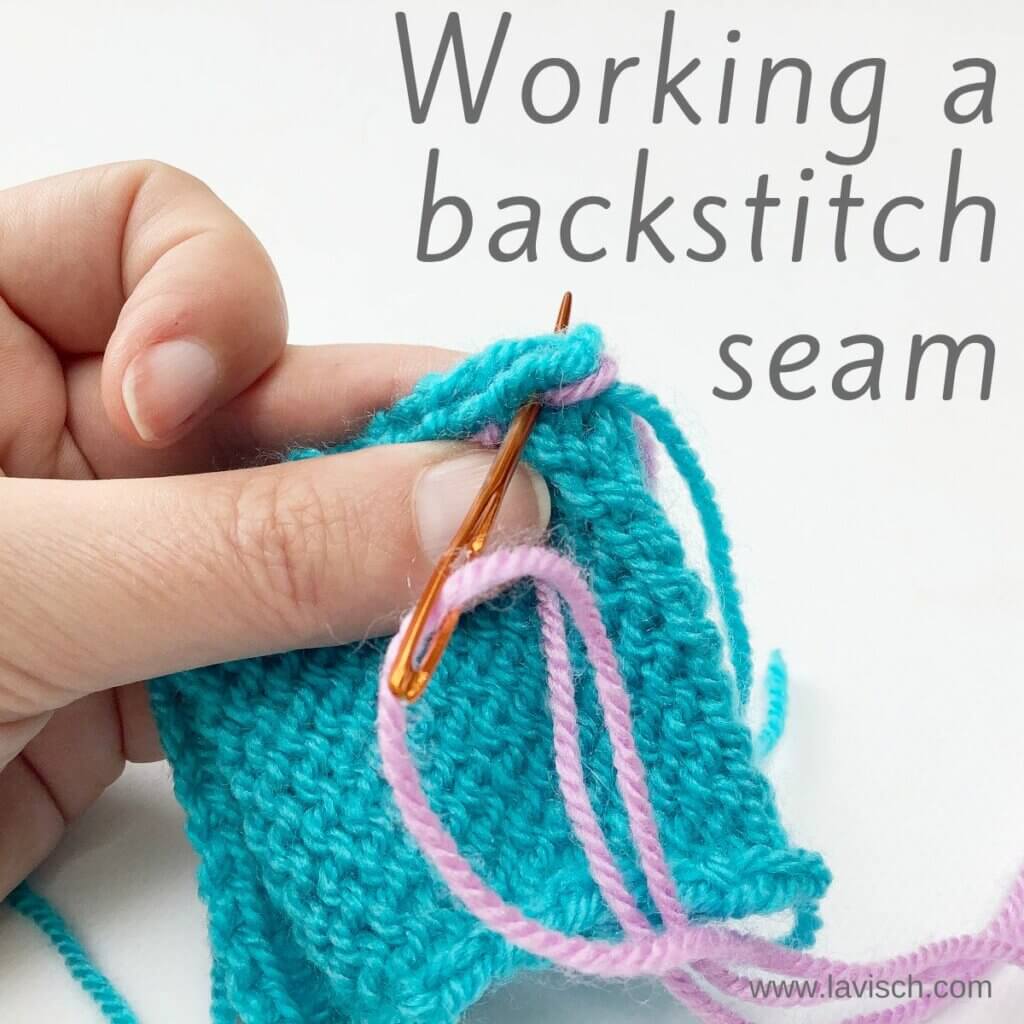
There are many ways to join two pieces of knitted fabric together. In this post, I’ll tell you all about working the backstitch seam. It’s a sturdy kind of seam, worked from the wrong side of the fabric. This type of seam creates a seam allowance. Because it’s not worked right at the edge of the fabric, this technique can also be used to slightly change the fit of a garment by changing the seam allowance. Do take care to not make your seam allowance too big, say about 1 cm or 3/8 inches. Because it will make a ridge at the inside of the garment.
In this tutorial, I’m using a contrasting yarn to make it easy to view what exactly I’m doing in the various pictures. However, if you want the seam to be less visible, make sure to use a yarn that matches the knitted fabric.
Materials used
Yarn: Paintbox Yarns Simply DK, a good value, good quality 100% acrylic yarn, here in the color Marine Blue. I also used a bit of Tea Rose.
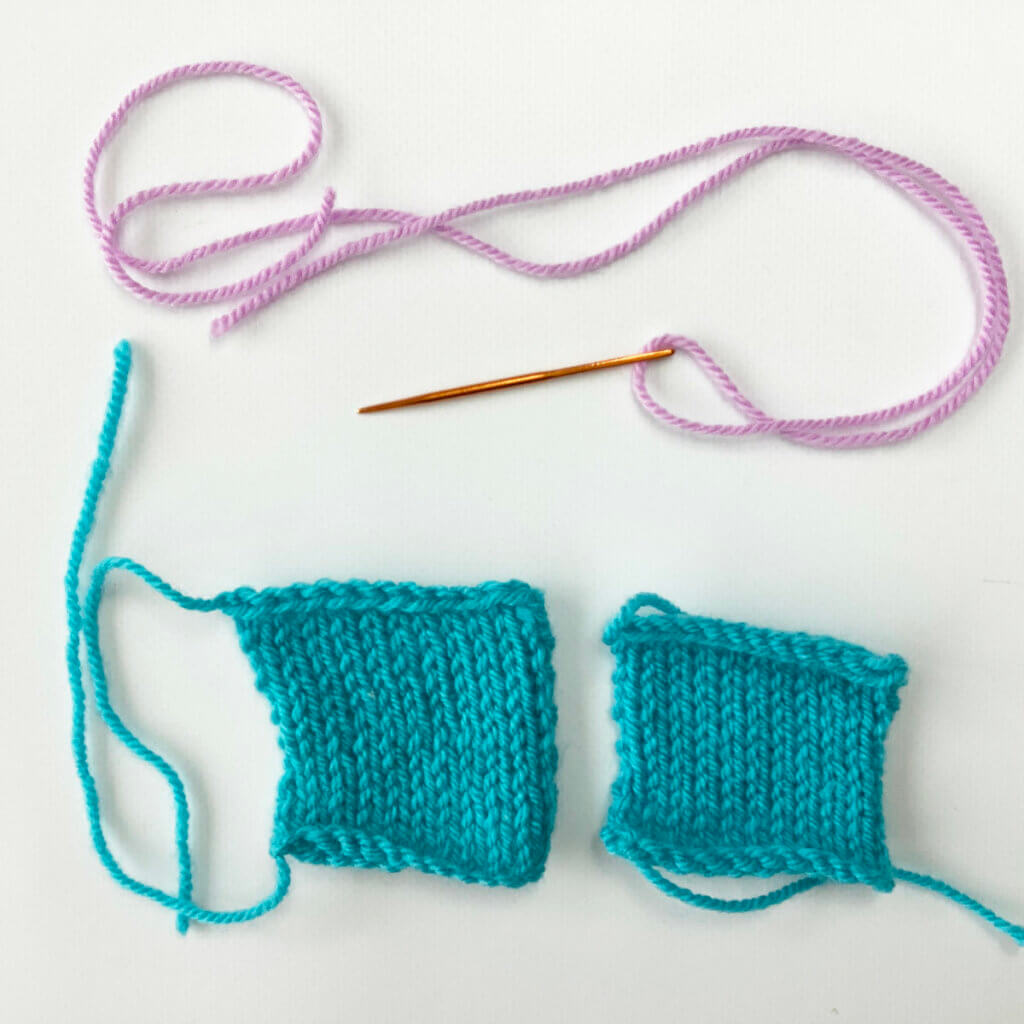
Darning needle: Hiya Hiya Darn It Yarn Needle, or any other tapestry needle, threaded with yarn. You will need a length of yarn about three times longer than the length of the seam.
Working a backstitch seam step by step
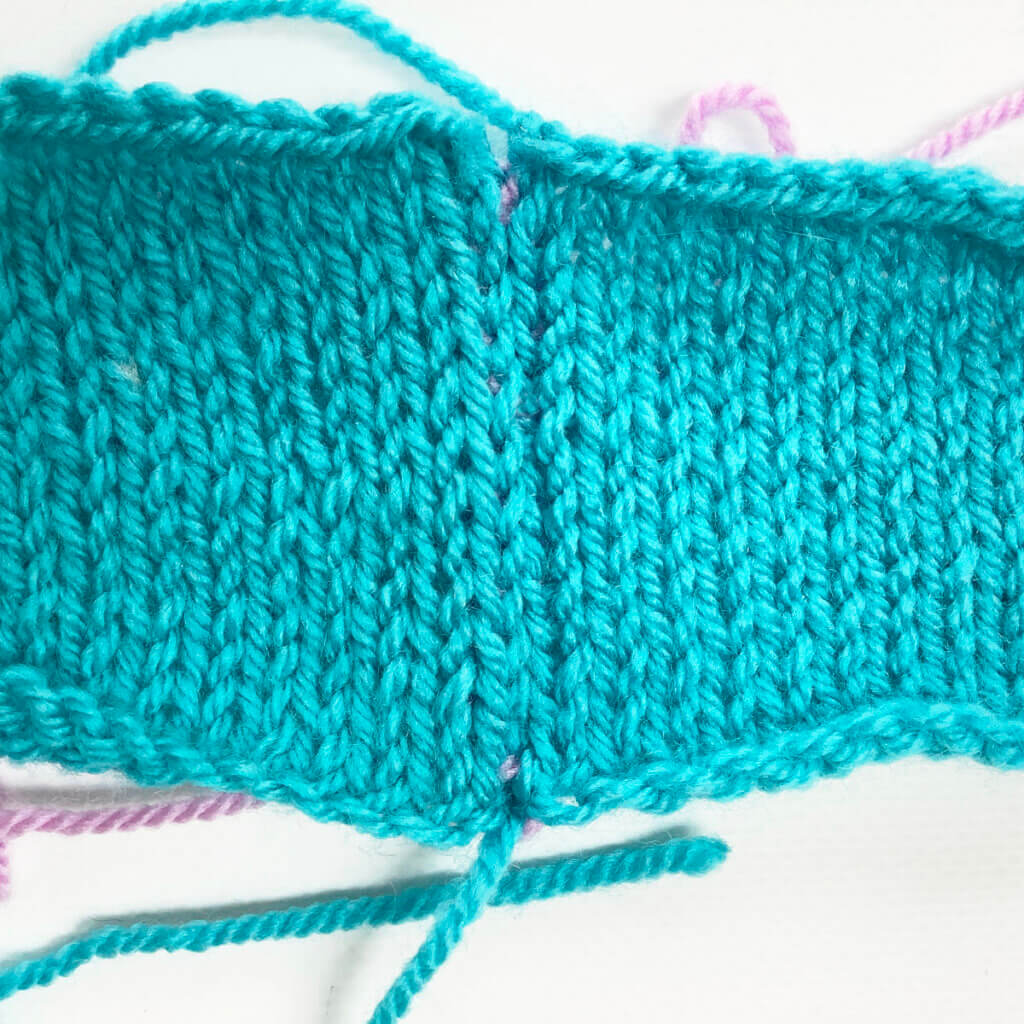
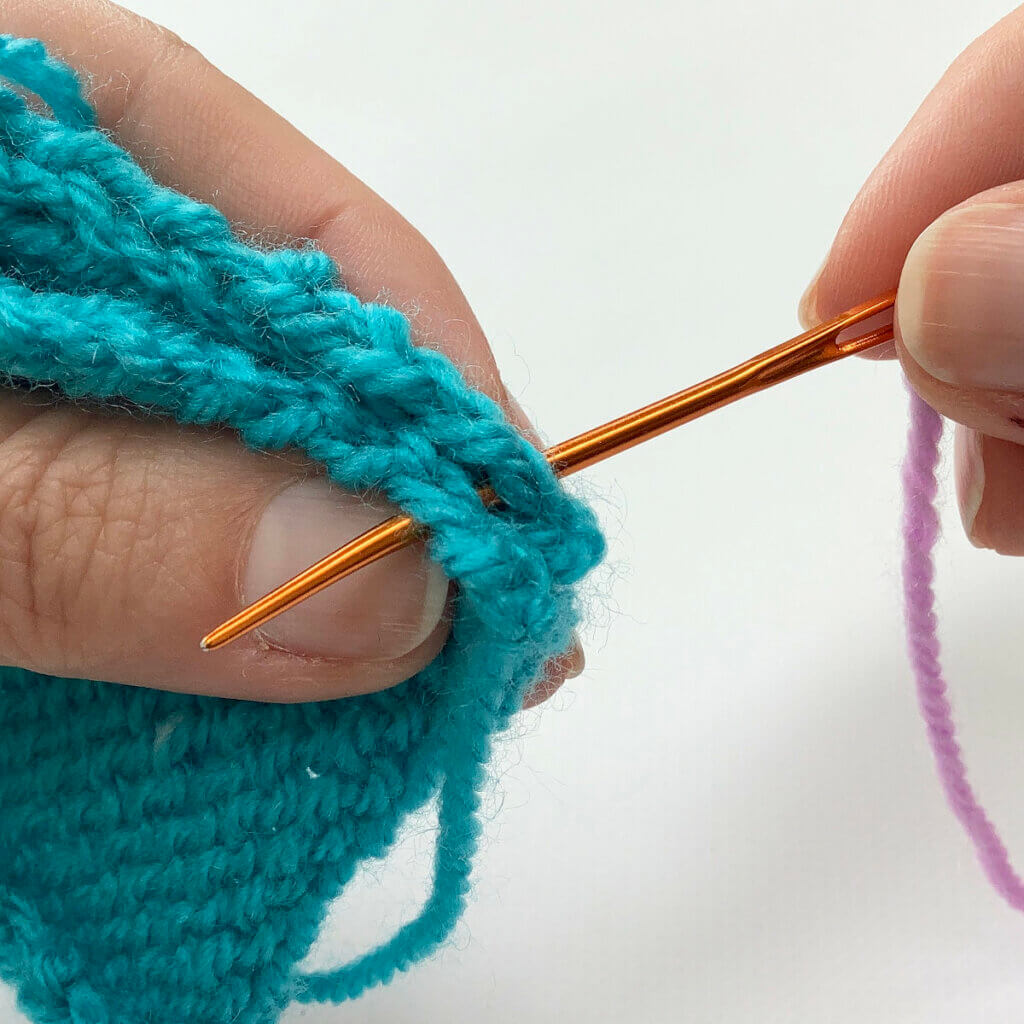
In this tutorial, I’m using 2 turquoise swatches to show you how to seam them together using a backstitch seam with the lilac yarn. This seaming technique is worked with the wrong side of the fabric facing, to have the seam on the inside of the piece.
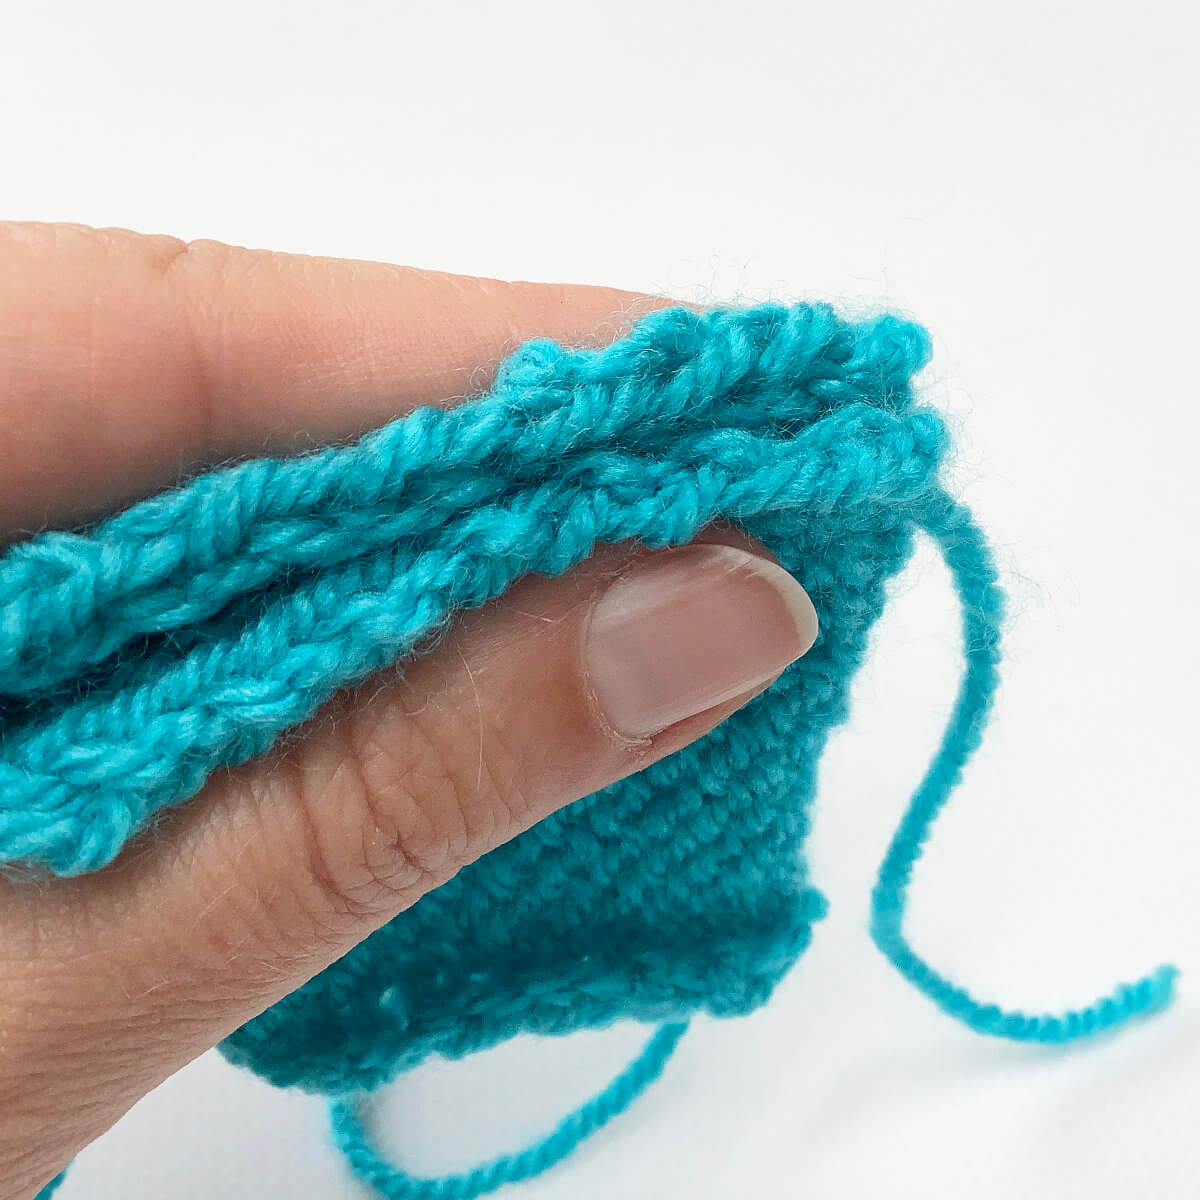
First, line up the edges of the pieces to be seamed together.
As said, here I’m working with the swatches with their right sides together.
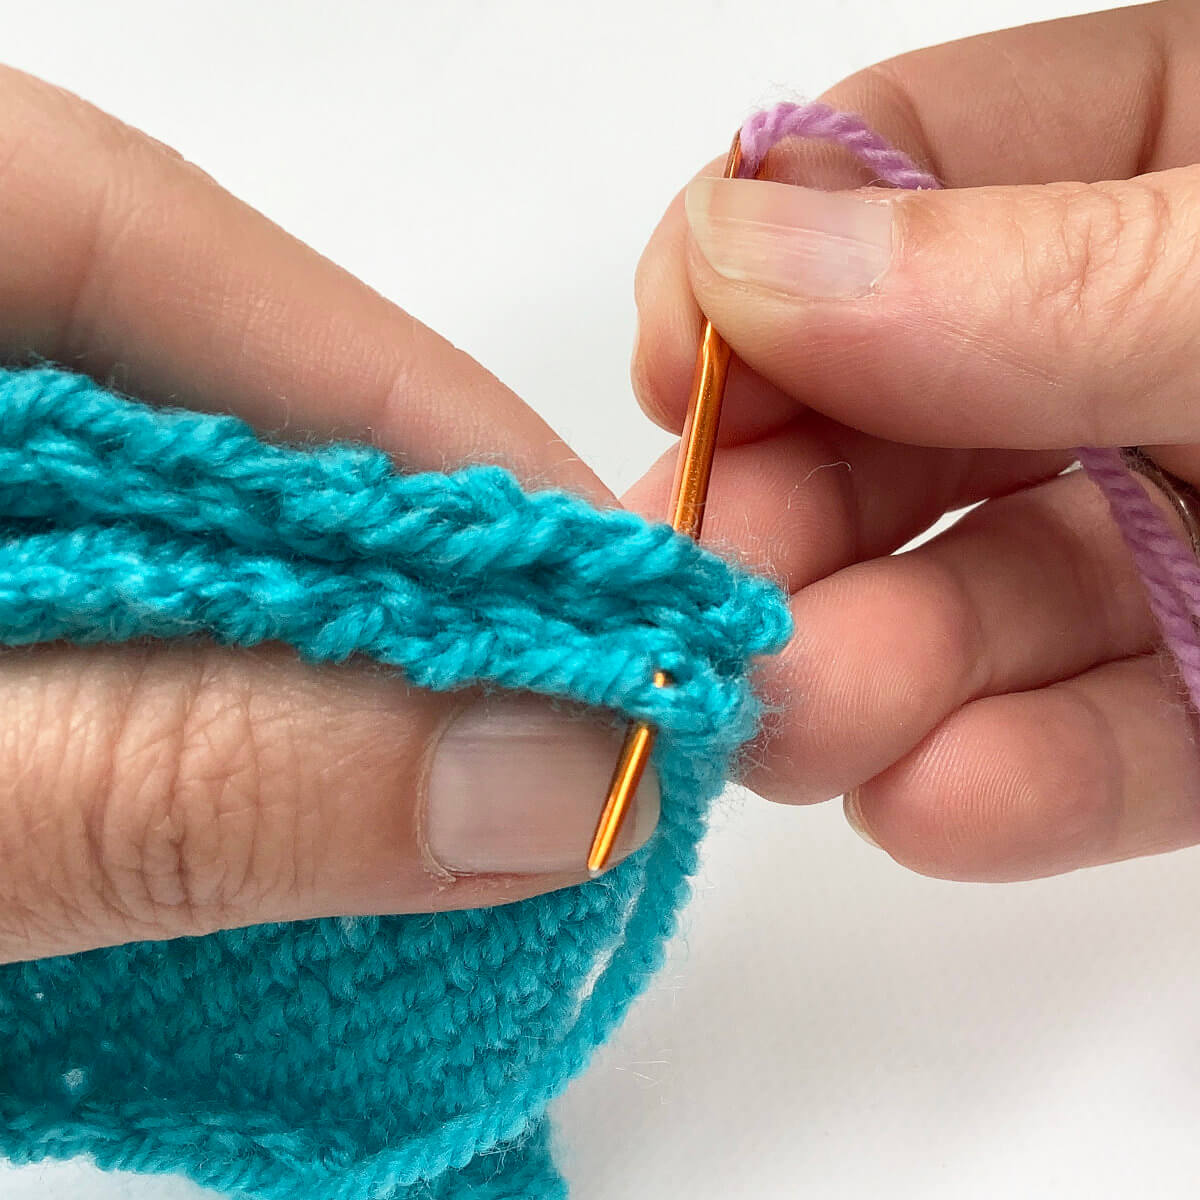
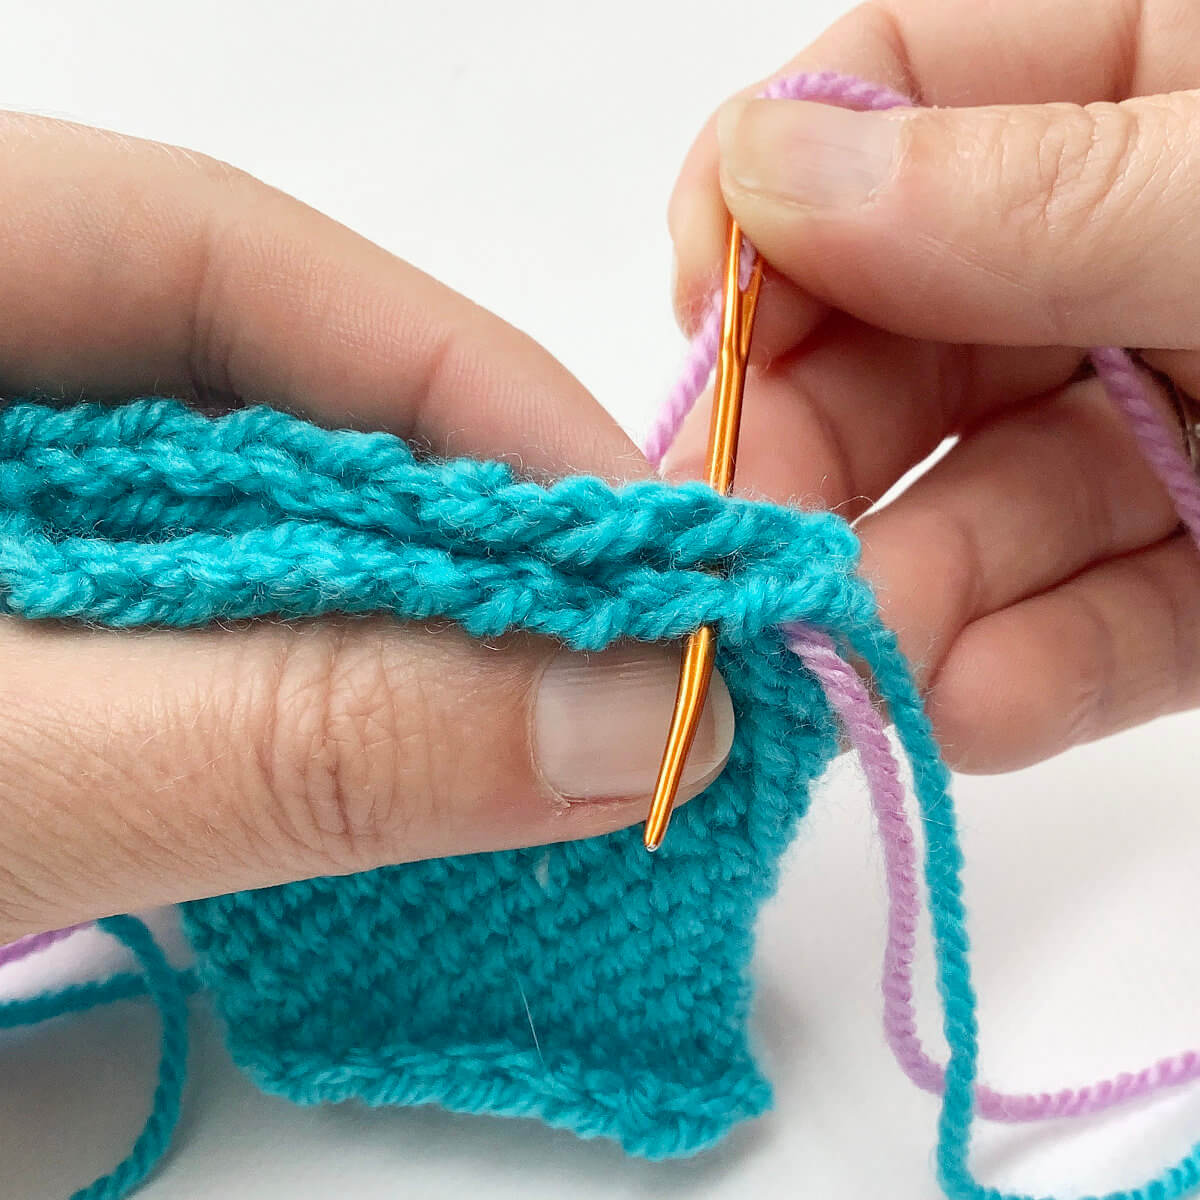
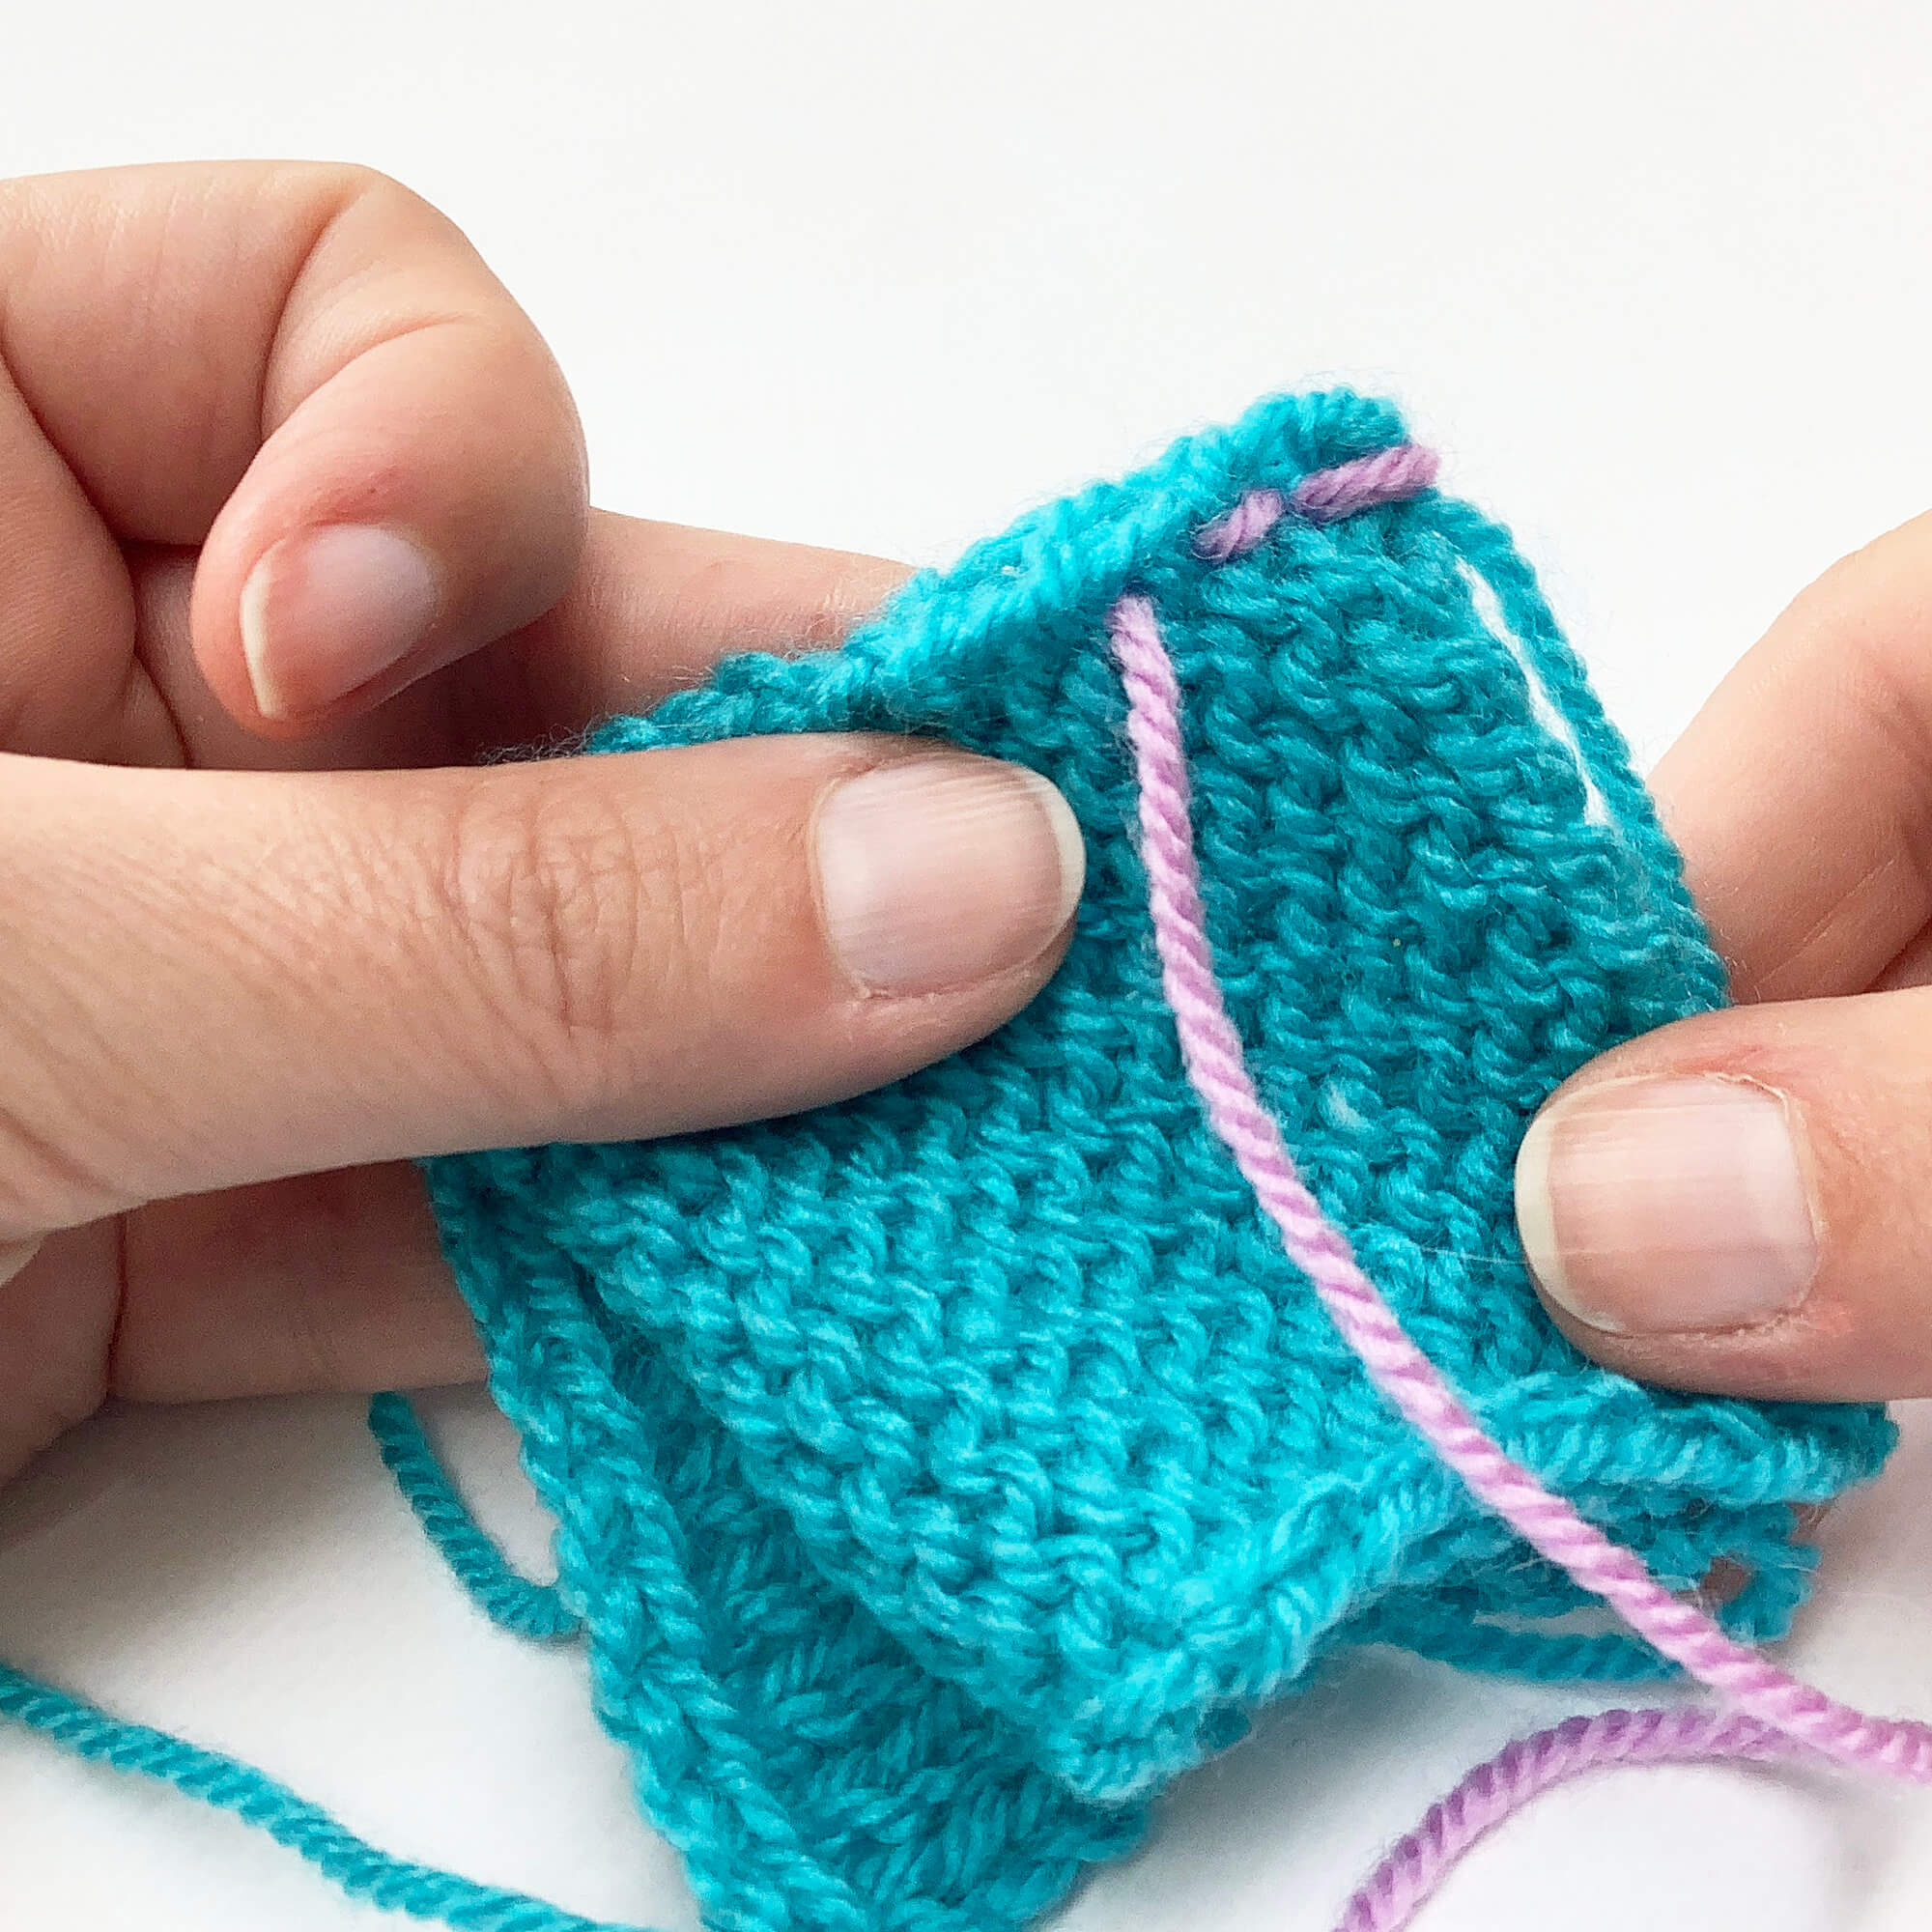
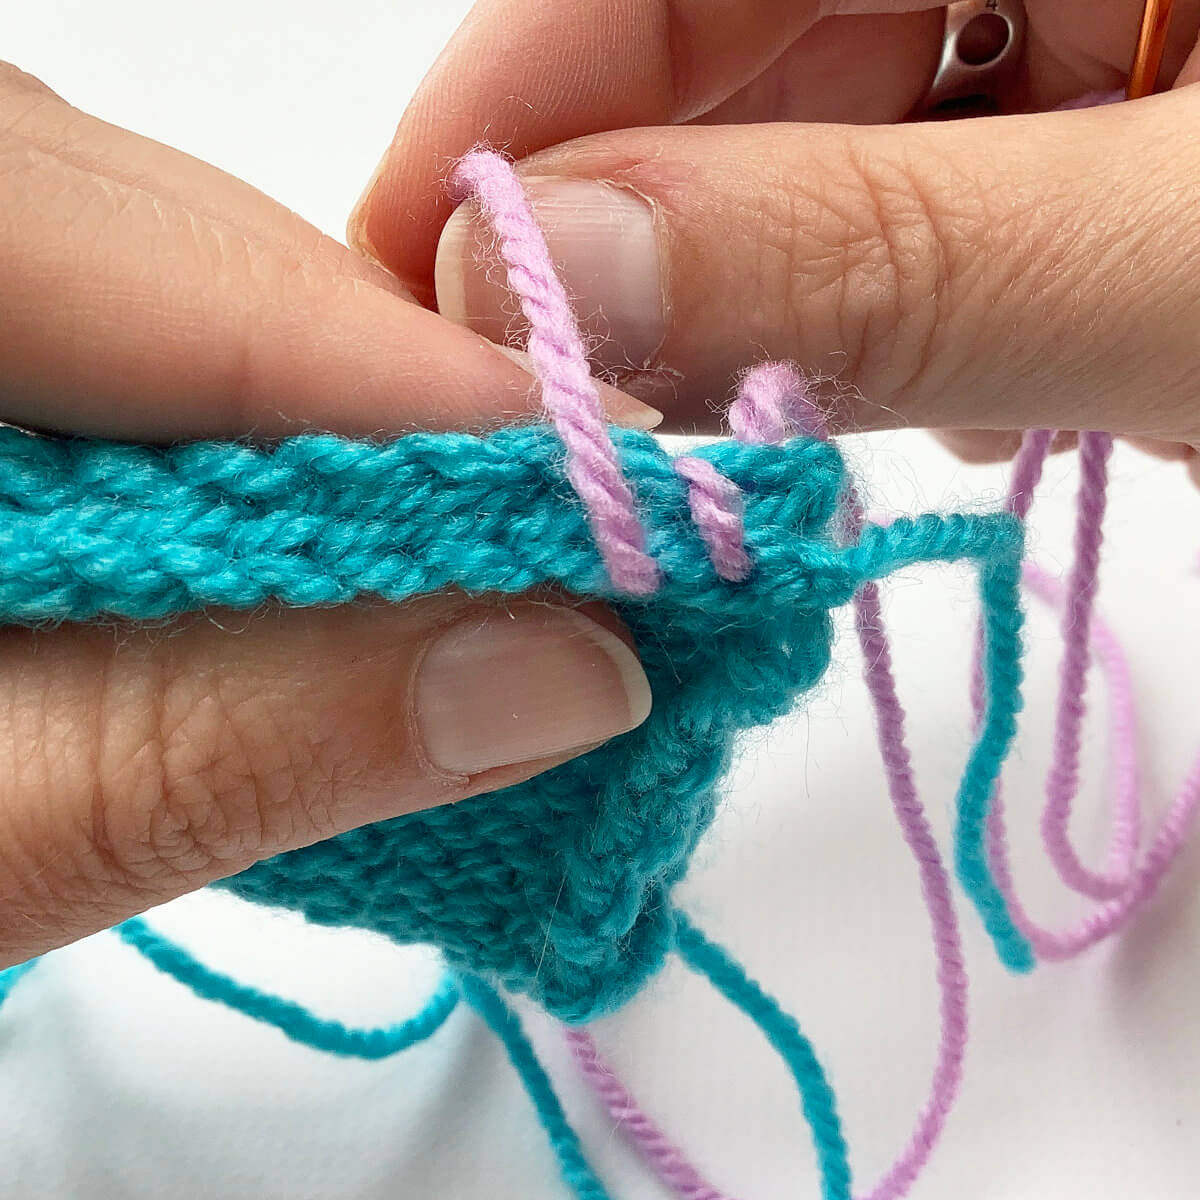
First, we secure the seam by taking the needle and seaming yarn around the edge of the fabric. To do so, insert the needle from back to front underneath the strands of the edge stitches in both pieces of fabric.
To finish this step, insert the needle once again from back to front underneath the strands of the edge stitches in both pieces of fabric, and pull the yarn through.
Take care to leave a yarn tail long enough to weave in later.
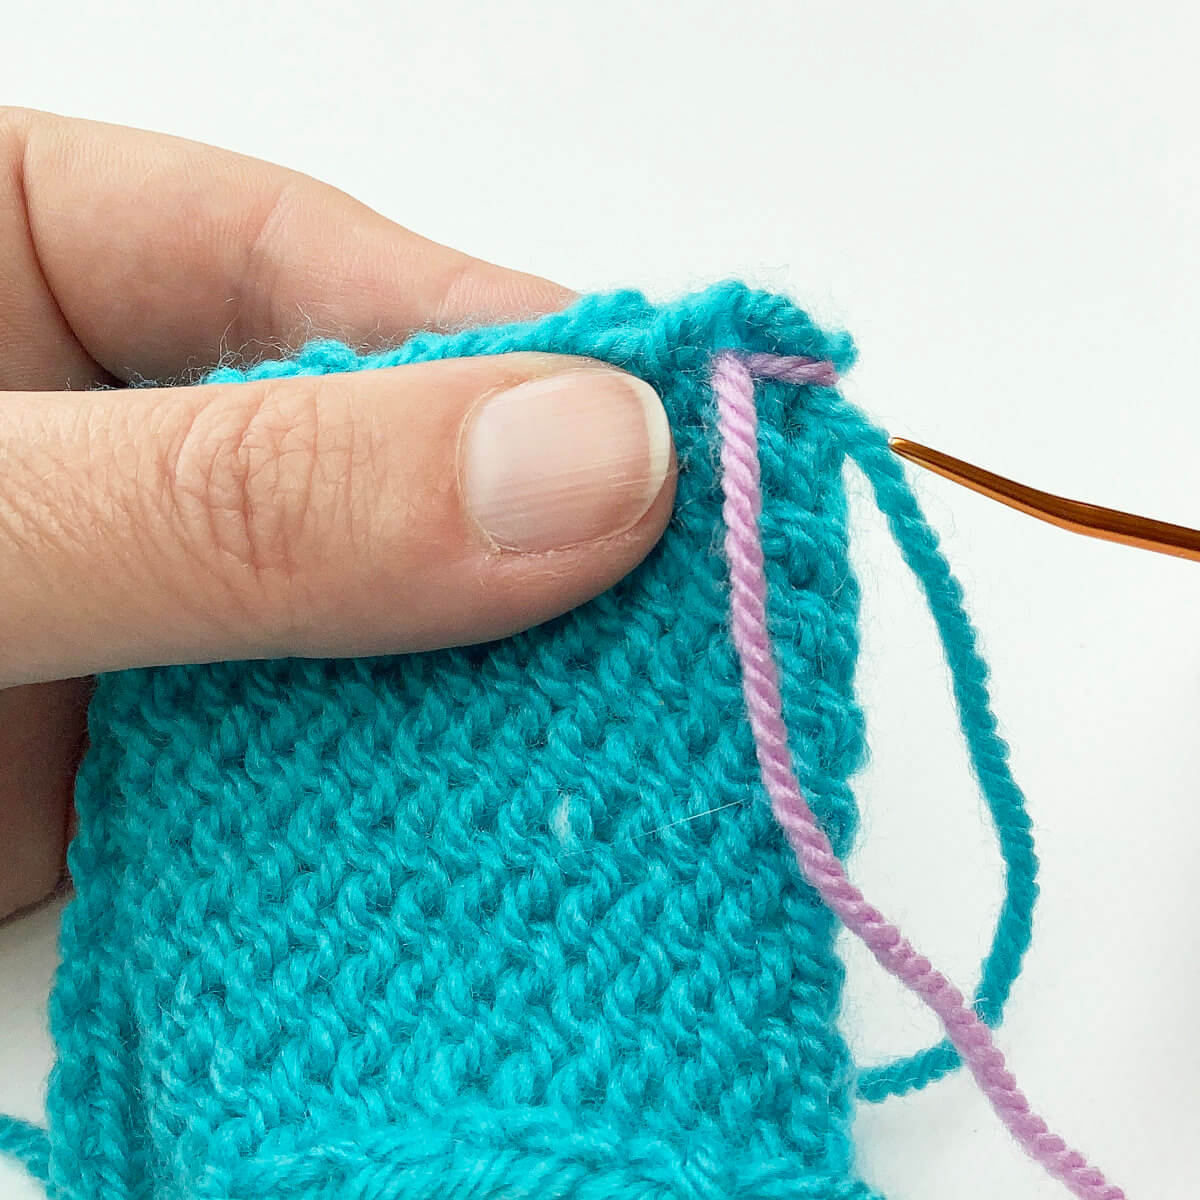
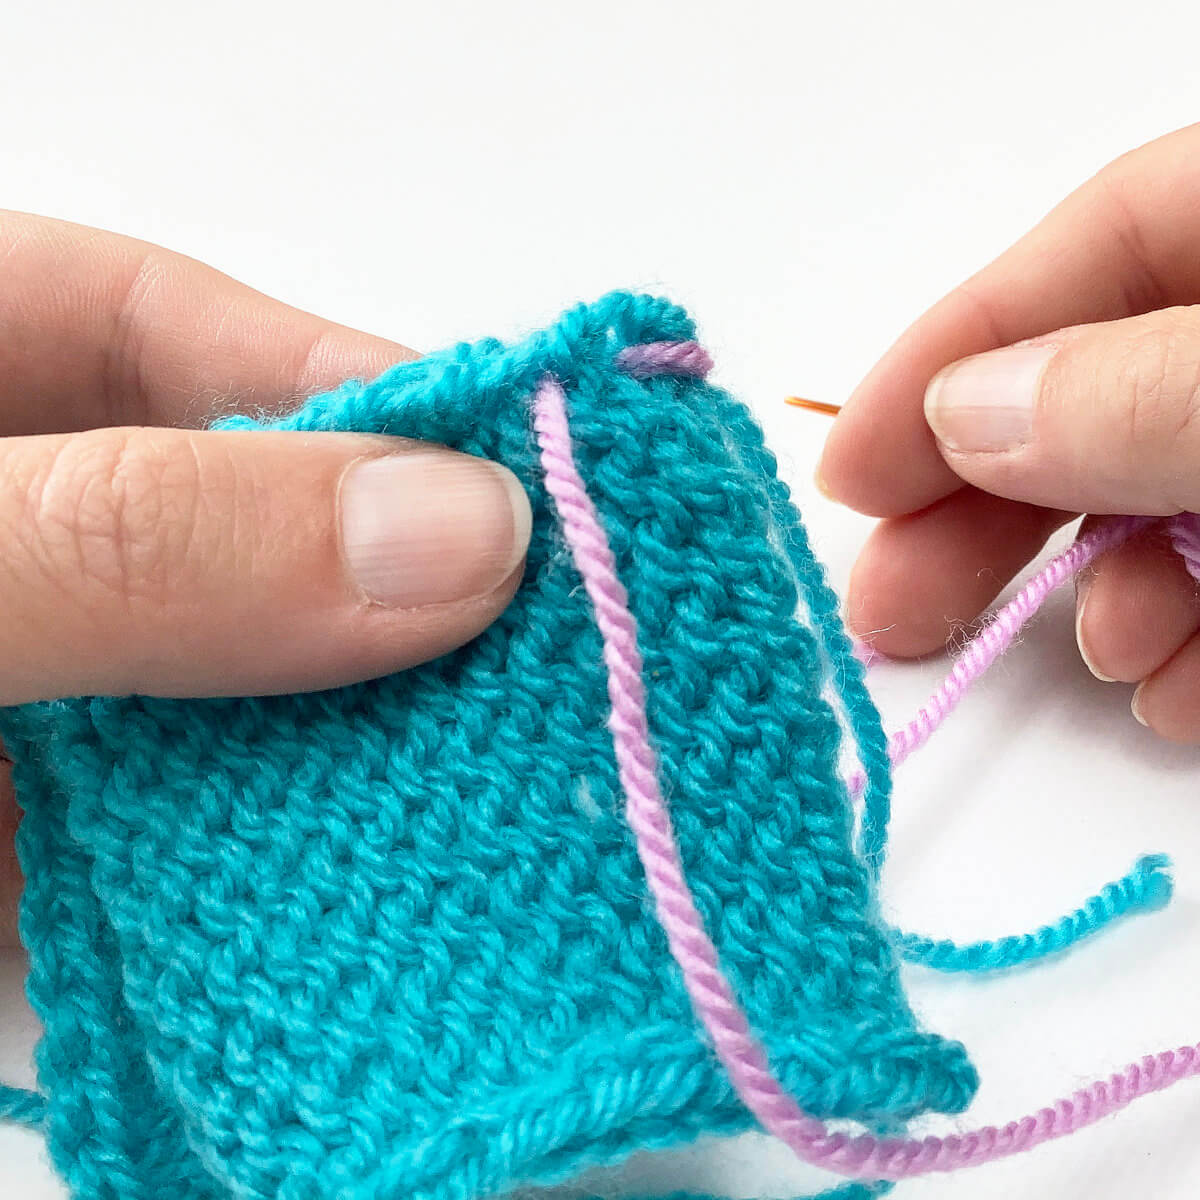
Next, insert the needle from back to front underneath the strands of the next stitch to the left.
This should be approx. 1/2 cm or 1/4 inch from where the yarn came out of the fabric before. If you’re working with a very fine-gauge fabric, you could consider skipping a stitch instead of going through the next one.
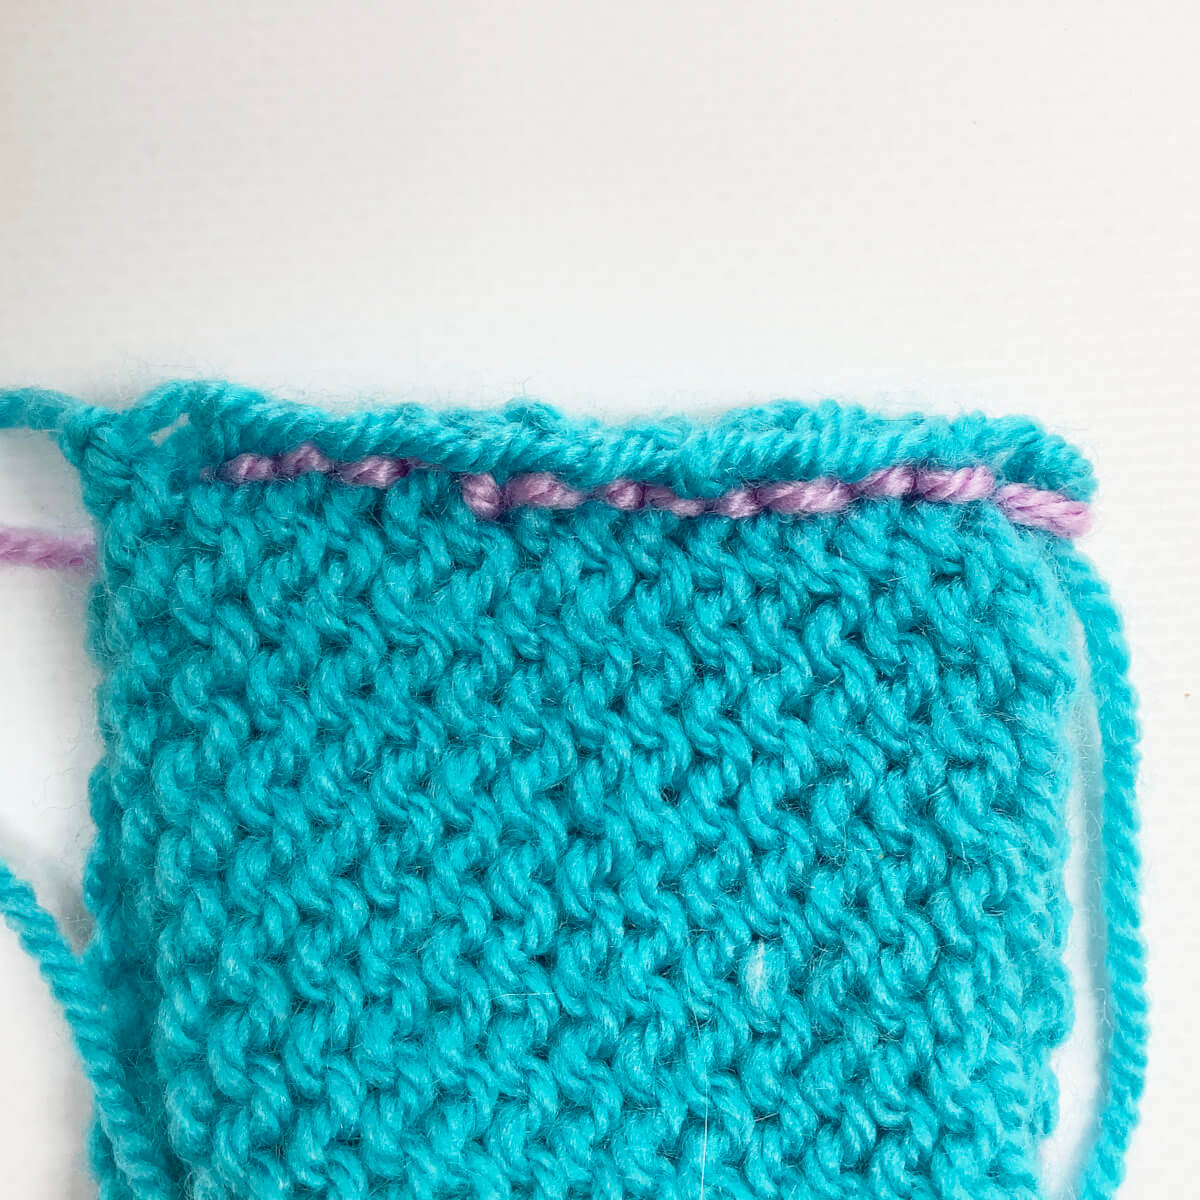
Pull the yarn through.
This is how it looks:
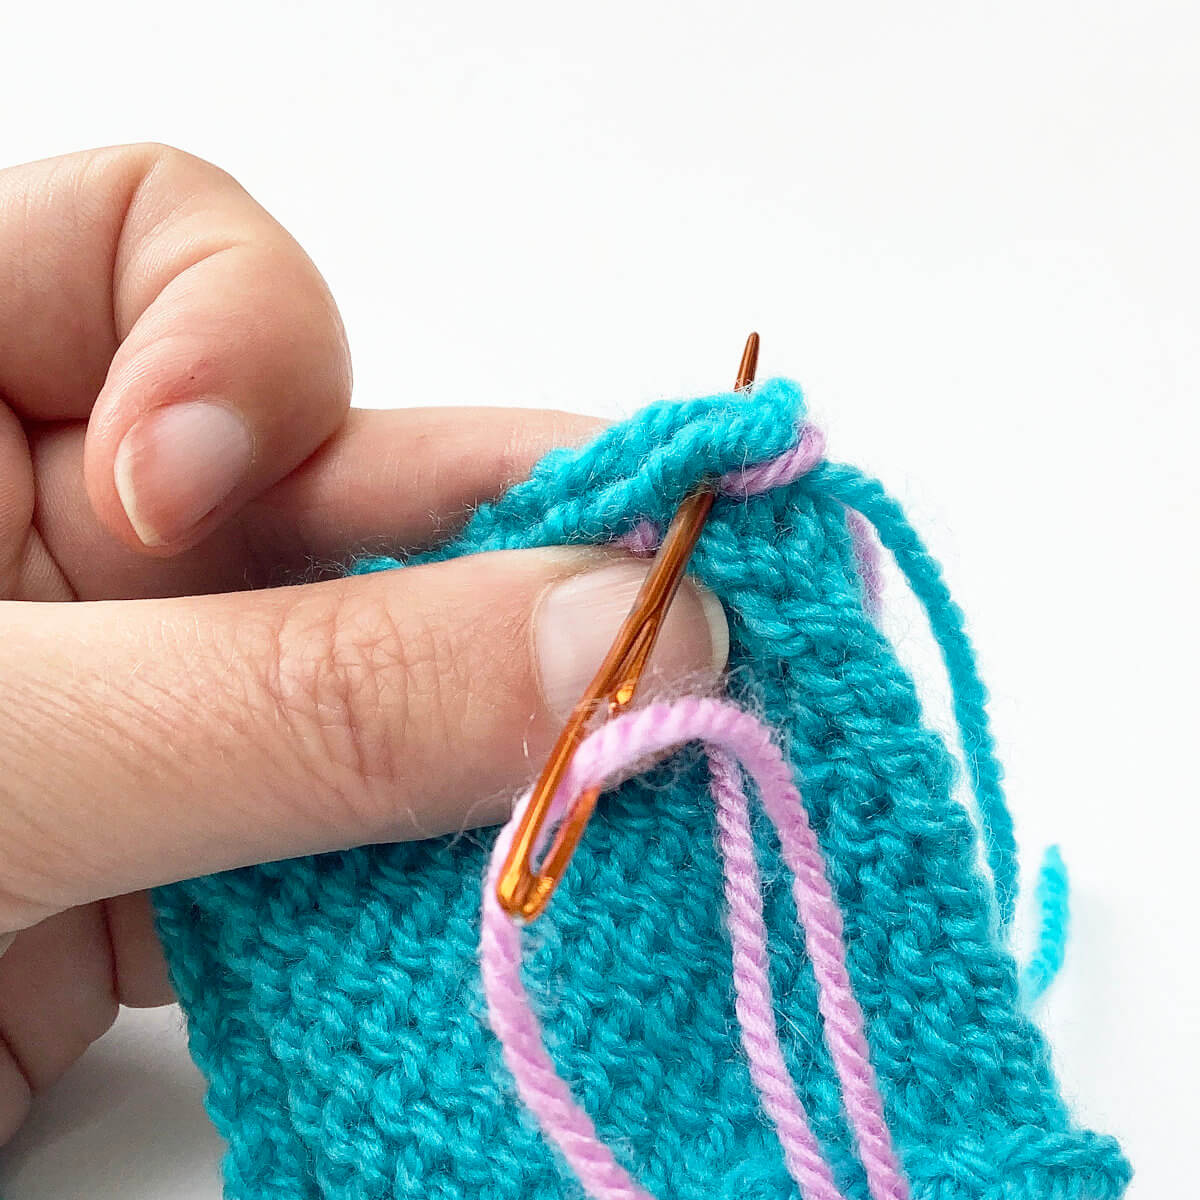
Next, insert the yarn needle from front to back into the point where it last came out of the fabric…
… when behind the fabric, back up about 5 cm / 1/4 inch (1 or more stitches) and insert it through the fabric again from back to front.
Pull the yarn through.
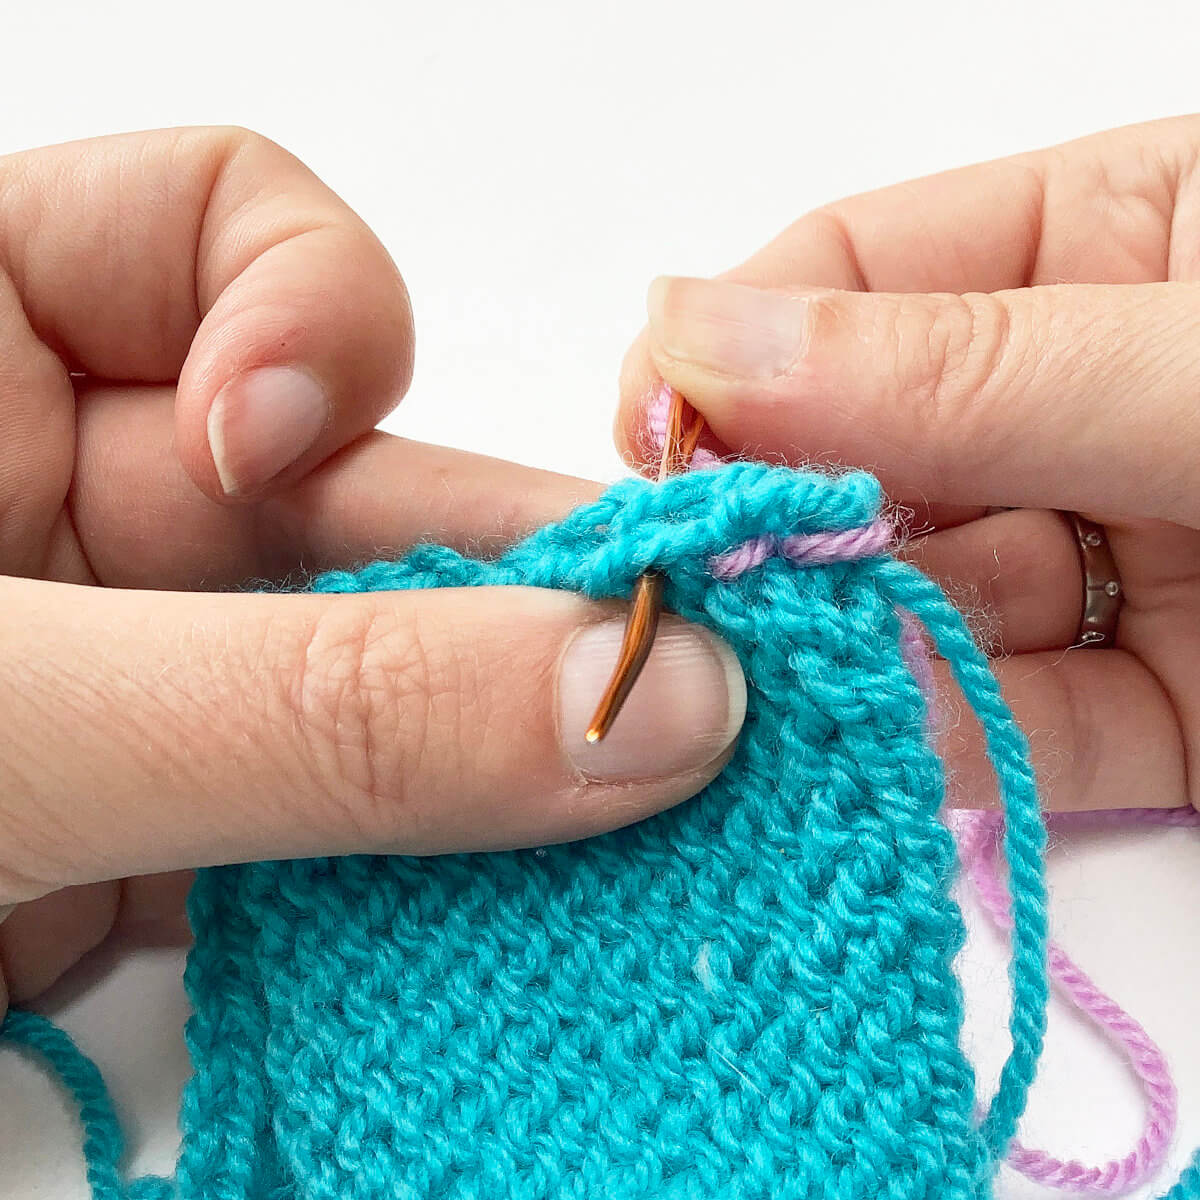
Repeat steps 6, 7 and 8, each time moving to the left, until the entire edge has been worked.
To complete it, just break the yarn and pull the end through the last remaining loop before weaving in the ends.
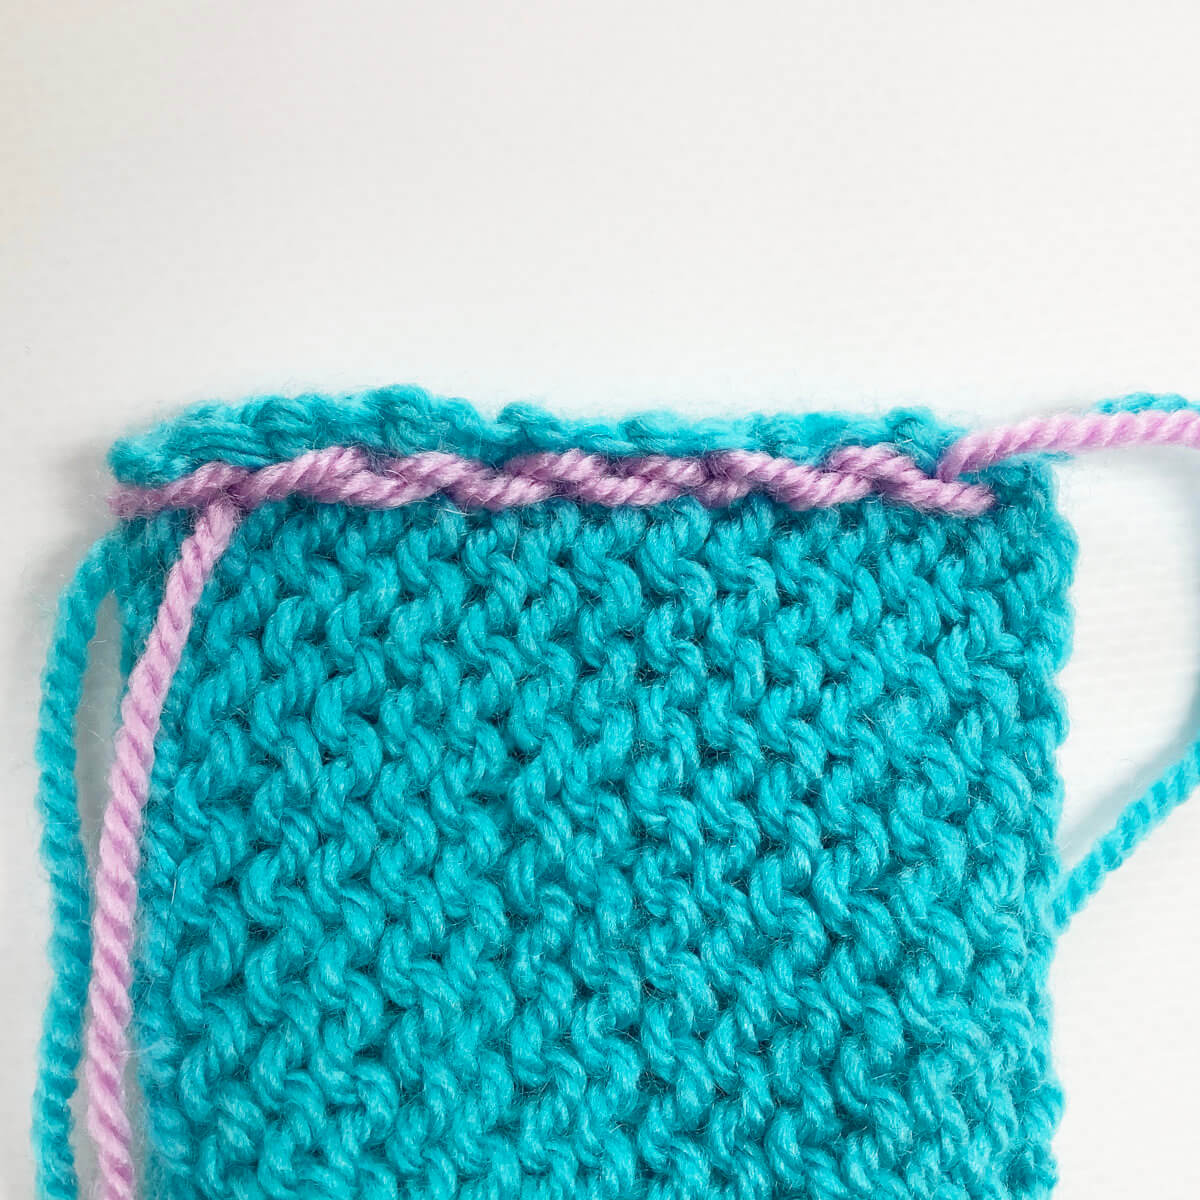
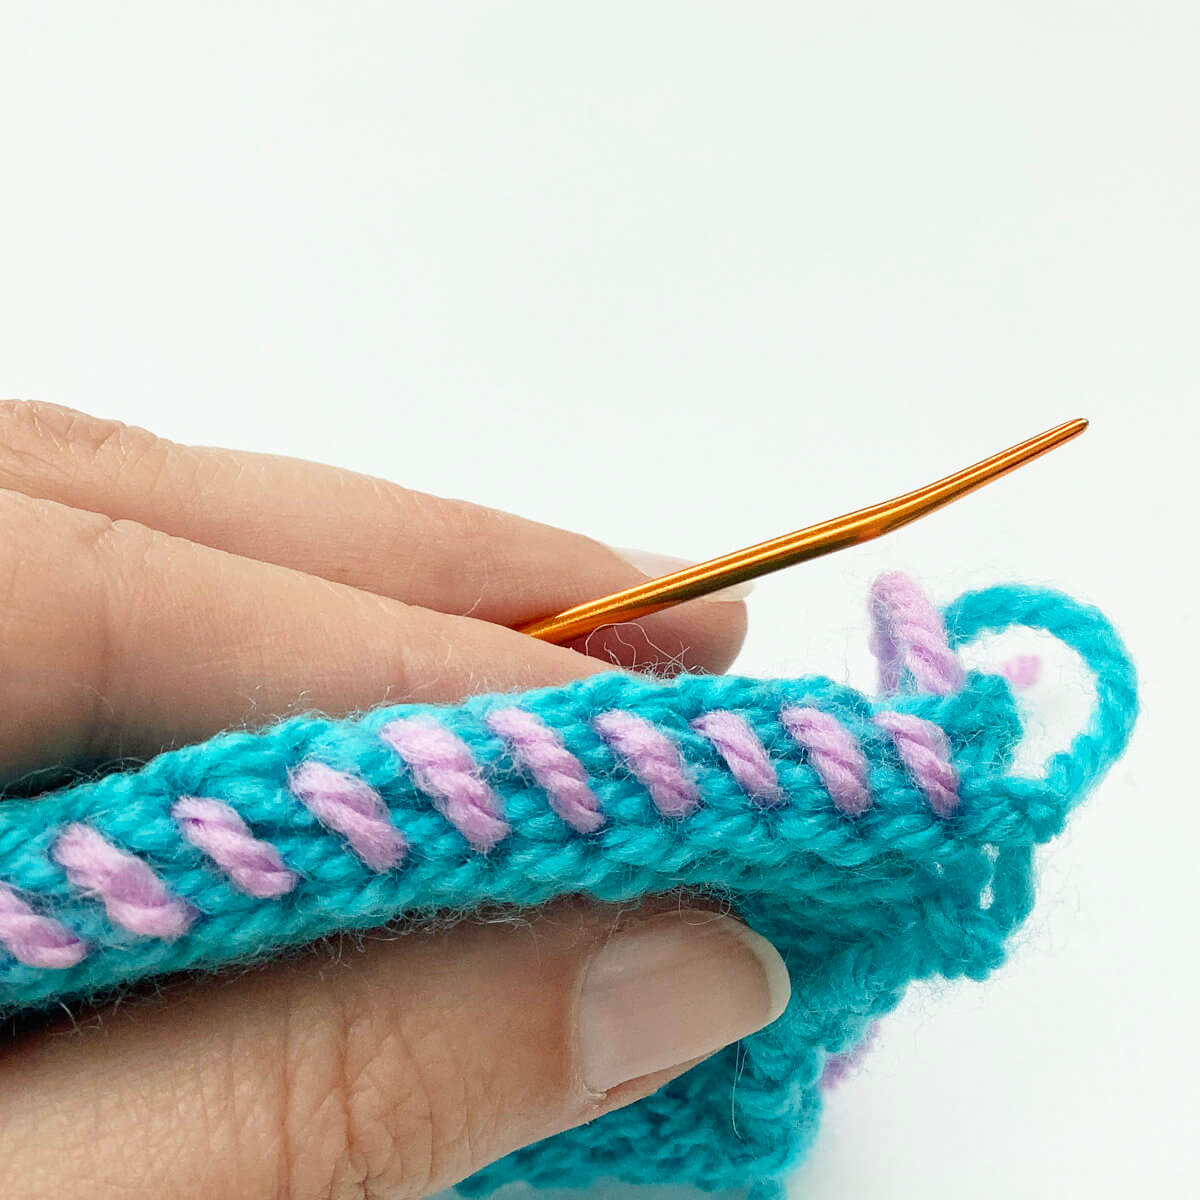
When turning the piece around, it looks like this:
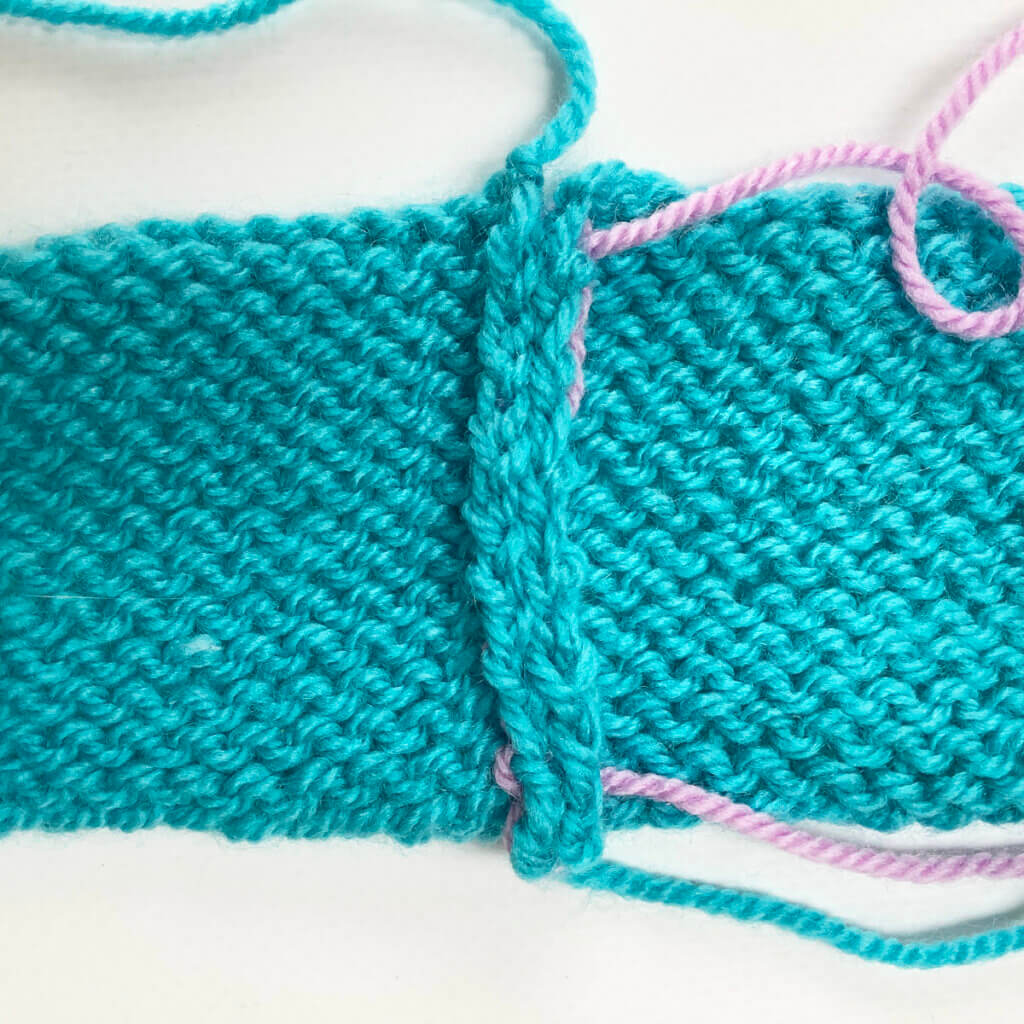
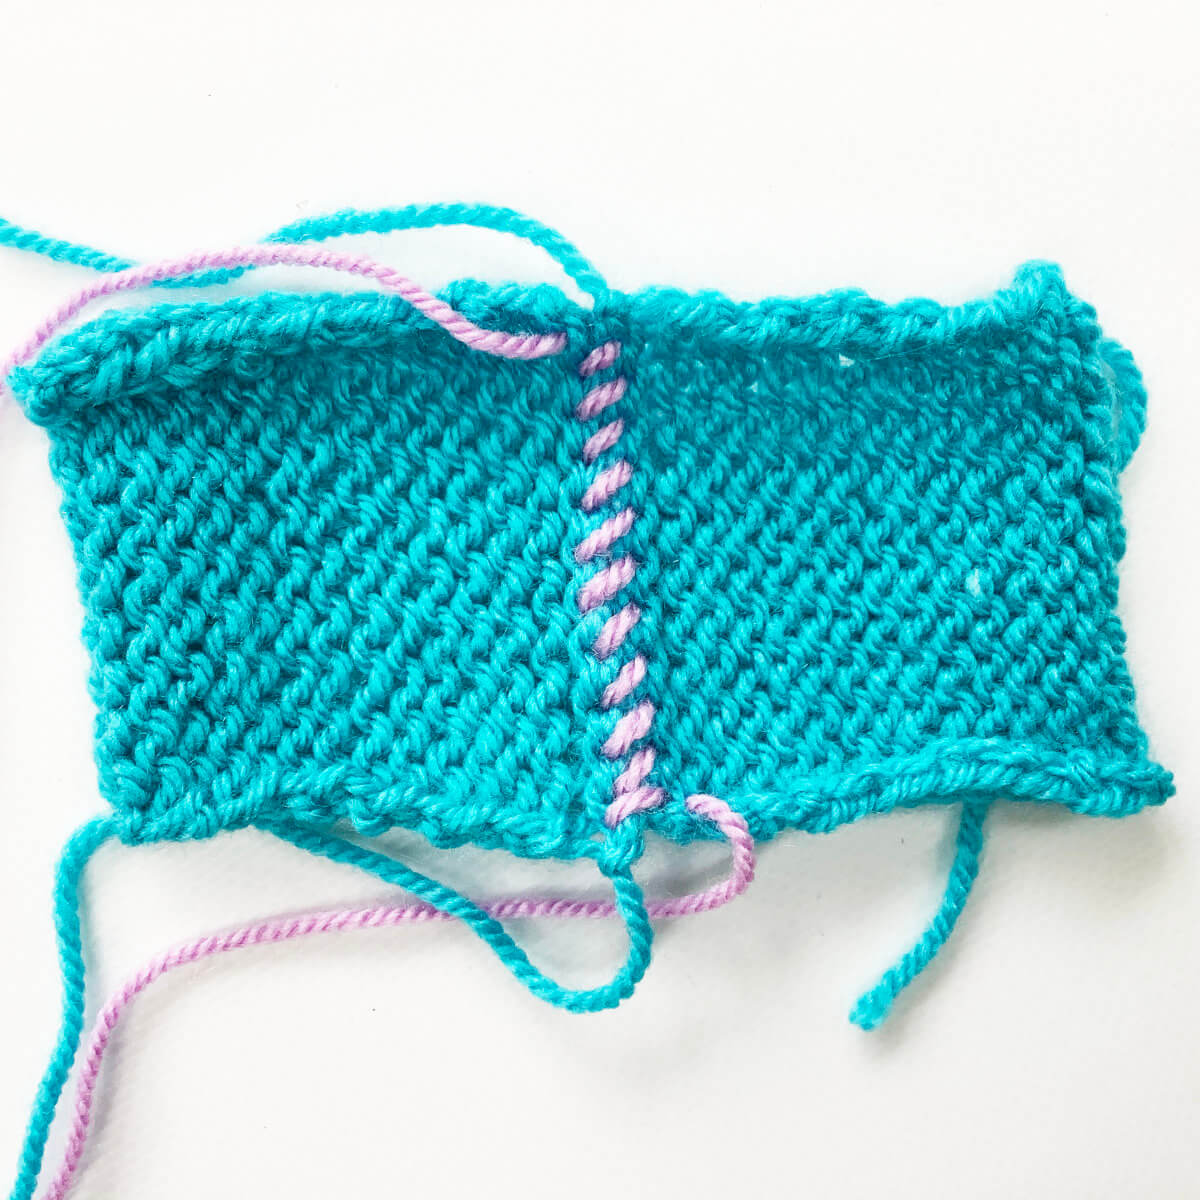
The result when viewed flat
Viewed from the wrong side of the fabric
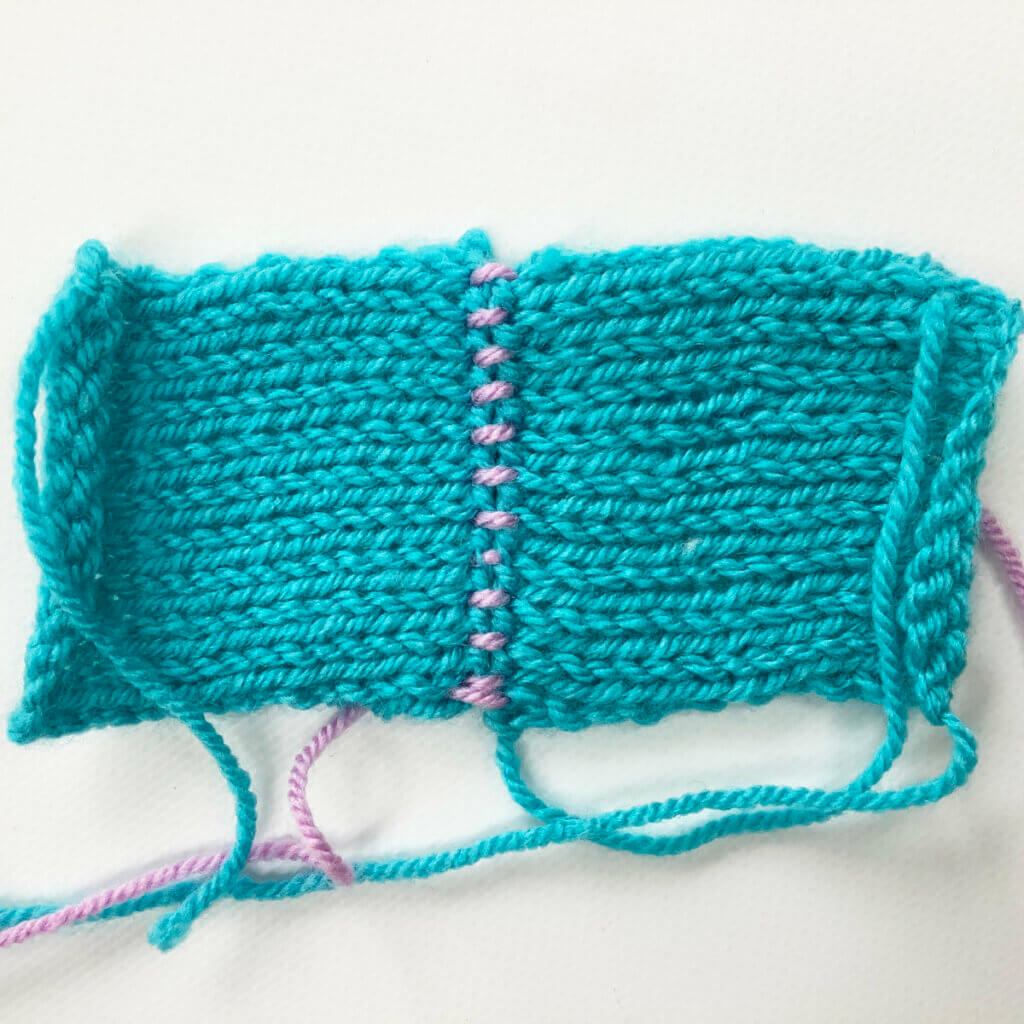
Viewed from the right side of the fabric:
Thanks to my Patreon supporters for bringing you this freebie! Creating quality patterns and tutorials is a lot of work and resource-intensive. However, I find it important to give you free content like this tutorial. Thanks to the generous support of my Patreon supporters, I can make it happen. Thank you, patrons! Click here to join, or click here to read more about La Visch Designs on Patreon.
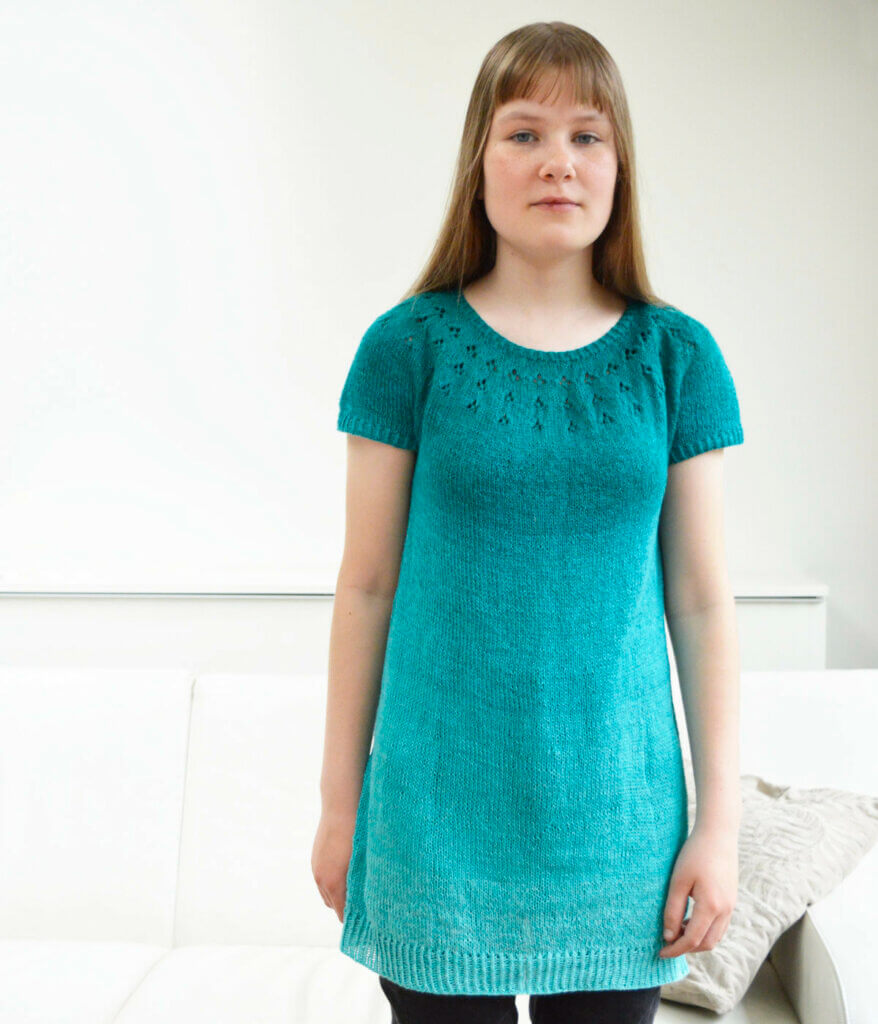
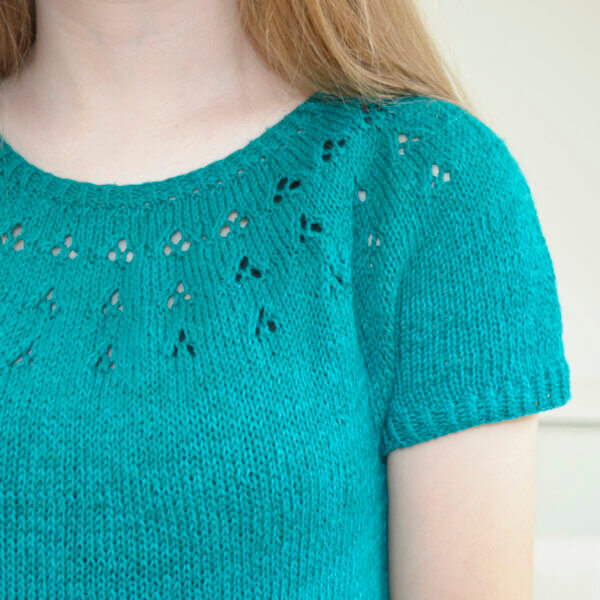
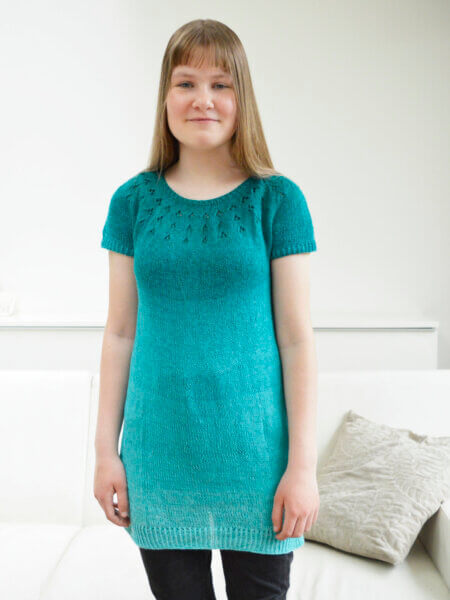
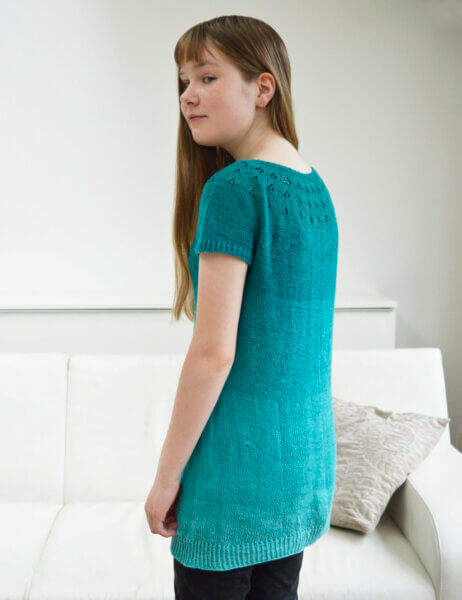
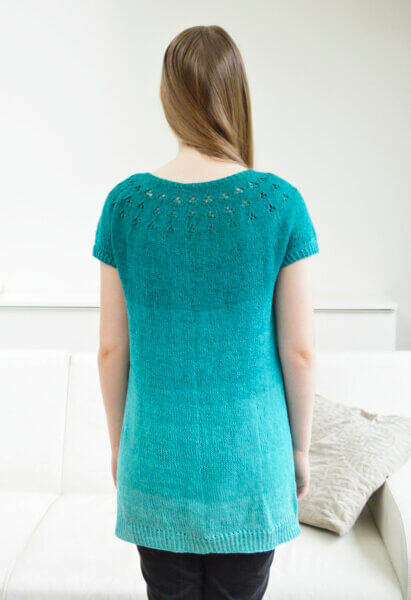
A soft and feminine tunic with sweet lace patterning in the yoke and short sleeves. Jade Clover is worked seamlessly in the round top down in one piece, and with neat twisted rib edgings. With its subtle A-line shaping, this tunic is not only flattering on all sizes. Additionally, it’s also very easy to shorten to tee length, or lengthen to a dress. Not only tips for these modifications as well as for a more flared out body, but also associated yarn requirements are included!
This pattern contains instructions for 11 sizes. These sizes have finished bust measurements ranging from 80 to 146.5 cm (31.5 to 57.75 inches). The sample in size 1 shown is worn with 7.5 cm (3 inches) of positive ease.
Pay what you want: (minimum €9.00)
€
Difficulty level
Stitches used include knit, purl, knit tbl, k2tog, skp, yo, m1l and m1r. This pattern is therefor suitable for the intermediate knitter.
Sizes and finished measurements
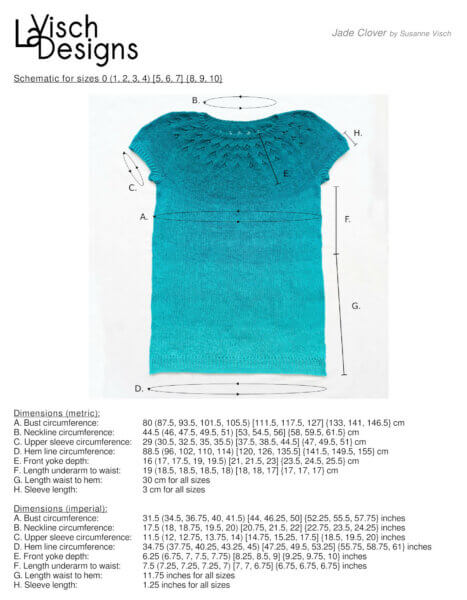
The Jade Clover tunic pattern is available in 11 sizes: Size 0 (1, 2, 3, 4) [5, 6, 7] {8, 9, 10} with a finished bust measurement of 80 (87.5, 93.5, 101.5, 105.5) [111.5, 117.5, 127] {133, 141, 146.5} cm or 31.5 (34.5, 36.75, 40, 41.5) [44, 46.25, 50] {52.25, 55.5, 57.75} inches. For more measurements, please see the schematic in the picture gallery.
The garment is intended to be worn with approx. 5-10 cm (2-4 inches) of positive ease at the full bust. The sample in size 1 shown is worn with 7.5 cm (3 inches) of positive ease.
Pattern details
Gauge: 23.5 sts / 30 rounds = 10 cm (4 inches) over stockinette stitch on larger needles, measured after blocking.
Pattern languages included: English.
Digital PDF has 8 pages (letter size)
Yarn
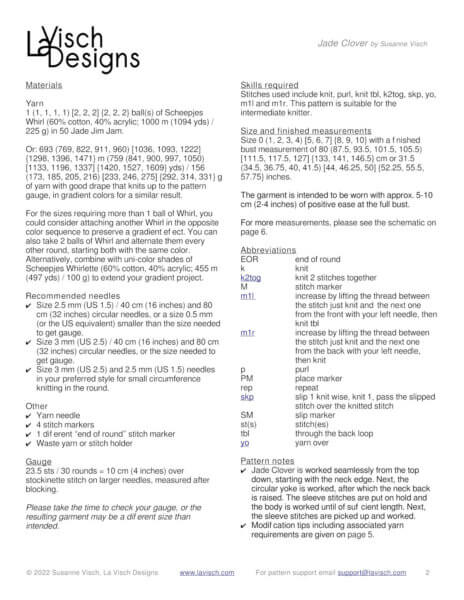
Yarn used in the sample Jade Clover tunic: 1 (1, 1, 1, 1) [2, 2, 2] {2, 2, 2} ball(s) of Scheepjes Whirl (60% cotton, 40% acrylic; 1000 m (1094 yds) / 225 g) in 50 Jade Jim Jam.
Alternatively, use: 693 (769, 822, 911, 960) [1036, 1093, 1222] {1298, 1396, 1471} m (759 (841, 900, 997, 1050) [1133, 1196, 1337] {1420, 1527, 1609} yds) / 156 (173, 185, 205, 216) [233, 246, 275] {292, 314, 331} g of yarn with good drape that knits up to the pattern gauge, in gradient colors for a similar result.
For the sizes requiring more than 1 ball of Whirl, you could consider attaching another Whirl in the opposite color sequence. This will preserve a gradient effect. You can also take 2 balls of Whirl and alternate them every other round, starting both with the same color. Alternatively, combine with uni-color shades of Scheepjes Whirlette (60% cotton, 40% acrylic; 455 m (497 yds) / 100 g) to extend your gradient project.
Materials
Knitting needles:
Size 2.5 mm (US 1.5) / 40 cm (16 inches) and 80 cm (32 inches) circular needles, or a size 0.5 mm (or the US equivalent) smaller than the size needed to get gauge
A size 3 mm (US 2.5) / 40 cm (16 inches) and 80 cm (32 inches) circular needles, or the size needed to get gauge
Size 3 mm (US 2.5) and 2.5 mm (US 1.5) needles in your preferred style for small circumference knitting in the round
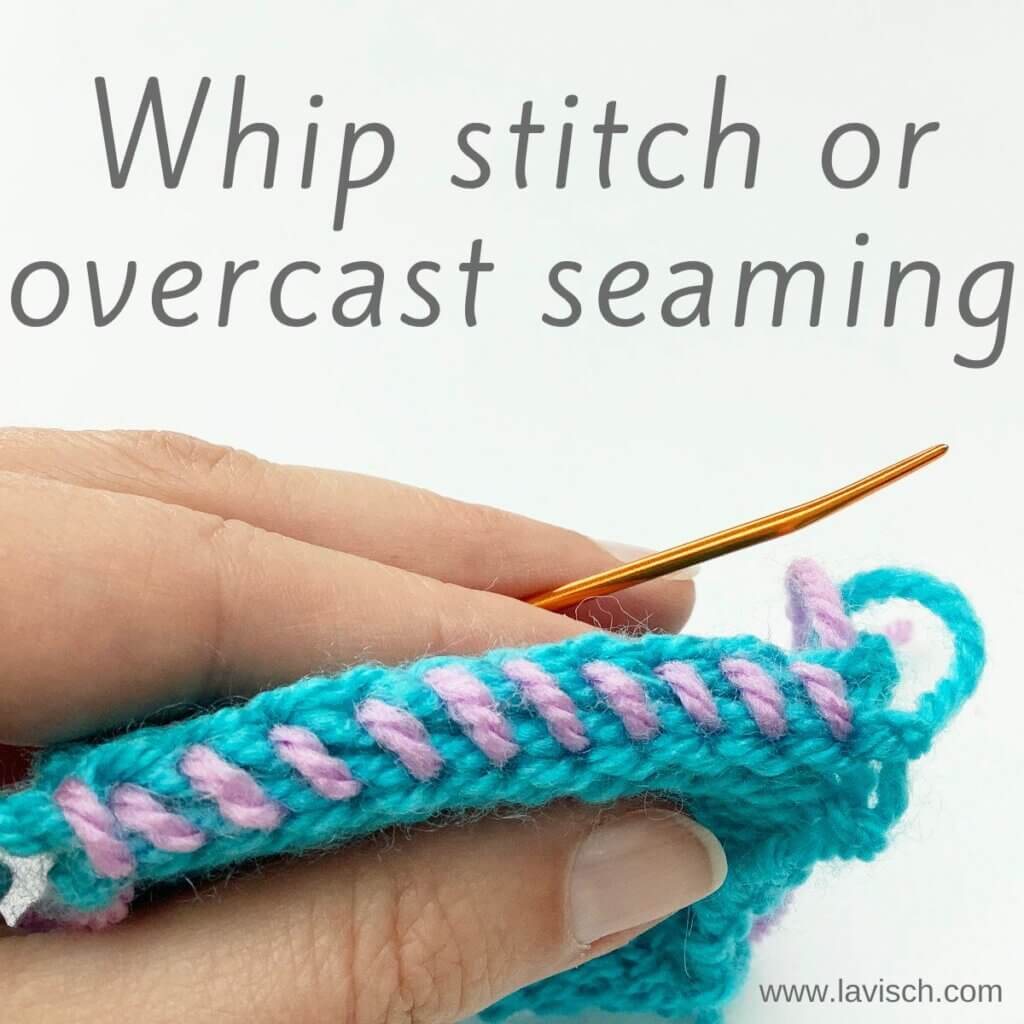
As I wrote in my tutorial on the mattress stitch, there are many ways to join two pieces of knitted fabric together. And they all have their own advantages and disadvantages! In this post, I’ll be talking about seaming with the whip stitch, using a darning needle. This technique is also called an overcast stitch because of the way it looks on the side where it’s worked. It’s a pretty basic and fast to work seaming technique. I’m using a contrasting yarn to make it easy to view what exactly I’m doing in the various pictures. However, if you want the seam to be less visible, make sure to use a yarn that matches the knitted fabric.
Materials used
Yarn: Paintbox Yarns Simply DK, a good value, good quality 100% acrylic yarn, here in the color Marine Blue. I also used a bit of Tea Rose.
Darning needle: Hiya Hiya Darn It Yarn Needle, or any other tapestry needle, threaded with yarn. You will need a length of yarn about three times longer than the length of the seam.
Whip stitch seaming step by step
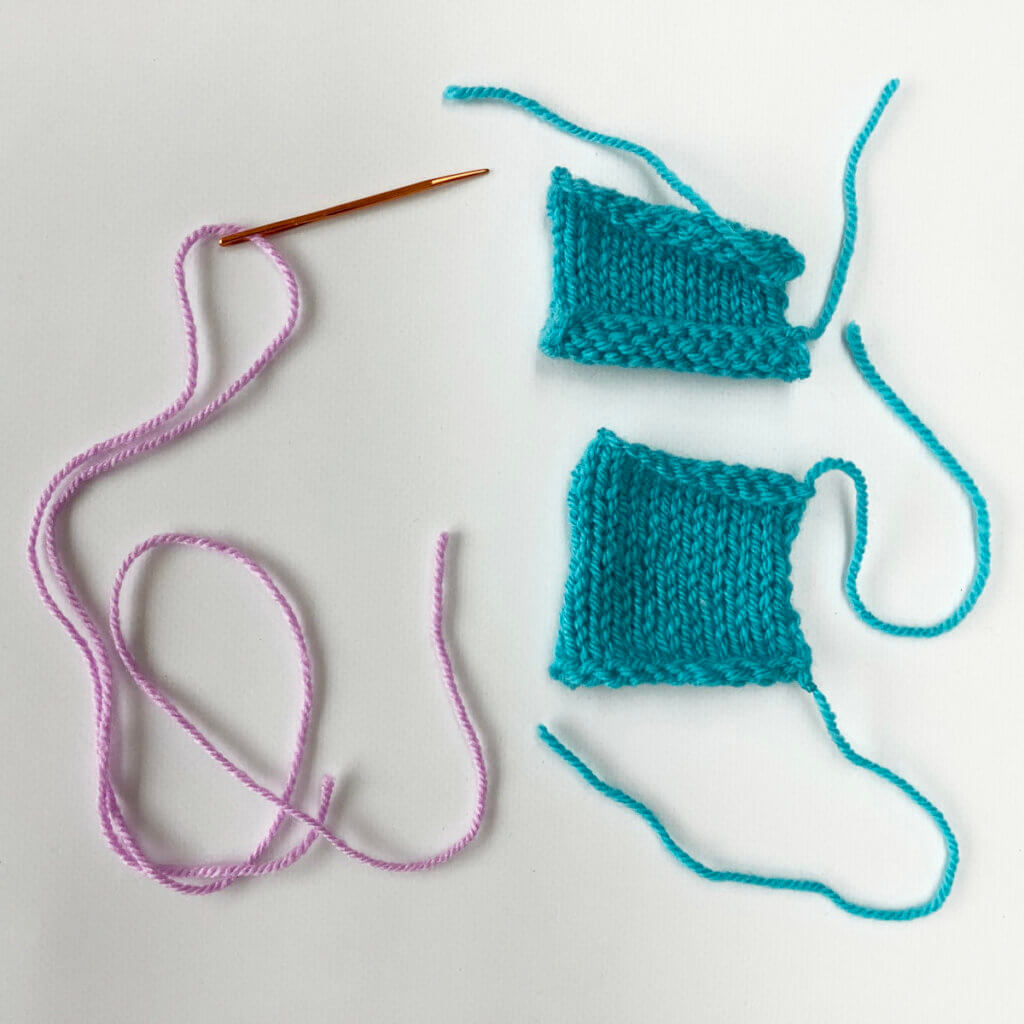
In this tutorial, I’m using 2 turquoise swatches to show you how to seam them together using the whip stitch or overcast stitch, with the lilac yarn. This particular seaming technique can be done with both the right side or the wrong side of the fabric facing. It yields a decorative seam, that could be used as a design feature when visible on the outside of the piece, especially in a contrasting yarn. In this example, however, I’m working it with the wrong side facing, to have the seam on the inside of the piece.
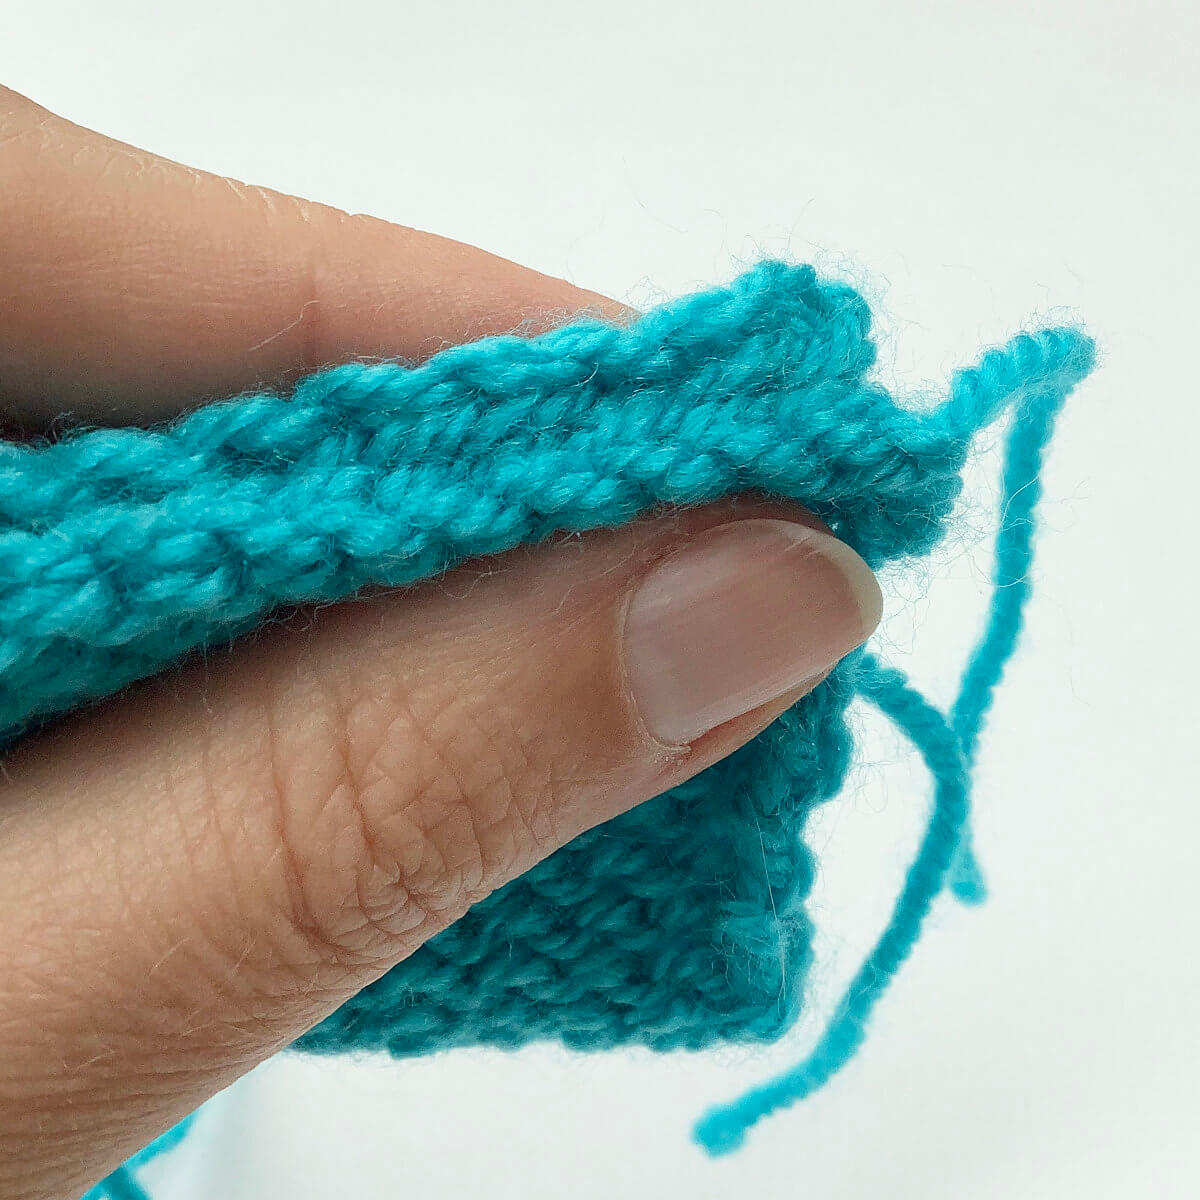
First, line up the edges of the pieces to be seamed together.
As said, here I’m working with the swatches with their right sides together.
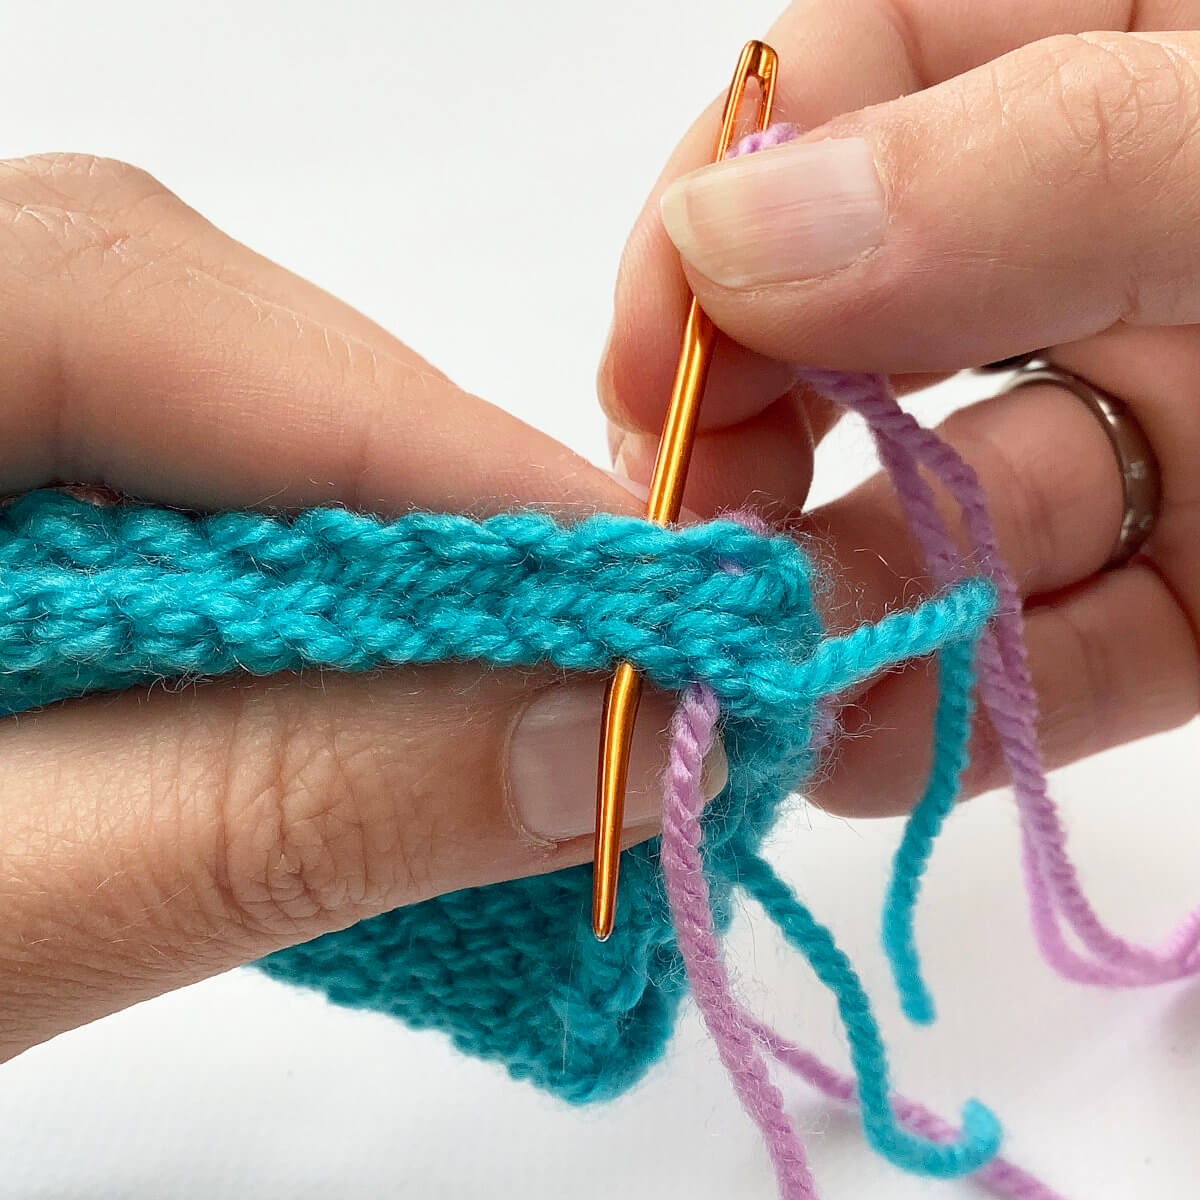
To start, insert the needle from back to front along the edge of the right side of both pieces. Take care to go under both strands of the edge stitch for each piece, and to leave a tail long enough to weave in later. Pull the yarn through.
Next, insert the needle from back to front of the next stitch on both pieces of fabric.
Pull the yarn through.
See how it forms loops over the edges of both swatches? This is why this is also called the “overcast” seaming method.
Repeat steps 3 and 4, each time moving one edge stitch to the left, until the entire edge has been worked.
To complete it, just break the yarn and pull the end through the last remaining loop before weaving in the ends.
When laid flat, it looks like this:
The result when viewed from the RS
For completeness’s sake, you can see below how this seam looks on the other side of the fabric, the right side, in this case:
What if I’m not working with BO or CO edges?
You can, of course, also use this seaming technique on the side edges of knitted fabric. In that case, identify the column of stitches at the edge of the fabric. To work the seam, insert the darning needle underneath both legs of the v at the edge of the fabric for each swatch.
Thanks to my Patreon supporters for bringing you this freebie! Creating quality patterns and tutorials is a lot of work and resource-intensive. However, I find it important to give you free content like this tutorial. Thanks to the generous support of my Patreon supporters, I can make it happen. Thank you, patrons! Click here to join, or click here to read more about La Visch Designs on Patreon.
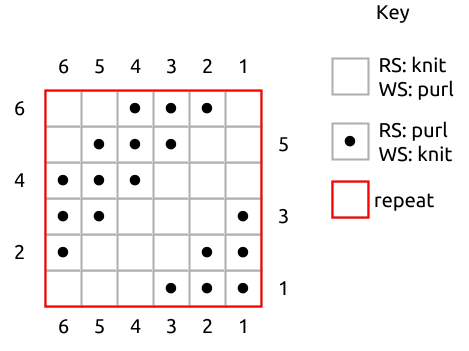
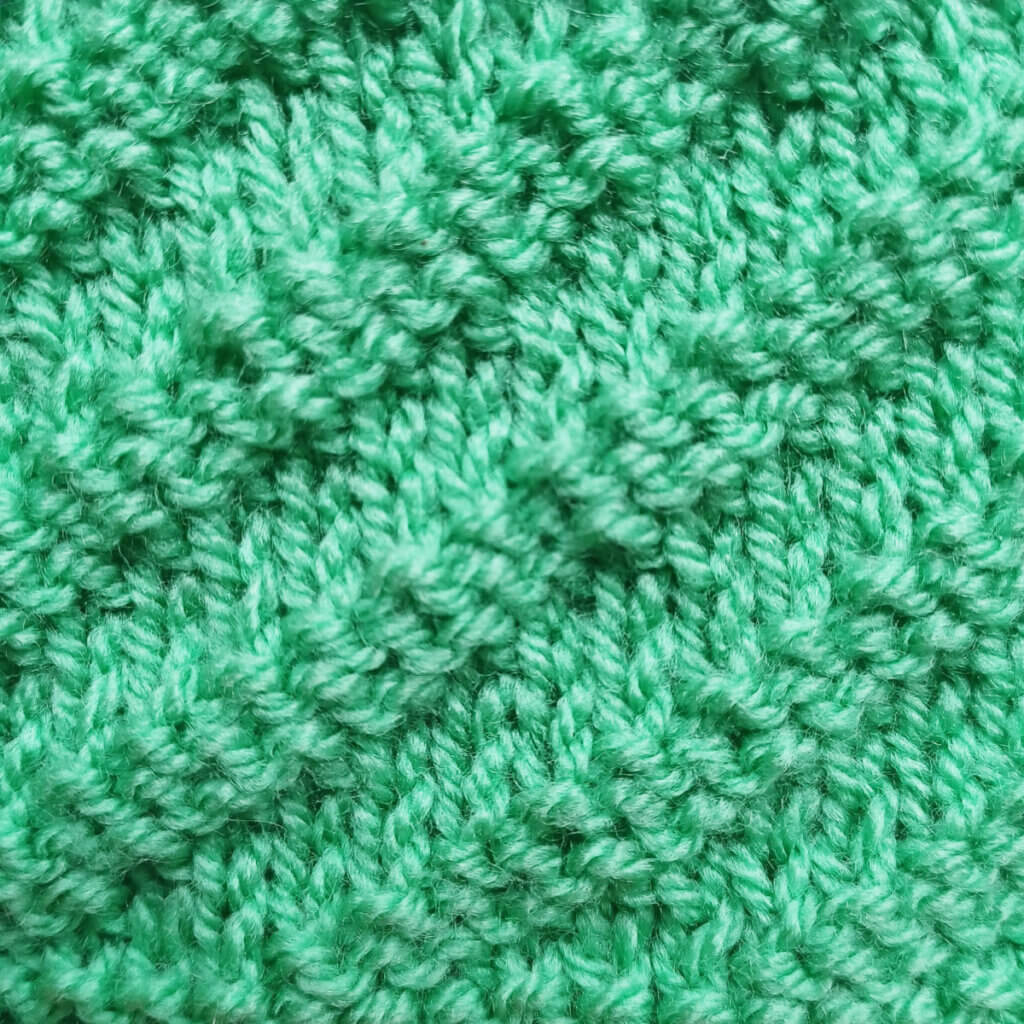
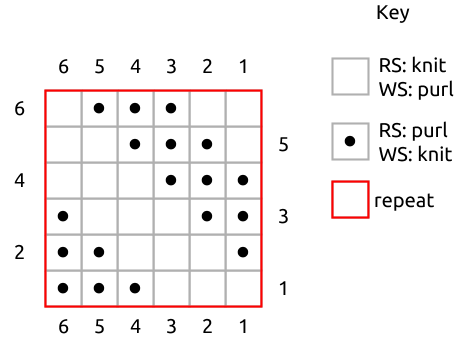
This post will give you the instructions for working the right slanting diagonal rib pattern. As its left slanting counterpart, it works well both as all-over patterning, as well as an alternative for regular rib as finishing for hems and sleeves. This stitch pattern is worked on both right side and wrong side rows, and is a multiple of 6 stitches.
Materials used
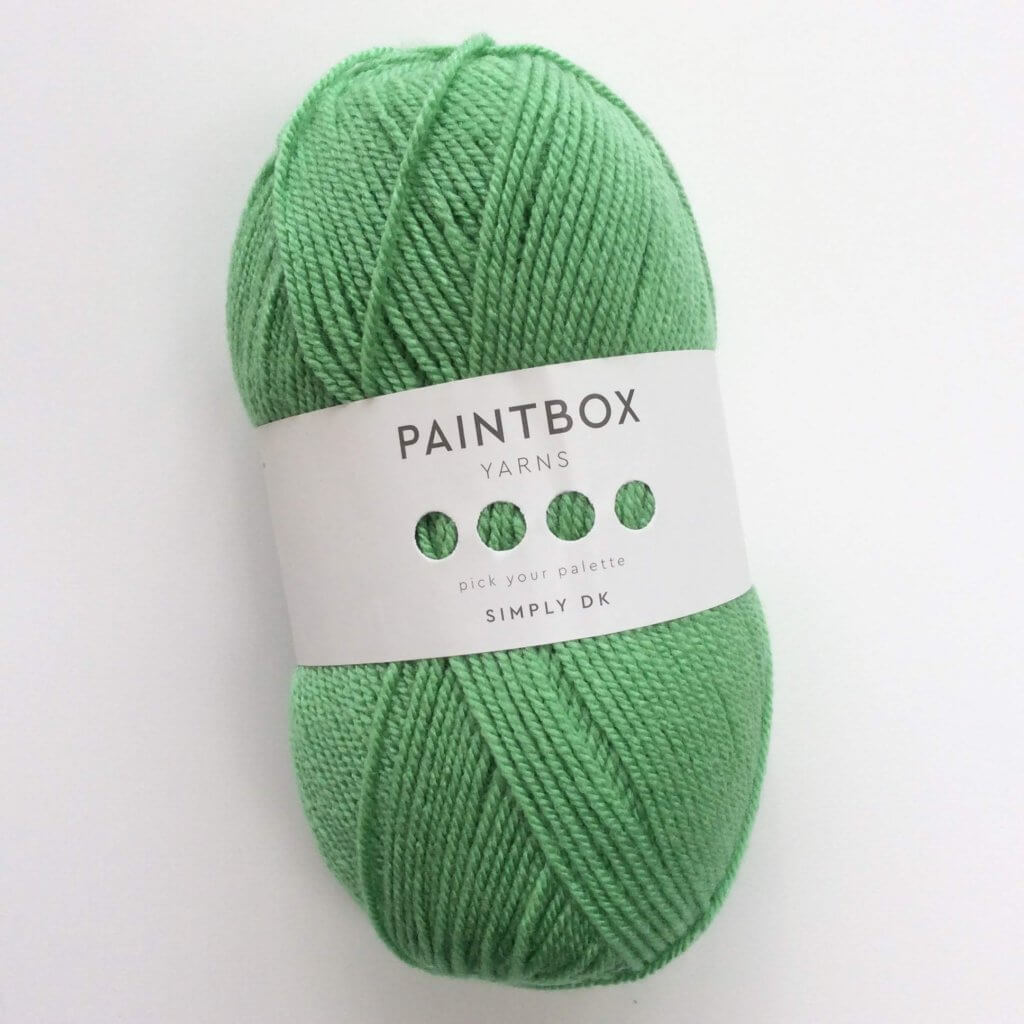
Yarn: Paintbox Yarns Simply DK, a good value, good quality 100% acrylic yarn, here in the color 125 Spearmint Green.
Knitting needles: This is a pair of straights that I picked up at the second-hand store when I started knitting, brand unknown.
Row 2: (wrong side): *K1, p3, k2 rep from * to end.
Row 3: *P1, k3, p2; rep from * to end.
Row 4: *K3, p3; rep from * to end.
Row 5: *K2, p3, k1; rep from * to end.
Row 6: *P2, k3, p1; rep from * to end.
Repeat rows 1-6 for pattern.
Thanks to my Patreon supporters for bringing you this freebie! Creating quality patterns and tutorials is a lot of work and resource-intensive. However, I find it important to give you free content like this tutorial. Thanks to the generous support of my Patreon supporters, I can make it happen. Thank you, patrons! Click here to join, or click here to read more about La Visch Designs on Patreon.
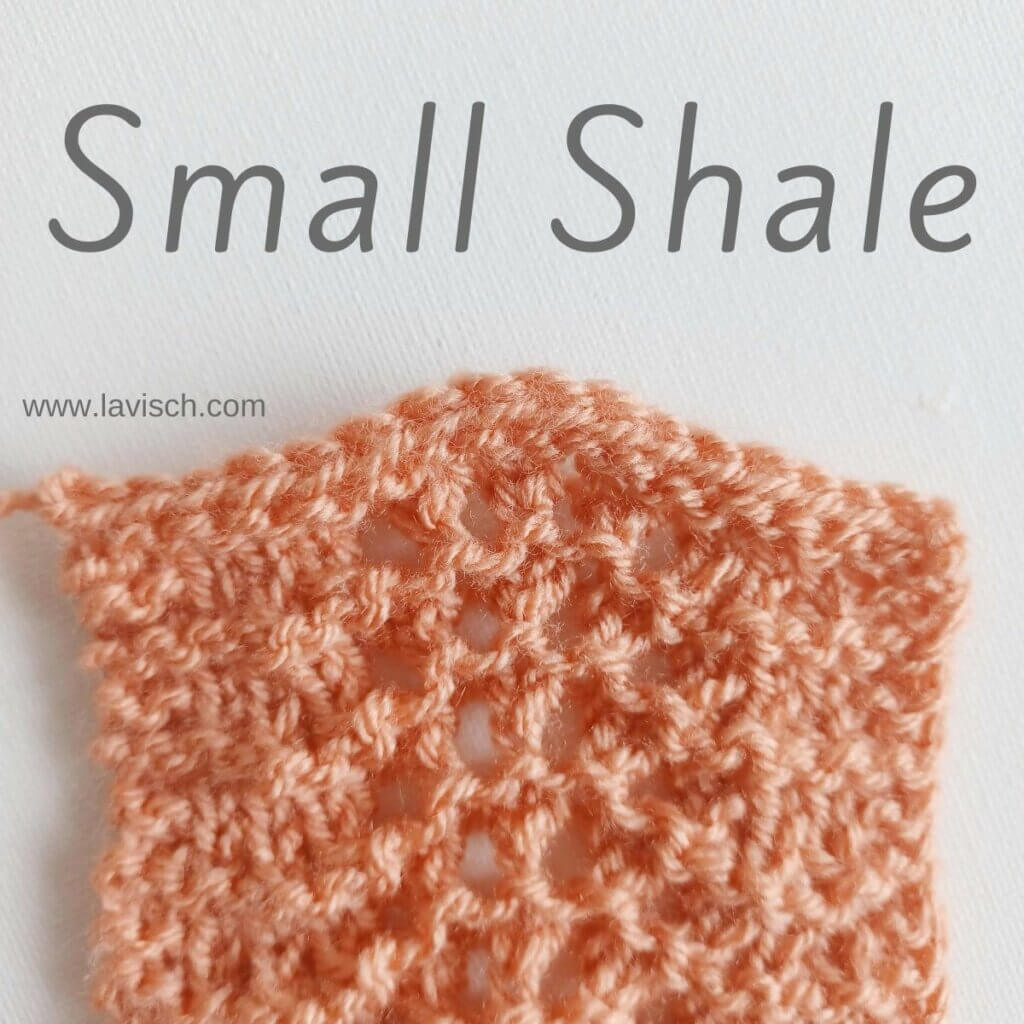
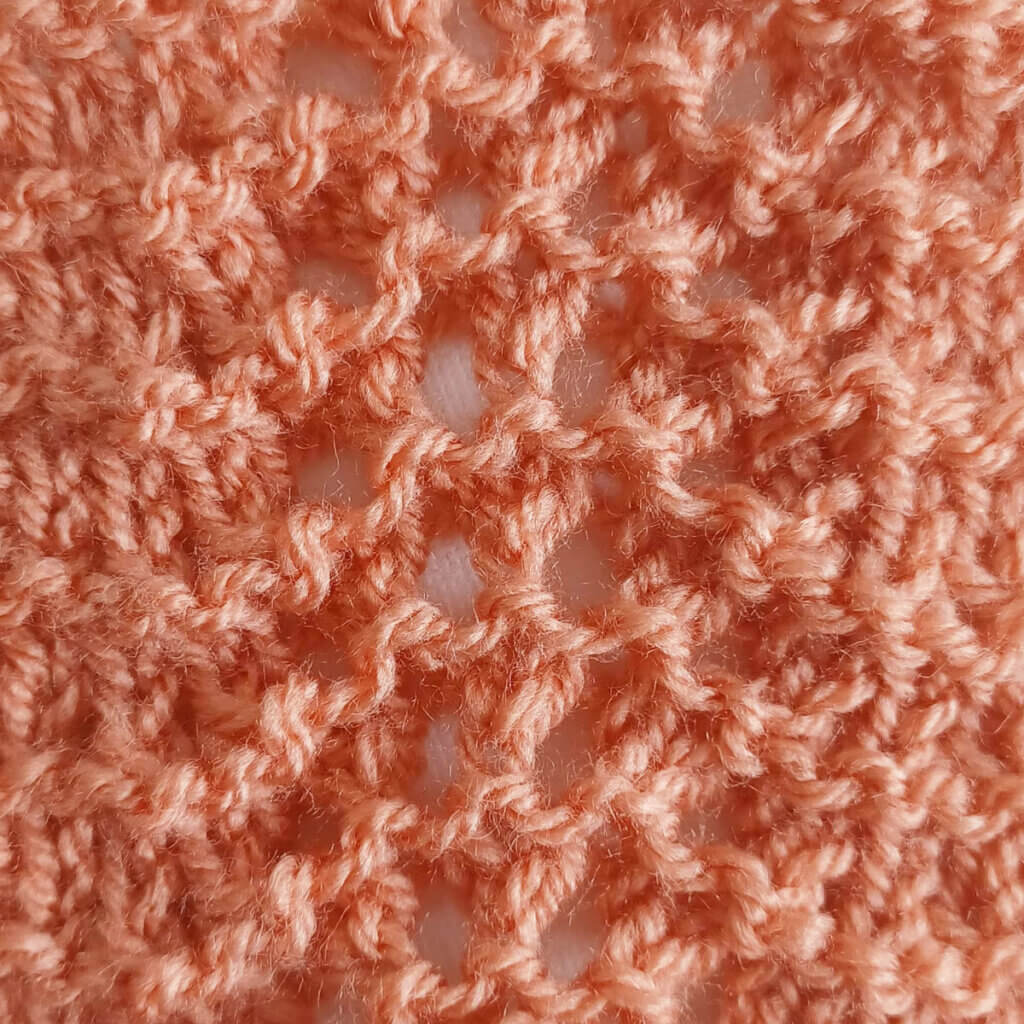
Small Shale is the smallest variation of the Old Shale stitch pattern, which is a traditional Shetland stitch pattern. Sets of decreases are alternated with sets of yarn over increases, creating a lovely wavy edge of both the bottom and top of the fabric. Because this patterning also contains some garter stitch, the fabric tends to lay flat. For this reason, Small Shale is very suitable for things like hems and edgings. This stitch pattern is worked in a multiple of 11 + 2 stitches. Please note that in the above picture, I’ve added 2 edge stitches in garter stitch on both sides of the swatch.
Materials used
Yarn: Paintbox Yarns Simply DK, a good value, good quality 100% acrylic yarn, here in the color Vintage Pink.
Knitting needles: This is a pair of straights that I picked up at the second-hand store when I started knitting, brand unknown.
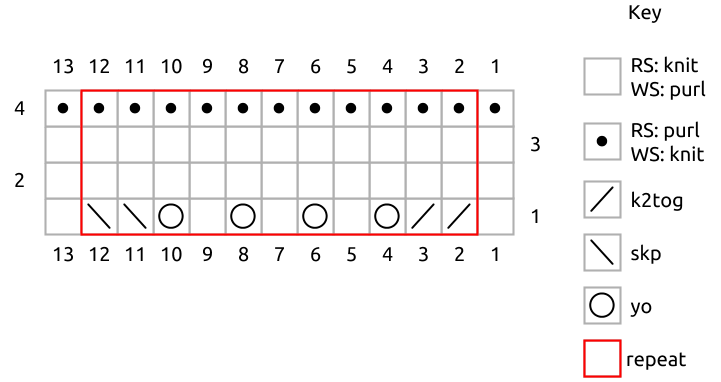
Row 1 (right side): K1, *k2tog twice, (yo, k1) 3 times, yo, skp twice; rep from * to 1 st before end, k1.
Row 2: (wrong side): Purl.
Row 3: Knit.
Row 4: Knit.
Repeat rows 1-4 for pattern.
Thanks to my Patreon supporters for bringing you this freebie! Creating quality patterns and tutorials is a lot of work and resource-intensive. However, I find it important to give you free content like this tutorial. Thanks to the generous support of my Patreon supporters, I can make it happen. Thank you, patrons! Click here to join, or click here to read more about La Visch Designs on Patreon.
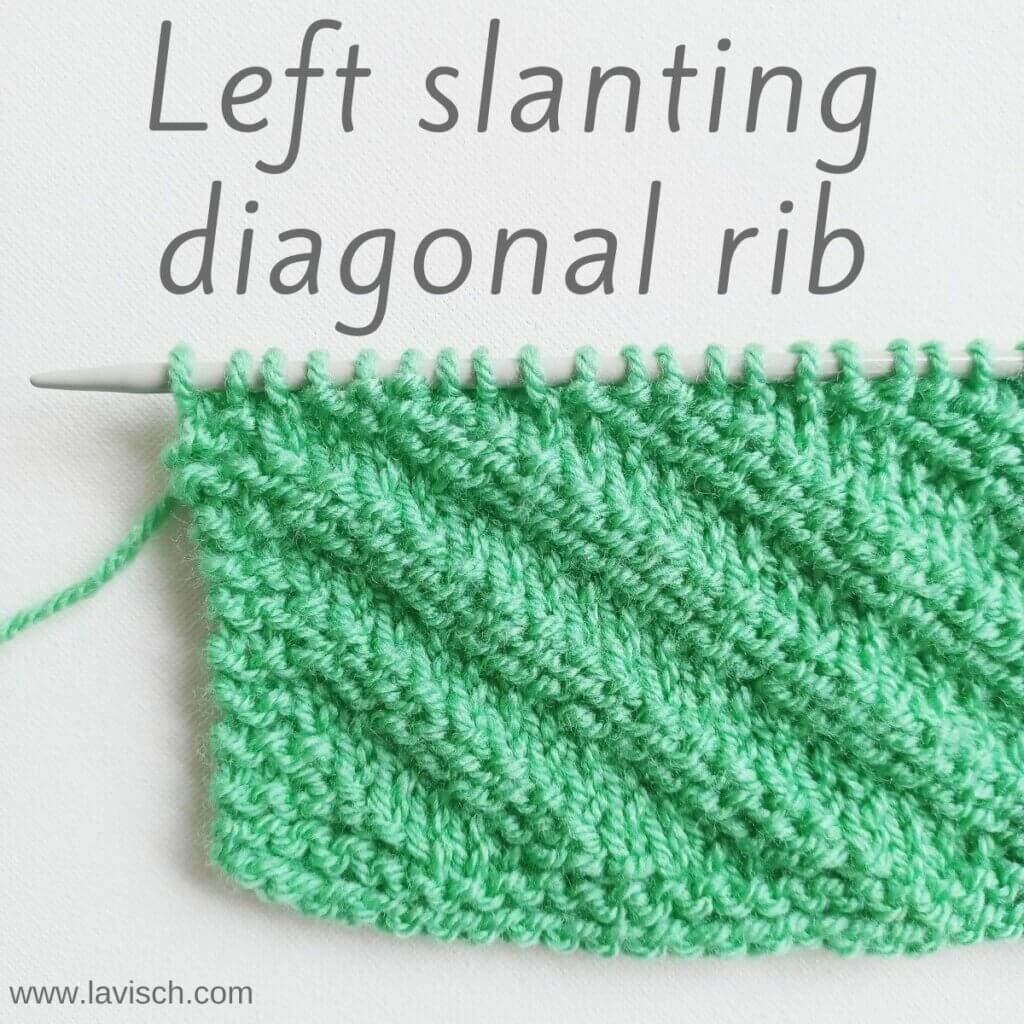
This post is about working the left slanting diagonal rib pattern. It works well both as all-over patterning, as well as an alternative for regular rib as finishing for hems and sleeves. This stitch pattern is worked on both right side and wrong side rows, and is a multiple of 6 stitches.
Materials used
Yarn: Paintbox Yarns Simply DK, a good value, good quality 100% acrylic yarn, here in the color 125 Spearmint Green.
Knitting needles: This is a pair of straights that I picked up at the second-hand store when I started knitting, brand unknown.
Row 1 (right side): *K3, p3; rep from * to end. Row 2: (wrong side): *K2, p3, k1 rep from * to end. Row 3: *P2, k3, p1; rep from * to end. Row 4: *P3, k3; rep from * to end. Row 5: *K1, p3, k2; rep from * to end. Row 6: *P1, k3, p2; rep from * to end.
Repeat rows 1-6 for pattern.
Thanks to my Patreon supporters for bringing you this freebie! Creating quality patterns and tutorials is a lot of work and resource-intensive. However, I find it important to give you free content like this tutorial. Thanks to the generous support of my Patreon supporters, I can make it happen. Thank you, patrons! Click here to join, or click here to read more about La Visch Designs on Patreon.
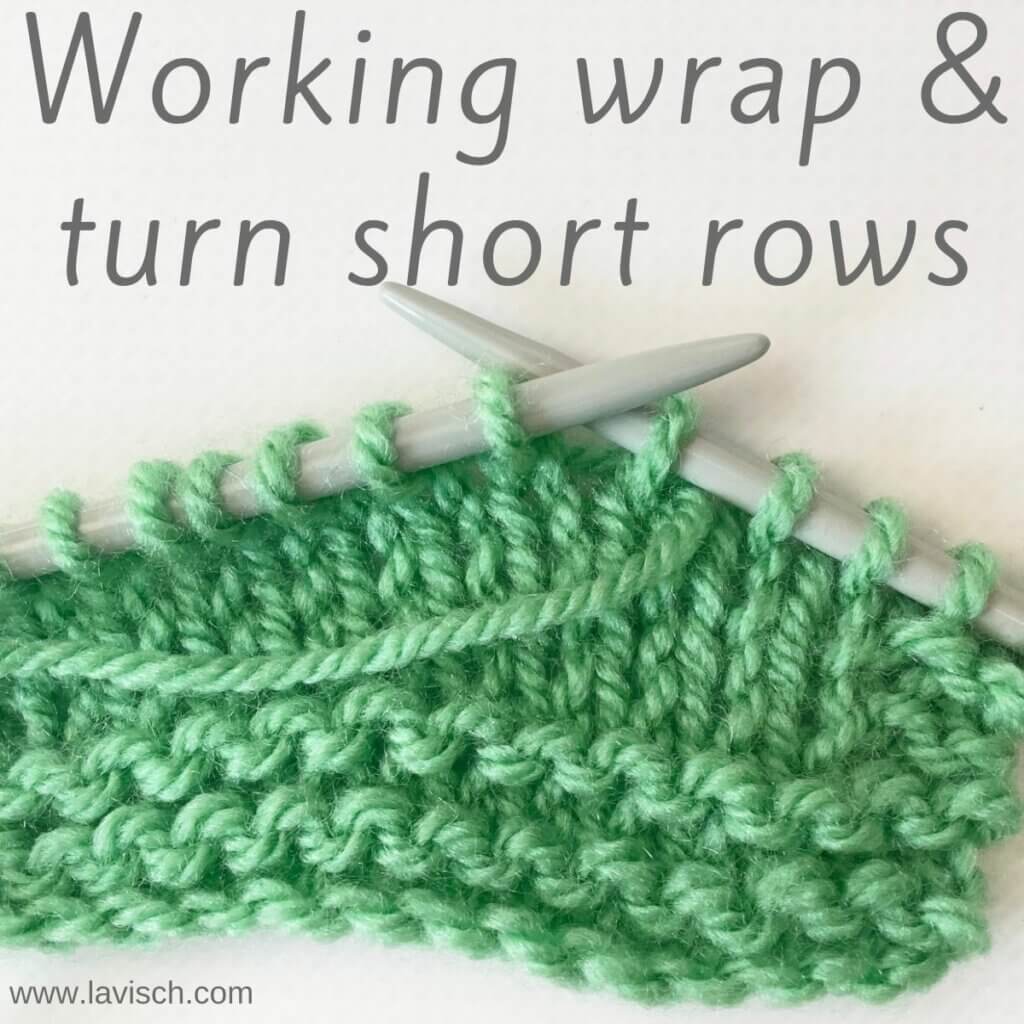
What exactly are short rows? They’re partial rows of knitting in your project, that can be used to shape the fabric. Think for example of creating extra room for the bust, or to raise the back neck in sweaters. In this tutorial, I’ll tell you all about the wrap & turn method of working short rows. Good to know, is that “wrap & turn” is often abbreviated as “w&t”. If you encounter it in a knitting instruction, it is telling you to wrap a stitch with your working yarn, and then turn your work. By wrapping this stitch, any holes in the fabric by switching the knitting direction in the middle of your row or round are closed.
Grab your materials and let’s get started!
Materials used
Yarn: Paintbox Yarns Simply DK, a good value, good quality 100% acrylic yarn, here in the color 125 Spearmint Green.
Knitting needles: This is a pair of straights that I picked up at the second-hand store when I started knitting. Brand unknown.
Working wrap & turn short rows step by step
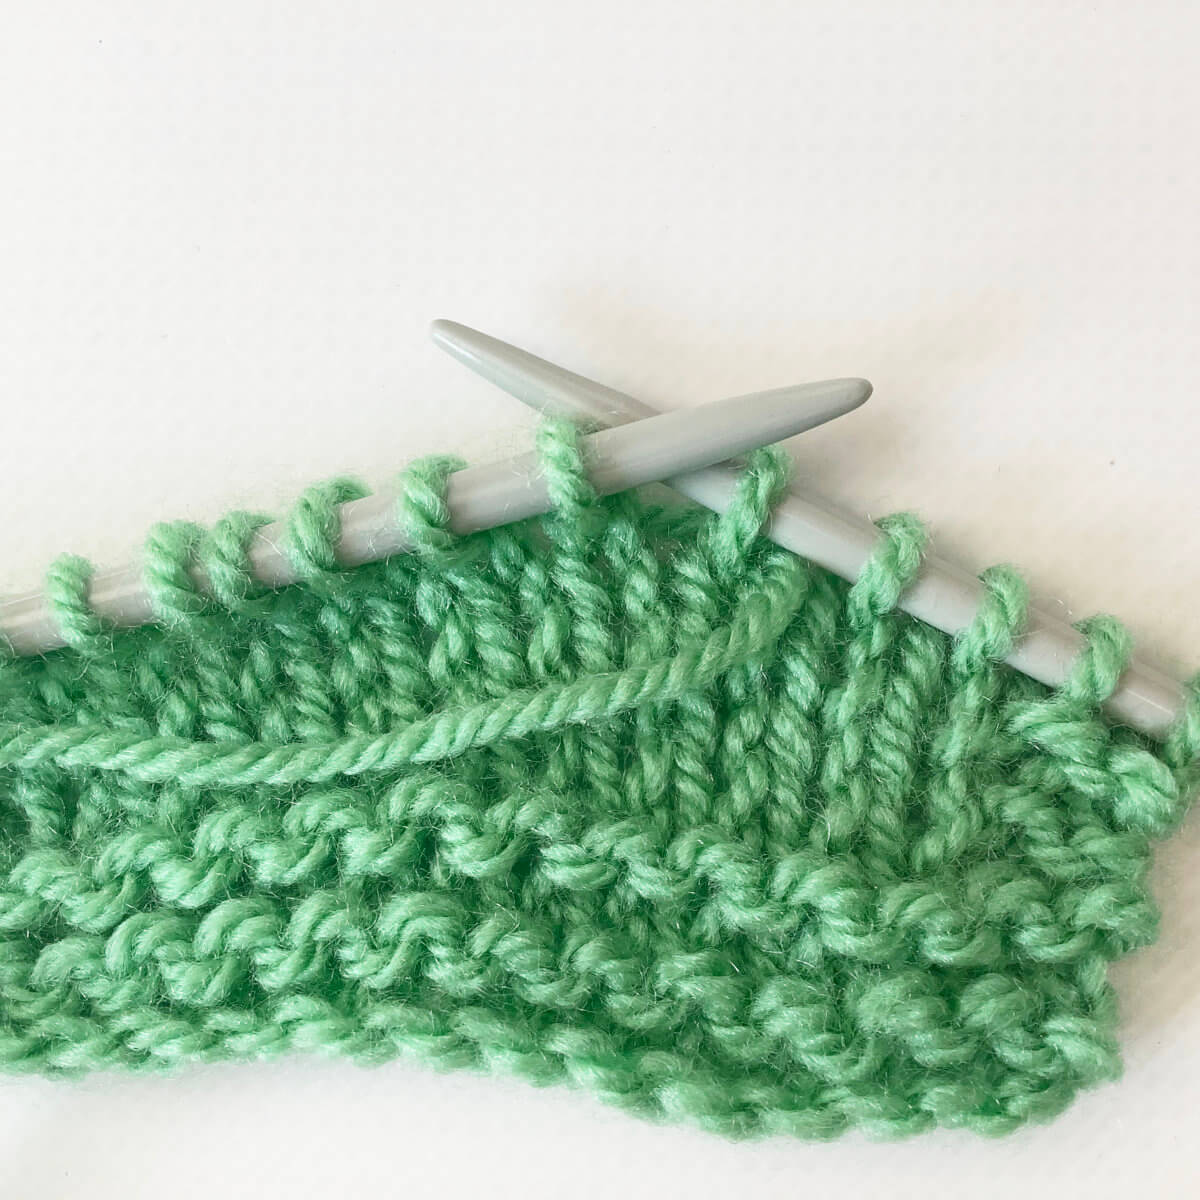
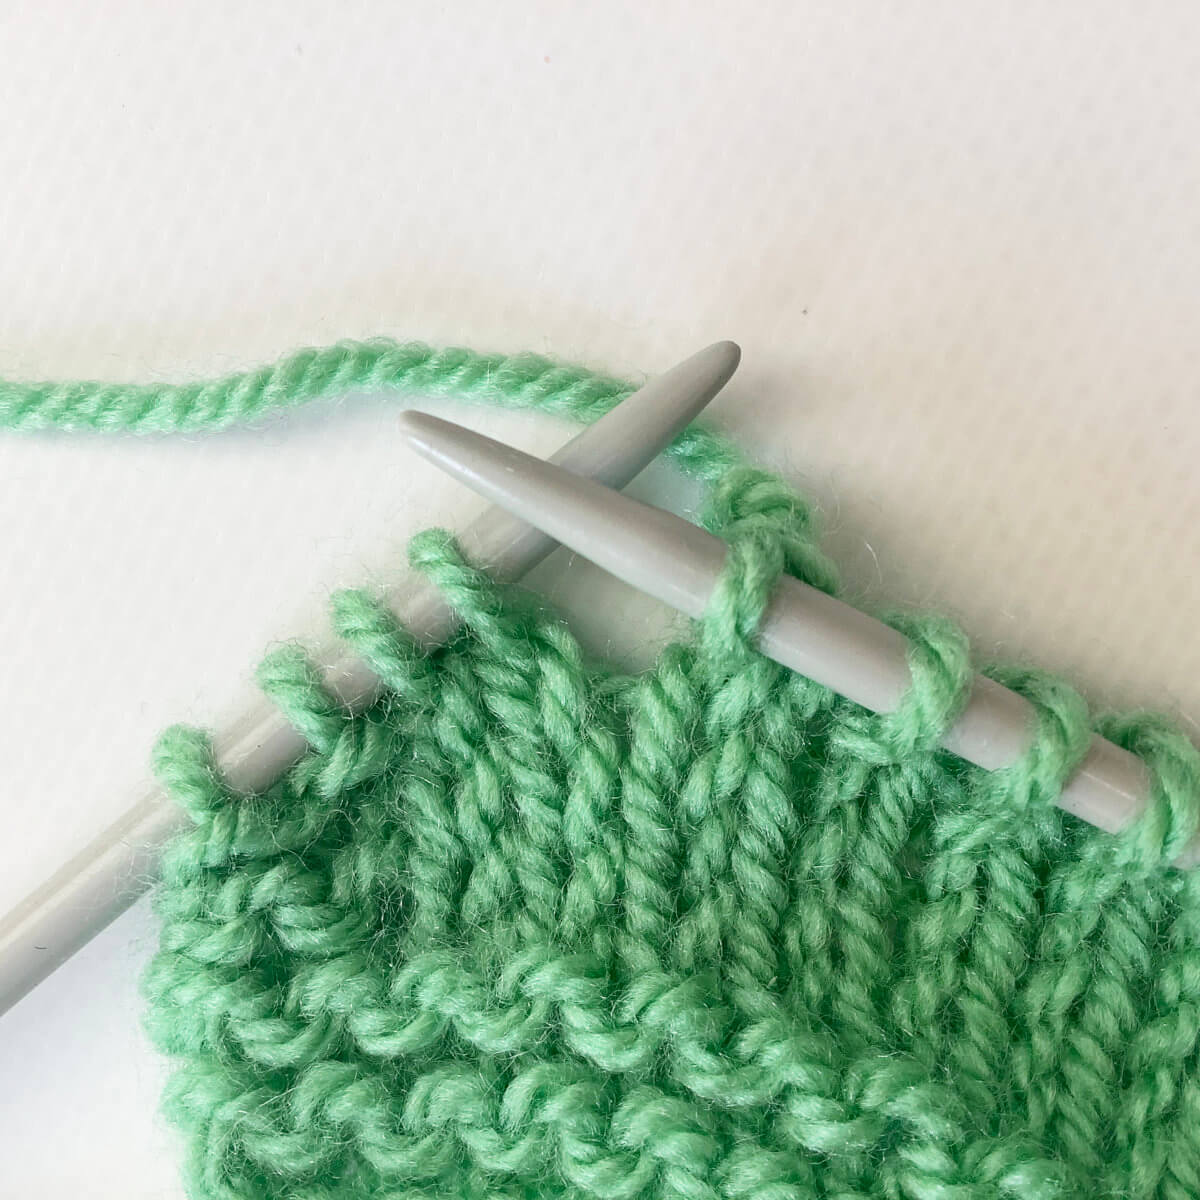
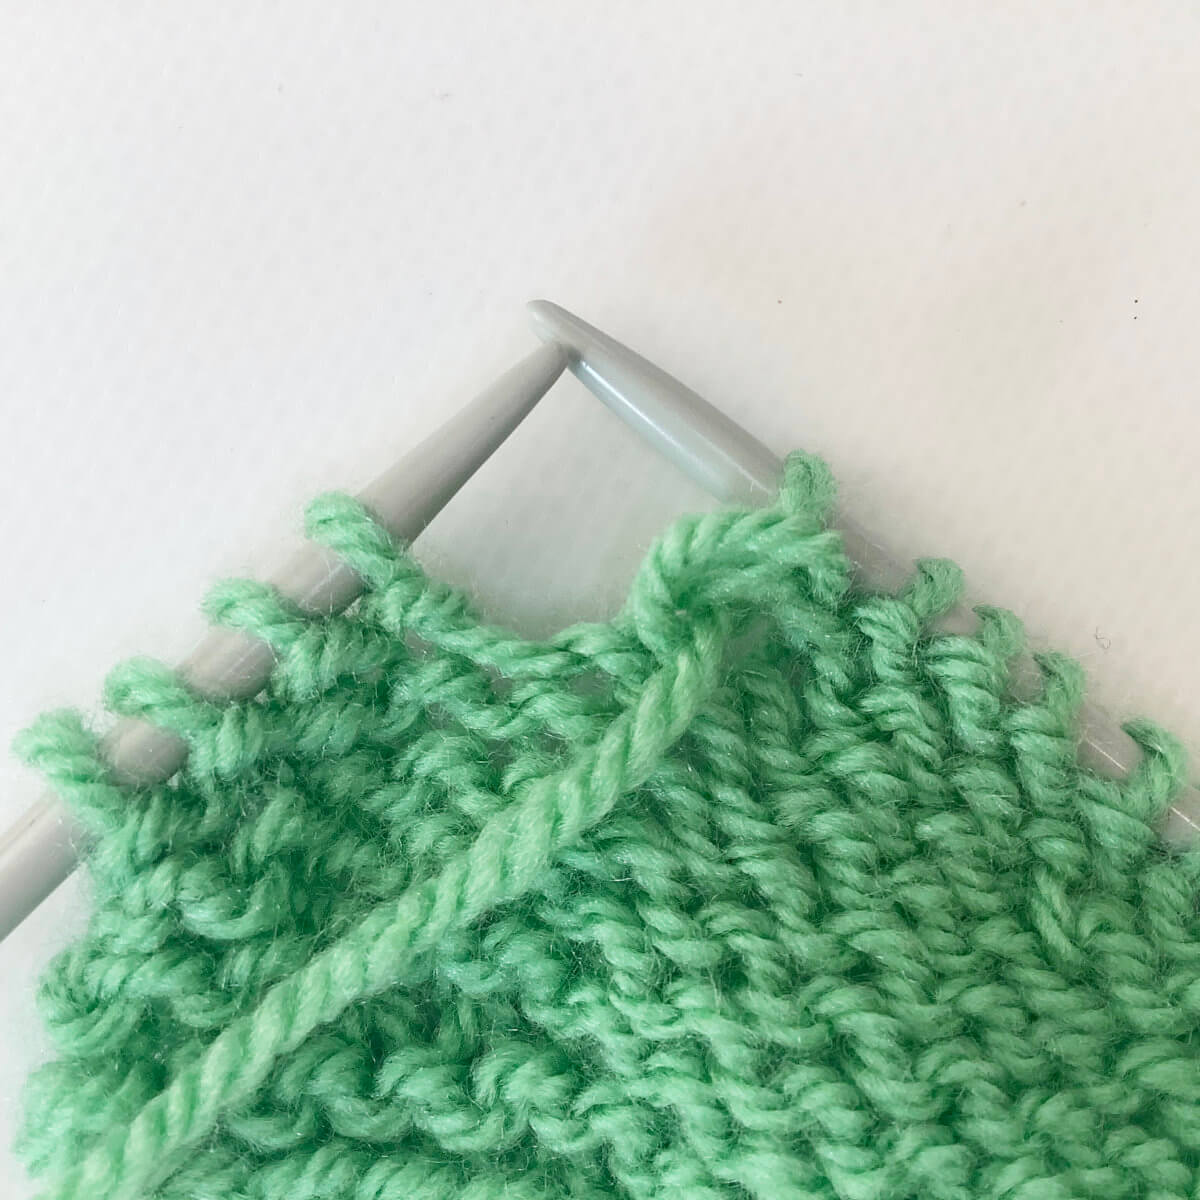
To start, work as instructed by your pattern until the point where it says “wrap & turn”.
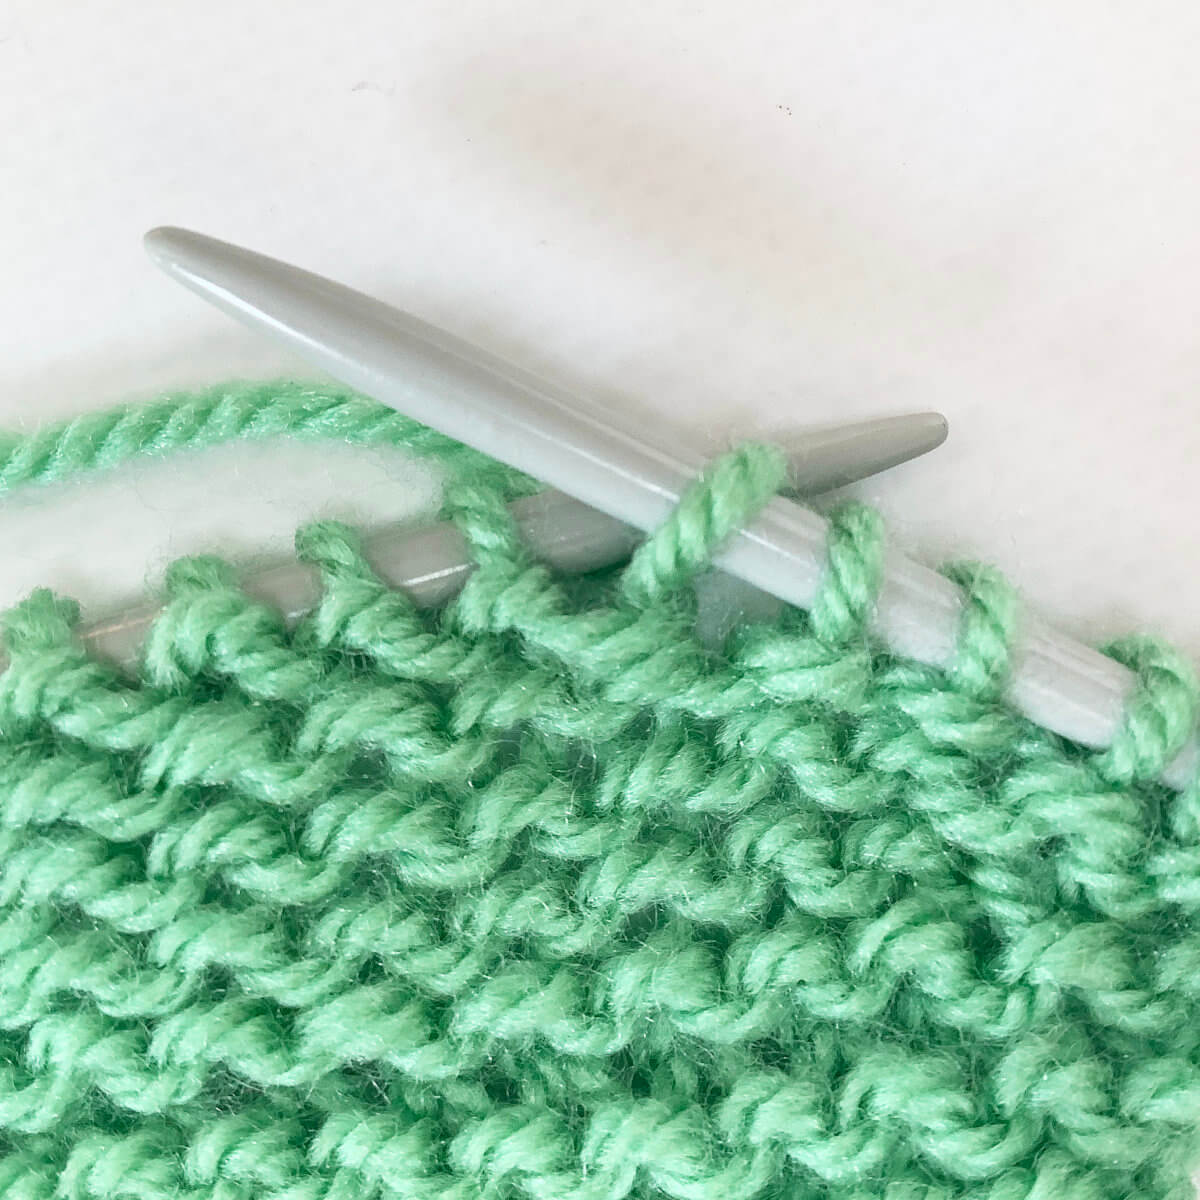
With the yarn in back, slip the first stitch on the left-hand needle purlwise.
Bring the yarn to the front of the work…
… and slip the stitch back onto the left needle again.
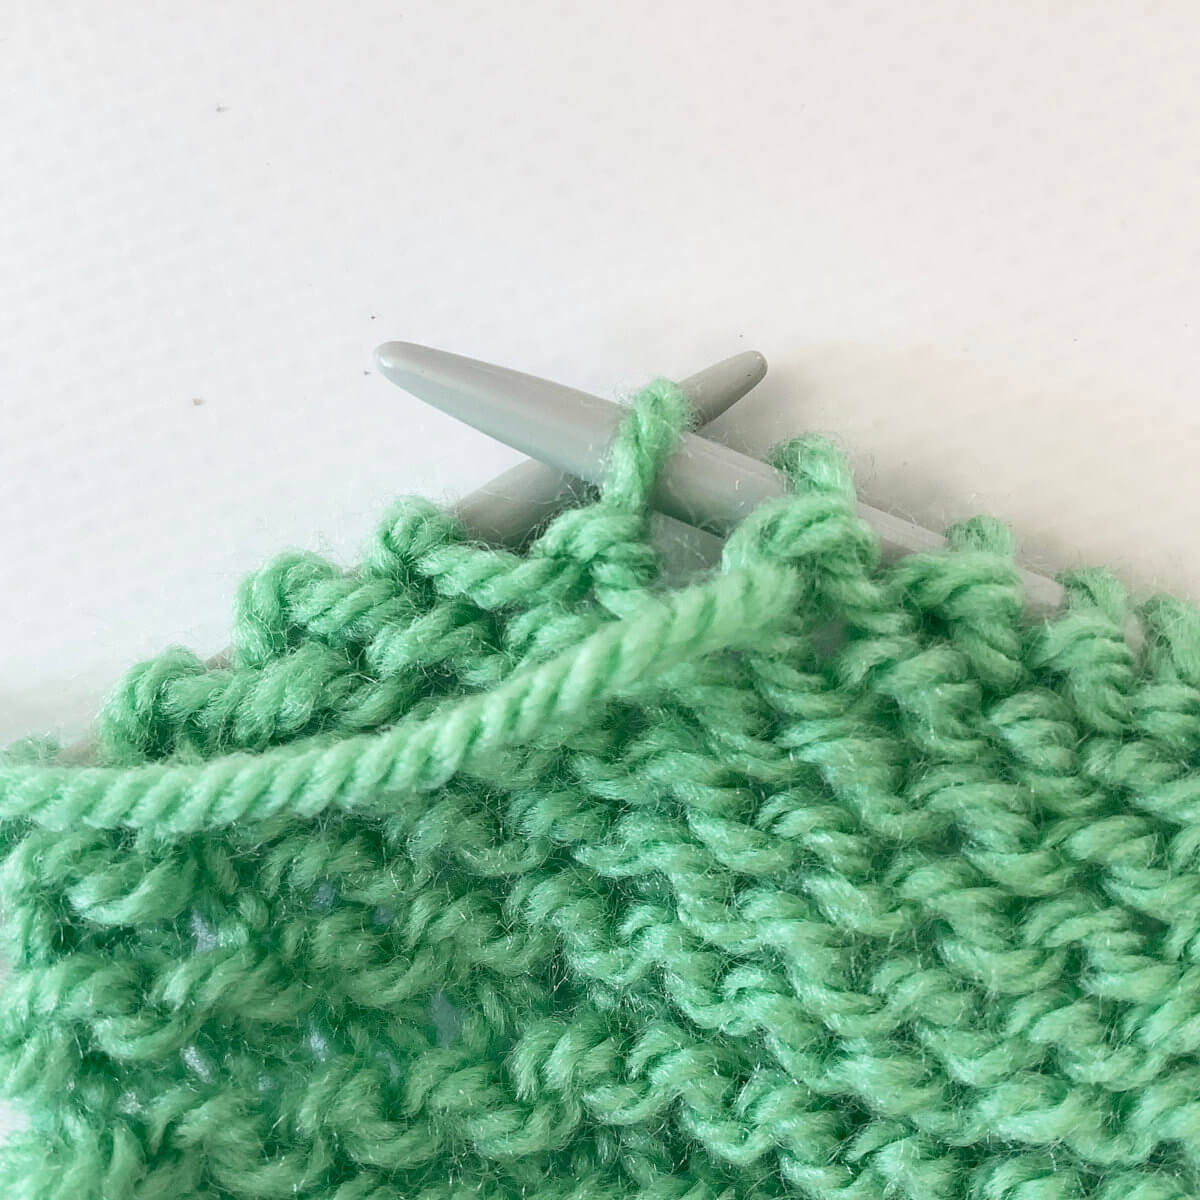
Now turn your work to the wrong side.
Do you see that the stitch we slipped is now wrapped with the working yarn?
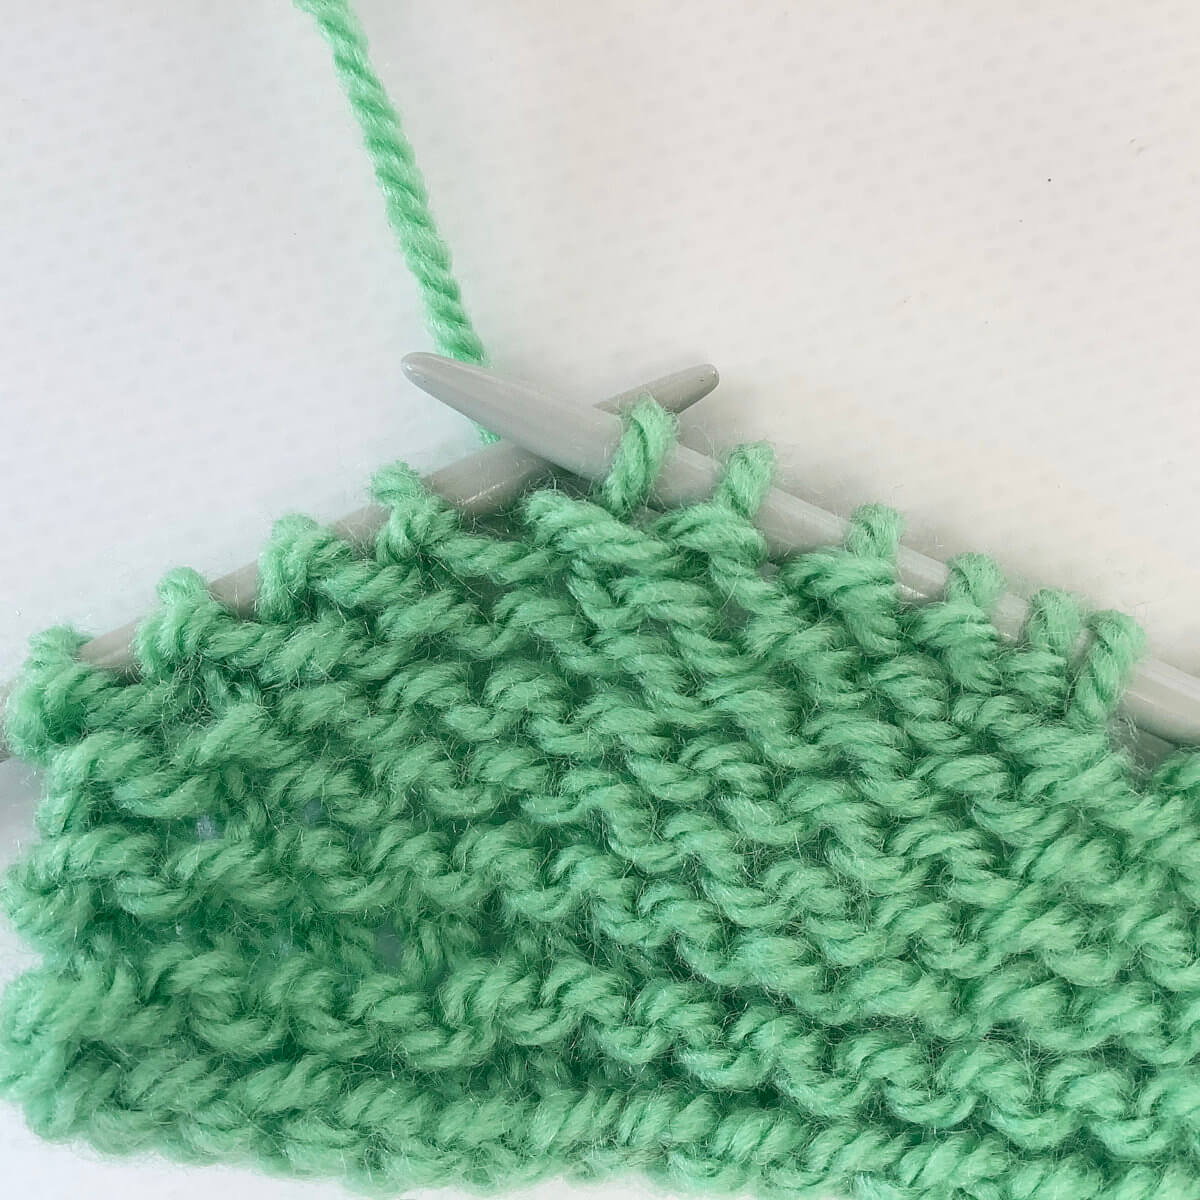
Now we’re going to repeat steps 1 to 5, but working them on the purl side instead of on the knit side.
Again, work as instructed by your pattern until the point where it says “wrap & turn”. With the yarn in front, slip the first stitch on the left-hand needle purlwise.
Bring the yarn between the needles to the back of the work…
… and slip the stitch back onto the left needle again.
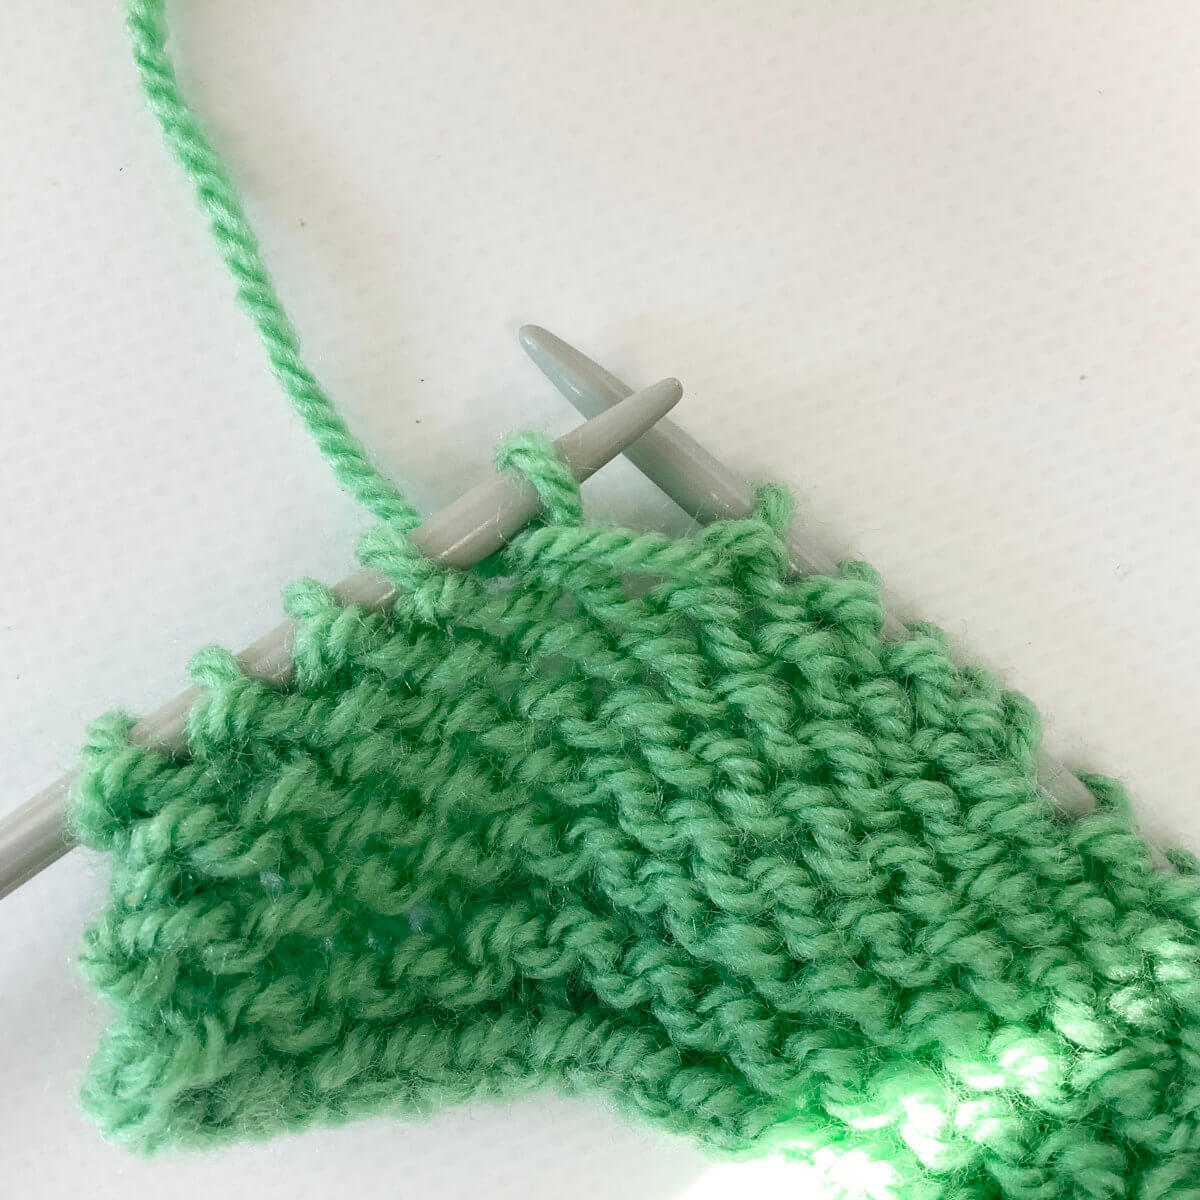
Now turn your work to the right side again. Do you see that the stitch we slipped is now wrapped with the working yarn?
Before you continue working in stockinette again, we, of course, have to move the working yarn to the back again. Do so in between the knitting needle tips.
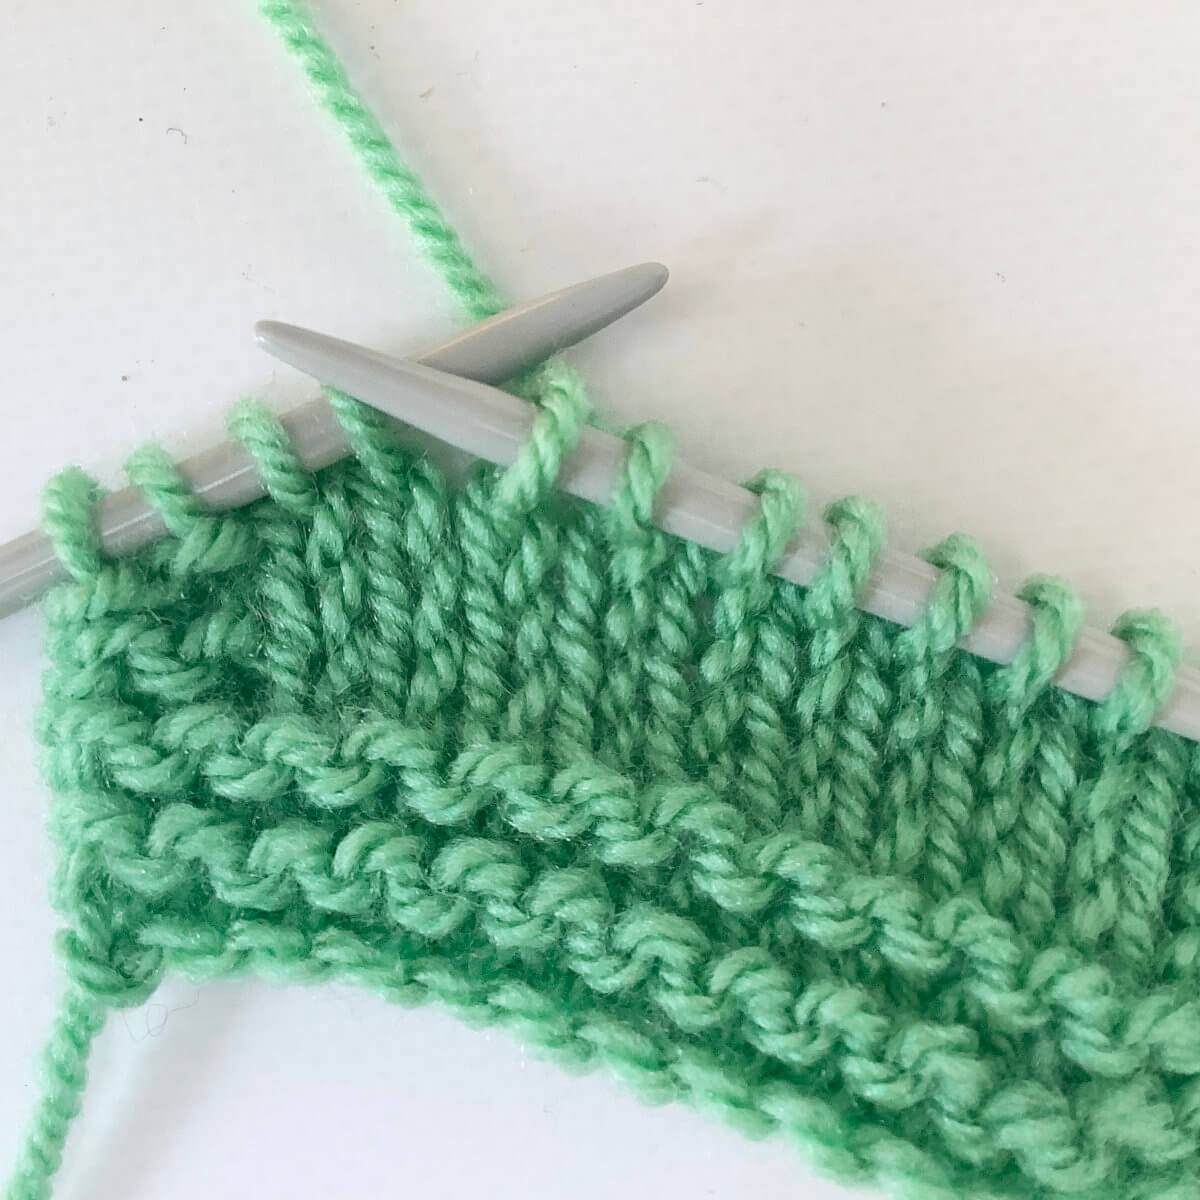
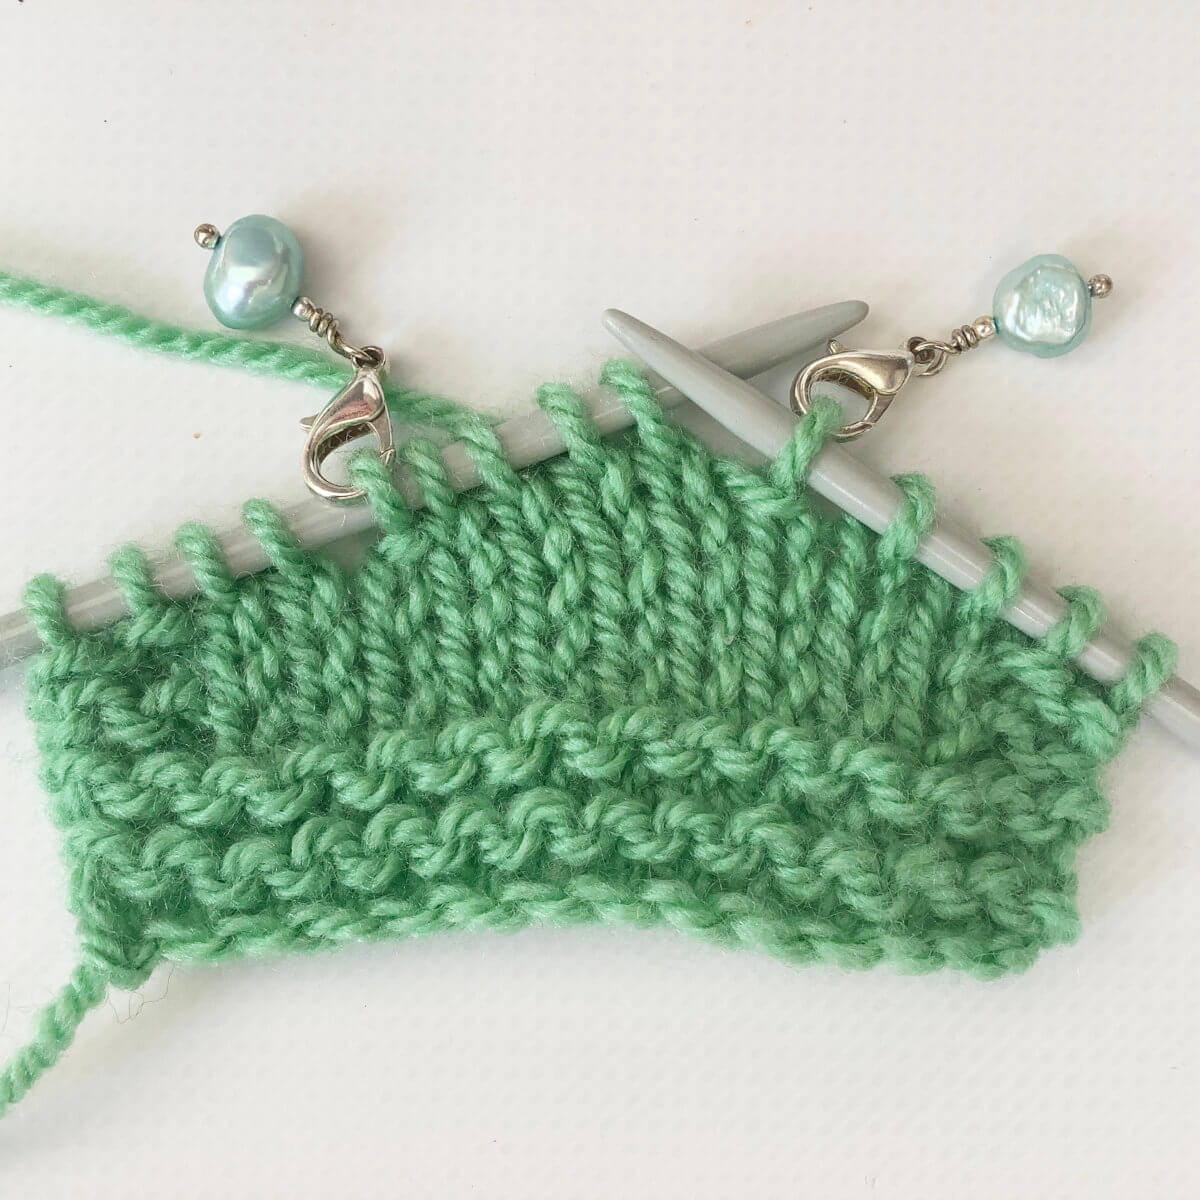
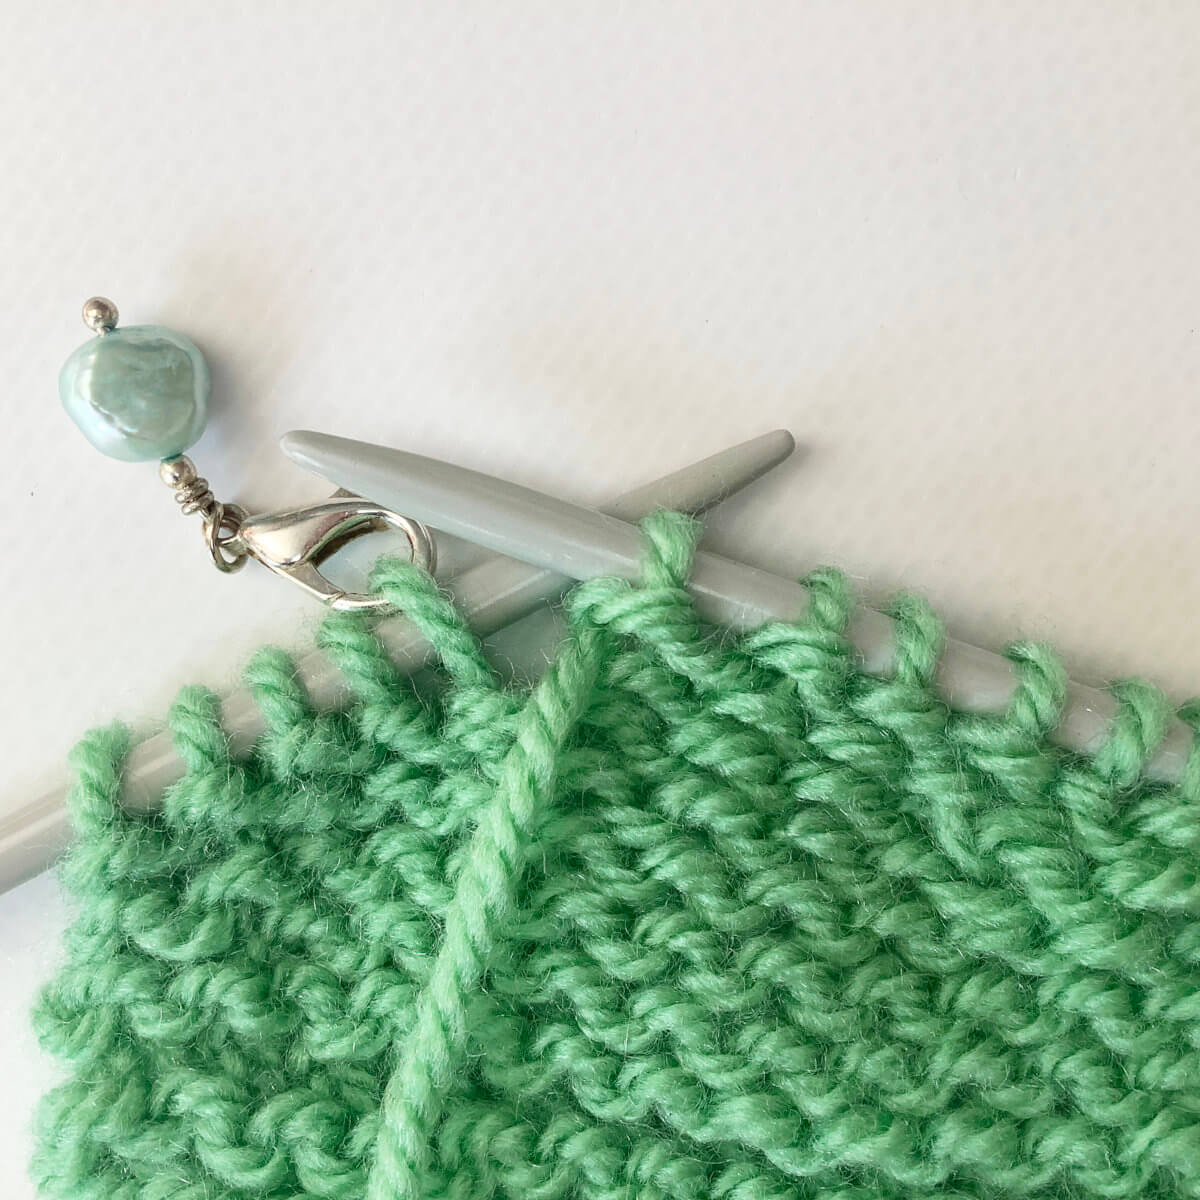
In the below picture, I’ve marked the wrapped stitches with stitch markers. It is possible to identify them without marking, but this is just easier.
In this case I didn’t make my swatch big enough, otherwise I could have continued working more sets of short rows, starting the “w&t” 3 sts before the last wrapped (marked) stitch. In other words: Working steps 1 to 8 of this tutorial more times as needed.
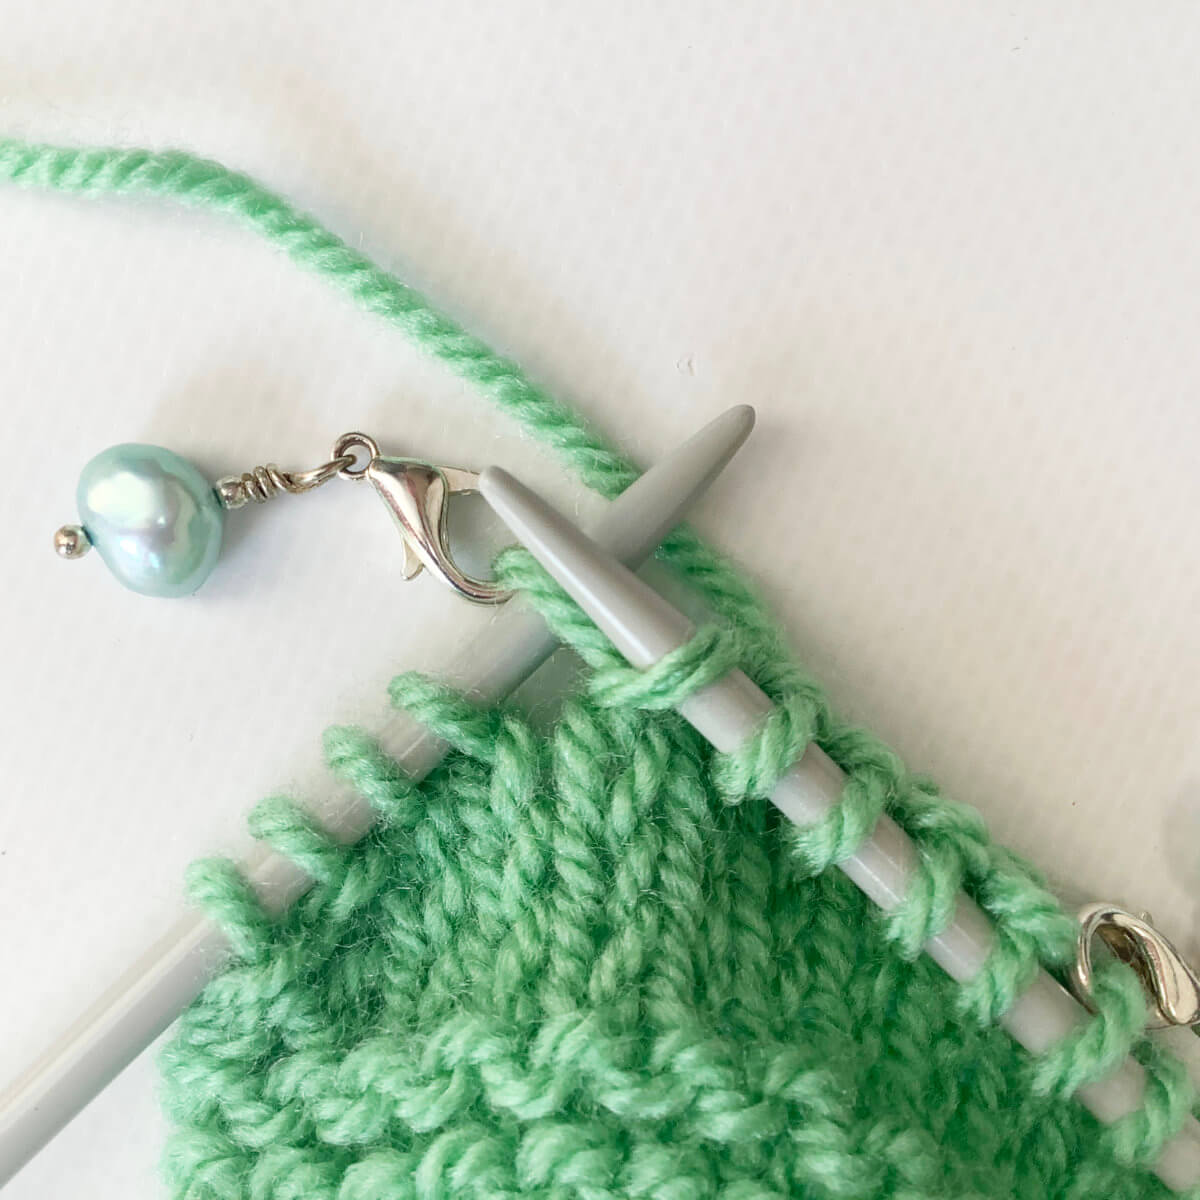
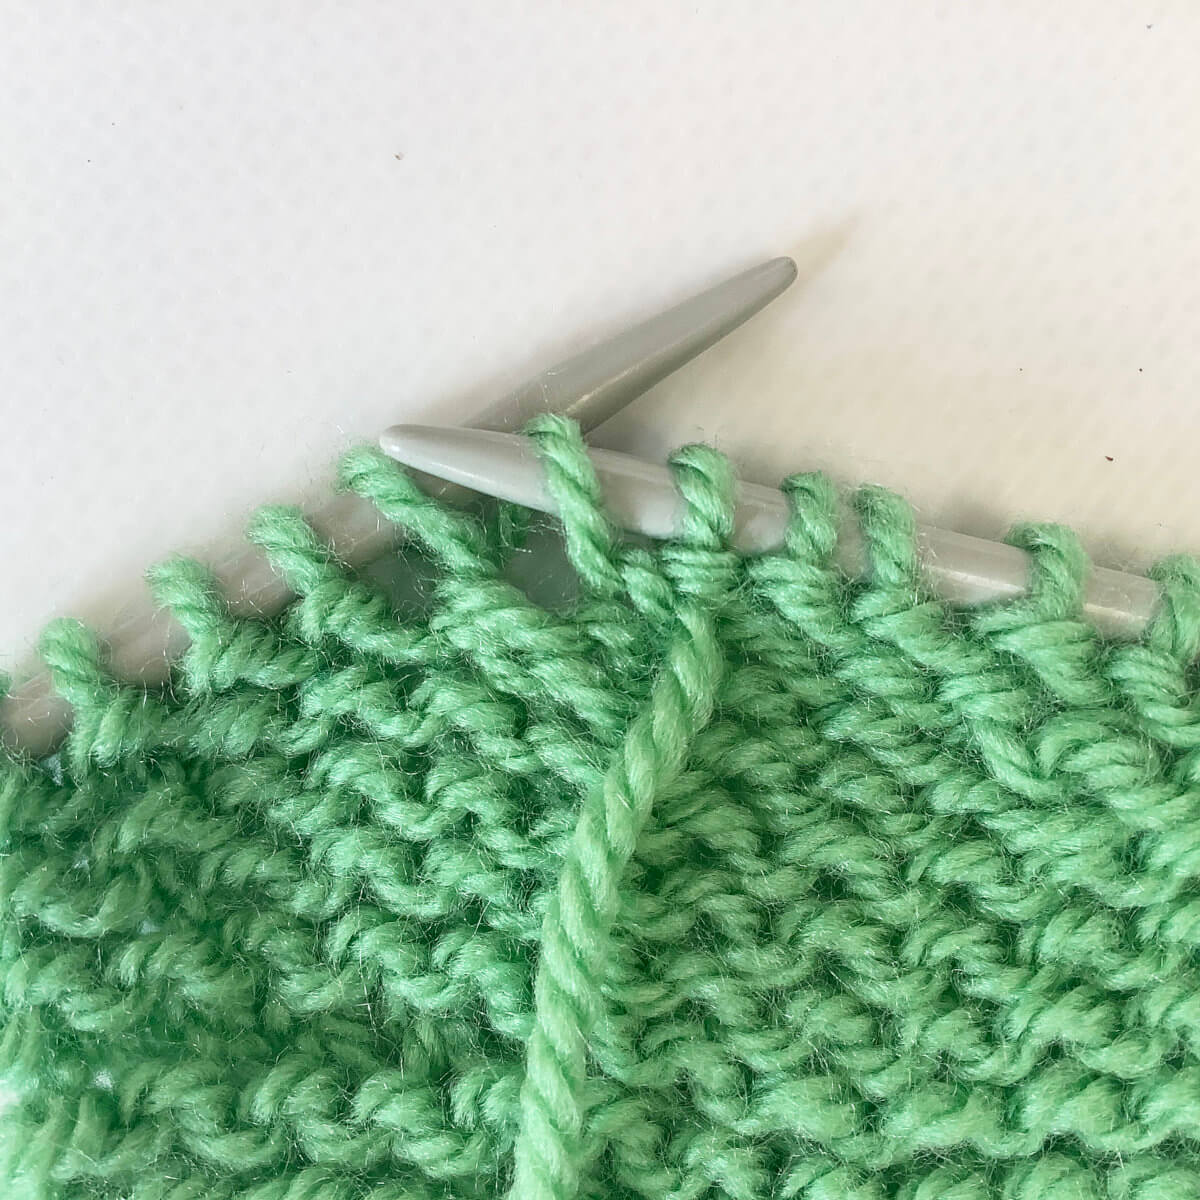
At some point, you’ll want to resume working over the entire row or round of the work. This is also the row where you want to pick up the strand that you wrapped around the slipped stitch, and knit it together with the stitch that it wraps.
Especially in stockinette fabric, this wrap is very visible. Also, not knitting the wrap with its stitch will make a visible hole in the fabric. In garter stitch or lace, this may not be that noticeable, though. So, first, work to the first wrapped stitch, and insert the needle from bottom to top into the wrap…
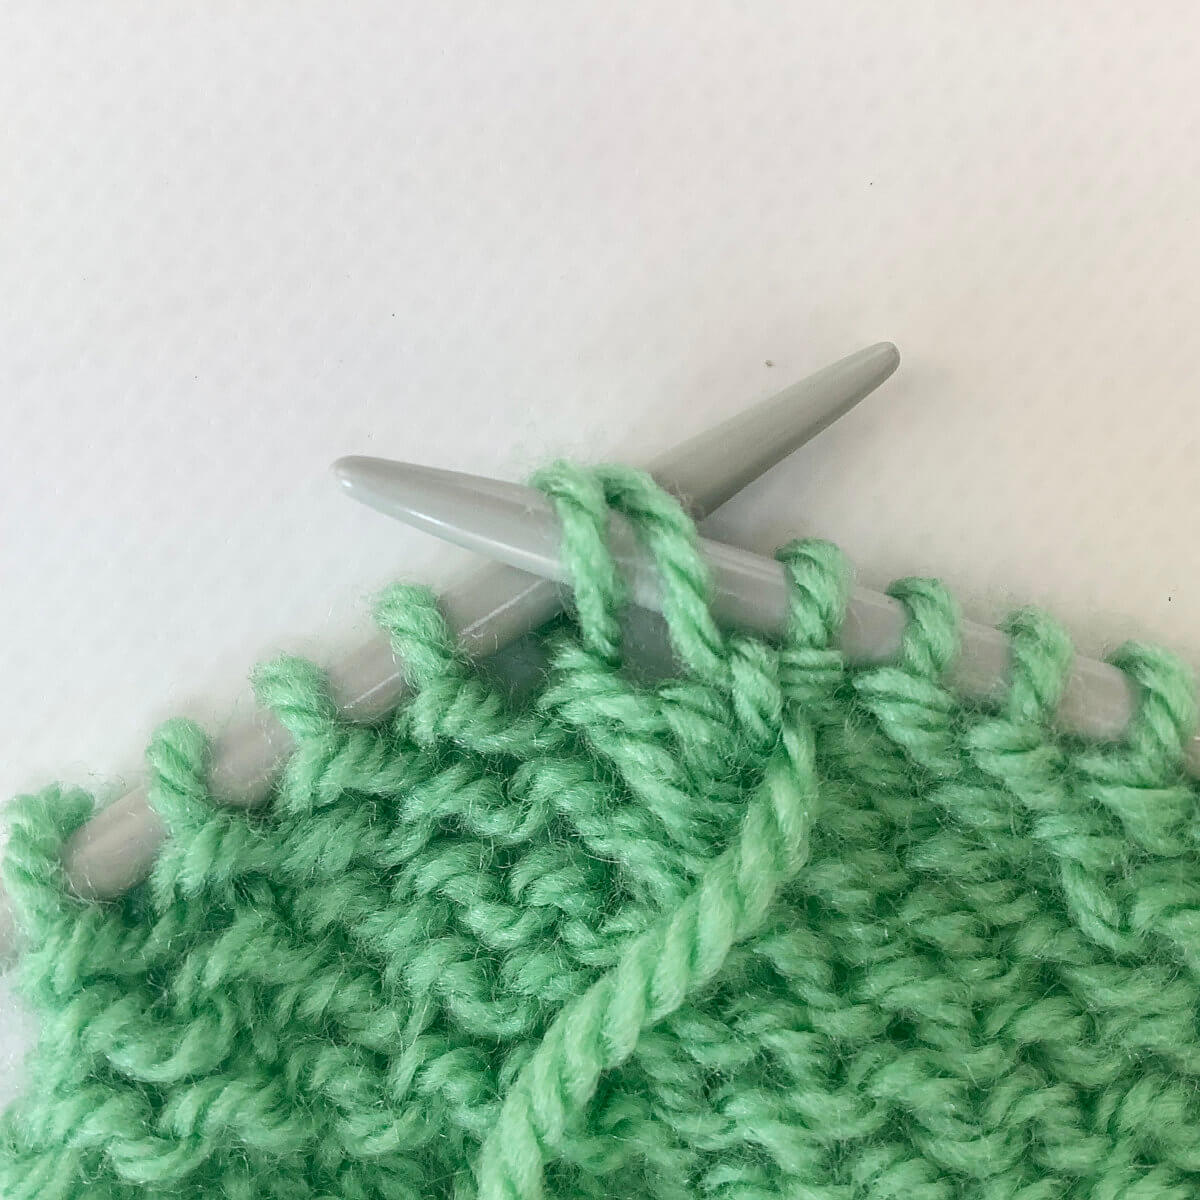
…. Then into the stitch itself as if to knit.
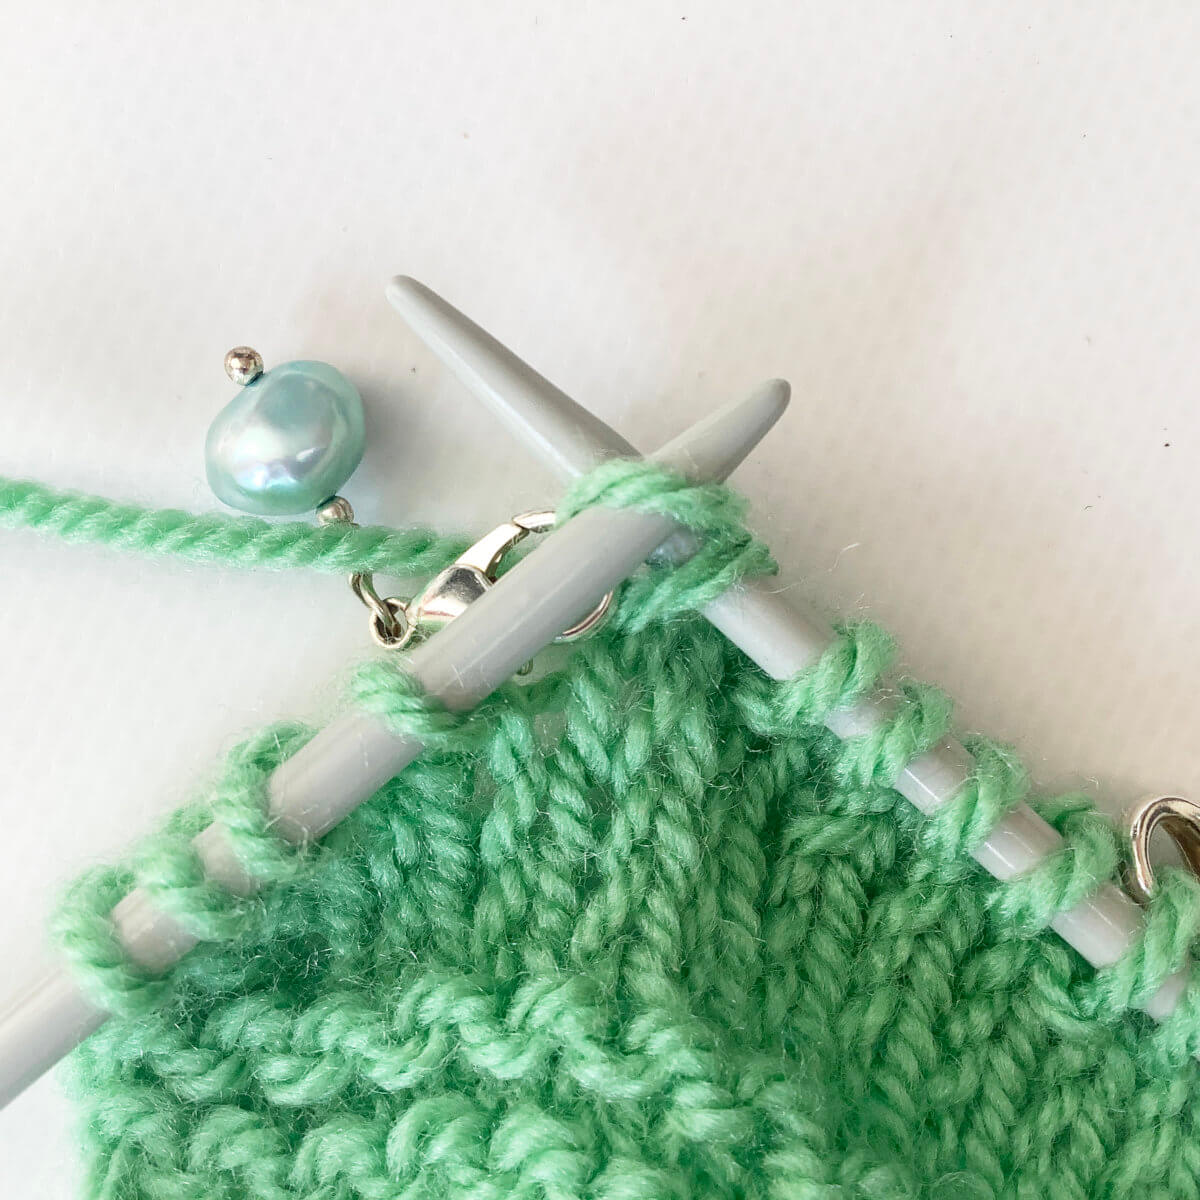
Wrap the yarn around the needle, and pull it through both the stitch and the wrap. Pulling it through the wrap may be a tad fiddly.
To finish the stitch, let it slide off the needle.
Here, I finished the row, turned the work and purled right to the remaining wrapped stitch.
Then, with the yarn in front, insert the needle into the **back** of the wrap, from back to front, and place it on the needle.
If you work the wrap any other way, it will be visible on the right side of the fabric.
Next, insert the needle as if to purl into both the wrap and the stitch itself.
Wrap the yarn around the needle, and pull it through both the stitch and the wrap. To finish the stitch, let it slide off the needle.
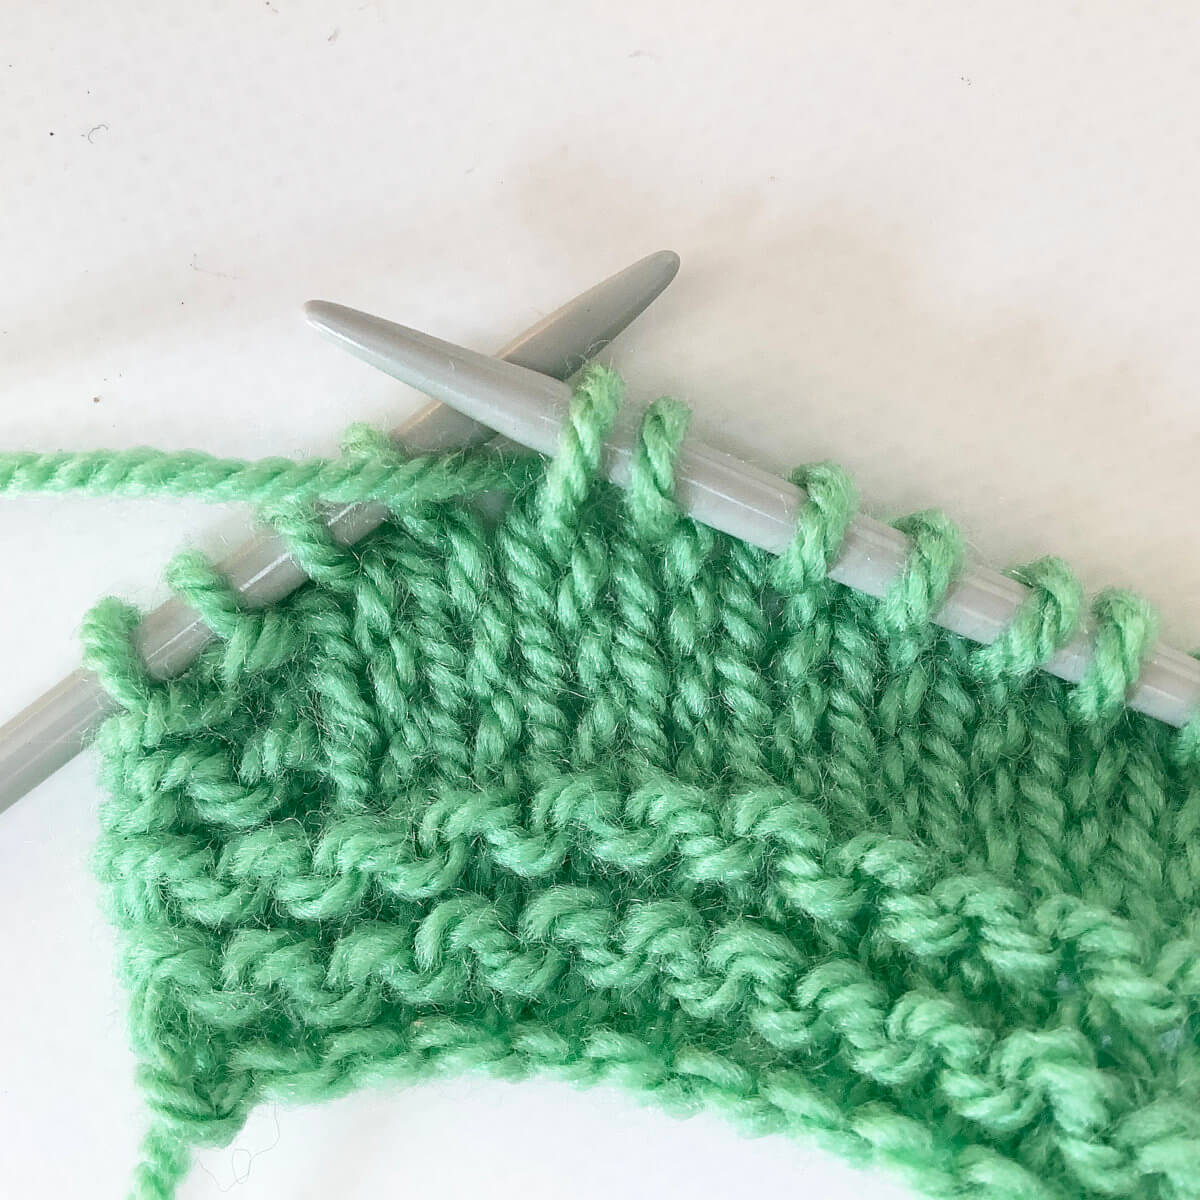
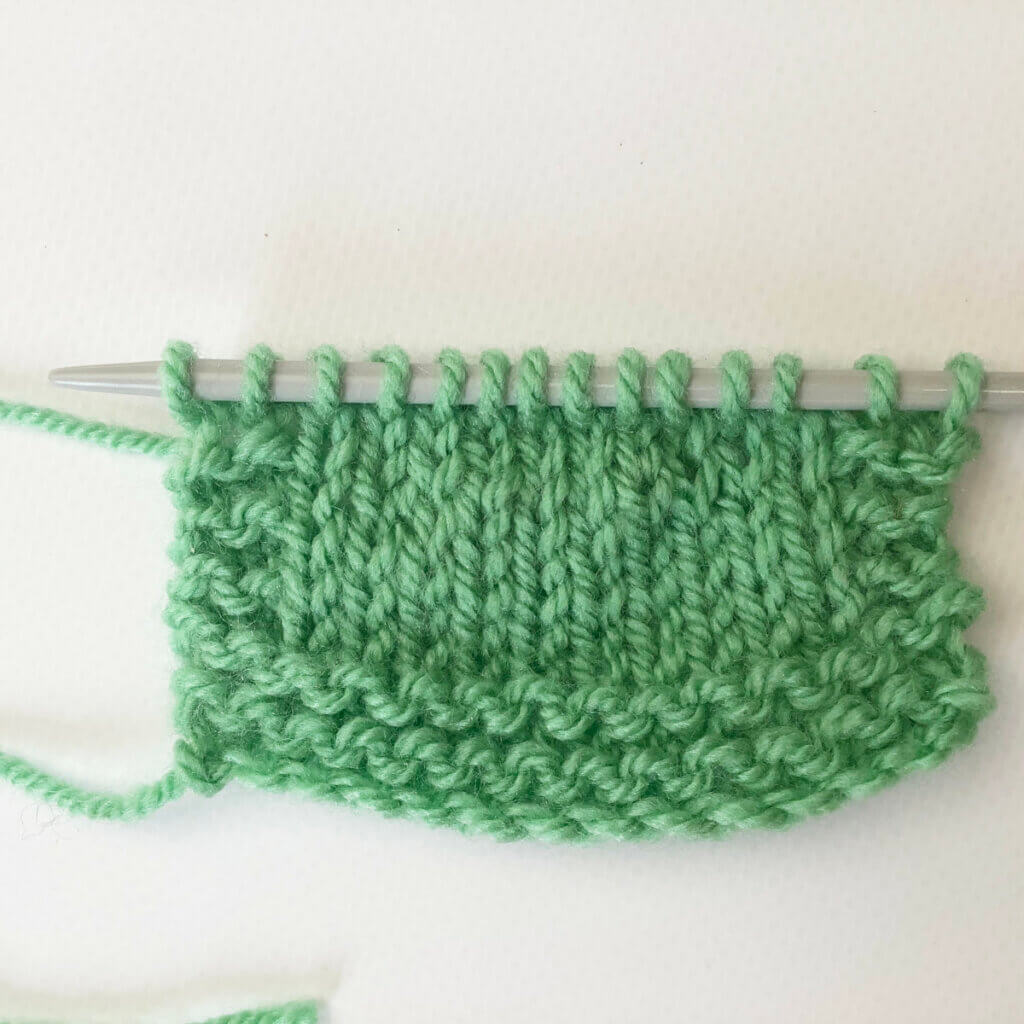
The result
Below, you can see the result of the wrap & turn short rows I worked for this tutorial. The shaping is not very dramatic, because I ended up only having room in my swatch for 1 set of short rows.
Thanks to my Patreon supporters for bringing you this freebie! Creating quality patterns and tutorials is a lot of work and resource-intensive. However, I find it important to give you free content like this tutorial. Thanks to the generous support of my Patreon supporters, I can make it happen. Thank you, patrons! Click here to join, or click here to read more about La Visch Designs on Patreon.